1
Writing Technician Interface
Scripts
Router Software Version 10.0
Site Manager Software Version 4.0
Software Version BNX 6.0
Site Manager Software Version BNX 6.0
Part No. 112946 Rev. A
January 1996
4401 Great America Parkway
Santa Clara, CA 95054
8 Federal Street
Billerica, MA 01821
Copyright © 1988–1996 Bay Networks, Inc.
All rights reserved. Printed in the USA. January 1996.
The information in this document is subject to change without notice. The statements, configurations, technical data, and
recommendations in this document are believed to be accurate and reliable, but are presented without express or implied
warranty. Users must take full responsibility for their applications of any products specified in this document. The
information in this document is proprietary to Bay Networks, Inc.
The software described in this document is furnished under a license agreement and may only be used in accordance with the
terms of that license. A summary of the Software License is included in this document.
Restricted Rights Legend
Use, duplication, or disclosure by the United States Government is subject to restrictions as set forth in subparagraph
(c)(1)(ii) of the Rights in Technical Data and Computer Software clause at DFARS 252.227-7013.
Notice for All Other Executive Agencies
Notwithstanding any other license agreement that may pertain to, or accompany the delivery of, this computer software, the
rights of the United States Government regarding its use, reproduction, and disclosure are as set forth in the Commercial
Computer Software-Restricted Rights clause at FAR 52.227-19.
Trademarks of Bay Networks, Inc.
ACE, AFN, BCN, BLN, BN, CN, FRE, LN, Optivity, SynOptics, SynOptics Communications, Wellfleet and the Wellfleet
logo are registered trademarks and AN, ANH, ASN, BaySIS, BayStack, BCNX, BLNX, BNX, EZ Internetwork, EZ LAN,
FN, PathMan, PhonePlus, PPX, Quick2Config, RouterMan, SPEX, Bay Networks, Bay Networks Press, the Bay Networks
logo and the SynOptics logo are trademarks of Bay Networks, Inc.
Third-Party Trademarks
All other trademarks and registered trademarks are the property of their respective owners.
Statement of Conditions
In the interest of improving internal design, operational function, and/or reliability, Bay Networks, Inc. reserves the right to
make changes to the products described in this document without notice.
Bay Networks, Inc. does not assume any liability that may occur due to the use or application of the product(s) or circuit
layout(s) described herein.
Portions of the code in this software product are Copyright © 1988, Regents of the University of California. All rights
reserved. Redistribution and use in source and binary forms of such portions are permitted, provided that the above copyright
notice and this paragraph are duplicated in all such forms and that any documentation, advertising materials, and other
materials related to such distribution and use acknowledge that such portions of the software were developed by the
University of California, Berkeley. The name of the University may not be used to endorse or promote products derived from
such portions of the software without specific prior written permission.
SUCH PORTIONS OF THE SOFTWARE ARE PROVIDED “AS IS” AND WITHOUT ANY EXPRESS OR IMPLIED
WARRANTIES, INCLUDING, WITHOUT LIMITATION, THE IMPLIED WARRANTIES OF MERCHANTABILITY
AND FITNESS FOR A PARTICULAR PURPOSE.
In addition, the program and information contained herein are licensed only pursuant to a license agreement that contains
restrictions on use and disclosure (that may incorporate by reference certain limitations and notices imposed by third parties).
Bay Networks Software License
Note: This is Bay Networks basic license document. In the absence of a
software license agreement specifying varying terms, this license — or the
license included with the particular product — shall govern licensee’s use of
Bay Networks software.
This Software License shall govern the licensing of all software provided to licensee by Bay Networks (“Software”).
Bay Networks will provide licensee with Software in machine-readable form and related documentation
(“Documentation”). The Software provided under this license is proprietary to Bay Networks and to third parties from
whom Bay Networks has acquired license rights. Bay Networks will not grant any Software license whatsoever, either
explicitly or implicitly, except by acceptance of an order for either Software or for a Bay Networks product
(“Equipment”) that is packaged with Software. Each such license is subject to the following restrictions:
1.
Upon delivery of the Software, Bay Networks grants to licensee a personal, nontransferable, nonexclusive license
to use the Software with the Equipment with which or for which it was originally acquired, including use at any
of licensee’s facilities to which the Equipment may be transferred, for the useful life of the Equipment unless
earlier terminated by default or cancellation. Use of the Software shall be limited to such Equipment and to such
facility. Software which is licensed for use on hardware not offered by Bay Networks is not subject to restricted
use on any Equipment, however, unless otherwise specified on the Documentation, each licensed copy of such
Software may only be installed on one hardware item at any time.
2.
Licensee may use the Software with backup Equipment only if the Equipment with which or for which it was
acquired is inoperative.
3.
Licensee may make a single copy of the Software (but not firmware) for safekeeping (archives) or backup
purposes.
4.
Licensee may modify Software (but not firmware), or combine it with other software, subject to the provision
that those portions of the resulting software which incorporate Software are subject to the restrictions of this
license. Licensee shall not make the resulting software available for use by any third party.
5.
Neither title nor ownership to Software passes to licensee.
6.
Licensee shall not provide, or otherwise make available, any Software, in whole or in part, in any form, to any
third party. Third parties do not include consultants, subcontractors, or agents of licensee who have licensee’s
permission to use the Software at licensee’s facility, and who have agreed in writing to use the Software only in
accordance with the restrictions of this license.
7.
Third-party owners from whom Bay Networks has acquired license rights to software that is incorporated into
Bay Networks products shall have the right to enforce the provisions of this license against licensee.
8.
Licensee shall not remove or obscure any copyright, patent, trademark, trade secret, or similar intellectual
property or restricted rights notice within or affixed to any Software and shall reproduce and affix such notice on
any backup copy of Software or copies of software resulting from modification or combination performed by
licensee as permitted by this license.
Bay Networks, Inc.
4401 Great America Parkway, Santa Clara, CA 95054
8 Federal Street, Billerica, MA 01821
Bay Networks Software License (continued)
9.
Licensee shall not reverse assemble, reverse compile, or in any way reverse engineer the Software. [Note: For
licensees in the European Community, the Software Directive dated 14 May 1991 (as may be amended from time
to time) shall apply for interoperability purposes. Licensee must notify Bay Networks in writing of any such
intended examination of the Software and Bay Networks may provide review and assistance.]
10. Notwithstanding any foregoing terms to the contrary, if licensee licenses the Bay Networks product “Site
Manager,” licensee may duplicate and install the Site Manager product as specified in the Documentation. This
right is granted solely as necessary for use of Site Manager on hardware installed with licensee’s network.
11. This license will automatically terminate upon improper handling of Software, such as by disclosure, or Bay
Networks may terminate this license by written notice to licensee if licensee fails to comply with any of the
material provisions of this license and fails to cure such failure within thirty (30) days after the receipt of written
notice from Bay Networks. Upon termination of this license, licensee shall discontinue all use of the Software
and return the Software and Documentation, including all copies, to Bay Networks.
12. Licensee’s obligations under this license shall survive expiration or termination of this license.
Bay Networks, Inc.
4401 Great America Parkway, Santa Clara, CA 95054
8 Federal Street, Billerica, MA 01821
Contents
About This Guide
Software Suites ...............................................................................................................xiii
Audience ..........................................................................................................................xiv
Before You Begin .............................................................................................................xiv
Bay Networks Customer Support ....................................................................................xiv
CompuServe ............................................................................................................. xv
InfoFACTS .................................................................................................................xvi
World Wide Web ........................................................................................................xvi
How to Get Help ..............................................................................................................xvi
Conventions .....................................................................................................................xvi
Ordering Bay Networks Publications ..............................................................................xvii
Acronyms ....................................................................................................................... xviii
Chapter 1
Creating a Script File
About Variables ...............................................................................................................1-2
Local, Global, and System Variables ........................................................................1-4
Special Variables ............................................................................................................1-4
Input Parameters ......................................................................................................1-4
Prompting for Input ...................................................................................................1-5
Polling the Console for Input ..............................................................................1-5
Accessing MIB Information ......................................................................................1-6
Formatting a MIB Entry ............................................................................................1-7
Defining a Pseudo-Variable Array ...................................................................................1-8
Creating and Using Variables .........................................................................................1-8
Viewing Variables .....................................................................................................1-8
Setting Variables ......................................................................................................1-9
Deleting Variables ..................................................................................................1-10
Setting the Current Volume or Directory .......................................................................1-11
v
Controlling Program Flow .............................................................................................1-11
Writing Messages to the Console .................................................................................1-12
Saving Console Messages to a File .............................................................................1-12
Performing Error Recovery ...........................................................................................1-12
Inserting Comments .....................................................................................................1-13
Debugging a Script File ................................................................................................1-13
Saving and Restoring Variables ....................................................................................1-13
Running a Script File ....................................................................................................1-14
Creating Menus ............................................................................................................1-14
Chapter 2
Command Reference
arrayenv ..........................................................................................................................2-3
cutenv .............................................................................................................................2-3
echo ................................................................................................................................2-6
enumenv .........................................................................................................................2-7
export ..............................................................................................................................2-8
getenv .............................................................................................................................2-9
gosub ............................................................................................................................2-10
goto ...............................................................................................................................2-11
if ....................................................................................................................................2-12
instenv ..........................................................................................................................2-16
let ..................................................................................................................................2-18
mibget ...........................................................................................................................2-24
octetfmt .........................................................................................................................2-27
on error .........................................................................................................................2-29
pause ............................................................................................................................2-30
printf ..............................................................................................................................2-31
record ...........................................................................................................................2-34
return ............................................................................................................................2-36
run ................................................................................................................................2-37
save env .......................................................................................................................2-39
setenv ...........................................................................................................................2-40
source env ....................................................................................................................2-41
sprintf ............................................................................................................................2-42
unsetenv .......................................................................................................................2-43
vi
verbose .........................................................................................................................2-45
Appendix A
Sample Scripts
Menu Script ................................................................................................................... A-1
FDDI.MNU Script ........................................................................................................... A-2
FDDI.BAT Script ............................................................................................................ A-3
Index
vii
Tables
Table 2-1.
Table 2-2.
Table 2-3.
Table 2-4.
Script Commands ....................................................................................2-1
Arithmetical Operators ...........................................................................2-19
Logical Operators ...................................................................................2-19
Special Characters .................................................................................2-32
ix
About This Guide
If you are interested in creating and editing Technician Interface scripts, refer to
this guide for
•
An overview of variables
•
Instructions on creating, using, and saving variables, using the Technician
Interface script commands
•
The function and syntax of each Technician Interface script command
Software Suites
Routing and Switching software is available in the following suites:
•
The System Suite includes IP routing, 802.1 Transparent Bridge, Source Route
Bridge, Translation Bridge, SNMP Agent, Bay Networks HDLC, PPP, OSPF,
EGP, BGP, and basic DLSw.
•
The LAN Suite includes DECnet Phase 4, AppleTalk Phase 2, OSI, VINES,
IPX, and ATM DXI, in addition to the System Suite.
•
The WAN Suite includes ATM DXI, Frame Relay, LAPB, and X.25, in
addition to the System Suite.
•
The Corporate Suite includes the System, LAN, and WAN suites in their
entirety.
•
The ARE ATM Suite provides RFC 1483 and 1577 compliance, ATM UNI 3.0
signaling, in addition to the LAN Suite.
•
The ARE VNR Corporate Suite provides ATM Forum LAN Emulation, in
addition to the ARE ATM Suite and Corporate Suite.
xi
Writing Technician Interface Scripts
•
The BNX Suite includes IP Routing, SNMP Agent, Bay Networks HDLC,
PPP, OSPF, EGP, BGP, File-Based Performance Statistics, Frame Relay
switching, and Frame Relay billing, and selected components from the
Corporate, ARE ATM, and ARE VNR Corporate suites.
Availability of features and functionality described in this guide depends on the
suites you are using.
Audience
This manual is for network administrators with the following background:
•
Knowledge of the UNIX operating system and the C programming language
•
A general understanding of local and wide area networking fundamentals
•
An understanding of the transmission and management protocols used on
your network
Before You Begin
Before using this guide, you must load the router software from the release
medium. This guide assumes that you are familiar with the Technician Interface.
For information on this interface, refer to Using Technician Interface Software.
Bay Networks Customer Support
Bay Networks provides live telephone technical support to our distributors,
resellers, and service-contracted customers from two U.S. and three international
support centers. If you have purchased your Bay Networks product from a
distributor or authorized reseller, contact the technical support staff of that
distributor or reseller for assistance with installation, configuration,
troubleshooting, or integration issues.
Customers also have the option of purchasing direct support from Bay Networks
through a variety of service programs. The programs include priority access
telephone support, on-site engineering assistance, software subscription, hardware
replacement, and other programs designed to protect your investment.
xii
About This Guide
To purchase any of these support programs, including PhonePlus™ for 24-hour
telephone technical support, call 1-800-2LANWAN. Outside the U.S. and
Canada, call (408) 764-1000. You can also receive information on support
programs from your local Bay Networks field sales office, or purchase Bay
Networks support directly from your reseller. Bay Networks provides several
methods of receiving support and information on a nonpriority basis through the
following automated systems.
CompuServe
Bay Networks maintains an active forum on CompuServe. All you need to join us
online is a computer, a modem, and a CompuServe account. We also recommend
using the CompuServe Information Manager software, available from
CompuServe.
The Bay Networks forum contains libraries of technical and product documents
designed to help you manage and troubleshoot your Bay Networks products.
Software agents and patches are available, and the message boards are monitored
by technical staff and can be a source for problem solving and shared experiences.
Customers and resellers holding Bay Networks service contracts can visit the
special libraries to acquire advanced levels of support documentation and
software.
To open an account and receive a local dial-up number, call CompuServe at
1-800-524-3388 and ask for Representative No. 591.
•
In the United Kingdom, call Freephone 0800-289378.
•
In Germany, call 0130-37-32.
•
In Europe (except for the United Kingdom and Germany), call
(44) 272-760681.
•
Outside the U.S., Canada, and Europe, call (614) 529-1349 and ask for
Representative No. 591, or consult your listings for an office near you.
Once you are online, you can reach our forum by typing the command GO
BAYNETWORKS at any ! prompt.
xiii
Writing Technician Interface Scripts
InfoFACTS
InfoFACTS is the Bay Networks free 24-hour fax-on-demand service. This
automated system contains libraries of technical and product documents designed
to help you manage and troubleshoot your Bay Networks products. The system
can return a fax copy to the caller or to a third party within minutes of being
accessed.
World Wide Web
The World Wide Web (WWW) is a global information system for file distribution
and online document viewing via the Internet. You need a direct connection to the
Internet and a Web Browser (such as Mosaic or Netscape).
Bay Networks maintains a WWW Home Page that you can access at http://
www.baynetworks.com. One of the menu items on the Home Page is the
Customer Support Web Server, which offers technical documents, software
agents, and an E-mail capability for communicating with our technical support
engineers.
How to Get Help
For additional information or advice, contact the Bay Networks Technical
Response Center in your area:
United States
Valbonne, France
Sydney, Australia
Tokyo, Japan
1-800-2LAN-WAN
(33) 92-966-968
(61) 2-903-5800
(81) 3-328-005
Conventions
This section describes the conventions used in this guide.
angle brackets (< >)
Indicate that you choose the text to enter based on the
description inside the brackets. Do not type the
brackets when entering the command. Example: if
command syntax is ping <ip_address>, you enter ping
192.32.10.12
xiv
About This Guide
arrow character (➔)
Separates menu and option names in instructions.
Example: Protocols➔AppleTalk identifies the
AppleTalk option in the Protocols menu.
bold text
Indicates text that you need to enter and command
names in text. Example: Use the dinfo command.
brackets ([ ])
Indicate optional elements. You can choose none, one,
or all of the options.
italic text
Indicates variable values in command syntax
descriptions, new terms, file and directory names, and
book titles.
quotation marks (“ ”)
Indicate the title of a chapter or section within a book.
screen text
Indicates data that appears on the screen. Example: Set
Bay Networks Trap Monitor Filters
ellipsis points
vertical line (|)
.
Horizontal (. . .) and vertical ( .. ) ellipsis points indicate
omitted information.
Indicates that you enter only one of the parts of the
command. The vertical line separates choices. Do not
type the vertical line when entering the command.
Example: If the command syntax is
show at routes | nets, you enter either
show at routes or show at nets, but not both.
Ordering Bay Networks Publications
To purchase additional copies of this document or other Bay Networks
publications, order by part number from Bay Networks Press™ at the following
numbers. You may also request a free catalog of Bay Networks Press product
publications.
Phone:
FAX - U.S./Canada:
FAX - International:
1-800-845-9523
1-800-582-8000
1-916-939-1010
xv
Writing Technician Interface Scripts
Acronyms
xvi
ANSI
American National Standards Institute
ARP
Address Resolution Protocol
ASCII
American Standard Code for Information Interchange
ATM
Asynchronous Transfer Mode
FDDI
Fiber Distributed Data Interface
MAC
Media Access Control
OSI
Open Systems Interconnection
OSPF
Open Shortest Path First
RIP
Routing Information Protocol
SNMP
Simple Network Management Protocol
Chapter 1
Creating a Script File
The Technician Interface script facility allows you to read and execute Technician
Interface commands from a script file. You create and edit script files on a remote
workstation and transfer the files to the router via TFTP or XMODEM. For
instructions on using TFTP or XMODEM, see Using Technician Interface
Software.
We provide several script programs that let you manage the router using
information stored in the Management Information Base (MIB). You can use the
scripts to display information about protocols and network services and to enable
and disable protocols, circuits, lines, and services. You may also choose to write
your own scripts, using this manual as a guide. Technician Interface scripts are
very similar to UNIX shell scripts.
This chapter describes how to perform the following tasks, using the Technician
Interface script commands:
•
Prompting the user for input, using the special variable $<prompt>
•
Referencing and using MIB information, using the special variable
$<object.attribute.instance>, the mibget and instenv commands, and
formatting MIB entries using the octetfmt command
•
Creating, using, and deleting variables, using the arrayenv, cutenv,
enumenv, getenv, instenv, let, setenv, sprintf, and unsetenv commands
•
Changing a local variable into a global variable, using the export command
•
Evaluating an arithmetic or logical expression, using the let command
•
Parsing a text string, using the cutenv command
•
Controlling the execution of the script, using the if, goto, pause, gosub, and
return commands
1-1
Writing Technician Interface Scripts
•
Writing messages to the console, using the echo and the printf commands
•
Recording console messages to a file, using the record command
•
Handling and recovering from errors, using the on error command
•
Inserting comments into a script file, using the pound sign (#)
•
Debugging a script file, using the verbose command
•
Saving or restoring variables to or from a file, using the save env and source
env commands
•
Running a script file with command line arguments, using the run command
•
Documenting a script file with command lines
About Variables
A variable is a location in the computer’s memory for storing a value. A variable
name identifies the location. Variable names can consist of up to 15 alphanumeric
characters and the underscore character (_). The first character of a variable name
must be an alphabetical character. The Technician Interface stores the value of a
variable as a string of ASCII characters. The maximum string length is 255
characters.
You can assign a value to a variable using one of the set variable commands
(arrayenv, cutenv, enumenv, instenv, let, setenv, mibget, or sprintf). For
instructions on using these commands, see Chapter 2.
After you have assigned a value to a variable, you can refer to the variable on a
command line within the script file by entering a dollar sign ($) before the variable
name (for example, $a).
When you refer to a variable, the Technician Interface substitutes the value set for
the variable itself. If you want to prevent or delay the substitution of the variable,
enter the backslash character (\) before the $. The backslash character, also called
the escape character, indicates that special characters follow.
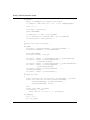
In the following script, the value of a is substituted for $a when b is executed.
setenv
a
setenv
b
echo
$b
blue
“My color is \$a”
My color is blue appears
1-2
on the user’s console.
Creating a Script File
To prevent a variable from being expanded, enter two dollar signs ($$) before the
variable name, as shown in the following example:
setenv
a
setenv
b
echo
$$b
blue
“My color is \$a”
My color is $a appears
on the user’s console.
You may embed variables in quoted strings, as shown in the previous example.
The following command line encloses the variable names a and b in curly
brackets ({ }) to separate the variable names from other data within the string.
echo
“The sum of ${a}+1=${b}”
Note: If the variable name is followed by a space or an end-of-line character
(carriage return), the brackets are optional.
A variable name is usually a literal string of characters preceded by a dollar sign
($). The variable name can also be “built” dynamically when the script is executed
by using a combination of literal text and the text stored in other variables.
For example, if you have a variable named array_10, you can reference this
variable by entering $array_10 on a command line. You can build this same
variable name by concatenating the text strings array_ and 10. For example, if
you assign the variable index the value 10, using the command let index = 10,
then you can build the variable name array_10 dynamically on the command line
using the following syntax: ${array_[$index]}. Notice the use of the square
brackets ([ ]) within the variable name. Any literal text or variable name specified
within the square brackets is expanded first to replace any variables with their
values and then concatenated onto the preceding characters of the variable name.
To use square brackets, you must enclose the entire variable name being built in
brackets ({ }).
1-3
Writing Technician Interface Scripts
Local, Global, and System Variables
When you first define a variable, the computer stores it in the local environment
variable table. Local variables are only accessible from within the script in which
they were created. You cannot access them from another script file. When a script
routine ends, any local variables that you defined are automatically deleted.
Global variables are stored in the global environment variable table and may be
accessed by any script file. You create global variables by using the export
command to change a local variable to a global variable. For more information
about the export command, see Chapter 2. Global variables are not automatically
deleted when a script file ends.
System variables, which are read-only, are created only during a Telnet session.
You cannot have the same variable name in the local and the global variable
tables. You can delete local and global variables by using the unsetenv command.
You can also change the value of a global variable by using any of the set variable
commands (arrayenv, cutenv, enumenv, instenv, let, mibget, setenv, or
sprintf). For more information about these commands, see Chapter 2.
Note: The value of a variable in the local or global table takes precedence
over a variable with the same name in the system variable table.
Special Variables
This section describes how to use input variables, how to prompt for user entry
from the console, and how to access and format information from the MIB.
Input Parameters
The Technician Interface reserves the following variables as input parameters for
a script file: $1, $2, $3, $4, $5, $6, $7, $8, $9 and $#. The special variable $#
contains the number of parameters entered on the command line following the
script filename. It is set to zero if no parameters are entered. For more information
about input parameters, see “run” in Chapter 2.
1-4
Creating a Script File
Prompting for Input
The input prompt variable allows you to create a prompt that accepts user input
from the Technician Interface console. The syntax of the input prompt variable is
$<prompt_string>. The Technician Interface prompts the user with the message
you entered between the brackets (< >). In the following script,
setenv
ans
“$<Enter your name: >”
echo
“Your name is $ans”
Enter your name: appears on the user’s console. After the user enters a value, the
Technician Interface substitutes the value for ans and displays the message Your
name is followed by the name entered by the user.
For instructions on using the setenv command and the echo command, see
Chapter 2.
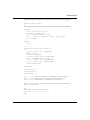
Polling the Console for Input
You can specify how much time a user has to respond to a prompt (that is, to press
Return) before the system times out. If you do not specify a timeout value, the
system prompts the user for input until the user responds.
To specify a timeout value, enter the following command, where
<value_in_seconds> is the length of time, in seconds, that the system will wait for
a response before timing out.
let SYS_IO_TIMEOUT = <value_in_seconds>
The timeout value cannot exceed the timeout specified by one of the following
MIB objects: wfSerialPort.wfSerialPortTimeOut.0 or
wfTelnet.wfTelnetSerialPortTimeOut.0. For example, if you specify a timeout of
600 seconds and the timeout specified by wfSerialPort.wfSerialPortTimeOut.0 = 5
minutes, the system uses the timeout value given by
wfSerialPort.wfSerialPortTimeOut.0.
For instructions on using the let command, see Chapter 2.
1-5
Writing Technician Interface Scripts
In the following script, if the user does not press Return before the time specified
for SYS_IO_TIMEOUT has elapsed, nothing entered appears on the user’s
console:
let
SYS_IO_TIMEOUT
= 10
setenv
ans
“$<Enter your name: >”
echo
“Your name is $ans”
if
“$ans” = “” then;
\
echo “nothing entered”
To change the timeout back to an indefinite waiting period, use the following
command:
unsetenv SYS_IO_TIMEOUT
For more information about using the commands in the preceding examples, see
Chapter 2.
Accessing MIB Information
The Technician Interface script facility allows you to assign the value of a MIB
attribute to a variable. Using the syntax $<object.attribute.instance>, you can refer
to the following types of MIB variables:
1-6
•
Counter variables, which keep track of how many times an event occurs.
•
Display string variables, which specify a piece of information stored in ASCII
characters, and which the system can display for the user to read. The string
must be shorter than 255 characters.
•
Gauge variables, which keep track of values that fluctuate.
•
Integer variables, which specify information in the form of a simple integer.
Creating a Script File
The variable values <object>, <attribute>, and <instance> are defined as follows:
<object> is the name or identifier of the object (for example, wfSnmp).
<attribute> is the name or identifier of the attribute (for example,
wfSnmpDisable).
<instance> is the identifier of a nontabular object or the index value of a tabular
object (for example, 1).
For more information about <object. attribute. instance>, see Using Technician
Interface Software.
Using the syntax $<object.attribute.instance [index]>, you can refer to the
following types of data:
•
Opaque string data
•
Octet string data
Opaque and octet string data are hexadecimal numbers that start with 0x.
The variable value index is the byte offset into the opaque or octet string data. An
offset of 0 returns the length of the data in bytes. Each byte is accessed, one byte
at a time, using the index number. For example, to access the value of a byte in an
octet string, use the following procedure:
1.
Enter $<object.attribute.instance[0]> (for example,
$(wfHwBase.wfHwBpRev.0[0])) to get the length of the data in bytes.
The system returns the number of bytes in the octet string (for example, 4).
2.
Enter $<object.attribute.instance[n]> (for example,
$(wfHwBase.wfHwBpRev.0[3])) to get the value of the selected byte (for
example, the third byte).
Formatting a MIB Entry
The octetfmt command formats a MIB entry with an Octet or Opaque data type
using the specified format type. For more information about using the octetfmt
command, see Chapter 2.
1-7
Writing Technician Interface Scripts
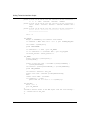
Defining a Pseudo-Variable Array
The Technician Interface script facility allows you to define a pseudo-variable
array. A true array is a set of consecutive memory locations used to store data.
Each item in the array is called an element. An element is a variable. To reference
an element of an array, you use a number called the index. In a pseudo-variable
array, the elements (variables) are not in consecutive memory locations. To create
a pseudo-array, use variable names that end in numbers (for example, a1, a2, and
a3). The following script shows how to access a member of an array using an
index:
setenv
a1
one
setenv
a2
two
setenv
a3
three
let
index=2
echo “a[$index]=${a[$index]}”
a[2]=two is
displayed on the user’s console.
For specific instructions on using the commands in the previous example, see
Chapter 2.
Creating and Using Variables
This section explains how to view local and global variables, how to set variables,
and how to delete them.
Viewing Variables
You view the current list of variables stored in the local and global environment
variable tables using the getenv command. For example, if you enter
getenv a
the system responds a = blue.
You can also use the echo $<variable_name> command to view a variable.
For specific instructions on using the getenv and echo commands, see Chapter 2.
1-8
Creating a Script File
If you access the Technician Interface via Telnet, the Technician Interface also
displays the variables in the system environment variable table. Variables in this
table are read-only from the Technician Interface. If your Telnet client supports
the environment variable option, you can use Telnet to send your UNIX
environment variables to the Technician Interface’s system list. See your Telnet
client documentation for instructions.
Note: If two variables, one in the system table and one in the local or global
table, have the same name, the one in the local or global table is used.
Setting Variables
The Technician Interface provides several ways to set variables, depending on
what you want to accomplish in your script. This section lists the ways you can set
variables. For details on each of the following commands, see Chapter 2.
•
To assign an ASCII string or numeric value to a variable in the local
environment variable table, use the setenv command.
When you assign a value to a variable, you do not type the $ before the
variable. If the value contains spaces or tabs, place double quotes (“”) around
the value string. In the following command, you assign the value Statistics
Menu to the variable a.
setenv a “Statistics Menu”
•
To define a pseudo-variable array that contains the list of MIB instance IDs
for a given MIB object name, use the instenv command.
The instenv command builds a pseudo-variable array by appending an index
number to the variable name specified on the command line. Each member of
the pseudo-variable array contains a single instance ID. The size of the
pseudo-array is stored at index 0.
Note: We recommend that you use the mibget command instead of the
instenv command. The mibget command accesses MIB tables approximately
50% faster than the instenv command.
•
To select parts of a text string and write them to a pseudo-variable array, use
the cutenv command.
1-9
Writing Technician Interface Scripts
•
To convert and format text, and save the result in a specified variable for later
use, use the sprintf command.
•
To evaluate a simple arithmetical or logical expression and assign the result to
a given variable, use the let command.
The let command evaluates an expression from left to right (default). You can
use parentheses to change the order of the evaluation.
•
To write a list of command line arguments into a pseudo-variable array, use
the arrayenv command.
You can append arguments to the end of an existing variable array with the -a
option. If an argument contains spaces, place double quotes (“”) around it (for
example, “enclose this one”).
•
To assign a sequence of values to a list of variable names, use the enumenv
command. You must indicate a starting number and optionally you can specify
a value by which to increment the values in the series. You can use the
sequence you have created as named indices of an array variable. Primarily,
you use this command with the arrayenv command to index the values
created by that command.
Deleting Variables
To delete one or more variables from the local or global environment variable
table, use the unsetenv command. For example, if you enter
unsetenv a
the system deletes variable a from the table.
You cannot delete a variable from the system environment variable table.
You can delete all variables that are part of a pseudo-variable array by using the
wildcard character *. For example, to delete all variables that begin with array_,
enter the following command:
unsetenv array_*
For specific instructions on using the unsetenv command, see Chapter 2.
1-10
Creating a Script File
Setting the Current Volume or Directory
When you set the current working volume or directory using the cd (change
directory) command, you are setting the global variable “PWD” to the value you
specify in the command, as shown in the following script:
cd 3:
echo $PWD
3:
getenv PWD
PWD = “3:”
Controlling Program Flow
The Technician Interface provides several commands to control program flow in
your script. For details on each of the following commands, see Chapter 2.
•
To specify the next line to be executed from the script file, use the goto
command.
Within the script file, use the goto command with a label. A label begins and
ends with a colon (:), consists of up to 15 alphanumeric characters and the
underscore character (_), and must be on its own line, beginning in column 1.
•
To evaluate whether an expression is true, use the if command. The expression
can compare two numerical values or two ASCII strings. If the expression is
true, the script interpreter executes any additional commands that are on the
same command line as the if command. If the expression is false, the script
interpreter does not execute the if command.
You use a semicolon (;) to end an if command. The semicolon separates the if
command from the commands you want executed if the if command is true.
•
To suspend the Technician Interface’s operation for a given interval, use the
pause command. During this time the router is still running.
•
To call a subroutine inside the same script file, use the gosub command. It
must be the last command on a line. You can nest subroutines up to 10 deep.
You use the return command in a subroutine to return to the calling routine.
When the return command executes, the script interpreter begins executing
the instructions on the line following the line containing the gosub command.
1-11
Writing Technician Interface Scripts
Writing Messages to the Console
The Technician Interface provides two commands to display messages on the
console. For details on each of the following commands, see Chapter 2.
•
To display command line arguments to the user’s terminal, use the echo
command.
•
To convert, format, and print input arguments on the Technician Interface’s
console, use the printf command.
Saving Console Messages to a File
To save to a file all messages that are written to the console terminal, use the
record command.
The record file must be opened before recording, and the file must be closed when
recording is completed. The file will be lost if it is not closed before the file
system is unmounted or the router is reset.
For specific instructions on using the record command, see Chapter 2.
Performing Error Recovery
To specify an error handler label within a script file, use the on error command. If
a command returns an error or if you attempt to abort the script file, the script
interpreter goes to the error handler label defined in the file. If you press Ctrl-c to
abort the script, the Technician Interface displays the following prompt:
Terminate script file? (y/n):
You can use the on error command with the -s flag to allow the script to recover
without returning an error message if the on error command cannot locate a
specified script file. The following example shows the on error command with the
-s flag:
on error
-s
:ERROR_HANDLER:
For more information about the on error command, see Chapter 2 in this manual.
1-12
Creating a Script File
Inserting Comments
You can insert comments into the script file. Comments begin with a pound sign
(#) in column 1, as shown in the following example:
# The 'echo' command is used to
# output messages to the user’s console.
When a script file is executed, the system does not display comments to the user’s
console.
Debugging a Script File
To enable the debug trace facility, use the verbose command. When you enable
the trace facility, the Technician Interface displays each command read from the
script file before and after its variables have been expanded. For instructions on
using the verbose command, see Chapter 2.
Saving and Restoring Variables
To save the current list of local and global variables to a file, use the save env
command. For example, to save the variables to a file named test, enter the
following command:
save env test
To read and execute the commands in a Technician Interface script file, and to
ensure that the router saves (restores) all local variables when the script ends, use
the source env command.
For example, to run the script file test on volume 2, and to restore upon
completion all local variables saved previously to test, enter the following
command:
source env 2:test
To locate script errors, use the verbose on command and then use the source env
command. The Technician Interface displays each line from the file before it
executes the line, enabling you to easily locate errors.
For more information about the save env and source env commands, see
Chapter 2.
1-13
Writing Technician Interface Scripts
Running a Script File
To read and execute the commands in a Technician Interface script file, and to
ensure that the router deletes all local variables when the script ends, use the run
command.
For example, to run the script file test on volume 2, deleting upon script
completion all local variables saved previously to test, enter the following
command:
run 2:test
To locate script errors, use the verbose on command and then use the run
command. The Technician Interface displays each line from the file before it
executes the line, enabling you to locate errors easily.
You can use the run command with the -s flag to prevent the system from
returning an error message if the run command cannot locate the specified script
file. The following example shows the run command with the -s flag:
run
-s
install.bat
Note: The run command automatically appends the .bat suffix to the end of the
script filename you specify. If you issue the command run install, the system
first looks for a file named install. If it cannot find this file, it looks for a file
named install.bat.
For more information about the run command, see Chapter 2.
Creating Menus
The menu utility allows you to edit existing script menus and to create your own
menus. For instructions on using the menu utility, refer to Using Technician
Interface Scripts.
You can also edit a script menu by directly editing the appropriate .mnu file.
Appendix A shows examples of a script menu and a script.
1-14
Chapter 2
Command Reference
In the following pages you can find the function, syntax, and examples of all the
script commands you need to write, edit, and execute your script files. Table 2-1
lists the script commands and their functions.
Table 2-1.
Script Commands
Command
Function
arrayenv
Writes list of command line arguments to a pseudo-variable array
cutenv
Selects part of a text string and writes it to a pseudo-variable array
echo
Displays command line arguments to a user’s terminal
enumenv
Assigns a sequence of values to a list of variables
export
Moves one or more local variables to the global environment variable
table
getenv
Displays the current list of variables stored in the local and global
environment variable tables
gosub
Calls a subroutine inside the same script file
goto
Specifies the next line to be executed from the script file
if
Evaluates whether an expression is true
instenv
Defines a pseudo-variable array that contains the list of MIB instance
IDs for a given MIB object name
let
Evaluates a simple arithmetical or logical expression and assigns the
result to a given variable
mibget
Searches a MIB object table one record at a time and retrieves a set of
attributes from each record
octetfmt
Formats a MIB entry with an Octet or Opaque data type
on error
Specifies an error handler label within a script file
(continued)
2-1
Writing Technician Interface Scripts
Table 2-1.
2-2
Script Commands (continued)
Command
Function
pause
Suspends the Technician Interface’s operation for a given interval
printf
Converts, formats, and prints the input arguments on the Technician
Interface’s console
record
Saves to a file all messages written to the console terminal
return
Returns control to the calling routine
run
Reads and executes the Technician Interface commands in a script file;
deletes local variables when the script ends
save env
Saves the current list of local and global variables to a script file
setenv
Assigns an ASCII string value or a numeric value to a variable in a local
environment variable table
source env
Reads and executes the Technician Interface commands in a script file;
saves (restores) local variables when the script ends
sprintf
Converts and formats text, and saves the result in a specified variable
unsetenv
Deletes one or more variables from the local or global environment
variable table
verbose
Enables the debug trace facility
Command Reference
arrayenv
The arrayenv command allows you to write a list of command line arguments
<text_string> to a pseudo-variable array, beginning with the prefix
<variable_name>. You can also append arguments to the end of an existing
variable array using the -a option.
The arrayenv command has the following syntax:
arrayenv [-a] <variable_name> “<text_string>” [“<text_string>”. . .]
-a appends the new arguments to the end of a variable array.
<variable_name> is the name of the variable that holds the array.
<text_string> contains the command line arguments. If the text for the arguments
contains blanks or special characters, enclose it in double quotes (as shown in
syntax). For example, to pass the argument Router One, specify “Router One” in
the statement.
The following example sets up an array named attribute, specifies a series of
values for the array, appends a value to the list, and then prints the number of
elements in the array, the value of the first element and the value of the last
element. The size of the pseudo-variable array is stored at index 0.
arrayenv attribute one two “three & four” five “six & seven”
arrayenv -a attribute “Router One”
echo “Size:
${attribute[0]}”;
echo “First element:
${attribute[1]}”;
echo “Last element:
${attribute[${attribute[0]}]}”;
The output from this script is as follows:
Size: 6
First element: one
Last element: Router One
cutenv
The cutenv command allows you to select portions of a <text_string> (as
specified by <list>) and write them to a pseudo-variable array, beginning with the
prefix <variable_name>. The items specified by <list> can represent column
position or fields delimited by a special character. Column and field numbering
start at 1.
2-3
Writing Technician Interface Scripts
The cutenv command has the following syntax:
cutenv [-s] [-d <delimiter>] [-f <list> | -c <list>] <variable_name>
“<text_string>”
-s suppresses <text_string> with no delimiter characters.
-d <delimiter> sets the field delimiter to <delimiter>. The default is a tab.
Characters with a special meaning to the Technician Interface interpreter, such as
a tab or space character, must be set in quotes.
-f <list> is field position. Instead of character positions, <list> specifies fields that
are separated by a delimiter (for example, a tab). Separate variables are created for
each noncontiguous field of characters selected. For example:
1,4,7 represent fields 1, 4, and 7.
-c <list> is character position. <list> is a comma-separated list of integer field
numbers (in increasing order), with an optional hyphen (-) to indicate ranges.
Separate variables are created for each noncontiguous set of characters. For
example:
2,4,6 represent characters 2, 4, and 6.
1-5,9 represent characters 1 through 5, inclusive, and 9.
-5,10 represent the first character in the list through 5, inclusive, and 10.
5- represent the character 5 through the last character in the list, inclusive.
Numbers and number ranges may be repeated, overlapping, and in any order. You
can select fields or columns not present in the text string.
<variable_name> is the prefix or name representing the pseudo-variable array.
<text_string> with no field delimiters is normally passed through in its entirety.
2-4
Command Reference
The following sample script shows how you use the cutenv command to assign
portions of 192.32.100.55 to a pseudo-variable array:
cutenv -d . -f
1,3
addr_
echo $addr_0 $addr_1 $addr_2
2 192 100
“192.32.100.55”
2-5
Writing Technician Interface Scripts
echo
The echo command allows you to display its command line arguments to the
user’s terminal.
The echo command has the following syntax:
echo <text_string>
or
echo $<variable_name>
<text_string> is any literal text.
<variable_name> is the name of a variable.
For example, when you execute the script
echo Good Morning
the system displays Good Morning on the user’s console.
When you execute the script
setenv b blue
echo $b
the system displays blue on the user’s console.
2-6
Command Reference
enumenv
The enumenv command lets you assign a sequence of values to a list of variables.
You assign a starting number <starting_#> and can optionally specify a value by
which to increment the enumeration <+increment>. Most commonly, you use this
command with the arrayenv command to create named indices to use with a value
array. That way you can refer to the elements of the array with meaningful names
rather than index numbers. For an example, see the mibget command.
The enumenv command has the following syntax:
enumenv <starting_#> [+<increment>] <variable_name> [<variable_name> . . .]
<starting_#> is the starting number of the enumeration.
+<increment> is the value by which to increment the enumeration.
<variable_name> is the pseudo-variable array.
The following example creates indices for attributes in a value array. In the result,
1 is the starting number and the values increment by 1. Therefore, the variable
named proto is 1, the variable named dest is 2, and so on.
enumenv 1 proto dest next hop mask metric as
2-7
Writing Technician Interface Scripts
export
The export command allows you to move one or more local variables to the
global environment variable table. (When you first define a variable, it is stored in
the local environment variable table.) Global variables can be accessed from other
script files. You cannot move global variables to the local environment variable
table.
The export command has the following syntax:
export <variable_name>
or
export <variable_name> <variable_name> . . .
For example:
setenv A
“string”
let B = 1
export A B
2-8
Command Reference
getenv
The getenv command allows you to view the current list of variables stored in the
local and global environment variable tables. If you access the Technician
Interface via Telnet, the Technician Interface also displays the variables in the
system environment variable table. Variables in this table are read-only from the
Technician Interface. If your Telnet client supports the environment variable
option, you can use Telnet to send your UNIX environment variables to the
Technician Interface’s system list. See your Telnet client documentation for
instructions.
The getenv command has the following syntax:
getenv <variable_name>
<variable_name> is the name of the variable whose value you want to display.
To display the current list of variables in all tables, enter the getenv command
with no arguments.
Note: If two variables, one in the system table and one in the local table, have
the same name, the one in the local table is displayed.
2-9
Writing Technician Interface Scripts
gosub
The gosub command calls a subroutine inside the same script file. It must be the
last command on a line. A subroutine begins and ends with a colon (:). You can
nest subroutines up to 10 deep. You use the return command in a subroutine to
return to the calling routine. When the return command executes, the script
interpreter begins executing the instructions on the line following the line
containing the gosub command.
The gosub command has the following syntax:
gosub :<subroutine_name>:
<subroutine_name> is the name of the subroutine.
The following example shows a script using the gosub and return commands:
:main:
let arg = 1; gosub :SUBROUTINE:
echo “Return value: $return”
goto :EXIT:
:SUBROUTINE:
let return = ($arg*$arg) + $arg + 1
return
:EXIT:
2-10
Command Reference
goto
The goto command lets you specify the next line to be executed from the script
file. Within the script file, the goto command is used with a label. A label begins
and ends with a colon (:), consists of up to 15 alphanumeric characters and the
underscore character (_), and must be on its own line, beginning in column 1.
The goto command has the following syntax:
goto :<label_name>:
<label_name> is the name of the label.
In the following script, you instruct the script file to go to the :LABEL: label.
Note: The following examples only work from a script file; the examples will
not work from an interactive Technician Interface console.
goto
:LABEL:
echo
“This line is not executed.”
:LABEL:
The argument to the goto command can be a variable whose value is a valid label
in the script file. This allows for dynamic branching within the script file.
setenv
vector
“:LABEL_2:”
goto
$vector
echo
“This line is skipped.”
:LABEL_2:
2-11
Writing Technician Interface Scripts
if
The if command allows you to evaluate whether an expression is true. The
expression can be a comparison of two numerical values or two ASCII strings. If
the expression is true, the script interpreter executes any additional commands that
are on the same command line as the if command. If the expression is false, the
script interpreter does not execute the if command.
You use a semicolon (;) to end an if command. The semicolon separates the if
command from the additional commands you want executed if the if command is
true. The syntax for the if command is shown below:
if [<option>] <string1> <operand> <string2> then; <command> [; <command>
...]
<option> is one of the following arguments:
-u tests whether <string1> is an unsigned number.
-num tests whether <string1> is a number.
-ip tests whether <string1> is an IP address.
-ipx tests whether <string1> is an IPX address.
-ic means ignore case when comparing strings.
-file tests whether <filename> is present.
-dir tests whether <directory_name> is present.
-vines tests whether <string1> is a VINES address.
-date tests whether <string1> uses the date format MM/DD/YY.
-time tests whether <string1> uses the time format HH:MM:SS.
-tz tests whether <string1> uses the GMT offset format [+ | -]HH:MM.
2-12
Command Reference
<string1> <string2> are ASCII character strings or numbers.
<operand> is one of the following comparison operations:
(=) equal (!=) not equal
(>) greater than (>=) greater than or equal
(<) less than (<=) less than or equal
then is an optional word used for ease of reading.
<command> is a Technician Interface command.
If both <string1> and <string2> are numbers, the test expression for the if
command is a numeric comparison. If <string1> and <string2> are not numbers, a
case-sensitive string comparison is done. You specify a case-insensitive
comparison using the -ic argument.
The syntax for certain data types may also be tested using the -u, -num, -ip,
or -ipx argument. If the test on <string1> is valid, a 1 is substituted for <string1>.
If the test on <string1> is invalid, a 0 is substituted for <string1>.
The following example shows a script using the if command. The comments
explain what is happening in the script.
setenv
A
“YES”
setenv
B
1993
#string comparison
if
“$A”
=
“YES”
then ; echo
TRUE ; date
#numeric comparison
if
“$B” !=
“2001”
then ; echo
FALSE ; date
#test for valid IP address syntax
if
-ip 192.88.22.33 = 1
then ; echo TRUE
#case-insensitive string comparison
if
-ic
“ABC” = “abc”
then ; echo TRUE
#test for valid date, time, and timezone offset syntax
if -date “10/10/94” = 1 then; echo “Good”
if -time “10:10:44” = 1 then; echo “Good”
if -tz “-5.00”
= 1 then; echo “Good”
2-13
Writing Technician Interface Scripts
The backslash character (\) allows you to continue a command line on the
following physical line. When used in this way, the backslash is referred to as a
line continuation character. The line continuation character makes it easier for
you to read the script file. The maximum command line size is still restricted to
255 characters. The following example shows an if command using the backslash
character:
if
$num = 1
then ; \
echo
“The number is 1”;
We recommend that you indent the additional commands to make the script file
easier to read. Also, if there is a large amount of code following the if command,
use a goto command to branch around the conditional code, as shown in the
following example.
if
$num !=1 then ;
goto :IF_10:
echo
“the number is 1”;
:IF_10:
The following script shows how the if command is used to pass parameters into
the script file.
echo
let
“Number of parameters entered on run line: $#”
index = 1
:LOOP:
if
$index > $# then;
goto :LOOP_END:
echo
“Parameter $index: ${[$index]}”
let
index = $index + 1
goto :LOOP:
:LOOP_END:
To test whether a variable is defined, use the if command with the following
syntax:
if $?<variable_name>=1
where 1=defined.
For example, the following script tests whether variable a has been defined:
setenv
a
5
if
$?a=1
then; \
echo
“Defined”
To test whether a file is present, use the if command with the following syntax:
2-14
Command Reference
if -file <filename>=1
For example, the following script tests whether the install.bat file is present:
if
-file
install.bat=1
echo “File present”
then;\
To test whether a directory is present, use the if command with the following
syntax:
if -dir <directory_name>=1
For example, the following script tests whether volume 2 is present:
if
-dir 2:=1
then;\
echo “Volume 2 present”
2-15
Writing Technician Interface Scripts
instenv
The instenv command allows you to define a pseudo-variable array that contains
the list of MIB instance IDs for a given MIB object name. The instenv command
builds a pseudo-variable array by appending an index number to the variable name
specified on the command line. Each member of the pseudo-variable array
contains a single instance ID. The size of the pseudo-array is stored at index 0.
The instenv command has the following syntax:
instenv <array_name> <object>
<array_name> is the name you assign the pseudo-variable array.
<object> is the name of the MIB object table from which to retrieve the
information.
Note: We recommend that you use the new mibget command instead of the
instenv command. The mibget command accesses MIB tables approximately
50 percent faster than the instenv command.
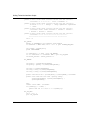
The first four lines in the following example show how you list the instance IDs
for wfIpInterfaceEntry to the console; the last nine lines show how you use the
instenv command to assign these instance IDs to a pseudo-variable array.
$list
-i
wfIpInterfaceEntry
inst_ids = 192.32.23.5.1
192.32.7.8.2
192.32.2.3.3
$instenv
ip_ wfIpInterfaceEntry
$echo
Size: ${ip_[0]}
Size: 3
$echo
“1: ${ip_[1]}”
1: 192.32.23.5.1
$echo
“2: ${ip_[2]}”
2: 192.32.7.8.2
$echo
“3: ${ip_[3]}”
3: 192.32.2.3.3
2-16
Command Reference
The following example is an excerpt from a script file showing how to use the
instenv command.
instenv ip_ wfIpInterfaceEntry
echo “Size of array :{ip_[0]}”
let i = 1
:LOOP:
if $i > ${ip_[0]} then; goto :DONE:
setenv ipstate wfIpInterfaceEntry.wfIpInterfaceState.${ip_[$i]}
setenv ipaddr wfIpInterfaceEntry.wfIpInterfaceAddr.${ip_[$i]}
echo “$i: IP Address: $($ipaddr) State: $($ipstate)”
let i = $i + 1
goto :LOOP:
:DONE:
2-17
Writing Technician Interface Scripts
let
The let command allows you to evaluate a simple arithmetical or logical
expression and assign the result to a given variable.
The let command has the following syntax:
let <flag>
<flag> formats the result, as follows:
-s in signed decimal (default)
-u in unsigned decimal
-h in hexadecimal
-date as MM/DD/YY
-days as DD days
-time as HH:MM:SS; Modulo 24 hours
-tz as [+|-]HH:MM; Modulo +/-12:00
The following flags may be used together. Flag combinations other than those
listed below are invalid.
-date -time as MM/DD/YY HH:MM:SS
-days -time as DD days HH:MM:SS
The flags must immediately precede the variable name that represents the result,
as shown in the following example:
let
-h
a = 1 + 2
In the following script, variable name b is assigned the sum of variable name a
plus 1.
setenv
a
1
let
b=$a+1
The let command evaluates an expression from left to right. You can use
parentheses to change the order of the evaluation.
2-18
Command Reference
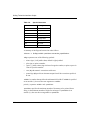
Use the arithmetical and logical operators listed in Table 2-2 and Table 2-3 with
the let command.
Table 2-2.
Arithmetical Operators
Operation
Symbol
Addition
+
Subtraction
-
Multiplication
*
Division
/
Exponent
**
Remainder
%
Table 2-3.
Logical Operators
Operation
Symbol
Definition
1’s complement
~
Bit negation operator that provides the
bitwise complement of an integer
AND
&
Arithmetic AND
Inclusive-OR
|
Arithmetic inclusive OR
Exclusive-OR
^
Arithmetic exclusive OR
Logical shift left
<<
Bit-shift to the left, far-right bit set to zero
Logical shift right
>>
Bit-shift to the right, far-left bit set to zero
2-19
Writing Technician Interface Scripts
The let command provides the following string functions:
•
strlen( )
•
strindex( )
•
strrindex( )
•
strpbrk( )
•
strmatch( )
•
<single_character>
The arguments for each function can be a literal character string, a set of
characters enclosed in double quotes (“”), or the name of an environment variable.
When you specify an environment variable, do not precede the name with $.
If a function returns an offset within a string, an index of 1 refers to the first
character position.
The function strlen( ) returns the number of characters in the parameter <string>.
strlen(<string>)
The function strindex( ) finds the first occurrence of a string in another string. The
function strrindex( ) finds the last occurrence of a string in another string. Both
functions return the offset within <string> of <substring>’s position, or 0 if
<substring> is not found.
strindex(<string>, <substring>)
strrindex(<string>, <substring>)
The function strpbrk( ) searches <string> for the first character that matches any
of the characters given in the character string <set>. The function returns the
offset to the first matching character’s position in <string>, or 0 if no character of
<set> appears in <string>.
strpbrk(<string>, <set>)
The function strmatch(<string>, <pattern>) compares <string> to <pattern>. If
<string> matches the pattern, the function returns a 1; otherwise it returns a 0. You
may use wildcards (* or ?) in <pattern>. A * matches any character (or no
character), and a ? matches any character in that position in the string. A character
must exist in that position for ? to match.
strmatch(<string>, <pattern>)
2-20
Command Reference
You can also get the ASCII code for a given character (indicated as one character
within single quotes, such as ‘c’).
The let command also provides the following date and time functions:
•
date( )
•
time( )
•
timezone( )
The function date( ) used with no arguments returns the current date in seconds. If
you enter a date string in the format MM/DD/YY (for example, date(“10/7/95”)),
the function returns the number of seconds from January 1, 1900 to that date.
Dates may range from 1/1/00 (January 1, 1900) to 12/31/99 (December 31, 1999).
If you omit the year, the function uses the current year.
The function time( ) used with no arguments returns the current local time in
seconds. If you enter a time string in the format HH:MM:SS (for example,
time(“7:04:32”)), HH:MM, or MM, the function returns the number of seconds
from 12:00 midnight to that time. HH must be a value between 0 and 23,
inclusive. MM must be a value between 0 and 59, inclusive. SS must be a value
between 0 and 59, inclusive.
The function timezone( ) used with no arguments returns the current time zone in
seconds. If you enter a time-zone string in the format [+|-]HH:MM (for example,
timezone(“-08:00”)), the function returns the number of seconds for that time
zone from the International Date Line. You enter the time-zone string relative to
GMT, which is 43200 seconds offset from the International Date Line. The string
must begin with either a plus (+) or a minus (-) sign followed immediately by
HH:MM. HH must be a value between 0 and 11, inclusive, and MM must be a
value between 0 and 59, inclusive.
Note: In the previous examples, the date variables MM, DD, and YY represent
the numeric values of month, day, and year, respectively. The time variables
HH, MM, and SS represent the numeric values of hours, minutes, and seconds,
respectively.
Example:
The following example shows how to use the -date, -time, and -days flags and the
date( ), time( ), and timezone( ) functions of the let command:
2-21
Writing Technician Interface Scripts
let -date -time localtime = date() + time()
echo $localtime
10/11/95 15:24:05
let -date -time london = date(“10/7/95”) + time(“7:04”) + \
timezone() - timezone(“+00:00”)
echo $london
10/07/95 12:04:00
let -date -time newyork = date(“10/7/95”) + time(“7:04”) + \
timezone() - timezone(“-05:00”)
let -date -time la = date(“10/7/95”) + time(“7:04”) + \
timezone() - timezone(“-08:00”)
let -days -time time_left = date(“12/25”)-(date()+time())
echo $time_left
74 days 08:34:58
2-22
Command Reference
Example:
The following example shows how to use the let command to set up a slotmask:
let
let
echo
slot = $<Enter Slot Number>
-h
slotmask = 0x80000000 >> ($slot - 1)
“slot #” $slot “slotmask” $slotmask
Examples:
Additional examples using the let command are shown below:
let b = 5 * (10**2);
let capA = 'A'
set env letter “A”
let capA = '$letter'
let len = strlen(“abcdef”)
setenv string “answer=1”
let len = strlen(string)
let index = strindex(string, “wer”)
let index = strpbrk(string, “=:;”)
if $index = 0 then; echo “Missing Delimiter”
let index = strmatch(string, “pat”)
if $index = 0 then; echo “No match found”
2-23
Writing Technician Interface Scripts
mibget
The mibget command lets you search a MIB object table one record at a time and
retrieve a set of attributes from each record. For example, you can use this
command in a script to retrieve information from a routing table and print the
information immediately on the console. When you are searching a larger MIB
table, this method is faster and more efficient than using the instenv command.
The mibget command has the following syntax:
mibget [-n] [-p <pattern>] <object> <attribute_variable_array> <instance_id>
<value_variable_array> <next_instance_variable>
-n retrieves the information from the next record in the MIB table. You can use it
in a loop to read the next instance following the identity of the instance
<instance_id> just read. For example, the current ID is 192.32.0.1 and the next ID
is 192.32.0.2. If you enter the -n option with the current ID, the mibget command
returns information for the instance ID 192.32.0.2.
-p <pattern> specifies an instance ID pattern string. The script returns only
instance IDs that match the pattern. For example, -p 192.32.* returns all instances
whose address starts with 192.32., such as 192.32.0.0, 192.32.1.1, and so on.
<object> is the name of the MIB object table from which to retrieve the
information (for example, wfIPForwardEntry).
<attribute_variable_array> is an environmental array variable that contains the list
of attributes to be retrieved. To create this array variable, you use the arrayenv
command. Do not type $ before this variable name, since the input is passed by
reference, not by value. If the attribute is an OCTET string, you can use an
optional format specifier (/<format>) for each array entry. For information on this
format specifier, see the octetfmt command. If the attribute is not an OCTET
string, the mibget command ignores the format specifier.
<instance_id> is the first instance to reference in the MIB table. You can use the *
wildcard. If you use the -n option, this option identifies the instance ID most
recently retrieved.
<value_variable_array> is the name of an environmental array variable that stores
the values retrieved. The values are in the same order as listed in the attribute
array <attribute_variable_array>. Do not type $ before this variable name, since
the input is passed by reference, not by value.
2-24
Command Reference
<next_instance_variable> is the name of the variable that stores the instance ID of
the record currently read. If the routine reaches the end of the table, it sets this
variable to the string “END.” In this case, the mibget command has not read any
record information. Do not type $ before this variable name, since the input is
passed by reference, not by value.
The following example searches through the IP routing table to retrieve a series of
attributes and prints the result on the Technician Interface console. The object
from which to retrieve information is wfIpForwardEntry. The script uses the
arrayenv command to create the attribute array variable attr that lists the
attributes from which to retrieve values. Then it uses the enumenv command to
establish meaningful names for the indices for attr.
The script reads the first record with the nextflag turned off.
In the loop (:IP_RT_LOOP:), nextid is the <instance_id> option. value is the
name of the value array where the script places the values it retrieves. nextflag is
set to -n to read through the records. The script prints the values as it retrieves
them and loops again until it has retrieved the desired attributes from the entire set
of records.
The following examples show how to retrieve attribute values from the IP routing
table using the mibget command. The comments (#) explain what is happening in
the script.
# Purpose: Retrieve attribute values from the IP routing table.
# Retrieve values from the following attributes:
arrayenv attr fIpForwardProto wfIpForwardDest \
wfIpForwardNextHop wfIpForwardAge \
wfIpForwardMask wfIpForwardMetric1 \
wfIpForwardNextHopAS
# Indices for attributes in value array where values are placed:
enumenv 1 proto dest next age mask metric as
# Read the first record with nextflag turned off.
setenv nextflag “”
# First instance ID to read, wildcard.
setenv nextid “*”
2-25
Writing Technician Interface Scripts
# Begin loop to read entire set of records
:IP_RT_LOOP:
mibget $nextflag wfIpForwardEntry attr $nextid
if “$nextid” = “END” then; goto :IP_RT_END:
value nextid
# Set get-next record flag.
setenv nextflag “-n”
printf “%-15s %-15s %-5d %8d %8d %-15s” ${value[$dest]}\
${value[$mask]} ${value[$proto]} ${value[$age]} \
${value[$metric]} ${value[$next]}
goto :IP_RT_LOOP:
:IP_RT_END:
2-26
Command Reference
octetfmt
The octetfmt command formats a MIB entry with an Octet or Opaque data type
using the specified format type. The syntax for the octetfmt command is shown
below:
octetfmt <variable_name> <format_type> <MIB_object>
<variable_name> is the name of the variable.
<format_type> is one of the following values:
ASCII_STRING returns the data as a printable display string. Any data that is not
printable is returned as its hex value in the form <00>.
formats the data as an unsigned decimal number, with each byte
separated by a dot.
DEC_BYTES
formats the data as an unsigned decimal number, with a dot
separating every 2 bytes.
DEC_WORDS
DEC_LONGS formats the data as an unsigned decimal number, with a dot
separating every 4 bytes.
HEX_BYTES formats the data as a hexadecimal string, with each byte separated by
a dot.
HEX_WORDS formats the data as a hexadecimal string, with a dot separating every
2 bytes.
HEX_LONGS formats the data as a hexadecimal string, with a dot separating every
4 bytes.
HEX_USTRING or HEX_STRING formats the data as a hexadecimal string using
uppercase digits for ‘A-F.’
HEX_LSTRING formats the data as a hexadecimal string, using lowercase digits for
‘a-f.’
MAC1_ADDRESS or MAC_ADDRESS formats the data as a canonical MAC address.
MAC2_ADDRESS
formats the data as a noncanonical MAC address.
SIGNED_INTEGER
or INTEGER formats the data as a 4-byte signed integer.
2-27
Writing Technician Interface Scripts
UNSIGNED_INTEGER
formats the data as a 4-byte unsigned integer.
<MIB_object> represents the variable values <object.attribute.instance>.
The following example shows a script using the octetfmt command. The
command formats the MIB object as a hexadecimal string using uppercase digits.
octetfmt
serialno
HEX_USTRING
wfHwBase.wfHwBpSerialNumber.0
echo \“Backplane serial number: 0x$serialno\”
2-28
Command Reference
on error
The on error command allows you to specify an error handler label within a script
file. If a command returns an error or if the user attempts to abort the script file,
the script interpreter goes to the error handler label defined in the file. If you press
Ctrl-c to abort the script, the Technician Interface displays the following prompt:
Terminate script file? (y/n):
The on error command has the following syntax:
on error [-s] :<label>:
-s allows the script to recover without returning an error message if the on error
command cannot locate a specified file.
<label> is the name of the error handler label.
In the following script, the script interpreter goes to the label
:ERROR_HANDLER: when an error occurs:
on error :ERROR_HANDLER:
echo
“what
echo
“this line is skipped due to the above”
echo
“syntax error. (Missing quote)”
:ERROR_HANDLER:
echo
“The error handler is called because of the”
echo
“deliberate syntax error in the previous command.”
The error handler is automatically canceled after an error is found or if you issue
the on error command without a label.
2-29
Writing Technician Interface Scripts
pause
The pause command allows you to suspend operation of the Technician Interface
for a given interval. During this time the router is still running.
The pause command has the following syntax:
pause <no._of_seconds>
<no._of_seconds> is the length of the pause in the operation of the Technician
Interface.
The following command suspends operation of the Technician Interface for 10
seconds:
pause 10
2-30
Command Reference
printf
The printf command converts, formats, and prints the input arguments
(<p1>,. . .,<pN>) on the Technician Interface console under the control of
<format>.
The printf command has the following syntax:
printf <format> <p1> <p2> . . . <pN>
<format> is the string describing what to print.
<p1> <p2>...<pN> represent input arguments.
<format> contains text to be printed and conversion specifications. Everything
inside the <format> string is printed, except for the conversion specifications.
When the printf command locates a conversion specification, it formats and prints
the value of the next input argument that follows the <format> string. You must
have the same number of input arguments as conversion specifications. The syntax
rules for <format> are described later in this section.
The printf command does not automatically output a newline at the end of each
line. You must explicitly output a newline as part of either the <format> string or
in the argument strings. This feature lets you use multiple printf commands to
output a single line or you can use a single printf command to output multiple
lines. The special character \n represents a new line.
Table 2-4 lists the special characters you can use in the format and input
arguments.
2-31
Writing Technician Interface Scripts
Table 2-4.
Special Characters
Character
Meaning
\a
audible bell
\b
backspace
\f
form feed
\n
newline
\r
carriage return
\t
tab
\xhh
hex. code
\000
octal code
A summary of the flags and conversion codes follows:
<format> = %<flag><width>.<precision><conversion_specification>
<flag> represents one of the following symbols:
•
minus sign (-) left-justifies data; default is right-justified.
•
plus sign (+) prints a number.
•
space ( ) prints a minus sign in front of a negative number, or prints a space in
front of a positive number.
•
zero (0) pads numeric conversions with zeros.
•
pound sign (#) specifies an alternate output form if the conversion specifier is
x or o.
<width> is a number that specifies the minimum field width. If <width> is specified
as an asterisk (*), then use the next argument as <width>.
period (.) separates <width> and <precision>.
<precision> specifies the maximum number of characters to be printed from a
string, or the minimum number of digits for an integer. If <precision> is an
asterisk (*), then use the next argument as <precision>.
2-32
Command Reference
<conversion_specification> can be one of the following:
•
d or i indicates signed decimal notation.
•
o indicates unsigned octal notation (no leading zero).
•
x or X indicates unsigned hexadecimal notation (no 0x prefix).
•
u indicates unsigned decimal.
•
c indicates a single unsigned character.
•
s indicates a character string.
•
A percent sign (%) means to print a %.
If you enter the printf command incorrectly, the console returns one of the
following error messages:
•
printf: Expected numeric argument; invalid string argument found
The %<conversion_specification> expected numeric data in the input
argument, which contained a text string (“hello there”) instead of a number
(123).
•
printf: Format string has more format codes than there are arguments
The <format> string has more conversion specifications than there are input
arguments (<p1>,. . .,<pN>).
•
printf: Invalid format code
You entered an invalid conversion specification in the format string (%z).
Example:
The following example shows a sample printf command:
let
slot = 2
printf
“Slot: %5d\n” $slot
2-33
Writing Technician Interface Scripts
record
The record command saves to an open file all messages written to the console
terminal. Use this command when you need to capture a snapshot of Technician
Interface output for analysis by Bay Networks Technical Response Center
personnel.
You must open a snapshot file before attempting to capture any Technician
Interface output to that file.
You must close the file
•
After capturing the desired output from the Technician Interface
•
Before unmounting the router file system
•
Before resetting the router
If you do not follow these instructions, you can lose the contents of your snapshot
file.
Enter the following command to open a file, and to save console messages to that
file:
record open [-fileonly] [-pause] <vol>:<filename>
open creates and opens a snapshot file. The system sends command output and
messages to both the console terminal and the file.
-fileonly writes messages only to the file, not to the terminal. This option is used
only within a script, and is otherwise ignored. This option allows a script to write
output to a file. The default is for messages to be written to both the file and the
terminal.
-pause immediately places the system in pause mode. You can use this option
with the -fileonly option.
<vol> is the slot number containing the volume used to store the file.
<filename> is the name of the file used to store output from the router’s Technician
Interface.
2-34
Command Reference
Note: When you designate a snapshot file on an NVFS (flash) file system,
remember that only one snapshot file can be open at a time. If you use other
Technician Interface commands to write to another file when the snapshot file
is open on the same file system, the commands fail.
You can stop saving messages to a snapshot file temporarily by using the pause
option with the record command.
To change the pause state, enter
record pause [on | off]
on disables recording.
off re-enables recording.
To display the pause state, enter
record pause
To close and save the contents of your designated snapshot file, enter
record close
By checking the global variable RECORD_STATE, you can determine whether
•
The router is actively saving messages to your snapshot file
(RECORD_STATE = ON)
•
The router has temporarily stopped saving messages to your snapshot file
(RECORD_STATE = PAUSED)
•
The router has unconditionally stopped saving messages to your snapshot file
(RECORD_STATE = OFF)
2-35
Writing Technician Interface Scripts
return
You use the return command in a subroutine to return to the calling routine. When
the return command executes, the script interpreter begins executing the
instructions on the line following the line containing the gosub command.
The return command has the following syntax:
return
The following example shows a script using the gosub and return commands:
:main:
let arg = 1; gosub :SUBROUTINE:
echo “Return value: $return”
goto :EXIT:
:SUBROUTINE:
let return = ($arg*$arg) + $arg + 1
return
:EXIT:
2-36
Command Reference
run
The run command allows you to read and execute the Technician Interface
commands in a Technician Interface script file. The run command deletes all local
variables when a script ends.
The run command has the following syntax:
run [-s] <vol>:<filename> [<p1> [<p2> [. . .<p9>]]]
-s prevents the system from returning an error message if the run command
cannot locate the specified script file.
<vol> is the volume number of the script you want to execute.
<filename> is the name of the script file you want to execute.
<p1>, <p2>, <p3>, <p4>, <p5>, <p6>, <p7>, <p8>, <p9> are optional input
parameters to the script file. They may be referred to within the script file, as
follows:
<p1> -> $1
<p2> -> $2
<p3> -> $3
<p4> -> $4
<p5> -> $5
<p6> -> $6
<p7> -> $7
<p8> -> $8
<p9> -> $9
To locate script errors, use the verbose on command and then use the run
command. The Technician Interface displays each line from the file before it
executes the line, enabling you to locate errors easily.
2-37
Writing Technician Interface Scripts
Note: The run command automatically appends the .bat suffix to the end of the
script filename you specify. If you issue the command run install, the system
first looks for a file named install. If it cannot find this file, it looks for a file
named install.bat.
The special variable $# contains the number of parameters entered on the
command line following the script filename. It is set to zero if no parameters are
entered.
2-38
Command Reference
save env
The save env command allows you to save the current list of local and global
variables to a script file. Use the following syntax to save the variables to a file:
save env <filename>
<filename> is the name of the file in which you want to store the variables.
For example, the following script saves the current list of variables to the
install.bat file.
save env install.bat
2-39
Writing Technician Interface Scripts
setenv
The setenv command allows you to assign an ASCII string value or a numeric
value to a variable in the local environment variable table. When you assign a
value to a variable, you do not type the $ before the variable. If the value contains
spaces or tabs, place double quotes (“”) around the value string.
The setenv command uses the following syntax:
setenv <variable_name> <variable_value>
<variable_name> is the name of the variable.
<variable_value> is the value assigned to the variable.
For example, the following script assigns the value “Good Morning” to the
variable a.
setenv
2-40
a
“Good Morning”
Command Reference
source env
The source env command allows you to read and execute the Technician
Interface commands in a Technician Interface script file. The source env
command saves (restores) all local variables when a script ends.
The source env command uses the following syntax to load the variables from a
script file:
source env <vol>:<filename>
<vol> is the volume storing the script file.
<filename> is the name of the script file that contains the variables.
To locate script errors, use the verbose on command and then use the source env
command. The Technician Interface displays each line from the file before it
executes the line, enabling you to easily locate errors.
2-41
Writing Technician Interface Scripts
sprintf
The sprintf command converts and formats text, and saves the result in a specified
variable for later use.
The sprintf command uses the following syntax:
sprintf <variable_name> <format> <p1> <p2> . . . <pN>
<variable_name> is the name of the environment variable where the formatted
string is saved.
<format> is the conversion specification. (See “printf” for information about
conversion specifications.)
<p2> . . . <pN> is the list of arguments to be formatted.
If you enter the sprintf command incorrectly, the console returns one of the
following error messages:
•
sprintf: Expected numeric argument; invalid string argument found
The %<conversion_specification> expected numeric data in the input
argument, which contained a text string (“hello there”) instead of a number
(123).
•
sprintf: Format string has more format codes than there are arguments
The <format> string has more conversion specifications than there are input
arguments (<p1>,. . .,<pN>).
•
sprintf: Invalid format code
You entered an invalid conversion specification in the format string (%z).
•
*ERROR*** Symbol name is greater than 15 characters
You specified a variable name longer than 15 characters.
•
*ERROR*** Invalid character “<invalid_character>” in <symbol>
You entered an invalid character in the variable name.
•
**ERROR*** Symbol text is greater than 255 characters
The value assigned to the variable is longer than 255 characters.
2-42
Command Reference
unsetenv
The unsetenv command allows you to delete one or more variables from the local
or global environment variable table. You cannot delete a variable from the system
environment variable table.
The unsetenv command uses the following syntax:
unsetenv <variable_name>
unsetenv <variable_name>,<variable_name>, . . .
unsetenv *
unsetenv -l *
unsetenv -g *
unsetenv <text>*
unsetenv <text> ?
<variable_name> is the name of the variable you want to delete.
-l deletes variables from the local table only.
-g deletes variables from the global table only.
* deletes all variables from the table you specify. If you do not specify a table, it
deletes all variables.
? matches a single character in the given string position.
<text> deletes all variables that begin with the specified text string.
2-43
Writing Technician Interface Scripts
Examples
2-44
If you enter:
The system:
unsetenv slot
Deletes the variable slot from either the local or the global
table, depending on the table in which the variable resides.
unsetenv slot value
Deletes the variables slot and value from either the local
or global table, depending on the table in which the
variables reside.
unsetenv *
Deletes all variables in both the local and global
environment variable tables.
unsetenv -l *
Deletes all variables in the local environment variable
table.
unsetenv -g *
Deletes all variables in the global environment variable
table.
unsetenv ip_*
Deletes all symbols that begin with ip_.
Command Reference
verbose
The verbose command allows you to enable the debug trace facility. When you
enable the trace facility, the Technician Interface displays each command read
from the script file before and after its variables have been expanded.
The verbose command uses the following syntax:
verbose [on|off]
[on|off] is on to enable the debug trace facility or off to disable it.
2-45
Appendix A
Sample Scripts
To help you create your own scripts, this appendix contains three sample scripts:
•
Menu script
•
FDDI.mnu script
•
FDDI.bat script
Menu Script
The following example shows a menu script for a Bay Networks router:
:MENU:
on error :MENU:
echo “”
echo “Simple Menu Example”
echo “”
echo “1. Display Time and Date”
echo “2. Display TFTP default volume”
echo “3. Set TFTP default volume”
echo “4. Quit”
echo “”
setenv ans “$<Enter selection: >”
if “$ans ” = “” then; \
goto :MENU:
if $ans = 1 then; \
date ; \
echo “” ; \
goto :MENU:
if $ans = 2 then ;\
let vol=$(wfTftp.wfTftpDefaultVolume.0);\
echo “Tftp Default Volume:$vol”;\
goto :MENU:
if $ans = 3 then ;\
let vol=$<Enter new TFTP Default Value #: >;\
A-1
Writing Technician Interface Scripts
set wfTftp.wfTftpDefaultVolume.0 $vol;\
go to :MENU:
if $ans = 4 then;\
echo “Exiting ...”;\
goto :EXIT:
echo “Bad choice, try again ...”
pause 2
goto :MENU:
:EXIT:
If you place a label at the end of the script file, you can terminate the script file at
any time by executing a goto :EXIT: command.
FDDI.MNU Script
The following example shows a menu script for a Bay Networks router.
# @(#)WSCCS j/scripts-fddi.mnu 1.1 4/8/95 #
################################################################
# Copyright 1995 Bay Networks, Inc.
################################################################
alias setcmd “let cmd_0 = \$cmd_0 + 1; setenv cmd_\$cmd_0 %1;
let title_0 = \$title_0 + 1; setenv title_\$title_0 %2;”
setenv maintitle “FDDI Menu”
setenv cmd_0
“0”
setenv title_0 “0”
setcmd
setcmd
setcmd
setcmd
setcmd
setcmd
setcmd
setcmd
setcmd
setcmd
setcmd
setcmd
setcmd
“show
“show
“show
“show
“show
“show
“show
“show
“show
“show
“show
“show
“show
fddi
fddi
fddi
fddi
fddi
fddi
fddi
fddi
fddi
fddi
fddi
fddi
fddi
unalias setcmd
A-2
alerts”
“Alerts”
base”
“Base Info”
disabled”
“Disabled Circuits”
enabled”
“Enabled Circuits”
version”
“FDDI.bat version”
hwfilters” “Hardware Filters”
mac”
“MAC Parameters”
port”
“Port Parameters”
receive errors” “Receive Errors”
sat”
“SMT Parameters”
stats”
“Stats”
system
errors” “System Errors”
transmit errors” “Transmit Errors”
Sample Scripts
FDDI.BAT Script
The following example shows a protocol script for a Bay Networks router. You
view output from the script by entering script commands (for example, show
fddi) at the Technician Interface command line, or by using the menu utility. See
Using Technician Interface Scripts for instructions on entering script commands.
The following script allows you to display information from FDDI MIB objects,
and to enable or disable FDDI.
# @(#)WSCCS k/scripts-fddi.bat 1.11 10/31/95 #
################################################################
#
# Copyright Bay Networks, Inc. 1995
#
# Display FDDI Driver Information
#
################################################################
################################################################
#
# Set up for either using the builtin octetfmt function (7.80 or newer)
# or the gosub (7.70)
#
################################################################
#
# General variable initialization...
setenv match_entries 0
setenv matchcct
“”
A-3
Writing Technician Interface Scripts
################################################################
#
# Sub-command vectoring...
#
################################################################
if $# = 0
then ; goto :FI_HELP:
setenv cmd “$1”
let cmdlen = strlen(cmd)
if $cmdlen < 3 then ; goto :FI_HELP:
let i = strindex(“show”, cmd)
if $i = 1 then ; goto :FI_SHOW:
let i = strindex(“enable”, cmd)
if $i = 1 then ; goto :FI_ENBL:
let i = strindex(“disable”, cmd)
if $i = 1 then ; goto :FI_DSBL:
# else fall through to the Help screen.
################################################################
#
# Help screen...
#
################################################################
:FI_HELP:
echo “FDDI Command Script”
echo “-------------------”
echo
echo “This script is not intended to be run directly.”
echo “Please 'run setpath' and then use the following”
echo “commands:”
echo
echo “disable fddi”
echo “enable fddi”
echo “show
fddi”
echo
goto :FI_END:
A-4
Sample Scripts
################################################################
#
# Parse for “show” command...
#
################################################################
:FI_SHOW:
if $# = 1 then ; goto :FI_HELP_SHOW:
setenv cmd “$2”
let len = strlen(cmd)
if $len < 3 then ; goto :FI_HELP_SHOW:
let i = strindex(“base”, cmd)
if $i = 1 then ; goto :FI_BASE:
let i = strindex(“alerts”, cmd)
if $i = 1 then ; goto :FI_ALERTS:
let i = strindex(“disabled”, cmd)
if $i = 1 then ; goto :FI_DSBLED:
let i = strindex(“enabled”, cmd)
if $i = 1 then ; goto :FI_ENBLED:
let i = strindex(“stats”, cmd)
if $i = 1 then ; goto :FI_STATS:
let i = strindex(“receive”, cmd)
if $i = 1 then ; goto :FI_RCV:
let i = strindex(“transmit”, cmd)
if $i = 1 then ; goto :FI_XMIT:
let i = strindex(“system”, cmd)
if $i = 1 then ; goto :FI_SYSTEM:
let i = strindex(“smt”, cmd)
if $i = 1 then ; goto :FI_SMT:
let i = strindex(“mac”, cmd)
if $i = 1 then ; goto :FI_MAC:
let i = strindex(“port”, cmd)
if $i = 1 then ; goto :FI_PORT:
let i = strindex(“sample”, cmd)
if $i = 1 then ; goto :FI_SAMP:
A-5
Writing Technician Interface Scripts
let i = strindex(“hwfilters”, cmd)
if $i = 1 then ; goto :FI_HWF:
let i = strindex(“version”, cmd)
if $i = 1 then ; goto :FI_VER:
:FI_HELP_SHOW:
echo “FDDI Show Command Help”
echo “----------------------”
echo
echo “show fddi <option>”
echo “
Where option is one of the following:”
echo “
?”
echo “
alerts”
echo “
base
[circuit <circuit name>]”
echo “
disabled”
echo “
enabled”
echo “
hwfilters”
echo “
mac
[circuit <circuit name>]”
echo “
port”
echo “
receive errors [circuit <circuit name>]”
echo “
sample
[<period in seconds>] [circuit <circuit name>]”
echo “
smt
[circuit <circuit name>]”
echo “
stats
[circuit <circuit name>]”
echo “
system
errors [circuit <circuit name>]”
echo “
transmit errors [circuit <circuit name>]”
echo “
version”
goto :FI_END:
################################################################
#
# Base or Module screen...
#
################################################################
:FI_BASE:
#
# check for circuit name to match on...
#
if $# = 2 then ; goto :FI_BASE_NM:
setenv cmd “$3”
let len = strlen(cmd)
if $len < 3 then ; goto :FI_HELP_SHOW:
let j = strindex(“circuit”, cmd)
if $j != 1 then ; goto :FI_HELP_SHOW:
if $# != 4 then ; goto :FI_HELP_SHOW:
setenv matchcct “$4”
A-6
Sample Scripts
:FI_BASE_NM:
setenv nextflag “”
setenv pattern “”
setenv nextid
“*”
array
attr wfFDDICct wfFDDIState wfFDDIEnable wfFDDISlot
array -a attr wfFDDINode wfFDDIMadr/MAC_ADDRESS wfFDDIBofl
array -a attr wfFDDIBoflTmo wfFDDIMtu wfFDDIHardwareFilter
enum
enum
enum
1
$i
$i
Cct State Enable Slot i
Node Madr Bofl i
BoflTmo Mtu HwFilter
echo
echo “FDDI Modules:”
echo “-------------”
gosub :FI_BASEHDR:
let i = 0
:FI_LOOP:
mibget -n wfFddiEntry attr $nextid value nextid
if “$nextid” = “END” then; let i = $i + 1; goto :FOOTER_AND_END:
let cctnum = ${value[$Cct]}
gosub :GETCCTNAME:
if “$matchcct” = “” then ; goto :FI_PRNTB:
if -ic “$matchcct” != “$cctname” then ; goto :FI_BASE_NXT:
let match_entries = $match_entries + 1
:FI_PRNTB:
gosub :FI_ONELINE:
#
# Do next circuit...
#
:FI_BASE_NXT:
let i = $i + 1
goto :FI_LOOP:
A-7
Writing Technician Interface Scripts
################################################################
#
# Show Alerts screen...
#
################################################################
:FI_ALERTS:
setenv matchcct “xxx”
setenv nextflag “”
setenv pattern “”
setenv nextid
“*”
array
attr wfFDDICct wfFDDIState wfFDDIEnable wfFDDISlot
array -a attr wfFDDINode wfFDDIMadr/MAC_ADDRESS wfFDDIBofl
array -a attr wfFDDIBoflTmo wfFDDIMtu wfFDDIHardwareFilter
enum
enum
enum
1
$i
$i
Cct State Enable Slot i
Node Madr Bofl i
BoflTmo Mtu HwFilter
echo
echo “FDDI Modules on Alert:”
echo “----------------------”
gosub :FI_BASEHDR:
let i = 0
:FI_ALOOP:
mibget -n wfFddiEntry attr $nextid value nextid
if “$nextid” = “END” then; let i = $i + 1; goto :FOOTER_AND_END:
let cctnum = ${value[$Cct]}
gosub :GETCCTNAME:
if ${value[$Enable]} != 1 then ; goto :FI_SKIPA:
if ${value[$State]} != 1 then ; goto :FI_BASE10:
if $(wfFddiSmtEntry.wfFddiSmtCfState.$nextid) = 1 then; \
goto :FI_BASE10:
if $(wfFddiMacExtEntry.wfFddiMacMaUnitDataEnable.$nextid) != 2 \
then; goto :FI_SKIPA:
:FI_BASE10:
let match_entries = $match_entries + 1
gosub :FI_ONELINE:
A-8
Sample Scripts
# Do next circuit...
#
:FI_SKIPA:
let i = $i + 1
goto :FI_ALOOP:
################################################################
#
# Show Disabled screen...
#
################################################################
:FI_DSBLED:
setenv matchcct “xxx”
setenv nextflag “”
setenv pattern “”
setenv nextid
“*”
array
attr wfFDDICct wfFDDIState wfFDDIEnable wfFDDISlot
array -a attr wfFDDINode wfFDDIMadr/MAC_ADDRESS wfFDDIBofl
array -a attr wfFDDIBoflTmo wfFDDIMtu wfFDDIHardwareFilter
enum
enum
enum
1
$i
$i
Cct State Enable Slot i
Node Madr Bofl i
BoflTmo Mtu HwFilter
echo
echo “FDDI Modules Disabled”
echo “---------------------”
gosub :FI_BASEHDR:
let i = 0
:FI_DLOOP:
mibget -n wfFddiEntry attr $nextid value nextid
if “$nextid” = “END” then; let i = $i + 1; goto :FOOTER_AND_END:
let cctnum = ${value[$Cct]}
gosub :GETCCTNAME:
if ${value[$Enable]} == 2 then ; \
let match_entries = $match_entries + 1 ; \
gosub :FI_ONELINE:
let i = $i + 1
goto :FI_DLOOP:
A-9
Writing Technician Interface Scripts
################################################################
#
# Show Enabled screen...
#
################################################################
:FI_ENBLED:
setenv matchcct “xxx”
setenv nextflag “”
setenv pattern “”
setenv nextid
“*”
array
attr wfFDDICct wfFDDIState wfFDDIEnable wfFDDISlot
array -a attr wfFDDINode wfFDDIMadr/MAC_ADDRESS wfFDDIBofl
array -a attr wfFDDIBoflTmo wfFDDIMtu wfFDDIHardwareFilter
enum
enum
enum
1
$i
$i
Cct State Enable Slot i
Node Madr Bofl i
BoflTmo Mtu HwFilter
echo
echo “FDDI Modules Enabled”
echo “--------------------”
gosub :FI_BASEHDR:
let i = 0
:FI_ELOOP:
mibget -n wfFddiEntry attr $nextid value nextid
if “$nextid” = “END” then; let i = $i + 1; goto :FOOTER_AND_END:
let cctnum = ${value[$Cct]}
gosub :GETCCTNAME:
if ${value[$Enable]} == 1 then ; \
let match_entries = $match_entries + 1; \
gosub :FI_ONELINE:
let i = $i + 1
goto :FI_ELOOP:
A-10
Sample Scripts
################################################################
#
# Print header for base/alerts/disabled/enabled screens...
#
################################################################
:FI_BASEHDR:
echo
printf “%-4.4s %-4.4s %-8.8s %-8.8s %-17.17s %-4.4s %-4.4s \
%-8.8s\n” “” “” “” “” “” “BOFL” “” “HW”
printf “%-4.4s %-4.4s %-8.8s %-8.8s %-17.17s %-4.4s %-4.4s \
%-8.8s\n” “Slot” “Conn” “Circuit” “State” “MAC Address” \
“TMO” “MTU” “Filter”
printf “%-4.4s %-4.4s %-8.8s %-8.8s %-17.17s %-4.4s %-4.4s \
%-8.8s\n” “----” “----” “--------” “--------” \
“-----------------” “----” “----” “--------”
return
################################################################
#
# Print one line for base/alerts/disabled/enabled screens...
#
################################################################
:FI_ONELINE:
printf “%4d %4d” ${value[$Slot]} \
${value[$Node]}
printf “%-8.8s” “$cctname”
if ${value[$Enable]} = 2 then; \
printf “%-8s” “Disabled” ; goto :FI_STATE_ESC:
if ${value[$State]} = 4 then ; printf “%-8s” “Not Pres” ; goto
:FI_STATE_ESC:
if ${value[$State]} = 3 then ; printf “%-8s” “Init” ; goto
:FI_STATE_ESC:
if ${value[$State]} = 2 then ; printf “%-8s” “Down” ; goto
:FI_STATE_ESC:
if $(wfFddiSmtEntry.wfFddiSmtCfState.$nextid) = 1 then; \
printf “%-8s” “Down” ; goto :FI_STATE_ESC:
if $(wfFddiMacExtEntry.wfFddiMacMaUnitDataEnable.$nextid) = 2 \
then; printf “%-8s” “LLC Off” ; goto :FI_STATE_ESC:
printf “%-8s” “Up”
A-11
Writing Technician Interface Scripts
:FI_STATE_ESC:
printf “%-17.17s” “${value[$Madr]}”
if ${value[$Bofl]} = 2 then ; \
printf “%-4s” “Off” ; goto :FI_BOFL_ESC:
printf “%4d” ${value[$BoflTmo]}
:FI_BOFL_ESC:
printf “%4d”
${value[$Mtu]}
let mode = ${value[$HwFilter]}
if $mode = 1 then ; printf “%-8s” “Enabled”
if $mode = 2 then ; printf “%-8s” “Disabled”
echo
cutenv -c9-15 name2 “$cctname”
if ${name2[0]} = 1 then; \
printf “%4s %4s *%-7.7s\n” “”
“”
“${name2[1]}”
return
################################################################
#
# Statistics screen...
#
################################################################
:FI_STATS:
#
# check for circuit name to match on...
#
if $# = 2 then ; goto :FI_STAT_NM:
setenv cmd “$3”
let len = strlen(cmd)
if $len < 3 then ; goto :FI_HELP_SHOW:
let j = strindex(“circuit”, cmd)
if $j != 1 then ; goto :FI_HELP_SHOW:
if $# != 4 then ; goto :FI_HELP_SHOW:
setenv matchcct “$4”
A-12
Sample Scripts
:FI_STAT_NM:
setenv nextflag “”
setenv pattern “”
setenv nextid
“*”
array
array
array
array
array
array
array
array
-a
-a
-a
-a
-a
-a
-a
attr
attr
attr
attr
attr
attr
attr
attr
wfFDDICct wfFDDICrcErrRx wfFDDIOverrunRx
wfFDDIInvalidFrameStatusRx wfFDDIMacErrRx
wfFDDIRxOversizedFrames wfFDDIAbortTx wfFDDIUnderrunTx
wfFDDIParityErrRx wfFDDIParityErrTx wfFDDIRingErrRx
wfFDDIRingErrTx wfFDDISmtRingErrRx wfFDDIPortOpErr
wfFDDIInternOpErr wfFDDIHostErr
wfFDDISlot wfFDDINode wfFDDIOctetsRxOk wfFDDIFramesRxOk
wfFDDIOctetsTxOk wfFDDIFramesTxOk
enum
enum
enum
enum
enum
enum
enum
enum
1
$i
$i
$i
$i
$i
$i
$i
Cct CrcErrRx OverrunRx i
InvalidFrame MacErrRx i
RxOversized AbortTx UnderrunTx i
ParityErrRx ParityErrTx RingErrRx i
RingErrTx SmtRingErrRx PortOpErr i
InternOpErr HostErr i
Slot Node OctetsRxOk FramesRxOk i
OctetsTxOk FramesTxOk
echo
echo “FDDI Module I/O Statistics:”
echo “---------------------------”
echo
printf “%-4.4s %-4.4s %-8.8s %-10.10s %-10.10s %-10.10s %-10.10s \
%-10.10s\n” “” “” “” “Receive” “Receive” “Transmit” \
“Transmit” “Total”
printf “%-4.4s %-4.4s %-8.8s %-10.10s %-10.10s %-10.10s %-10.10s \
%-10.10s\n” “Slot” “Conn” “Circuit” “Bytes” “Frames” \
“Bytes” “Frames” “Errors”
printf “%-4.4s %-4.4s %-8.8s %-10.10s %-10.10s %-10.10s %-10.10s \
%-10.10s\n” “----” “----” “--------” “----------” \
“----------” “----------” “----------” “----------”
let i = 0
A-13
Writing Technician Interface Scripts
:FI_STLOOP:
mibget -n wfFddiEntry attr $nextid value nextid
if “$nextid” = “END” then; let i = $i + 1; goto :FOOTER_AND_END:
let i = $i + 1
let cctnum = ${value[$Cct]}
gosub :GETCCTNAME:
if “$matchcct” = “” then ; goto :FI_PRNTS:
if -ic “$matchcct” != “$cctname” then ; goto :FI_STAT_NXT:
let match_entries = $match_entries + 1
#
# Sum up total errors for display...
#
:FI_PRNTS:
let tlerrs = ${value[$CrcErrRx]} + ${value[$OverrunRx]} + \
${value[$InvalidFrame]} + ${value[$MacErrRx]}
gosub :MAC_EXTRACT:
let tlerrs = $tlerrs + $mac_sum
let tlerrs = $tlerrs + ${value[$RxOversized]}
let tlerrs = $tlerrs + ${value[$UnderrunTx]}
${value[$ParityErrRx]}
let tlerrs = $tlerrs + ${value[$ParityErrTx]}
let tlerrs = $tlerrs + ${value[$RingErrTx]}
${value[$SmtRingErrRx]}
let tlerrs = $tlerrs + ${value[$PortOpErr]}
${value[$InternOpErr]}
let tlerrs = $tlerrs + ${value[$HostErr]}
+ ${value[$AbortTx]}
+ \
+ ${value[$RingErrRx]}
+ \
+ \
#
# Display the line...
#
printf “%4d %4d %-8.8s” ${value[$Slot]} ${value[$Node]} “$cctname”
printf “%10u %10u %10u %10u %10u” ${value[$OctetsRxOk]} \
${value[$FramesRxOk]} ${value[$OctetsTxOk]} \
${value[$FramesTxOk]} $tlerrs
echo
cutenv -c9-15 name2 “$cctname”
if ${name2[0]} = 1 then; \
printf “%4s %4s *%-7.7s\n” “”
:FI_STAT_NXT:
let i = $i + 1
goto :FI_STLOOP:
A-14
“”
“${name2[1]}”
Sample Scripts
################################################################
#
# Receive Errors screen...
#
################################################################
:FI_RCV:
if $# < 3 then; goto :FI_Rx1:
let cmdlen = strlen(“$3”)
let i = strindex(“errors”, “$3”)
if $i = 1 then ; if $cmdlen >= 3 then ; goto :FI_Rx1:
goto :FI_HELP:
:FI_Rx1:
let i = 1
#
# check for circuit name to match on...
#
if $# <= 3 then ; goto :FI_RCV_NM:
setenv cmd “$4”
let len = strlen(cmd)
if $len < 3 then ; goto :FI_HELP_SHOW:
let j = strindex(“circuit”, cmd)
if $j != 1 then ; goto :FI_HELP_SHOW:
if $# != 5 then ; goto :FI_HELP_SHOW:
setenv matchcct “$5”
:FI_RCV_NM:
setenv nextflag “”
setenv pattern “”
setenv nextid
“*”
array
attr wfFDDICct wfFDDISlot wfFDDINode wfFDDICrcErrRx
array -a attr wfFDDIOverrunRx wfFDDIInvalidFrameStatusRx
array -a attr wfFDDIMacErrRx wfFDDIRxOversizedFrames
enum 1 Cct Slot Node CrcErrRx OverrunRx InvalidFrame MacErrRx i
enum $i RxOversized
echo
echo “FDDI Module Receive Errors:”
echo “---------------------------”
echo
A-15
Writing Technician Interface Scripts
printf “%-4.4s %-4.4s %-8.8s %-10.10s %-10.10s %-10.10s %-10.10s\n”
“” “” “” “CRC” “Overrun” “Invalid” “Frames”
printf “%-4.4s %-4.4s %-8.8s %-10.10s %-10.10s %-10.10s %-10.10s\n”
“Slot” “Conn” “Circuit” “Errors” “ “Errors” “Frames” “Too
Long”
printf “%-4.4s %-4.4s %-8.8s %-10.10s %-10.10s %-10.10s %-10.10s\n”
“----” “----” “--------” “----------” “----------” \
“----------” “----------”
\
\
\
\
let i = 0
:FI_RxLOOP:
mibget -n wfFddiEntry attr $nextid value nextid
if “$nextid“ = “END” then; let i = $i + 1; goto :FOOTER_AND_END:
let cctnum = ${value[$Cct]}
gosub :GETCCTNAME:
if “$matchcct“ = “” then ; goto :FI_PRNTR:
if -ic “$matchcct“ != “$cctname” then ; goto :FI_RCV_NXT:
let match_entries = $match_entries + 1
:FI_PRNTR:
printf “%4d %4d “ ${value[$Slot]} \
${value[$Node]}
printf “%-8.8s %10u %10u ” “$cctname“ ${value[$CrcErrRx]} \
${value[$OverrunRx]}
let invalid = ${value[$InvalidFrame]} + ${value[$MacErrRx]}
gosub :MAC_EXTRACT:
let invalid = $invalid + $mac_sum
printf “%10u %10u ” $invalid ${value[$RxOversized]}
echo
cutenv -c9-15 name2 “$cctname“
if ${name2[0]} = 1 then; \
printf “%4s %4s *%-7.7s\n” ““ “” “${name2[1]}“
:FI_RCV_NXT:
let i = $i + 1
goto :FI_RxLOOP:
#
# Gosub to extract errors in the MAC object from the octet strings...
# ...returns sum in “mac_sum”
#
A-16
Sample Scripts
:MAC_EXTRACT:
setenv mac_sum 0
if $?(wfFddiMacEntry.wfFddiMacErrorCts.${nextid}) = 0 then ; \
return
array mac_attr wfFddiMacErrorCts/HEX_BYTES wfFddiMacLostCts/
HEX_BYTES
enum 1 errorcts lostcts
mibget wfFddiMacEntry mac_attr $nextid mac_value mac_next
cutenv -d. -f1- mac_err ${mac_value[$errorcts]}
cutenv -d. -f1- mac_lost ${mac_value[$lostcts]}
let
let
let
let
mac_sum
mac_sum
mac_sum
mac_sum
=
=
=
=
$mac_sum
$mac_sum
$mac_sum
$mac_sum
+
+
+
+
0x${mac_err[8]}
(256 * 0x${mac_err[7]})
(65536 * 0x${mac_err[6]})
(16777216 * 0x${mac_err[5]})
let mac_sum
let mac_sum
let mac_sum
let mac_sum
return
=
=
=
=
$mac_sum
$mac_sum
$mac_sum
$mac_sum
+
+
+
+
0x${mac_lost[8]}
(256 * 0x${mac_lost[7]})
(65536 * 0x${mac_lost[6]})
(16777216 * 0x${mac_lost[5]})
################################################################
#
# Transmit Errors screen...
#
################################################################
:FI_XMIT:
if $# < 3 then; goto :FI_Tx1:
let cmdlen = strlen(“$3”)
let i = strindex(“errors”, “$3”)
if $i = 1 then ; if $cmdlen >= 3 then ; goto :FI_Tx1:
goto :FI_HELP:
:FI_Tx1:
#
# check for circuit name to match on...
#
if $# <= 3 then ; goto :FI_XMIT_NM:
setenv cmd “$4”
let len = strlen(cmd)
if $len < 3 then ; goto :FI_HELP_SHOW:
let j = strindex(“circuit”, cmd)
if $j != 1 then ; goto :FI_HELP_SHOW:
if $# != 5 then ; goto :FI_HELP_SHOW:
setenv matchcct “$5”
A-17
Writing Technician Interface Scripts
:FI_XMIT_NM:
setenv nextflag “”
setenv pattern “”
setenv nextid
“*”
array attr wfFDDICct wfFDDISlot wfFDDINode
wfFDDIUnderrunTx
enum 1 Cct Slot Node AbortTx UnderrunTx
wfFDDIAbortTx \
echo
echo “FDDI Module Transmit Errors:”
echo “----------------------------”
echo
printf “%-4.4s %-4.4s %-8.8s %-10.10s %-10.10s\n” \
“
” “
” “
” “ Aborted ” “ Underrun ”
printf “%-4.4s %-4.4s %-8.8s %-10.10s %-10.10s\n” \
“Slot” “Conn” “Circuit” “ Frames ” “ Errors ”
printf “%-4.4s %-4.4s %-8.8s %-10.10s %-10.10s\n” \
“----” “----” “--------” “----------” “----------”
let i = 0
:FI_TxLOOP:
on error :FI_XMIT_NXT:
mibget -n wfFddiEntry attr $nextid value nextid
if “$nextid” = “END” then; let i = $i + 1; goto :FOOTER_AND_END:
let cctnum = ${value[$Cct]}
gosub :GETCCTNAME:
if “$matchcct” = “” then ; goto :FI_PRNTT:
if -ic “$matchcct” != “$cctname” then ; goto :FI_XMIT_NXT:
let match_entries = $match_entries + 1
:FI_PRNTT:
printf “%4d %4d %-8.8s %10u %10u\n” ${value[$Slot]} ${value[$Node]} \
“$cctname” ${value[$AbortTx]} ${value[$UnderrunTx]}
cutenv -c9-15 name2 “$cctname”
if ${name2[0]} = 1 then; \
printf “%4s %4s *%-7.7s\n” “” “” “${name2[1]}”
:FI_XMIT_NXT:
let i = $i + 1
goto :FI_TxLOOP:
A-18
Sample Scripts
################################################################
#
# System Errors screen...
#
################################################################
:FI_SYSTEM:
if $# < 3 then; goto :FI_Sy1:
let cmdlen = strlen(“$3”)
let i = strindex(“errors”, “$3”)
if $i = 1 then ; if $cmdlen >= 3 then ; goto :FI_Sy1:
goto :FI_HELP:
:FI_Sy1:
#
# check for circuit name to match on...
#
if $# <= 3 then ; goto :FI_SYS_NM:
setenv cmd “$4”
let len = strlen(cmd)
if $len < 3 then ; goto :FI_HELP_SHOW:
let j = strindex(“circuit”, cmd)
if $j != 1 then ; goto :FI_HELP_SHOW:
if $# != 5 then ; goto :FI_HELP_SHOW:
setenv matchcct “$5”
:FI_SYS_NM:
setenv nextflag “”
setenv pattern “”
setenv nextid
“*”
array attr wfFDDICct wfFDDISlot wfFDDINode wfFDDIParityErrRx \
wfFDDIParityErrTx
array -a attr wfFDDIRingErrRx wfFDDIRingErrTx wfFDDISmtRingErrRx \
wfFDDIPortOpErr
array -a attr wfFDDIInternOpErr wfFDDIHostErr
enum 1 Cct Slot Node ParityErrRx ParityErrTx i
enum $i RingErrRx RingErrTx SmtRingErrRx PortOpErr InternOpErr HostErr
echo
echo “FDDI Module System Errors:”
echo “--------------------------”
echo
A-19
Writing Technician Interface Scripts
printf “%-4.4s %-4.4s %-8.8s %-10.10s %-10.10s %-10.10s %-10.10s \
%-10.10s\n” “” “” “” “” “” “
Port” “ Internal” “”
printf “%-4.4s %-4.4s %-8.8s %-10.10s %-10.10s %-10.10s %-10.10s %10.10s\n” “” “” “” “ Parity” “
Ring” “Operation” “Operation”
“
Host”
printf “%-4.4s %-4.4s %-8.8s %-10.10s %-10.10s %-10.10s %-10.10s \
%-10.10s\n” “Slot” “Conn” “Circuit” “ Errors” “ Errors” \
“ Errors” “ Errors” “ Errors”
printf “%-4.4s %-4.4s %-8.8s %-10.10s %-10.10s %-10.10s %-10.10s \
%-10.10s\n” “----” “----” “--------” “----------” \
“----------” “----------” “----------” “----------”
let i = 0
:FI_SyLOOP:
mibget -n wfFddiEntry attr $nextid value nextid
if “$nextid” = “END” then; let i = $i + 1; goto :FOOTER_AND_END:
let cctnum = ${value[$Cct]}
gosub :GETCCTNAME:
if “$matchcct” = “” then ; goto :FI_PRNTSE:
if -ic “$matchcct” != “$cctname” then ; goto :FI_SYS_NXT:
let match_entries = $match_entries + 1
:FI_PRNTSE:
let parity = ${value[$ParityErrRx]}
let parity = $parity + ${value[$ParityErrTx]}
let ring = ${value[$RingErrRx]}
let ring = $ring + ${value[$RingErrTx]}
let ring = $ring + ${value[$SmtRingErrRx]}
printf “%4d %4d %-8.8s ” ${value[$Slot]} ${value[$Node]} “$cctname”
printf “%10u %10u %10u %10u %10u ” $parity $ring \
${value[$PortOpErr]} ${value[$InternOpErr]} \
${value[$HostErr]}
echo
cutenv -c9-15 name2 “$cctname”
if ${name2[0]} = 1 then; \
printf “%4s %4s *%-7.7s\n” “” “” “${name2[1]}”
:FI_SYS_NXT:
let i = $i + 1
goto :FI_SyLOOP:
A-20
Sample Scripts
################################################################
#
# SMT screen...
#
################################################################
:FI_SMT:
let i = 1
#
# check for circuit name to match on...
#
if $# = 2 then ; goto :FI_SMT_NM:
setenv cmd “$3”
let len = strlen(cmd)
if $len < 3 then ; goto :FI_HELP_SHOW:
let j = strindex(“circuit”, cmd)
if $j != 1 then ; goto :FI_HELP_SHOW:
if $# != 4 then ; goto :FI_HELP_SHOW:
setenv matchcct “$4”
:FI_SMT_NM:
echo
echo “FDDI Modules SMT Parameters:”
echo “----------------------------”
echo
printf “%-4.4s %-4.4s %-8.8s %-31.31s %-8.8s %-8.8s %-6.6s\n” \
“” “” “” “ Connection Policy (R = Reject)” “” “” “”
printf “%-4.4s %-4.4s %-8.8s %-31.31s %-8.8s %-8.8s %-6.6s\n” \
“” “” “” “- - - - - - - - - - - - - - - -” “” “” “”
printf “%18.18s %-31.31s %-8.8s %-8.8s %-6.6s\n” \
“Local:” “M M M M S S S S B B B B A A A A” “” “” “”
printf “%18.18s %-31.31s %-8.8s %-8.8s %-6.6s\n” \
“Neighbor:” “M S B A M S B A M S B A M S B A” “” “” “ T”
printf “%-4.4s %-4.4s %-8.8s %-31.31s %-8.8s %-8.8s %-6.6s\n” \
“” “” “” “| | | | | | | | | | | | | | | |” “
ECM” “ Connect” \
“Notify”
printf “%-4.4s %-4.4s %-8.8s %-31.31s %-8.8s %-8.8s %-6.6s\n” \
“Slot” “Conn” “Circuit” “| | | | | | | | | | | | | | | |” “ \
State” “ State” “(secs)”
printf “%-4.4s %-4.4s %-8.8s %-31.31s %-8.8s %-8.8s %-6.6s\n” \
“----” “----” “--------” “- - - - - - - - - - - - - - - -” \
“--------” “--------” “------”
instenv list_ wfFddiSmtEntry
A-21
Writing Technician Interface Scripts
:FI_SMT_LP:
on error :FI_SMT_NXT:
if $i > $list_0 then; goto :FOOTER_AND_END:
let cctnum = $(wfFddiEntry.wfFDDICct.${list_[$i]})
gosub :GETCCTNAME:
if “$matchcct” = “” then ; goto :FI_PRNTSMT:
if -ic “$matchcct” != “$cctname” then ; goto :FI_SMT_NXT:
let match_entries = $match_entries + 1
:FI_PRNTSMT:
printf “%4d %4d ” $(wfFddiEntry.wfFDDISlot.${list_[$i]}) \
$(wfFddiEntry.wfFDDINode.${list_[$i]})
printf “%-8.8s ” “$cctname”
#
# Print the connection policy matrix...
#
let bit = 12
setenv flags “”
setenv bit0x0 “. . . . ”
setenv bit0x1 “. . . R ”
setenv bit0x2 “. . R . ”
setenv bit0x3 “. . R R ”
setenv bit0x4 “. R . . ”
setenv bit0x5 “. R . R ”
setenv bit0x6 “. R R . ”
setenv bit0x7 “. R R R ”
setenv bit0x8 “R . . . ”
setenv bit0x9 “R . . R ”
setenv bit0xA “R . R . ”
setenv bit0xB “R . R R ”
setenv bit0xC “R R . . ”
setenv bit0xD “R R . R ”
setenv bit0xE “R R R . ”
setenv bit0xF “R R R R ”
let policy = $(wfFddiEntry.wfFDDISmtConnectionPolicy.${list_[$i]})
:FI_BIT_LP:
let -h result = ($policy & (0xF << $bit)) >> $bit
setenv flags “${flags}${bit[$result]}”
:FI_NEXT_BIT:
let bit = $bit - 4
if $bit >= 0 then ; goto :FI_BIT_LP:
A-22
Sample Scripts
# Note field size is 32 because flags contains the trailing space.
printf “%32s” “$flags”
let state
if $state
if $state
if $state
if $state
if $state
if $state
if $state
if $state
=
=
=
=
=
=
=
=
=
$(wfFddiSmtEntry.wfFddiSmtEcmState.${list_[$i]})
1 then ; printf “%-8s ” “ByPassed”
2 then ; printf “%-8s ” “In”
3 then ; printf “%-8s ” “Trace”
4 then ; printf “%-8s ” “Leave”
5 then ; printf “%-8s ” “Pathtest”
6 then ; printf “%-8s ” “Insert”
7 then ; printf “%-8s ” “By_Check”
8 then ; printf “%-8s ” “Deinsert”
let state
if $state
if $state
if $state
if $state
if $state
if $state
if $state
if $state
if $state
if $state
if $state
if $state
if $state
=
=
=
=
=
=
=
=
=
=
=
=
=
=
$(wfFddiSmtEntry.wfFddiSmtCfState.${list_[$i]})
1 then ; printf “%-8s ” “Isolated”
2 then ; printf “%-8s ” “Unknown”
3 then ; printf “%-8s ” “Wrap A”
4 then ; printf “%-8s ” “Wrap B”
5 then ; printf “%-8s ” “Wrap AB”
6 then ; printf “%-8s ” “Thru”
7 then ; printf “%-8s ” “Local A”
8 then ; printf “%-8s ” “Local B”
9 then ; printf “%-8s ” “Local AB”
10 then ; printf “%-8s ” “Unknown”
11 then ; printf “%-8s ” “C Wrap A”
12 then ; printf “%-8s ” “C Wrap B”
13 then ; printf “%-8s ” “Unknown”
printf “%6d ” $(wfFddiEntry.wfFDDISmtTNotify.${list_[$i]})
#
# Next line...
#
echo
cutenv -c9-15 name2 “$cctname”
if ${name2[0]} = 1 then; \
printf “%4s %4s *%-7.7s\n” “” “” “${name2[1]}”
:FI_SMT_NXT:
let i = $i + 1
goto :FI_SMT_LP:
A-23
Writing Technician Interface Scripts
################################################################
#
# MAC screen...
#
################################################################
:FI_MAC:
let i = 1
#
# check for circuit name to match on...
#
if $# = 2 then ; goto :FI_MAC_NM:
setenv cmd “$3”
let len = strlen(cmd)
if $len < 3 then ; goto :FI_HELP_SHOW:
let j = strindex(“circuit”, cmd)
if $j != 1 then ; goto :FI_HELP_SHOW:
if $# != 4 then ; goto :FI_HELP_SHOW:
setenv matchcct “$4”
:FI_MAC_NM:
echo
echo “FDDI Modules MAC Parameters:”
echo “----------------------------”
echo
printf “%-4.4s %-4.4s %-8.8s %-17.17s %-17.17s %-4.4s %-9.9s \
%-10.10s\n” “” “” “” “
Upstream” “
Downstream” “TNeg” \
“Ring Mgmt” “ Ring Op”
printf “%-4.4s %-4.4s %-8.8s %-17.17s %-17.17s %-4.4s %-9.9s \
%-10.10s\n” “Slot” “Conn” “Circuit” “
Neighbor” \
“
Neighbor” “(ms)” “ State” “ Count”
printf “%-4.4s %-4.4s %-8.8s %-17.17s %-17.17s %-4.4s %-9.9s \
%-10.10s\n” “----” “----” “--------” “-----------------” \
“-----------------” “----” “---------” “----------”
instenv list_ wfFddiMacEntry
A-24
Sample Scripts
:FI_MAC_LP:
on error :FI_MAC_NXT:
if $i > $list_0 then; goto :FOOTER_AND_END:
let cctnum = $(wfFddiEntry.wfFDDICct.${list_[$i]})
gosub :GETCCTNAME:
if “$matchcct” = “” then ; goto :FI_PRNTMAC:
if -ic “$matchcct” != “$cctname” then ; goto :FI_MAC_NXT:
let match_entries = $match_entries + 1
:FI_PRNTMAC:
printf “%4d %4d ” $(wfFddiMacEntry.wfFddiMacSlot.${list_[$i]}) \
$(wfFddiMacEntry.wfFddiMacNode.${list_[$i]})
printf “%-8.8s ” “$cctname”
#
# Print Upstream Neighbor's MAC address...
#
octetfmt mac MAC_ADDRESS
wfFddiMacEntry.wfFddiMacUpstreamNbr.${list_[$i]}
printf “%-17s ” “$mac”
#
# Print Downstream Neighbor's MAC address...
#
octetfmt mac MAC_ADDRESS
wfFddiMacEntry.wfFddiMacDownstreamNbr.${list_[$i]}
printf “%-17s ” “$mac”
#
# Print remainder of line...
#
let tneg = $(wfFddiMacEntry.wfFddiMacTNeg.${list_[$i]}) / 1000000
printf “%4d ” $tneg
let state
if $state
if $state
if $state
if $state
if $state
if $state
if $state
if $state
= $(wfFddiMacEntry.wfFddiMacRmtState.${list_[$i]})
=
1 then ; printf “%-9s ” “Isolated”
=
2 then ; printf “%-9s ” “NonOp”
=
4 then ; printf “%-9s ” “RingOp”
=
8 then ; printf “%-9s ” “Detect”
= 16 then ; printf “%-9s ” “NonOpDup”
= 32 then ; printf “%-9s ” “RingOpDup”
= 64 then ; printf “%-9s ” “Directed”
= 128 then ; printf “%-9s ” “Trace”
A-25
Writing Technician Interface Scripts
printf “%10u\n” $(wfFddiMacExtEntry.wfFddiMacRingOpCts.${list_[$i]})
cutenv -c9-15 name2 “$cctname”
if ${name2[0]} = 1 then; \
printf “%4s %4s *%-7.7s\n” “” “” “${name2[1]}”
#
# Next line...
#
:FI_MAC_NXT:
let i = $i + 1
goto :FI_MAC_LP:
################################################################
#
# Port screen...
#
################################################################
:FI_PORT:
let i = 1
echo
echo “FDDI Modules Port Parameters:”
echo “----------------------------”
echo
printf “%-4.4s %-4.4s %-5.5s %-9.9s %-9.9s %-10.10s %-10.10s \
%-10.10s\n” “” “” “” “” “” “Link Error” “Elasticity” “
Link”
printf “%-4.4s %-4.4s %-5.5s %-9.9s %-9.9s %-10.10s %-10.10s \
%-10.10s\n” “” “” “Local” “Neighbor” “ Physical” “ Monitor” \
“ Buffer” “Confidence”
printf “%-4.4s %-4.4s %-5.5s %-9.9s %-9.9s %-10.10s %-10.10s \
%-10.10s\n” “Slot” “Conn” “Port” “Port Type” “ State” “ \
Count” “ Errors” “ Count”
printf “%-4.4s %-4.4s %-5.5s %-9.9s %-9.9s %-10.10s %-10.10s \
%-10.10s\n” “----” “----” “-----” “---------” “---------” \
“----------” “----------” “----------”
instenv list_ wfFddiPortEntry
A-26
Sample Scripts
:FI_PORT_LP:
on error :FI_PORT_NXT:
if $i > $list_0 then; goto :FOOTER_AND_END:
printf “%4d %4d ” $(wfFddiPortEntry.wfFddiPortSlot.${list_[$i]}) \
$(wfFddiPortEntry.wfFddiPortNode.${list_[$i]})
let port
if $port
if $port
if $port
if $port
if $port
=
=
=
=
=
=
$(wfFddiPortEntry.wfFddiPortPcType.${list_[$i]})
1 then ; printf “%-5s ” “A”
2 then ; printf “%-5s ” “B”
3 then ; printf “%-5s ” “S”
4 then ; printf “%-5s ” “M”
5 then ; printf “%-5s ” “None”
let port
if $port
if $port
if $port
if $port
if $port
=
=
=
=
=
=
$(wfFddiPortEntry.wfFddiPortPcNeighbor.${list_[$i]})
1 then ; printf “%-9s ” “A”
2 then ; printf “%-9s ” “B”
3 then ; printf “%-9s ” “S”
4 then ; printf “%-9s ” “M”
5 then ; printf “%-9s ” “Unknown”
let port
if $port
if $port
if $port
if $port
if $port
if $port
if $port
if $port
if $port
if $port
= $(wfFddiPortEntry.wfFddiPortPcmState.${list_[$i]})
= 1 then ; printf “%-9s ” “Off”
= 2 then ; printf “%-9s ” “Break”
= 3 then ; printf “%-9s ” “Trace”
= 4 then ; printf “%-9s ” “Connect”
= 5 then ; printf “%-9s ” “Next”
= 6 then ; printf “%-9s ” “Signal”
= 7 then ; printf “%-9s ” “Join”
= 8 then ; printf “%-9s ” “Verify”
= 9 then ; printf “%-9s ” “Active”
= 10 then ; printf “%-9s ” “Maint”
printf “%10u ” $(wfFddiPortExtEntry.wfFddiPortLemCts.${list_[$i]})
printf “%10u ”
$(wfFddiPortExtEntry.wfFddiPortEbErrorCts.${list_[$i]})
printf “%10u ”
$(wfFddiPortExtEntry.wfFddiPortLctFailCts.${list_[$i]})
#
# Next line...
#
echo
:FI_PORT_NXT:
let i = $i + 1
goto :FI_PORT_LP:
A-27
Writing Technician Interface Scripts
################################################################
#
# Sample screen (samples parameters twice, prints deltas)
#
################################################################
:FI_SAMP:
let period = 10
if $# < 3 then; goto :FI_Samp1:
#
# check for circuit to match without period given
#
setenv cmd “$3”
let j = strindex(“circuit”, cmd)
if $j != 1 then; goto :FI_ITSPERIOD:
let len = strlen(cmd)
if $len < 3 then; goto :FI_HELP_SHOW:
if $# != 4 then; goto :FI_HELP_SHOW:
setenv matchcct “$4”
goto :FI_Samp1:
:FI_ITSPERIOD:
setenv period “$3”
#
# Check “period” parameter for invalid characters, 0 value
#
if “$ver” < “x7.80” then; goto :FI_SAMP_CKVAL:
setenv teststr “ABCDEFGHIJKLMNOPQRSTUVWXYZ”
let invalch = strpbrk(“$3”, “$teststr”)
if $invalch != 0 then ; goto :FI_SAMP_HELP:
setenv teststr “abcdefghijklmnopqrstuvwxyz”
let invalch = strpbrk(“$3”, “$teststr”)
if $invalch != 0 then ; goto :FI_SAMP_HELP:
setenv teststr “!@#%^&*()_-=+\|`~[{]}';:/?,<>”
let invalch = strpbrk(“$3”, “$teststr”)
if $invalch != 0 then ; goto :FI_SAMP_HELP:
A-28
Sample Scripts
:FI_SAMP_CKVAL:
if $period <= 0 then; \
echo “Period of $period seconds is too low.” ; \
goto :FI_HELP_SHOW:
#
# Check for circuit to match on...
#
if $# <= 3 then ; goto :FI_Samp1:
setenv cmd “$4”
let len = strlen(cmd)
if $len < 3 then ; goto :FI_HELP_SHOW:
let j = strindex(“circuit”, cmd)
if $j != 1 then ; goto :FI_HELP_SHOW:
if $# != 5 then ; goto :FI_HELP_SHOW:
setenv matchcct “$5”
#
# Take the first sample...
#
:FI_Samp1:
echo
printf “FDDI Sampled Data over %3u seconds\n” $period
echo
“----------------------------------”
echo
printf “%4.4s %4.4s %-8.8s %-10.10s %-10.10s %-10.10s %-10.10s\n” \
“” “” “” “
Rx” “
Tx” “Rx Lack of” “Tx Lack of”
printf “%4.4s %4.4s %-8.8s %-10.10s %-10.10s %-10.10s %-10.10s\n” \
“Slot” “Conn” “Circuit” “ Frames” “ Frames” “Resources”\
“Resources”
printf “%4.4s %4.4s %-8.8s %10.10s %10.10s %10.10s %10.10s\n” \
“----” “----” “--------” “----------” “----------” “----------” \
“----------”
printf “Taking first sample...”
instenv list_ wfFddiEntry
let i = 1
if $list_0 = 0 then; \
printf “\r
goto :FOOTER_AND_END:
\r”; \
A-29
Writing Technician Interface Scripts
:FI_SAMP1_LP:
on error :FI_SAMP1_SKP:
if $i > $list_0 then; goto :FI_SAMP_WT:
if “$matchcct” = “” then ; goto :FI_SAMP1_NOW:
let cctnum = $(wfFddiEntry.wfFDDICct.${list_[$i]})
gosub :GETCCTNAME:
if -ic “$matchcct” != “$cctname” then; goto :FI_SAMP1_SKP:
:FI_SAMP1_NOW:
let match_entries = $match_entries + 1
let m = $match_entries
setenv s1instid_$m “${list_[$i]}”
setenv s1rxfrms_$m “$(wfFddiEntry.wfFDDIFramesRxOk.${list_[$i]})”
setenv s1txfrms_$m “$(wfFddiEntry.wfFDDIFramesTxOk.${list_[$i]})”
setenv s1rxlors_$m “$(wfFddiEntry.wfFDDIRingOverrunRx.${list_[$i]})”
setenv s1txlors_$m “$(wfFddiEntry.wfFDDITxClipFrames.${list_[$i]})”
:FI_SAMP1_SKP:
let i = $i + 1
goto :FI_SAMP1_LP:
#
# Wait the proscribed period of time...
#
:FI_SAMP_WT:
printf “\r
\r”
if $match_entries = 0 then; goto :FOOTER_AND_END:
let s1instid_0 = $match_entries
printf “Waiting %2u seconds...” $period
pause $period
#
# Take the second sample. Collecting the second sample in its entirety
# before calculating output is preferred because the variance in sample
# times between instances of the MIB object should be reduced.
#
printf “\r
\r”
printf “Taking second sample...”
instenv list_ wfFddiEntry
let i = 1
let match_entries = 0
if $list_0 = 0 then; \
printf “\r
goto :FOOTER_AND_END:
A-30
\r”; \
Sample Scripts
:FI_SAMP2_LP:
on error :FI_SAMP2_SKP:
if $i > $list_0 then; goto :FI_SAMP_PRT:
if “$matchcct” = “” then ; goto :FI_SAMP2_NOW:
let cctnum = $(wfFddiEntry.wfFDDICct.${list_[$i]})
gosub :GETCCTNAME:
if -ic “$matchcct” != “$cctname” then; goto :FI_SAMP2_SKP:
:FI_SAMP2_NOW:
let match_entries = $match_entries + 1
let m = $match_entries
setenv s2instid_$m “${list_[$i]}”
setenv s2rxfrms_$m “$(wfFddiEntry.wfFDDIFramesRxOk.${list_[$i]})”
setenv s2txfrms_$m “$(wfFddiEntry.wfFDDIFramesTxOk.${list_[$i]})”
setenv s2rxlors_$m “$(wfFddiEntry.wfFDDIRingOverrunRx.${list_[$i]})”
setenv s2txlors_$m “$(wfFddiEntry.wfFDDITxClipFrames.${list_[$i]})”
:FI_SAMP2_SKP:
let i = $i + 1
goto :FI_SAMP2_LP:
#
# Compare the two samples and generate the output.
#
:FI_SAMP_PRT:
let table_size = $i
printf “\r
\r”
if $match_entries = 0 then; goto :FOOTER_AND_END:
let s2instid_0 = $match_entries
let
let
let
let
i = 1
j = 1
jlow = 1
matches = 0
A-31
Writing Technician Interface Scripts
:FI_SAMP_MATCH:
on error :FI_NEXT_TRY:
if ${s1instid_[$i]} != ${s2instid_[$j]} then; goto :FI_NEXT_TRY:
if $j = $jlow then; \
if $jlow < $s2instid_0 then; \
let jlow = $jlow + 1
let delta_rxfrms
if $delta_rxfrms
let delta_txfrms
if $delta_txfrms
let delta_rxlors
if $delta_rxlors
let delta_txlors
if $delta_txlors
=
<
=
<
=
<
=
<
${s2rxfrms_[$j]} - ${s1rxfrms_[$i]}
0 then; goto :FI_NEXT_TRY:
${s2txfrms_[$j]} - ${s1txfrms_[$i]}
0 then; goto :FI_NEXT_TRY:
${s2rxlors_[$j]} - ${s1rxlors_[$i]}
0 then; goto :FI_NEXT_TRY:
${s2txlors_[$j]} - ${s1txlors_[$i]}
0 then; goto :FI_NEXT_TRY:
let matches = $matches + 1
let cctnum = $(wfFddiEntry.wfFDDICct.${s1instid_[$i]})
gosub :GETCCTNAME:
printf “%4d %4d ” $(wfFddiEntry.wfFDDISlot.${s1instid_[$i]}) \
$(wfFddiEntry.wfFDDINode.${s1instid_[$i]})
printf “%-8.8s ” “$cctname”
printf “%10u %10u %10u %10u\n” $delta_rxfrms $delta_txfrms \
$delta_rxlors $delta_txlors
cutenv -c9-15 name2 “$cctname”
if ${name2[0]} = 1 then; \
printf “%4s %4s *%-7.7s\n” “” “” “${name2[1]}”
:FI_NEXT_TRY:
let j = $j + 1
if $j <= $s2instid_0 then; goto :FI_SAMP_MATCH:
let i = $i + 1
if $i <= $s1instid_0 then; \
let j = $jlow; \
goto :FI_SAMP_MATCH:
let i = $table_size
goto :FOOTER_AND_END:
:FI_SAMP_HELP:
cutenv -c $invalch ugly_ “$3”
echo “Inappropriate character '$ugly_1' in parameter;”
echo “
only digits allowed.”
echo
goto :FI_HELP_SHOW:
A-32
Sample Scripts
################################################################
#
# Hardware Filter screen...
#
################################################################
:FI_HWF:
setenv RUN_SILENT 1
on error :FI_HANDLER:
run hwfilter show fddi
goto :FI_END:
:FI_HANDLER:
echo “Script hwfilter.bat not found.”
echo
goto :FI_END:
################################################################
#
# Parse for “enable” command...
#
################################################################
:FI_ENBL:
if $# = 1 then ; goto :FI_HELP_ENBL:
setenv cmd “$2”
let len = strlen(cmd)
if $len < 3 then ; goto :FI_HELP_ENBL:
let i = strindex(“circuit”, cmd)
if $i = 1 then ; goto :FI_ENBLC:
let i = strindex(“connector”, cmd)
if $i = 1 then ; goto :FI_ENBLI:
:FI_HELP_ENBL:
echo “FDDI Enable Command Help”
echo “------------------------”
echo
echo “enable fddi <option>”
echo “
Where option is one of the following:”
echo “
?”
echo “
circuit
<circuit name>”
echo “
connector <slot.connector>”
goto :FI_END:
A-33
Writing Technician Interface Scripts
#
# Enable circuit...
#
:FI_ENBLC:
if $# != 3 then ; goto :FI_HELP_ENBL:
instenv list_ wfFddiEntry
if $list_0 = 0 then; goto :FI_ENBLNF:
setenv matchcct “$3”
if “$matchcct” = “” then ; goto :FI_END:
let i = 1
# Search for circuit with matching name
:FI_ENBLLP:
on error :FI_ENBLNXT:
if $i > $list_0 then; goto :FI_ENBLNF:
let cctnum = $(wfFddiEntry.wfFDDICct.${list_[$i]})
gosub :GETCCTNAME:
if -ic “$matchcct” != “$cctname” then ; goto :FI_ENBLNXT:
# Found it!
set wfFddiEntry.wfFDDIEnable.${list_[$i]} 1
echo “FDDI circuit $cctname enabled.”
commit
goto :FI_END:
:FI_ENBLNXT:
let i = $i + 1
goto :FI_ENBLLP:
:FI_ENBLNF:
echo “FDDI circuit $3 not found.”
goto :FI_END:
#
# Enable connector...
#
A-34
Sample Scripts
:FI_ENBLI:
if $# != 3 then ; goto :FI_HELP_ENBL:
# Sanity check <slot.connector> parameter...
if “$ver” < “x7.80” then; goto :SKIP_STRPBRK1:
setenv teststr “ABCDEFGHIJKLMNOPQRSTUVWXYZ”
let invalch = strpbrk(“$3”, “$teststr”)
if $invalch != 0 then ; goto :FIEN_MSG1_HELP:
setenv teststr “abcdefghijklmnopqrstuvwxyz”
let invalch = strpbrk(“$3”, “$teststr”)
if $invalch != 0 then ; goto :FIEN_MSG1_HELP:
setenv teststr “!@#%^&*()_-=+\|`~[{]}';:/?,<>”
let invalch = strpbrk(“$3”, “$teststr”)
if $invalch != 0 then ; goto :FIEN_MSG1_HELP:
:SKIP_STRPBRK1:
let firstdot = strindex(“$3”, “.”)
if $firstdot = 0 then ; goto :FIEN_MSG2_HELP:
let lastdot = strrindex(“$3”, “.”)
if $firstdot != $lastdot then ; goto :FIEN_MSG3_HELP:
if $?(wfFddiEntry.wfFDDIEnable.$3) = 0 then ; goto :FI_ENBLIE:
set wfFddiEntry.wfFDDIEnable.$3 1
echo “FDDI connector $3 enabled.”
commit
goto :FI_END:
:FI_ENBLIE:
echo “FDDI connector $3 not found.”
goto :FI_END:
:FIEN_MSG1_HELP:
gosub :ERR_MSG1:
goto :FI_HELP_ENBL:
:FIEN_MSG2_HELP:
gosub :ERR_MSG2:
goto :FI_HELP_ENBL:
:FIEN_MSG3_HELP:
gosub :ERR_MSG3:
goto :FI_HELP_ENBL:
A-35
Writing Technician Interface Scripts
#
# Gosubs shared by enable and disable...
#
:ERR_MSG1:
cutenv -c $invalch ugly_ “$3”
echo “Inappropriate character '$ugly_1' in parameter;”
echo “
only digits and '.' allowed.”
echo
return
:ERR_MSG2:
echo “Parameter must contain a '.' character.”
echo
return
:ERR_MSG3:
echo “Too many '.' characters in parameter; enter one only.”
echo
return
################################################################
#
# Parse for “disable” command...
#
################################################################
:FI_DSBL:
if $# = 1 then ; goto :FI_HELP_DSBL:
setenv cmd “$2”
let len = strlen(cmd)
if $len < 3 then ; goto :FI_HELP_DSBL:
let i = strindex(“circuit”, cmd)
if $i = 1 then ; goto :FI_DSBLC:
let i = strindex(“connector”, cmd)
if $i = 1 then ; goto :FI_DSBLI:
:FI_HELP_DSBL:
echo “FDDI Disable Command Help”
echo “-------------------------”
echo
echo “disable fddi <option>”
echo “
Where option is one of the following:”
echo “
?”
echo “
circuit
<circuit name>”
echo “
connector <slot.connector>”
goto :FI_END:
A-36
Sample Scripts
#
# Disable circuit...
#
:FI_DSBLC:
if $# != 3 then ; goto :FI_HELP_DSBL:
instenv list_ wfFddiEntry
if $list_0 = 0 then; goto :FI_DSBLNF:
setenv matchcct “$3”
if “$matchcct” = “” then ; goto :FI_END:
let i = 1
# Search for circuit with matching name
:FI_DSBLLP:
on error :FI_DSBLNXT:
if $i > $list_0 then; goto :FI_DSBLNF:
let cctnum = $(wfFddiEntry.wfFDDICct.${list_[$i]})
gosub :GETCCTNAME:
if -ic “$matchcct” != “$cctname” then ; goto :FI_DSBLNXT:
# Found it!
set wfFddiEntry.wfFDDIEnable.${list_[$i]} 2
echo “FDDI circuit $cctname disabled.”
commit
goto :FI_END:
:FI_DSBLNXT:
let i = $i + 1
goto :FI_DSBLLP:
:FI_DSBLNF:
echo “FDDI circuit $3 not found.”
goto :FI_END:
#
# Disable connector...
#
A-37
Writing Technician Interface Scripts
:FI_DSBLI:
if $# != 3 then ; goto :FI_HELP_DSBL:
# Sanity check <slot.connector> parameter...
if “$ver” < “x7.80” then; goto :SKIP_STRPBRK2:
setenv teststr “ABCDEFGHIJKLMNOPQRSTUVWXYZ”
let invalch = strpbrk(“$3”, “$teststr”)
if $invalch != 0 then ; goto :FIDS_MSG1_HELP:
setenv teststr “abcdefghijklmnopqrstuvwxyz”
let invalch = strpbrk(“$3”, “$teststr”)
if $invalch != 0 then ; goto :FIDS_MSG1_HELP:
setenv teststr “!@#%^&*()_-=+\|`~[{]}';:/?,<>”
let invalch = strpbrk(“$3”, “$teststr”)
if $invalch != 0 then ; goto :FIDS_MSG1_HELP:
:SKIP_STRPBRK2:
let firstdot = strindex(“$3”, “.”)
if $firstdot = 0 then ; goto :FIDS_MSG2_HELP:
let lastdot = strrindex(“$3”, “.”)
if $firstdot != $lastdot then ; goto :FIDS_MSG3_HELP:
if $?(wfFddiEntry.wfFDDIEnable.$3) = 0 then ; goto :FI_DSBLIE:
set wfFddiEntry.wfFDDIEnable.$3 2
echo “FDDI connector $3 disabled.”
commit
goto :FI_END:
:FI_DSBLIE:
echo “FDDI connector $3 not found.”
goto :FI_END:
:FIDS_MSG1_HELP:
gosub :ERR_MSG1:
goto :FI_HELP_DSBL:
:FIDS_MSG2_HELP:
gosub :ERR_MSG2:
goto :FI_HELP_DSBL:
:FIDS_MSG3_HELP:
gosub :ERR_MSG3:
goto :FI_HELP_DSBL:
A-38
Sample Scripts
################################################################
#
# Version command
#
################################################################
:FI_VER:
echo “fddi.bat Version: 1.11 Date: 10/31/94.”
goto :FI_END:
#
# Circuit Name fetching Gosub...
#
:GETCCTNAME:
if $?(wfCircuitNameEntry.wfCircuitName.$cctnum) = 0 then ; \
setenv cctname “” ; \
return
setenv cctname “$(wfCircuitNameEntry.wfCircuitName.$cctnum)”
return
#
# Branch point to print footer of table, then fall through to end of
# script.
#
:FOOTER_AND_END:
echo
let tbl_entries = $i - 1
if “$matchcct” = “” then ; goto :FAE_SKIP:
if $match_entries = 1 then ; \
printf “Found %5d match out of ” $match_entries; goto :FAE_SKIP:
printf “Found %5d matches out of ” $match_entries
:FAE_SKIP:
if $tbl_entries = 1 then ; \
printf “%5d entry in table.\n” $tbl_entries ; \
goto :FAE_DONE:
printf “%5d entries in table.\n” $tbl_entries
:FAE_DONE:
#
# Exit branch point...
#
:FI_END:
A-39
Index
Symbols
#, inserting comments using, 1-13
$, referencing variable using, 1-2
A
arrayenv command, 1-10, 2-3
arrays, 1-8
sprintf, 1-10, 2-42
unsetenv, 1-10, 2-43
verbose, 1-13, 2-45
comments, inserting, 1-13
controlling program flow, 1-11
cutenv command, 1-9, 2-4
D
C
commands
arrayenv, 1-10, 2-3
cutenv, 1-9, 2-4
echo, 1-8, 1-12, 2-6
enumenv, 1-10, 2-7
export, 1-4, 2-8
getenv, 1-8, 2-9
gosub, 1-11, 2-10
goto, 1-11, 2-11
if, 1-11, 2-12 to 2-15
instenv, 1-9, 2-16
let, 1-10, 2-18 to 2-23
mibget, 2-24 to 2-26
octetfmt, 1-7, 2-27
on error, 1-12, 2-29
pause, 1-11, 2-30
printf, 1-12, 2-31 to 2-33
record, 1-12
return, 1-11, 2-36
run, 1-14, 2-37
save env, 2-39
setenv, 1-9, 2-40
source env, 1-13, 2-41
debugging script files, 2-45
deleting variables, 1-10, 2-43
E
echo command, 1-8, 1-12, 2-6
enumenv command, 1-10, 2-7
error messages
from printf command, 2-33
from sprintf command, 2-42
error recovery, performing, 1-12, 2-29
evaluating expressions, 2-12, 2-18
export command, 1-4, 2-8
F
formatting output, 2-31
functions, 2-20, 2-21
Index-1
G
P
getenv command, 1-8, 2-9
global variables
overview of, 1-4
PWD, 1-11
gosub command, 1-11, 2-10
goto command, 1-11, 2-11
pause command, 1-11, 2-30
polling console for input, 1-5
printf command, 1-12, 2-31 to 2-33
prompting user for input, 1-5
pseudo-variable arrays
defining, 1-8, 2-16
description of, 1-8
writing arguments to, 2-3
writing text to, 2-4
PWD global variable, 1-11
I
if command, 1-11, 2-12 to 2-15
instenv command, 1-9, 2-16
R
L
let command, 1-10, 2-18 to 2-23
local variables, 1-4
record command, 1-12, 2-34
recording console messages, 1-12, 2-34
return command, 1-11, 2-36
run command, 1-14, 2-37
M
menus, 1-14
messages
saving to a file, 1-12, 2-34
writing to the console, 1-12, 2-6
MIB
accessing information about, 1-6
formatting entries, 1-7, 2-27
retrieving attributes from, 2-24
variable types, 1-6
mibget command, 2-24 to 2-26
moving variables, 2-8
O
octet string data, 1-7, 2-27
octetfmt command, 1-7, 2-27
on error command, 1-12, 2-29
opaque string data, 1-7, 2-27
Index-2
S
save env command, 2-39
saving console messages, 1-12, 2-34
script files
creating, 1-1 to 1-13
debugging, 1-13, 2-45
examples of, A-1 to A-68
loading variables from, 2-41
running, 1-14, 2-37
saving variables to, 1-13, 2-39
transferring to router, 1-1
setenv command, 1-9, 2-40
setting timeout values, 1-5
setting variables, 1-9, 2-3, 2-4, 2-7, 2-16, 2-18,
2-40, 2-42
source env command, 1-13, 2-41
sprintf command, 1-10, 2-42
suspending Technician Interface operation, 2-30
system variables, 1-4
T
X
TFTP, 1-1
timeout values, setting, 1-5
transferring script files, 1-1
true variable array, 1-8
XMODEM, 1-1
U
unsetenv command, 1-10, 2-43
V
variable array, 1-8
variables
assigning a sequence of values to, 2-7
assigning a value to, 2-40
assigning value of MIB attribute to, 1-6
deleting, 1-10, 2-43
global, 1-4
local, 1-4
moving between tables, 2-8
overview of, 1-2
preventing expansion of, 1-3
referencing, 1-2
restoring, 1-13
saving, 1-13
setting, 1-9, 2-3, 2-4, 2-7, 2-16, 2-18, 2-40,
2-42
special
input parameters, 1-4
input prompt, 1-5
system, 1-4
viewing, 1-8, 2-9
verbose command, 1-13, 2-45
W
writing messages to the console, 1-12, 2-6
Index-3