1
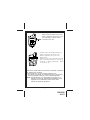
Model SS91 Transmitter Programming Guide These transmitters makes use of icons (symbols) to identify the reaction your security system/keyless entry/and or remote start system, where applicable, will have when any icon (button) is pressed. These icons are programmed at time of installation to meet the needs of the individual and to complement the vehicle that the system is installed in. To replace a transmitter or add transmitters, please follow the programming instructions listed on the pages of this manual. BUTTON RECEIVER CHANNEL 1 Lock And Arm Alarm, also initiate and terminates *Panic 2 Unlock And Disarm, also initiates and terminates *Panic. Programmable to unlock drivers door and or all doors. 1 Lock and arm/unlock and disarm. May be programmed to unlock driver's door or all doors. Also will initiate and terminate *Panic. 3 Pulsed or switched output to control Remote Trunk Release or optional device connected to channel 3. 3 When pressed and release two times, will provide pulsed output or activate the Remote Start option when installed. 4 5 * Where So Equipped SYSTEM FUNCTION When so equipped, this button used to operate an optional connected to channel 4. When so equipped, this button used to operate an optional connected to channel 5. can be device can be device 1 128-8840 1 of 8 Although the most common use of the transmitter buttons are shown on the front page of this guide, any button or button combination can be programmed into any receiver channel. Additionally, if all 4 buttons are used and you require access to a 5th channel, you would program a combination of buttons to control the 5th function. i.e... you have programmed lock for arm, unlock for disarm, trunk for trunk release, and OPT1 Sliding Door where applicable, and you've added a window up module that you want independent control of, you would program unlock and trunk buttons pressed simultaneously into the receiver to control this function independently. Also, if you do not program a transmitter button into channel 2 which is the separate unlock/disarm channel, then whatever button is programmed into channel 1 will serve as both lock/arm & unlock/disarm. PROGRAMMING TRANSMITTERS: NOTE: It is important to remember that during the programming mode, each individual step must be completed within 15 seconds of the previous step. If the 15 second time limit expires between steps, the unit will automatically exit the program mode. This is indicated by a long chirp from the siren. Non alarm models will flash the parking lights only to confirm the transmitter code has been learned and stored. NOTE: Because the system may be capable of sounding a siren, the vehicle horn, or both, where the siren chirp is referenced below, the siren may chirp, the horn may beep, or both devices may sound. TO PROGRAM ADDITIONAL TRANSMITTERS: 1) Enter the vehicle, and turn the ignition switch to the on position. 2) Press and release the valet push button switch three times. NOTE: Some systems may use a combination push-button LED switch, others may use an intergrated push-button LED receiver. In these systems the push-button and the dash mounted LED, or the receiver, push-button,LED are one and the same. 3) The LED will flash 1x, and the siren will chirp 1x, indicating that the system is ready to accept programming of channel #1 which is arm/ lock, disarm/unlock/unlock 2, and panic functions. 4) Press and hold the lock or lock/unlock symbol button of the transmitter you wish to program for 4 seconds or until a long chirp is heard from the siren. "Repeat step 4 for each transmitter you wish to program". NOTE: If your transmitter button has the Lock/Unlock icon on one button, press and release the valet push button switch 2 times then move on to step #8. 5) Press and release the valet push button switch one time to advance to channel 2. The siren will chirp 2 times and the dash mounted LED will 2 128-8840 2 of 8 Flash 2 times, indicating that the unit is ready to accept programming for channel # 2 which is only used for separate lock and unlock button transmitters, and is the disarm/unlock/unlock 2 and panic. 6) Press and hold the unlock symbol button of the transmitter you wish to program for 4 seconds or until a long chirp is heard from the siren. "Repeat step 6 for each transmitter you wish to program". 7) Press and release the valet push button switch one time to advance to channel 3.The siren will chirp 3 times and the dash mounted LED will Flash 3 times, indicating that the unit is ready to accept programming for channel # 3 which is the trunk release/alternate output channel of the system. 8) Press and hold the trunk/key symbol button of the transmitter you wish to program for 4 seconds or until a long chirp is heard from the siren. "Repeat step 8 for each transmitter you wish to program". 9) Press and release the valet push button switch one time to advance to channel 4 if so equipped. The siren will chirp 4 times and the dash mounted LED will Flash 4 times, indicating that the unit is ready to accept programming for channel # 4, optional device (where equipped) 10) Press and hold the Option button of the transmitter you wish to program for 4 seconds or until a long chirp is heard from the siren. "Repeat step 10 for each transmitter you wish to program". 11) Press and release the valet push button switch one time to advance to channel 5 if so equipped. The siren will chirp 5 times and the dash mounted LED will Flash 5 times, indicating that the unit is ready to accept programming for channel # 5 optional device (where equipped) 12) Press and hold the second Option button of the transmitter you wish to program for 4 seconds or until a long chirp is heard from the siren. "Repeat step 12 for each transmitter you wish to program". 13) Within 10 seconds, press and release the valet program switch one time. (Siren emits 6 short chirps indicating channel 6 has been entered) 14) Within 10 Seconds, Press and hold the unlock button, (or any unused button(s)), of the first transmitter you wish to control Channel 6 output, (Driver Priority 1) until a long chirp is heard from the siren. (Repeat this for each transmitter you wish to operate the Channel 6 output, Driver Priority 1) 15) Within 10 seconds, press and release the valet program switch one time. (Siren emits 7 short chirps indicating channel 7 has been entered) 3 128-8840 3 of 8 16) Within 10 Seconds, Press and hold the unlock button (or any unused button(s)) of the first transmitter you wish to control Channel 7 output, (Driver Priority 2) until a long chirp is heard from the siren. (Repeat this for each transmitter you wish to operate the Channel 7 output, Driver Priority 2) NOTE: Channels 6 and 7 can be used as a separate output to control a function other than driver priority. Simply programming any unused transmitter button other than the unlock button will allow complete independent control of these outputs. ERASING TRANSMITTERS IF THEY HAVE BEEN LOST OR STOLEN: NOTE: Before you begin to erase the lost or stolen transmitter(s), have all transmitters available that you wish to remain programmed. These will be used during the program process to identify transmitters that will continue to be used. Enter the transmitter program mode: 1. Turn the ignition switch to the “ON” position. 2. Within 10 seconds, press and release the valet/program switch three times. (Siren emits 1 short chirp indicating channel 1 has been entered) 3. Within 10 Seconds, press and hold the ARM or ARM/DISARM button of the first transmitter you wish to remain stored into the control unit until a single chirp is heard from the siren. (Repeat this for each transmitter you wish to remain stored in the control unit). The receiver stores up to four transmitters. To be certain all transmitter slots in the receiver are occupied with transmitters you wish to continue to use, and all others are erased, you will have to fill all four receiver slots. If in step 3 you identified one transmitter, you will have to fill the additional 3 slots. If in step 3 you identified two transmitters, you will have to fill the additional two slots, etc... 4. Press and hold any unused button or combination of buttons until a long chirp is heard from the siren. Release and press the button or button combination again and again until all remaining slots are full. NOTE: The button or combination of buttons entered will also control the arm or arm/disarm function until additional transmitters are added. All unwanted transmitters are now deleted. REPRIORITIZING A TRANSMITTER’S PROGRAMMING: To reprogram a receiver channel with a different transmitter button once a code has been stored, there will be two options: 1. Enter the transmitter program mode of the receiver channel to be reprogrammed. Using any unused button or combination of buttons, push out the stored code by pressing the unused button until a long chirp is heard, then repeat 3 additional times. After this, you 4 128-8840 4 of 8 can add any desired unused transmitter button. This action erases only the button stored of the transmitter you are programming. All other codes will remain stored. 2. Enter the transmitter program mode. Using any transmitter button press and hold until a long chirp is heard. If a single chirp or multiple chirps, (up to 7 chirps), are heard, the unit is indicating that the transmitter has already been programmed elsewhere in the receiver. Release the transmitter button and within 5 seconds press and hold until a long chirp is heard. This action forces the unit to erase all stored codes of that transmitter. The unit then exits the program mode the siren emits the program mode exit chirp pattern. All transmitter buttons for that transmitter must now be reprogrammed. Any other transmitter stored in the unit’s memory still remain operational. If the button is released and not pressed again within the 5 second period, no change in programming has been made to the receiver channel. The programmer can move onto a different channel or erase the transmitter codes as described in 1 above. BATTERY REPLACEMENT: The transmitter incorporates a small LED visible through the case which is used to indicate battery condition. You will notice a decrease in transmitter range as the battery condition deteriorates. Transmitter battery replacement is recommended at least every 10 to 12 months, depending upon how frequently the transmitter is used. To replace the battery: 1) Remove the 3 small # 0 Phillips head screw from the rear of the case. 2) Remove the rear cover to access the discharged battery paying attention to the proper polarity orientation. 3) Carefully remove and properly dispose of the discharged battery. 4) Insert the new battery, close the case, then reinstall the 3 small case screw removed in step 1. 5) If you accidently dislodge the circuit board from the transmitter housing, be certain that the rubber membrane is seated properly, and the buttons are properly exposed from the front view of the case, then insert the circuit board, and return to step #4. SS91P uses CR2032 Coin Cell Type Batteries. SEE ASSOCIATED DIAGRAMS ON FOLLOWING PAGE 5 128-8840 5 of 8 Remove three #0 philips head screws where indicated to gain access to the CR 2032 battery. Carefully remove transmitter back cover. Carefully remove the discharged battery by sliding it out from under the clip in the direction indicated by the arrow in the diagram below. Properly dispose of the exhausted battery and insert a new CR2032 taking care to arrange it so that the + is facing up toward the + symbol on the battery clip. This device complies with FCC Rules Part 15 Operation is subject to the following two conditions: 1. This device may not cause harmful interference and 2. This device must accept any interference that may be received, including interference that may cause undesired operation. NOTE: The manufacturer is not responsible for any radio or TV interference caused by unauthorized modifications to this equipment. Such modifications could void the user’s authority to operate the equipment. 6 128-8840 6 of 8 ORDER FORM FOR SS 91 Transmitter Attention: Transmitter Ordering Department Important: To help us expedite your order, please print all of the information legibly and mail this form and your payment according to the instructions below. Indicate the pad number of your transmitter selected from the pads shown above. Note: Transmitter model number found on back of case. 1) Name: _______________________________________ 2)Address: ______________________________________ 3) City: ________________ State: _____ Zip Code: ________ 4) Telephone Number: (_____) _______________ 5) Total Number Of Transmitters Required: Cost Per Transmitter is: $75.00 Multiply By Number Of Transmitters X ______ 6) Enter Total Amount Enclosed _________________ (New York State Residents must include the appropriate sales tax) 7) Method of Payment: Mastercard Visa Check or Money Order (do not send cash) Make Checks Payable To Audiovox Corporation CreditCard Number: _________________________________ Credit Card Expiration Date: ____ / _____ / _____ 8) Mail this form along with your payment to: Credit card purchasers can order additional or replacement transmitters by phone. Simply dial 1 - 800 - 645 - 4994, and follow the instructions from the operator interface. Audiovox Electronics Corp., 150 Marcus Blvd., Hauppauge, N.Y., 11788 Attn.: TRANSMITTER DEPARTMENT 7 128-8840 7 of 8 © 2010 Audiovox Electronics Corp., 150 Marcus Blvd., Hauppauge, NY, 11788 128-8840 8 128-8840 8 of 8