1
DC POWER PLANT
PRODUCT MANUAL
MODEL MX28B1200/2400+27V
APC DC Network Solutions Inc.
11035 Switzer Avenue
Dallas, TX 75238
800-800-4APC
Part Number 990-9166
Preliminary release
MX28B-1200+27V PRODUCT MANUAL
Rev 1
Product Structure
Component
Description
Part Number
MX28B1200/2400+27V Main Bay
1200 amp frame, 2400 amp carry through,
controller. No rectifiers, converters, no
distribution
0M-91147
MX28B1200/2400+27V Main Bay
1200 Amp expansion frame, No rectifiers,
distribution.
Available soon
DC Distribution Options +24V
Main and/or extension Bay
Small Breakers
38 +27V breakers and 8 –48V volt
breakers
LVD Options +24V
Main and/or extension Bay
0M-91145
No LVD
TBD
Battery LVD
TBD
Converter Shelf Option
No Converters
TBD
Converter Shelf, Input power
breakers, distribution breakers
Provides power to, and distribution from
converters
0M-6176
Rectifiers
+27V @ 100 Amps each
1MRF28H27BV
Converters
-50V @ 10 Amps each
AAC-0010
Battery Temperature Probe
15 ft. (4.6m)
FFA-0013-1
50 ft. (15.2m)
FFA-0013-2
*Note: DC-to-DC converters are available in the main frame only.
ii
Rev 1
MX28B-1200+27V PRODUCT MANUAL
REVISION HISTORY
Revision
Date
By
1
09/12/2001
JNF
Description
Initial release.
iii
MX28B-1200+27V PRODUCT MANUAL
Rev 1
TABLE OF CONTENTS
1
GENERAL INFORMATION ...........................................................................................................1
1.1
1.2
1.3
INTRODUCTION ................................................................................................................................................................. 1
PRECAUTIONS.................................................................................................................................................................... 1
INSPECTION UPON RECEIPT OF GOODS.......................................................................................................................... 1
1.3.1
General ...................................................................................................................................................................1
1.3.2
Visible External Damage.....................................................................................................................................1
1.3.3
Concealed Damage...............................................................................................................................................2
1.3.4
Return of Damaged Goods..................................................................................................................................2
2
CUSTOMER SERVICE AND SUPPORT .......................................................................3
3
WARRANTY PROVISIONS ............................................................................................................3
3.1
GENERAL PROVISIONS ..................................................................................................................................................... 3
3.1.1
Warranty Returns..................................................................................................................................................3
3.1.2
Warranty Repair or Replacement.......................................................................................................................3
3.2 EXCLUSIONS AND LIMITATIONS..................................................................................................................................... 4
4
PRODUCT OVERVIEW AND TECHNICAL DESCRIPTION .........5
4.1
4.2
4.3
4.4
4.5
4.6
4.7
4.8
4.9
4.10
4.11
4.12
5
DESCRIPTION ..................................................................................................................................................................... 5
POWER OUTPUT CAPACITY............................................................................................................................................. 7
RECT IFIERS........................................................................................................................................................................ 7
CONVERTERS..................................................................................................................................................................... 7
CONTROL UNIT ................................................................................................................................................................. 8
AC INPUT POWER............................................................................................................................................................. 8
BATTERY CONNECTIONS.................................................................................................................................................. 9
+24V DC DI STRIBUTION................................................................................................................................................. 9
–48 V DC DISTRIBUTION FROM CONVERTERS (OPTIONAL).................................................................................... 10
ENVIRONMENTAL ........................................................................................................................................................... 11
M ECHANICAL.................................................................................................................................................................. 11
COMPLIANCE ................................................................................................................................................................... 11
INSTALLATION PROCEDURES..........................................................................................12
5.1
PREPARATION.................................................................................................................................................................. 12
5.1.1
Recommended Tools...........................................................................................................................................12
5.1.2
Recommended Test Equipment.........................................................................................................................12
5.1.3
Equipment Inspection.........................................................................................................................................12
5.1.4
Safety Precautions...............................................................................................................................................12
5.1.5
Room/Locations...................................................................................................................................................13
5.1.6
Mounting...............................................................................................................................................................13
5.1.7
Ventilation ............................................................................................................................................................14
5.2 AC SERVICE AND GROUND CONNECTIONS................................................................................................................ 14
5.3 BATTERY CONNECTIONS............................................................................................................................................... 15
5.3.1
Battery Disconnect..............................................................................................................................................15
5.3.2
Cable Sizing Considerations.............................................................................................................................16
5.3.3
Connecting the Cables .......................................................................................................................................16
5.4 DC SYSTEM GROUNDING...................................................................................................................................... 16
5.5 RECTIFIER INSTALLATION............................................................................................................................................. 17
5.6 CONVERTER INSTALLATION.......................................................................................................................................... 17
5.7 A LARM CONNECTIONS................................................................................................................................................... 18
5.7.1
External Alarm Inputs........................................................................................................................................19
5.7.2
Alarm Outputs......................................................................................................................................................19
iv
Rev 1
5.8
MX28B-1200+27V PRODUCT MANUAL
CONNECTING THE LOADS ............................................................................................................................................. 20
5.8.1
DC Circuit Breakers...........................................................................................................................................20
5.8.2
Installation of Circuit Breakers........................................................................................................................21
5.8.2.1
5.8.2.2
24V Circuit Breaker Load Connections ...................................................................................................... 21
–48V Circuit Breaker Load Connections .................................................................................................... 21
5.9 BATTERY TEMPERATURE PROBE INSTALLATION ...................................................................................................... 22
5.10 POWER-UP AND CHECKOUT.......................................................................................................................................... 22
5.10.1
Apply AC Power.............................................................................................................................................23
5.10.2
System Parameters Verification/Adjustment.............................................................................................23
5.10.3
Full System Power Up...................................................................................................................................24
6
SETUP, ADJUSTMENTS, AND OPERATION .....................................................25
6.1
6.2
6.3
6.4
6.5
U SER INTERFACE ............................................................................................................................................................ 25
SNMP INTERFACE .......................................................................................................................................................... 26
EXTERNAL A LARM INPUTS........................................................................................................................................... 26
A LARM OUTPUT RELAYS .............................................................................................................................................. 26
PARAMETER LOCATIONS, DESCRIPTIONS, AND DEFAULT VALUES........................................................................ 27
v
Rev 1
MX28B-1200+27V PRODUCT MANUAL
1 GENERAL INFORMATION
1.1 Introduction
DC Power Plants from APC have unique features that make them easy to install, maintain, and
upgrade. The rectifier units are modular and truly “hot-pluggable” into the shelf assembly
without any separate AC wiring.
All system settings are made from the system control unit that provides monitoring and control
functions for each component of the system as well as alarm listings for system diagnosis and
maintenance.
The APC international network of sales and service offices and qualified representatives
provides sales assistance for proposals, purchases, and after-sales support.
APC provides nationwide 24-hour, 7-day service response by dialing:
(800) 800-4APC
This service will answer your call, gather specific service information, and have a qualified APC
service representative contact you as quickly as possible (refer to section on customer service
and support).
1.2 Precautions
It is extremely important to read, understand, and strictly follow the instructions in
sections on installation and setup. Also, please note the special SAFETY PRECAUTIONS
outlined in Section 5.1.4 before beginning actual installation of the power system.
If any precautions are not clearly understood, or local conditions are not covered, contact the
nearest APC representative or APC at (800) 800-4172 for clarification.
Also, refer to all applicable federal, state, and local regulations, and industry guidelines for
correct installation of this power system.
1.3 Inspection upon Receipt of Goods
1.3.1
General
APC has taken precautions in packing the power equipment for shipment to ensure its safe
arrival; however, the entire shipment including any boxes or crates should be inspected upon
receipt for evidence of damage that may have occurred during transit.
1.3.2
Visible External Damage
It is the responsibility of the person receiving the shipment to inventory and inspect all materials
against the bill of lading or waybill provided IMMEDIATELY upon taking delivery while the
carrier representative is STILL ON SITE. Please be sure that all items are accounted for,
including the correct number of pallets and the quantity of accessory and/or component boxes.
Also, note any visible external damage that may have occurred during transit.
If damage has occurred or the quantity of items is not correct, then:
1) Make a descriptive notation on the delivery receipt before signing.
2) File a damage or shortage report with the carrier that delivered the shipment.
1
MX28B-1200+27V PRODUCT MANUAL
1.3.3
Rev 1
Concealed Damage
It is the customer’s responsibility to unpack the power system and equipment received from
APC and check for concealed damage. Within 15 days of receipt, check the materials received
against the detailed packing list to verify that the quantity and condition are complete and
satisfactory.
Again, note any damage to the internal packing material and/or material shortages. If damage or
shortage is noted, then:
1) Request an inspection by the carrier;
2) File a concealed damage claim; and/or
3) File a material shortage claim with your APC representative.
DELAY IN NOTIFYING THE CARRIER MAY RESULT IN LOSS OF RIGHT TO
REIMBURSEMENT FOR DAMAGES OR LOSS.
If you are unsure about the appearance of a part while conducting the materials inventory and
inspection, refer to the manual or contact the Customer Service Department of APC
Should you have any questions concerning potential damages or should you experience a
lack of cooperation from your carrier, please contact your APC representative, or call
APC
1.3.4
Return of Damaged Goods
Should equipment be damaged and require return to APC for repair, the APC service
representative will provide instructions along with a valid returned material authorization
(RMA) number to facilitate return of the damaged goods to the APC repair center.
It is important that the steps outlined in Section 1.3.2 and Section 1.3.3 above are followed
carefully. Your APC representative will assist you, if required, in obtaining proper disposition
of an initial delivery return issue; however, a valid RMA number must be obtained before
returning any equipment to APC.
2
Rev 1
MX28B-1200+27V PRODUCT MANUAL
2 CUSTOMER SERVICE AND SUPPORT
APC manufactures a line power plants and provides customers with complete product and systems
support and service. APC has an international network of factory trained service technicians. The
service organization is on call 24 hours a day, 365 days a year.
If there is a problem with the power system, contact APC at
(800) 800-4APC
Units returned for repair can be turned around within 24 to 48 hours of receipt at the factory
location. Shipment should be sent pre -paid. The unit will be returned pre -paid provided it was
received that way.
An RMA must be obtained for all equipment returned to APC. It is important that correct procedures
be followed in filing an RMA, including providing an accurate written description of the problem.
An accurate written problem description will help ensure that the unit will be properly repaired.
If a unit is returned and a “No Fault Found” results, APC reserves the right to bill the customer for
labor and assess a service charge to cover extra costs incurred.
3 WARRANTY PROVISIONS
3.1 General Provisions
APC warrants the power equipment and components it manufactures or sells against defective
materials and workmanship for a period of TWO (2) YEARS from the date of shipment.
3.1.1
Warranty Returns
If initial physical inspection results in identification of a material or workmanship flaw(s) that could
impair product performance as defined by APC’s electrical and physical specification in effect at the
time of shipment, and if this flaw(s) is not due to transportation damage or installation abuse, contact
APC or call the 24-hour emergency number, (800) 800-4APC, to request assistance.
You will be provided either a) an RMA number with instructions for return of the equipment or
component(s) to the APC factory service center, FOB destination, freight pre-paid, for examination,
or b) for non-returnable systems and equipment, notice to wait until an APC authorized service
representative arrives at the site to inspect the equipment. Repaired or advance replacement modules
or circuit components will normally be available within 24 to 48 hours of receipt of equipment or
RMA.
3.1.2
Warranty Repair or Replacement
If, during the warranty period, the supplied equipment is found to be physically or electrically faulty
due to defective materials or workmanship on the part of APC, the defective product(s) or
component(s) will be repaired or replaced at the sole option of APC without charge to the user for
replacement materials or repair labor. (The procedure outlined above for contacting APC must be
followed.) Costs incurred for replacement installation including, but not limited to, installation
equipment, travel expenses of an APC representative(s), and costs of installation material
transportation expenses are not the responsibility of APC Any replacement product(s) or
component(s) shall only complete the remaining unused portion of the original warranty of the
replaced product(s) or component(s).
3
MX28B-1200+27V PRODUCT MANUAL
Rev 1
3.2 Exclusions and Limitations
1. This warranty applies only to the original US domestic purchaser (user) and is not transferable
internationally, except with expressed written consent from APC facility in Dallas, Texas.
2. APC reserves the right to void the warranty if identification marks or serial numbers have been
removed or tampered with, or the defect is determined to have been caused by misuse, neglect,
improper installation, environmental conditions, non-authorized repair, alteration, or accident.
3. This warranty does not cover physical damage due to the acts of nature or man that stress the
equipment or component(s) beyond design limits and exert undesirable influence aside from
normal wear and tear.
4. APC assumes no responsibility for any work accomplished or expenses incurred except with
expressed written consent from APC
5. APC shall not be liable to the user (purchaser) or any third party for indirect, incidental, or
consequential damages such as, but not limited to, loss of use, loss of profits, costs associated
with removal/installation of a defective product(s) or component(s) arising out of the sale or
relating to the use of this product, and the user (purchaser) assumes responsibility for all personal
injury and property damage resulting from the handling, possession, or use of the product. In no
event shall the liability of APC for any and all claims, including claims of breach of warranty or
negligence, exceed the purchase price of the product that gave rise to the claim.
The above warranty is in lieu of all other remedies, including actions for contract or negligence.
All other warranties, expressed or implied, including but not limited to the implied warranties of
merchantability and fitness for a particular purpose, are hereby excluded.
4
Rev 1
MX28B-1200+27V PRODUCT MANUAL
4 PRODUCT OVERVIEW AND TECHNICAL DESCRIPTION
4.1 Description
The APC Models MX28B1200+27V represents a family of stand-alone +24V DC power plants.
Through the use of modular power, a system is configurable in such a manner that it will support
most typical applications within the specified current range of up to 1200 amps without special
application engineering or assistance. The expansion bay, which will increase the output to 2400
Amps, will be available shortly.
The system is capable of supplying 1200 amps of +24V DC power in a single frame with integrated
power distribution and an advanced control and monitoring module. Standard distribution for a
power bay includes up to 38 plug-in circuit breakers ranging from 1 to 100 amps. An optional +24V
to -48V Converter shelf is available to power up to 80 Amps of –48V loads that can be distributed by
up to 7 circuit breakers. An optional low voltage disconnect (LVD) can be provided on the battery
side. A 1200 amp MX28B+27V with converters is shown in. Figure 4-1. A block diagram is shown
in Figure 4–2
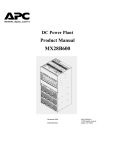
Figure 4-1 MX28B-1200/2400+27V
5
MX28B-1200+27V PRODUCT MANUAL
USER INFRASTRUCTURE
Rev 1
+24V RECTIFIERS
-48V
LOADS
UTILITY
AC
-48V DC/DC
CONVERTERS
-48V BUS
+24V BUS
+24V
LOADS
BATTERY
PLANT
BATTERY
DISCONNECT
LVD
(OPTIONAL)
MASTER
CONTROLLER
WEB/SNMP
INTERFACE
USER
INPUT/OUTPUT
RETURN BUS
BATTERY SHUNT
MX28B-1200 +27
Figure 4-2 MX28B1200/2400+27V System Diagram
6
MAIN GND
BUS
Rev 1
MX28B-1200+27V PRODUCT MANUAL
4.2 Power Output Capacity
A power frame consists of three rectifier shelves, each shelf accommodating up to four hot-plug, 100
amp rectifiers. A completely configured power frame with 12 rectifiers is rated at 1200 amps. The
master control unit provides control and monitoring for the entire system.
The optional converter shelf supports up to eight hot-plug +24/-48V DC/DC converters. Each
converter is rated at 10 Amps.
4.3 Rectifiers
APC Model MRF28H27BV with specifications as follows:
•
Input Voltage:
176-264V ac (230V ac nominal) @ 45-66 Hz
•
Input Current per Rectifier:
13.9 Amps @ 230V ac
•
Apparent Power Factor:
99% Typical, 98% Minimum
•
Output Voltage:
27.2V DC
•
Overvoltage Protection:
Set at 31.5V DC
•
Output Current per Rectifier:
100A Minimum Continuous
•
Power Output per Rectifier:
2800W Continuous, Vin > 198V ac
•
Efficiency:
89% Typical
•
Cooling:
Fan cooled, front to rear airflow
•
Ambient Temperature:
-25°C to 55°C Operational
4.4 Converters
APC Vector Series with specifications as follows:
•
Input Voltage:
+20V DC to +30V DC
•
Input Current per converter:
<30 amps
•
Output Voltage:
-50VDC (-48V DC to –52V DC)
•
Output current per converter:
10 amps
•
Power output per converter:
520 Watts
•
Efficiency:
>85%
•
Cooling:
Fan cooled, front to rear airflow
•
Ambient temperature:
-40°C to 55°C Operational
7
MX28B-1200+27V PRODUCT MANUAL
Rev 1
4.5 Control Unit
The microprocessor-based power system control unit is 1U high (1.75”) and provides control and
monitoring functions. Features implemented are:
•
32-character alphanumeric display (2 lines by 16 characters)
•
LED alarm and status indicators
•
Standard voltage and battery charging control
•
Battery temperature compensation (optional temperature probe)
•
Monitoring of up to 6 shelves of four rectifiers each and up to 8 DC to DC Converters
•
Individual alarm monitoring of 72 breakers
•
Individual alarm monitoring of 16 power distribution fuses
•
Eight alarm / annunciation relays (Major, Minor, and six user defined) with form C contact
outputs
•
Four external alarm inputs (either N.O. or N.C. contacts)
•
Control for two independent Low Voltage Disconnects (LVD’s)
•
WEB/SNMP Interface Card for remote monitoring
4.6 AC Input Power
Each rectifier shelf requires 208/220/240V ac, single -phase, 50/60 Hz, supplied through an external
80-amp breaker. Three Vertical wire conduits in the left rear of the frame provide routing for AC
input power connection of each shelf. The Earth Ground wiring is factory installed to each rectifier
shelf. A power entry box with 3 pilot holes is provided at the top and rear of the frame where AC
wiring conduit can be run. Refer to Figure 4-3.
AC wire conduits (3)
Figure 4.3 Power Entry Box
8
Rev 1
MX28B-1200+27V PRODUCT MANUAL
4.7 Battery connections
Battery connections are made at the top rear of the unit. The +24V and Battery Return buses each
provide two sets of 3/8”-16 holes on 1 inch or 1 ¾ inch centers for connecting two-hole battery cable
lugs. Refer to Figure 4-4.
A battery disconnect breaker is required external to this equipment. The power plant can monitor
auxiliary contacts from this breaker. Battery temperature compensation is available. APC’s master
control unit, in conjunction with the optional temperature monitor sensor cable, is used to implement
this function.
+
-
Figure 4.4 Battery Connections
4.8 +24V DC Distribution
A standard power distribution module can mount up to 38 plug-in circuit breakers providing +24V
power for customer loads. Each breaker row is connected at its center to the +24V DC bus, with each
column having an ampacity of 300A. Connections for the +24V DC loads are located directly above
the corresponding breaker. A typical load connection would utilize a #6 AWG wire with a two-hole
lug on 5/8-inch centers, attached with standard #10-32 mounting screws.
The load return cables for each circuit breaker connect to a return bus directly above the top row of
circuit breakers. The return bus contains a pattern for 40 two-hole #10-32 lugs on 5/8-inch centers.
Figure 4-5 shows the power plant’s DC distribution section.
9
MX28B-1200+27V PRODUCT MANUAL
+24V load supply
Rev 1
Load Return Bus.
Thirty-eight +24V Breakers
Seven -48V Breakers
For DC to DC converters
Figure 4.5 DC Distribution.
4.9 –48 V DC Distribution from Converters (Optional)
Up to eight 24V/-48V dc converters can be used to supply power for –48V loads in increments of 10
Amps each. These converters are mounted at to bottom of the unit. Each converter is powered via a
circuit breaker located directly below. See figure 4.6
Figure 4.6 DC-to-DC Converters.
10
Rev 1
MX28B-1200+27V PRODUCT MANUAL
4.10 Environmental
•
Ambient Temperature:
-4°F to 149°F (-20°C to +65°C) operating
-40°F to 185°F (-40°C to +85°C) storage
•
Humidity:
0% to 85% RH non-condensing operating
0% to 95% RH non-condensing storage
•
Altitude:
Up to10,000 feet (3000m) operating
Up to 33,000 feet (10,000m) storage
4.11 Mechanical
•
Weight:
Power Frame – 550 to 600 lbs. (250 to 272 kg)
Rectifier - 11 lbs. (5 kg.)
Converters – 7.2 lbs. (3.3 kg.)
•
Dimensions
Frame: 84” high x 24.25” wide x 18” deep
(2134 mm x 616 mm x 457 mm)
•
Color:
Dawn Gray (fronts)
4.12 Compliance
•
Safety:
UL-1950 (Pending)
•
NEBS
Level 1 (Pending)
11
MX28B-1200+27V PRODUCT MANUAL
Rev 1
5 INSTALLATION PROCEDURES
5.1 Preparation
5.1.1
5.1.2
Recommended Tools
•
Standard selection of insulated hand tools.
•
Proper tools for crimping the selected cable lugs.
Recommended Test Equipment
•
5.1.3
Digital Multimeter
Equipment Inspection
Remove equipment from packing material and inspect for shipping damage to verify the safety and
operational suitability for the installation site. [Refer to Section 1.3]
5.1.4
Safety Precautions
***** WARNING *****
The power plant is supplied from a nominal 230V AC, 50/60 Hz source. Keep All AC input
enclosure covers in place when the system is operational or energized.
***** CAUTION *****
Handling or touching the controller boards located inside this unit without being electro
statically discharged (grounded to the frame) may cause extensive damage to the electronics.
Before touching or handling the controller boards, it is recommended that an ESD wrist strap be
utilized.
***** WARNING *****
Hazardous energy levels are present on bare conductors in the +24 and -48V DC distribution
connection areas of the plant. Accidental shorting of distribution conductors can cause arcing
and high currents that can cause serious burns or other physical harm.
It is recommended that:
12
•
Any jewelry, rings or watches be removed while working on this equipment.
•
Handles of all wrenches, screwdrivers, cutters and pliers be insulated.
•
Shafts of screwdrivers be wrapped in electrical tape or otherwise insulated.
Rev 1
5.1.5
MX28B-1200+27V PRODUCT MANUAL
Room/Locations
NOTE: The APC Model MX28B1200/2400+27V DC power plant is to be installed in a room,
vault, or similar enclosure that is accessible only to qualified persons in accordance
with the NEC or the authority having jurisdiction.
Prior to installation, drawings, floor loading requirements, external alarm points, AC service entrance,
and grounding schemes should all be checked and confirmed. If batteries are to be mounted in a
room separate from the power plant, careful attention should be paid to battery cable voltage drop
effects. Environmental operating temperatures and ventilation/cooling considerations should also be
noted, not just for the power system but also for all other equipment that may reside in the power
room area.
5.1.6
Mounting
The unit is designed to be bolted to the floor of the housing structure. Figure 5-1 shows the footprint
of the frame and the mounting points with dimensions. Consult the system design specifications to
see if it is necessary to electrically isolate the frame from the floor structure. This is required in many
installations.
Figure 5-1 Floor Mounting Dimensions
13
MX28B-1200+27V PRODUCT MANUAL
5.1.7
Rev 1
Ventilation
The rectifiers have fans that provide front to rear airflow for internal cooling. The MX28B1200
housing should mounted to allow free airflow from the front and out the top of the unit. [Refer to
Section 4.10 for environmental characteristics.]
5.2 AC Service and Ground Connections
***** WARNING *****
Ensure that all of the DC and external AC circuit breakers are in the OFF position prior to
connecting service to the power plant. Confirm that all voltages have be en removed including
any battery sources before proceeding.
The MX28B DC power plant requires the supply of 208/220/240V AC, single -phase, 50/60 Hz power
through individual external 80-amp circuit breakers to the AC input terminal block connections for
each rectifier shelf the system. Each rectifier shelf has four 20-amp breakers, each serving one
rectifier. The AC Grounding wiring, from the Earth terminal block to the individual shelves is factory
installed for each shelf installed. Connections to the AC input connector for each rectifier, is factory
installed.
AC Grounding
wires
Figure 5-2 AC Wiring conduit
14
Figure 5-3 AC Wiring Terminal
Rev 1
MX28B-1200+27V PRODUCT MANUAL
The AC input enclosure, located at the top rear of the MX28B housing, is provided with three pilot
holes in the top for attaching external conduit (Figure 5-4), and three 1-inch conduits exiting the
bottom for AC wire. AC wiring passing through the conduit will be routed through the access
opening in the AC input enclosure into the wiring area where a safety ground bar and rectifier input
terminal blocks are located. The terminal blocks are labeled as “L1” and “L2/N” for connection of the
two AC wires (Figure 5-3). Each terminal block represents connections for all 4 rectifiers in the
shelf.
The suggested wire size for L1, and L2 is #4 AWG rated at 105°C; however, the ambient temperature
and number of wires in a conduit must also be considered in accordance with NEC requirements. Be
sure to follow any local electrical wiring codes. Terminate the ground wire in the AC box at the top of
the unit to the ground terminal block. Continue to run the remaining two wires into the individual
conduits to each rectifier shelf. Connect them to L1, and L2 of the terminal block behind the access
plate.
If the AC input power is provided from a three-phase distribution panel, the circuit breaker positions
should be selected such that the load is balanced as much as possible.
Pilot holes (3)
Figure 5-4
5.3 Battery Connections
5.3.1
Battery Disconnect
An external circuit breaker or fused disconnect (not supplied) is recommended in the positive line (located
at the battery end) to protect the cables from the battery to the MX28B DC power plant. The power plant
can monitor auxiliary contacts from this breaker. Selection of a circuit breaker or fuse for a battery string
should take into account maximum battery short circuit current and cable sizing.
15
MX28B-1200+27V PRODUCT MANUAL
Rev 1
5.3.2 Cable Sizing Considerations
The battery cable(s) should be sized sufficiently large to limit the voltage drop from the MX28B DC
power plant to the battery during charging per system design requirements. The cable (s) must also carry
the full load current during battery operation. If assistance is required to determine the necessary cables
for the application, contact your sales representative or APC.
5.3.3
Connecting the Cables
The battery cable connections are located at the top rear of the unit as shown in Figure 5-5. The battery
negative (return bus) and battery positive (+24V) buses each provide two sets of 3/8”-16 holes on a double
pattern one-inch and 1 ¾-inch centers for connecting two-hole battery cable lugs. Connect the battery
cables as applicable using 3/8”-16 bolts (not provided) and tighten them with a torque wrench to 200 inlbs.
Battery Positive (+)
Battery Negative (-)
Figure 5-5 Battery Connections
***** CAUTION *****
Make certain that the battery polarity is correct when making connections to the Model
MX28B DC power plant. Incorrect connection could cause severe equipment damage.
5.4 DC SYSTEM GROUNDING
THE NEGATIVE LOAD CONNECTION (RETURN BUS) FOR THE POWER PLANT MUST
BE CONNECTED TO THE FACILITY MASTER STATION GROUND. THE
CONNECTION SHOULD BE MADE ON THE RETURN BUS IN THE BASE UNIT
DISTRIBUTION AREA. DETAILS FOR THIS CONNECTION SHOULD BE PROVIDED IN
THE SITE ELECTRICAL GROUNDING PLANS.
16
Rev 1
MX28B-1200+27V PRODUCT MANUAL
5.5 Rectifier Installation
The rectifiers are shipped in separate containers. Follow the procedure below to install a rectifier.
1) Remove the rectifier from its shipping box.
2) Slide the rectifier into the shelf between the guides until fully seated.
3) Fasten the rectifier in place with the rectifier retaining screw included in the shipment.
Since all adjustments are made from the system control unit, no rectifier adjustments are necessary.
NOTE: All “FLOAT” – “BOOST/EQUALISE” switches (one is located on the front of each
rectifier in the system) must be set to “FLOAT” to allow the MX28B to control the
output voltage properly.
5.6 Converter Installation
The converters are also shipped in separate containers.
1) Remove the Converter from its shipping box.
2) Slide the converter into its shelf until fully seated.
3) Tighten the retaining screw mounted on the lower front on the converter.
17
MX28B-1200+27V PRODUCT MANUAL
Rev 1
5.7 Alarm Connections
The alarm connections for all rectifiers, breakers, and fuses are factory pre-wired. The MX28B DC
power plant, however, permits the user to program the system alarms in various ways. A Printed
Circuit (PC) board designated “0P9133” is mounted in the space above the master control unit and
provides terminal block connection points for alarm outputs and alarm inputs (Figure 5-7). These
cage-clamp terminal blocks are operated by pushing back the lever, inserting the wire and then
releasing the lever to clinch the connection. Recommended wire size is #28 AWG to #20 AWG.
Alarm Outputs
Alarm Inputs
Figure 5-8 Alarm Interface PC Board
18
Rev 1
5.7.1
MX28B-1200+27V PRODUCT MANUAL
External Alarm Inputs
Four external alarm inputs with assignable priority levels are availa ble. These alarm inputs respond
to external dry contact closures between normally open (NO) and common (C) or contact openings
between normally closed (NC) and C (see Table 5-1).
External Alarm Source
(non-alarm state)
Connect To Input
Alarm Terminals
OPEN
CLOSED
NO-C
NC-C
Table 5-1. External Alarm Input Definition
Table 5-2 shows the external alarm input connection designations. Connector J4 is located on the
alarm interface board mounted in the space above the control unit. Systems are shipped with jumper
wires connecting each NC and corresponding C contact. A jumper wire should be removed only if
the corresponding NC-C contacts are going to be used.
EXTERNAL
ALARM
INPUT
J4 TERMINAL
DESIGNATION
(NO-NC-C)
USER ALARM NOTES
#1
#2
#3
#4
NO1-NC1-C1
NO2-NC2-C2
NO3-NC3-C3
NO4-NC4-C4
___________________________
___________________________
___________________________
___________________________
Table 5-2. External Alarm Input Connections
5.7.2
Alarm Outputs
There are eight alarms available that provide outputs via Form “C” relay contacts. The last two of
these are pre-assigned as the Minor and Major alarm outputs. The Major relay is energized (NO-C
contacts closed) during normal (non-alarm) operating conditions ; all the other relays energize
when an alarm condition occurs. The other six outputs are initially designated as “Relay 1” through
“Relay 6” (the user may assign more meaningful names if desired). The various system alarm
conditions can be assigned to any of the eight alarm outputs.
Table 5-3 shows the alarm output connection designations. Connectors J1 and J2 are located on the
alarm interface board mounted in the space above the control unit. The relay contacts should only be
used to switch resistive loads of 0.5 amperes or less at 60 volts or less.
19
MX28B-1200+27V PRODUCT MANUAL
ALARM
OUTPUT
Rev 1
TERMINAL
DESIGNATION
NO-NC-C
USER ALARM NOTES
J1
RELAY #1
RELAY #2
RELAY #3
RELAY #4
NO1-NC1-C1
NO2-NC2-C2
NO3-NC3-C3
NO4-NC4-C4
________________________
________________________
________________________
________________________
J2
RELAY #5
RELAY #6
MINOR
MAJOR
NO5-NC5-C5
NO6-NC6-C6
NO7-NC7-C7
NO8-NC8-C8
________________________
________________________
________________________
________________________
Table 5-3. Alarm Output Connections
5.8 Connecting The Loads
5.8.1
DC Circuit Breakers.
Various circuit breakers can be installed in the MX28B power plant for DC distribution circuit
protection. Available plug-in circuit breakers are shown in Table 5-4. Plug-in circuit breakers rated
at 60A or more require two mounting positions and require a breaker adapter kit, which is included
(see kit selection information below the table). The breaker adapter kit includes all necessary
mounting hardware.
*
BREAKER
RATING
PART NUMBER
BREAKER
RATING
PART NUMBER
1A
FFA-0014
40 A
FFA-0020
3A
FFA-0015
50 A
FFA-0025
5A
FFA-0016
60 A
FFA-0021-X *
10 A
FFA-0017
70 A
FFA-0022-X *
15 A
FFA-0028
80 A
FFA-0023-X *
20 A
FFA-0018
100 A
FFA-0024-X *
30 A
FFA-0019
-1: adapter has #10 studs on 5/8” centers for two-hole cable lug
-2: adapter has #10 studs on ¾” centers for two-hole cable lug
-3: adapter has ¼” studs on 1” centers for two-hole cable lug
Table 5-4. Plug-in Circuit Breakers
20
Rev 1
5.8.2
MX28B-1200+27V PRODUCT MANUAL
Installation of Circuit Breakers
1) Remove the metal circuit breaker cover panels.
2) Use diagonal cutters to cut the metal web of the breaker panel “knock-outs” at the desired
breaker locations.
3) Install the circuit breaker(s) by snapping the top terminal onto the upper bus bar and rotating
the unit down until the second terminal snaps onto the breaker termination post as shown in
Figure 5-8. The breaker alarm terminals are designed to make contact with the alarm terminal
board as the breaker is snapped into place.
NOTE: Circuit breaker alarm contacts close when the circuit breaker is tripped but not
when it is turned OFF.
*****
CAUTION
*****
During circuit breaker installation, carefully align the breaker alarm terminals with the alarm terminal
board to avoid breaker terminal damage.
4) Reattach the circuit breaker cover panels.
Figure 5-8 Plug-in Circuit Breaker Insertion
5.8.2.1
24V Circuit Breaker Load Connections
Connections for the +24V DC loads are located directly above the corresponding breaker. A typical
load connection would utilize a #6 AWG wire with a two-hole lug on 5/8-inch centers, attached with
standard #10-32 mounting screws.
The load return cables for each circuit breaker section connect to the return bus directly above the top
row of circuit breakers. These return buses contain patterns for 40 two-hole #10-32 lugs on 5/8-inch
centers.
5.8.2.2
–48V Circuit Breaker Load Connections
Connections for the –48V DC loads are made directly above the corresponding breaker. A typical
load connection would utilize a #6 AWG wire with a two-hole lug on 5/8-inch centers, attached with
standard #10-32 mounting screws.
The load return cables for each circuit breaker section connect to the return bus located above the
upper circuit breakers.
21
MX28B-1200+27V PRODUCT MANUAL
Rev 1
5.9 Battery Temperature Probe Installation
The optional temperature probe is used to monitor the battery string temperature. To get the most
representative temperature measurement, the probe should be placed in contact with a battery cell that
is centrally located. The probe should be placed directly in contact with the cell (not the frame
surrounding the cell). Generally, the cell cover can be used; be careful not to allow the probe body to
touch the terminals.
1) Plug the connector end of the temperature probe into J5 on the left side of the control unit
backplane card in the base power bay.
2) Route the cable as required to position the probe on the selected battery cell
3) Remove the adhesive protection strip from the probe body and press the adhesive side of the
probe on the battery cell cover.
J5
Figure 5-10 J5 Location
5.10 Power-Up and Checkout
Before initiating power-up and checkout, ensure that the following conditions exist:
1) Make sure that the external circuit breaker or fused disconnect protecting the cables from the
battery to the power plant is turned OFF (the battery cables should be connected to the power
plant, but the battery should not be connected).
2) Make sure that all load circuit breakers are turned OFF and all load distribution fuses are
removed.
3) Verify that all rectifiers have been installed.
4) Verify that converters if installed are set to ON and have their respective breakers ON.
22
Rev 1
MX28B-1200+27V PRODUCT MANUAL
5.10.1 Apply AC Power
Turn on the circuit breakers that supply AC power to the rectifier shelves in the MX28B DC power
plant. Turn on the individual 20 Amp circuit breakers for each rectifier on the shelf. The main screen
should appear on the control unit display (see Figure 5-10). The display on the control unit is a 2-line
by 16-characters display. The cursor cycles below the characters of the active selection on the
display. Information shown in the second line of Figure 5-10 that extends beyond 16 characters (to
the right of the “S” in “ALARMS”) can viewed on the control unit display by using the scrolling
controls (refer to Section 6 for operation of the control unit).
NOTE: When AC power is initially applied, there is a 60-second period during which no alarms
are reported.
MX28B1200 24V +
STATUS ALARMS
SYSTEM MODULES BATT PIN OEM
Figure 5-11 Control Unit Display
5.10.2 System Parameters Verification/Adjustment
The MX28B system control unit is delivered with pre-programmed parameter default settings. A
complete listing and description of all system configuration parameters as well as displayable system
status and information is provided in Section 6. Read Section 6 to gain an understanding of and how
to use the operational features provided by the MX28B DC power plant. As a minimum, the
following parameters should be verified and adjusted, if required, before connecting batteries or loads
to the power plant:
1) Battery Float Voltage - default = +27.00V DC (Check the manufacturer’s recommendation
for the batteries being used in the system.)
2) Battery Maximum Recharge Rate - default = 200A. (Bellcore specifications recommend a
maximum charging rate of battery capacity (in Ampere-hours) divided by 20 hours; check the
manufacturer’s recommendation.)
3) System Voltage - measurement ≅ +27.00V DC (This is a measurement by the system of the
DC output bus voltage.)
4) LVD Option - default = “Enable” (If the MX28B does not have an LVD installed, this should
be changed to “Disable”.)
5) Rectifier Information - Check the rectifier information displays to verify that all rectifiers
installed can be viewed on the control unit display and that no rectifier alarms are active.
Section 6 provides location information for these parameters and how to make changes if required.
23
MX28B-1200+27V PRODUCT MANUAL
Rev 1
5.10.3 Full System Power Up
To complete a full system power up, perform the following steps
1) Turn OFF all the circuit breakers that supply AC power to the rectifiers in the MX28B DC
power plant.
2) Turn on the external circuit breaker from the battery to the power plant.
3) Turn on all the circuit breakers that supply AC power to the rectifiers in the MX28B DC
power plant.
4) Load circuit breakers may now be turned on and inserted as required.
24
Rev 1
MX28B-1200+27V PRODUCT MANUAL
6 SETUP, ADJUSTMENTS, AND OPERATION
6.1 User Interface
The MX28B control unit provides a user interface designed with a hierarchical menu that can be
viewed on the 32-character display by “navigating” with the “ï” (left), “ð” (right), “ñ” (up), and
“ò” (down) arrow keys located on the front panel. The selected item on the display is identified by
the cursor cycling beneath its characters.
MX28B1200 24V +
STATUS ALARMS
SYSTEM MODULES BATT PIN OEM
Figure 6-1 Navigating the Menu
The “M” (Modify) key and the arrow keys are used to set parameters and text to customize the system
operation for a specific application. Items that can be modified have "m+" in the upper right corner
of the display. If a security level higher than the one presently set is required to modify the
parameter, "s+" is displayed instead of “m+”. Status, alarms, and information screens have "+" in the
upper right corner of the display (or “#” in the case of rectifier information screens) and cannot be
modified. When AC power is initially applied, there is a 60-second period during which no alarms
are reported.
Pressing the "M" key on the front panel will change the "m+" to "M+", indicating that the parameter
can now be changed using the arrow keys. Some parameters can be changed to other predefined
selections by pressing the up or down arrow keys to display an alternative selection. These
parameters can be recognized after the “M” key is pressed by the cursor cycling beneath the
characters of the selection. For other parameters, such as text and most numeric values, after the “M”
key is pressed the cursor will be displayed under an individual character. The right or left arrow key
is used to position the cursor below the character to be changed and the up or down arrow key is used
to "spin" the digit or letter to the desired value. When the desired changes have been made to an
individual parameter screen, the “M” key is pressed again; the “M+” changes back to “m+” and the
new entry is stored in memory.
If the user plans to make any changes to system parameters, the first item that should be verified or
entered is the appropriate password for the security level required for the parameters to be modified.
Security level 2 enables modification of all variable system parameters; level 1 permits modification
of some parameters; no security is required for viewing status items. The security level password is
entered through the “PIN” screen. If no front panel keys are pressed for 60 minutes, the active
password reverts to “0000” and “¦APC¦” begins to move about the display. Pressing any key
returns the display to normal; the password must be re-entered if system parameters require changes.
25
MX28B-1200+27V PRODUCT MANUAL
Rev 1
The default passwords for level 1 and level 2 are “1111” and “2222”, respectively. There are no
alternate passwords or “backdoors” for accessing the system. A forgotten password may require a
new master controller board, at customer expense.
System control parameters are stored in non-volatile memory and will not be erased when power is
removed for the master control unit. However, if a new program EPROM is installed or a different
device model selected, the system control parameters will be re-initialized to the factory default
settings.
Eleven LEDs are provided on the front panel of the control unit to indicate system status. Three
LEDs grouped together vertically provide overall system status; they are “MAJOR”, “MINOR”, and
“NORMAL”, indicating the presence of a major alarm, a minor alarm, or normal operation. The
other eight LEDs correspond to the active state of each of the alarm output relays and are labeled
“ALM1”···“ALM6”, “MIN”, and “MAJ”.
6.2 SNMP Interface
In addition, the unit’s controller incorporates a 10-base T Ethernet connection to allow remote access
to the system signals, and remote control of certain aspects of its operation. APC’s Manual #9910181 in the form of a CDRom will allow users to set up interface with the user’s Information
Technology System. Simple Network Management Protocol (SNMP) version 1 is supported along
with telnet protocol.
6.3 External Alarm Inputs
The four external alarm inputs (also referred to as “Input Relay Alarms”) can be assigned a priority
and routed or “mapped” to alarm output relays. Available assignments are “Ignore”, “Major”,
“Minor”, and “Relay 1” ··· “Relay 6”. Screens for making the assignments are located at
[SYSTEM/IN-RLY/RLY-MAP]. This special menu notation is explained with an example in
section 6.4
A user defined name or “alias” may also be assigned to each of these input alarms. Screens for
making these assignments are located at [SYSTEM/IN-RLY/ALIAS]. For information on wiring
connections to these inputs refer to Section 5.7.1.
6.4 Alarm Output Relays
There are eight alarm output relays designated Relay 1 through Relay 6, Minor, and Major,
respectively. Various system parameters may be programmed to activate any of these alarm relays
when set thresholds are exceeded or specific conditions occur. The first six relays can also be
assigned a priority and routed or “mapped” to other output alarm relays. Available assignments are
“Ignore”, “Major”, “Minor”, and “Relay 1” ··· “Relay 6”. Screens for making these assignments
are located at [SYSTEM/OUT-RLY/RLY-MAP]. This feature makes it possible for a single alarm
condition to activate multiple alarm output relays including the Minor or Major alarm relay. A user
defined name or “alias” may also be assigned to each of the eight output relay alarms. Screens for
making these assignments are located at [SYSTEM/OUT-RLY/ALIAS]. For information on
making wiring connections to the alarm output relays refer to Section 5.7.2.
26
Rev 1
MX28B-1200+27V PRODUCT MANUAL
6.5 Parameter Locations, Descriptions, and Default Values
The location, description, and factory programmed default value for each of the MX28B system
parameters is found in Table 6-1. The table also shows all of the status and information screens with
typical displays. The location of a parameter screen is shown in brackets, for example:
[SYSTEM/IN-RLY/RLY-MAP]. To find the parameters that can be accessed in this category,
starting from the main menu screen, do the following:
1) Use the right or left arrow keys to position the cycling cursor below “SYSTEM”.
2) Press the down arrow key once.
3) Use the right arrow key to position the cycling cursor below “IN-RLY”.
4) Press the down arrow key once; the cursor will be cycling below “RLY-MAP”.
5) Press the down arrow key (repeatedly if necessary) until the desired parameter screen is
displayed (there are eight parameter screens in this category).
6) After making any desired changes (refer to Section 6.1 for the procedure), to return to the main
menu press the up arrow key repeatedly.
If a parameter requires a level 1 or level 2 security access to permit changes to it, the security level
will be found in braces, i.e. {2}, in the “PARAMETER” column of Table 6-1.
The complete menu structure shown in the order in which it is accessed from the control unit display
is presented in outline form in Figure 6.2. Each indentation to the right represents a menu level below
the indicated title.
27
MX28B-1200+27V PRODUCT MANUAL
Figure 6-2. Control Unit Menu Structure
MX28B120024V
+
STATUS
Sys Voltage
Sys Current
Conv Voltage
Conv Current
Sys Temp
Batt Current
Batt Temp
ALARMS
Alarm Item 1
Alarm Item 2
Alarm Item 3
Alarm Item 4
Alarm Item 5
Alarm Item 6
Alarm Item 7
Alarm Item 8
Alarm Item 9
Alarm Item 10
Alarm Item 11
Alarm Item 12
Alarm Item 13
Alarm Item 14
Alarm Item 15
Alarm Item 16
SYSTEM
SET-ALM
Sys HV Thr
Sys HV Alm
Sys LV Thr
Sys LV Alm
Conv HV Thr
Conv HV Alm
Conv LV Thr
Conv LV Alm
Rect Cfg Alm
Rect 1ofN Alm
Rect 2ofN Alm
Conv Cfg Alm
Conv 1ofN Alm
Conv 2ofN Alm
Sys HT Thr
Sys HT Alm
Sys LT Thr
Sys LT Alm
Hw Sys V Alm
Hw Cnv V Alm
Hw Batt C Alm
28
Rev 1
Rev 1
MX28B-1200+27V PRODUCT MANUAL
(Figure 6-2. Control Unit Menu Structure)
Hw Batt T Alm
Hw Sys T Alm
Hw LVD1 Alm
Hw LVD2 Alm
SETUP
PIN 1
PIN 2
Address 1
Address 2
Address 3
Model
Fahrenheit
Cntrl Rev
FW Version
Display Type
DATE
Date
Time
OUT-RLY
RLY-MAP
Out-Rly 1 Alm
Out-Rly 2 Alm
Out-Rly 3 Alm
Out-Rly 4 Alm
Out-Rly 5 Alm
Out-Rly 6 Alm
Out-Rly 1 Dly
Out-Rly 2 Dly
Out-Rly 3 Dly
Out-Rly 4 Dly
Out-Rly 5 Dly
Out-Rly 6 Dly
ALIAS
Out-Rly 1
Out-Rly 2
Out-Rly 3
Out-Rly 4
Out-Rly 5
Out-Rly 6
Relay Minor
Relay Major
IN-RLY
RLY-MAP
In-Rly 1 Alm
In-Rly 2 Alm
In-Rly 3 Alm
In-Rly 4 Alm
(Figure 6-2. Control Unit Menu Structure)
29
MX28B-1200+27V PRODUCT MANUAL
ALIAS
In-Rly
In-Rly
In-Rly
In-Rly
1
2
3
4
DIAG
Store Cfg
Lamp Test
Test Relay En
Test Relay 1
Test Relay 2
Test Relay 3
Test Relay 4
Test Relay 5
Test Relay 6
Test Min Rly
Test Maj Rly
MODULES
RECT
SET-ALM
Rect
Rect
Rect
Rect
PARAM
Rect
Rect
INFO
Rect
Rect
Rect
Rect
Rect
CL Alm
Stdby Alm
FF Alm
RFA Alm
Fail Safe
Fail Comm
#
#
#
#
#
Curr
CL
Stdby
FF
RFA
Conv
SET-ALM
Conv
Conv
Conv
Conv
PARAM
Conv
Conv
INFO
Conv
Conv
Conv
Conv
Conv
30
CL Alm
Stdby Alm
FF Alm
CFA Alm
Fail Safe
Fail Comm
#
#
#
#
#
Curr
CL
Stdby
FF
CFA
Rev 1
Rev 1
MX28B-1200+27V PRODUCT MANUAL
(Figure 6-2. Control Unit Menu Structure)
CIRBKR
SET-ALM
Cir
Cir
Cir
Cir
Cir
Cir
Bkr
Bkr
Bkr
Bkr
Bkr
Bkr
•
•
•
Cir Bkr
Cir Bkr
Cir Bkr
ALIAS
Cir Bkr
Cir Bkr
Cir Bkr
Cir Bkr
Cir Bkr
Cir Bkr
Cir Bkr
Cir Bkr
•
•
•
Cir Bkr
Cir Bkr
Cir Bkr
1
2
3
4
5
6
Alm
Alm
Alm
Alm
Alm
Alm
70 Alm
71 Alm
72 Alm
1
2
3
4
5
6
7
8
70
71
72
FUSE
SET-ALM
FUSE 1 Alm
FUSE 2 Alm
FUSE 3 Alm
FUSE 4 Alm
FUSE 5 Alm
FUSE 6 Alm
FUSE 7 Alm
FUSE 8 Alm
FUSE 9 Alm
FUSE 10 Alm
FUSE 11 Alm
FUSE 12 Alm
FUSE 13 Alm
FUSE 14 Alm
FUSE 15 Alm
FUSE 16 Alm
(Figure 6-2. Control Unit Menu Structure)
31
MX28B-1200+27V PRODUCT MANUAL
ALIAS
FUSE
FUSE
FUSE
FUSE
FUSE
FUSE
FUSE
FUSE
FUSE
FUSE
FUSE
FUSE
FUSE
FUSE
FUSE
FUSE
1
2
3
4
5
6
7
8
9
10
11
12
13
14
15
16
LVD
SET-ALM
LVD1
LVD1
LVD2
LVD2
PARAM
LVD1
LVD1
LVD2
LVD2
Option
Open Alm
Option
Open Alm
Trip
Reset
Trip
Reset
BATT
SET-ALM
Batt
Batt
Batt
Batt
Batt
Batt
Batt
Batt
Batt
Batt
PARAM
Batt
Batt
COMP
Comp
Comp
Comp
Comp
Disc Thr
Disc Alm
HV Thr
HV Alm
LV Thr
LV Alm
HT Thr
HT Alm
LT Thr
LT Alm
Float
Max Rech
Method
TC
HKnee
Lknee
(Figure 6-2. Control Unit Menu Structure)
32
Rev 1
Rev 1
MX28B-1200+27V PRODUCT MANUAL
PIN
PIN
OEM
OEM
OEM
OEM
OEM
OEM
OEM
R
R
C
C
S
S
Offset
Gain
Offset
Gain
Offset
Gain
33
MX28B-1200+27V PRODUCT MANUAL
Rev 1
Table 6-1. Parameter Locations, Descriptions, and Default Values
PARAMETER
DESCRIPTION
DISPLAY SCREENS /
DEFAULT SETTINGS
SYSTEM SETUP
Password Entry
PIN Entry
[PIN]
Screen for entry of the active password (PIN).
PIN
m+
0000
Password Setup
Level 1 PIN {2}
[SYSTEM/SETUP]
Password (PIN) that permits security Level 1 parameter
changes - limited access.
PIN 1
Level 2 Password {2}
[SYSTEM/SETUP]
Password (PIN) that permits security Level 2 parameter
changes - unlimited access.
PIN 2
OEM R Offset {2}
[OEM]
Voltage offset adjustment for factory calibration of voltage
readings/settings.
OEM R Offset m+
0.000 V
OEM R Gain {2}
[OEM]
Voltage gain adjustment for factory calibration of voltage
readings/settings.
OEM R Gain
m+
1.000 V
OEM C Offset {2}
[OEM]
Voltage offset adjustment for factory calibration of voltage
readings/settings
OEM C Offset m+
0.000 V
OEM C Gain {2}
[OEM]
Voltage gain adjustment for factory calibration of voltage
readings/settings.
OEM C Gain
m+
1.000 V
OEM S Offset {2}
[OEM]
Current offset adjustment for factory calibration of battery
current readings/settings.
OEM S Offset m+
0.0 A
OEM S Gain {2}
[OEM]
Current gain adjustment for factory calibration of battery
current readings/settings.
OEM S Gain
m+
1.000 A
Address 1 {1}
[SYSTEM/SETUP]
Power plant address or identification - first line.
Address 1
APC
Address 2 {1}
[SYSTEM/SETUP]
Power plant address or identification - second line.
Address 2
m+
11035 Switzer Av
Address 3 {1}
[SYSTEM/SETUP]
Power plant address or identification - third line.
Address 3
Dallas, TX.
Model {2}
[SYSTEM/SETUP]
Model name for the DC power plant “reset defaults”
selection will re-initialize to factory settings for model
selected
Model
m+
MX28B 1200 24V
Temperature Scale {1}
[SYSTEM/SETUP]
Enables selection of Fahrenheit or Celsius temperature scale
(Fahrenheit “OFF” displays readings in °C).
Fahrenheit
Control Unit Revision
[SYSTEM/SETUP]
Hardware revision level of the control unit.
Cntrl Rev
+
000002
Firmware Version
[SYSTEM/SETUP]
Version number of the control unit firmware.
NOTE: Actual firmware version number displayed is the
current version as of the date of manufacture.
FW Version
+
000131
m+
1111
m+
2222
OEM Calibration
Site Address/Identification
m+
m+
Control Unit Setup & Info.
34
m+
OFF
Rev 1
MX28B-1200+27V PRODUCT MANUAL
PARAMETER
Display Type
[SYSTEM/SETUP]
DESCRIPTION
DISPLAY SCREENS /
DEFAULT SETTINGS
Type number for the control unit display.
Display Type
+
000255
Date {1}
[SYSTEM/DATE]
Internal system calendar date.
Date
m+
DEC 16 1999
Time {1}
[SYSTEM/DATE]
Internal system clock time (24-hour format).
Time
Date/Time Setup
m+
9:00:25
Alarm Threshold Setup
High Voltage Threshold {1}
[SYSTEM/SET-ALM]
System High voltage alarm threshold.
Sys HV Thr
m+
28.00 V
Low Voltage Threshold {1}
[SYSTEM/SET-ALM]
System Low voltage alarm threshold.
Sys LV Thr
m+
25.00 V
High Voltage Threshold {1}
[SYSTEM/SET-ALM]
Converter High voltage alarm threshold.
Conv HV Thr
m+
-52.00 V
Low Voltage Threshold {1}
[SYSTEM/SET-ALM]
Converter Low voltage alarm threshold.
Conv LV Thr
m+
-48.00 V
High Temperature Threshold {1}
[SYSTEM/SET-ALM]
Over temperature alarm threshold.
Sys HT Thr
m+
70.0 C
Low Temperature T hreshold {1}
[SYSTEM/SET-ALM]
Under temperature alarm threshold.
Sys LT Thr
m+
0.0 C
System Voltage
[STATUS]
System output voltage measured between the MX28B DC
power plant +27V and return buses.
Sys Voltage
+
27.00 V
System Current
[STATUS]
The total system output current (calculated as the sum of the
individual rectifier output currents).
Sys Current
+
1120.8 A
Converter Voltage
[STATUS]
Converter output voltage measured be tween the MX28B DC
power plant -48V and return buses.
Conv Voltage
+
-50.00 V
Converter Current
[STATUS]
The total converter output current (calculated as the sum of
the individual converter output currents).
Conv Current
68.2
System Temperature
[STATUS]
System temperature measured within the control unit. Note:
Will read about -156° C with no probe attached
Sys Temp
Battery Current
[STATUS]
Battery current measured at the current shunt.
Batt Current
+
15.0 A
Battery Temperature
[STATUS]
Battery temperature measured by the optional battery
temperature sensor probe.
Batt Temp
System High Voltage {1}
[SYSTEM/SET-ALM]
System voltage is above the high voltage threshold.
Sys HV Alm
m+
Minor
System Low Voltage {1}
[SYSTEM/SET-ALM]
System voltage is below the low-voltage threshold.
Sys LV Alm
m+
Minor
Converter High Voltage {1}
[SYSTEM/SET-ALM]
Converter voltage is above the high voltage threshold
Conv HV Alm
m+
Minor
System Status
+
A
+
25.2 C
+
25.2 C
System Alarms
35
MX28B-1200+27V PRODUCT MANUAL
Rev 1
Converter Low Voltage {1}
[SYSTEM/SET-ALM]
Converter voltage is below the low-voltage threshold.
Conv LV Alm
m+
Minor
System High Temperature {1}
[SYSTEM/SET-ALM]
The control unit temperature is above the high temperature
threshold.
Sys HT Alm
m+
Minor
System Low Temperature {1}
[SYSTEM/SET-ALM]
The control unit temperature is below the low temperature
threshold.
Sys LT Alm
m+
Minor
Rectifier Configuration {1}
[SYSTEM/SET-ALM]
The rectifier configuration differs from its stored
configuration.
Rect Cfg Alm m+
Minor
Rectifier Fail 1-of-N {1}
[SYSTEM/SET-ALM]
Rectifier Fail 1-of-N alarm - one rectifier has at least one
alarm condition.
Rect 1ofN Alm m+
Minor
Rectifier Fail 2-of-N {1}
[SYSTEM/SET-ALM]
Rectifier Fail 2-of-N alarm – two or more rectifiers have at
least one alarm condition each.
Rect 2ofN Alm m+
Major
Converter Configuration {1}
[SYSTEM/SET-ALM]
The converter configuration differs from its stored
configuration.
Conv Cfg Alm m+
Minor
Converter Fail 1-of-N {1}
[SYSTEM/SET-ALM]
Converter Fail 1-of-N alarm - one rectifier has at least one
alarm condition.
Conv 1ofN Alm m+
Minor
Converter Fail 2-of-N {1}
[SYSTEM/SET-ALM]
Converter Fail 2-of-N alarm – two or more rectifiers have at
least one alarm condition each
Conv 2ofN Alm m+
Major
Hardware System Voltage {2}
[SYSTEM/SET-ALM]
This alarm indicates there is a hardware failure in the system
voltage monitoring function.
Hw Sys V Alm m+
Minor
Converter System Voltage {2}
[SYSTEM/SET-ALM]
This alarm indicates there is a hardware failure in the
converter voltage monitoring function.
Hw Cnv V Alm m+
Minor
Hardware Battery Current {2}
[SYSTEM/SET-ALM]
This alarm indicates there is a hardware failure in the battery
current monitoring fun ction.
Hw Batt C Alm m+
Minor
Hardware Battery Temperature {2}
[SYSTEM/SET-ALM]
This alarm indicates there is a hardware failure in the battery
temperature monitoring function.
Hw Batt T Alm m+
Minor
Hardware System Temperature {2 }
[SYSTEM/SET-ALM]
This alarm indicates there is a hardware failure in the system
temperature monitoring function.
Hw Sys T Alm m+
Minor
Hardware LVD1 {2}
[SYSTEM/SET-ALM]
This alarm indicates there is a conflict between the
commanded and sensed positions of the LVD1.
Hw LVD1 Alm
m+
Minor
Hardware LVD2 {2}
[SYSTEM/SET-ALM]
This alarm indicates there is a conflict between the
commanded and sensed positions of the LVD2.
Hw LVD2 Alm
m+
Minor
Display of up to 16 active alarms (a typical alarm screen is
shown).
Alarm Item 1
+
Batt LV Alm On m
SYSTEM ALARMS DISPLAY
Alarms Item 1
[ALARMS]
•
•
Alarms Item 16
[ALARMS]
•
•
•
•
Display of up to 16 active alarms (a typical alarm screen is
shown).
Alarm Item 16
Store Configuration {1}
[SYSTEM/DIAG]
Setting this parameter to “Enable” will cause the current
rectifier configuration to be stored (the display toggles back
to “Disable” after entry).
Store Cfg
m+
Disable
Lamp Test {1}
[SYSTEM/DIAG]
Setting Lamp Test to “ON” will turn on the “MAJOR”,
“MINOR”, “NORMAL”, “MAJ”, and “MIN” LEDs on the
control unit front panel.
Lamp Test
+
SYSTEM DIAGNOSTICS
36
m+
OFF
Rev 1
MX28B-1200+27V PRODUCT MANUAL
Test Relay Enable {1}
[SYSTEM/DIAG]
This parameter must be set to “Enable” to permit the eight
output relays to be manually tested; otherwise, the state of the
relays will be per system conditions.
Test Relay En m+
Disable
Test Relay 1 {1}
[SYSTEM/DIAG]
Setting this parameter to “ON” energizes Relay 1 and turns
on the “ALM1” LED on the control unit front panel.
Test Relay 1 m+
OFF
•
•
•
•
•
•
•
•
•
Test Relay 6 {1}
[SYSTEM/DIAG]
Setting this parameter to “ON” energizes Relay 6 and turns
on the “ALM6” LED on the control unit front panel.
Test Relay 6 m+
OFF
Test Minor Relay {1}
[SYSTEM/DIAG]
Setting this parameter to “ON” energizes the Minor Relay
and turns on the “MIN” LED on the control unit front panel.
Test Min Rly m+
OFF
Test Major Relay {1}
[SYSTEM/DIAG]
Setting this parameter to “ON” de -energizes the Major Relay
and turns on the “MAJ” LED on the control unit front panel.
Test Maj Rly m+
OFF
Float Voltage {1}
[BATT/PARAM]
Float voltage at 25°C bat tery temperature.
Batt Float
m+
27.00 V
Maximum Recharge Current {1}
[BATT/PARAM]
Maximum battery recharge current (the system limits the
charging current to this programmable value).
Batt Max Rech m+
100A
Compensation Method {1}
[BATT/COMP]
Activate “000001” or de -activate “000000” battery
temperature compensation.
Comp Method
m+
000000
Temperature Compensation {1}
[BATT/COMP]
Temperature compensation between low knee and high knee
in mV/cell/°C. (Compensation equals zero at 25°C.)
Comp TC
Compensation High Knee {1}
[BATT/COMP]
The temperature compensation high knee is the point above
which there is no additional battery voltage compensation for
further increases in temperature.
Comp Hknee
Compensation Low Knee {1}
[BATT/COMP]
The temperature compensation low knee is the point below
which there is no additional battery voltage compensation for
further decreases in temperature.
Comp Lknee
Discharge Threshold {1}
[BATT/SET-ALM]
An alarm is generated if the battery discharge current exceeds
this value.
Batt Disc Thr m+
100 A
High Voltage Threshold {1}
[BATT/SET-ALM]
An alarm is generated if the magnitude of the battery voltage
rises above this value.
Batt HV Thr
m+
28.00 V
Low Voltage Threshold {1}
[BATT/SET-ALM]
An alarm is generated if the magnitude of the battery voltage
drops below this value.
Batt LV Thr
m+
22.00 V
High Temperature Threshold {1}
[BATT/SET-ALM]
An alarm is generated if the battery temperature exceeds this
value.
Batt HT Thr
m+
70.0 C
Low Temperature Threshold {1}
[BATT/SET-ALM]
An alarm is generated if the battery temperature drops be low
this value.
Batt LT Thr
BATTERY SETUP
m+
- 3.00mV
m+
40.0 C
m+
0.0 C
m+
0.0 C
37
MX28B-1200+27V PRODUCT MANUAL
Rev 1
(Table 6-1. Parameter Locations, Descriptions, and Default Values)
PARAMETER
DESCRIPTION
DISPLAY SCREENS /
DEFAULT SETTINGS
Battery Alarms
Discharge Alarm {1}
[BATT/SET-ALM]
An alarm that is ge nerated if the battery discharge current
exceeds the programmed battery discharge threshold.
Batt Disc Alm m+
Minor
High Voltage Alarm {1}
[BATT/SET-ALM]
An alarm that is generated if the magnitude of the battery
voltage rises above the high voltage threshold.
Batt HV Alm
m+
Minor
Low Voltage Alarm {1}
[BATT/SET-ALM]
An alarm that is generated if the magnitude of the battery
voltage drops below the low voltage threshold.
Batt LV Alm
m+
Minor
High Temperature Alarm {1}
[BATT/SET-ALM]
An alarm that is generated if the battery temperature exceeds
the high temperature threshold.
Batt HT Alm
m+
Minor
Low Temperature Alarm {1}
[BATT/SET-ALM]
An alarm that is generated if the battery temperature drops
below the low temperature threshold.
Batt LT Alm
m+
Minor
Fail Safe Voltage {1}
[MODULES/RECT/PARAM]
Rectifier default output voltage if communication with the
control unit fails.
Rect Fail Safem+
27.00 V
Communications Timeout {1}
[MODULES/RECT/PARAM]
The maximum rectifier communications response time
allowed before a communications failure is declared.
Rect Fail Commm+
1 min
RECTIFIER SETUP
Rectifier Information
NOTE: This information can be viewed for each rectifier
installed by using the horizontal arrow keys.
Rectifier Current
[MODULES/RECT/INFO]
A display of the DC output current for the individual
rectifier.
Rect 1 Curr
#
24.9 A
Current Limit Alarm
[MODULES/RECT/INFO]
The status will be “ON” if the rectifier has been forced into
its current limited mode.
Rect 1 CL
Standby Alarm
[MODULES/RECT/INFO]
The status will be “ON” if the control unit is holding the
rectifier in the standby mode.
Rect 1 Stdby
#
OFF
Fan Fail Alarm
[MODULES/RECT/INFO]
The status will be “ON” if the rectifier fan has failed.
Rect 1 FF
Rectifier Fault Alarm (RFA)
[MODULES/RECT/INFO]
The status will be on if the rectifier output has failed.
#
OFF
#
OFF
Rect 1 RFA
#
OFF
Rectifier Alarms
Current Limit Alarm {1}
[MODULES/RECT/SET-ALM]
38
This alarm indicates that a rectifier has been forced into the
current limited mode.
Rect CL Alm
m+
n of N
Rev 1
MX28B-1200+27V PRODUCT MANUAL
(Table 6-1. Parameter Locations, Descriptions, and Default Values)
PARAMETER
DESCRIPTION
DISPLAY SCREENS /
DEFAULT SETTINGS
Standby Alarm {1}
[MODULES/RECT/SET-ALM]
This alarm indicates that the control unit is holding a rectifier
in the standby mode.
Rect Stdby Almm+
n of N
Fan Fail Alarm {1}
[MODULES/RECT/SET-ALM]
This alarm indicates that a rectifier fan has failed.
Rect FF Alm
m+
n of N
RFA Alarm {1}
[MODULES/RECT/SET-ALM]
This alarm indicates that a rectifier output has failed.
Rect RFA Alm m+
n of N
Fail Safe Voltage {1}
[MODULES/CONV/PARAM]
Converter default output voltage if communication with the
control unit fails.
Conv Fail Safem+
-50.00 V
Communications Timeout {1}
[MODULES/CONV/PARAM]
T he maximum converter communications response time
allowed before a communications failure is declared.
Conv Fail Commm+
1 min
Converter Information
NOTE: This information can be viewed for each
converter installed by using the horizontal arrow keys.
CONVERTER SETUP
Converter Current
[MODULES/CONV/INFO]
A display of the DC output current for the individual
Converter.
Conv 1 Curr
#
7.9 A
Current Limit Alarm
[MODULES/CONV/INFO]
The status will be “ON” if the Converter has been forced into
its current limited mode.
Conv 1 CL
Standby Alarm
[MODULES/CONV/INFO]
The status will be “ON” if the control unit is holding the
Converter in the standby mode.
Conv 1 Stdby
#
OFF
Fan Fail Alarm
[MODULES/CONV/INFO]
The status will be “ON” if the Converter fan has failed.
Conv 1 FF
Converter Fault Alarm (CFA)
[MODULES/CONV/INFO]
The status will be on if the Converter output has failed.
#
OFF
#
OFF
Conv 1 CFA
#
OFF
Converter Alarms
Current Limit Alarm {1}
[MODULES/CONV/SET-ALM]
This alarm indicates that a converter has been forced into the
current limited mode.
Conv CL Alm
m+
n of N
Standby Alarm {1}
[MODULES/CON/SET-ALM]
This alarm indicates that either the control unit is holding a
converter in the standby mode or an operator has set a
converter to standby
Conv Stdby Almm+
n of N
Fan Fail Alarm {1}
[MODULES/CON/SET-ALM]
This alarm indicates that a converter fan has failed.
Conv FF Alm
m+
n of N
CFA Alarm {1}
[MODULES/CON/SET-ALM]
This alarm indicates that a converter output has failed.
Conv CFA Alm m+
n of N
An alternate name (alias) that can be assigned to a circuit
breaker if desired.
Cir Bkr 1
+24V
CIRCUIT BREAKER SETUP
Breaker 1 Alias {1}
[MODULES/CIRBKR/ALIAS]
•
•
•
•
m+
•
•
39
MX28B-1200+27V PRODUCT MANUAL
•
Breaker 72 Alias {1}
[MODULES/CIRBKR/ALIAS]
Rev 1
•
•
An alternate name (alias) that can be assigned to a circuit
breaker if desired.
Cir Bkr 72
+24V
An alarm that indicates Circuit Breaker 1 is tripped.
Cir Bkr 1 Alm m+
Major
m+
Circuit Breaker Alarms
Breaker 1 Tripped {1}
[MODULES/CIRBKR/SET-ALM]
•
•
•
Breaker 72 Tripped {1}
[MODULES/CIRBKR/SET-ALM]
•
•
•
•
•
•
An alarm that indicates Circuit Breaker 24 is tripped.
Cir Bkr 72 Almm+
Major
An alternate name (alias) that can be assigned to a Fuse 1 if
desired.
FUSE 1
+24V
FUSE SETUP
Fuse 1 Alias {1}
[MODULES/FUSE/ALIAS]
+
•
•
•
•
•
•
•
•
•
Fuse 16 Alias {1}
[MODULES/FUSE/ALIAS]
An alternate name (alias) that can be assigned to a Fuse 16 if
desired.
FUSE 16
+24V
An alarm that indicates Fuse 1 is blown.
FUSE 1 Alm
m+
Major
+
FUSE Fuse Alarms
Fuse 1 Blown {1}
[MODULES/FUSE/SET-ALM]
•
•
•
Fuse 16 Blown {1}
[MODULES/FUSE/SET-ALM]
•
•
•
•
•
•
An alarm that indicates Fuse 16 is blown.
FUSE 16 Alm
m+
Major
An alternate name (alias) can be assigned to the relay if
desired.
In-Rly 1
m+
Input Relay 1
INPUT RELAY SETUP
Input Relay 1 Alias {1}
[SYSTEM/IN-RLY/ALIAS]
•
•
•
Input Relay 4 Alias {1}
[SYSTEM/IN-RLY/ALIAS]
•
•
•
•
•
•
An alternate name (alias) can be assigned to the relay if
desired.
In-Rly 4
m+
Input Relay 4
An alarm activated in response to an external contact closure
or opening at the Input Relay 1 connection.
In-Rly 1 Alm m+
Ignore
•
•
•
•
•
•
Input Relay Alarms
Input Relay 1 {1}
[SYSTEM/IN-RLY/RLY-MAP]
•
•
•
40
Rev 1
MX28B-1200+27V PRODUCT MANUAL
Input Relay 4 {1}
[SYSTEM/IN-RLY/RLY-MAP]
An alarm activated in response to an external contact closure
or opening at the Input Relay 4 connection.
In-Rly 4 Alm m+
Ignore
An alternate name (alias) can be assigned to the relay if
desired.
Out-Rly 1
Relay 1
OUTPUT RELAY SETUP
Output Relay 1 Alias {1}
[SYSTEM/OUT-RLY/ALIAS]
•
•
•
•
•
•
m+
•
•
•
Output Relay 6 Alias {1}
[SYSTEM/OUT-RLY/ALIAS]
An alternate name (alias) can be assigned to the relay if
desired.
Out-Rly 6
Relay 6
m+
Output Relay Minor Alias {1}
[SYSTEM/OUT-RLY/ALIAS]
An alternate name (alias) can be assigned to the relay if
desired.
Relay Minor
Minor
m+
Output Relay Major Alias {1}
[SYSTEM/OUT-RLY/ALIAS]
An alternate name (alias) can be assigned to the relay if
desired.
Relay Major
Major
m+
Output Relay 1 Delay {1}
[SYSTEM/OUT-RLY/RLY-MAP]
Delay between sensing of the alarm condition and activation
of the alarm relay. An alarm condition must exist for longer
than the delay to be activated.
Out-Rly 1 Dly m+
0 sec
•
•
•
•
•
•
Delay between sensing of the alarm condition and activation
of the alarm relay. An alarm condition must exist for longer
than the delay to be activated.
Out-Rly 6 Dly m+
0 sec
Output Relay 1 alarm can be “mapped” to activate other
output relays (“Ignore” activates no additional relays).
Out-Rly 1 Alm m+
Ignore
•
•
•
Output Relay 6 Delay {1}
[SYSTEM/OUT-RLY/RLY-MAP]
Output Relay Alarms
Output Relay 1 {1}
[SYSTEM/OUT-RLY/RLY-MAP]
•
•
Output Relay 6 {1}
[SYSTEM/OUT-RLY/RLY-MAP]
•
•
•
•
Output Relay 6 alarm can be “mapped” to activate other
output relays (“Ignore” activates no additional relays).
Out-Rly 6 Alm m+
Ignore
LVD1 Trip {1}
[MODULES/LVD/PARAM]
LVD1 trip (disconnect) threshold voltage.
LVD1 Trip
LVD1 Restore {1}
[MODULES/LVD/PARAM]
LVD1 restore (reconnect) threshold voltage.
LVD1 Reset
m+
24.00 V
LVD2 Trip {1}
[MODULES/LVD/PARAM]
LVD2 trip (disconnect) threshold voltage.
LVD2 Trip
LVD2 Restore {1}
[MODULES/LVD/PARAM]
LVD2 restore (reconnect) threshold voltage.
LVD2 Reset
m+
24.00 V
LVD SETUP
m+
21.00 V
m+
21.00 V
41
MX28B-1200+27V PRODUCT MANUAL
Rev 1
LVD Alarm
42
LVD1 Option {1}
[MODULES/LVD/SET-ALM]
Set to “Enable” if the unit has an LVD1.
LVD1
LVD1 Alarm {1}
[MODULES/LVD/SET-ALM]
Sets the priority or “mapping” of an LVD1 Alarm.
LVD1 Open Alm m+
Minor
LVD2 Option {1}
[MODULES/LVD/SET-ALM]
Set to “Enable” if the unit has an LVD2.
LVD2
LVD2 Alarm {1}
[MODULES/LVD/SET-ALM]
Sets the priority or “mapping” of an LVD2 Alarm.
LVD2 Open Alm m+
Minor
Option m+
Enable
Option m+
Enable