Transcript
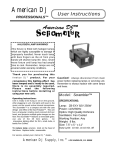
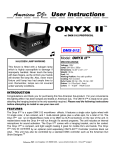
American DJ User Instructions
®
QUADRA FORCE/SYS™
CAUTION! Read instructions before installing or plugging unit in.
DO NOT mount near any flammable surface -- Operate in well ventilated area.
SPECIFICATIONS:
“QUADRA FORCE™”
Weight:
Size:
Lamp:
Fuse:
Supply Voltage:
Working Position:
Colors:
9lbs. (master), 8lbs. Slaves
6"H x 11.5"W x 12.75"L
EXY 82V 250W
10A GMA
120V
Any Safe position
Multiple Dichroic Colored
Moonflower Effect
HALOGEN LAMP WARNING!
This fixture is fitted with halogen lamps
which are highly susceptible to damage if improperly handled. Never
touch lamp with bare fingers as the oil
from your hands will shorten lamp life.
Also, never move fixture until lamp has
had ample time to cool. Remember,
lamps are not covered under warranty
conditions.
Operating Instructions:
The Quadra Force/SYS is designed to operate as a complete 4-unit lighting system, consisting of 1 master and 3
slave units. Each lightweight unit is a multi-dichroic rotating moonflower effect, projecting a different gobo in
multiple beams of rich color. The three slave units plug directly into the master to perform a sound-activated
chasing light show.
Verify Package Contents:(1) Master Unit - Equipped with three AC input jacks on the rear panel
(3) Slave Units - Each equipped with one AC input jack on the rear panel (3) Computer-style AC cords of varied
lengths. Once the three slaves have been connected to the master, plug the master unit into a standard 110V
power supply. Each unit has been lamped and is ready for operation. Turn the knob on the rear panel of the
master to adjust for the desired level of audio sensitivity. Note: If the audio sensitivity is turned all the way down
or if there is no sound, the units will not chase; instead, the effect will remain fixed on one unit, which will cause
overheating and damage to that unit.
To focus a unit, loosen the two Phillips screws on the bottom panel which hold the lens in place. Slide the lens
forward or backward until you achieve proper focus. Tighten screws.
Caution! Never open unit when in use. Always disconnect main power before serving or replacing lamp.
Always replace with same lamp and fuse.
Lamp Replacement
Unplug the unit and allow it to cool down. Remove finger screw on the top panel and its attached door.
Remove the bad lamp from the socket and slide it up through the retaining clips. Replace lamp, being careful
not to touch lamp with bare fingers. Reassemble.
Please fill out and send the enclosed warranty card to ensure proper registration of this product. Contact your
authorized American DJ dealer for service.
American DJ . Los Angeles, CA. 90058 USA
®