1
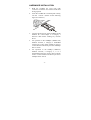
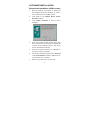
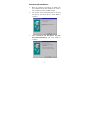
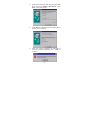
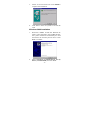
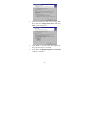
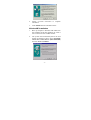
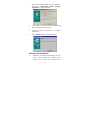
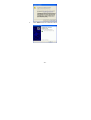
CardBus 10/100 Fast
Ethernet PC Card
Quick Installation Guide
HARDWARE INSTALLATION
1.
Hold the CardBus PC Card with wide
connector toward the slot and the brand label
facing upward.
2.
Insert the CardBus PC Card and push it firmly
into the bottom. (Please see the following
figure for reference)
N otebook
Po
3.
we
C
rA
T
NK
LI
Connect the RJ-45 port of the CardBus 10/100
Ethernet PC Card Adapter to a Category 5
Network cable before loading any network
driver.
For operation in the 100Mbps (100Base-TX)
Ethernet network, a Category 5 unshielded
twisted pair (UTP) cable should be used to
connect between the RJ-45 port and a 100Mbps
hub or switch.
For operation in the 10Mbps (10Base-T)
Ethernet network, a Category 3, 4 or 5
unshielded twisted pair (UTP) cable could be
used to connect between the RJ-45 port and a
10Mbps hub or switch.
-1-
SOFTWARE INSTALLATION
Windows 95 Installation (OSR2 or later)
1.
Boot up computer to Windows 95. Make sure
the CardBus 10/100 Fast Ethernet PC Card is
well connected to the CardBus Socket.
2.
Click Next in the Update Device Driver
Wizard Windows.
3.
Click Others Locations to select a driver
manually.
4.
Insert the installation disk into the floppy disk
drive and type A:\ (Assumed A:\) to specify the
location of the installation driver. The driver
will be installed automatically.
5.
Insert the original Windows 95 CD/disks to
reset the system as requested.
6.
For the first installation, please select Network
in the Control Panel window to add Protocols,
Client and Service if needed.
7.
Restart the system to activate the card.
-2-
Windows 98 Installation
1.
Boot up computer to Windows 98. Make sure
the CardBus 10/100 Fast Ethernet PC Card is
well connected to the CardBus Socket.
2.
The system will automatically detect the card
and ask for the device driver. Click Next to
continue.
3.
Select Search for the best driver for your
device(Recommended) and click Next to
continue.
-3-
4.
Insert the installation disk into the floppy disk
drive and select Floppy disk drives. Click
Next to start the search.
5.
Click Next to continue when the suitable driver
for the device selected.
6.
Insert the original Windows 98 CD/disks to
reset the system as requested. Click OK to
continue.
-4-
7.
Follow on-screen instruction. Click Finish to
complete the installation.
8.
Click Yes to restart the system to activate the
card.
Windows 2000 Installation
1.
When the CardBus 10/100 Fast Ethernet PC
Card is well connected to the CardBus Socket,
the system will detect automatically the card
and ask for the necessary device driver. Click
Next to continue.
2.
Select Search for a suitable driver for my
device (recommended) and click Next.
-5-
3.
Insert the installation disk into the floppy disk
drive and select Floppy disk drives and click
Next to start the search.
4.
Click Next to continue when the appropriate
driver for the device is selected.
5.
Click Yes in the Digital Signature Not Found
window to continue.
-6-
6.
Follow on-screen instruction to complete
installation.
7.
Click Finish when the installation done.
Window ME Installation
1.
Boot up computer to Windows ME. Make sure
the CardBus 10/100 Fast Ethernet PC Card is
well connected to the CardBus Socket.
2.
The system will automatically detect the card
and ask for the device driver. Select Automatic
search for a better driver (Recommended)
and click Next to continue.
-7-
3.
Insert the installation disk into the disk drive
and select Removable Media (Floppy,
CD-ROM…) and click Next.
4.
Click Next to continue when the appropriate
driver for the device is selected.
5.
Follow on-screen instruction to complete
installation.
6.
Click Finish when the installation done.
Windows XP Installation
1.
Windows will detect automatically the new
device which being well connected and
prompt you to insert the network device
-8-
driver. Click Install from a list or specific
location… and click next to continue.
2.
Insert the installation disk into the floppy disk
driver. Select Search for the removable
media(floppy, CD-ROM…) and click Next
to proceed.
3.
Windows will start searching for the
appropriate driver for the installation. When
the screen instruction appears as below, click
Continue Anyway to proceed.
-9-
4.
Click Finish when the installation done.
- 10 -