1
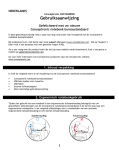
NEDERLANDS
Conceptronic C7USB2
Snelstartgids
Gefeliciteerd met uw nieuwe
Conceptronic 7-poorts USB 2.0 hub.
In deze gebruiksaanwijzing vindt u stap-voor-stap instructies voor de installatie van de
Conceptronic 7-poorts USB 2.0 hub.
Bij problemen kunt u het beste naar onze support-site gaan (www.conceptronic.net - klik op
‘Support’). Daar vindt u een database met veel gestelde vragen (FAQ).
Als u een vraag over dit product heeft die niet op onze website wordt beantwoord, kunt u
ons gerust e-mailen op [email protected].
Ga voor meer informatie over Conceptronic producten naar de Conceptronic website:
www.conceptronic.net.
1. Inhoud verpakking
U vindt de volgende items in de verpakking van de Conceptronic 7-poorts USB 2.0 hub:
•
•
•
•
•
Conceptronic 7-poorts USB 2.0 hub
Kabel USB-A naar mini-USB
Netvoeding 5V 2500 mA
Meertalige snelstartgids
Garantiekaart
1
NEDERLANDS
2. Hardware installeren
De USB-hub kan zonder netvoeding werken, maar we raden u sterk aan deze toch te
gebruiken. Als u de netvoeding niet gebruikt, worden alleen USB-apparaten ondersteund die
weinig stroom gebruiken (zoals flashgeheugenstations, toetsenborden, etc).
A.
B.
C.
Sluit eerst de netvoeding aan op de gelijkstroomingang van de USB-hub; sluit de
netvoeding vervolgens aan op een stopcontact.
Sluit de USB-kabel aan tussen de computer en de USB-hub. De hub wordt automatisch
gevonden en in uw besturingssysteem geïnstalleerd; er zijn geen aanvullende
stuurprogramma's nodig.
Nadat het apparaat is geïnstalleerd, kunt u uw USB-apparaten op uw USB-hub
aansluiten. Afhankelijk van de aangesloten USB-apparaten kan het nodig zijn om
aanvullende stuurprogramma's te installeren.
Uw Conceptronic 7-poorts USB 2.0 hub is nu klaar voor gebruik!
2
ENGLISH
Conceptronic C7USB2
Quick Installation Guide
Congratulations on the purchase of your
Conceptronic 7 Port USB 2.0 Hub.
This Quick Installation Guide gives you a step-by-step explanation of how to install the
Conceptronic 7 Port USB 2.0 Hub.
When problems occur, we advise you to go to our support-site (go to www.conceptronic.net
and click ‘Support’). Here you will find the Frequently Asked Questions Database.
When you have other questions about your product and you cannot find it at our website,
please contact us by e-mail: [email protected]
For more information about Conceptronic products, please visit the Conceptronic Web Site:
www.conceptronic.net
1. Package contents
The following items should be present in the package of the Conceptronic 7 Port USB 2.0
Hub.
•
•
•
•
•
Conceptronic 7 Port USB 2.0 Hub
USB-A to mini-USB cable
Power supply 5V, 2500mA
Multilanguage Quick Installation Guide
Warranty Card
3
ENGLISH
2. Hardware installation
The USB Hub can work without AC/DC power supply, but it is strongly recommended to use
the power supply. When not using the AC/DC power supply only low power USB devices are
supported. (such as flashdrives, keyboards, etc).
A.
B.
C.
First of all, connect the plug of the power adapter to the power jack of the USB Hub
and connect the power supply to a wall outlet.
Connect the USB cable to the computer and to the USB Hub. The USB Hub will be
automatically found and installed in your operating system, no additional drivers are
needed.
When the device is installed you can connect your USB devices to your USB Hub.
Depending on your USB device you might need to install a driver for the USB device.
Your Conceptronic 7 port USB 2.0 Hub is now ready to use!
4
ESPAÑOL
C7USB2 de Conceptronic
Guía de instalación rápida
Felicidades por la compra de su
Hub USB 2.0 de 7 puertos de Conceptronic.
Esta Guía de instalación rápida le indica detalladamente cómo instalar el Hub USB 2.0 de 7
puertos de Conceptronic.
Si se producen problemas, le aconsejamos que consulte a nuestro servicio técnico (en
www.conceptronic.net y haga clic en “Support”). Aquí encontrará la base de datos de las
preguntas más frecuentes o FAQ.
Si tiene otras preguntas sobre su producto y no las encuentra en nuestro sitio web, póngase
en contacto con nosotros por correo electrónico: [email protected]
Si desea información adicional sobre los productos de Conceptronic, visite nuestro sitio web:
www.conceptronic.net
1. Contenido del paquete
El paquete del Hub USB 2.0 de 7 puertos de Conceptronic incluye los elementos siguientes:
•
•
•
•
•
Hub USB 2.0 de 7 puertos de Conceptronic
Cable USB-A a mini USB
Adaptador de alimentación (5 V, 2500 mA)
Guía de instalación rápida multilingüe
Tarjeta de garantía
5
ESPAÑOL
2. Instalación del hardware
El Hub USB funciona sin fuente de alimentación AC/DC, pero es muy recomendable utilizarla.
En caso de no utilizar dicha fuente de alimentación, sólo son aptos dispositivos USB que
consumen poca energía (como unidades de memoria flash, teclados, etc).
A.
B.
C.
En primer lugar, conecte el enchufe del adaptador de corriente al conector del Hub
USB. A continuación, conecte la fuente de alimentación a un enchufe de pared.
Conecte el cable USB al ordenador y al Hub USB. El ordenador detectará e instalará
automáticamente el Hub USB en su sistema operativo. No se necesitan drivers
adicionales.
Una vez instalado el Hub USB, podrá conectar a éste sus dispositivos USB. En función de
su dispositivo USB, es posible que necesite instalar un driver para dicho dispositivo.
Su Hub USB 2.0 de 7 puertos de Conceptronic ya está listo para su uso
6
DEUTSCH
Conceptronic C7USB2
Schnellinstallationsanleitung
Wir gratulieren Ihnen zum Kauf Ihres
Conceptronic USB 2.0 7-Port Hubs.
In beiliegender Schnellinstallationsanleitung wird Ihnen Schritt für Schritt gezeigt, wie der
Conceptronic USB 2.0 7-Port Hub installiert werden muss.
Wenn Probleme auftreten sollten, besuchen Sie unsere Support-Seite (unter
www.conceptronic.net) und klicken Sie auf ‚Support’. Dort steht Ihnen unsere FAQDatenbank mit den häufig gestellten Fragen zur Verfügung.
Wenn Sie weitere Fragen zu Ihrem Produkt haben, die Sie auf unserer Webseite nicht
beantworten können, kontaktieren Sie uns bitte per E-Mail: [email protected]
Detaillierte Informationen über Conceptronic Produkte finden Sie auf unserer Webseite:
www.conceptronic.net
1. Packungsinhalt
Folgendes ist in der Verpackung des Conceptronic USB 2.0 7-Port Hubs enthalten:
•
•
•
•
•
Conceptronic USB 2.0 7-Port Hub
USB A - Mini-USB-Kabel
Netzteil 5V, 2500mA
Mehrsprachige Schnellinstallationsanleitung
Garantiekarte
7
DEUTSCH
2. Installation der Hardware
Der USB Hub kann ohne Wechsel-/Gleichstromversorgung betrieben werden. Es wird jedoch
dringend empfohlen, das Netzteil zu verwenden. Wenn das Wechsel-/Gleichstromnetzteil
nicht verwendet wird, werden nur Kleinleistungs-USB-Geräte unterstützt (wie FlashLaufwerke, Tastaturen usw.).
A.
B.
C.
Schließen Sie zuerst das Netzteil am entsprechenden Anschluss des USB Hubs und an der
Stromversorgung an.
Schließen Sie das USB-Kabel am Computer und am USB Hub an. Der USB Hub wird von
Ihrem Betriebssystem automatisch erkannt und installiert. Es werden keine zusätzlichen
Treiber benötigt.
Nach der Installation des Geräts können Sie Ihre USB-Geräte an den US Hub anschließen.
Einige USB-Geräte verlangen die Installation eines Treibers.
Damit ist Ihr Conceptronic USB 2.0 7-Port Hub betriebsbereit!
8
FRANÇAIS
Conceptronic C7USB2
Guide d’installation rapide
Nous vous félicitons pour l’achat de votre hub USB 2.0 à 7 ports de
Conceptronic
Ce guide d’installation rapide vous explique étape par étape comment installer votre hub
USB 2.0 à 7 ports de Conceptronic.
En cas de problème, nous vous conseillons de consulter notre site web
www.conceptronic.net et de cliquer sur « Support ». Vous y trouverez les réponses aux
questions les plus fréquentes (FAQ).
Pour toute autre question au sujet de notre produit, ou si vous ne trouvez pas l’information
dont vous avez besoin sur notre site web, vous pouvez nous contacter par mail :
[email protected].
Pour de plus amples informations sur les produits Conceptronic, merci de visiter notre site
web : www.conceptronic.net.
1. Contenu du paquet
Le présent paquet du hub USB 2.0 à 7 ports de Conceptronic doit contenir les éléments
suivants :
•
•
•
•
•
Hub USB 2.0 à 7 ports de Conceptronic
Câble USB-A vers mini-USB
Alimentation électrique de 5 V, 2500 mA
Guide d’installation rapide multilingue
Fiche de garantie
9
FRANÇAIS
2. Installation du hardware
Le hub USB peut fonctionner sans courant électrique CA/CD, mais il est vivement
recommandé de le brancher au courant électrique. Si vous ne le branchez pas à une
alimentation électrique CA/CD, il ne peut fonctionner qu’avec des dispositifs USB à faible
alimentation électrique (comme des claviers, des unités flash, etc.).
A.
B.
C.
Tout d’abord, branchez la prise de l’adaptateur électrique à la prise Jack
d’alimentation du hub USB, puis branchez le tout à la prise de courant.
Connectez le câble USB à l’ordinateur et au hub USB. Le hub USB sera détecté et
installé automatiquement sur votre système d’exploitation ; aucun driver additionnel
n’est nécessaire.
Une fois le dispositif installé, vous pouvez connecter vos appareils USB à votre hub USB.
En fonction de vos appareils USB, vous aurez peut-être besoin d’installer un driver pour
chaque appareil USB en question.
Votre hub USB 2.0 à 7 ports de Conceptronic 7 est prêt à fonctionner !
10
ITALIANO
Conceptronic C7USB2
Manuale d’uso
Vi ringraziamo per aver acquistato questo
Hub USB 2.0 a 7 porte di Conceptronic
Il presente Manuale d’uso spiega passo a passo come installare l’Hub USB 2.0 a 7 porte di
Conceptronic.
In caso di problemi, si consiglia di consultare la pagina web di supporto (collegandovi con
www.conceptronic.net e facendo clic su “Support”), dove troverete il database con le
domande e i quesiti più frequenti, accompagnati dalle relative risposte.
In caso di domande e dubbi di altra natura riguardanti il prodotto e che non appariranno nel
nostro sito web, potete contattarci via e-mail al seguente indirizzo:
[email protected]
Per maggiori informazioni sui prodotti di Conceptronic potete consultare la pagina web di
Conceptronic: www.conceptronic.net
1. Contenuto della confezione
La confezione contenente l’Hub USB 2.0 a 7 porte di Conceptronic deve essere composta dai
seguenti elementi:
•
•
•
•
•
Hub USB 2.0 a 7 porte di Conceptronic
Cavo USB-A to mini-USB
Alimentatore di corrente 5V, 2500mA
Manuale d’uso multilingue
Scheda di garanzia
11
ITALIANO
2. Installazione dell’hardware
Sebbene l’Hub USB sia in grado di funzionare senza corrente AC/DC, si consiglia vivamente di
usare un alimentatore di corrente, perché in caso contrario verranno supportati solo i
dispositivi USB con un livello basso di energia (come unità flash, tastiere, ecc.).
A.
B.
C.
In primo luogo, collegare la presa dell’adattatore di corrente alla presa jack di
alimentazione dell’Hub USB e collegare l’alimentatore a una presa a muro.
Collegare il cavo USB al computer e all’Hub USB. L’Hub USB verrà rilevato e installato
automaticamente nel sistema operativo in uso, senza bisogno di driver addizionali.
Una volta installato il dispositivo, sarà possibile connettere i dispositivi USB all’Hub USB.
A seconda del dispositivo USB potrebbe essere necessario installare un driver o meno.
L’Hub USB 2.0 a 7 porte di Conceptronic è pronto per essere usato!
12
PORTUGUÊS
Conceptronic C7USB2
Manual de Instalação Rápida
Parabéns pela compra do seu
hub USB 2.0 de 7 portas da Conceptronic.
Este manual de instalação rápida fornece-lhe uma explicação passo-a-passo sobre como
instalar o hub USB 2.0 de 7 portas da Conceptronic.
Quando tiver algum problema, aconselhamo-lo a consultar a nossa página de suporte (vá a
www.conceptronic.net e clique em ‘Support’ (Suporte)). Aí vai encontrar a Base de Dados
das Perguntas Mais Frequentes.
Quando tiver outras questões sobre o seu produto e não encontrar resposta para elas na
nossa página, contacte-nos por e-mail: [email protected]
Para mais informações sobre os produtos da Conceptronic, visite a página web da
Conceptronic em: www.conceptronic.net
1. Conteúdo da embalagem
Os elementos descritos a seguir devem estar presentes na embalagem do hub USB 2.0 de 7
portas da Conceptronic:
•
•
•
•
•
Hub USB 2.0 de 7 portas da Conceptronic
Cabo mini USB para USB-A
Fonte de alimentação 5 V, 2500 mA
Manual multilíngue de instalação rápida
Certificado de garantia
13
PORTUGUÊS
2. Instalação do hardware
O hub USB pode funcionar sem a fonte de alimentação CA/CC, mas recomenda-se vivamente
que a fonte de alimentação seja usada. Quando não usar a fonte de alimentação CA/CC
apenas são suportados dispositivos USB de baixa energia. (tais como memórias Flash,
teclados, etc.).
A.
B.
C.
Primeiro, ligue a ficha do transformador à ficha de alimentação do hub USB e ligue a
fonte de alimentação a uma tomada de parede.
Ligue o cabo USB ao computador e ao hub USB. O hub USB vai imediatamente detectado
e instalado no seu sistema operativo. Não necessita de qualquer controlador adicional.
Quando o dispositivo estiver instalado, pode ligar os seus dispositivos USB ao hub USB.
Dependendo do seu dispositivo USB, pode precisar de instalar um controlador para o
mesmo.
O seu hub USB 2.0 de 7 portas da Conceptronic está agora pronto a
usar!
14
MAGYAR
Conceptronic C7USB2
Gyorstelepítési útmutató
Köszönjük, hogy a Conceptronic 7 portos USB 2.0 hubját választotta.
Ez a gyorstelepítési útmutató lépésről lépésre elmagyarázza, miként kell a Conceptronic 7
portos USB 2.0 hubját telepítenie.
Ha probléma jelentkezne, azt tanácsoljuk, hogy keresse fel terméktámogatást nyújtó
webhelyünket (látogasson el a www.conceptronic.net honlapra, majd ott kattintson a
„Support”-ra). Ott található ugyanis a gyakran ismétlődő kérdések (GYIK) adatbázisa.
Ha a termékkel kapcsolatban további kérdése volna, és arra választ webhelyünkön nem talál,
e-mailben is fordulhat hozzánk: [email protected]
A Conceptronic termékekkel kapcsolatos további tájékozódás végett látogasson el
Conceptronic webhelyére: www.conceptronic.net
1. A csomag tartalma
A Conceptronic 7 portos USB 2.0 hubját tartalmazó csomagban az alábbiak találhatók.
•
•
•
•
•
Conceptronic 7 portos USB 2.0 hub
USB-A — mini-USB kábel
5 V, 2500 mA tápellátás
Többnyelvű gyorstelepítési útmutató
Jótállási jegy
15
MAGYAR
2. A hardver telepítése
Az USB hub váltakozó áramú/egyenáramú tápegység nélkül működik, de nyomatékosan
javasoljuk a tápegység használatát. Ha nem használ váltakozó áramú/egyenáramú
tápegységet, csak a kis teljesítményű USB-eszközök támogatottak (például flash-meghajtók,
billentyűzetek stb.).
A.
B.
C.
Mindenekelőtt csatlakoztassa a tápegység dugaszát az USB-hub jack-dugójához, majd
csatlakoztassa a tápegységet falicsatlakozóhoz.
Csatlakoztassa az USB-kábelt a számítógéphez és az USB-hubhoz. Az operációs rendszer
az USB-hubot automatikusan megtalálja és telepíti, nincs ehhez szükség semmilyen
további illesztőprogramra.
Az eszköz telepítése után az USB-eszközök azonnal csatlakoztathatók az USB-hubhoz. Az
adott USB-eszköztől függően szükség lehet illesztőprogram telepítésére is az USBeszköznél.
Mostantól a Conceptronic 7 portos USB 2.0 hub használatkész!
16
TÜRKÇE
Conceptronic C7USB2
Hızlı Kurulum Kılavuzu
Conceptronic 7 Port USB 2.0 Hub’ı
Satın Aldığınız İçin Tebrikler.
Bu Hızlı Kurulum Kılavuzu, Conceptronic 7 Port USB 2.0 Hub’ı kurulumunun adım adım nasıl
yapılacağı konusunda bilgi içermektedir.
Problem ortaya çıktığında, destek sitemize gitmenizi (www.conceptronic.net adresine gidin
ve ‘Support’ bölümüne tıklayın) tavsiye ederiz. Burada Sıkça Sorulan Sorular Veritabanını
bulacaksınız.
Ürününüzle ilgili başka sorularınız varsa ve bunların yanıtlarını web sitemizde bulamıyorsanız,
lütfen bize e-posta ile ulaşın: [email protected]
Conceptronic ürünleri ile ilgili daha fazla bilgi için, lütfen Conceptronic Web Sitesini ziyaret
edin: www.conceptronic.net
1. Paket İçeriği
Conceptronic 7 Port USB 2.0 Hub’ı paketinin içeriği aşağıdaki gibidir:
•
•
•
•
•
Conceptronic 7 Port USB 2.0 Hub’ı
Bir ucu USB diğer ucu mini-USB kablo
Güç kaynağı 5V, 2500mA
Çok Dilli Hızlı Kurulum Kılavuzu
Garanti Belgesi
17
TÜRKÇE
2. Donanım kurulumu
USB Hub’ı AC/DC güç kaynağı olmadan çalışabilir fakat güç kaynağı kullanmanız özellikle
tavsiye edilir. AC/DC güç kaynağı kullanmadığınızda sadece düşük güçlü USB aygıtlar
desteklenir. (örn. flash bellek, klavye vb.)
A.
B.
C.
Önce güç adaptörünün fişini USB Hub’ı güç jakına ve adaptörü de bir prize takın.
USB kabloyu bilgisayara ve USB Hub’ına takın. USB Hub’ı otomatik olarak
algılanacak ve işletim sisteminize kurulacaktır, ilave sürücü gerekmemektedir.
Aygıt kurulumu bittiğinde USB aygıtlarınızı USB Hub’ına bağlayabilirsiniz. USB
aygıtınıza bağlı olarak, USB aygıt için bir sürücü yüklemeniz gerekebilir.
Conceptronic 7 port USB 2.0 Hub’ı artık kullanıma hazırdır!
18