1
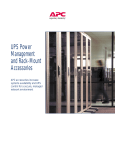
APC MasterSwitch Power Receptacles (AP9510 Series)
Introduction
APC® MasterSwitch™ Power Receptacles increase the maxi-
mum amperage controlled by a MasterSwitch unit. A North
American model of MasterSwitch can supply a maximum of 12
amps total over eight outlets. Using eight 5-15 Power Receptacle units, for example, you can control power to a total load of
up to 96 amps— 12 amps per receptacle—using a single
MasterSwitch. For international models, you can control power
to loads totaling 80 A—10 amps per receptacle—using a single
MasterSwitch unit.
You can mount up to three Power Receptacle units in a Power
Receptacle Tray (AP9510BAY), which installs into an APC
NetShelter® enclosure. You can mix and match various Power
Receptacle models in the Power Receptacle Tray. The tray
requires 2U of space in the NetShelter and can fit conveniently
on the rear mounting flanges, behind a MasterSwitch unit.
Electrical
information
APC
Part Number
AP9510515
AP9510520
Mounting
options
Receptacle
5-15
duplex
5-20
duplex
Volts
Amps
Φ
Relay Coil
115
12
1
100/120 VAC
@ 17/24 mA
115
16
1
100/120 VAC
@ 17/24 mA
AP9510L620
L6-20
240
16
2
100/120 VAC
@ 34/48 mA
AP9510L630
L6-30
240
24
2
100/120 VAC
@ 34/48 mA
AP95103202
IEC320
(international)
Quad
240
10
1
200/240 VAC
@8.5/10 mA
Power Receptacles can be placed on a desk or mounted in a
rack. To place on a desk, attach the four rubber feet (supplied)
to the bottom of the unit. To mount in a rack, use the Power
Receptacle Tray (AP9510BAY) and follow the mounting
instructions in “Mounting power receptacles in a rack” on
page 2.
1
MasterSwitch Power Receptacles continued
Warnings
Exceeding the voltage or amperage limits for the individual
Power Receptacles could cause fire damage or shock.
Do not exceed the load capacity of the UPS or branch circuit by
connecting more than one fully loaded Power Receptacle. To
calculate the expected load, consult the nameplate ratings of all
connected equipment.
You must maintain reliable grounding of all equipment. Pay
particular attention to supply connections other than direct
connections to the branch circuit.
Do not exceed the operating temperature or humidity limits
shown in “Additional specifications” on page 5. Note that the
ambient temperature in a rack environment may be greater than
the ambient room temperature.
When installing the Power Receptacles in a rack:
• Do not mount the receptacles in a location that impedes
the flow of air in the rack.
• Do not mount the receptacles in a way that loads the
rack unevenly, causing the rack to become unstable.
Disconnect the front panel power cord and the relay control
input cord before moving the Power Receptacle. Both cords
carry hazardous voltages.
Mounting
power
receptacles in a
rack
To mount Power Receptacles in a NetShelter enclosure or other
standard (EIA 310-D) 19" rack, use the hardware provided with
the Power Receptacle Tray and perform the following steps in
the order given.
1. Plan the mounting location for the tray and each unit
within the tray. The figure on page 4 shows the tray
mounted at the rear of a NetShelter, at the same height
as the MasterSwitch, which has been mounted on the
front. Consider your need for proximity to the UPS and
to the attached load(s).
Note: You must install Power Receptacles near the attached
load(s), so that the outlet is easily accessible.
2
MasterSwitch Power Receptacles continued
Mounting
power
receptacles in a
rack, continued
2. Using a Phillips head screwdriver, remove the
four outermost 6-32 screws from the front panel of each
Power Receptacle to be mounted in the tray, as shown in
the figure below.
Remove Screws
3. Remove blanking panels from the front of the Power
Receptacle Tray, as necessary.
4. Insert each Power Receptacle unit into one of the bays
of the tray, aligning the holes on front panel of the unit
with the holes in the flanges of the tray. Attach with the
four 6-32 screws removed in Step 2.
5. Attach a blanking panel to any empty bays, using four 632 screws (provided). See the figure on page 4 for an
example setup.
6. Place the mounting brackets on the side of the tray,
inserting the two tray studs into the slit of each bracket.
Slide the brackets forward to allow room for the power
cords that will be connected at the rear of the rack.
Attach using two 8-32 acorn nuts (provided with the
Power Receptacle Tray) for each bracket.
3
MasterSwitch Power Receptacles continued
Mounting
power
receptacles in a
rack, continued
MasterSwitch
Power
Module
Tray
Front
Mounting
Bracket
Acorn
Nut
Blanking
Panel
Connecting the
power
receptacles
Power
Modules
Attach the tray assembly to the rack, using hardware provided
with the rack. To connect the Power Receptacle(s), refer to the
figure on page 5 and perform the following steps in the order
given.
1. Connect the power cord on the front panel of the Power
Receptacle to your APC UPS or to a branch circuit capable of supplying power to the connected loads.
Note: International models do not include a power cord.
You must supply your own. However, the
procedure for connecting power is the same.
2. Connect the load(s) to the outlet(s) on the front panel of
the power receptacle.
4
MasterSwitch Power Receptacles continued
Connecting the
power
receptacles,
continued
3. Connect the relay control input cord (on the rear panel
of the Power Receptacle) to an outlet on the rear of the
MasterSwitch.
Plane4
Note: To disconnect, perform steps 1–3 in reverse order.
Additional
specifications
The following table provides Power Receptacle specifications
not listed in “Electrical information” on page 1.
Item
Specification
Approvals
North American
UL, CSA
AP9510515, AP9510520,
AP9510L620, AP9510L630
International
VDE, CE
AP95103202
Operating temperature
– 5°C to + 45°C
Operating humidity
35% to 85%, non-condensing
5
MasterSwitch Power Receptacles continued
Limited
warranty
American Power Conversion (APC) warrants the Power
Receptacle to be free from defects in material and
workmanship for a period of two years from the date of
purchase. Its obligation under this warranty is limited to
repairing or replacing, at its own sole option, any such
defective products. This warranty does not apply to equipment
which has been damaged by accident, negligence, or
misapplication or has been altered or modified in any way. This
warranty applies only to the original purchase.
Warranty
limitations
Except as provided herein, American Power Conversion
makes no warranties, express or implied, including
warranties of merchantability and fitness for a particular
purpose. Some jurisdictions do not permit limitation or
exclusion of implied warranties; therefore, the aforesaid
limitation(s) or exclusion(s) may not apply to the purchaser.
Except as provided above, in no event will APC be liable
for direct, indirect, special, incidental, or consequential
damages arising out of the use of this product, even if
advised of the possibility of such damage.
Specifically, APC is not liable for any costs, such as lost profits
or revenue, loss of equipment, loss of use of equipment, loss of
software, loss of data, costs of substitutes, claims by third
parties, or otherwise. This warranty gives you specific legal
rights and you may also have other rights which vary from
state to state.
Life-support
policy
6
As a general policy, APC does not recommend the use of any
of its products in life-support applications where failure or
malfunction of the APC product can be reasonably expected to
cause failure of the life-support device or to affect significantly
its safety or effectiveness. APC does not recommend the use of
any of its products in direct patient care. APC will not
knowingly sell its products for use in such applications unless
it receives in writing assurances satisfactory to APC that (a) the
risks of injury or damage have been minimized, (b) the
customer assumes all such risks, and (c) the liability of
American Power Conversion is adequately protected under the
circumstances.
MasterSwitch Power Receptacles continued
Examples of lifesupport devices
The term life-support device includes, but is not limited to,
neonatal oxygen analyzers, nerve stimulators (whether used for
anesthesia, pain relief, or other purposes), autotransfusion
devices, blood pumps, defibrillators, arrhythmia detectors and
alarms, pacemakers, hemodialysis systems, peritoneal dialysis
systems, neonatal ventilator incubators, ventilators (for adults
or infants), anesthesia ventilators, infusion pumps, and any
other devices designated as “critical” by the U.S. FDA.
Hospital-grade wiring devices and leakage current protection
may be ordered as options on many APC UPS systems. APC
does not claim that units with this modifications are certified or
listed as hospital-grade by APC or any other organization.
Therefore these units do not meet the requirements for use in
direct patient care.
Additional
safety warrnings
English
• Always connect the three-wire main power cord before
connecting the two-wire control cord. When removing power,
disconnect the two-wire control cord before disconnecting the
three-wire power cord.
• Always install the Power Receptacle right side up.
Français
• Toujours brancher le cordon électrique à trois fils avant de
brancher le cordon de commande à deux fils. Pour couper le
courant, débrancher d'abord le cordon à deux fils avant de
débrancher le cordon à trois fils.
• Toujours installer le Module électrique avec le côté droit vers
le haut.
Deustch
• Das dreiadrige Netzkabel immer vor dem zweiadrigen
Steuerkabel anschließen. Zum Trennen der Stromversorgung,
zuerst das zweiadrige Steuerkabel entfernen und danach das
dreiadrige Netzkabel.
• Das Stromversorgungsmodul immer in normaler (aufrechter)
Lage befestigen.
Español
• Siempre conecte el cable de suministro eléctrico principal de
tres puntos antes de conectar el cable de control de dos puntos.
Al apagar el suministro eléctrico, desconecte el cable de
control de dos puntos antes de desconectar el cable de
suministro de tres puntos.
• Siempre instale el módulo de suministro eléctrico con el lado
derecho hacia arriba.
7
MasterSwitch Power Receptacles continued
Additional
safety warrnings
continued
Italiano
• Prima di collegare il cavo di controllo a due conduttori,
collegare sempre il cavo di alimentazione a tre conduttori.
Per interrompere l'alimentazione, staccare il cavo di controllo
a due conduttori prima di scollegare il cavo di alimentazione a
tre conduttori.
• Installare sempre il modulo di alimentazione con il lato destro
rivolto verso l'alto.
Português
• Ligue sempre o cabo principal de alimentação de três fios
antes de ligar o cabo de controlo de dois fios. Ao desligar a
corrente, desligue o cabo de controlo de dois fios antes de
desligar o cabo de alimentação de três fios.
• Instale sempre o Módulo de Alimentação com o lado direito
virado para cima.
Entire contents copyright © 2001 American Power Conversion. All rights reserved.
Reproduction in whole or in part without permission is prohibited. APC, the APC logo,
MasterSwitch, and NetShelter are trademarks of American Power Conversion Corporation and
may be registerd in some jurisdictions. All other trademarks, product names, and corporate names
are the property of their respective owners and are used for informational purposes only.
990-0322D
08/2001