1
Cooling
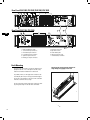
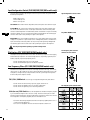
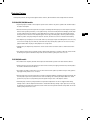
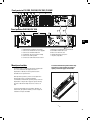
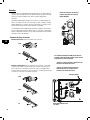
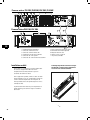
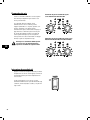
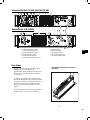
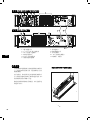
Air flows from the rack, into the back of the amplifier, and out the
front. This keeps the rack cool. The fan automatically runs faster
when the amp is working hard.
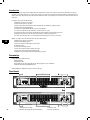
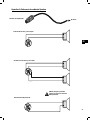
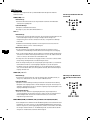
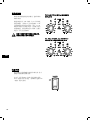
Air flow in QSC amplifiers: Cool air is drawn into the
rear of the amplifier by the cooling fan. Warm air exits
the front of the amplifier.
Do not block the front or rear air vents!
EN
AC Mains Connection
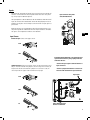
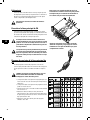
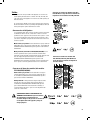
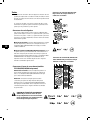
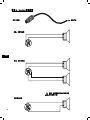
Connect AC power to the IEC socket on the back of the amplifier.
NOTE: Turn off the AC power switch before connecting AC power.
Connect the AC mains plug to a suitable AC mains outlet.
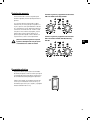
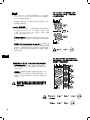
The correct AC line voltage is shown on the serial number
label, on the rear panel. Connecting to the wrong line
voltage may damage the amplifier or increase the risk of
electric shock.
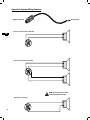
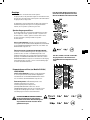
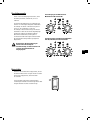
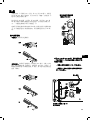
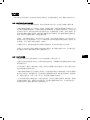
Orient the IEC connector with the connector prongs in
the socket, then push the connector firmly into the IEC
socket until fully seated.
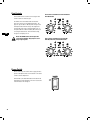
The rear chassis ear can be used to retain the IEC power
connector. After inserting the IEC block into the receptacle, use a wire-tie or similar device to secure the cord to
the chassis ear.
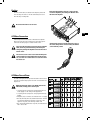
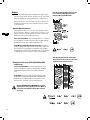
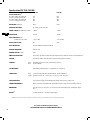
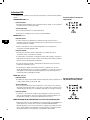
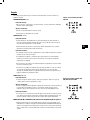
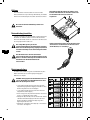
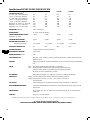
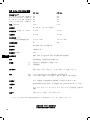
AC Mains Current Draw
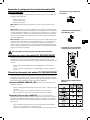
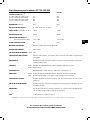
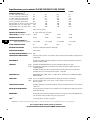
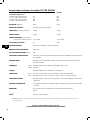
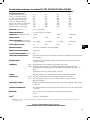
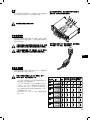
The table at the right provides typical current draw for each model as
a function of load and output power level. Units of measurement are
amperes rms.
NOTE! Current draw shown is for 120 VAC line. For 230
VAC models, multiply values shown by 0.5.
•1/8 power (pink noise) represents typical program with occasional clipping. Use this rating for most applications.
•1/3 power (pink noise) represents severe program with heavy
clipping.
•Full power (sine) is continuous sine wave driven at 1% clipping.
•PLX 1802, PLX 2502, PLX 3102, and PLX 3602 models: Thermal
or overcurrent cutback limits duration of full power 2 ohm
operation. Long term, active limiting to 30A at 120V.
•PLX 1104 and PLX 1804 models: Long-term, circuit breaker limited to 15A at 120V.
5