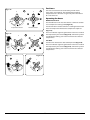
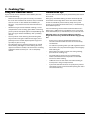
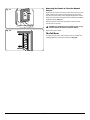
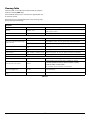
1
Accessories
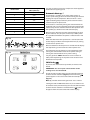
Fig. 2.16
Flat shelf
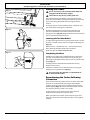
Oven Shelves – Left-hand (Main) Oven
In addition to the flat shelf your cooker is supplied with a
drop shelf (Fig.2-16). The drop shelf increases the possibilities
for oven shelf spacing.
Shelf guard
Front
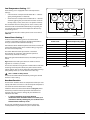
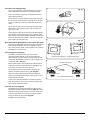
The oven shelves can be easily removed and refitted.
Pull the shelf forward until the back of the shelf is stopped by
the shelf stop bumps in the oven sides (Fig.2-17).
Shelf guard
Drop shelf
Lift up the front of the shelf so the back of the shelf will pass
under the shelf stop and then pull the shelf forward
(Fig.2-18).
To refit the shelf, line up the shelf with a groove in the oven
side and push the shelf back until the ends hit the shelf stop.
Lift up the front so the shelf ends clear the shelf stops, and
then lower the front so that the shelf is level and push it fully
back (Fig.2-19).
Front
Fig. 2.17
Fig. 2.18
Oven Shelves – Right-hand (Tall) Oven
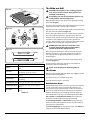
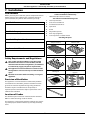
The tall oven is supplied with four flat cooking shelves
(Fig.2-20) and a plate warming shelf (Fig.2-21).
When using the tall oven, you can cook on all four shelves at
the same time, but make sure that they are well spaced out to
allow the hot air to circulate.
ArtNo.320-0011 Removing the shelf 1
Fig. 2.19
ArtNo.320-0012 Removing the shelf 2
Fig. 2.20
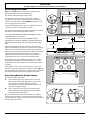
The Handyrack (Main Oven)
The Handyrack (Fig.2-22) fits to the left-hand oven door
only. Food cooking on it is easy to attend to, because it is
accessible when the door is open.
ArtNo.324-0002 Oven shelf
The maximum weight that can be held by the Handyrack
is 5.5 kg (12 lb). It should only be used with the supplied
roasting tin, which is designed to fit the Handyrack. Any other
vessel could be unstable.
ArtNo.320-0013
Removing the shelf 3
Fig.
2.21
Fig. 2.22
It can be fitted at two different heights. One of the oven
shelves must be removed and the other positioned to suit.
When the Handyrack is used in its highest position, other
dishes can be cooked on the bottom shelf position or base of
the oven.
ArtNo.324-0010 Plate warming shelf
When the Handyrack is used in its lowest position, other
dishes can be cooked on the second shelf position or base of
the oven.
ArtNo.320-0014 Handyrack on LH door
Fig. 2.23
Fig. 2.24
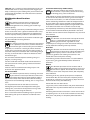
To fit the Handyrack, locate one side of it on the door bracket
(Fig.2-23).
Then spring the other side out to clip it onto the other
bracket (Fig.2-24).
Main Oven Light
ArtNo.320-0015
Fitting the Handyack 1
Press the button to turn the light on (Fig.2-25).
ArtNo.320-0016
Fitting the handyrack 2
Fig. 2.25
If the oven light fails, turn off the power supply before
changing the bulb. See the ‘Troubleshooting’ section for
details on how to change the bulb.
ArtNo.320-0017
Main oven light
11