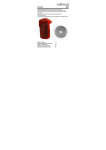
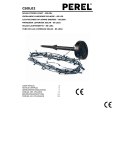
1
GZB
B9
GAZEB
BO WHITE
E – 3 X 6M
M
ZONN
NETENT WI
IT – 3 X 6M
TONN
NELLE BLANCHE – 3 X 6M
CENADOR BLAN
NCO – 3 X 6M
LION WEIß
ß – 3 X 6M
M
GARTENPAVILL
O BRANCO
O – 3 X 6M
M
TOLDO
USER MANUAL
M
GEBRUIKERSHAND
DLEIDING
MODE D’EMPLOI
MANUA
AL DEL USUA
ARIO
BEDIEN
NUNGSANLEITUNG
MANUA
AL DO UTILIZ
ZADOR
3
4 5 7 8 9 GZB9
V. 01 – 23/11/2012
2
©Velleman nv
GZB9
USER MA
ANUAL
1.
Inttroduction
Thank you
u for choosing Pe
erel! Please read the manual thorroughly before brringing this device into service. If the
device wa
as damaged in tra
ansit, don't install or use it and co
ontact your deale
er.
2.
Saffety Instructtions
Follow these instructions
i
careffully to avoid han
nds/fingers injury
y due to moving parts.
Set up and brreak down requirres three adult pe
ersons.
Make sure the
e weather conditions are suitable (e.g. not too win
ndy) for setting up
u or breaking do
own
the gazebo.
aterial of this gazebo is flammable
e. DO not make open fires (e.g. barbecue) under or
The cover ma
near the gaze
ebo.
• Familiaarise yourself witth the functions of
o the device beffore actually using it.
• All moodifications of thee device are forbiidden for safety reasons.
r
Damage
e caused by user modifications to
o the
device
e is not covered by
b the warranty.
• Damag
ge caused by disregard of certain
n guidelines in this manual is not covered by the warranty
w
and the
dealerr will not accept responsibility
r
for any ensuing defects or problems
s.
• Keep this
t
manual for fu
uture reference.
3. Gen
neral guideliines
• Protecct the gazebo from
m shocks and ab
buse. Avoid brute
e force when deploying, folding up
p or during usage
e.
• Only use
u the gazebo fo
or its intended pu
urpose. Using the
e gazebo in an un
nauthorised way will void the
warran
nty.
• NEVER
R store the gazeb
bo unless it is com
mpletely dry. Sto
oring when damp
p allows the formation of mold and
d
mildew
w, which will rot natural fibers, da
amage the coatin
ng to the fabric and leave indelible
e stains.
4.
•
•
•
•
Fea
atures
foldable and easy to se
et up
comes
s with handy carrrying bag with wh
heels
long-liife UV resistant polyester
p
with PV
VC coating, 100%
% water-proof
colourr of the cover: wh
hite.
Remark: Under extreme weather
w
conditions water infiltrattion is possible.
5.
Settting up
Refer to the illustrations on
o page 2 of this manual.
t
gazebo at the
e centre of the ch
hosen location. Rest
R
the gazebo on
o its feet and re
emove the carryin
ng
1. Place the
bag. Lift
L the gazebo by
y the six legs and
d move the legs as
a far as possible
e apart [1].
2. Hold the gazebo at opp
posite legs, lift an
nd slowly step ba
ackwards until fully opened [2]. A yoke slides up over
g; be careful not to get hands or fingers injured by
b this yoke or an
ny other hinging joints.
j
the leg
3. Secure
e the sliding yoke
e at each leg [3]
]. Place one hand
d on top of the le
eg to hold it down
n and push the yo
oke
up witth the other hand
d until the spring-loaded button snaps into place. Do this for all 6 legs.
l
4. Hold two adjacent legs
s of the gazebo [4]. Simultaneously place a foot on
o the foot plate to hold the innerr leg
he spring-loaded button snaps intto place. Repeat this
t
step for the other
down and gently lift the gazebo until th
legs.
5. Make sure the legs of the
t
gazebo form a rectangle and fold the Velcro ta
abs located at the bottom side off the
over around the frame.
top co
6. It is sttrongly recomme
ended to secure the
t
gazebo to the
e ground by puttiing stakes (not in
ncl.) through the
bases of the legs. Drive a stake (incl.) into the ground at
a every corner, tie guy-ropes (in
ncl.) to the top off each
of the 4 corners and co
onnect the other end tightly to the stakes.
6.
Bre
eaking down
Refer to the illustrations on
o page 2 of this manual.
ve any guy-ropes
s and stakes thatt were used to ho
old the gazebo in
n place.
1. Remov
2. Hold two adjacent legs
s of the gazebo [5]. Simultaneously press on the spring-loaded bu
uttons and slide the
t
inner legs
l
into the oute
er legs. Repeat this step for the other
o
legs.
3. Releas
se the sliding yok
ke at each leg [6
6]. Push the slidin
ng yoke slightly upwards
u
and pres
ss on the spring-loaded
d button. Slide th
he yoke down pas
st the spring-load
ded button. Do this for all 6 legs.
4. Hold the gazebo at opp
posite legs, lift an
nd slowly step fo
orwards until nearly closed [7]. Shake the canopy
y
y to facilitate folding. The yoke slides down over th
he leg; be carefu
ul not to get hand
ds or fingers injurred by
gently
this yo
oke or any other hinging joints.
5. Close the gazebo comp
pletely by lifting and
a
pulling the adjacent
a
legs toge
ether [8].
y before placing it inside the stora
age bag!
6. Make sure the gazebo is completely dry
V. 01 – 23
3/11/2012
3
©Vellem
man nv
GZB9
7.
Tec
chnical speciifications
fabric of roof,
r
walls and sidewalls
aluminium
m legs
powder-co
oated steel roof frame
f
peak heig
ght
260 g/m² polyester with PV
VC coating
30 x 30 mm / 25 x 25 mm
23 x 12 mm
3.50 m
man nv cannot be
b held respons
sible in the event of
Use this device with oriiginal accessoriies only. Vellem
damage or injury resultting from (incorrrect) use of th
his device. For more
m
info conce
erning this prod
duct
and the latest
l
version of
o this manual, please visit ourr website www
w.perel.eu. The information
i
in this
t
manual is subject to change without prior
p
notice.
© COPYR
RIGHT NOTICE
The copy
yright to this manual is owned
d by Velleman nv.
n All worldwid
de rights reserv
ved. No part of th
his
manual may
m
be copied, re
eproduced, translated or reduced to any electronic
c medium or othe
erwise without th
he
prior writtten consent of th
he copyright holder.
GEBRU
UIKERSHA
ANDLEID
DING
1.
Inle
eiding
Dank u vo
oor uw aankoop! Lees deze handleiding grondig vo
oor u het toestel in gebruik neem
mt. Werd het toes
stel
beschadig
gd tijdens het transport, installeerr het dan niet en raadpleeg uw de
ealer.
2.
Veiiligheidsinstrructies
Volg de instru
ucties in de handleiding zorgvuldig
g na om kwetsurren aan vingers/h
handen te vermijjden.
Het opstellen en het afbreken van de zonneten
nt gebeurt best met
m drie personen
n.
Stel de tent op
o en breek opnie
euw af bij gunstig
ge weersomstand
digheden. Gebruik de zonnetent nooit
n
bij te veel win
nd.
an deze zonneten
nt is brandbaar. Maak geen vuur of houd geen barbecue onder of dicht
Het dekzeil va
bij de zonnete
ent.
• Leer eerst
e
de functies van
v
het toestel kennen
k
voor u he
et gaat gebruiken
n.
• Om veeiligheidsredenen
n mag u geen wijzigingen aanbren
ngen. Schade door wijzigingen die
e de gebruiker he
eeft
aangebracht valt niet onder
o
de garantie
e.
• De garrantie geldt niet voor schade door het negeren vaan bepaalde richtlijnen in deze handleiding en uw dealer
zal de verantwoordelijk
kheid afwijzen vo
oor defecten of problemen die hie
er rechtstreeks ve
erband mee houd
den.
• Bewaaar deze handleiding voor verdere raadpleging.
3. Alg
gemene richttlijnen
• Bescheerm de tent tegeen schokken. Vermijd brute kracht tijdens het opstellen en het afbreken.
• Gebruik de tent enkel waarvoor
w
zij gem
maakt is. Bij onoo
ordeelkundig geb
bruik vervalt de garantie.
g
• Laat een
e
vochtig dekze
eil eerst volledig drogen alvorens de tent op te bergen. Een vochtig dekzeil is de id
deale
kweek
kvijver voor schim
mmels die op hun
n beurt de natuurrlijke vezels en de
d coating aantas
sten.
4.
•
•
•
•
Eigenschappen
opvouwbaar en eenvou
udige montage
geleve
erd met handige draagtas op wieltjes
stevig UV-bestendig po
olyesther met pvc-coating, 100%
% waterbestendig
kleur van
v
het dekzeil: wit.
Opmerking: bij gebruik van
v
de tenten ond
der extreme wee
ersomstandighede
en kan het zijn dat
d er waterinsijpeling
ontstaat.
5.
Ops
stellen van de
d zonnetentt
Raadpleeg
g de figuren op pagina
p
2 van deze handleiding.
1. Kies een geschikte plaa
ats voor uw zonn
netent. Verwijderr de tent uit de opbergzak. Plaats de tent op de po
oten.
Neem elk twee poten vast
v
en vouw zo ver mogelijk ope
en [1].
2. Houd nu elk een tegen
noverliggende poo
ot vast en vouw verder open [2]. Het vergrendels
stuk schuift over de
poot. Ga
G voorzichtig te
e werk om kwetsu
uren aan vingers
s/handen te verm
mijden.
3. Klik he
et dekzeil nu aan
n elke poot vast [3]:
[
plaats een hand
h
bovenaan de poot en duw he
et vergrendelstuk
k
omhoo
og tot het in de poot
p
klikt. Doe dit voor de zes potten.
4. Houd elk
e een poot aan dezelfde kant va
an de tent vast [4].
[
Houd het onderste gedeelte van
v
de poot tege
en met
uw voet en til de tent lichtjes
l
op zodat het onderste ged
deelte van de poot uit de poot sch
huift. Klik vast. Doe
D
or de zes poten.
dit voo
V. 01 – 23
3/11/2012
4
©Vellem
man nv
GZB9
5. Plaats de poten zodat de
d tent een rechtthoek vormt. Vou
uw de klittenband
d onderaan het dekzeil
d
rondom het
h
frame.
6. Het wo
ordt ten zeerste aangeraden om de
d tent verstevig
gen door elke poo
ot met een haring
g (niet meegelev
verd)
en tui (meegeleverd) in de grond vast te
t zetten.
6.
Afb
breken van de
d zonnetentt
Raadpleeg
g de figuren op pagina
p
2 van deze handleiding.
1. Verwijjder de tui en de haringen indien u die gebruikt he
ebt.
2. Houd elk
e een poot aan dezelfde kant va
an de tent vast [5].
[
Druk samen de vergrendelkn
nop in en schuif het
h
onders
ste gedeelte van de poot in het bovenste gedeelte
e. Doe dit voor de
e zes poten.
3. Ontgre
endel het dekzeil aan elke poot [6
6]: schuif het ve
ergrendelstuk lich
htjes naar boven en druk de
vergre
endelknop in. Sch
huif het vergrend
delstuk nu vollediig naar beneden. Doe dit voor de zes poten.
4. Houd nu elk een tegen
noverliggende poo
ot vast en vouw de tent dicht [7]
]. Schud de tent lichtjes om het
dichtvouwen te vergem
makkelijken. Het vergrendelstuk schuift
s
over de po
oot. Ga voorzichttig te werk om
kwetsu
uren aan vingers
s/handen te verm
mijden.
5. Til de tent lichtjes op en
e sluit het dekze
eil volledig [8].
6. Laat een
e
vochtig dekze
eil eerst volledig drogen alvorens de tent op te bergen.
7.
Tec
chnische spe
ecificaties
materiaal dak, façade en zijwanden
z
poten in aluminium
a
stalen dak
kwerk met poede
ercoating
max. hoogte
260 g/m² polyestter met pvc-coatiing
2
3 x 30 mm / 25 x 25 mm
30
2 x 12 mm
23
3
3.50
m
Gebruik dit toestel enke
el met originele
e accessoires. Velleman
V
nv is niet
n
aansprakelijk voor schade
e of
en bij (verkeerd
d) gebruik van dit toestel. Voo
or meer informatie over dit pr
roduct en de laa
atste
kwetsure
versie va
an deze handleiiding, zie www.perel.eu. De in
nformatie in dez
ze handleiding kan te allen tijde
worden gewijzigd
g
zonder voorafgaand
de kennisgeving
g.
© AUTEU
URSRECHT
Velleman
n nv heeft het auteursrecht
a
vo
oor deze handle
eiding. Alle werreldwijde rechte
en voorbehouden.
Het is niett toegestaan om deze handleiding
g of gedeelten errvan over te nem
men, te kopiëren, te vertalen, te
bewerken
n en op te slaan op
o een elektronis
sch medium zond
der voorafgaande
e schriftelijke toes
stemming van de
e
rechthebb
bende.
M
MODE
D’E
EMPLOI
1.
Inttroduction
Nous vous
s remercions de votre achat ! Lire
e la présente nottice attentivemen
nt avant la mise en
e service de
l’appareil.. Si l’appareil a été endommagé pendant
p
le transp
port, ne pas l’insttaller et consulter votre revendeur.
2.
Con
nsignes de sécurité
Suivre les instructions dans ce
ette notice pour éviter
é
les blessurres causées par des
d pièces mobile
es. Il
est conseillé de
d monter et de démonter la tonn
nelle à trois.
Monter et de démonter la tonn
nelle dans des co
onditions météoro
ologiques favorab
bles. Ne jamais utiliser
u
ar grand vent.
la tonnelle pa
st pas ignifuge. Ne
N jamais faire de
e feu ni de barbecue sous ou à prroximité de la ton
nnelle.
La bâche n’es
• Se fam
miliariser avec le fonctionnement avant l’emploi.
• Toute modification est interdite pour dees raisons de séccurité. Les domm
mages occasionnés par des
modifications par le client ne tombent pas
p sous la garan
ntie.
• La garrantie ne s’appliq
que pas aux domm
mages survenus en négligeant ce
ertaines directives de cette notice
e et
votre revendeur déclinera toute respon
nsabilité pour les problèmes et les
s défauts qui en résultent.
r
• Garder cette notice pour toute référencce ultérieure.
3. Dirrectives géné
érales
• Protég
ger la tonnelle les
s chocs et la traitter avec circonsp
pection pendant l’’installation et l’o
opération.
• N’utilisser la tonnelle qu
u’à sa fonction prrévue. Un usage impropre annule d'office la garan
ntie.
• Ne jam
mais ranger la tonnelle avec une bâche
b
humide. Une
U
bâche humide
e favorise la form
mation de moisiss
sures
qui po
ourront endomma
ager les fibres et former des taches.
V. 01 – 23
3/11/2012
5
©Vellem
man nv
GZB9
4.
•
•
•
•
Caractéristiques
repliable, facile à monter
livrée avec housse de transport pratique sur roulettes
polyesther à revêtement PVC résistant aux UV, 100% résistant à l'eau
couleur de la bâche : blanc.
Remarque : Possibilité d'infiltration d'eau en cas d'usage des tentes dans des conditions climatiques extrêmes.
5.
Montage de la tonnelle
Consulter les illustrations à la page 2 de cette notice.
1. Choisir un endroit approprié pour la tonnelle. Sortir la tonnelle du sac de rangement et la placer sur les pieds.
Soulever légèrement la tonnelle et déplier au maximum sans forcer [1].
2. Maintenir la tonnelle par deux pieds opposés. Soulever légèrement la tonnelle et ouvrir entièrement la
tonnelle [1]. L’étrier de verrouillage glisse sur le pied. Procéder prudemment afin d’éviter de coincer les
doigts entre l’étrier et le pied.
3. Verrouiller l’étrier au haut de chaque pied [3] : maintenir en place le haut du pied avec la main et faire
coulisser l’étrier vers le haut jusqu’à à ce qu’il soit verrouillé. Procéder pour les six pieds.
4. Maintenir la tonnelle par deux pieds d’un même côté [4]. Bloquer la partie inférieure du pied avec votre pied
et soulever la tonnelle afin de glisser cette partie inférieure hors du pied. Verrouiller l’ensemble. Procéder
pour les quatre pieds.
5. Placer les pieds de manière à ce qu’ils forment un rectangle. Replier les bandes scratch autour de l’armature
afin de fixer la bâche.
6. Il est fortement conseillé de fixer la tonnelle en sécurisant chaque pied utilisant un hauban (incl.) ancré à un
piquet (pas incl.) enfoncé dans le sol.
6.
Démontage de la tonnelle
Consulter les illustrations à la page 2 de cette notice.
1. Retirer les haubans ancrés aux piquets si nécessaire.
2. Maintenir la tonnelle par deux pieds d’un même côté [5]. Enfoncer le bouton de verrouillage et faire coulisser
le pied inférieur dans le pied. Procéder pour les six pieds.
3. Déverrouiller l’étrier au haut de chaque pied [6] : soulever légèrement l’étrier et enfoncer le bouton de
verrouillage. Faire coulisser l’étrier vers le bas. Procéder pour les six pieds
4. Maintenir la tonnelle par deux pieds opposés. Soulever légèrement la tonnelle et refermer la tonnelle. Secouer
légèrement la tonnelle pour faciliter la fermeture [7]. L’étrier de verrouillage glisse sur le pied. Procéder
prudemment afin d’éviter de coincer les doigts entre l’étrier et le pied.
5. Soulever légèrement la tonnelle et fermer entièrement la tonnelle [8].
6. Ne jamais ranger la tonnelle avec une bâche humide.
7.
Spécifications techniques
matériau toit, façade et parois
pieds en aluminium
armature toit en acier à revêtement poudrée
hauteur max.
polyester 260 g/m² à revêtement PVC
30 x 30 mm / 25 x 25 mm
23 x 12 mm
3.50 m
N’employer cet appareil qu’avec des accessoires d’origine. La SA Velleman ne peut, dans la mesure
conforme au droit applicable être tenue responsable des dommages ou lésions (directs ou indirects)
pouvant résulter de l’utilisation de cet appareil. Pour plus d’information concernant cet article et la
dernière version de cette notice, visiter notre site web www.perel.eu. Toutes les informations
présentées dans cette notice peuvent être modifiées sans notification préalable.
© DROITS D’AUTEUR
SA Velleman est l’ayant droit des droits d’auteur pour cette notice. Tous droits mondiaux réservés.
Toute reproduction, traduction, copie ou diffusion, intégrale ou partielle, du contenu de cette notice par quelque
procédé ou sur tout support électronique que se soit est interdite sans l’accord préalable écrit de l’ayant droit.
V. 01 – 23/11/2012
6
©Velleman nv
GZB9
MAN
NUAL DEL
L USUAR
RIO
1.
Inttroducción
¡Gracias por
p haber compra
ado el GZB9! Lea
a atentamente la
as instrucciones del
d manual antes de usarlo. Si el
aparato ha sufrido algún daño
d
en el transp
porte no lo instale
e y póngase en contacto
c
con su distribuidor.
d
2.
Ins
strucciones de
d seguridad
d
Siga cuidados
samente las instrrucciones de este
e manual del usua
ario para evitar lesiones causadas
s por
piezas móvile
es. Monte y desm
monte el cenador con tres persona
as.
Monte y desm
monte el cenador en condiciones meteorológicas
m
fa
avorables. Nunca
a utilice el cenado
or si
hay mucho viento.
e
un fueg
go ni una barbaco
oa bajo o cerca del
d cenador.
La lona es infflamable. Nunca encienda
• Familiaarícese con el fun
ncionamiento del aparato antes de
d utilizarlo.
• Por razones de segurid
dad, las modificac
ciones no autoriz
zadas del aparato
o están prohibida
as. Los daños cau
usados
por mo
odificaciones no autorizadas, no están
e
cubiertos por
p la garantía.
• Dañoss causados por deescuido de las insstrucciones de seeguridad de este manual invalidarrán su garantía y su
distrib
buidor no será res
sponsable de ningún daño u otros
s problemas resu
ultantes.
• Guarde este manual deel usuario para cuando necesite consultarlo.
c
3. Norrmas genera
ales
• No agiite el cenador. Evvite usar excesiva fuerza durantee el manejo y la in
nstalación.
• Utilice sólo el cenador para las aplicacioones descritas en
n este manual. Su uso incorrecto anula la garantía
a
completamente.
• Asegúrese de que el ceenador esté comp
pletamente seco antes de almace
enarlo. Una lona húmeda puede causar
c
moho que podría dañar las fibras y la tela.
4.
•
•
•
•
Carracterísticas
plegab
ble y fácil de mon
ntar
se enttrega con funda de
d transporte prá
áctica con ruedec
cillas
poliéstter con revestimiiento PVC resiste
ente a los rayos UV
U y 100% imperrmeable
color de
d la lona: blanco
o.
Observac
ción: En caso de
e condiciones clim
matológicas extre
emas podría filtra
arse agua en las carpas.
c
5.
Montar el cenad
dor
Véase las figuras en la pág
gina 2 de este manual
m
del usuario
o.
cione un lugar ad
decuado para el cenador.
c
Sáquenlo fuera de la bolsa de transporte y móntenlo. Sujjeten
1. Selecc
cada uno,
u
dos patas y desplieguen el ce
enador lo mejor posible, sin forza
ar [1].
2. Cojan cada uno el cena
ador por las dos patas opuestas. Levántenlo ligera
amente y ábranlo
o completamente
e [2].
La unidad de bloqueo se
s deslizará sobrre la pata. Sean cuidadosos
c
para no pillarse la mano o los dedos.
ga una mano en la parte de arriba
a de la pata y des
slicen la unidad de
d
3. Fijen la lona a cada pata [3]: manteng
bloque
eo hacia arriba ha
asta que se bloquee y oigan un clic. Hagan lo mis
smo para las seis patas.
4. Coged
d cada uno el cenador por los dos pies del mismo lado [4]. Bloqueen la parte inferiior de la pata con
n el
pie y levanten el cenad
dor, para deslizarr esta parte inferrior, fuera de la pata.
p
Bloqueen ell conjunto. Hagan
n lo
mismo
o para las otras cuatro
c
patas.
5. Pongan las patas de ta
al manera que forrmen un rectángulo. Vuelvan a pllegar las cintas de
d velcro alrededo
or del
zón para fijar la lo
ona.
armaz
6. Fije ca
ada pata del cena
ador al suelo con picas (no incl.) y vientos (incl.).
6.
Des
smontar el cenador
c
Véase las figuras en la pág
gina 2 de este manual
m
del usuario
o.
1. Quiten
n las picas y los vientos
v
si fuera necesario.
n
2. Cojan cada uno el cena
ador por dos pies
s del mismo lado [5]. Pulsen el botón
b
de bloqueo y deslicen la parrte
inferio
or en la parte exterior de la pata. Hagan lo mismo para las seis pattas.
3. Desblo
oqueen la unidad
d de bloqueo de la
a parte superior de cada pata [6]
]: deslicen ligera
amente la unidad de
bloque
eo y pulsen el botón de bloqueo. Deslicen la unida
ad de bloqueo hacia abajo. Hagan
n lo mismo para las
l
seis pa
atas.
4. Cojan cada uno el cena
ador por dos pata
as opuestas. Lev
vanten ligeramente el cenador y vuelvan
v
a plegarlo
o [7].
Sacudan ligeramente para
p
facilitar esto
o. La unidad de bloqueo
b
se desliza
a sobre la pata. Sean
S
cuidadosos para
os dedos.
no pillarse la mano o lo
5. Levantten ligeramente el cenador y pliéguenlo completamente [8].
6. Nunca
a almacenen el ce
enador con una lo
ona húmeda.
V. 01 – 23
3/11/2012
7
©Vellem
man nv
GZB9
7.
Esp
pecificacione
es
material del
d techo, la fachada y las lonas la
aterales
pés em allumínio
estructura
a del techo de ac
cero con revestim
miento pulverizado
altura máx.
poliéster 260 g/m²
g
con revestimiento PVC
30 x 30 mm / 25 x 25 mm
23 x 12 mm
3.50 m
ste aparato sólo
o con los accesorios originales
s. Velleman NV
V no será respon
nsable de daños ni
Utilice es
lesiones causados por un
u uso (indebid
do) de este aparato. Para más información so
obre este produ
ucto y
la versión más reciente
e de este manua
al del usuario, visite
v
nuestra página
p
www.perel.eu. Se pued
den
aciones y el con
ntenido de este manual sin pre
evio aviso.
modificar las especifica
CHOS DE AUTOR
R
© DEREC
Velleman
n NV dispone de
e los derechos de autor para este
e
manual del usuario. Todo
os los derechos
mundiale
es reservados. Está estrictamen
nte prohibido reproducir, traducir,, copiar, editar y guardar este ma
anual
del usuariio o partes de ello sin previo perm
miso escrito del derecho
d
habiente.
BEDIE
ENUNGSANLEITU
UNG
1.
Ein
nführung
Wir bedan
nken uns für den Kauf des GZB9!! Lesen Sie diese Bedienungsanleitung vor Inbetriebnahme sorgfälltig
durch. Üb
berprüfen Sie, ob Transportschäde
en vorliegen. Sollte dies der Fall sein,
s
verwenden Sie das Gerät nic
cht
und wend
den Sie sich an Ih
hren Händler.
2.
Sicherheitshinw
weise
Befolgen Sie die
d Anweisungen
n der Bedienungsanleitung, um Ve
erletzungen zu ve
ermeiden.
Montieren und
d demontieren Sie den Gartenpav
villon zu dritt.
Montieren und
d demontieren Sie den Gartenpav
villon bei günstigen Wetterverhälttnissen. Verwend
den
Sie den Garte
enpavillon nie beii starkem Wind.
Die Abdeckpla
ane vom Gartenp
pavillon ist entzündbar. Machen Sie
S kein Feuer oder geben Sie kein
ne
Grillparty unter oder in der Nä
ähe des Gartenpa
avillons.
• Nehmeen Sie das Gerät erst in Betrieb, nachdem Sie sich
h mit seinen Funktionen vertraut gemacht haben.
• Eigenm
mächtige Veränderungen sind aus
s Sicherheitsgrün
nden verboten. Bei
B Schäden verursacht durch
eigenm
mächtige Änderungen erlischt derr Garantieanspruch.
• Bei Scchäden, die durch
h Nichtbeachtung
g der Bedienungs
sanleitung verursacht werden, erlischt der
Garantieanspruch. Für daraus resultiere
ende Folgeschäden übernimmt de
er Hersteller kein
ne Haftung.
• Bewah
hren Sie diese Be
edienungsanleitun
ng für künftige Einsichtnahme auf.
3. Allg
gemeine Richtlinien
• Vermeeiden Sie Erschüttterungen. Vermeeiden Sie rohe Geewalt während deer Installation un
nd Bedienung des
s
Garten
npavillons.
• Verweenden Sie den Gaartenpavillon nur für Anwendungeen beschrieben in
n dieser Bedienun
ngsanleitung sons
st
erlisch
ht der Garantiean
nspruch.
• Lassen
n Sie eine feuchte Plane zuerst vö
öllig trocknen ehe
e Sie den Gartenpavillon lagern. Eine
E
feuchte Plan
ne ist
ein ide
ealer Zuchtteich für
f Schimmel, die natürlichen Fas
sern und die Besc
chichtung angreifen.
4.
•
•
•
•
Eigenschaften
zusam
mmenklapbar und
d einfach zu baue
en
Lieferu
ung in praktische
er Transporttasch
he mit Rollen
soliderr UV-beständigerr Polyester mit PV
VC-Beschichtung, 100% wasserdiicht
Farbe der Abdeckplane
e: weiß
Bemerku
ung: Bei extreme
en Wetterverhältn
nissen kann Wasser in die Zelt eindringen.
5.
Den
n Gartenpavillon montieren
Siehe Abb
bildungen, Seite 2 dieser Bedienu
ungsanleitung.
1. Wähle
en Sie einen geeig
gneten Ort für de
en Gartenpavillon
n. Nehmen Sie de
en Gartenpavillon
n aus der Trageta
asche
und sttellen Sie ihn auf seine Standbeine. Nehmen Sie beide
b
zwei Standb
beine fest und falten Sie den
Garten
npavillon möglich
hst weit auf [1].
2. Halten
n Sie und die and
dere Person nun jeder
j
ein gegenüberliegendes Sta
andbein fest und falten Sie den
Garten
npavillon weiter auf
a [2]. Der Verrriegelungsteil gle
eitet über das Sta
andbein. Seien Sie vorsichtig, um
Verletz
zungen zu verme
eiden.
V. 01 – 23
3/11/2012
8
©Vellem
man nv
GZB9
3. Befesttigen Sie die Plan
ne nun an jedem Standbein [3]: legen Sie eine Ha
and obenan auf dem
d
Standbein und
schieb
ben Sie den Verriegelungsteil nach
h oben, bis er in das Standbein einrastet. Wiederh
holen Sie dieses
Verfah
hren für die sechs
s Standbeine.
4. Halten
n Sie und die and
dere Person nun jeder
j
ein Standbe
ein derselben Seite fest [4]. Haltten Sie den unterren
Teil de
es Standbeins mit Ihrem Fuß auf und heben Sie den Gartenpavillon leicht hoch so dass der untere Teil
T
des Sttandbeins aus de
em oberen Teil sc
chiebt. Rasten Sie
e ein. Wiederhole
en Sie dieses Verrfahren für die vie
er
übrige
en Standbeine.
5. Installieren Sie die Sta
andbeine so, dass
s der Gartenpavilllon ein Rechteck
k bildet. Falten Siie den Klettverschluss
auf de
er Unterseite der Plane rund das Gestänge.
G
6. Befesttigen Sie den Garrtenpavillon auch
h noch mit Hering
gen (nicht mitgeliefert) und Spanngurten (mitgelie
efert)
am Bo
oden befestigen.
6.
Den
n Gartenpavillon demonttieren
Siehe Abb
bildungen, Seite 2 dieser Bedienu
ungsanleitung.
1. Entferrnen Sie die Herin
nge und Spanngu
urten wenn Sie diese verwendet haben.
h
2. Halten
n Sie und die and
dere Person nun jeder
j
ein Standbe
ein derselben Seite fest [5]. Drüc
cken Sie zusamm
men
die Ve
erriegelungstaste ein und schieben
n Sie den unteren Teil des Standb
beins in den oberren Teil. Wiederh
holen
Sie die
eses Verfahren fü
ür die sechs Stan
ndbeine.
3. Entrieg
geln Sie die Plane von jedem Standbein [6]: Schiieben Sie den Ve
erriegelungsteil le
eicht nach oben und
u
drücke
en Sie auf die Verriegelungstaste. Schieben Sie de
en Verriegelungsteil nun völlig nach unten.
Wiederholen Sie dieses
s Verfahren für die
d sechs Standbe
eine.
n Sie und die and
dere Person nun jeder
j
ein gegenüberliegendes Sta
andbein fest und falten Sie den
4. Halten
Garten
npavillon zusamm
men [7]. schütte
eln Sie den Gartenpavillon leicht, um das Zusamm
menfalten zu
vereinfachen. Der Verrriegelungsteil gleitet über das Sta
andbein. Seien Sie vorsichtig, um Verletzungen zu
u
eiden.
verme
5. Heben
n Sie den Gartenp
pavillon ein bissc
chen hoch und sc
chließen Sie die Plane
P
völlig [8].
6. Lassen
n Sie eine feuchte Plane zuerst vö
öllig trocknen, eh
he Sie den lagern
n.
7.
Tec
chnische Datten
Material Dach,
D
Frontwand und Seitenwände
Aluminium
mstangen
pulverbes
schichtete Dachko
onstruktion aus Stahl
S
Höhe Dac
chfirst
Polyesterr 260 g/m² mit PVC-Beschichtung
P
g
30 x 30 mm
m / 25 x 25 mm
m
23 x 12 mm
m
3.50 m
Verwend
den Sie dieses Gerät
G
nur mit orriginellen Zube
ehörteilen. Velle
eman NV übern
nimmt keine Haftung
für Schad
den oder Verlettzungen bei (fa
alscher) Anwendung dieses Ge
erätes. Für meh
hr Informatione
en zu
diesem Produkt
P
und die
e neueste Version dieser Bedie
enungsanleitun
ng, siehe www.perel.eu. Alle
Änderungen ohne vorhe
erige Ankündigung vorbehalte
en.
© URHEB
BERRECHT
Velleman
n NV besitzt das Urheberrechtt für diese Bedie
enungsanleitun
ng. Alle weltweiten Rechte
vorbehallten. Ohne vorhe
erige schriftliche Genehmigung de
es Urhebers ist es nicht gestattet,, diese
Bedienung
gsanleitung ganz
z oder in Teilen zu reproduzieren, zu kopieren, zu übersetzen, zu bearbeiten
b
oder zu
z
speichern.
MANU
UAL DO UTILIZAD
U
DOR
1.
Inttrodução
Obrigada por ter adquirido
o o GZB9! Leia atentamente as in
nstruções do man
nual antes de o usar.
u
Caso o aparrelho
tenha sofrrido algum dano durante o transp
porte não o instale e entre em contacto com o seu
u distribuidor.
2.
Ins
struções de segurança
s
samente as isntru
uções deste manual do utilizador a fim de evitar le
esões causadas por
p
Siga cuidados
peças móveis
s. Monte e desmo
onte o toldo com a ajuda a três pe
essoa.
Monte e desm
monte o toldo com
m condições mete
eorológicas favorráveis. Nunca use
e o toldo caso ha
aja
muito vento.
mável. Nunca faç
ça fogueiras ou churrascos
c
por ba
aixo ou perto do toldo.
A lona é inflam
• Normaas gerais Familarrize-se com o fun
ncionamento do aparelho
a
antes de
e o usar.
• Por razões de segurançça, estão proíbidas quaisquer moodificações ao apaarelho desde quee não autorizadass. Os
a
não estão cobertos pela
p
garantia.
danos causados por modificações não autorizadas,
• Utilizee o aparelho apen
nas para as aplica
ações descritas neste
n
manual. O uso incorrecto an
nula completame
ente a
garanttia.
V. 01 – 23
3/11/2012
9
©Vellem
man nv
GZB9
• Os danos causados pelo não respeito das instruções de segurança referidas neste manual anulam a garantia e
o seu distribuidor não será responsável por qualquer dano ou outros problemas resultantes.
• Guarde este manual para que o possa consultar sempre que necessário.
3. Normas gerais
• Não abane o toldo. Evite usar força excessiva durante o manuseamento e instalação.
• Use apenas o toldo para as aplicações descritas neste manual. O uso indevido anula a garantia
completamente.
• Certifique-se que o toldo está completamente seco antes de o guardar. A lona húmida pode provocar bolor e
poderá danificar as fibras e a tela.
4.
•
•
•
•
Características
dobrável e fácil de montar
saco de transporte com rodas incluído
poliester com revestimento em PVC resistente aos raios UV, 100% impermeável
cor do toldo: branco.
Nota: Em condições climáticas extremas, a infiltração de água é possível.
5.
Montar o toldo
Ver as figuras da página 2 deste manual do utilizador.
1. Seleccione o local adequado para o toldo. Retire-o do estojo de transporte e montá-lo. Cada pessoa deve
segurar em duas das pernas e estenderem o toldo o melhor possível, sem forçar [1].
2. Cada pessoa deve pegar no toldo pelas pernas dos lados opostos. Levantá-lo ligeramente abri-lo
completamente [2]. A unidade de bloqueio deslizará ao longo da perna. É necessário cuidado para não
entalar os dedos.
3. Fixar a lona em cada uma das pernas [3]: manter uma mão na parte superior da perna e fazer deslizar a
unidade de bloqueio para cima até bloquear e ouvir-se um clic. Proceder da mesma forma para as seis
pernas.
4. Segurar cada um o toldo pelas pernas do mesmo lado [4]. Bloquear a parte inferior da perna e levantar o
toldo, para deslizar esta parte inferior, fora do perna. Bloquear o conjunto. Proceder da mesma forma para as
seis pernas.
5. Dispor os pés de forma a que formem um rêtangulo. Voltar a colar as cintas de velcro em volta da armação
para fixar a lona.
6. Fixa cada uma das pernas do toldo ao chão (acessórios de fixação incl).
6.
Desmontar o toldo
Ver as figuras da página 2 deste manual do utilizador.
1. Retirar os acessórios de fixação caso seja necessário.
2. Cada pessoa segura o toldo pelas duas pernas do mesmo lado. Primir o botão de bloqueio e fazer deslizar a
parte inferior na parte exterior da perna [5]. Proceder da mesma forma para as seis pernas.
3. Desbloquear a unidade de bloqueio da parte superior de cada perna [6]: fazer deslizar ligeramente a unidade
de bloqueio e primir o botão de bloqueio. Fazer deslizar a unidade de bloqueio para baixo. Proceder da
mesma forma para as seis pernas.
4. Cada pessoa segura o toldo por duas das pernas opostas. Levantar ligeramente o toldo e voltar a dobrá-lo
[7]. Abanar ligeiramente para facilitar a operação. A unidade de bloqueio desliza pela perna. É necessário
cuidado para não entalar os dedos.
5. Levantar ligeiramente o tolos e dobrá-lo completamente [8].
6. Nunca guardar o toldo com a lona húmida.
7.
Especificações
material tecto e painéis
pés em alumínio
estrutura do tecto em aço com revestimento pulverizado
altura máx.
260 g/m² poliester com revestimento em PVC
30 x 30 mm / 25 x 25 mm
23 x 12 mm
3.50 m
Utilize este aparelho apenas com acessórios originais. A Velleman NV não será responsável por
quaisquer danos ou lesões causados pelo uso (indevido) do aparelho. Para mais informação sobre
este produto e para aceder à versão mais recente deste manual do utilizador, visite a nossa página
www.perel.eu. Podem alterar-se as especificações e o conteúdo deste manual sem aviso prévio.
© DIREITOS DE AUTOR
A Velleman NV detem os direitos de autor deste manual do utilizador. Todos os direitos mundiais
reservados. É estrictamente proíbido reproduzir, traduzir, copiar, editar e gravar este manual do utilizador ou
partes deste sem prévia autorização escrita por parte da detentora dos direitos.
V. 01 – 23/11/2012
10
©Velleman nv
Velleman® Service and Quality Warranty
Since its foundation in 1972, Velleman® acquired extensive experience in the
electronics world and currently distributes its products in over 85 countries.
All our products fulfil strict quality requirements and legal stipulations in the EU. In
order to ensure the quality, our products regularly go through an extra quality
check, both by an internal quality department and by specialized external
organisations. If, all precautionary measures notwithstanding, problems should
occur, please make appeal to our warranty (see guarantee conditions).
General Warranty Conditions Concerning Consumer Products (for EU):
• All consumer products are subject to a 24-month warranty on production flaws
and defective material as from the original date of purchase.
• Velleman® can decide to replace an article with an equivalent article, or to refund
the retail value totally or partially when the complaint is valid and a free repair or
replacement of the article is impossible, or if the expenses are out of proportion.
You will be delivered a replacing article or a refund at the value of 100% of the
purchase price in case of a flaw occurred in the first year after the date of purchase
and delivery, or a replacing article at 50% of the purchase price or a refund at the
value of 50% of the retail value in case of a flaw occurred in the second year after
the date of purchase and delivery.
• Not covered by warranty:
- all direct or indirect damage caused after delivery to the article (e.g. by oxidation,
shocks, falls, dust, dirt, humidity...), and by the article, as well as its contents (e.g.
data loss), compensation for loss of profits;
- consumable goods, parts or accessories that are subject to an aging process
during normal use, such as batteries (rechargeable, non-rechargeable, built-in or
replaceable), lamps, rubber parts, drive belts... (unlimited list);
- flaws resulting from fire, water damage, lightning, accident, natural disaster,
etc.…;
- flaws caused deliberately, negligently or resulting from improper handling,
negligent maintenance, abusive use or use contrary to the manufacturer’s
instructions;
- damage caused by a commercial, professional or collective use of the article (the
warranty validity will be reduced to six (6) months when the article is used
professionally);
- damage resulting from an inappropriate packing and shipping of the article;
- all damage caused by modification, repair or alteration performed by a third party
without written permission by Velleman®.
• Articles to be repaired must be delivered to your Velleman® dealer, solidly
packed (preferably in the original packaging), and be completed with the original
receipt of purchase and a clear flaw description.
• Hint: In order to save on cost and time, please reread the manual and check if the
flaw is caused by obvious causes prior to presenting the article for repair. Note that
returning a non-defective article can also involve handling costs.
• Repairs occurring after warranty expiration are subject to shipping costs.
• The above conditions are without prejudice to all commercial warranties.
The above enumeration is subject to modification according to the article
(see article’s manual).
Velleman® service- en kwaliteitsgarantie
Velleman® heeft sinds zijn oprichting in 1972 een ruime ervaring opgebouwd in de
elektronicawereld en verdeelt op dit moment producten in meer dan 85 landen. Al
onze producten beantwoorden aan strikte kwaliteitseisen en aan de wettelijke
bepalingen geldig in de EU. Om de kwaliteit te waarborgen, ondergaan onze
producten op regelmatige tijdstippen een extra kwaliteitscontrole, zowel door onze
eigen kwaliteitsafdeling als door externe gespecialiseerde organisaties. Mocht er
ondanks deze voorzorgen toch een probleem optreden, dan kunt u steeds een
beroep doen op onze waarborg (zie waarborgvoorwaarden).
Algemene waarborgvoorwaarden consumentengoederen (voor Europese
Unie):
• Op alle consumentengoederen geldt een garantieperiode van 24 maanden op
productie- en materiaalfouten en dit vanaf de oorspronkelijke aankoopdatum.
• Indien de klacht gegrond is en een gratis reparatie of vervanging van een artikel
onmogelijk is of indien de kosten hiervoor buiten verhouding zijn, kan Velleman®
beslissen het desbetreffende artikel te vervangen door een gelijkwaardig artikel of
de aankoopsom van het artikel gedeeltelijk of volledig terug te betalen. In dat geval
krijgt u een vervangend product of terugbetaling ter waarde van 100% van de
aankoopsom bij ontdekking van een gebrek tot één jaar na aankoop en levering, of
een vervangend product tegen 50% van de kostprijs of terugbetaling van 50 % bij
ontdekking na één jaar tot 2 jaar.
• Valt niet onder waarborg:
- alle rechtstreekse of onrechtstreekse schade na de levering veroorzaakt aan het
toestel (bv. door oxidatie, schokken, val, stof, vuil, vocht...), en door het toestel,
alsook zijn inhoud (bv. verlies van data), vergoeding voor eventuele winstderving.
- verbruiksgoederen, onderdelen of hulpstukken die onderhevig zijn aan
veroudering door normaal gebruik zoals bv. batterijen (zowel oplaadbare als nietoplaadbare, ingebouwd of vervangbaar), lampen, rubberen onderdelen,
aandrijfriemen... (onbeperkte lijst).
- defecten ten gevolge van brand, waterschade, bliksem, ongevallen,
natuurrampen, enz.
- defecten veroorzaakt door opzet, nalatigheid of door een onoordeelkundige
behandeling, slecht onderhoud of abnormaal gebruik of gebruik van het toestel
strijdig met de voorschriften van de fabrikant.
- schade ten gevolge van een commercieel, professioneel of collectief gebruik van
het apparaat (bij professioneel gebruik wordt de garantieperiode herleid tot 6
maand).
- schade veroorzaakt door onvoldoende bescherming bij transport van het
apparaat.
- alle schade door wijzigingen, reparaties of modificaties uitgevoerd door derden
zonder toestemming van Velleman®.
• Toestellen dienen ter reparatie aangeboden te worden bij uw Velleman®verdeler. Het toestel dient vergezeld te zijn van het oorspronkelijke aankoopbewijs.
Zorg voor een degelijke verpakking (bij voorkeur de originele verpakking) en voeg
een duidelijke foutomschrijving bij.
• Tip: alvorens het toestel voor reparatie aan te bieden, kijk nog eens na of er geen
voor de hand liggende reden is waarom het toestel niet naar behoren werkt (zie
handleiding). Op deze wijze kunt u kosten en tijd besparen. Denk eraan dat er ook
voor niet-defecte toestellen een kost voor controle aangerekend kan worden.
• Bij reparaties buiten de waarborgperiode zullen transportkosten aangerekend
worden.
• Elke commerciële garantie laat deze rechten onverminderd.
Bovenstaande opsomming kan eventueel aangepast worden naargelang de
aard van het product (zie handleiding van het betreffende product).
Garantie de service et de qualité Velleman®
Depuis 1972, Velleman® a gagné une vaste expérience dans le secteur de
l’électronique et est actuellement distributeur dans plus de 85 pays.
Tous nos produits répondent à des exigences de qualité rigoureuses et à des
dispositions légales en vigueur dans l’UE. Afin de garantir la qualité, nous
soumettons régulièrement nos produits à des contrôles de qualité supplémentaires,
tant par notre propre service qualité que par un service qualité externe. Dans le
cas improbable d’un défaut malgré toutes les précautions, il est possible d’invoquer
notre garantie (voir les conditions de garantie).
Conditions générales concernant la garantie sur les produits grand public
(pour l’UE) :
• tout produit grand public est garanti 24 mois contre tout vice de production ou de
matériaux à dater du jour d’acquisition effective ;
• si la plainte est justifiée et que la réparation ou le remplacement d’un article est
jugé impossible, ou lorsque les coûts s’avèrent disproportionnés, Velleman®
s’autorise à remplacer ledit article par un article équivalent ou à rembourser la
totalité ou une partie du prix d’achat. Le cas échéant, il vous sera consenti un
article de remplacement ou le remboursement complet du prix d’achat lors d’un
défaut dans un délai de 1 an après l’achat et la livraison, ou un article de
remplacement moyennant 50% du prix d’achat ou le remboursement de 50% du
prix d’achat lors d’un défaut après 1 à 2 ans.
• sont par conséquent exclus :
- tout dommage direct ou indirect survenu à l’article après livraison (p.ex.
dommage lié à l’oxydation, choc, chute, poussière, sable, impureté…) et provoqué
par l’appareil, ainsi que son contenu (p.ex. perte de données) et une indemnisation
éventuelle pour perte de revenus ;
- toute pièce ou accessoire nécessitant un remplacement causé par un usage
normal comme p.ex. piles (rechargeables comme non rechargeables, intégrées ou
remplaçables), ampoules, pièces en caoutchouc, courroies… (liste illimitée) ;
- tout dommage qui résulte d’un incendie, de la foudre, d’un accident, d’une
catastrophe naturelle, etc. ;
- out dommage provoqué par une négligence, volontaire ou non, une utilisation ou
un entretien incorrect, ou une utilisation de l’appareil contraire aux prescriptions du
fabricant ;
- tout dommage à cause d’une utilisation commerciale, professionnelle ou
collective de l’appareil (la période de garantie sera réduite à 6 mois lors d’une
utilisation professionnelle) ;
- tout dommage à l’appareil qui résulte d’une utilisation incorrecte ou différente que
celle pour laquelle il a été initialement prévu comme décrit dans la notice ;
- tout dommage engendré par un retour de l’appareil emballé dans un
conditionnement non ou insuffisamment protégé.
- toute réparation ou modification effectuée par une tierce personne sans
l’autorisation explicite de SA Velleman® ; - frais de transport de et vers Velleman®
si l’appareil n’est plus couvert sous la garantie.
• toute réparation sera fournie par l’endroit de l’achat. L’appareil doit
nécessairement être accompagné du bon d’achat d’origine et être dûment
conditionné (de préférence dans l’emballage d’origine avec mention du défaut) ;
• tuyau : il est conseillé de consulter la notice et de contrôler câbles, piles, etc.
avant de retourner l’appareil. Un appareil retourné jugé défectueux qui s’avère en
bon état de marche pourra faire l’objet d’une note de frais à charge du
consommateur ;
• une réparation effectuée en-dehors de la période de garantie fera l’objet de frais
de transport ;
• toute garantie commerciale ne porte pas atteinte aux conditions susmentionnées.
La liste susmentionnée peut être sujette à une complémentation selon le type
de l’article et être mentionnée dans la notice d’emploi.
Garantía de servicio y calidad Velleman®
Desde su fundación en 1972 Velleman® ha adquirido una amplia experiencia
como distribuidor en el sector de la electrónica en más de 85 países. Todos
nuestros productos responden a normas de calidad rigurosas y disposiciones
legales vigentes en la UE. Para garantizar la calidad, sometemos nuestros
productos regularmente a controles de calidad adicionales, tanto a través de
nuestro propio servicio de calidad como de un servicio de calidad externo. En el
caso improbable de que surgieran problemas a pesar de todas las precauciones,
es posible recurrir a nuestra garantía (véase las condiciones de garantía).
Condiciones generales referentes a la garantía sobre productos de venta al
público (para la Unión Europea):
• Todos los productos de venta al público tienen un período de garantía de 24
meses contra errores de producción o errores en materiales desde la adquisición
original;
• Si la queja está fundada y si la reparación o sustitución de un artículo no es
posible, o si los gastos son desproporcionados, Velleman® autoriza reemplazar el
artículo por un artículo equivalente o reembolsar la totalidad o una parte del precio
de compra. En este caso, usted recibirá un artículo de recambio o el reembolso
completo del precio de compra si encuentra algún fallo hasta un año después de la
compra y entrega, o un artículo de recambio al 50% del precio de compra o el
reembolso del 50% del precio de compra si encuentra un fallo después de 1 año y
hasta los 2 años después de la compra y entrega.
Por consiguiente, están excluidos entre otras cosas:
- todos los daños causados directa o indirectamente al aparato (p.ej. por oxidación,
choques, caída,...) y a su contenido (p.ej. pérdida de datos) después de la entrega
y causados por el aparato, y cualquier indemnización por posible pérdida de
ganancias;
- partes o accesorios, que estén expuestos al desgaste causado por un uso
normal, como por ejemplo baterías (tanto recargables como no recargables,
incorporadas o reemplazables), bombillas, partes de goma, etc. (lista ilimitada);
- defectos causados por un incendio, daños causados por el agua, rayos,
accidentes, catástrofes naturales, etc.;
- defectos causados a conciencia, descuido o por malos tratos, un mantenimiento
inapropiado o un uso anormal del aparato contrario a las instrucciones del
fabricante;
- daños causados por un uso comercial, profesional o colectivo del aparato (el
período de garantía se reducirá a 6 meses con uso profesional);
- daños causados por un uso incorrecto o un uso ajeno al que está previsto el
producto inicialmente como está descrito en el manual del usuario;
- daños causados por una protección insuficiente al transportar el aparato.
- daños causados por reparaciones o modificaciones efectuadas por una tercera
persona sin la autorización explícita de Velleman®;
- se calcula gastos de transporte de y a Velleman® si el aparato ya no está
cubierto por la garantía.
• Cualquier artículo que tenga que ser reparado tendrá que ser devuelto a su
distribuidor Velleman®. Devuelva el aparato con la factura de compra original y
transpórtelo en un embalaje sólido (preferentemente el embalaje original). Incluya
también una buena descripción del fallo;
• Consejo: Lea el manual del usuario y controle los cables, las pilas, etc. antes de
devolver el aparato. Si no se encuentra un defecto en el artículo los gastos podrían
correr a cargo del cliente;
• Los gastos de transporte correrán a carga del cliente para una reparación
efectuada fuera del período de garantía.
• Cualquier gesto comercial no disminuye estos derechos.
La lista previamente mencionada puede ser adaptada según el tipo de
artículo (véase el manual del usuario del artículo en cuestión).
Velleman® Service- und Qualitätsgarantie
Seit der Gründung in 1972 hat Velleman® sehr viel Erfahrung als Verteiler in der
Elektronikwelt in über 85 Ländern aufgebaut.
Alle Produkte entsprechen den strengen Qualitätsforderungen und gesetzlichen
Anforderungen in der EU. Um die Qualität zu gewährleisten werden unsere
Produkte regelmäßig einer zusätzlichen Qualitätskontrolle unterworfen, sowohl von
unserer eigenen Qualitätsabteilung als auch von externen spezialisierten
Organisationen. Sollten, trotz aller Vorsichtsmaßnahmen, Probleme auftreten,
nehmen Sie bitte die Garantie in Anspruch (siehe Garantiebedingungen).
Allgemeine Garantiebedingungen in Bezug auf Konsumgüter (für die
Europäische Union):
• Alle Produkte haben für Material- oder Herstellungsfehler eine Garantieperiode
von 24 Monaten ab Verkaufsdatum.
• Wenn die Klage berechtigt ist und falls eine kostenlose Reparatur oder ein
Austausch des Gerätes unmöglich ist, oder wenn die Kosten dafür
unverhältnismäßig sind, kann Velleman® sich darüber entscheiden, dieses Produkt
durch ein gleiches Produkt zu ersetzen oder die Kaufsumme ganz oder teilweise
zurückzuzahlen. In diesem Fall erhalten Sie ein Ersatzprodukt oder eine
Rückzahlung im Werte von 100% der Kaufsumme im Falle eines Defektes bis zu 1
Jahr nach Kauf oder Lieferung, oder Sie bekommen ein Ersatzprodukt im Werte
von 50% der Kaufsumme oder eine Rückzahlung im Werte von 50 % im Falle
eines Defektes im zweiten Jahr.
• Von der Garantie ausgeschlossen sind:
- alle direkten oder indirekten Schäden, die nach Lieferung am Gerät und durch
das Gerät verursacht werden (z.B. Oxidation, Stöße, Fall, Staub, Schmutz,
Feuchtigkeit, ...), sowie auch der Inhalt (z.B. Datenverlust), Entschädigung für
eventuellen Gewinnausfall.
- Verbrauchsgüter, Teile oder Zubehörteile, die durch normalen Gebrauch dem
Verschleiß ausgesetzt sind, wie z.B. Batterien (nicht nur aufladbare, sondern auch
nicht aufladbare, eingebaute oder ersetzbare), Lampen, Gummiteile, Treibriemen,
usw. (unbeschränkte Liste).
- Schäden verursacht durch Brandschaden, Wasserschaden, Blitz, Unfälle,
Naturkatastrophen, usw.
- Schäden verursacht durch absichtliche, nachlässige oder unsachgemäße
Anwendung, schlechte Wartung, zweckentfremdete Anwendung oder
Nichtbeachtung von Benutzerhinweisen in der Bedienungsanleitung.
- Schäden infolge einer kommerziellen, professionellen oder kollektiven
Anwendung des Gerätes (bei gewerblicher Anwendung wird die Garantieperiode
auf 6 Monate zurückgeführt).
- Schäden verursacht durch eine unsachgemäße Verpackung und
unsachgemäßen Transport des Gerätes.
- alle Schäden verursacht durch unautorisierte Änderungen, Reparaturen oder
Modifikationen, die von einem Dritten ohne Erlaubnis von Velleman®
vorgenommen werden.
• Im Fall einer Reparatur, wenden Sie sich an Ihren Velleman®-Verteiler. Legen
Sie das Produkt ordnungsgemäß verpackt (vorzugsweise die Originalverpackung)
und mit dem Original-Kaufbeleg vor. Fügen Sie eine deutliche Fehlerbeschreibung
hinzu.
• Hinweis: Um Kosten und Zeit zu sparen, lesen Sie die Bedienungsanleitung
nochmals und überprüfen Sie, ob es keinen auf de Hand liegenden Grund gibt, ehe
Sie das Gerät zur Reparatur zurückschicken. Stellt sich bei der Überprüfung des
Gerätes heraus, dass kein Geräteschaden vorliegt, könnte dem Kunden eine
Untersuchungspauschale berechnet.
• Für Reparaturen nach Ablauf der Garantiefrist werden Transportkosten
berechnet.
• Jede kommerzielle Garantie lässt diese Rechte unberührt.
Die oben stehende Aufzählung kann eventuell angepasst werden gemäß der
Art des Produktes (siehe Bedienungsanleitung des Gerätes).
Garantia de serviço e de qualidade Velleman®
Desde a sua fundação em 1972 Velleman® tem adquirido uma amplia experiencia
no sector da eletrónica com uma distribuição em mais de 85 países.
Todos os nossos produtos respondem a exigências rigorosas e a disposições
legais em vigor na UE. Para garantir a qualidade, submetemos regularmente os
nossos produtos a controles de qualidade suplementares, com o nosso próprio
serviço qualidade como um serviço de qualidade externo. No caso improvável de
um defeito mesmo com as nossas precauções, é possível invocar a nossa
garantia. (ver as condições de garantia).
Condições gerais com respeito a garantia sobre os produtos grande público
(para a UE):
• qualquer produto grande público é garantido 24 mês contra qualquer vício de
produção ou materiais a partir da data de aquisição efectiva;
• no caso da reclamação ser justificada e que a reparação ou substituição de um
artigo é impossível, ou quando os custo são desproporcionados, Velleman®
autoriza-se a substituir o dito artigo por um artigo equivalente ou a devolver a
totalidade ou parte do preço de compra. Em outro caso, será consentido um artigo
de substituição ou devolução completa do preço de compra no caso de um defeito
no prazo de 1 ano depois da data de compra e entrega, ou um artigo de
substituição pagando o valor de 50% do preço de compra ou devolução de 50% do
preço de compra para defeitos depois de 1 a 2 anos.
• estão por consequência excluídos:
- todos os danos directos ou indirectos depois da entrega do artigo (p.ex. danos
ligados a oxidação, choques, quedas, poeiras, areias, impurezas…) e provocado
pelo aparelho, como o seu conteúdo (p.ex. perca de dados) e uma indemnização
eventual por perca de receitas;
- consumíveis, peças ou acessórios sujeitos a desgaste causado por um uso
normal, como p.ex. pilhas (recarregáveis, não recarregáveis, incorporadas ou
substituíveis), lâmpadas, peças em borracha correias… (lista ilimitada);
- todos os danos que resultem de um incêndio, raios, de um acidente, de una
catastrophe natural, etc.;
- danos provocados por negligencia, voluntária ou não, uma utilização ou
manutenção incorrecta, ou uma utilização do aparelho contrária as prescrições do
fabricante ;
- todos os danos por causa de uma utilização comercial, profissional ou colectiva
do aparelho ( o período de garantia será reduzido a 6 meses para uma utilização
profissional);
- todos os danos no aparelho resultando de uma utilização incorrecta ou diferente
daquela inicialmente prevista e descrita no manual de utilização;
- todos os danos depois de uma devolução não embalada ou mal protegida ao
nível do acondicionamento.
- todas as reparações ou modificações efectuadas por terceiros sem a autorização
de SA Velleman®;
- despesas de transporte de e para Velleman® se o aparelho não estiver coberto
pela garantia.
• qualquer reparação será fornecida pelo local de compra. O aparelho será
obrigatoriamente acompanhado do talão ou factura de origem e bem
acondicionado (de preferência dentro da embalagem de origem com indicação do
defeito ou avaria);
• dica: aconselha-mos a consulta do manual e controlar cabos, pilhas, etc. antes
de devolver o aparelho. Um aparelho devolvido que estiver em bom estado será
cobrado despesas a cargo do consumidor;
• uma reparação efectuada fora da garantia, será cobrado despesas de transporte;
• qualquer garantia comercial não prevalece as condições aqui mencionadas.
A lista pode ser sujeita a um complemento conforme o tipo de artigo e estar
mencionada no manual de utilização.
Made in PRC
Imported for PEREL by Velleman nv
Legen Heirweg 33, 9890 Gavere, Belgium
www.perel.eu