1
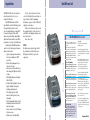
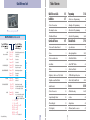
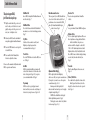
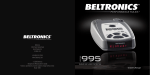
Congratulations If you’ve used a radar detector before, a review of the Quick Reference Guide on pages 4 and 5, and the Programming information on pages 12 and 13 will briefly explain the new features. If this is your first detector, please read the manual in detail to get the most out of your RX65’s outstanding performance and innovative features. Please drive safely. Remove card along perforations BEL Pro RX65 Quick Reference Card There are 7 user-selectable options so you can customize your RX65 for your own preferences. The buttons labeled CITY and BRT are also used to enter the Program Mode, REVIEW your current program settings, and to CHANGE any settings as desired. The words PROGRAM, RVW and CHG are located on the top of the detector, and are highlighted in graphics. FCC Note: Modifications not expressly approved by the manufacturer could void the user’s FCC granted authority to operate the equipment. Remove card along perforations The BEL Pro RX65 is the most advanced radar, laser and safety detector ever designed by Beltronics. The BEL RX65 includes full X, K, SuperWide Ka, and Safety Warning System radar capability, front and rear laser detection, digital signal processing (DSP) for superior range and reduced false alarms, our patented Mute and AutoMute, audible and visual band alerts, and all the performance you’d expect from Beltronics. In addition, the BEL RX65 introduces a new level of revolutionary performance and innovative features. • Superior long-range radar and laser detection, including new “POP” mode alert • Advanced Programming lets you customize 7 features • AutoScan mode drastically reduces false alarms, plus Highway and City settings • Ultra-bright alphanumeric Display with 280 LEDs • Exclusive Threat Display tracks and displays multiple radar signals, including signal strength. • Tech Display provides actual numeric radar frequency for any radar signal • New Programmable Bands (on/off), including International and North American settings. • Detects and decodes Safety Warning System messages • Includes new coiled SmartPlug Quick Reference Card How to use Programming 1 To enter Program Mode, press and hold both CITY and BRT buttons down for 2 seconds. The unit will beep twice, and will display the word Program. 2 Then press the RVW button to review the current settings.You can either tap the button to change from item to item, or hold the button to scroll through the items. 3 Press the CHG button to change any setting. You can either tap the button to change from setting to setting, or hold the button to scroll through all the options. 4 To leave Program Mode, simply wait 8 seconds without pressing any button, or press the PWR button. The unit will display Complete, beep, and return to normal operation. 1 Factory Default Settings To reset RX65 to its original factory settings, press and hold the “CITY” and “BRT” buttons while turning the powetr on. RX65’s display will provide a Reset message, accompanied by an audible alert, acknowledging the reset. An example Here is how you would turn RX65’s AutoMute feature off. 1 Enter the Program Mode by holding both the CITY and BRT buttons down for 2 seconds. RX65 will beep twice and display Program. 2 Then hold the RVW button down. The RX65 will scroll through the categories, starting with Pilot (Pilot), then Voice (Voice), then Power-on sequence (PwrOn), then Signal strength meter (Meter), and then AutoMute (aMute). 3 Release the RVW button when RX65 shows the AutoMute item. Since the factory setting is for AutoMute to be on, RX65 will display aMute ON. If you accidentally don’t release the RVW button in time, and the RX65 goes to the next category, hold the RVW button down again, and after RX65 scrolls through all categories, it will begin again at the top of the list. 4 Press the CHG button to change from aMute ON to aMute OFF. 5 To complete the Programming, simply wait 8 seconds without pressing any button, or press the PWR button. The RX65 will display Complete, beep, and return to normal operation. Programming Details