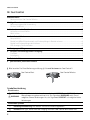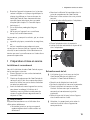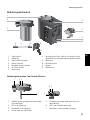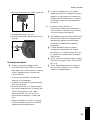
1
de en fr it Cool Control Basis 1 l / Cool Control Wireless 1 l Bedienungsanleitung nl Cool Control Basic 1 l / Cool Control Wireless 1 l Instructions for Use Cool Control de base 1 l / Cool Control Wireless 1 l Mode d’emploi es Cool Control Basic 1 l / Cool Control Wireless 1 l Istruzioni per l’uso Cool Control Basis 1 l / Cool Control Wireless 1 l Gebruiksaanwijzing pt Cool Control básico 1 l / Cool Control Wireless 1 l Manual Cool Control Básico 1 l / Cool Control Wireless 1 l Manual de instruções sv Cool Control Basic 1 l / Cool Control Wireless 1 l Bruksanvisning Cool Control Basic 1 l / Cool Control Wireless 1 l Руководство по эксплуатации ru Inhaltsverzeichnis Ihr Cool Control Bedienelemente3 Bedienelemente Cool Control Wireless................................................................................................................3 Wichtige Hinweise 4 Bestimmungsgemäße Verwendung.....................................................................................................................4 Zu Ihrer Sicherheit....................................................................................................................................................4 1 Vorbereiten und in Betrieb nehmen 5 Aufstellen und anschließen.....................................................................................................................................5 Milch kühlen..............................................................................................................................................................5 2 Cool Control Wireless 6 Kompatibilität............................................................................................................................................................6 Deckel (mit Milchfüllstandsensor) und Funkempfänger in Betrieb nehmen.................................................6 Deckel und Funkempfänger deinstallieren..........................................................................................................6 LED-Anzeigen / Fehler beheben.............................................................................................................................6 3 Reinigung und Pflege 7 4 Transport und umweltgerechte Entsorgung 7 Transport....................................................................................................................................................................7 Entsorgung................................................................................................................................................................7 5 Technische Daten 8 6 JURA-Kontakte / Rechtliche Hinweise 8 E Bitte beachten Sie: Diese Bedienungsanleitung gilt für zwei Versionen des Cool Control 1l. Cool Control Basis Cool Control Wireless Symbolbeschreibung Warnhinweise J VORSICHT J WARNUNG Beachten Sie stets die Informationen, die durch VORSICHT oder WARNUNG mit Warnpiktogramm gekennzeichnet sind. Das Signalwort WARNUNG weist Sie auf mögliche schwere Verletzungen hin, das Signalwort VORSICHT auf mögliche leichte Verletzungen. Verwendete Symbole 2 T Handlungsaufforderung. Hier werden Sie zu einer Aktion aufgefordert. E Hinweise und Tipps, damit Ihnen der Umgang mit Ihrem Cool Control noch leichter fällt. de Bedienelemente Bedienelemente en 1 2 4 3 5 6 7 8 9 10 fr it 11 12 nl 8Verbindungsstück (kann je nach Kaffeevollautomat und dazugehöriger Cappuccino-Düse variieren) 9Milchschlauch 10Verbindungsstück 11Adapter 12Metallrohr 1 Cool Control 2Deckel 3Edelstahlbehälter 4Betriebsanzeige 5 Netzteil mit Netzkabel 6 Q Taste Ein/Aus 7Anschlussbuchse es Bedienelemente Cool Control Wireless 1 2 3 pt 6 7 4 1 2 3 4 Deckel mit integriertem Milchfüllstandsensor LED im Deckel Reset-Taste im Deckel Milchfüllstandsensor 5 sv 5Funkempfänger (zum Einsetzen im Kaffee vollautomat) 6 LED im Funkempfänger 7 Reset-Taste im Funkempfänger ru 3 Wichtige Hinweise Wichtige Hinweise UU Bestimmungsgemäße Verwendung Dieses Gerät (Kaltgetränkespender) ist dazu bestimmt, im Haushalt und ähnlichen Anwendungen verwendet zu werden, beispielsweise von Kunden in Hotels, Motels und anderen Wohneinrichtungen, von Personal in Geschäften, Büros und anderen Arbeitsumgebungen. Es dient nur dazu, Milch im mitgelieferten Edelstahlbehälter abzukühlen und frisch zu halten. Die Zubehörteile des Cool Control Wireless dienen der Milchfüllstandüberwachung per Funk im mitgelieferten Edelstahlbehälter des Cool Control. Jede andere Verwendung gilt als nicht bestimmungsgemäß. JURA übernimmt keine Haftung für Folgen aus nicht bestimmungsgemäßer Verwendung. Lesen und beachten Sie diese Bedienungsanleitung vollständig vor Gebrauch des Geräts. Eine Garantieleistung entfällt für Schäden oder Mängel, die durch Nichtbeachten der Bedienungsanleitung entstanden sind. Halten Sie diese Bedienungsanleitung beim Gerät verfügbar und geben Sie sie an nachfolgende Anwender weiter. Zu Ihrer Sicherheit Lesen und beachten Sie die folgenden wichtigen Sicherheitshinweise sorgfältig. So vermeiden Sie Lebensgefahr durch Stromschlag: Nehmen Sie nie ein Gerät mit Beschädigungen oder schadhaftem Netzkabel in Betrieb. Nehmen Sie das Gerät nie mit nassen Händen in Betrieb. Achten Sie vor der Inbetriebnahme darauf, dass das Netzkabel trocken ist. Schließen Sie das Gerät nur mit dem im Lieferumfang enthaltenen Netzteil an das Wechselstromnetz an. Bei Hinweisen auf Beschädigungen, beispielsweise Schmorgeruch, trennen Sie das Gerät unverzüglich vom Netz und wenden Sie sich an den JURA-Service. UU UU UU Ein beschädigtes Gerät ist nicht sicher und kann Verletzungen und Brand verursachen. Um Schäden und damit mögliche Verletzungs- und Brandgefahren zu vermeiden: Achten Sie darauf, dass die Lüftungsschlitze nicht abgedeckt werden. Lassen Sie das Netzkabel niemals lose herabhängen. Das Netzkabel kann zur Stolperfalle werden oder beschädigt werden. Schützen Sie den Cool Control vor Witterungseinflüssen wie Regen, Frost und direkter Sonneneinstrahlung. Tauchen Sie den Cool Control, die Kabel und Anschlüsse nicht in Wasser. Stellen Sie den Cool Control und seine Einzelteile nicht in die Spülmaschine. Schalten Sie Ihren Cool Control vor Reinigungsarbeiten aus und ziehen Sie den Netzstecker. Wischen Sie den Cool Control stets feucht, aber niemals nass ab und schützen Sie ihn vor dauerhaftem Spritzwasser. Füllen Sie die Milch, die Sie kühlen möchten, nicht direkt in das Gerät. Verwenden Sie den im Lieferumfang enthaltenen Edelstahlbehälter. UU UU UU UU UU UU UU UU UU UU UU 4 Wenn das Netzkabel dieses Gerätes beschädigt wird, muss es entweder direkt bei JURA oder bei einer autorisierten JURA-Servicestelle repariert werden. Achten Sie darauf, dass sich der Cool Control und das Netzkabel nicht in der Nähe von heißen Oberflächen oder offenen Flammen befinden. Achten Sie darauf, dass das Netzkabel nicht eingeklemmt wird oder an scharfen Kanten scheuert. Öffnen und reparieren Sie das Gerät niemals selbst. Nehmen Sie keine Veränderungen am Gerät vor, die nicht in der Bedienungsanleitung beschrieben sind. Das Gerät enthält Strom führende Teile. Reparaturen dürfen ausschließlich von autorisierten JURA-Servicestellen mit Originalersatz- und -zubehörteilen durchgeführt werden. UU de 1 Vorbereiten und in Betrieb nehmen UU UU UU Das Gerät nur an Netzspannung gemäß Typenschild anschließen. Das Typenschild ist auf der Unterseite Ihres Cool Control angebracht. Weitere technische Daten finden Sie in dieser Bedienungsanleitung (siehe Kapitel 5 »Technische Daten«). Schalten Sie das Gerät bei längerer Abwesenheit aus. Betreiben Sie das Gerät nur unter Aufsicht. Personen, einschließlich Kindern, die aufgrund ihrer physischen, sensorischen oder geistigen Fähigkeiten oder Unerfahrenheit oder Unkenntnis nicht in der Lage sind, das Gerät sicher zu bedienen, dürfen das Gerät nicht ohne Aufsicht oder Anweisung durch eine verantwortliche Person nutzen. T Stecken Sie das Kabel des Netzteils in die Anschlussbuchse des Cool Control. T Stecken Sie den Netzstecker in eine Netzsteckdose. T Stecken Sie das Metallrohr in den Adapter. en fr UU UU T Setzen Sie den Adapter im Deckel ein. T Stecken Sie eine Seite des Milchschlauchs in den Adapter. it nl 1 Vorbereiten und in Betrieb nehmen Aufstellen und anschließen Beachten Sie beim Aufstellen Ihres Cool Control folgende Punkte: Stellen Sie das Gerät auf eine waagrechte, gegen Wasser unempfindliche Fläche. Wählen Sie den Standort des Cool Control so, dass das Gerät vor Überhitzung geschützt ist. Achten Sie darauf, dass die Lüftungsschlitze nicht abgedeckt werden. Bevor Sie das neue Gerät in Betrieb nehmen, sollten Sie es aus hygienischen Gründen innen und außen mit einem feuchten Tuch reinigen. Spülen Sie den Edelstahlbehälter gründlich aus. UU UU UU J WARNUNG Lebensgefahr durch Stromschlag bei Betrieb mit schadhaftem Netzkabel. T Nehmen Sie nie ein Gerät mit Beschädigungen oder schadhaftem Netzkabel in Betrieb. es Milch kühlen EE Die Bedienung (z.B. Inbetriebnahme) des Cool Control Wireless ist beschrieben in Kapitel 2 »Cool Control Wireless«. T Füllen Sie den Edelstahlbehälter mit Milch. T Verschließen Sie den Edelstahlbehälter mit dem Deckel. T Setzen Sie den Edelstahlbehälter im Cool Control ein. Achten Sie darauf, dass der Anschluss des Deckels richtig ausgerichtet ist und einrastet. T Verbinden Sie den Milchschlauch mit der Cappuccino-Düse an Ihrem Kaffeevollautomaten. EE Bitte beachten Sie, dass das Verbindungsstück je nach Kaffeevollautomat und dazugehöriger Cappuccino-Düse variieren kann. pt sv ru 5 2 Cool Control Wireless Q T Drücken Sie die Taste Ein/Aus. Ist der Deckel richtig ausgerichtet und eingerastet, beginnt das Gerät zu kühlen. EE Ihr JURA Cool Control hält die Milch immer im optimalen Temperaturbereich. Die Milch kann nicht gefrieren. EE Um Energie zu sparen, wird der Kühlvorgang beendet, sobald der Edelstahlbehälter aus dem Cool Control herausgenommen wird. EE Um den Cool Control auszuschalten, drücken Sie die Taste Ein/Aus Q. EE Wenn Sie das Gerät außer Betrieb nehmen, ziehen Sie den Netzstecker aus der Netzsteckdose. 2 Cool Control Wireless EE Diese Kapitel gilt nur für den Cool Control Wireless 1 l. Kompatibilität EE Der Cool Control Wireless ist leider nicht mit allen Kaffeespezialitäten-Vollautomaten von JURA kompatibel. Fragen Sie Ihren Fachhändler oder schauen Sie nach unter www.jura.com. Deckel (mit Milchfüllstandsensor) und Funkempfänger in Betrieb nehmen EE Reinigen Sie den Deckel mit Milchfüllstandsensor vor dem ersten Gebrauch gründlich mit einem feuchten Tuch und mildem Spülmittel. T Schalten Sie Ihren Kaffeevollautomaten ein. T Stecken Sie den Funkempfänger in die Serviceschnittstelle des Kaffeevollautomaten. EE Wissen Sie nicht, wo sich die Serviceschnittstelle Ihres Kaffeevollautomaten befindet, fragen Sie Ihren Fachhändler oder schauen Sie nach unter www.jura.com. 6 Q T Drücken Sie die Taste Ein/Aus. T Füllen Sie den Edelstahlbehälter des Cool Control (zu mind. einem Drittel) mit Milch. T Verschließen Sie den Edelstahlbehälter mit dem Deckel. T Setzen Sie den Edelstahlbehälter im Cool Control ein. Achten Sie darauf, dass der Anschluss des Deckels richtig ausgerichtet ist und einrastet. Die LEDs im Deckel und im Funkempfänger blinken. Sobald beide LEDs dauerhaft blau leuchten sind der Milchfüllstandsensor und der Funkempfänger betriebsbereit. EE Sobald der Edelstahlbehälter eingesetzt wurde und der Deckel korrekt eingerastet ist, beginnt das Gerät zu kühlen. Der Kühlvorgang wird beendet, sobald der Edelstahlbehälter wieder herausgenommen wird. EE Befindet sich zu wenig Milch im Edelstahlbehälter, so wird dies bei der Zubereitung im Display Ihres Kaffeevollautomaten angezeigt. Der Displaytext kann je nach Gerät variieren. Deckel und Funkempfänger deinstallieren T Schalten Sie Ihren Kaffeevollautomaten aus. T Entfernen Sie den Funkempfänger aus der Serviceschnittstelle des Kaffeevollautomaten. Q T Drücken Sie die Taste Ein/Aus, um den Cool Control auszuschalten. LED-Anzeigen / Fehler beheben LED im Deckel und im Funkempfänger: Anzeige Beschreibung LED leuchtet Der Deckel wird nicht mit Strom nicht. versorgt. Der Cool Control ist ausgeschaltet. LED leuchtet. Die Wireless-Verbindung zwischen Deckel und Funkempfänger ist hergestellt. LED blinkt (1 Mal / Sek.) Es wird versucht, die Wireless-Verbindung aufzubauen. de 3 Reinigung und Pflege Mögliche Fehler beheben: Im Display wird »Error Milk« angezeigt, beide LEDs leuchten. UUDer Milchfüllstandsensor ist defekt. Servicefall. Beide LEDs blinken. UUDie Verbindung zwischen Deckel und Funkempfänger ist gestört oder nicht hergestellt. Drücken Sie beide Reset-Tasten gleichzeitig (z.B. mit einem Kugelschreiber). Sobald beide LEDs dauerhaft blau leuchten sind der Milchfüllstandsensor und der Funkempfänger betriebsbereit. Besteht das Problem immer noch? Servicefall. UU UU EE Sollte es zu einem Servicefall kommen, deinstallieren Sie den Deckel und Funkempfänger wie in diesem Kapitel (unter »Deckel und Funkempfänger deinstallieren«) beschrieben. Nehmen Sie bitte den Deckel und den Funkempfänger mit zu Ihrem JURA-Fachhändler. 3 Reinigung und Pflege EE Wurde der Deckel mit Milchfüllstandsensor längere Zeit nicht verwendet, reinigen Sie den Milchfüllstandsensor vor erneutem Gebrauch gründlich mit einem feuchten Tuch und mildem Spülmittel. en 4 Transport und umweltgerechte Entsorgung fr Transport Bewahren Sie die Verpackung des Cool Control auf. Sie dient zum Schutz beim Transport. Reinigen Sie den Edelstahlbehälter vor dem Transport. it Entsorgung Bitte entsorgen Sie Altgeräte umweltgerecht. H Altgeräte enthalten wertvolle recyclingfähige Materialien, die einer Verwertung zugeführt werden sollten. Entsorgen Sie Altgeräte deshalb über geeignete Sammelsysteme. nl es EE Verwenden Sie zur Reinigung keine scharfen, scheuernden Reinigungsmittel oder harten Gegenstände. Dies kann das Gerät, die Beschichtung der Edelstahlbehälter-Aufnahme und den Edelstahlbehälter beschädigen. EE Beachten Sie bitte, dass ausschließlich der Edelstahlbehälter und das Metallrohr spülmaschinenfest sind – alle anderen Teile (Deckel, Adapter etc.) nicht. pt T Ziehen Sie vor jedem Reinigen des Geräts den Netzstecker aus der Netzsteckdose. T Reinigen Sie das Gerät innen mit einem feuchten Tuch. T Reinigen Sie die Außenseite des Geräts mit einem feuchten Tuch. T Spülen Sie den Edelstahlbehälter und die Einzelteile gründlich unter fließendem Wasser. sv ru 7 5 Technische Daten 5 Technische Daten Spannung 100–240 V ~, 50–60 Hz Sicherheitsprüfung Konformitätszeichen A CE0051 Leistung 25 W Temperaturbereich Kühlt bis 25 °C unter Umgebungstemperatur, aber nicht unter 4 °C Fassungsvermögen Edelstahlbehälter 1,1 l Kabellänge ca. 1,8 m Gewicht ca. 1,9 kg Maße (B × H × T) 14,8 × 22,5 × 21,8 cm Klimaklasse N (für Umgebungstemperatur von + 16 °C bis + 32 °C) Zusatz für den Cool Control Wireless: Dieses Gerät erfüllt die Bedingungen von Abschnitt 15 der FCC-Vorschriften. Der Betrieb unterliegt den zwei folgenden Bedingungen: (1) Dieses Gerät darf keine schädlichen Interferenzen verursachen, und (2) dieses Gerät muss empfangene Interferenzen aufnehmen können, einschließlich Interferenzen, die zu unerwünschtem Betrieb führen können. 8 6 JURA-Kontakte / Rechtliche Hinweise JURA Elektroapparate AG Kaffeeweltstraße 10 CH-4626 Niederbuchsiten Tel. +41 (0)62 38 98 233 @@ Weitere Kontaktdaten für Ihr Land finden Sie online unter www.jura.com. Richtlinien Das Gerät entspricht den folgenden Richtlinien: ZZ 2002/95/EG (RoHS) ZZ 1907/2006/EG (REACH) ZZ 2006/95/EG (Niederspannungsrichtlinie) ZZ 2004/108/EG (Elektromagnetische Verträglichkeit) ZZ 2009/125/EG (Energierichtlinie) Technische Änderungen Technische Änderungen vorbehalten. Die in dieser Bedienungsanleitung verwendeten Illustrationen sind stilisiert und zeigen nicht die Originalfarben des Geräts. Ihr Gerät kann in Details abweichen. Feedback Ihre Meinung ist uns wichtig! Nutzen Sie den Kontakt-Link unter www.jura.com. Copyright Die Bedienungsanleitung enthält Informationen, die durch Copyright geschützt sind. Fotokopieren oder Übersetzen in eine andere Sprache ist ohne vorherige schriftliche Zustimmung durch die JURA Elektroapparate AG nicht zulässig. de Table of contents Your Cool Control en Control elements 10 Controls on the Cool Control Wireless............................................................................................................... 10 Important information 11 Proper use................................................................................................................................................................. 11 For your safety......................................................................................................................................................... 11 1 Preparing and using for the first time 12 Setting up and connecting....................................................................................................................................12 Cooling milk.............................................................................................................................................................12 2 Cool Control Wireless 13 Compatibility............................................................................................................................................................13 Setting up the cover (with milk level sensor) and receiver..............................................................................13 Uninstalling the cover and receiver......................................................................................................................13 LED behaviours / troubleshooting........................................................................................................................13 3 Cleaning and maintenance it 14 4 Transport and environmentally friendly disposal 14 Transport.................................................................................................................................................................. 14 Disposal.................................................................................................................................................................... 14 5 Technical data 14 6 JURA contact details / legal information 15 nl es E Please note: These instructions apply to both versions of the Cool Control 1l. Cool Control Basic fr Cool Control Wireless pt Symbol description Warnings J CAUTION J WARNING Always take note of any information marked with the words CAUTION or WARNING and a warning sign. The signal word WARNING draws your attention to potential serious injury, and the signal word CAUTION to potential minor injury. sv Symbols used T Prompt to take action. This symbol means that you are being prompted to perform some action. E Information and tips to make use of your Cool Control even easier. ru 9 Control elements Control elements 1 2 4 3 5 6 7 8 9 10 11 12 8Connector (may vary depending on the machine and the associated cappuccino frother) 9 Milk pipe 10Connector 11Adapter 12 Metal pipe 1 Cool Control 2Cover 3 Stainless steel container 4 Operating display 5 Power supply unit with mains cable 6 Q On/Off button 7Socket Controls on the Cool Control Wireless 1 2 3 6 7 4 1 2 3 4 10 Cover with integrated milk level sensor LED in the cover Reset button in the cover Milk level sensor 5 5Receiver (for inserting in the coffee machine) 6 LED in the receiver 7 Reset button in the receiver de Important information Important information UU Proper use UU This machine (chilled drinks dispenser) is intended for use in the home and similar situations, for example by customers in hotels, motels and other residential buildings and by workers in shops, offices and other working environments. It should only be used to cool milk and keep it fresh in the stainless steel container supplied. The accessory parts for the Cool Control Wireless wirelessly monitor the milk level in the stainless steel container supplied. Use for any other purpose will be deemed improper. JURA cannot accept any responsibility for the consequences of improper use. Before using the machine read these instructions for use thoroughly and completely and comply with the instructions they contain. A warranty service is not applicable for damage or defects caused by non-compliance with the instructions for use. Keep these instructions for use close to the machine and pass them on to the next user. For your safety Please carefully read and observe the important safety information set out below. To avoid danger of potentially fatal electric shock: Never use a machine which is damaged or has a defective mains cable. Never start the machine with wet hands. Before starting the machine, ensure that the mains cable is dry. Only use the power supply unit supplied as standard to connect the machine to the alternating current grid. In the event of signs of damage, for example if there is a smell of burning, unplug the machine immediately from the mains supply and contact JURA service. If the mains cable of this machine is damaged, it must be repaired either directly by JURA or by an authorised JURA service centre. UU UU UU UU UU UU UU Make sure that the Cool Control and the mains cable are not located close to hot surfaces or naked flames. Be careful to ensure that the mains cable is not trapped and does not rub against sharp edges. Never open and repair the machine yourself. Do not modify the machine in any way that is not described in the instructions for use. The machine contains live parts. Repairs may only be carried out by authorised JURA service centres, using original spare parts and accessories. A defective machine is not safe and could cause injury or fire. To avoid damage and any associated risk of injury or fire: Ensure that the ventilation slots are not covered. Never allow the mains cable to loosely hang down. The mains cable could pose a tripping hazard or become damaged. Protect your Cool Control from environmental influences such as rain, frost and direct sunlight. Do not immerse the Cool Control, cable or connections in water. Do not put the Cool Control or any individual parts in the dishwasher. Switch your Cool Control off before cleaning and disconnect the mains plug. Always wipe the Cool Control with a damp cloth rather than a wet one, and protect it from prolonged exposure to water splash. Do not pour the milk you want to cool directly into the machine. Use the stainless steel container supplied as standard. Only connect the machine to the mains voltage in accordance with the information on the rating plate. The rating plate is located on the underside of your Cool Control. Further technical data is given in these instructions for use (see Chapter 5 'Technical Data'). Switch the machine off if you are going to be absent for a long period of time. Only operate the machine when supervised. en fr it UU UU nl UU UU UU es UU pt UU UU sv UU UU 11 ru 1 Preparing and using for the first time People, including children, who do not have the physical, sensory or mental capabilities to use the machine safely or are inexperienced or lack knowledge in how to use the machine safely must be supervised by a responsible person when using it, or must be instructed in how to use it correctly. UU UU T Insert the adapter into the cover. T Insert one end of the milk pipe into the adapter. 1 Preparing and using for the first time Setting up and connecting Cooling milk When setting up your Cool Control, please note the following: Set the machine down on a horizontal surface that is not sensitive to water. Choose a spot for your Cool Control which is protected against overheating. Ensure that the ventilation slots are not covered. In the interests of hygiene, you should use a damp cloth to clean both the inside and outside of your new machine before starting it. Rinse the stainless steel container out thoroughly. EE Chapter 2 'Cool Control Wireless' explains how to start up and operate the Cool Control Wireless. J WARNING If the machine is operated with a defective mains cable, there is a danger of potentially fatal electric shock. T Never use a machine which is damaged or has a defective mains cable. EE Please note that the connector may vary depending on the machine and the associated cappuccino frother. UU UU UU T Plug the cable for the power supply unit into the Cool Control's socket. T Insert the mains plug into a power socket. T Insert the metal pipe into the adapter. 12 T Fill the stainless steel container with milk. T Use the cover to close the stainless steel container. T Insert the stainless steel container into the Cool Control. Ensure the the cover connection is correctly aligned correctly and engaged. T Connect the milk pipe with the cappuccino frother on your coffee machine. Q T Press the On/Off button. Once the cover is correctly aligned and engaged, the machine starts cooling. EE Your JURA Cool Control always keeps your milk within the optimum temperature range. The milk cannot freeze. EE To save energy, the cooling process stops as soon as the container is removed from the Cool Control. EE To switch off the Cool Control, press the On/ Off button Q. EE If you want to shut down the machine, remove the mains plug from the power socket. de 2 Cool Control Wireless display of your coffee machine during preparation. The display text may vary depending on the machine. 2 Cool Control Wireless EE This chapter only applies to the Cool Control Wireless 1 l. Compatibility EE The Cool Control Wireless is unfortunately not compatible with all JURA coffee machines. Ask your dealer or visit www.jura.com. Setting up the cover (with milk level sensor) and receiver EE Clean the cover with the milk level sensor thoroughly before first use using a damp cloth and a mild liquid detergent. T Switch on your coffee machine. T Insert the receiver into the service socket of the coffee machine. EE If you don't know where the service socket of your coffee machine is, ask your dealer or visit www.jura.com. Q T Press the On/Off button. T Fill the stainless steel container of the Cool Control (at least a third) with milk. T Use the cover to close the stainless steel container. T Insert the stainless steel container into the Cool Control. Ensure the the cover connection is correctly aligned correctly and engaged. The LEDs in the cover and receiver flash. As soon as both LEDs continuously light up blue, the milk level sensor and the receiver are ready for use. EE Once the stainless steel container is inserted and the cover is correctly engaged, the machine starts cooling. The cooling process stops when the container is removed again. EE If there is not enough milk in the stainless steel container, this is indicated on the en Uninstalling the cover and receiver T Switch off your coffee machine. T Remove the receiver from the service socket of the coffee machine. Q T Press the On/Off button to switch the Cool Control off. LED behaviours / troubleshooting it LEDs in the cover and receiver: Behaviour fr Description LED does not The cover is not supplied with light up. electricity. The Cool Control is switched off. nl LED lights up. The wireless connection between the cover and receiver is established. LED flashes (once per second) Attempting to establish the wireless connection. es Rectifying potential faults: 'Error Milk' is displayed, both LEDs light up. UUThe milk level sensor is defective. Service required. Both LEDs flash. UUThe connection between the cover and receiver is faulty or not established. Press both Reset buttons at the same time (e.g. with a pen). As soon as both LEDs continuously light up blue, the milk level sensor and the receiver are ready for use. Problem persisting? Service required. UU UU EE If service is required, uninstall the cover and receiver as described in this chapter (under 'Uninstalling the cover and receiver'). Take the cover and receiver to your JURA dealer. 13 pt sv ru 3 Cleaning and maintenance 3 Cleaning and maintenance EE Do not use harsh or abrasive cleaning agents or hard objects to clean the machine. This may damage the machine, the coating of the stainless steel container holder and the stainless steel container. EE Please note that only the stainless steel container and the metal pipe are dishwasher-safe – all other parts (cover, adapter etc.) are not. T Before cleaning the machine, remove the mains plug from the power socket. T Clean the inside of the machine with a damp cloth. T Clean the outside of the machine with a damp cloth. T Rinse the stainless steel container and individual parts thoroughly under running water. EE If the cover and milk level sensor have not been used for a long period of time, clean the sensor thoroughly with a damp cloth and a mild liquid detergent before using it again. 4 Transport and environmentally friendly disposal Transport Keep the packaging for your Cool Control. It should be used to protect the machine during transport. Clean the stainless steel container before transporting it. 14 Disposal Please dispose of old machines in an environmentally friendly way. H Old machines contain valuable, recyclable materials which should be recycled. Please therefore dispose of old machines via suitable collection systems. 5 Technical data Voltage 100–240 V ~, 50–60 Hz Safety test Conformity symbol A CE0051 Power 25 W Temperature range Cools up to 25°C below the ambient temperature, but no lower than 4°C Holding capacity of stainless steel container 1.1 l Cable length Approx. 1.8 m Weight Approx. 1.9 kg Dimensions (W × H × D) 14.8 × 22.5 × 21.8 cm Climate class N (for ambient temperature from + 16°C to + 32°C) Addition for the Cool Control Wireless: This product satisfies the requirements of Section 15 of the FCC regulations. Operation is subject to the following two conditions: (1) The product must not cause harmful inference. (2) The product must be able to absorb received interference, including interference that could lead to malfunction. de 6 JURA contact details / legal information 6 JURA contact details / legal information en JURA Elektroapparate AG Kaffeeweltstrasse 10 CH-4626 Niederbuchsiten Tel. +41 (0)62 38 98 233 fr @@ You will find additional contact details for your country at www.jura.com. Directives The machine complies with the following directives: ZZ 2002/95/EC (RoHS) ZZ 1907/2006/EC (REACH) ZZ 2006/95/EC (Low Voltage Directive) ZZ 2004/108/EC (Electromagnetic Compatibility) ZZ 2009/125/EC (Ecodesign Directive) it nl Technical changes We reserve the right to make technical changes. The diagrams used in these instructions for use are for illustration purposes only and do not represent the original colours of the machine. Some details of your machine may vary. es Feedback Your opinion is important to us! Use the contact link at www.jura.com. Copyright The instructions for use contain information which is protected by copyright. It is not permitted to photocopy these instructions for use or translate them into another language without the prior written consent of JURA Elektroapparate AG. pt sv ru 15 Table des matières Votre Cool Control Eléments de commande 17 Eléments de commande du Cool Control Wireless..........................................................................................17 Remarques importantes 18 Utilisation conforme.............................................................................................................................................. 18 Pour votre sécurité................................................................................................................................................. 18 1 Préparation et mise en service 19 Installation et raccordement................................................................................................................................ 19 Refroidissement du lait.......................................................................................................................................... 19 2 Cool Control Wireless 20 Compatibilité.......................................................................................................................................................... 20 Mise en service du couvercle (avec capteur de niveau de lait) et du récepteur radio............................... 20 Dépose du couvercle et du récepteur radio...................................................................................................... 20 Indications des LED / Dépannage........................................................................................................................ 21 3 Nettoyage et entretien 21 4 Transport et élimination écologique 21 Transport.................................................................................................................................................................. 21 Elimination...............................................................................................................................................................22 5 Caractéristiques techniques 22 6 Contacts JURA / Mentions légales 22 E Remarque : ce mode d'emploi est valable pour deux versions du Cool Control 1 l. Cool Control de base Cool Control Wireless Description des symboles Mises en garde J ATTENTION J AVERTISSEMENT Respectez impérativement les informations identifiées par les mentions ATTENTION ou AVERTISSEMENT accompagnées d'un pictogramme. Le mot AVERTISSEMENT signale un risque de blessure grave, le mot ATTENTION signale un risque de blessure légère. Symboles utilisés 16 T Demande d'action. Une action vous est demandée. E Remarques et conseils destinés à faciliter encore l'utilisation de votre Cool Control. de Eléments de commande Eléments de commande en 1 2 4 3 5 6 7 8 9 10 fr it 11 12 nl 8Raccord (peut varier selon la machine à café et la buse Cappuccino correspondante) 9 Tuyau de lait 10Raccord 11Adaptateur 12 Tube métallique 1 Cool Control 2Couvercle 3 Récipient en inox 4 Témoin de fonctionnement 5 Alimentation avec câble secteur 6 Q Touche Marche/Arrêt 7 Prise de raccordement es Eléments de commande du Cool Control Wireless 1 2 3 pt 6 7 4 1Couvercle avec capteur de niveau de lait intégré 2 LED du couvercle 3 Touche de réinitialisation du couvercle 4 Capteur de niveau de lait 5 sv 5Récepteur radio (à placer dans la machine à café) 6 LED du récepteur radio 7 Touche de réinitialisation du récepteur radio ru 17 Remarques importantes Remarques importantes UU Utilisation conforme Cet appareil (distributeur de boissons froides) est conçu pour être utilisé dans un cadre domestique ou similaire, par exemple par les clients d'hôtels, motels et autres établissements résidentiels ou par le personnel de magasins, bureaux et autres environnements de travail. Il sert à refroidir et à maintenir au frais le lait placé dans le récipient en inox fourni. Les accessoires du Cool Control Wireless servent à surveiller par radio le niveau de lait dans le récipient en inox fourni avec le Cool Control. Toute autre utilisation est considérée comme non conforme. JURA décline toute responsabilité relative aux conséquences d'une utilisation non conforme. Lisez entièrement ce mode d'emploi avant d'utiliser l'appareil et respectez-le scrupuleusement. Aucune prestation de garantie ne pourra être invoquée pour des dommages ou défauts résultant du non-respect du mode d'emploi. Conservez ce mode d'emploi à proximité de l'appareil et remettez-le aux utilisateurs suivants. Pour votre sécurité Lisez attentivement les importantes consignes de sécurité suivantes et respectez-les scrupuleusement. Voici comment éviter tout risque d'électrocution : Ne mettez jamais en service un appareil endommagé ou dont le câble secteur est défectueux. Ne mettez jamais l'appareil en service avec les mains mouillées. Avant la mise en service, assurez-vous que le câble secteur est sec. Utilisez uniquement l'alimentation fournie pour raccorder l'appareil au secteur. Si vous remarquez des signes de détérioration, par exemple une odeur de brûlé, débranchez immédiatement l'appareil du secteur et contactez le service après-vente JURA. UU UU UU UU UU 18 UU UU UU Si le câble secteur de l'appareil est endommagé, il doit être réparé soit directement chez JURA, soit dans un centre de service agréé JURA. Assurez-vous que le Cool Control et le câble secteur ne se trouvent pas à proximité d'une surface chaude ou d'une flamme vive. Assurez-vous que le câble secteur n'est pas coincé ou qu'il ne frotte pas contre des arêtes vives. N'ouvrez ou ne réparez jamais l'appareil vous-même. N'apportez à l'appareil aucune modification qui ne soit indiquée dans son mode d'emploi. L'appareil contient des pièces sous tension. Toute réparation doit exclusivement être effectuée par un centre de service agréé JURA, avec des pièces détachées et des accessoires d'origine. Un appareil endommagé n'est pas sûr et peut provoquer des blessures ou un incendie. Pour éviter les dommages et donc les risques de blessure et d'incendie : Veillez à ce que les fentes d'aération ne soient pas obstruées. Ne laissez jamais le câble secteur pendre de manière lâche. Le câble secteur peut provoquer une chute ou être endommagé. Protégez le Cool Control des intempéries telles que la pluie, le gel et le rayonnement solaire direct. Ne plongez pas le Cool Control, les câbles ou les raccordements dans l'eau. Ne mettez pas le Cool Control ni ses pièces constitutives au lave-vaisselle. Avant d'effectuer des travaux de nettoyage, éteignez votre Cool Control et débranchez la fiche secteur. Essuyez le Cool Control avec un chiffon humide, mais jamais mouillé, et protégez-le des projections d'eau permanentes. Ne versez pas le lait que vous souhaitez refroidir directement dans l'appareil. Utilisez le récipient en inox fourni. UU UU UU UU UU UU UU de 1 Préparation et mise en service UU UU UU Branchez l'appareil uniquement sur la tension secteur indiquée sur la plaque signalétique. La plaque signalétique se situe en dessous de votre Cool Control. Vous trouverez d'autres caractéristiques techniques dans ce mode d'emploi (voir chapitre 5 « Caractéristiques techniques »). En cas d'absence prolongée, éteignez l'appareil. Ne laissez pas l'appareil sans surveillance lorsqu'il est en fonctionnement. Les personnes, y compris les enfants, qui, en raison de leurs capacités physiques, sensorielles ou cognitives, ou de leur inexpérience ou méconnaissance, ne sont pas en mesure d'utiliser l'appareil en toute sécurité, ne sont autorisées à faire fonctionner ce dernier que sous la surveillance ou sur l'ordre d'une personne responsable. UU UU T Branchez le câble de l'alimentation dans la prise de raccordement du Cool Control. T Branchez la fiche secteur dans une prise de courant. T Insérez le tube métallique dans l'adaptateur. en fr T Placez l'adaptateur dans le couvercle. T Insérez l'une des extrémités du tuyau de lait dans l'adaptateur. it nl 1 Préparation et mise en service Installation et raccordement Lors de l'installation de votre Cool Control, respectez les consignes suivantes : Placez l'appareil sur une surface horizontale, insensible à l'eau. Choisissez l'emplacement du Cool Control de sorte qu'il soit à l'abri d'une source de chaleur excessive. Veillez à ce que les fentes d'aération ne soient pas obstruées. Avant de mettre le nouvel appareil en service, vous devez le nettoyer à l'intérieur et à l'extérieur avec un chiffon humide pour des raisons d'hygiène. Rincez soigneusement le récipient en inox. UU UU UU J AVERTISSEMENT Risque d'électrocution en cas d'utilisation d'un câble secteur défectueux. T Ne mettez jamais en service un appareil endommagé ou dont le câble secteur est défectueux. es Refroidissement du lait EE L'utilisation (p. ex. la mise en service) du Cool Control Wireless est décrite au chapitre 2 « Cool Control Wireless ». T Remplissez le récipient en inox de lait. T Fermez le récipient en inox avec le couvercle. T Placez le récipient en inox dans le Cool Control. Assurez-vous que le raccord du couvercle est correctement ajusté et enclenché. T Reliez le tuyau de lait avec la buse Cappuccino à votre machine à café. pt sv EE Attention : le raccord peut varier selon la machine à café et la buse Cappuccino correspondante. ru 19 2 Cool Control Wireless Q T Appuyez sur la touche Marche/Arrêt. Si le couvercle est correctement ajusté et enclenché, l'appareil commence à refroidir. EE Votre Cool Control JURA maintient le lait dans une plage de température optimale. Le lait ne peut pas geler. EE Afin d'économiser de l'énergie, le refroidissement s'arrête dès que le récipient en inox est retiré du Cool Control. EE Pour éteindre le Cool Control, appuyez sur la touche Marche/Arrêt Q. EE Si vous souhaitez mettre l'appareil hors service, débranchez la fiche secteur de la prise de courant. 2 Cool Control Wireless EE Ce chapitre est uniquement valable pour le Cool Control Wireless 1 l. Compatibilité EE Le Cool Control Wireless n'est malheureusement pas compatible avec toutes les machines automatiques à spécialités de café JURA. Renseignez-vous auprès de votre revendeur agréé ou consultez le site www.jura.com. Mise en service du couvercle (avec capteur de niveau de lait) et du récepteur radio EE Avant la première utilisation, nettoyez soigneusement le couvercle avec le capteur de niveau de lait à l'aide d'un chiffon humide et de liquide vaisselle doux. T Allumez votre machine à café. T Insérez le récepteur radio dans le port de service de la machine à café. 20 EE Si vous ne savez pas où se trouve le port de service de votre machine à café, renseignezvous auprès de votre revendeur agréé ou consultez le site www.jura.com. Q T Appuyez sur la touche Marche/Arrêt. T Remplissez de lait le récipient en inox du Cool Control (un tiers minimum). T Fermez le récipient en inox avec le couvercle. T Placez le récipient en inox dans le Cool Control. Assurez-vous que le raccord du couvercle est correctement ajusté et enclenché. Les LED du couvercle et du récepteur radio clignotent. Dès que les deux LED restent allumées en bleu, le capteur de niveau de lait et le récepteur radio sont prêts à l'emploi. EE Dès que le récipient en inox est en place et le couvercle correctement enclenché, l'appareil commence à refroidir. Le refroidissement s'arrête dès le récipient en inox est retiré. EE Si le récipient en inox ne contient pas suffisamment de lait, un message correspondant s'affiche sur le visuel de la machine à café lors de la préparation. Le texte affiché peut varier selon la machine. Dépose du couvercle et du récepteur radio T Eteignez votre machine à café. T Retirez le récepteur radio du port de service de la machine à café. Q T Appuyez sur la touche Marche/Arrêt pour éteindre le Cool Control. de 3 Nettoyage et entretien Indications des LED / Dépannage LED du couvercle et du récepteur radio : Indication Description La LED ne s'allume pas. Le couvercle n'est pas alimenté en courant. Le Cool Control est éteint. La LED s'allume. La liaison sans fil entre le couvercle et le récepteur radio est établie. La LED clignote. Le système tente d'établir la (1 fois/seconde) liaison sans fil. Dépannage des erreurs possibles : « Error Milk » s'affiche sur le visuel, les deux LED s'allument. UULe capteur de niveau de lait est défectueux. Une intervention du service après-vente est nécessaire. Les deux LED clignotent. UULa liaison entre le couvercle et le récepteur radio est perturbée ou n'est pas établie. Appuyez simultanément sur les deux touches de réinitialisation (p. ex. avec un stylo à bille). Dès que les deux LED restent allumées en bleu, le capteur de niveau de lait et le récepteur radio sont prêts à l'emploi. Le problème persiste ? Une intervention du service après-vente est nécessaire. UU UU EE Si une intervention du service après-vente s'avère nécessaire, déposez le couvercle et le récepteur radio comme décrit dans ce chapitre (à la rubrique « Dépose du couvercle et du récepteur radio »). Amenez le couvercle et le récepteur radio à votre revendeur JURA. 3 Nettoyage et entretien en EE Pour nettoyer l'appareil, n'utilisez pas de détergent corrosif ou abrasif ni d'objets durs. Cela peut endommager l'appareil, le revêtement du logement du récipient en inox et le récipient en inox. EE Attention : seuls le récipient en inox et le tube métallique sont lavables au lave-vaisselle ; toutes les autres pièces (couvercle, adaptateur, etc.) ne le sont pas. T Avant de nettoyer l'appareil, débranchez toujours la fiche secteur de la prise de courant. T Nettoyez l'intérieur de l'appareil avec un chiffon humide. T Nettoyez l'extérieur de l'appareil avec un chiffon humide. T Rincez soigneusement le récipient en inox et les différentes pièces sous l'eau courante. EE Si le couvercle avec le capteur de niveau de lait est resté inutilisé pendant une longue période, nettoyez soigneusement le capteur de niveau de lait avec un chiffon humide et du liquide vaisselle doux avant de le réemployer. 4 Transport et élimination écologique fr it nl es pt Transport Conservez l'emballage du Cool Control. Il vous servira à protéger votre appareil en cas de transport. Nettoyez le récipient en inox avant le transport. sv ru 21 5 Caractéristiques techniques Elimination Eliminez les anciens appareils dans le respect de l'environnement. H Les anciens appareils contiennent des matériaux recyclables de valeur qui doivent être récupérés. C'est pourquoi il convient de les éliminer par le biais d'un système de collecte adapté. 5 Caractéristiques techniques Tension 100–240 V ~, 50–60 Hz Contrôle de sécurité Marque de conformité A CE0051 Puissance 25 W Plage de température Refroidit jusqu'à 25 °C en dessous de la température ambiante, dans la limite de 4 °C Contenance du récipient en inox 1,1 l Longueur du câble 1,8 m environ Poids 1,9 kg environ Dimensions (l × h × p) 14,8 × 22,5 × 21,8 cm Classe climatique N (pour une température ambiante de + 16 °C à + 32 °C) Complément pour le Cool Control Wireless : cet appareil est conforme aux dispositions de la section 15 de la réglementation FCC. Son fonctionnement est soumis aux deux conditions suivantes : (1) cet appareil ne doit pas causer d’interférences nocives et (2) cet appareil doit accepter toutes les interférences reçues, y compris les interférences susceptibles de provoquer un fonctionnement indésirable. 22 6 Contacts JURA / Mentions légales JURA Elektroapparate AG Kaffeeweltstrasse 10 CH-4626 Niederbuchsiten Tél. +41 (0)62 38 98 233 @@ Vous trouverez d'autres coordonnées de contact pour votre pays sur la page www.jura.com. Directives Cet appareil est conforme aux directives suivantes : ZZ 2002/95/CE (RoHS) ZZ 1907/2006/CE (REACH) ZZ 2006/95/CE (directive basse tension) ZZ 2004/108/CE (compatibilité électromagnétique) ZZ 2009/125/CE (directive sur les produits consommateurs d'énergie) Modifications techniques Sous réserve de modifications techniques. Les illustrations utilisées dans ce mode d'emploi sont stylisées et ne montrent pas les couleurs originales de l'appareil. Votre appareil peut différer par certains détails. Vos réactions Votre avis compte pour nous ! Utilisez le lien de contact mentionné sur la page www.jura.com. Copyright Ce mode d'emploi contient des informations protégées par un copyright. Il est interdit de photocopier ou de traduire ce mode d'emploi dans une langue étrangère sans l'accord écrit préalable de JURA Elektroapparate AG. de Indice Il vostro Cool Control en Elementi di comando 24 Elementi di comando Cool Control Wireless.....................................................................................................24 Avvertenze importanti 25 Uso conforme..........................................................................................................................................................25 Norme di sicurezza.................................................................................................................................................25 1 Operazioni preliminari e messa in servizio 26 Collocazione e collegamento...............................................................................................................................26 Raffreddamento del latte......................................................................................................................................26 2 Cool Control Wireless 27 Compatibilità...........................................................................................................................................................27 Mettere in funzione il coperchio (con sensore di livello del latte) e ricevitore radio..................................27 Disinstallare il coperchio e il ricevitore radio.....................................................................................................27 Indicatori LED / eliminare gli errori......................................................................................................................28 3 Pulizia e manutenzione it 28 4 Trasporto e smaltimento conforme alle normative ambientali 28 Trasporto..................................................................................................................................................................28 Smaltimento............................................................................................................................................................29 5 Dati tecnici 29 6 Come contattare JURA / Avvertenze legali 29 nl es E Tenere presente: le presenti istruzioni per l'uso è valida per due versioni del Cool Control 1l. Cool Control Basic fr Cool Control Wireless pt Descrizione dei simboli adottati Avvertenze J ATTENZIONE J AVVERTENZA Osservare sempre scrupolosamente le informazioni evidenziate dai termini ATTENZIONE o AVVERTENZA e da un pittogramma. La segnalazione AVVERTENZA indica il pericolo di possibili lesioni gravi; la segnalazione ATTENZIONE indica il pericolo di possibili lesioni lievi. sv Simboli adottati T Richiesta d'intervento. Il simbolo segnala che l'utente deve eseguire un'operazione. E Consigli e suggerimenti utili per renderle ancora più facile l'uso del Cool Control. ru 23 Elementi di comando Elementi di comando 1 2 4 3 5 6 7 8 9 10 11 12 8Elemento dicollegamento (può variare a seconda della macchina automatica e del relativo ugello per cappuccino) 9 Tubo del latte 10 Elemento di collegamento 11Adattatore 12 Tubo in metallo 1 Cool Control 2Coperchio 3 Contenitore in acciaio inox 4 Indicatore di funzionamento 5 Alimentatore con cavo di rete 6 Q Interruttore di esercizio ON/OFF 7 Presa di collegamento Elementi di comando Cool Control Wireless 1 2 3 6 7 4 1Coperchio con sensore di livello del latte integrato 2 LED nel coperchio 3 Tasto reset nel coperchio 4 Sensore di livello del latte 24 5 5Ricevitore radio (per l'inserimento nella macchina automatica) 6 LED nel ricevitore radio 7 Tasto reset nel ricevitore radio de Avvertenze importanti Avvertenze importanti UU Uso conforme Questo apparecchio (distributore di bevande fredde) è concepito per l'uso domestico e per applicazioni simili, ad esempio da parte di clienti in alberghi, motel e altre strutture residenziali, dal personale in negoti, uffici ed altri ambienti lavorativi. Serve unicamente a raffreddare e a mantenere freddo il latte all'interno del contenitore in acciaio inox in dotazione. Gli accessori del Cool Control Wireless servono per il monitoraggio del livello del latte tramite radio nel contenitore in acciaio inox fornito in dotazione del Cool Control. Ogni altro utilizzo è da considerarsi non conforme. JURA declina ogni responsabilità per conseguenze derivanti da un uso non conforme. Leggere e osservare le presenti istruzioni per l'uso per intero prima di utilizzare l'apparecchio. Il diritto alla prestazione di garanzia viene a decadere in caso di danni o difetti riconducibili all'inosservanza delle istruzioni per l'uso. Conservare le presenti istruzioni per l'uso vicino all'apparecchio e consegnarle agli eventuali utilizzatori successivi. Norme di sicurezza Si raccomanda di leggere con attenzione e attenersi scrupolosamente alle seguenti norme di sicurezza. In questo modo si previene il pericolo di folgorazione: Non mettere mai in funzione un apparecchio danneggiato o con il cavo di rete difettoso. Non mettere mai in funzione l'apparecchio se le mani sono umide. Prima della messa in funzione, accertarsi che il cavo di rete sia asciutto. Collegare l'apparecchio alla rete elettrica utilizzando esclusivamente l'alimentatore in dotazione. Se si sospettano danneggiamenti all'apparecchio, ad esempio per via dell'odore di bruciato, scollegarlo immediatamente dalla rete e rivolgersi al servizio di assistenza JURA. UU UU UU UU UU UU UU UU Se il cavo di rete di questo apparecchio è danneggiato, dovrà essere riparato direttamente da JURA o presso un centro di assistenza autorizzato JURA. Assicurarsi che il Cool Control e il cavo di rete non si trovino nelle vicinanze di superfici surriscaldate. Assicurarsi che il cavo di rete non venga schiacciato e non si usuri a contatto con spigoli vivi. Non aprire né tentare mai di riparare l'apparecchio. Non apportare modifiche all'apparecchio salvo quelle descritte nelle istruzioni per l'uso. L'apparecchio contiene componenti sotto tensione. Eventuali riparazioni devono essere effettuate esclusivamente dai centri di assistenza autorizzati JURA, utilizzando pezzi di ricambio e accessori originali. Un apparecchio danneggiato non è sicuro e può provocare lesioni e incendi. Per prevenire danni, possibili lesioni e pericoli di incendio: Fare attenzione che le griglie di ventilazione non siano coperte. Non lasciare mai penzolare liberamente il cavo di alimentazione. Il cavo di alimentazione può costituire causa d'inciampo o danneggiarsi. Proteggere il Cool Control dagli agenti atmosferici quali pioggia, gelo e irraggiamento solare diretto. Non immergere mai in acqua il Cool Control, i cavi e i raccordi. Non inserire il Cool Control e i singoli componenti nella lavastoviglie. Prima di ogni ciclo di pulizia, spegnere il Cool Control e staccare la spina. Pulire il Cool Control sempre con un panno umido, ma non bagnato, e proteggerlo dagli schizzi d'acqua continui. Non versare il latte da raffreddare direttamente all'interno dell'apparecchio. Utilizzare il contenitore in acciaio inox in dotazione. en fr it nl UU UU UU es UU UU pt UU UU sv ru 25 1 Operazioni preliminari e messa in servizio UU UU UU Collegare l'apparecchio solo ad una tensione di rete corrispondente a quella indicata sulla targhetta. La targhetta dei dati tecnici è collocata sul lato inferiore del Cool Control. Ulteriori dati tecnici sono riportati nelle presenti istruzioni per l'uso (cfr. il capitolo 5 «Dati tecnici»). In caso di assenza prolungata, spegnere l'apparecchio. Utilizzare l'apparecchio sempre sotto sorveglianza. Le persone, inclusi i bambini, che a causa delle loro capacità fisiche, sensoriali o mentali o a causa della loro inesperienza o mancata conoscenza non sono in grado di usare l'apparecchio in sicurezza, non possono usare l'apparecchio senza assistenza o supervisione da parte di una persona responsabile. UU UU T Inserire il cavo di rete nella presa di collegamento del Cool Control. T Inserire la spina in una presa di rete. T Inserire il tubo in metallo nell'adattatore. T Inserire l'adattatore nel coperchio. T Inserire un'estremità del tubo del latte nell'adattatore. 1 Operazioni preliminari e messa in servizio Collocazione e collegamento Adottare le seguenti precauzioni per la collocazione del Cool Control: Collocare l'apparecchio su una superficie orizzontale, resistente all'acqua. Collocare il Cool Control in modo che sia protetto da surriscaldamento. Fare attenzione che le griglie di ventilazione non siano coperte. Prima di mettere in funzione l'apparecchio, per motivi igienici è opportuno pulirlo esternamente e internamente utilizzando un panno inumidito. Sciacquare a fondo il contenitore in acciaio inox. UU UU UU J AVVERTENZA Pericolo di folgorazione in caso di uso dell'apparecchio con il cavo di alimentazione danneggiato. T Non mettere mai in funzione un apparecchio danneggiato o con il cavo di rete difettoso. 26 Raffreddamento del latte EE L'uso (ad es. la messa in funzione) del Cool Control Wireless è descritto nel capitolo 2 »Cool Control Wireless«. T Riempire il contenitore in acciaio inox con del latte. T Chiudere il contenitore in acciaio inox con il coperchio. T Inserire il contenitore in acciaio inox nel Cool Control. Assicurarsi che il raccordo del coperchio sia allineato correttamente e innesti in posizione. T Collegare il tubo del latte all'ugello per il cappuccino della macchina automatica da caffè. EE Tenere presente che l'elemento di collegamento può variare a seconda della macchina automatica e del relativo ugello per cappuccino. de 2 Cool Control Wireless Q T Premere l'interruttore di esercizio ON/OFF. Se il coperchio è allineato correttamente ed innestato, l'apparecchio inizia a raffreddare. EE JURA Cool Control mantiene sempre il latte alla temperatura ottimale, impedendone il congelamento. EE Per risparmiare energia, il processo di raffreddamento viene terminato non appena il contenitore in acciaio inox viene estratto dal Cool Control. EE Per spegnere il Cool Control, premere l'interruttore di esercizio ON/OFF Q. EE In caso di mancato utilizzo dell'apparecchio, staccare la spina dalla presa di rete. 2 Cool Control Wireless EE Questo capitolo vale solo per il Cool Control Wireless 1 l. Compatibilità EE Purtroppo il Cool Control Wireless non è compatibile con tutte le macchine automatiche di JURA. Chieda al proprio rivenditore specializzato o vada a vedere all'indirizzo www.jura.com. Mettere in funzione il coperchio (con sensore di livello del latte) e ricevitore radio EE Prima del primo utilizzo, pulire a fondo il coperchio con sensore di livello del latte con un panno umido ed un detergente delicato. Q T Premere l'interruttore di esercizio ON/OFF. T Riempire il contenitore in acciaio inox del Cool Control (almeno di un terzo) con latte. T Chiudere il contenitore in acciaio inox con il coperchio. T Inserire il contenitore in acciaio inox nel Cool Control. Assicurarsi che il raccordo del coperchio sia allineato correttamente e innesti in posizione. I LED nel coperchio e nel ricevitore radio lampeggiano. Non appena i due LED si accendono con una luce blu continua, il sensore di livello del latte e il ricevitore radio sono pronti all'uso. EE Non appena il contenitore in acciaio inox è stato applicato e il coperchio è innestato correttamente, l'apparecchio inizia a raffreddare. Il processo di raffreddamento viene terminato non appena il contenitore in acciaio inox viene nuovamente estratto. EE Se il latte nel contenitore in acciaio inox è insufficiente, ciò viene visualizzato nel display della macchina automatica durante la preparazione. Il testo del display può variare a seconda dell'apparecchio. en fr it nl es Disinstallare il coperchio e il ricevitore radio T Spegnere la macchina automatica. T Rimuovere il ricevitore radio dall'interfaccia di servizio della macchina automatica. Q T Premere l'interruttore di esercizio ON/OFF per spegnere il Cool Control. pt sv T Accendere la macchina automatica. T Inserire il ricevitore radio nell'interfaccia di servizio della macchina automatica. EE Se non sa dove si trova l'interfaccia di servizio della sua macchina automatica, chieda al proprio rivenditore specializzato o consulti il sito www.jura.com. ru 27 3 Pulizia e manutenzione Indicatori LED / eliminare gli errori LED nel coperchio e nel ricevitore radio: Visualizzazione Descrizione Il LED non è acceso. Il coperchio non viene alimentato con corrente. Il Cool Control è disattivato. Il LED è acceso. Il collegamento wireless tra coperchio e ricevitore radio è stabilito. Il LED Viene tentato di instaurare il lampeggia collegamento wireless. (1 volta / sec.) Eliminare gli errori possibili: Nel display viene visualizzato »Error Milk«, sono accesi entrambi i LED. UUIl sensore di livello del latte è difettoso. È richiesto un intervento di manutenzione. Entrambi i LED lampeggiano. UUIl collegamento tra coperchio e ricevitore radio è disturbato o non instaurato. Premere contemporaneamente i due tasti di reset (ad es. con una penna biro). Non appena i due LED si accendono con una luce blu continua, il sensore di livello del latte e il ricevitore radio sono pronti all'uso. Il problema persiste? È richiesto un intervento di manutenzione. UU UU EE Se dovesse essere necessario uin intervento di manutenzione, disinstallare il coperchio e il ricevitore radio come descritto inm questo capitolo (sotto »Disinstallare il coperchio e il ricevitore radio«) Portare il coperchio e il ricevitore radio al proprio rivenditore specializzato JURA. 28 3 Pulizia e manutenzione EE Per la pulizia, non utilizzare detergenti corrosivi e abrasivi né oggetti duri. Ciò potrebbe danneggiare l'apparecchio, il rivestimento dell'alloggiamento del contenitore in acciaio inox e il contenitore stesso. EE Tenere presente che è possibile lavare in lavastoviglie esclusivamente il contenitore in acciaio inox e il tubo in metallo, ma non gli altri componenti (coperchio, adattatore ecc.). T Prima di pulire l'apparecchio, staccare sempre la spina dalla presa di rete. T Pulire l'apparecchio all'interno utilizzando un panno inumidito. T Pulire l'esterno dell'apparecchio utilizzando un panno inumidito. T Sciacquare a fondo sotto l'acqua corrente il contenitore in acciaio inox e i singoli componenti. EE Se il coperchio con sensore di livello del latte non è stato utilizzato per un tempo prolungato, pulire il sensore a fondo con un panno umido e un detergente delicato prima di riutilizzarlo. 4 Trasporto e smaltimento conforme alle normative ambientali Trasporto Conservare l'imballo del Cool Control. Serve da protezione in caso di trasporto. Prima del trasporto, pulire il contenitore in acciaio inox. de 5 Dati tecnici Smaltimento Smaltire gli apparecchi usati in conformità con le normative ambientali. H Gli apparecchi usati contengono materiali pregiati riciclabili che devono essere avviati al riciclaggio. Pertanto occorre smaltire gli apparecchi usati servendosi degli appositi sistemi di raccolta. JURA Elektroapparate AG Kaffeeweltstrasse 10 CH-4626 Niederbuchsiten Tel. +41 (0)62 38 98 233 en fr @@ Per altri dati di contatto per i singoli paesi consultare il sito Internet www.jura.com. 5 Dati tecnici Tensione 6 Come contattare JURA / Avvertenze legali 100–240 V ~, 50–60 Hz Marchi di sicurezza Marchio di conformità A CE0051 Assorbimento 25 W Campo di temperatura Raffredda fino a 25 °C al di sotto della temperatura ambiente, ma non sotto i 4 °C Capacità contenitore in 1,1 l acciaio inox Lunghezza del cavo ca. 1,8 m Peso ca. 1,9 kg Dimensioni (L x A x P) 14,8 × 22,5 × 21,8 cm Classe climatica N (per temperatura ambiente da + 16 °C a + 32 °C) Supplemento per il Cool Control Wireless: Questo apparecchio soddisfa le condizioni della Parte 15 delle Norme FCC. L'utilizzo è soggetto alle due seguenti condizioni: (1) Il presente apparecchio non deve causare interferenze dannose e (2) deve poter assorbire eventuali interferenze ricevute, incluse quelle che potrebbero causare problemi di funzionamento. Direttive L'apparecchio soddisfa le seguenti direttive: ZZ 2002/95/CE (RoHS) ZZ 1907/2006/CE (REACH) ZZ 2006/95/CE (Direttiva Bassa Tensione) ZZ 2004/108/CE (Compatibilità elettromagnetica) ZZ 2009/125/CE (Direttiva ErP) Modifiche tecniche Con riserva di modifiche tecniche. Le illustrazioni contenute nelle istruzioni per l'uso sono stilizzate e non mostrano i colori originali dell'apparecchio. L'apparecchio può differire in alcuni dettagli. La Sua opinione La Sua opinione è importante per noi! Utilizzi il link sul sito all'indirizzo www.jura.com. Copyright Le istruzioni per l'uso contengono informazioni protette da copyright. È vietato fotocopiare o tradurre il documento in un'altra lingua senza previa autorizzazione scritta da parte della JURA Elektroapparate AG. it nl es pt sv ru 29 Inhoudsopgave Uw Cool Control Bedieningselementen31 Bedieningselementen Cool Control Wireless.....................................................................................................31 Belangrijke aanwijzingen 32 Eigenlijk gebruik.....................................................................................................................................................32 Voor uw veiligheid..................................................................................................................................................32 1 Voorbereiden en in bedrijf stellen 33 Opstellen en aansluiten.........................................................................................................................................33 Melk koelen..............................................................................................................................................................33 2 Cool Control Wireless 34 Compatibiliteit........................................................................................................................................................34 Afdekking (met sensor voor het melkniveau) en draadloze ontvanger in bedrijf stellen.........................34 Afdekking en draadloze ontvanger deïnstalleren.............................................................................................34 LED-indicaties / storingen verhelpen..................................................................................................................35 3 Reiniging en onderhoud 35 4 Transport en milieuvriendelijke afvoer 35 Transport..................................................................................................................................................................35 Afvoer........................................................................................................................................................................36 5 Technische gegevens 36 6 JURA contacten / juridische informatie 36 E Let op: deze gebruiksaanwijzing geldt voor twee versies van de Cool Control 1l. Cool Control Basis Cool Control Wireless Beschrijving van de symbolen Waarschuwingen J VOORZICHTIG J WAARSCHUWING Neem altijd de informatie in acht die met VOORZICHTIG of WAARSCHUWING en een waarschuwingspictogram gemarkeerd is. Het signaalwoord WAARSCHUWING wijst u op mogelijk gevaar voor ernstige verwondingen, het signaalwoord VOORZICHTIG wijst u op mogelijk gevaar voor lichte verwondingen. Gebruikte symbolen 30 T Verzoek tot actie. Hier wordt u verzocht een handeling uit te voeren. E Aanwijzingen en tips om het gebruik van uw Cool Control nog makkelijker te maken. de Bedieningselementen Bedieningselementen en 1 2 4 3 5 6 7 8 9 10 fr it 11 12 nl 8Verbindingsstuk (kan variëren, afhankelijk van de volautomaat en de bijbehorende cappuccinatore) 9Melkslang 10Verbindingsstuk 11Adapter 12 Metalen buis 1 Cool Control 2Afdekking 3 Roestvrijstalen houder 4Bedrijfsindicatie 5 Netvoeding met netsnoer 6 Q Toets Aan/Uit 7Aansluitbus es Bedieningselementen Cool Control Wireless 1 2 3 pt 6 7 4 1Afdekking met geïntegreerde sensor voor het melkniveau 2 LED in de afdekking 3 Resettoets in de afdekking 4 Sensor voor het melkniveau 5 sv 5Draadloze ontvanger (voor plaatsing in de volautomaat) 6 LED in de draadloze ontvanger 7 Resettoets in de draadloze ontvanger ru 31 Belangrijke aanwijzingen Belangrijke aanwijzingen UU Eigenlijk gebruik Dit apparaat (melkkoeler) is bestemd voor huishoudelijk of soortgelijk gebruik, bijvoorbeeld door klanten in hotels, motels en andere inrichtingen, of door personeel in winkels, kantoren en andere werkomgevingen. Het is uitsluitend bedoeld om melk in de meegeleverde roestvrijstalen houder af te koelen en vers te houden. De accessoires van de Cool Control Wireless dienen voor de draadloze bewaking van het melkniveau in de meegeleverde roestvrijstalen houder van de Cool Control. Ieder ander gebruik wordt beschouwd als oneigenlijk gebruik. JURA kan niet aansprakelijk worden gesteld voor de gevolgen van oneigenlijk gebruik. Lees deze gebruiksaanwijzing vóór gebruik van het apparaat volledig door, en neem de aanwijzingen in acht. De garantie vervalt bij beschadigingen of gebreken die resulteren uit het niet in acht nemen van de gebruiksaanwijzing. Bewaar deze gebruiksaanwijzing in de nabijheid van het apparaat en geef deze aan volgende gebruikers door. Voor uw veiligheid Lees de onderstaande belangrijke veiligheidsaanwijzingen zorgvuldig door en neem deze in acht. Zo voorkomt u levensgevaar door een elektrische schok: Neem nooit een beschadigd apparaat of een apparaat met een beschadigd netsnoer in gebruik. Neem het apparaat nooit met natte handen in gebruik. Controleer vóór de inbedrijfstelling of het netsnoer droog is. Sluit het apparaat uitsluitend met het tot de leveringsomvang behorende netsnoer op het wisselstroomnet aan. UU UU UU UU UU UU UU UU Een beschadigd apparaat is niet veilig en kan verwondingen en brand veroorzaken. Om schade en mogelijk gevaar voor verwondingen en brandgevaar te voorkomen: Zorg ervoor dat de ventilatieopeningen niet afgedekt worden. Laat het netsnoer nooit los naar beneden hangen. Het netsnoer kan een struikelblok vormen of beschadigd raken. Bescherm de Cool Control tegen weersinvloeden zoals regen, vorst en direct zonlicht. Dompel de Cool Control, het netsnoer en de aansluitingen nooit in water. Plaats de Cool Control en de afzonderlijke onderdelen niet in de vaatwasser. Schakel uw Cool Control vóór reinigingswerkzaamheden uit en trek de netstekker uit het stopcontact. Veeg de Cool Control altijd vochtig, echter nooit nat af en bescherm het apparaat tegen constant spatwater. Vul de melk die u wilt koelen niet direct in het apparaat. Gebruik de tot de leveringsomvang behorende roestvrijstalen houder. UU UU UU UU UU UU UU 32 Zijn er tekenen die duiden op beschadigingen, bijvoorbeeld brandlucht, dient het apparaat onmiddellijk van het stroomnet losgekoppeld te worden dient u contact met de JURA service op te nemen. Als het netsnoer van dit apparaat beschadigd wordt, moet het direct bij JURA of bij een geautoriseerd JURA servicecenter worden gerepareerd. Zorg ervoor dat de Cool Control en het netsnoer zich niet in de buurt van hete oppervlakken of open vuur bevinden. Zorg ervoor dat het netsnoer niet wordt afgeklemd of langs scherpe randen schuurt. Open en repareer het apparaat nooit zelf. Breng geen wijzigingen aan het apparaat aan die niet in de gebruiksaanwijzing zijn beschreven. Het apparaat bevat stroomvoerende onderdelen. Reparaties mogen uitsluitend door geautoriseerde JURA servicecenters met originele onderdelen en accessoires worden uitgevoerd. de 1 Voorbereiden en in bedrijf stellen UU UU UU Het apparaat alleen op de netspanning aansluiten zoals weergegeven op het typeplaatje. Het typeplaatje bevindt zich aan de onderzijde van uw Cool Control. Meer technische gegevens vindt u in deze gebruiksaanwijzing (zie hoofdstuk 5, »Technische gegevens«). Schakel het apparaat uit als u het gedurende langere tijd niet gebruikt. Gebruik het apparaat uitsluitend onder toezicht. Personen, inclusief kinderen, die vanwege hun fysieke, zintuiglijke of verstandelijke vaardigheden of onervarenheid of onwetendheid niet in staat zijn het apparaat veilig te gebruiken, mogen het apparaat niet zonder toezicht of instructie van een verantwoordelijke persoon gebruiken. UU UU T Steek het netsnoer van de netvoeding in de aansluitbus van de Cool Control. T Steek de netstekker in een stopcontact. T Steek de metalen buis in de adapter. en fr T Plaats de adapter in de afdekking. T Steek één kant van de melkslang in de adapter. it nl 1 Voorbereiden en in bedrijf stellen Opstellen en aansluiten Neem bij het opstellen van uw Cool Control de volgende punten in acht: Plaats het apparaat op een horizontaal en voor water ongevoelig oppervlak. Kies de plaats voor de Cool Control zodanig dat het apparaat tegen oververhitting beschermd is. Zorg ervoor dat de ventilatieopeningen niet afgedekt worden. Alvorens het nieuwe apparaat in bedrijf te stellen, dient u het om hygiënische redenen zowel van binnen als van buiten met een vochtige doek te reinigen. Spoel de roestvrijstalen houder grondig uit. UU UU UU J WAARSCHUWING Levensgevaar door een elektrische schok bij gebruik met een defect netsnoer. T Neem nooit een beschadigd apparaat of een apparaat met een beschadigd netsnoer in gebruik. es Melk koelen EE De bediening (bijv. de inbedrijfstelling) van de Cool Control Wireless wordt beschreven in hoofdstuk 2 »Cool Control Wireless«. T Vul de roestvrijstalen houder met melk. T Sluit de roestvrijstalen houder met de afdekking. T Plaats de roestvrijstalen houder in de Cool Control. Zorg ervoor dat de aansluiting van de afdekking correct gepositioneerd is en vastklikt. T Sluit de melkslang met de cappuccinatore op uw volautomaat aan. pt sv EE Neem in acht dat het verbindingsstuk, afhankelijk van de volautomaat en de bijbehorende cappuccinatore, kan variëren. ru 33 2 Cool Control Wireless Q T Druk op de toets Aan/Uit. Als de afdekking correct gepositioneerd en vastgeklikt is, begint het apparaat te koelen. EE Uw JURA Cool Control houdt de melk altijd in een optimaal temperatuurbereik. De melk kan niet bevriezen. EE Om energie te besparen wordt de koeling beëindigd zodra de roestvrijstalen houder uit de Cool Control wordt genomen. EE Om de Cool Control uit te schakelen drukt u op de toets Aan/Uit Q. EE Als u het apparaat buiten bedrijf wilt stellen, trekt u de netstekker uit het stopcontact. 2 Cool Control Wireless EE Dit hoofdstuk geldt uitsluitend voor de Cool Control Wireless 1 l. Compatibiliteit EE De Cool Control Wireless is helaas niet met alle volautomaten van JURA compatibel. Vraag uw geautoriseerde dealer of kijk op www.jura.com. Afdekking (met sensor voor het melkniveau) en draadloze ontvanger in bedrijf stellen EE Reinig de afdekking met de sensor voor het melkniveau vóór het eerste gebruik grondig met een vochtige doek en een mild afwasmiddel. T Schakel uw volautomaat in. T Steek de draadloze ontvanger in de service interface van de volautomaat. EE Als u niet weet waar de service interface van uw volautomaat zich bevindt, vraag dan uw geautoriseerde dealer of kijk op www.jura.com. 34 Q T Druk op de toets Aan/Uit. T Vul de roestvrijstalen houder van de Cool Control (tot minimaal een derde) met melk. T Sluit de roestvrijstalen houder met de afdekking. T Plaats de roestvrijstalen houder in de Cool Control. Zorg ervoor dat de aansluiting van de afdekking correct gepositioneerd is en vastklikt. De LED's in de afdekking en in de draadloze ontvanger knipperen. Zodra beide LED's continu blauw branden, zijn de sensor voor het melkniveau en de draadloze ontvanger klaar voor gebruik. EE Zodra de roestvrijstalen houder geplaatst is en de afdekking correct vastgeklikt is, begint het apparaat te koelen. De koeling wordt beëindigd zodra de roestvrijstalen houder weer verwijderd wordt. EE Als zich te weinig melk in de roestvrijstalen houder bevindt, wordt dit bij de bereiding op de display van uw volautomaat weergegeven. De tekst op de display kan variëren, afhankelijk van het apparaat. Afdekking en draadloze ontvanger deïnstalleren T Schakel uw volautomaat uit. T Neem de draadloze ontvanger uit de service interface van de volautomaat. Q T Druk op de toets Aan/Uit om de Cool Control uit te schakelen. de 3 Reiniging en onderhoud LED-indicaties / storingen verhelpen LED in afdekking en in draadloze ontvanger: Indicatie Beschrijving LED brandt niet. De afdekking wordt niet van stroom voorzien. De Cool Control is uitgeschakeld. LED brandt. De wireless verbinding tussen afdekking en draadloze ontvanger is tot stand gebracht. LED knippert Er wordt geprobeerd de wireless (1 keer / sec.) verbinding tot stand te brengen. Mogelijke storingen verhelpen: Op de display wordt »Error Milk« weergegeven, beide LED's branden. UUDe sensor voor het melkniveau is defect. Service noodzakelijk. Beide LED's knipperen. UUDe verbinding tussen afdekking en draadloze ontvanger is gestoord of niet tot stand gebracht. Druk beide resettoetsen gelijktijdig in (bijv. met een pen). Zodra beide LED's continu blauw branden, zijn de sensor voor het melkniveau en de draadloze ontvanger klaar voor gebruik. Is het probleem nog steeds aanwezig? Service noodzakelijk. UU UU EE Mocht service noodzakelijk zijn, dient u de afdekking en de draadloze ontvanger te deïnstalleren zoals in dit hoofdstuk (onder »Afdekking en draadloze ontvanger deïnstalleren«) beschreven. Neem de afdekking en de draadloze ontvanger a.u.b. mee naar uw geautoriseerde dealer. 3 Reiniging en onderhoud en EE Gebruik voor de reiniging geen scherpe, schurende reinigingsmiddelen of harde voorwerpen. Deze kunnen het apparaat, de coating van de houder voor de roestvrijstalen houder en de roestvrijstalen houder beschadigen. EE Neem in acht dat alleen de roestvrijstalen houder en de metalen buis geschikt zijn voor de vaatwasser – alle andere onderdelen (afdekking, adapter enz.) niet. T Trek de netstekker vóór iedere reiniging van het apparaat uit het stopcontact. T Reinig het apparaat van binnen met een vochtige doek. T Reinig de buitenkant van het apparaat met een vochtige doek. T Spoel de roestvrijstalen houder en de afzonderlijke onderdelen grondig onder stromend water. EE Als de afdekking met de sensor voor het melkniveau gedurende langere tijd niet werd gebruikt, dient u de sensor voor het melkniveau vóór gebruik met een vochtige doek en een mild afwasmiddel grondig te reinigen. 4 Transport en milieuvriendelijke afvoer fr it nl es pt Transport Bewaar de verpakking van de Cool Control. Deze dient ter bescherming tijdens het transport. Reinig de roestvrijstalen houder vóór het transport. sv ru 35 5 Technische gegevens Afvoer Voer oude apparaten milieuvriendelijk af. H Oude apparaten bevatten waardevolle, recyclebare materialen die moeten worden gerecycled. Voer oude apparaten daarom af via de hiervoor bestemde inzamelpunten. 5 Technische gegevens Spanning 100–240 V ~, 50–60 Hz Veiligheidscontrole Conformiteitsteken A CE0051 Vermogen 25 W Temperatuurbereik Koelt tot 25 °C onder de omgevingstemperatuur, echter niet onder 4 °C Inhoud roestvrijstalen houder 1,1 l Snoerlengte ca. 1,8 m Gewicht ca. 1,9 kg Afmetingen (b × h × d) 14,8 × 22,5 × 21,8 cm Klimaatklasse N (voor omgevingstemperatuur van + 16 °C tot + 32 °C) Aanvulling voor de Cool Control Wireless: dit apparaat voldoet aan de voorwaarden zoals genoemd in Deel 15 van de FCC-voorschriften. Het bedrijf is onderhevig aan de volgende twee voorwaarden: (1) Dit apparaat mag geen schadelijke interferentie veroorzaken, en (2) Het apparaat moet alle ontvangen interferentie accepteren, inclusief interferentie die een ongewenste werking tot gevolg kan hebben. 36 6 JURA contacten / juridische informatie JURA Elektroapparate AG Kaffeeweltstrasse 10 CH-4626 Niederbuchsiten Tel. +41 62 38 98 233 @@ Meer contactgegevens in uw land vindt u online onder www.jura.com. Richtlijnen Het apparaat voldoet aan de volgende richtlijnen: ZZ 2002/95/EG (RoHS) ZZ 1907/2006/EG (REACH) ZZ 2006/95/EG (laagspanningsrichtlijn) ZZ 2004/108/EG (elektromagnetische compatibiliteit) ZZ 2009/125/EG (richtlijn ecodesign) Technische wijzigingen Technische wijzigingen voorbehouden. De in deze gebruiksaanwijzing gebruikte illustraties zijn gestileerd en geven niet de originele kleuren van het apparaat weer. Uw apparaat kan in details afwijken. Feedback Wij stellen uw mening zeer op prijs! Maak hiervoor gebruik van de contactlink onder www.jura.com. Copyright De gebruiksaanwijzing bevat informatie die door copyright is beschermd. Fotokopiëren of vertalen in een andere taal is zonder voorafgaande schriftelijke toestemming van JURA Elektroapparate AG niet toegestaan. de Índice de contenidos Su Cool Control en Elementos de control 38 Elementos de control del Cool Control Wireless..............................................................................................38 Advertencias importantes 39 Utilización conforme a lo previsto.......................................................................................................................39 Para su seguridad...................................................................................................................................................39 1 Preparación y puesta en funcionamiento 40 Instalación y conexión.......................................................................................................................................... 40 Refrigerar leche....................................................................................................................................................... 41 2 Cool Control Wireless 41 Compatibilidad....................................................................................................................................................... 41 Poner en funcionamiento la tapa (con sensor de nivel de leche) y el receptor.......................................... 41 Desinstalar la tapa y el receptor...........................................................................................................................42 Indicaciones de los LED/eliminación de errores................................................................................................42 3 Limpieza y conservación it 42 4 Transporte y eliminación respetuosa con el medioambiente 43 Transporte................................................................................................................................................................43 Eliminación..............................................................................................................................................................43 5 Datos técnicos 43 6 Contactos JURA/advertencias legales 44 nl es E Tenga en cuenta que: Este modo de empleo es válido para dos versiones del Cool Control 1 l. Cool Control básico fr Cool Control Wireless pt Descripción de símbolos Advertencias J ATENCIÓN J ADVERTENCIA Tenga siempre en cuenta la información que va acompañada de ATENCIÓN o ADVERTENCIA con pictograma de advertencia. La palabra de señalización ADVERTENCIA hace referencia a posibles lesiones graves y la palabra de señalización ATENCIÓN, a posibles lesiones leves. sv Símbolos utilizados T Requerimiento de acción. Aquí se requiere una acción por su parte. E Advertencias y consejos para que el manejo de su Cool Control sea aún más fácil. ru 37 Elementos de control Elementos de control 1 2 4 3 5 6 7 8 9 10 11 12 1 Cool Control 2Tapa 3 Recipiente de acero inoxidable 4 Indicador de funcionamiento 5 Bloque con cable de alimentación 6 Q Botón de mando marcha/parada 7 Conector hembra de corriente 8Pieza de conexión (puede variar dependiendo de la cafetera automática y el correspondiente vaporizador Cappuccino) 9 Tubo de leche 10 Pieza de conexión 11Adaptador 12 Tubo metálico Elementos de control del Cool Control Wireless 1 2 3 6 7 4 1 2 3 4 38 Tapa con sensor de nivel de leche integrado LED en la tapa Botón de restauración en la tapa Sensor de nivel de leche 5 5Receptor (para montar en la cafetera automática) 6 LED en el receptor 7 Botón de restauración en el receptor de Advertencias importantes Advertencias importantes UU Utilización conforme a lo previsto Esta máquina (distribuidor de bebidas frías) está destinada a un uso doméstico o similar, como pueden ser los clientes de hoteles, moteles y otros edificios destinados al alojamiento de huéspedes, o bien el personal empleado en comercios, oficinas y otros lugares de trabajo. Se utiliza exclusivamente para refrigerar leche en el recipiente de acero inoxidable suministrado y mantenerla fresca. Los accesorios del Cool Control Wireless están diseñados para el control remoto de nivel de leche en el recipiente de acero inoxidable suministrado del Cool control. Cualquier otra aplicación se considerará no conforme a lo previsto. JURA no asume ninguna responsabilidad por las consecuencias derivadas de una utilización no conforme a lo previsto. Lea y respete completamente el presente modo de empleo antes de usar la máquina. La prestación de garantía queda anulada frente a daños o defectos ocasionados por el incumplimiento del modo de empleo. Guarde el presente modo de empleo junto a la máquina y entréguelo a usuarios posteriores. Para su seguridad Lea y respete atentamente las siguientes indicaciones importantes de seguridad. Así se evitará un peligro de muerte por descarga eléctrica: No ponga nunca la máquina en funcionamiento si presenta daños o si el cable de alimentación está deteriorado. Nunca ponga la máquina en funcionamiento con las manos mojadas. Antes de la puesta en funcionamiento, preste atención a que el cable de alimentación esté seco. Conecte la máquina a la red de corriente alterna utilizando únicamente el bloque de alimentación incluido con el equipamiento. UU UU UU UU UU UU UU UU Si se advierten indicios de posibles daños, por ejemplo olor a quemado, desconecte la máquina inmediatamente de la alimentación y póngase en contacto con el servicio técnico de JURA. Si se daña el cable de alimentación de esta máquina, debe encargar su reparación directamente a JURA o a un departamento de servicio técnico autorizado por JURA. Preste atención a que el Cool Control y el cable de alimentación no se encuentren en la proximidad de superficies calientes o llamas abiertas. Asegúrese de que el cable de alimentación no está presionado y que no roza con cantos vivos. No abra nunca la máquina ni intente repararla usted mismo. No realice modificaciones en la máquina que no estén descritas en el modo de empleo. La máquina contiene componentes conductores de corriente. Las reparaciones deben ser realizadas exclusivamente por departamentos de servicio técnico autorizados por JURA, utilizando accesorios y repuestos originales. Una máquina dañada no es segura y puede provocar lesiones y quemaduras. Para evitar daños y, con ello, el peligro de incendio y de sufrir lesiones: Preste atención a que no se tapen las rendijas de ventilación. No deje nunca el cable de alimentación suelto y colgando. El cable de alimentación puede provocar tropezones o resultar dañado. No exponga su Cool Control a las influencias meteorológicas como lluvia, heladas y radiación solar directa. No sumerja el Cool Control, ni los cables ni las conexiones en agua. No coloque el Cool Control ni sus componentes en el lavavajillas. en fr it nl es UU UU pt UU UU sv UU ru 39 1 Preparación y puesta en funcionamiento UU UU UU UU UU Antes de proceder con los trabajos de limpieza, desconecte el Cool Control y desenchufe el enchufe de alimentación. Limpie el Cool Control siempre con un paño húmedo, nunca mojado, y protéjalo de salpicaduras de agua continuadas. No llene directamente en la máquina la leche que desea enfriar. Utilice el recipiente de acero inoxidable incluido en el equipamiento. Conecte la máquina sólo al voltaje de alimentación especificado según la placa de características técnicas. La placa de características técnicas va fijada en la parte inferior de su Cool Control. Para más datos técnicos, consulte el presente modo de empleo (véase el capítulo 5 «Datos técnicos»). Desconecte la máquina en caso de una ausencia prolongada. Opere la máquina únicamente bajo supervisión. Las personas, incluyendo a los niños, que por sus capacidades físicas, sensoriales o mentales, o por su falta de experiencia o conocimientos no sean capaces de utilizar la máquina de forma segura, no deberán hacer uso de la misma sin la debida supervisión o instrucción por parte de una persona responsable. UU Antes de poner en funcionamiento la nueva máquina, deberá limpiarla interna y exteriormente con un paño húmedo por motivos de higiene. Enjuague bien el recipiente de acero inoxidable. J ADVERTENCIA Peligro de muerte por descarga eléctrica en caso de funcionamiento con un cable de alimentación defectuoso. T Nunca ponga la máquina en funcionamiento si presenta daños o si el cable de alimentación está deteriorado. T Inserte el cable de alimentación en el conector hembra de corriente del Cool Control. T Inserte el enchufe de alimentación en una toma de corriente. T Inserte el tubo metálico en el adaptador. UU UU 1 Preparación y puesta en funcionamiento Instalación y conexión Preste atención a los siguientes puntos cuando instale su Cool Control: Coloque la máquina sobre una superficie horizontal y resistente al agua. Seleccione el lugar del Cool Control de tal modo que esté protegido contra un sobrecalentamiento. Preste atención a que no se tapen las rendijas de ventilación. UU UU 40 T Coloque el adaptador en la tapa. T Inserte uno de los extremos del tubo de leche en el adaptador. de 2 Cool Control Wireless Refrigerar leche EE El manejo (por ejemplo, la puesta en funcionamiento) del Cool Control Wireless se describe en el capítulo 2 «Cool Control Wireless». T Llene de leche el recipiente de acero inoxidable. T Cierre el recipiente de acero inoxidable con la tapa. T Introduzca el recipiente de acero inoxidable en el Cool Control. Asegúrese de que la conexión de la tapa está correctamente orientada y encajada. T Conecte el tubo de leche con el vaporizador Cappuccino de su cafetera automática. EE Tenga en cuenta que la pieza de conexión puede variar dependiendo de la cafetera y el correspondiente vaporizador Cappuccino. Q T Pulse el botón de mando marcha/parada. La máquina comienza a refrigerar en cuanto la tapa está correctamente colocada y encajada. EE Su Cool Control de JURA mantiene la leche siempre dentro de un rango de temperatura ideal. La leche no se congela. EE Para ahorrar energía, el proceso de refrigeración finaliza en cuanto se saca el recipiente de acero inoxidable del Cool Control. EE Pulse el botón de mando marcha/parada Q para desconectar el Cool Control. EE Cuando apague la máquina retire el enchufe de alimentación de la toma de corriente. 2 Cool Control Wireless EE Este capítulo es válido exclusivamente para el Cool Control Wireless 1 l. en Compatibilidad EE Por desgracia, el Cool Control Wireless no es compatible con todas las máquinas automáticas para especialidades de café de JURA. Consulte con su distribuidor especializado o acceda a www.jura.com. fr it Poner en funcionamiento la tapa (con sensor de nivel de leche) y el receptor EE Limpie a fondo la tapa con sensor de nivel de leche antes de utilizarla por primera vez utilizando un paño humedecido y lavavajillas suave. nl T Conecte su cafetera automática. T Introduzca el receptor en la interfaz de servicio de la cafetera automática. EE En caso de que no sepa dónde se encuentra la interfaz de servicio de su cafetera automática, consulte con su distribuidor especializado o acceda a www.jura.com. Q T Pulse el botón de mando marcha/parada. T Llene el recipiente de acero inoxidable del Cool Control (hasta, como mínimo, un tercio) con leche. T Cierre el recipiente de acero inoxidable con la tapa. T Introduzca el recipiente de acero inoxidable en el Cool Control. Asegúrese de que la conexión de la tapa está correctamente orientada y encajada. Los LED de la tapa y el receptor parpadean. Cuando estos se enciendan en azul de manera continua, indican que tanto el sensor de nivel de leche como el receptor están listos para funcionar. 41 es pt sv ru 3 Limpieza y conservación EE La máquina comienza a refrigerar en cuanto se haya colocado el recipiente de acero inoxidable y la tapa esté correctamente encajada. El proceso de refrigeración finaliza en cuanto se saca el recipiente de acero inoxidable del Cool Control. EE En caso de que haya muy poca leche en el recipiente de acero inoxidable se indicará esta situación durante la preparación en el visualizador de su cafetera automática. El texto del visualizador puede variar dependiendo de la máquina. Desinstalar la tapa y el receptor T Desconecte su cafetera automática. T Retire el receptor de la interfaz de servicio de la cafetera automática. Q T Pulse el botón de mando marcha/parada para desconectar el Cool Control. Indicaciones de los LED/eliminación de errores LED en la tapa y en el receptor: Indicación Descripción El LED no se La tapa no recibe corriente. El Cool enciende. Control está desconectado. El LED se enciende. La conexión inalámbrica entre la tapa y el receptor está establecida. El LED parpadea (1 vez/s) Se está intentando establecer la conexión inalámbrica. Solucionar posibles errores: En el visualizador se indica »Error Milk«, se encienden ambos LED. UUEl sensor de nivel de leche está defectuoso. Esta situación requiere la intervención del servicio técnico. UU 42 UU Ambos LED parpadean. UULa conexión entre la tapa y el receptor está interrumpida o no establecida. Pulse simultáneamente ambos botones de restauración (p. ej., con un bolígrafo). Cuando estos se enciendan en azul de manera continua, indican que tanto el sensor de nivel de leche como el receptor están listos para funcionar. ¿Se mantiene el problema? Esta situación requiere la intervención del servicio técnico. EE En caso de que sea necesaria la intervención del servicio técnico, desinstale la tapa y el receptor como se describe en este capítulo (en el apartado «Desinstalar la tapa y el receptor»). Lleve la tapa y el receptor a su distribuidor especializado de JURA. 3 Limpieza y conservación EE No utilice productos limpiadores agresivos o abrasivos ni objetos duros durante la limpieza. Esto podría dañar la máquina, el revestimiento del alojamiento para el recipiente de acero inoxidable así como el propio recipiente de acero inoxidable. EE Tenga en cuenta que solo el recipiente de acero inoxidable y el tubo metálico pueden lavarse en el lavavajillas, el resto de piezas (tapa, adaptador, etc.) no lo son. T Antes de cada limpieza de la máquina, desenchufe el enchufe de alimentación de la toma de corriente. T Limpie el interior de la máquina con un paño húmedo. T Limpie el interior de la máquina con un paño húmedo. T Enjuague el recipiente de acero inoxidable y los componentes con abundante agua corriente. de 4 Transporte y eliminación respetuosa con el medioambiente EE En caso de que no se haya utilizado la tapa con sensor de nivel de leche durante un periodo de tiempo prolongado, lave a fondo el sensor de nivel de leche con un paño humedecido y lavavajillas suave antes de volver a utilizarla. 4 Transporte y eliminación respetuosa con el medioambiente Transporte Conserve el embalaje del Cool Control. Éste tiene la función de proteger la máquina cuando sea transportada. Limpie el recipiente de acero inoxidable antes del transporte. Eliminación Elimine las máquinas antiguas de manera respetuosa con el medioambiente. H Las máquinas antiguas contienen valiosos materiales reciclables que deberían destinarse al reciclado. Por este motivo, las máquinas antiguas deben eliminarse a través de sistemas de recogida adecuados. 5 Datos técnicos Voltaje en 100–240 V ~, 50–60 Hz Comprobación de seguridad Marca de conformidad A CE0051 Potencia 25 W Rango de temperatura Refrigera hasta 25 °C por debajo de la temperatura ambiente, pero no a menos de 4 °C Capacidad del recipiente de acero inoxidable 1,1 l Longitud del cable aprox. 1,8 m Peso aprox. 1,9 kg fr nl Medidas (An x Al x P) 14,8 × 22,5 × 21,8 cm Clase climática it N (para una temperatura ambiente de + 16 °C a + 32 °C) Anexo al Cool Control Wireless: Esta máquina cumple con los requisitos establecidos en el apartado 15 de las Directivas FCC. El funcionamiento está sujeto a las siguientes condiciones: (1) Esta máquina no debe provocar interferencias perjudiciales. (2) Esta máquina debe poder asimilar cualquier interferencia recibida, así como aquellas interferencias que puedan provocar un funcionamiento no deseado. es pt sv ru 43 6 Contactos JURA/advertencias legales 6 Contactos JURA/advertencias legales JURA Elektroapparate AG Kaffeeweltstrasse 10 CH-4626 Niederbuchsiten Tel. +41 (0)62 38 98 233 @@ Puede encontrar otros datos de contacto online para su país en www.jura.com. Directivas La máquina cumple las siguientes directivas: ZZ 2002/95/CE (Directiva sobre restricciones a la utilización de determinadas sustancias peligrosas en aparatos eléctricos y electrónicos) ZZ 2006/1907/CE (Reglamento relativo al registro, la evaluación, la autorización y la restricción de las sustancias y preparados químicos) ZZ 2006/95/CE (Directiva de baja tensión) ZZ 2004/108/CE (Compatibilidad electromagnética) ZZ 2009/125/CE (Directiva sobre energía) Modificaciones técnicas Reservado el derecho a introducir modificaciones técnicas. Las ilustraciones empleadas en el presente modo de empleo son esquemáticas y no muestran los colores originales de la máquina. Su máquina puede diferir en algunos detalles. Observaciones del cliente ¡Su opinión nos importa! Utilice el enlace de contacto en www.jura.com. Copyright El modo de empleo contiene información protegida por copyright. Queda prohibido fotocopiarlo o traducirlo a otro idioma sin el consentimiento previo por escrito de JURA Elektroapparate AG. 44 de Índice O seu Cool Control en Elementos de comando 46 Elementos de comando do Cool Control Wireless.......................................................................................... 46 Indicações importantes 47 Utilização conforme a finalidade.........................................................................................................................47 Para a sua segurança..............................................................................................................................................47 1 Preparação e colocação em funcionamento 48 Instalação e ligação............................................................................................................................................... 48 Arrefecer leite......................................................................................................................................................... 48 2 Cool Control Wireless 49 Compatibilidade.................................................................................................................................................... 49 Colocar em funcionamento a tampa (com sensor de nível de leite) e o aparelho recetor...................... 49 Desinstalação da tampa e do aparelho recetor............................................................................................... 49 Indicações LED/Eliminação de erros................................................................................................................... 50 3 Limpeza e manutenção it 50 4 Transporte e eliminação ecológica 50 Transporte............................................................................................................................................................... 50 Eliminação................................................................................................................................................................ 51 5 Dados técnicos 51 6 Endereços da JURA / Notas legais 51 nl es E Tenha en atenção o seguinte: este manual de instruções aplica-se a duas versões do Cool Control 1l. Cool Control Básico fr Cool Control Wireless pt Descrição dos símbolos Advertências J CUIDADO J ATENÇÃO Cumpra sempre as informações assinaladas com CUIDADO ou ATENÇÃO e os respetivos pictogramas de aviso. O termo de advertência ATENÇÃO alerta para eventuais ferimentos graves e o termo de advertência CUIDADO alerta para eventuais ferimentos ligeiros. sv Símbolos utilizados T Solicitação de ação. Aqui é-lhe solicitado que execute uma ação. E Notas e sugestões para facilitar ainda mais o manuseamento do seu Cool Control. ru 45 Elementos de comando Elementos de comando 1 2 4 3 5 6 7 8 9 10 11 12 8Peça de ligação (pode variar conforme a máquina de café e o respetivo bocal para Cappuccino) 9 Tubo do leite 10 Peça de ligação 11Adaptador 12 Tubo metálico 1 Cool Control 2Tampa 3 Recipiente em aço inoxidável 4 Indicador de funcionamento 5 Caixa de alimentação com cabo 6 Q Tecla Liga/Desliga 7 Tomada de ligação Elementos de comando do Cool Control Wireless 1 2 3 6 7 4 1Tampa com sensor de nível de leite integrado 2 LED na tampa 3 Tecla Reajustar na tampa 4 Sensor de nível de leite 46 5 5Aparelho recetor (para colocação na máquina de café automática) 6 LED no aparelho recetor 7 Tecla Reajustar no aparelho recetor de Indicações importantes Indicações importantes Utilização conforme a finalidade Este aparelho (dispensador de bebidas frias) destina-se a ser utilizado em contexto doméstico ou afins, nomeadamente em hotéis, motéis e outros tipos de alojamento, para uso dos respetivos clientes, ou em lojas, escritórios e outros ambientes laborais para uso do pessoal. Destina-se apenas a arrefecer o leite no recipiente em aço inoxidável fornecido e a mantê-lo fresco. Os acessórios do Cool Control Wireless destinam-se à monitorização do nível de leite por recetor no recipiente em aço inoxidável do Cool Control fornecido. Qualquer outra forma de utilização é considerada não conforme. A JURA não assumirá qualquer responsabilidade pelas consequências de uma utilização não conforme à finalidade. UU UU UU UU Antes da utilização do aparelho, leia e respeite este manual de instruções. O serviço coberto pela garantia é anulado em caso de danos ou falhas resultantes da não observância do manual de instruções. Mantenha este manual de instruções nas proximidades do aparelho e entregue-o ao utilizador seguinte. UU Para a sua segurança UU Leia atentamente e respeite as importantes instruções de segurança apresentadas a seguir. Assim, evita o perigo de morte por choque elétrico: Nunca utilize um aparelho se este ou o seu cabo de alimentação apresentarem danos. Nunca utilize o aparelho se tiver as mãos molhadas. Antes da colocação em funcionamento, tenha atenção para que o cabo de alimentação esteja seco. Ligue o aparelho à corrente alternada apenas com a caixa de alimentação fornecida na caixa original. Em caso de sinais de danos, como por exemplo, cheiro a queimado, desligue o UU UU UU UU UU aparelho imediatamente da rede elétrica e entre em contato com a assistência da JURA. Se o cabo de alimentação deste aparelho estiver danificado, tem de ser reparado diretamente pela JURA ou num serviço de assistência técnica autorizado da JURA. Certifique-se de que o Cool Control e o cabo de alimentação não se encontram nas proximidades de superfícies quentes ou chamas abertas. Preste atenção para que o cabo de alimentação não seja prensado nem encostado a arestas vivas. Nunca abra nem repare o aparelho. Não realize alterações no aparelho que não estejam descritas no manual de instruções. O aparelho contém peças condutoras de corrente elétrica. As reparações apenas devem ser executadas por serviços de assistência técnica autorizados da JURA e apenas devem ser utilizadas peças sobressalentes e acessórios originais. Um aparelho danificado não é seguro e poderá ser causa de incêndio ou ferimentos. Para evitar danos e consequentes perigos de ferimentos e de incêndio: Tenha atenção para que as ranhuras de ventilação não fiquem cobertas. Nunca deixe o cabo de alimentação pendurado. O cabo de alimentação poderá representar perigo de queda ou poderá ser danificado. Proteja o Cool Control contra elementos climáticos como chuva, geada e luz solar direta. Não mergulhe o Cool Control, o seu cabo ou as suas peças de ligação em água. Não coloque o Cool Control e as suas peças soltas na máquina de lavar loiça. Antes de efetuar processos de limpeza no seu Cool Control, desligue-o e retire a ficha de alimentação. Limpe o Cool Control sempre com um pano húmido, mas nunca molhado. Proteja-o contra salpicos de água contínuos. Nunca coloque o leite que pretende arrefecer diretamente no aparelho. Utilize o recipiente em aço inoxidável incluído na caixa original. UU en fr it nl es pt UU UU UU UU 47 sv ru 1 Preparação e colocação em funcionamento UU UU UU Conecte o aparelho apenas a uma tensão de rede, conforme indicado na placa de características. A placa de características está localizada no lado inferior do seu Cool Control. Para mais informações sobre os dados técnicos, consulte o presente manual de instruções (capítulo 5 "Dados técnicos"). No caso de uma ausência prolongada, desligue o aparelho. Opere o seu aparelho apenas sob supervisão. As pessoas, incluindo crianças, que não estão aptas a utilizar o aparelho com segurança devido às suas faculdades físicas, sensoriais ou mentais ou à sua inexperiência ou falta de conhecimento não devem utilizar o aparelho sem a supervisão ou orientação de uma pessoa responsável. UU UU T Introduza o cabo da caixa de alimentação na tomada de ligação do Cool Control. T Introduza a ficha na tomada de alimentação. T Introduza o tubo metálico no adaptador. T Coloque o adaptador na tampa. T Introduza um lado do tubo do leite no adaptador. 1 Preparação e colocação em funcionamento Instalação e ligação Ao instalar o seu Cool Control, observe os seguintes pontos: Coloque o aparelho numa superfície horizontal e resistente à água. Escolha um local no qual o Cool Control fique protegido contra sobreaquecimento. Tenha atenção para que as ranhuras de ventilação não fiquem cobertas. Por razões de higiene, deve proceder à limpeza interior e exterior do aparelho com um pano húmido antes de colocá-lo em funcionamento. Lave o recipiente em aço inoxidável exaustivamente. UU UU UU J ATENÇÃO Perigo de morte por choque elétrico se a máquina for utilizada com o cabo de alimentação danificado. T Nunca utilize um aparelho se este ou o seu cabo de alimentação apresentarem danos. 48 Arrefecer leite EE A utilização (p. ex. colocação em funcionamento) do Cool Control Wireless encontra-se descrita no capítulo 2 »Cool Control Wireless«. T Encha o recipiente em aço inoxidável com leite. T Tape o recipiente em aço inoxidável com a tampa. T Coloque o recipiente em aço inoxidável no Cool Control. Certifique-se de que a ligação da tampa fica corretamente alinhada e engatada. T Conecte o tubo do leite com o bocal para Cappuccino à sua máquina de café. EE Atenção que a peça de ligação pode variar, conforme a máquina de café e o respetivo bocal para Cappuccino. de 2 Cool Control Wireless Q T Prima a tecla Liga/Desliga. Se a tampa estiver corretamente alinhada e engatada, o aparelho começa a arrefecer. EE O seu Cool Control JURA mantém o leite sempre na temperatura ideal. O leite não congela. EE Para poupar energia, o processo de arrefecimento termina assim que se retira o recipiente em aço inoxidável do Cool Control. EE Para desligar o Cool Control, prima a tecla Liga/Desliga Q. EE Se pretender que o aparelho fique inoperacional retire a ficha de alimentação da tomada de alimentação. 2 Cool Control Wireless EE Este capítulo aplica-se apenas ao Cool Control Wireless 1 l. Compatibilidade EE O Cool Control Wireless não é compatível com todas as máquinas de café automáticas da JURA. Informe-se junto da sua loja especializada ou consulte a página web www.jura.com. Colocar em funcionamento a tampa (com sensor de nível de leite) e o aparelho recetor EE Antes da primeira utilização limpe bem a tampa com sensor de nível de leite com um pano húmido e um detergente suave. T Ligue a sua máquina de café automática. T Encaixe o aparelho recetor na interface de serviço da máquina de café. EE Caso não saiba onde se situa a interface de serviço da sua máquina de café automática, informe-se junto da sua loja especializada ou consulte a página web www.jura.com. Q T Prima a tecla Liga/Desliga. T Encha o recipiente em aço inoxidável do Cool Control com leite (no mínimo até um terço). T Tape o recipiente em aço inoxidável com a tampa. T Coloque o recipiente em aço inoxidável no Cool Control. Certifique-se de que a ligação da tampa fica corretamente alinhada e engatada. Os LED na tampa e no aparelho recetor piscam. Assim que os LED ficarem a azul e deixarem de piscar, tanto o sensor de nível de leite como o aparelho recetor estão prontos a funcionar. EE Depois de colocado o recipiente em aço inoxidável e corretamente engatada a tampa, o aparelho começa a arrefecer. O processo de arrefecimento termina assim que se volta a retirar o recipiente em aço inoxidável. EE Caso haja pouco leite no recipiente em aço inoxidável, aquando da preparação, aparecerá um aviso no visor da sua máquina de café automática. O texto no visor poderá variar conforme o aparelho. en fr it nl es pt Desinstalação da tampa e do aparelho recetor T Desligue a sua máquina de café automática. T Remova o aparelho recetor da interface de serviço da máquina de café. Q T Prima a tecla Liga/Desliga para desligar o Cool Control. sv ru 49 3 Limpeza e manutenção Indicações LED/Eliminação de erros LED na tampa e no aparelho recetor: Indicação Descrição O LED não se A tampa não está ligada à ilumina. eletricidade. O Cool Control está desligado. O LED ilumina-se. A ligação wireless entre a tampa e o aparelho recetor foi estabelecida. O LED pisca (1 vez/s.) Procura-se estabelecer a ligação wireless. Eliminação de possíveis erros: No Visor aparece »Error Milk«; ambos os LED se iluminam. UUO sensor de nível de leite está danificado. É necessária a intervenção da assistência técnica. Ambos os LED piscam. UUA ligação entre a tampa e o aparelho recetor foi interrompida ou não estabelecida. Pressione ambas as teclas Reajustar em simultâneo (com uma esferográfica, por exemplo). Assim que os LED ficarem a azul e deixarem de piscar, tanto o sensor de nível de leite como o aparelho recetor estão prontos a funcionar. O problema ainda persiste? É necessária a intervenção da assistência técnica. UU UU EE Se for necessária uma intervenção da assistência técnica, desinstale a tampa e o aparelho recetor, tal como se descreve neste capítulo (em «Desinstalar tampa e aparelho recetor»). Leve a tampa e o aparelho recetor à sua loja especializada JURA. 50 3 Limpeza e manutenção EE Para a limpeza, não utilize produtos de limpeza abrasivos ou objetos duros. Estes podem danificar o aparelho, o revestimento da entrada do recipiente em aço inoxidável e do próprio recipiente. EE Atenção que apenas o recipiente em aço inoxidável e o tubo metálico podem ser lavados na máquina de lavar louça, as restantes peças não podem (tampa, adaptador, etc.). T Antes de cada limpeza do aparelho, retire a ficha da tomada de alimentação. T Limpe o interior do aparelho com um pano húmido. T Limpe a parte exterior do aparelho com um pano húmido. T Lave exaustivamente o recipiente em aço inoxidável e as peças soltas com água corrente. EE Caso a tampa com sensor de nível de leite não tenha sido utilizada durante um longo período de tempo, limpe bem o sensor de nível de leite com um pano húmido e um detergente suave antes de uma nova utilização. 4 Transporte e eliminação ecológica Transporte Guarde a embalagem do Cool Control. Ela serve como proteção para o transporte da máquina. Antes do transporte, limpe o recipiente em aço inoxidável. de 5 Dados técnicos Eliminação Por favor, elimine os aparelhos velhos de forma ecológica. H Os aparelhos velhos possuem materiais recicláveis valiosos e devem ser entregues para a reciclagem. Portanto, elimine os aparelhos velhos através de postos de recolha adequados. en JURA Elektroapparate AG Kaffeeweltstrasse 10 CH-4626 Niederbuchsiten Tel. +41 (0)62 38 98 233 fr @@ Outros dados de contacto para o seu país podem ser consultados online em www.jura.com. 5 Dados técnicos Tensão 6 Endereços da JURA / Notas legais 100–240 V ~, 50–60 Hz Teste de segurança Marcação de conformidade A CE0051 Potência 25 W Gama de temperaturas Arrefece até 25 °C abaixo da temperatura ambiente, mas não abaixo de 4 °C Capacidade do recipiente 1,1 l em aço inoxidável Comprimento do cabo aprox. 1,8 m Peso aprox. 1,9 kg Dimensões (L × A × P) 14,8 × 22,5 × 21,8 cm Classe de refrigeração N (para temperatura ambiente de + 16 ºC a + 32 ºC) Aditamento relativo ao Cool Control Wireless: este aparelho cumpre o disposto na parte 15 das normas FCC (Federal Communications Commission). O funcionamento está sujeito aos dois requisitos descritos em seguida: (1) este aparelho não pode causar interferências nocivas, e (2) este aparelho deve aceitar quaisquer interferências recebidas, incluindo interferências que possam causar mau funcionamento. Diretivas O aparelho cumpre as exigências das seguintes diretivas: ZZ 2002/95/CE (Diretiva relativa à restrição de substâncias perigosas em equipamento elétrico e eletrónico - RoHS) ZZ 1907/2006/CE (Registo, Avaliação, Autorização e Restrição dos Produtos Químicos - REACH) ZZ 2006/95/CE (Diretiva de baixa tensão) ZZ 2004/108/CE (Compatibilidade eletromagnética) ZZ 2009/125/CE (Diretiva sobre energia) Alterações técnicas Reservados os direitos de alterações técnicas. As ilustrações utilizadas neste manual de instruções são estilizadas e não mostram as cores originais do aparelho. O seu aparelho pode apresentar detalhes diferentes. Feedback A sua opinião é importante! Utilize o acesso de contato na página www.jura.com. it nl es pt Copyright O manual de instruções contém informações protegidas por direitos de autor. As fotocópias ou traduções para outra língua não são admissíveis sem a autorização prévia por escrito pela JURA Elektroapparate AG. sv ru 51 Innehållsförteckning Din Cool Control Manöverorgan53 Manöverorgan på Cool Control Wireless...........................................................................................................53 Viktig information 54 Användning för avsett ändamål.......................................................................................................................... 54 För din säkerhet..................................................................................................................................................... 54 1 Förberedelse och idrifttagning 55 Uppställning och anslutning................................................................................................................................55 Kylning av mjölk.....................................................................................................................................................55 2 Cool Control Wireless 56 Kompatibilitet......................................................................................................................................................... 56 Idrifttagning av lock (med mjölknivåsensor) och mottagare........................................................................ 56 Demontering av locket och mottagaren........................................................................................................... 56 LED-indikatorer/åtgärd av fel............................................................................................................................... 56 3 Rengöring och skötsel 57 4 Transport och miljövänlig avfallshantering 57 Transport..................................................................................................................................................................57 Avfallshantering......................................................................................................................................................57 5 Tekniska data 57 6 JURA kontakt / juridisk information 58 E Obs! Den här bruksanvisningen gäller för två versioner av Cool Control 1l. Cool Control Basic Cool Control Wireless Symbolbeskrivning Varningar J OBSERVERA J VARNING Följ alltid de anvisningar som är betecknade med OBSERVERA eller VARNING plus en varningssymbol. Signalordet VARNING används när det finns risk för allvarlig personskada och signalordet OBSERVERA när det finns risk för mindre allvarliga personskador. Symboler som används 52 T Uppmaning till åtgärd. Du blir uppmanad att vidta en åtgärd. E Information och tips som gör det ännu lättare för dig att använda din Cool Control. de Manöverorgan Manöverorgan en 1 2 4 3 5 6 7 8 9 10 fr it 11 12 nl 8Anslutningsdel (utformningen kan variera beroende på kaffemaskin och tillhörande cappuccinoskummare) 9Mjölkslang 10Anslutningsdel 11Adapter 12Metallrör 1 Cool Control 2Lock 3 Rostfri behållare 4Indikator 5 Nätdel med nätsladd 6 Q Knapp Till/Från 7Anslutningsuttag es Manöverorgan på Cool Control Wireless 1 2 3 pt 6 7 4 1 2 3 4 Lock med integrerad mjölknivåsensor LED på locket Återställningsknapp på locket Mjölknivåsensor 5 sv 5Mottagare (för användning i kaffemaskinen) 6 LED i mottagaren 7 Återställningsknapp i mottagaren ru 53 Viktig information Viktig information UU Användning för avsett ändamål UU Denna apparat (Cool Control) är avsedd att användas i hemmet eller liknande, t.ex. av gäster på hotell, motell etc., av personal i butiker, på kontor och i andra arbetsmiljöer. Den är endast avsedd för att kyla och hålla mjölk färsk i den medföljande rostfria behållaren. Tillbehören till Cool Control Wireless är avsedda för trådlös bevakning av mjölknivån i den rostfria behållaren som medföljer Cool Control. All annan användning anses som icke ändamålsenlig. JURA påtar sig inget ansvar för följderna vid användning av apparaten för något annat ändamål än det avsedda. Läs igenom denna bruksanvisning innan du använder apparaten och följ anvisningarna. Garantin gäller inte för skador och brister som uppstått till följd av att bruksanvisningen inte har beaktats. Ha alltid den här bruksanvisningen tillgänglig nära apparaten och lämna den vidare till nästa användare. För din säkerhet Läs noggrant igenom och följ de viktiga säkerhetsföreskrifterna nedan. Så här gör du för att inte utsätta dig för livsfara genom elektriska stötar: Använd aldrig apparaten om den är skadad eller om nätsladden är trasig. Använd aldrig apparaten om du har våta händer. Se till att nätsladden är torr innan du använder apparaten. Använd endast den medföljande nätdelen för att ansluta apparaten till växelströmsnätet. Om du misstänker att apparaten är skadad, till exempel för att den luktar bränt, måste du omedelbart dra ut nätsladden och kontakta JURA service. Om apparatens nätsladd skadas måste den antingen repareras direkt hos JURA eller hos en av JURA auktoriserad serviceverkstad. UU UU UU UU UU UU 54 UU Var noga med att inte placera Cool Control eller nätsladden i närheten av varma ytor eller öppen eld. Se till att nätsladden inte är fastklämd eller skaver mot vassa kanter. Försök aldrig själv att öppna och laga apparaten. Gör inga ändringar på apparaten som inte finns beskrivna i bruksanvisningen. Apparaten innehåller strömförande delar. Endast av JURA auktoriserade serviceverkstäder, som använder originalreservdelar och -tillbehör, får utföra reparationer. En skadad apparat är inte säker och kan orsaka personskador och bränder. Gör så här för att förhindra skador på apparaten som kan medföra risk för brand- och personskador: Se till att ventilationsöppningarna inte täcks över. Låt aldrig nätsladden hänga löst. Du kan snubbla på nätsladden eller skada den. Skydda Cool Control mot väderlekspåverkan i form av regn, kyla och direkt solljus. Sänk aldrig ner Cool Control, nätsladden eller anslutningarna i vatten. Lägg aldrig Cool Control eller någon av dess delar i diskmaskinen. Stäng av din Cool Control innan du rengör den och dra ur nätkontakten. Använd en fuktig, men aldrig våt, trasa när du torkar av Cool Control och skydda den mot ihållande vattenstänk. Häll inte den mjölk som ska kylas direkt i apparaten. Använd den rostfria behållaren som ingår i leveransen. Apparaten får endast anslutas till eluttag med rätt nätspänning enligt typskylten. Typskylten sitter på undersidan av din Cool Control. Övriga tekniska data finns i den här bruksanvisningen (se kapitel 5 ”Tekniska data”). Stäng av apparaten om du ska vara borta en längre tid. Använd endast apparaten under uppsikt. UU UU UU UU UU UU UU UU UU UU de 1 Förberedelse och idrifttagning Personer, inklusive barn, som på grund av fysiska, sensoriska eller kognitiva funktionshinder eller på grund av oerfarenhet eller okunskap inte kan sköta apparaten på ett säkert sätt, får endast använda den om en ansvarig person ger anvisningar eller håller uppsikt. UU UU T Placera adaptern i locket. T Sätt in ena änden av mjölkslangen i adaptern. en fr 1 Förberedelse och idrifttagning Uppställning och anslutning Beakta följande när du ställer upp din Cool Control: Ställ upp apparaten på ett plant och vattenbeständigt underlag. Placera Cool Control så att apparaten inte kan bli överhettad. Se till att ventilationsöppningarna inte täcks över. Innan du börjar använda den nya apparaten bör du av hygieniska skäl torka av den in- och utvändigt med en fuktig trasa. Skölj ur den rostfria behållaren noggrant. UU UU UU J VARNING Det är livsfarligt att använda apparaten om nätsladden är trasig. Du kan få elektriska stötar. T Använd aldrig apparaten om den är skadad eller om nätsladden är trasig. T Sätt i nätdelens sladd i anslutningsuttaget på Cool Control. T Sätt i nätkontakten i ett eluttag. T Sätt in metallröret i adaptern. Kylning av mjölk it EE Användningen (t.ex. idrifttagning) av Cool Control Wireless beskrivs i kapitel 2 ”Cool Control Wireless”. T Fyll den rostfria behållaren med mjölk. T Stäng den rostfria behållaren med locket. T Placera den rostfria behållaren i Cool Control. Kontrollera att anslutningen på locket sitter rätt och hakar i. T Anslut mjölkslangen till cappuccino-skummaren på din kaffemaskin. EE Observera att anslutningsdelens utformning kan variera beroende på kaffemaskin och tillhörande cappuccino-skummare. Q T Tryck på knappen Till/Från. Om locket sitter rätt och har hakat i börjar apparaten att kyla. EE Din JURA Cool Control ser till att mjölken hela tiden håller en optimal temperatur. Mjölken riskerar inte att frysa. EE För att spara energi avbryts kylningen när den rostfria behållaren tas ut ur Cool Control. EE Tryck på knappen Till/Från Q för att stänga av din Cool Control. EE Om du vill stänga av apparaten helt drar du ut nätkontakten ur eluttaget. nl es pt sv ru 55 2 Cool Control Wireless 2 Cool Control Wireless EE Om den rostfria behållaren innehåller för lite mjölk visar kaffemaskinens display detta vid tillredningen. Displaytexten kan variera beroende på apparat. EE Detta kapitel gäller endast Cool Control Wireless 1 l. Kompatibilitet EE Cool Control Wireless är tyvärr inte kompatibel med alla helautomatiska kaffemaskiner från JURA. Fråga din återförsäljare eller titta efter på www.jura.com. Idrifttagning av lock (med mjölknivåsensor) och mottagare EE Rengör locket med mjölknivåsensorn noggrant före första användningen med en fuktig trasa och milt diskmedel. T Starta kaffemaskinen. T Placera mottagaren i kaffemaskinens servicegränssnitt. EE Om du inte vet var kaffemaskinens servicegränssnitt sitter kan du fråga din återförsäljare eller titta efter på www.jura.com. Q T Tryck på knappen Till/Från. T Fyll den rostfria behållaren till Cool Control (till minst en tredjedel) med mjölk. T Stäng den rostfria behållaren med locket. T Placera den rostfria behållaren i Cool Control. Kontrollera att anslutningen på locket sitter rätt och hakar i. LED-lamporna på locket och i mottagaren blinkar. När båda LED-lamporna lyser med varaktigt blått sken är mjölknivåsensorn och mottagaren klara för användning. EE När den rostfria behållaren satts i och locket har hakat i på rätt sätt, så börjar apparaten att kyla. Kylningen avslutas när den rostfria behållaren tas ut igen. 56 Demontering av locket och mottagaren T Stäng av kaffemaskinen. T Avlägsna mottagaren från kaffemaskinens servicegränssnitt. Q T Tryck på knappen Till/Från för att stänga av din Cool Control. LED-indikatorer/åtgärd av fel LED på locket och i mottagaren: Indikator Beskrivning LED lyser inte. Locket saknar strömförsörjning. Cool Control är avstängd. LED lyser. Wireless-anslutningen mellan lock och mottagare är upprättad. LED blinkar (1 gång/sek.) Försök till wireless-anslutning pågår. Åtgärda möjliga fel: Displayen visar ”Error Milk” och båda LED-lamporna lyser. UUMjölknivåsensorn är defekt. Kontakta service. Båda LED-lamporna blinkar. UUAnslutningen mellan locket och mottagaren har en störning eller är inte upprättad. Tryck samtidigt på båda återställningsknapparna (t.ex. med en kulspetspenna). När båda LED-lamporna lyser med varaktigt blått sken är mjölknivåsensorn och mottagaren klara för användning. Kvarstår problemet? Kontakta service. UU UU EE Om du måste kontakta service ska du demontera locket och mottagaren på det sätt som beskrivs i det här kapitlet (se ”Demontering av locket och mottagaren”). Lämna in locket och mottagaren hos din JURA-återförsäljare. de 3 Rengöring och skötsel 3 Rengöring och skötsel EE Använd inga starka, slipande rengöringsmedel eller hårda föremål vid rengöringen. Detta kan skada apparaten, ytan på utrymmet för den rostfria behållaren samt själva behållaren. EE Observera att endast den rostfria behållaren och metallröret tål maskindisk – samtliga övriga delar (lock, adapter etc.) gör det inte. T Dra alltid ut nätkontakten ur eluttaget innan du rengör apparaten. T Rengör apparaten invändigt med en fuktig trasa. T Rengör apparaten utvändigt med en fuktig trasa. T Diska den rostfria behållaren och delarna noggrant under rinnande vatten. EE Om locket med mjölknivåsensorn inte har använts under en längre tid ska du rengöra mjölknivåsensorn noggrant med en fuktig trasa och milt diskmedel innan den används igen. 4 Transport och miljövänlig avfallshantering 5 Tekniska data Spänning en 100–240 V ~, 50–60 Hz Säkerhetskontroll Konformitetsmärkning A CE0051 Effekt 25 W Temperaturområde Kyler upp till 25 °C under omgivande temperatur, dock inte under 4 °C Den rostfria 1,1 l behållarens kapacitet fr it Sladdlängd ca 1,8 m Vikt ca 1,9 kg Mått (B × H × D) 14,8 × 22,5 × 21,8 cm Klimatklass N (för omgivningstemperatur från + 16 °C till + 32 °C) Tillägg beträffande Cool Control Wireless: Denna apparat uppfyller kraven i avsnitt 15 i FCC-bestämmelserna. Driften är underkastad följande två krav: 1) Denna apparat får inte ge upphov till några skadliga interferenser och 2) denna apparat måste kunna tåla mottagna interferenser, inklusive interferenser som kan leda till oönskad drift. Transport nl es pt Spara förpackningen till Cool Control. Den skyddar apparaten under transport. Rengör den rostfria behållaren före transport. Avfallshantering sv Begagnade apparater ska omhändertas på ett miljövänligt sätt. H Begagnade apparater innehåller värdefulla återvinningsbara material som bör återvinnas. Omhänderta därför begagnade apparater via lämpliga uppsamlingssystem. ru 57 6 JURA kontakt / juridisk information 6 JURA kontakt / juridisk information JURA Elektroapparate AG Kaffeeweltstrasse 10 CH-4626 Niederbuchsiten Tel. +41 (0)62 38 98 233 @@ Ytterligare kontaktuppgifter för ditt land hittar du på www.jura.com. Direktiv Apparaten uppfyller kraven enligt följande direktiv: ZZ 2002/95/EG (RoHS-direktivet) ZZ 1907/2006/EG (Reach-förordningen) ZZ 2006/95/EG (lågspänningsdirektivet) ZZ 2004/108/EG (elektromagnetisk kompatibilitet) ZZ 2009/125/EG (energidirektivet) Tekniska ändringar Med förbehåll för tekniska ändringar. De bilder som används i denna bruksanvisning är stiliserade och visar inte apparatens originalfärger. Din apparat kan avvika i vissa detaljer. Feedback Din åsikt är viktig för oss! Använd kontaktlänken på www.jura.com. Copyright Denna bruksanvisning innehåller information som är skyddad av upphovsrätten. Kopiering eller översättning till ett annat språk är inte tillåten utan föregående skriftligt tillstånd från JURA Elektroapparate AG. 58 de Оглавление Ваша холодильная установка Cool Control en Элементы управления 60 Элементы управления холодильной установки Cool Control Wireless................................................ 60 Важные указания 61 Использование по назначению........................................................................................................................ 61 Ради Вашей безопасности.................................................................................................................................. 61 1 Подготовка и ввод в эксплуатацию 62 Размещение и подключение.............................................................................................................................62 Охлаждение молока............................................................................................................................................63 2 Холодильная установка Cool Control Wireless 64 Совместимость..................................................................................................................................................... 64 Ввод крышки (с датчиком уровня заполнения молоком) и приемника радиосигнала в эксплуатацию...................................................................................................................................................................... 64 Демонтаж крышки и приемника радиосигнала......................................................................................... 64 Светодиодные индикаторы/устранение неисправностей....................................................................... 65 3 Очистка и обслуживание it 65 4 Транспортировка и утилизация в соответствии с экологическими требованиями 66 Транспортировка................................................................................................................................................. 66 Утилизация............................................................................................................................................................ 66 5 Технические данные 66 6 Контактная информация компании JURA/правовая информация 67 E Учтите: данное руководство по эксплуатации действительно для двух исполнений холодильной установки Cool Control 1 л. Cool Control Basic fr nl es Cool Control Wireless pt Описание символов Предупреждения J ВНИМАНИЕ J ОСТОРОЖНО Обязательно обращайте внимание на информацию, которая сопровождается сигнальными словами ВНИМАНИЕ или ОСТОРОЖНО в сочетании с предупредительным знаком. Сигнальное слово ОСТОРОЖНО предупреждает о риске получения тяжелых травм, а сигнальное слово ВНИМАНИЕ – о риске получения легких травм. sv Используемые символы T Требуемое действие. В этом случае Вам необходимо выполнить то или иное действие. E Указания и советы, облегчающие процесс использования Вашей холодильной установки Cool Control. 59 ru Элементы управления Элементы управления 1 2 4 3 5 6 7 8 9 10 11 12 1 Холодильная установка Cool Control 2Крышка 3Контейнер из высококачественной стали 4 Индикатор рабочего состояния 5 Блок питания с сетевым шнуром 6 Q Кнопка «Вкл./Выкл.» 7 Соединительное гнездо 8Соединительный элемент (возможны отличия в зависимости от исполнения автоматической кофе-машины и соответствующей насадки для приготовления капучино) 9 Молочный шланг 10 Соединительный элемент 11Адаптер 12 Металлическая трубка Элементы управления холодильной установки Cool Control Wireless 1 2 3 6 7 4 1Крышка со встроенным датчиком уровня заполнения молоком 2 Встроенный в крышку светодиод 3 Встроенная в крышку кнопка сброса 4 Датчик уровня заполнения молоком 60 5 5Приемник радиосигнала (для использования в автоматических кофе-машинах) 6Встроенный в приемник радиосигнала светодиод 7Встроенная в приемник радиосигнала кнопка сброса de Важные указания Важные указания UU Использование по назначению UU Данная холодильная установка предусмотрена для бытового использования или использования, например, посетителями отеля, мотеля и других учреждений, предоставляющих услуги по проживанию, а также персоналом магазинов, работниками офисов и других производственных организаций. Она служит исключительно для охлаждения и сохранения свежести молока во входящем в комплект поставки контейнере из высококачественной стали. Принадлежности холодильной установки Cool Control Wireless служат для контроля за уровнем заполнения молоком входящего в комплект поставки контейнера из высококачественной стали посредством радиосигналов. Любое иное использование будет рассматриваться как использование не по назначению. Компания JURA не несет ответственности за последствия, связанные с использованием холодильной установки не по назначению. Перед использованием холодильной установки полностью прочтите данное руководство по эксплуатации. На повреждения или дефекты, возникшие вследствие несоблюдения указаний руководства по эксплуатации, гарантия не распространяется. Храните данное руководство по эксплуатации рядом с холодильной установкой и передавайте его последующим пользователям. UU UU UU UU UU UU Ради Вашей безопасности Внимательно прочтите и тщательно соблюдайте нижеследующие важные указания по технике безопасности. Соблюдая следующие указания, Вы сможете предотвратить опасность для жизни из-за удара электрическим током: ни в коем случае не эксплуатируйте холодильную установку с дефектами или с поврежденным сетевым шнуром; UU ни в коем случае не эксплуатируйте холодильную установку, предварительно не вытерев насухо мокрые руки; перед вводом в эксплуатацию убедитесь в том, что сетевой шнур сухой; подключайте холодильную установку к сети переменного тока только через блок питания, входящий в комплект поставки; в случае появления признаков повреждения, например, запаха горелого, немедленно отключите холодильную установку от сети и обратитесь в центр сервисного обслуживания компании JURA; при повреждении сетевого шнура данной холодильной установки его необходимо отремонтировать непосредственно в компании JURA или в авторизованном центре сервисного обслуживания компании JURA; следите за тем, чтобы холодильная установка Cool Control и сетевой шнур не находились вблизи горячих поверхностей или открытого пламени; следите за тем, чтобы сетевой шнур не был зажат и не терся об острые кромки. никогда не открывайте и не ремонтируйте холодильную установку самостоятельно. Не вносите в холодильную установку никаких изменений, которые не описываются в данном руководстве по эксплуатации. В холодильной установке имеются токопроводящие детали. Любой ремонт должен выполняться исключительно авторизованными центрами сервисного обслуживания компании JURA с использованием оригинальных запасных частей и принадлежностей. Поврежденная холодильная установка может стать причиной получения травм или возгорания. Во избежание повреждений, возможных травм и опасности возгорания: следите за тем, чтобы вентиляционные щели не были закрыты; en fr it nl es pt sv UU 61 ru Элементы управления UU UU UU UU UU UU UU UU UU никогда не оставляйте свисающим сетевой шнур. Вы можете споткнуться о него или повредить его; не допускайте воздействия на холодильную установку Cool Control таких погодных факторов, как дождь, мороз и прямые солнечные лучи; не опускайте холодильную установку Cool Control, ее сетевой шнур и элементы подключения в воду; не мойте холодильную установку Cool Control и ее отдельные детали в посудомоечной машине; перед проведением очистки выключите холодильную установку Cool Control и выньте сетевой штекер. Всегда протирайте холодильную установку Cool Control влажной, но не мокрой тканью и не допускайте постоянного попадания на установку брызг воды; не наливайте молоко, которое Вы хотите охладить, непосредственно в холодильную установку. Используйте для этого входящий в комплект поставки контейнер из высококачественной стали; подключайте холодильную установку только к сети с напряжением, указанным на заводской табличке. Заводская табличка находится на нижней стороне холодильной установки Cool Control. Дополнительные технические данные содержатся в данном руководстве по эксплуатации (см. главу 5 «Технические данные»); на время длительного отсутствия выключайте холодильную установку; во время использования холодильной установки всегда контролируйте ее работу. Лицам, а также детям, которые вследствие физических, сенсорных или психических нарушений либо отсутствия опыта и знаний в обращении с холодильной установкой UU UU 60 не способны безопасно пользоваться холодильной установкой, разрешено эксплуатировать ее исключительно под контролем или руководством ответственного лица. 1 Подготовка и ввод в эксплуатацию Размещение и подключение При размещении холодильной установки Cool Control соблюдайте следующее: поставьте холодильную установку на горизонтальную водостойкую поверхность; выберите место размещения холодильной установки Cool Control так, чтобы не допускать ее перегрева. следите за тем, чтобы вентиляционные щели не были закрыты; по гигиеническим соображениям перед вводом новой холодильной установки в эксплуатацию протрите ее внутренние и внешние поверхности влажной тканью. Тщательно промойте контейнер из высококачественной стали. UU UU UU J ОСТОРОЖНО Опасность для жизни из-за удара электрическим током при эксплуатации холодильной установки с поврежденным сетевым шнуром. T Ни в коем случае не эксплуатируйте холодильную установку с дефектами или с поврежденным сетевым шнуром. T Вставьте сетевой шнур блока питания в соединительное гнездо холодильной установки Cool Control. T Вставьте сетевой штекер в сетевую розетку. de Важные указания T Вставьте металлическую трубку в адаптер. T Установите адаптер в крышку. T Вставьте один конец молочного шланга в адаптер. Охлаждение молока EE Процесс управления холодильной установкой Cool Control Wireless (например, ввод в эксплуатацию) описывается в главе 2 «Холодильная установка Cool Control Wireless». EE Учтите, что соединительный элемент может отличаться от приведенного здесь элемента в зависимости от исполнения автоматической кофе-машины и соответствующей насадки для приготовления капучино. Q T Нажмите кнопку «Вкл./Выкл.». Если крышка правильно расположена и зафиксирована, холодильная установка начинает процесс охлаждения. en fr EE Ваша холодильная установка Cool Control от компании JURA всегда поддерживает температуру молока в оптимальном диапазоне. Замораживание молока исключено. EE В целях экономии энергии процесс охлаждения завершается, как только контейнер из высококачественной стали вынимается из холодильной установки Cool Control. EE Для выключения холодильной установки Cool Control следует нажать кнопку «Вкл./ Выкл.» Q. EE Для вывода холодильной установки из эксплуатации следует вынуть сетевой штекер из сетевой розетки. T Заполните контейнер из высококачественной стали молоком. T Закройте контейнер из высококачественной стали крышкой. T Вставьте контейнер из высококачественной стали в холодильную установку Cool Control. Проследите за тем, чтобы соединительная часть крышки была правильно расположена и зафиксирована. T Соедините молочный шланг с насадкой для приготовления капучино на Вашей автоматической кофе-машине. it nl es pt sv ru 61 Элементы управления 2 Холодильная установка Cool Control Wireless EE Данная глава относится только к холодильной установке Cool Control Wireless 1 л. Совместимость EE К сожалению, холодильная установка Cool Control Wireless совместима не со всеми автоматическими кофе-машинами JURA. Подробную информацию можно узнать в специализированных магазинах или на нашей интернет-странице www.jura.com. Ввод крышки (с датчиком уровня заполнения молоком) и приемника радиосигнала в эксплуатацию EE Перед первым использованием тщательно очистите крышку с датчиком уровня заполнения молоком влажной тканью и неагрессивным моющим средством. T Включите Вашу автоматическую кофемашину. T Вставьте приемник радиосигнала в сервисный разъем автоматической кофе-машины. EE Если Вы не знаете, где расположен сервисный разъем, Вы можете спросить об этом сотрудников специализированного магазина или найти ответ на нашей интернет-странице www.jura.com. Q T Нажмите кнопку «Вкл./Выкл.». T Залейте молоко (по меньшей мере на треть) в контейнер из высококачественной стали холодильной установки Cool Control. 60 T Закройте контейнер из высококачественной стали крышкой. T Вставьте контейнер из высококачественной стали в холодильную установку Cool Control. Проследите за тем, чтобы соединительная часть крышки была правильно расположена и зафиксирована. Светодиоды на крышке и приемнике радиосигнала мигают. Как только светодиоды начнут непрерывно гореть синим светом, датчик уровня заполнения молоком и приемник радиосигнала перейдут в состояние готовности работе. EE Как только контейнер из высококачественной стали помещается в холодильную установку и крышка фиксируется в правильном положении, холодильная установка начинает процесс охлаждения. Процесс охлаждения завершается, как только контейнер из высококачественной стали вынимается из холодильной установки. EE Если уровень молока в контейнере из высококачественной стали слишком низкий, то при приготовлении напитка на дисплее Вашей автоматической кофемашины будет отображаться соответствующее сообщение. Текст данного сообщения может отличаться в зависимости от исполнения кофе-машины. Демонтаж крышки и приемника радиосигнала T Выключите Вашу автоматическую кофе-машину. T Выньте приемник радиосигнала из сервисного разъема автоматической кофе-машины. Q T Для выключения холодильной установки Cool Control нажмите кнопку «Вкл./Выкл.». de Важные указания Светодиодные индикаторы/ устранение неисправностей Светодиод в крышке и на приемнике радиосигнала: Состояние Описание светодиода Светодиод не горит. Подача электропитания к крышке не осуществляется. Холодильная установка Cool Control выключена. Светодиод горит. Установлено беспроводное соединение между крышкой и приемником радиосигнала. Светодиод мигает. (1 раз в секунду) Выполняется установка беспроводного соединения. Устранение возможных неисправностей На дисплее отображается сообщение «Error Milk», горят оба светодиода. UUДатчик уровня заполнения молоком неисправен. Необходимо сервисное обслуживание. Мигают оба светодиода. UUСоединение между крышкой и приемником радиосигнала прервано или не установлено. Нажмите обе кнопки сброса одновременно (например, при помощи шариковой ручки). Как только светодиоды начнут непрерывно гореть синим светом, датчик уровня заполнения молоком и приемник радиосигнала перейдут в состояние готовности работе. Вам не удалось устранить проблему? Необходимо сервисное обслуживание. UU UU EE В случае необходимости выполнения сервисного обслуживания демонтируйте крышку и приемник радиосигнала, следуя описанию в данной главе («Демонтаж крышки и приемника радиосигнала»). Передайте крышку и приемник радиосигнала в специализированный магазин JURA. en fr 3 Очистка и обслуживание EE Не используйте для очистки твердые предметы, а также чистящие средства, содержащие острые, царапающие поверхность частицы. Они могут повредить холодильную установку, покрытие места установки контейнера из высококачественной стали и сам контейнер. EE Учтите, что за исключением контейнера из высококачественной стали и металлической трубки все остальные детали (крышка, адаптер и др.) не предусмотрены для мойки в посудомоечной машине. T Перед каждой очисткой холодильной установки вынимайте сетевой штекер из сетевой розетки. T Протрите внутренние поверхности холодильной установки влажной тканью. T Протрите внешние поверхности холодильной установки влажной тканью. T Тщательно промойте контейнер из высококачественной стали и отдельные детали под струей проточной воды. EE Если крышка с датчиком уровня заполнения молоком не использовалась долгое время, то перед ее использованием тщательно очистите датчик уровня заполнения молоком влажной тканью и неагрессивным моющим средством. it nl es pt sv ru 61 Элементы управления 4 Транспортировка и утилизация в соответствии с экологическими требованиями Транспортировка Сохраните упаковку холодильной установки Cool Control. Она послужит защитой при транспортировке. Перед транспортировкой выполните очистку контейнера из высококачественной стали. 5 Технические данные Напряжение Проверка надежности Знак соответствия A CE0051 Мощность 25 Вт Температурный диапазон Охлаждение до 25 °C ниже температуры окружающей среды, однако температура не опускается ниже 4 °C Объем контейнера из высококачественной стали 1,1 л Длина сетевого шнура Ок. 1,8 м Вес Ок. 1,9 кг Размеры (Ш × В × Г) 14,8 × 22,5 × 21,8 см Климатический класс N (для температуры окружающей среды от + 16 °C до + 32 °C) Утилизация Утилизируйте старое оборудование в соответствии с экологическими требованиями. H Старое оборудование содержит ценные материалы, пригодные для переработки и вторичного использования. По этой причине утилизируйте старое оборудование посредством соответствующих систем сбора отходов. 100-240 В ~, 50-60 Гц Дополнительно о холодильной установке Cool Control Wireless: данная холодильная установка соответствует требованиям части 15 предписаний Федеральной комиссии по связи США. При ее эксплуатации должны быть соблюдены следующие два условия: (1) данная холодильная установка не должна создавать вредные помехи; (2) данная холодильная установка должна воспринимать все полученные помехи, включая те, которые могут привести к неправильному функционированию. 60 de Важные указания 6 Контактная информация компании JURA/правовая информация JURA Elektroapparate AG Kaffeeweltstrasse 10 CH-4626 Niederbuchsiten Тел. +41 (0)62 38 98 233 Авторское право Данное руководство по эксплуатации содержит информацию, защищенную авторским правом. Фотокопирование или перевод руководства на другой язык не разрешается без предварительного письменного разрешения компании JURA Elektroapparate AG. en fr @@ Контактные данные, действительные для Вашей страны, см. на интернет-странице www.jura.com. it Директивы Холодильная установка соответствует требованиям следующих директив: ZZ 2002/95/ЕС (RoHS – Директива по ограничению использования определенных опасных веществ); ZZ 1907/2006/ЕС (REACH – Распоряжение по регистрации, оценке, разрешению и ограничению использования химических веществ); ZZ 2006/95/EС (Директива по низковольтному оборудованию); ZZ 2004/108/ЕС (Директива по электромагнитной совместимости); ZZ 2009/125/ЕС (Директива по энергопотреблению). nl es Технические изменения Права на технические изменения сохраняются. В данном руководстве по эксплуатации используются стилизованные рисунки, которые не соответствуют оригинальному цвету холодильной установки. Некоторые детали Вашей холодильной установки могут отличаться от приведенных. pt sv Отзывы Ваше мнение важно для нас! Воспользуйтесь для этого контактной ссылкой на интернетстранице www.jura.com. ru 61 Art. 71029/Cool Control 1l/de-ru/201209 68