1
G
How to bind
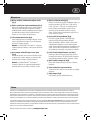
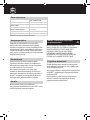
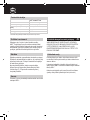
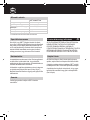
1 Measure document using colour coded guide
(fig.1)
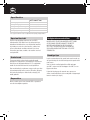
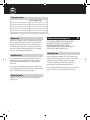
2 Select comb which fits your document (fig.2)
Use the table to choose a suitable comb size. Please
note that this guide is based on 80gsm paper.
The sheet capacity of combs will vary depending
on the type and thickness of the cover sheets you
have chosen. If in doubt select the next comb up in
capacity.
3 Load comb onto machine (fig.3)
Insert the binding comb next to the white positional
arrow on the machine, behind the metal comb
support fingers, with the open side of the comb
pointing upwards.
Note: If using GBC® ProCombs™ the white arrow
on your comb should align to the white arrow on the
machine.
4 Open comb by turning lever towards you (fig.4)
The coloured arrows adjacent to the opening comb
act as a guide as to how far to open in order to allow
punched sheets to be easily inserted.
Note: If using GBC® ProCombs™ the coloured line
on your comb should align to the coloured arrows on
the machine for faster binding.
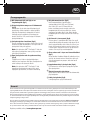
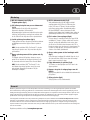
5 Select document size (fig.5)
Rotate the edge guide to the paper / cover size
you wish to bind; A4 (297mm x 210mm) or Letter
(215mm x 279mm). When using oversized covers,
rotate the edge guide to the oversize position, punch
the covers for your document and set aside. Then
rotate the edge guide to select either A4 or Letter
and proceed.
6 Load pages into slot (fig.6)
You can punch 2 cover sheets (0.2mm) or up to
20 sheets of paper (80gsm) at a time. Select the
quantity of sheets to punch and tap the edge of the
sheet stack against a flat surface to ensure that all
sheets are aligned. Push the side of the stack to be
punched into the punching slot as far as it will go,
and slide left to align with the edge guide.
7 Punch pages by pulling handle down (fig.7)
Then lift the handle back to the vertical position and
remove the punched sheets. Note: To prevent jams
do not attempt to punch more than one cover sheet
at a time.
8 Combine pages with comb (fig.8)
Remove the sheets from the punch slot and insert
onto the fingers of the binding comb.
9 Repeat process as required
Repeat stages 6-8 until your document is fully
loaded on the comb.
J Close (fig.9)
Close comb and remove document.
Guarantee
Operation of this machine is guaranteed for 2 years from date of purchase, subject to normal use. Within the guarantee period, ACCO
Brands Europe will at its own discretion either repair or replace the defective machine free of charge. Defects due to misuse or use for
inappropriate purposes are not covered under the guarantee. Proof of date of purchase will be required. Repairs or alterations made by
persons not authorised by ACCO Brands Europe will invalidate the guarantee. It is our aim to ensure that our products perform to the
specifications stated. This guarantee does not affect the legal rights which consumers have under applicable national legislation governing
the sale of goods.
If you experience a technical fault with your product during the warranty period, please contact the relevant ACCO service centre.
Depending on the diagnostics and the model type, we will either arrange a service call by an engineer or we will ask you to return the
machine to ACCO. If you return the machine, ACCO will, at its discretion, in accordance with law, either (i) repair the machine using either
new or refurbished parts, or (ii) replace the machine with a new or refurbished machine that is equivalent to the machine being replaced.
Register this product online at www.gbceurope.com
5