1
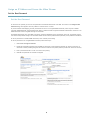
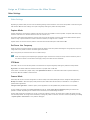
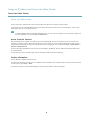
INSTALLATION GUIDE
Assign an IP Address and Access the Video Stream
Liability
Every care has been taken in the preparation of this document. Please
inform your local Axis office of any inaccuracies or omissions. Axis
Communications AB cannot be held responsible for any technical or
typographical errors and reserves the right to make changes to the
product and manuals without prior notice. Axis Communications AB
makes no warranty of any kind with regard to the material contained
within this document, including, but not limited to, the implied
warranties of merchantability and fitness for a particular purpose. Axis
Communications AB shall not be liable nor responsible for incidental or
consequential damages in connection with the furnishing, performance
or use of this material. This product is only to be used for its intended
purpose.
Intellectual Property Rights
Axis AB has intellectual property rights relating to technology embodied
in the product described in this document. In particular, and without
limitation, these intellectual property rights may include one or more
of the patents listed at http://www.axis.com/patent.htm and one or
more additional patents or pending patent applications in the US and
other countries.
This product contains licensed third-party software. See the menu item
“About” in the product’s user interface for more information.
This product contains source code copyright Apple Computer,
Inc., under the terms of Apple Public Source License 2.0 (see
http://www.opensource.apple.com/apsl). The source code is available
from http://developer.apple.com/darwin/projects/bonjour/
Trademark Acknowledgments
AXIS COMMUNICATIONS, AXIS, ETRAX, ARTPEC and VAPIX are
registered trademarks or trademark applications of Axis AB in various
jurisdictions. All other company names and products are trademarks or
registered trademarks of their respective companies.
Apple, Boa, Apache, Bonjour, Ethernet, Internet Explorer, Linux,
Microsoft, Mozilla, Real, SMPTE, QuickTime, UNIX, Windows, Windows
Vista and WWW are registered trademarks of the respective holders.
Java and all Java-based trademarks and logos are trademarks or
registered trademarks of Oracle and/or its affiliates. UPnPTM is a
certification mark of the UPnPTM Implementers Corporation.
SD, SDHC and SDXC are trademarks or registered trademarks of SD-3C,
LLC in the United States, other countries or both. Also, miniSD, microSD,
miniSDHC, microSDHC, microSDXC are all trademarks or registered
trademarks of SD-3C, LLC in the United States, other countries or both.
WPA, WPA2 and Wi-Fi Protected Setup are marks of the Wi-Fi Alliance.
Support
Should you require any technical assistance, please contact your Axis
reseller. If your questions cannot be answered immediately, your
reseller will forward your queries through the appropriate channels to
ensure a rapid response. If you are connected to the Internet, you can:
• download user documentation and software updates
• find answers to resolved problems in the FAQ database. Search
by product, category, or phrase
• report problems to Axis support staff by logging in to your private
support area
• chat with Axis support staff (selected countries only)
• visit Axis Support at www.axis.com/techsup/
Learn More!
Visit Axis learning center www.axis.com/academy/ for useful trainings,
webinars, tutorials and guides.
Assign an IP Address and Access the Video Stream
Assign an IP Address
Assign an IP Address
Default IP Address
The Axis product is designed for use on an Ethernet network and requires an IP address for access. Most networks have a DHCP server
that automatically assigns IP addresses to connected devices. If your network does not have a DHCP server the Axis product will
use 192.168.0.90 as the default IP address.
Recommended Methods in Windows®
AXIS IP Utility and AXIS Camera Management are recommended methods for finding Axis products on the network and assigning
them IP addresses in Windows®. Both applications are free and are available on the Installation and Management Software CD
supplied with this product. They can also be downloaded from www.axis.com/techsup
AXIS IP Utility – Small Installations
AXIS IP Utility automatically discovers and displays Axis products on your network. The application can also be used to manually
assign a static IP address.
Note that the computer running AXIS IP Utility must be on the same network segment (physical subnet) as the Axis product.
Automatic Discovery
1. Check that the Axis product is connected to the network and has powered up.
2. Start AXIS IP Utility.
3. When the Axis product appears in the window, double-click to open its web pages.
4. For information about how to set the password, see page 6 .
Assign the IP Address Manually (optional)
1. Acquire an available IP address on the same network segment as your computer.
2. Select the Axis product in the list.
3. Click Assign new IP address to selected device
and enter the IP address.
4. Click Assign and continue according to the instructions.
5. When the Axis product appears in the window, double-click to open its web pages.
6. For information about how to set the password, see page 6 .
AXIS Camera Management – Large Installations
AXIS Camera Management is a powerful installation and management tool for Axis network products. The tool can automatically
search the network for devices, assign IP addresses, set passwords, show connection status, manage firmware upgrades and configure
product parameters. It can perform batch operations on multiple products at once.
Automatic Discovery
1. Check that the Axis product is connected to the network and has powered up.
2. Start AXIS Camera Management.
3
Assign an IP Address and Access the Video Stream
Assign an IP Address
3. Connect to a server.
To connect to a server on the network, select Remote server and select a server from the drop-down list or enter the IP or
DNS address in the field.
To connect to a server running locally on your computer, select This computer.
4. Click Log On to log on as the current computer user, or de-select Log on as current user and enter the user name and
password to log on with.
5. The first time AXIS Camera Management runs it automatically searches for Axis products on the network. To manually
search for products, select Configuration > Add Devices. The software displays a list of the products found.
Select the products to add and click Next and then click Finish.
6. In the list of devices, click on the address to open the product’s web pages.
7. For information about how to set the password, see page 6 .
Assign IP Addresses in Multiple Devices
AXIS Camera Management speeds up the process of assigning IP addresses to multiple devices by suggesting IP addresses from a
specified range.
1. Select the devices you wish to configure (different models can be selected) and click Assign IP address to selected
devices
.
2. Click Yes in the Device Maintenance dialog.
3. Select Assign the following IP address range and enter the IP address range, subnet mask and default router the devices
will use. Click Next.
4. Suggested IP addresses are listed under New IP Addresses and can be edited by selecting a device and clicking Edit IP.
5. Click Finish.
Other Operating Systems and Methods
The list below shows the other methods available for assigning or discovering the IP address. All methods are enabled by default, and
all can be disabled.
•
AVHS Service Connection (all operating systems). To connect to an AVHS service, refer to the service provider’s Installation
guide. For information and help in finding a local AVHS Service Provider, go to www.axis.com/hosting
•
UPnP™ (Windows®). When enabled on your computer, the Axis network product is automatically detected and added
to Network/My Network Places.
•
Bonjour (Mac OS X® 10.4 or later). Applicable to browsers with support for Bonjour. Navigate to the Bonjour bookmark in
your browser (for example Safari) and click on the link to access the web pages.
•
AXIS Dynamic DNS Service (all operating systems). A free service from Axis that allows you to quickly and simply
install your Axis network product. Requires an Internet connection without an HTTP proxy. For more information, see
www.axiscam.net
•
ARP/Ping (all operating systems). See Assign IP Address Using ARP/Ping. The command must be issued within 2 minutes of
connecting power.
•
DHCP server (all operating systems). To view the admin pages for the network DHCP server, see the server’s user
documentation.
4
Assign an IP Address and Access the Video Stream
Assign an IP Address
Assign IP Address Using ARP/Ping
The product's IP address can be assigned using ARP/Ping. The command must be issued within 2 minutes of connecting power.
1. Acquire a free static IP address on the same network segment as the computer.
2. Locate the serial number (S/N) on the product label.
3. Open a command prompt and enter the following commands:
Linux/Unix syntax
arp -s <IP address> <serial number> temp
ping -l 408 <IP address>
Linux/Unix example
arp -s 192.168.0.125 00:40:8c:18:10:00 temp
ping -l 408 192.168.0.125
Windows syntax (this may require that you run the command prompt as an administrator)
arp -s <IP address> <serial number>
ping -l 408 -t <IP address>
Windows example (this may require that you run the command prompt as an administrator)
arp -s 192.168.0.125 00-40-8c-18-10-00
ping -l 408 -t 192.168.0.125
4. Check that the network cable is connected and then restart the product by disconnecting and reconnecting power.
5. Close the command prompt when the product responds with Reply from 192.168.0.125:... or similar.
6. Open a browser and type http://<IP address> in the Location/Address field.
Note
• To open a command prompt in Windows, open the Start menu and type cmd in the Run/Search field.
• To use the ARP command in Windows 7/Windows Vista, right-click the command prompt icon and select Run as
administrator.
• To open a command prompt in Mac OS X, open the Terminal utility from Application > Utilities.
5
Assign an IP Address and Access the Video Stream
Set the Root Password
Set the Root Password
To access the Axis product, you must set the password for the default administrator user root. This is done in the Configure Root
Password dialog, which appears when the product is accessed for the first time.
To prevent network eavesdropping, the root password can be set via an encrypted HTTPS connection, which requires an HTTPS
certificate. HTTPS (Hypertext Transfer Protocol over SSL) is a protocol used to encrypt traffic between web browsers and servers. The
HTTPS certificate ensures encrypted exchange of information.
The default administrator user name root is permanent and cannot be deleted. If the password for root is lost, the product must be
reset to the factory default settings. For information about how to reset the product to factory default, see the product’s User Manual.
To set the password via a standard HTTP connection, enter it directly in the dialog.
To set the password via an encrypted HTTPS connection, follow these steps:
1. Click Create self-signed certificate.
2. Provide the requested information and click OK. The certificate is created and the password can now be set securely. A
certificate is created, enabling encryption of all traffic to and from the product, and the password can now be set securely.
3. Enter a password and then re-enter it to confirm the spelling.
4. Click OK. The password has now been configured.
6
Assign an IP Address and Access the Video Stream
Other Settings
Other Settings
Depending on product model, some or all of the following settings must be made the first time the Axis product is accessed using the
web interface. Most of these settings can only be changed by resetting the product to factory default.
Capture Mode
Capture mode defines the maximum resolution and maximum frame rate available in the Axis product. A capture mode with a large
maximum resolution has a reduced maximum frame rate and vice versa.
The capture mode setting also affects the camera’s angle of view as the effective size of the image sensor differs between capture
modes. If using a capture mode with a smaller maximum resolution, the angle of view is reduced.
Capture mode is set the first time the product is accessed. Select the desired capture mode and click OK.
Set Power Line Frequency
Select the power line frequency (50 Hz or 60 Hz) used at the location of the Axis product. Selecting the wrong frequency may cause
image flicker if the product is used in fluorescent light environments.
When using 50 Hz, the maximum frame rate is limited to 25 fps.
Note
Power line frequency varies depending on geographic region. The Americas usually use 60 Hz, whereas most other parts of
the world use 50 Hz. Local variations could apply. Always check with the local authorities.
PTZ Mode
PTZ mode is set the first time the Axis product is accessed and can only be changed by resetting the product to factory default.
Digital PTZ is the default mode and should be used when a pan/tilt motor is not used.
If the camera is mounted to a pan/tilt motor, select Uploadable PTZ driver. For information about how to upload a PTZ driver,
see the User Manual available at www.axis.com
Camera Mode
Some 360°/180° cameras must be configured to use either multiple view modes (dewarped views) or intelligent video applications.
Multiple view modes - With this option, dewarped views (view modes other than Overview) are available. It is not possible to
upload camera applications.
Intelligent video applications - With this option, camera applications can be uploaded. Only the Overview view is available.
If using multiple view modes, the camera orientation must be set. Select Ceiling, Wall or Desktop depending on how the Axis
product is installed. Depending on the selected camera orientation, view mode settings will differ.
Camera mode and camera orientation are set the first time the product is accessed. To change camera mode, the product must be
reset to factory default. To change camera orientation, restoring the product is sufficient. To reset or restore the product, go to Setup
> System Options > Maintenance in the product’s web pages.
7
Assign an IP Address and Access the Video Stream
Access the Video Stream
Access the Video Stream
The Live View page is displayed with links to the setup pages that allow you to customize the Axis product.
If required, click Yes to install AXIS Media Control, which allows viewing of the video stream in Internet Explorer. You will need
administrator rights on the computer to do this.
Note
To install AXIS Media Control in Windows 7/Windows Vista, you must run Internet Explorer as an administrator. Right-click
the Internet Explorer icon and select Run as administrator.
Access from the Internet
Once connected, the Axis product is accessible on your local network (LAN). To access the product from the Internet you must
configure your network router to allow incoming data traffic to the product. To do this, enable the NAT-traversal feature, which
will attempt to automatically configure the router to allow access to the product. This is enabled from Setup > System Options >
Network > TCP/IP Advanced.
For more information about NAT trasversal for IPv4, see the product’s User Manual. See also AXIS Internet Dynamic DNS Service
at www.axiscam.net
For Technical notes on this and other topics, visit the Axis Support web at www.axis.com/techsup
Further Information
The User Manual is available at www.axis.com
Visit www.axis.com/techsup to check if there is updated firmware available for your network product. To see the currently installed
firmware version, go to Setup > About.
Visit Axis learning center www.axis.com/academy for useful trainings, webinars, tutorials and guides.
8
Installation Guide
Assign an IP Address and Access the Video Stream
© Axis Communications AB, 2012 - 2013
Ver. M1.18
Date: March 2013
Part No. 51375