1
ScratchStopper Anti-Fingerprint MATT for Samsung Galaxy S4 mini
- Instruction Manual -
5
6
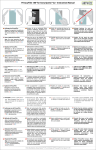
Place the sheet with the static side down
on the surface of the unit and align it
between Homebutton and camera hole.
Completely remove the first carrier foil
➀ now. Because of its the static coating,
the film will gradually adhere itself firmly
to the surface.
You can remove any possible air bubbles easily with the included Bubblecard, your finger, or the microfiber
cloth, etc., by gently rubbing the air
pockets to the sides.
Tip: If you should find dust under the film, you
can easily remove it with the Dust Removal
film. To do so, gently slide the slightly bent
film at the edge of the foil so that it rises. You
can then remove the dust with the film.
Then carefully remove the carrier
foil ➁. Finished.
Attention: Please be careful not to
remove the ScratchStopper along
with the packaging foil.
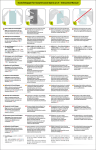
Platzieren Sie die Folie mit der statischen
Seite nach unten auf der Oberfläche des
Gerätes und richten sie zwischen Homebutton und Kameraaussparung aus. Die
erste Trägerfolie ➀ nun komplett abziehen. Durch die statische Beschichtung
zieht sich die Folie nach und nach von
selbst fest an die Oberfläche.
Sie können eventuell auftretende Luftblasen einfach mit der beigefügten
BubbleCard, dem Finger, dem Mikrofasertuch, etc. vorsichtig entfernen,
indem Sie die Lufteinschlüsse zu den
Seiten hin wegstreichen. Tipp: Sollte sich doch einmal Staub unter der
Folie befinden, können Sie diesen ganz einfach mit dem Dust Removal Film entfernen.
Dafür den Streifen leicht gebogen unter den
Rand der Folie schieben, so dass sich diese
anhebt und Sie das Staubkorn mit dem Film
entfernen können.
Anschließend noch die zweite Trägerfolie ➁ abziehen. Fertig.
Achtung: Geben Sie dabei darauf
Acht, den ScratchStopper nicht
mit abzuziehen.
ScratchStopperの保護フィルムを粘着部を下
にして取り付ける機器の上に置き、機器の端に
合わせます。
ここで最初のカバーフィルム を剥
がします。
フィルムは静電コーティングされてい
ますので、機器の表面に自然に貼り付きます。
気泡が残った時は、付属のバブルカードやマイ
クロファイバークロス、指などで端の方向に軽
く押し出すと、簡単に取り除くことができます。
ヒント: フィルムの下にホコリが入ってしまった時は、
ダストリムーバルフィスムで簡単に取り除くことがで
きます。
ホコリを取り除くには、
まず、
わずかに曲げた
ダストリムーバルフィルムをScratchStopeer保護フ
ィルムの端で軽くスライドさせると、保護フィルムが持
ち上がります。
その状態で、
ダストリムーバルフィルム
によりホコリを取り除きます。
最後にカバーフィルム を注意深くはが
して終了です。
ご注意: カバーフィルムと一緒に
ScratchStopper保護フィルムまではが
さないように注意してください。
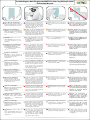
Plaats de folie met de statische kant naar
beneden op het oppervlak van het apparaat en richt hem langs de randen uit.
De eerste dragerfolie ➀ er nu compleet
aftrekken. Door de statische laag trekt
de folie zichzelf geleidelijk vanzelf vast
aan het oppervlak.
U kunt eventueel optredende luchtbellen eenvoudig met de bijgeleverde
BubbleCard, uw vinger, de microvezeldoek, etc. voorzichtig verwijderen,
door de opgesloten lucht naar de kanten toe weg te strijken. Tip: Als er toch nog een keer stof onder de
folie mocht zitten, kunt u die heel gemakkelijk met de Dust Removal Film verwijderen.
Daarvoor de strook licht gebogen onder de
rand van de folie schuiven, zodat deze omhoog komt en u het stofje met de film kunt
verwijderen.
Placez le film avec son côté statique
vers le bas sur la surface de l’appareil
et ajustez le long des bords. Détachez
maintenant entièrement le premier film
support ➀ . Grâce à son enduction statique, le film adhère progressivement de
lui-même à la surface.
Vous pouvez éliminer avec précaution
les bulles d’air éventuelles simplement
à l’aide de la BubbleCard jointe, du doigt, d’un chiffon en microfibres, etc. en
les éloignant vers les côtés. Conseil: Si jamais de la poussière se trouve
néanmoins sous le film, vous pouvez cependant l’enlever tout simplement avec le Dust
Removal Film. Pour cela, pousser la bande légèrement courbée sous le bord du film pour
qu’il se soulève et que vous puissiez ainsi retirer le grain de poussière avec le film.
Posizionare la pellicola sulla superficie
dell’apparecchio con il lato statico rivolto verso il basso e allinearla lungo i
bordi. Ora rimuovere completamente la
prima pellicola di supporto ➀ . Grazie al
rivestimento statico la pellicola aderisce
man mano da sola alla superficie.
Potete rimuovere con cautela le bolle
d’aria eventualmente formatesi, semplicemente con la BubbleCard in dotazione, un dito, un panno in microfibra
ecc., stendendo le inclusioni d’aria vero
i lati.
Consiglio: nel caso si dovesse trovare ancora
polvere sotto la pellicola, è possibile rimuoverla molto semplicemente con il Dust Removal Film. A tal scopo spingere la striscia leggermente piegata sotto il bordo della pellicola, in
modo tale da farla sollevare e da poter rimuovere il granello di polvere con il film.
Infine rimuovere con cautela la pellicola di supporto ➁. Finito.
Attenzione: Prestate attenzione a
non sfilare lo ScratchStopper.
Posicione la lámina con el lado estático
hacia abajo sobre la superficie del dispositivo y ajústela de acuerdo a los bordes.
Ahora hay que retirar completamente
la lámina de soporte ➀ . Por el recubrimiento estático la lámina se pega sola de
poco a poco a la superficie.
Cualquier burbuja de aire que ocurra,
Ud. puede quitarla cuidadosamente
con la tarjeta BubbleCard adjunta, con
el dedo, un paño de microfibra, etc.,
alisando hacia los costados las inclusiones de aire. Consejo: Si aun llega de haber polvo por debajo de la lámina, Ud. puede quitarlo fácilmente con la franja Dust Removal Film. Para
eso empuje la franja algo doblada por debajo
del borde de la lámina, de manera que esta se
levante y Ud. pueda quitar el polvo mediante
la franja.
Depués falta solo quitar la lámina de
soporte ➁ cuidadosamente. Listo.
¡Atención! Tenga cuidado en esto
de no retirar la lámina ScratchStopper también.
Coloque a película com o lado estático
para baixo na superfície do aparelho
e alinhe-a ao longo dos cantos. Extrair
agora completamente a primeira película de suporte ➀ . Devido ao revestimento estático, a película fixa-se por si pouco
a pouco na superfície.
Pode retirar com cuidado eventuais
bolhas de ar simplesmente com o
BubbleCard incluído, com o dedo, com
pano de microfibra, etc., alisando bolsas de ar para os lados. Dica: No caso de alguma vez se encontrar pó
sob a película, pode removê-lo de forma simples com a Dust Removal Film. Para tal, deslocar
as tiras ligeiramente dobradas sob a margem
da película, de modo a elevar as mesmas e
pode remover partículas de pó com a Film.
Em seguida, retirar cuidadosamente
a película de suporte ➁. E pronto!
Atenção: Tenha cuidado, para não
remover o ScratchStopper juntamente.
Filmin statik yüzeyi ekrana gelecek
şekilde, köşeleri hizalayarak yerleştirin.
➀ numaralı taşıyıcı filmi tamamen
çıkarın. Üzerindeki statik kaplama sebebiyle film yüzeye sıkıca tutunacaktır.
Filmi uyguladıktan sonra yüzeyde
oluşacak her türlü hava kabarcığını
paket içerisinde bulunan Baloncuk
Giderici aparat, mikrofiber bez ya da
parmağınız ile yok edebilirsiniz. Bunun
için, kabarcıkları kenarlara doğru
yavaşça ittirmeniz gerekmektedir.
İpucu: Eğer filmin altında toz kalmış ise Toz Giderici bant ile bunu kolaylıkla giderebilirsiniz.
Filmi bir köşesinden bant ile yavaşça kaldırın
ve tozu giderin.
Artık ➁ numaralı taşıyıcı filmi dikkatli bir şekilde kaldırabilirsiniz.
Dikkat: ScratchStopper koruyucu
filmi de yanlışlıkla kaldırmamaya
dikkat edin.
Поместите ScratchStopper, статической
стороной вниз, на поверхности
устройства и расположите ее по
краям. Теперь полностью удалите
первую пленки-подложки ➀ . За счет
статического покрытие, пленка сама
постепенно притянется к поверхности.
Возможно возникшие пузырьки
можно легко удалить с помощью
прилагаемой Bubblecard, салфетки
из микрофазера, пальца и т.п.. Просто
аккуратно выдавите пузырьки к
краям.
Совет: Если под пленкой окажется пылинка,
удалите ее с помощью Dust Removal Film.
Для этого просуньте слегка согнутый
Dust Removal Film под пленку так, чтобы
он приподнял ее, и вы смогли удалить
пылинки.
Осторожно
снимите
пленкиподложки ➁. Готово.
Внимание:
При
этом
удостоверьтесь, что защитная
пленка
ScratchStopper
не
стягивается вместе с подложкой.
Proszę umiejscowić folię stroną statyczną
skierowaną w dół na powierzchni
urządzenia, następnie wyrównać wzdłuż
krawędzi. Proszę teraz zdjąć całkowicie
pierwszą folię zewnętrzną➀ . Dzięki statycznej powłoce folia przymocuje się sama
do powierzchni.
Jeśli wystąpią pęcherzyki powietrza,
wówczas proszę delikatnie je usunąć za
pomocą dołączonej BubbleCard, palca,
szmatki z mikrowłókna, etc. poprzez
wykonywanie ruchów na boki. Wskazówka: Jeśli pod folią znajdzie się kurz,
możliwe jest jego usunięcie w bardzo prosty
sposób wykorzystując Dust Removal Film.
Aby wykonać powyższe, należy wsunąć pod
krawędź folii lekko zgięty pasek, tak aby się
uniosła i możliwe będzie usunięcie pyłku
kurzu.
Następnie należy delikatnie zdjąć
folię zewnętrzną ➁. Gotowe.
Uwaga: Należy uważać, aby nie
zerwać folii ochronnej ScratchStopper.
고정 면이 아래로 간 상태로 필름을 기
계의 표면 위에 대고 각에 맞춰 위치
를 잡습니다. 첫 번째 필름 ➀ 을 이
제 완전히 떼어냅니다. 고정 커버로 인
해 필름은 자동적으로 점점 표면에 점
착됩니다.
기포가 생겼을 경우에는 동봉된 BubbleCard와 손가락, 극세사 수건을 이
용하여 기포를 양 면으로 쓸어 내어
쉽게 제거할 수 있습니다.
팁: 필름 아래 먼지가 들어갔을 경우 Dust
Removal Film 으로 손쉽게 제거할 수 있습
니다. 이 필름을 살짝 구부린 상태로 필름
가장자리 면 아래로 밀어 넣습니다. 필름
이 살짝 뜨면 먼지를 필름과 함께 제거할
수 있습니다.
이어서 필름
어냅니다.
➀
7
8
➁
Daarna nog de dragerfolie ➁ voorzichtig eraf trekken. Klaar.
Attentie: Let erop, dat u de ScratchStopper er niet bij verwijdert.
Enfin, retirer encore le film support
➁ avec précaution. Et voilà.
Attention: Veillez à ne pas également retirer le ScratchStopper.
➁ 를 조심스럽게 떼
주의: 이 때 스크래치 스토퍼가 함
께 떼어지지 않도록 주의하십시오.