1
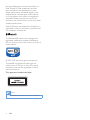
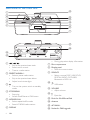
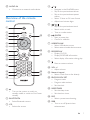
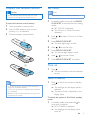
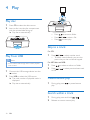
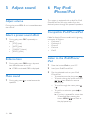
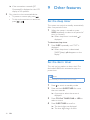
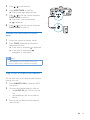
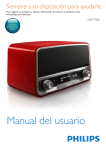
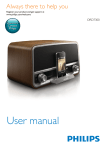
Prepare the remote control
Set clock
Caution
Note
•• Risk of explosion! Keep batteries away from heat,
sunshine, or fire. Never discard batteries in fire.
To insert the remote control battery:
1
2
Open the battery compartment.
3
Close the battery compartment.
•• You can set the clock in the standby mode only.
1
In standby mode, press and hold PROG/
CLOCK SET to activate the clock setting
mode.
»» SET CLOCK is displayed.
»» The 12 hour or 24 hour format is
displayed.
2
Press /
format.
3
Press PROG/CLOCK SET.
»» The hour digits begin to blink.
4
5
Press
6
7
Press
Insert 2 AAA batteries with correct
polarity (+/-) as indicated.
a
b
c
/
to select 12 hour or 24 hour
to set the hour.
Press PROG/CLOCK SET.
»» The minute digits begin to blink.
/
to set the minute.
Press PROG/CLOCK SET to confirm.
Turn on
1
Press .
»» The unit switches to the last selected
source.
Switch to standby
Note
1
•• If you are not going to use the remote control for a
long time, remove the batteries.
•• Do not use old and new or different types of batteries
in combination.
•• Batteries contain chemical substances, so they should
be disposed of properly.
Press to switch the system to standby
mode.
»» The backlight on the display panel is
reduced.
»» The clock (if set) is displayed on the
display panel.
To switch the system to Eco Power standby
mode:
1
In standby mode, press and hold for
more than 2 seconds.
»» ECO POWER is displayed.
»» The backlight on the display panel
turns off.
EN
9