1
English
IMPORTANT SAFEGUARDS
When using electrical appliances, basic safety precautions should always be
followed including the following:
1 Read all instructions.
2 Do not touch hot surfaces. Use handles or knobs.
3 To protect against electrical shock do not immerse cord, plugs or
appliance in water or other liquid.
4 Close supervision is necessary when any appliance is used by or near
children.
5 Unplug from outlet when not in use and before cleaning. Allow to cool
before putting on or taking off parts.
6 Do not operate any appliance with a damaged cord or plug or after
the appliance malfunctions or has been damaged in any manner. For
assistance call 1-866-309-8817.
7 The use of accessory attachments not recommended by the appliance
manufacturer may cause injuries.
8 Do not block any ventilation openings. Install in accordance with the
manufacturer’s instructions.
9 Do not use outdoors.
10 Do not let cord hang over edge or table or counter, or touch hot surfaces.
11 Do not place on or near a hot gas or electric burner, or in a heated oven.
12 Extreme caution must be used when moving an appliance containing
hot oil or other hot liquids.
13 Plug the cord into the wall outlet. To disconnect, turn any control to
“off ”, then remove plug from wall outlet.
14 Do not use appliance for other than intended use.
15 Use extreme caution when removing the pan, basket and disposing
hot grease.
16 Do not clean with metal scouring pads. Pieces can break off the pad and
touch electrical parts, creating a risk of electric shock.
17 Use only on properly grounded outlet.
18 A short power cord has been provided to prevent the risk of it
becoming entangled or being tripped over.
19 Extension cords may be used if care is exercised in their use. If an
extension cord is used:
The marked electrical rating of the cord must be as great as the rating of
the appliance.
The cord should be arranged so that it will not drape over the edge of the
counter or table top where it could be pulled by children or tripped
over unintentionally.
20 This appliance has a polarized plug (one blade is wider than the other). As
a safety feature, this plug fits in a polarized outlet only one way. If the plug
does not fit fully in the outlet, reverse the plug. If it still does not fit, contact
a qualified electrician. Do not attempt to modify the plug in any way.
21 Oversize foods or metal utensils must not be inserted in the appliance
as they may create a fire or risk of electric shock.
22 A fire may occur if the appliance is covered or touching flammable
material, including curtains, draperies, walls, and the like, when in operation.
Do not store any item on top of the appliance when in operation.
23 Do not place any of the following materials in the appliance: paper,
cardboard, plastic, and the like.
Save these
instructions
Introduction
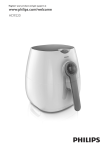
Congratulations on your purchase and welcome to Philips! To fully
benefit from the support that Philips offers, register your product
at www.philips.com/welcome.
Your new airfryer allows you to prepare your favorite ingredients and snacks
in a healthier way.
The airfryer uses hot air in combination with high-speed air circulation
(Rapid Air) and a top grill to prepare a variety of tasty dishes in a healthy,
fast and easy way. Your ingredients are heated from all sides at once and
there is no need to add oil to most of the ingredients.
For more inspiration for recipes and information about the airfryer, visit
www.philips.com/kitchen.
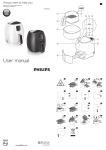
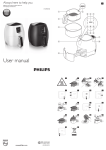
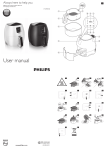
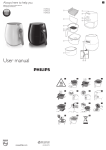
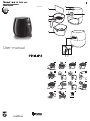
General description (Fig. 1)
A Divider
B Basket
C Basket release button
D Basket handle
E Pan
F Air outlet openings
G Cord storage compartment
H Power cord
I Timer (0-30 min.)/power-on knob
J Temperature control knob (180-390°F)
K Air inlet
L Power-on light
Before first use
1Remove all packaging material.
2Remove any stickers or labels from the appliance.
3Thoroughly clean the basket, the pan and the divider with hot
water, some dishwashing liquid and a non-abrasive sponge.
Note:You can also clean these parts in the dishwasher.
4Wipe the inside and outside of the appliance with a moist cloth.
This is an airfryer that works on hot air. Do not fill the pan with oil or
frying fat.
Preparing for use
1Place the appliance on a stable, horizontal and level surface.
Do not place the appliance on non-heat-resistant surfaces.
2Place the basket in the pan properly (Fig. 2).
3Pull the power cord out of the cord storage compartment in the
bottom of the appliance.
Do not fill the pan with oil or any other liquid.
Do not put anything on top of the appliance. This disrupts the airflow and
affects the hot air frying result.
Using the appliance
The airfryer can prepare a large range of ingredients. The recipe booklet
included helps you get to know the appliance. You can find more recipes at
www.philips.com/kitchen.
Hot air frying
1Put the power plug in a grounded wall outlet.
2Carefully pull the pan out of the airfryer (Fig. 3).
3Put the ingredients in the basket (Fig. 4).
Note: Never fill the basket beyond the MAX indication or exceed the amount
indicated in the table (see section ‘Settings’ in this chapter), as this could affect
the quality of the end result.
Tip: Use the divider to separate ingredients when you want to prepare different
ingredients at the same time. Place the divider in the basket and fill up each
side of the basket with the ingredients. Please note that the maximum amount
of each of the ingredients is half of the normal amount (Fig. 5).
4Slide the pan back into the airfryer (Fig. 6).
Never use the pan without the basket in it.
Caution: Do not touch the pan during and some time after use, as it gets
very hot. Only hold the pan by the basket handle.
5Turn the temperature control knob clockwise to the required
temperature. See section ‘Settings’ in this chapter to determine the
right temperature (Fig. 7).
Note: If you want to prepare different ingredients at the same time, make sure
you check the preparation time and the temperature required for the different
ingredients before you start to prepare them simultaneously. Home-made fries
and drumsticks, for example, can be prepared simultaneously because they
require the same settings.
6Determine the required preparation time for the ingredient (see
section ‘Settings’ in this chapter).
7To turn on the appliance, turn the timer knob to the
required preparation time (Fig. 8).
Add 3 minutes to the preparation time when the appliance is cold.
Note: If you want, you can also let the appliance preheat without any
ingredients inside. In that case, turn the timer knob to more than 3 minutes.
Then fill the basket and turn the timer knob to the required preparation time.
,, The power-on indicator goes on (Fig. 9).
,, The timer starts counting down the set preparation time.
,, Excess oil from the ingredients is collected on the bottom of the pan.