1
Instructions for the User
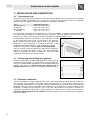
4.3 Air vents
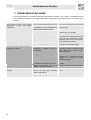
The air vents at the bottom front
and top rear of the appliance
must not be obstructed in any
way; refrigerator operation would
be jeopardised.
5. SETTING AND SELECTING THE OPERATING TEMPERATURE
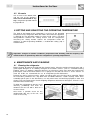
The knob at the bottom of the refrigerator is used to set the operating
temperature in the refrigerator. When the knob is turned to 0, the appliance
is switched off. The operating settings are from 1 to 9. There is no direct
correspondence between the setting chosen and the temperature.
Increasing the setting number reduces the temperature inside the
appliance. In normal operating conditions, a medium-low setting (1-5) is
recommended.
Important: changes in weather conditions (temperature and humidity) and the frequency with
which the door is opened may affect the refrigerator's operating temperatures.
6. MAINTENANCE AND CLEANING
6.1 Cleaning the refrigerator
Before cleaning, disconnect the plug from the electrical mains. Clean the outside using only water and a
gentle liquid detergent or an ordinary detergent for washable surfaces (such as a window-cleaning
product). Never use products containing abrasives or substances which may attack the lacquered or
painted parts, acids or chemical solvents. Use a sponge or a soft cloth. Do not use steam cleaners to
clean the inside; we recommend the use of refrigerator-specific disinfectants.
Remove the shelves and accessories, taking care not to apply excessive force when removing. Follow
the instructions provided in the "Top door shelf and bottle container" section carefully. Never wash
removable plastic parts in the dishwasher; use only warm water and washing-up liquid or water and
vinegar. Take care not to wet the electrical lighting components with water or detergents. Clean the seals
with warm water and then dry.
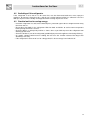
To allow the refrigerator to operate at full
efficiency, periodically also clean the
condenser on the rear with a brush or a
vacuum cleaner.
Also make a periodic check on the
condensation drip tray at the rear, and
clean it if necessary.
16