1
Installation Instructions
CMSH3
TOOLS REQUIRED / PARTS PROVIDED
5/64"
(included)
A (1)
[CMSH3]
C (1)
5/64"
B (1)
8-32 x 3/8"
ATTACHING CMSH3 TO CEILING PIPE
1.
2.
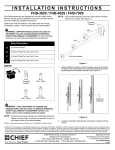
Thread CMSH3 (A) onto ceiling pipe until hand tight. (See
Figure 1)
Secure CMSH3 to ceiling pipe using 5/64" hex key (C) and
#8-32 x 3/8" set screw (B). (See Figure 1)
MOUNTING PROJECTOR MOUNT TO
CMSH3
1.
Press quick-release button to lower interior pipe to desired
mounting height. (See Figure 2)
2.
Tighten locking set screw with 5/64" hex key (C) to lock
mount in its current position. (See Figure 2)
(rear view)
1
1
quick-release 2
button
2
Figure 2
(A)
2
(B)
NOTE: Micro height adjustment is still possible with set screw
tightened, but the set screw must be loosened in order
to adjust height with the quick release button. See
Adjustments section for details.
Figure 1
3