1
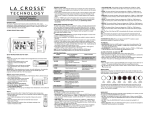
La Crosse Technology®
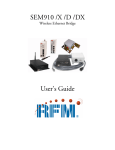
WS-811561
IT915 MHz
Atomic Digital Clock and Temperature
Station with Wireless Solar-Powered
Outdoor Temperature Sensor
Wireless Weather Instruments by
La Crosse Technology®
La Crosse Technology, Ltd.
www.lacrossetechnology.com
2809 Losey Blvd. S
La Crosse, WI 54601
Phone 608-782-1610
Table of Contents
Table of Contents ....................................................... 1
Inventory of Contents ................................................. 2
Features and Specifications ....................................... 2
Initial Set Up and Wireless Synchronization ............... 3
TX61U-IT Sensor Power Save "STOP" Mode ............ 4
Set the Time and Date................................................ 4
Page 1 of 12
Setting the Time Alarm ............................................... 6
Battery Replacement Information ............................... 7
Installation Notes ........................................................ 8
Mounting the Units...................................................... 9
Online Resources ..................................................... 10
Care and Maintenance ............................................. 10
Troubleshooting ........................................................ 10
Warranty Information ................................................ 11
Inventory of Contents
1.
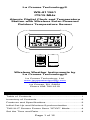
A WS-811561 IT 915 MHz Temperature Station
(referred to as "wireless display" in this manual)
2.
A TX61U-IT 915 MHz Wireless Solar-Powered Outdoor
Temperature Sensor with built-in rechargeable battery
pack (referred to as
TX61U-IT sensor in this manual)
3.
Mounting hardware for TX61U-IT sensor
4.
Instruction manual
Features and Specifications
Wireless Display:
•
•
•
•
•
•
•
•
•
•
•
•
•
•
•
•
•
•
WWVB radio controlled time (manual setting option
available)
DST function on/off selectable (default is ‘On’)
Wireless outdoor temperature (°F or °C)
Indoor temperature (°F or °C)
Time alarm with 10 minute snooze
12/24 hour time
Calendar: Month, date, day
Multi-language calendar: English (US), French (F),
Spanish (E) or (d) German
Time Zone setting: +/- 12 Hours from GMT
Continuous calendar up to year 2029
Low battery indicator
Wall hanging or free standing
Indoor measurement range: 14.2°F to 99.9°F
(-9.9°C to 37.8°C) w/ 0.1°C resolution. “OFL”
displayed if outside range
Indoor temperature update rate: Every 16 seconds
Batteries: 2 X “AA” size 1.5V (not included)
Battery life: Up to 24 months
915 MHz Wireless range:
Up to 200 Ft. (60.96m) open air
Dimensions: 8.9"L x 1.2"W x 7.1"H
(227 x 30.1 x 180 mm)
Page 2 of 12
TX61U-IT Wireless Solar-Powered Outdoor Sensor:
•
•
•
•
•
•
•
•
•
•
•
The TX61U-IT sensor sends the collected outdoor
temperature to your existing wireless display by
way of a 200 Ft wireless signal.
High-efficiency modern solar panel maintains full
charge with minimal light
Stores solar power for continuous operation
Batteries are a built-in (non-replaceable) Alkaline
power cell
Wall hanging or free standing
Outdoor measurement range:
-39.8°F to 139.8°F (-39.9°C to 59.9°C)
with 0.1°C resolution. “OFL” displayed if outside
range
Outdoor temperature update rate:
Every 8 seconds
915 MHz Wireless range:
Up to 200 Ft. (60.96m) open air
Dimensions: 1.7"L x .93"W x 3.94"H
(43 x 100 x 23.5 mm)
Signal reception and re-synchronization:
903MHz, 915MHz and 927MHz
Operating voltage: 2.5V or higher than 2.5V
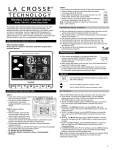
Initial Set Up and Wireless Synchronization
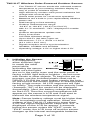
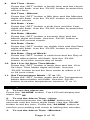
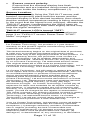
1.
Initialize the Sensor
It is important to
allow sufficient light
to reach the solar
panel while
activating the sensor.
Make sure the lights
are on in the setup room and the solar panel is
facing a 60W light bulb or brighter - do not cover
with hands or other objects. To begin the set up
process, use the included plastic reset rod to
GENTLY PUSH the reset button once in the hole
on the front of the sensor with the LCD/solar panel
facing a light source. All LCD segments will light
up briefly. The code number and the security code
(example: "20") of the model will be displayed
sequentially. Next, the battery voltage will appear
on the LCD. Then the current temperature will
appear on the sensor's LCD and it will start to
transmit the wireless temperature signal.
Note: Sensor battery voltage must be higher than
2.5V to maintain normal operation. When the
voltage of the TX61U-IT sensor is lower than
2.5V, the signal transmission stops and “LO” is
displayed on the LCD for approx. 2 seconds
before the sensor enters the "IDLE" mode. In
"IDLE" mode, the LCD turns off and the sensor
charges up the internal rechargeable batteries
Page 3 of 12
automatically. When the battery voltage charges
to 2.5V, the LCD will turn on and the transmission
of signal will start again.
2.
Install Batteries into Wireless Display
Insert 2 new "AA", 1.5 volt ALKALINE batteries
into the wireless display according to the polarity
marked on the battery compartment. Make sure to
do this within 2 minutes of performing the start up
process for the TX61U-IT. (Diagram on page 3)
Once the batteries are properly installed in the
wireless display, the unit will beep and all
segments of its LCD will light up briefly. The
indoor temp and the time (displayed as 12:00) will
appear on the LCD. If it does not appear after 30
seconds, please reinstall the wireless display
batteries and try again. Once the indoor data is
displayed, proceed to the next step.
3.
Wireless Temperature Reception
After the wireless display is powered up, it will
start receiving data from the TX61U-IT sensor. If
reception is successful, the outdoor temp will
appear on the wireless display. If the outdoor
temp does not display within 5 min, remove the
batteries from the display and go back to Step 1
(make sure the batteries are fresh).
4.
Distance Between Units
To ensure sufficient wireless communication, the
final distance between the wireless display and
the sensor should be no more than 200 ft (60.96
meters) (obstacles can reduce this distance).
TX61U-IT Sensor Power Save "STOP" Mode
If the TX61U-IT sensor is placed in a dark environment
for 24 hours, it will enter into the "STOP" mode to save
power. The LCD will turn off and it will stop transmitting
the data. If this happens, press the reset button on the
TX61U-IT sensor to wake it up. If the voltage is higher
than 2.5V, the LCD will turn on again and resume the
transmission of the wireless temperature signal.
If the voltage is lower than 2.5V, “LO” will appear on
the LCD and the sensor will enter into "IDLE" mode.
Move the sensor to a brightly lit area. In "IDLE" mode,
the LCD turns off and the sensor charges up the
internal rechargeable batteries automatically. When
the battery voltage charges to 2.5V, the LCD will turn
on and the transmission of signal will start again.
Set the Time and Date
The WS-811561 Wireless Display will automatically set
its time based on daily WWVB reception. The signal is
Page 4 of 12
attempted at the full hour between 12:00 am to 6:00
am. For best reception, place the display with the front
or back facing Colorado. After a successful reception,
no more reception attempt would be made until the
following day.
If the display is in an area of your home where the
WWVB signal cannot be received, you can set the
date and time manually.
In either case, the Time Zone must be set manually.
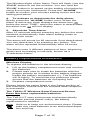
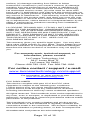
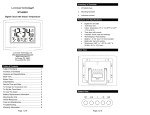
Note: The "SET" button is used
to enter SET mode. The display
will exit SET mode automatically
after 15 seconds of inactivity.
1.
Set the Time Zone
(back view)
Press the “SET” button and the
Time Zone display will flash. Use the “PLUS” button
to select the desired Time zone setting.
•
-5: EST – Eastern (default setting)
•
-6: CST – Central
•
-7: MST - Mountain
•
-8: PST - Pacific
•
-9: ALA - Alaska
•
-10,-11,-12,12,11,10,9,8,7,6,5,4,3,2,1: Other
time zones
•
0: Greenwich Mean Time (GMT)
•
-1,-2,-3 - Other time zones
•
-4: ATL - Atlantic
Note: North American time zones are negative
numbers.
2.
Set Daylight Saving Time ON/OFF:
Press the “SET” button a second time and DST will
flash. Press the "PLUS" button to toggle Daylight
Saving Time on ("On") or off ("OFF").
3.
Set Language:
Press the “SET” button a third time and the
Language Abbreviation will flash. Press the "PLUS"
button to select the display language. A three-letter
abbreviation for the day of the week will display in
the bottom of the LCD as the setting flashes above.
Language choices include:
US: English (default setting)
F: French (Français)
E: Spanish (Español)
d: German (Deutsch)
Page 5 of 12
4.
Set Time - Hour:
Press the “SET” button a fourth time and the Hours
digits will flash. Use the “PLUS“ button to select the
correct hour.
5.
Set Time - Minute:
Press the “SET” button a fifth time and the Minutes
digits will flash. Use the “PLUS“ button to select the
correct minute.
6.
Set Date - Year:
Press the “SET” button a sixth time and the Year
digits will flash. Use the “PLUS“ button to select the
correct year.
7.
Set Date - Month:
Press the “SET” button a seventh time and the
Month digits will flash. Use the “PLUS“ button to
select the correct month.
8.
Set Date - Date:
Press the “SET” button an eighth time and the Date
digits will flash. Use the “PLUS“ button to set the
correct date.
9.
Set Date - Day of Week:
Press the “SET” button a ninth time and the Day of
Week abbreviation will flash. Use the “PLUS“
button to set the correct day of week.
10. Set 12 or 24 Hour Time Mode:
Press the “SET” button a tenth time and the 12 or
24 Hour Time Mode digits will flash. Use the
“PLUS“ button to set the time mode to either a 12
or 24 hour clock.
11. Set Temperature Mode - °F or °C:
Press the “SET” button again and the Temperature
Mode abbreviation will flash. Use the “PLUS“
button to set the temperature mode to °F or °C.
Setting the Time Alarm
1. To turn the alarm on:
Press the "ALARM" button. The LCD will display the
alarm icon
.
2. To set the Alarm Time - Hour:
Press and hold down the "ALARM" button for 2
seconds until the hours digits flash. Use the “PLUS”
button to set the hour. Press the "ALARM" button to
confirm your setting and move to setting the minutes.
3.
To set the Alarm Time - Minutes:
Page 6 of 12
The Minutes digits of the Alarm Time will flash. Use the
“PLUS” button to set the minutes. You can hold the
"PLUS" button in to speed up the setting of minutes by
using five minute increments. Press the "ALARM"
button to confirm your minutes setting and to end the
setting procedure.
4. To activate or deactivate the daily alarm:
Briefly press the “ALARM” button once. When the
alarm is active the clock displays the alarm icon
below the word "TIME", when the alarm is deactivated,
the alarm icon
will not display.
5. About the Time Alarm:
After 15 seconds without pressing any button the clock
switches automatically from alarm setting mode to
normal clock mode.
The alarm will sound for 85 seconds if not deactivated.
You can deactivate it by pressing any button. The
alarm will be repeated automatically after 24 hours.
The alarm uses 3 different patterns of tone, beginning
gently and increasing in intensity, known as a
"Crescendo Alarm".
Battery Replacement Information
Wireless Display
To replace the batteries in the wireless display:
1.
2.
3.
Lift up the battery compartment cover and remove
the batteries.
Please take note to install the batteries with the
proper polarity as it relates to the battery diagram
inside the battery compartment (+). The batteries
will fit tightly. To avoid start-up problems please
ensure that the batteries do not spring free.
Replace compartment cover.
Please follow the steps listed in the Setup section of
this manual to ensure that the wireless data reception
is successful.
The TX61U-IT Wireless Solar-Powered Sensor
Does Not have replaceable batteries.
The TX61U-IT uses solar power and automatically
charges the internal power cell(s). No battery
replacement is needed.
Help us to keep our environment clean. Please
take any used batteries to an authorized depot
for recycling.
Page 7 of 12
Installation Notes
Point the TX61U-IT solar panel toward the best
available light source to recharge the batteries, but
avoid a location in direct sun as it will cause incorrect
temperature readings. We recommend facing the solar
panel East to catch the early morning sun, and placing
under an eave or overhang to avoid overhead sun.
The TX61U-IT sensor uses internal rechargeable
batteries to store the collected solar power.
The sensor features a high-efficiency solar panel that
maintains a full charge with minimal indirect light. Do
not place in direct sun, as this will cause incorrect
temp readings.
Fog and mist will not harm the sensor but direct rain
must be avoided.
The TX61U-IT sensor has a wireless range of 200 feet
(60.96 m). Keep in mind that the 200 ft range equates
to an open air scenario with no obstructions, and that
radio waves DO NOT curve around objects. The actual
transmission range will vary depending on the path of
the signal. Each obstruction (roof, walls, floors,
ceilings, thick trees, etc.) will effectively cut the signal
range in half.
Example: If the TX61U-IT sensor, with a 200 feet
(60.96 m) range, is mounted on an exterior wall, the
signal must then pass through one exterior wall, one
interior wall, and across the 10 feet (3 m) width of the
room between the 2 walls to reach the wireless
display. The first wall will reduce the range to 100 feet
(30.48 m), and the second wall will reduce the range to
50 feet (15.24 m). Factoring in the 10 foot room, this
leaves a maximum of 40 feet (12. 2 m) of remaining
signal range.
This allowance is typically enough for a frame wall with
non-metallic siding; however certain materials can
reduce range even further. Metal siding, stucco, and
some types of glass can reduce signal range by as
much as ¾ or more, compared to the ½ reduction
typical of most obstructions. It is possible to receive a
signal through these materials, however maximum
range will be much less due to their tendency to
absorb or reflect a much larger portion of the sensor’s
signal.
The TX61U-IT sensor measures and transmits signal
about every 8 seconds when its battery voltage is
higher than 2.5V.
Once the reset button is pressed on the TX-61U
sensor and the batteries are inserted into the wireless
display, the units will try to synchronize
communication. If the wireless display fails to receive
Page 8 of 12
the outdoor temp, this means that the sensor is either
located too close or too far from the wireless display.
Please adjust the location of the TX61U-IT sensor and
try again. If it fails again, please restart the set up
procedure (see below).
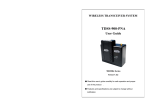
Mounting the Units
The TX61U-IT Sensor
The sensor can be set on a table or mounted onto a
wall using the included screws.
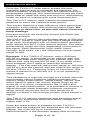
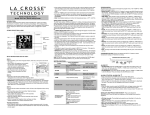
Mounting the Sensor with Screws
1.
2.
3.
4.
5.
Remove the mounting bracket
from the TX61U-IT sensor.
Place the mounting bracket over
the desired location.
Mark the mounting surface with a
pencil through the two screw
holes of the bracket.
Screw the mounting bracket onto
the mounting surface. Ensure that the screws are
tight against the bracket.
Insert the TX61U-IT sensor into the bracket.
Table Standing and Other Mounting Options
With the mounting bracket installed at the
bottom or on the top of the TX61U-IT
sensor, the user can place it on any flat
surface.
IMPORTANT NOTE: Before permanently
attaching the TX61U-IT sensor base, place
all units in the desired locations to check
that the outdoor temperature readings are
being received. In the event that the signal is not
received, relocate the TX61U-IT sensor (or move them
slightly) to improve the signal reception.
The Wireless Display
The wireless display can be set on a table or mounted
onto a wall.
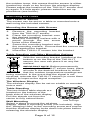
Table Standing
The two foldout table stands are
located on the bottom of the
back side of the wireless display.
Pull the stands out from the
center to fully extend them.
fold out legs
Wall Mounting
Select a place to mount the wireless
display. Install a mounting screw (not included). Align
the "Hanging Hole" to the mounting screw and ensure
that the wireless display locks down into place before
releasing the wireless display.
Page 9 of 12
Online Resources
Visit the WS-811561 page online at:
http://www.lacrossetechnology.com/811561
Care and Maintenance
Extreme temperatures, vibration and shock should be
avoided as these may cause damage to the unit and
give inaccurate readings.
Precautions shall be taken when handling the
batteries. Injuries, burns, or property damage may be
resulted if the batteries are in contact with conducting
materials, heat, corrosive materials or explosives. The
batteries shall be taken out from the unit before the
product is to be stored for a long period of time.
Immediately remove all low powered batteries to avoid
leakage and damage. Replace only with new batteries
of the recommended type.
When cleaning the display and casings, use a soft
damp cloth only. Do not use solvents or scouring
agents as they may mark the LCD and casings.
Do not submerge the unit in water. Furthermore, fix all
parts in place where the units are adequately protected
against moisture and rain.
Special care shall be taken when handling a damaged
LCD display. The liquid crystals can be harmful to
user's health.
Do not make any repair attempts to the unit. Contact
the La Crosse Technology® Warranty Department for
help. Opening and tampering with the unit may
invalidate their guarantee.
Never touch the exposed electronic circuit of the
device as there is a danger of electric shock should it
become exposed.
Do not expose the units to extreme and sudden
temperature changes, as this may lead to reduce their
accuracy.
Troubleshooting
For more product information, visit
http://www.lacrossetechnology.com/811561
Batteries:
Battery problems are the single largest cause of
customer support cases. A few things to check:
•
Use fresh batteries
Please use plain Alkaline batteries in the wireless
display that test no less than 1.48 on a voltmeter
or with an expiration date that is 7 years in the
future.
Page 10 of 12
•
Ensure correct polarity
Ensure that the wireless display has fresh
batteries and are installed using correct polarity as
shown inside the battery compartment (+).
Sensor Location:
Before permanently fixing the TX61U-IT sensor wall
bracket, temporarily place both the sensor and the
wireless display in their desired locations, then check
that the outdoor temperature reading is being received.
In the event that the signal is not received, relocate the
TX61U-IT sensor (remembering the 200 ft open air
wireless range) or move both units slightly as this may
help the signal reception.
TX61U-IT sensor LCD is turned "OFF":
Pease read step 1 of the Initial Setup… section on
page 3 or "TX61U-IT sensor Power Save "STOP"
Mode" on page 4.
Warranty Information
La Crosse Technology, Ltd provides a 1-year limited
warranty on this product against manufacturing defects in
materials and workmanship.
This limited warranty begins on the original date of purchase,
is valid only on products purchased and used in North
America and only to the original purchaser of this product. To
receive warranty service, the purchaser must contact La
Crosse Technology, Ltd for problem determination and
service procedures. Warranty service can only be performed
by a La Crosse Technology, Ltd authorized service center.
The original dated bill of sale must be presented upon
request as proof of purchase to La Crosse Technology, Ltd or
La Crosse Technology, Ltd’s authorized service center.
La Crosse Technology, Ltd will repair or replace this product,
at our option and at no charge as stipulated herein, with new
or reconditioned parts or products if found to be defective
during the limited warranty period specified above. All
replaced parts and products become the property of La
Crosse Technology, Ltd and must be returned to La Crosse
Technology, Ltd. Replacement parts and products assume
the remaining original warranty, or ninety (90) days,
whichever is longer. La Crosse Technology, Ltd will pay all
expenses for labor and materials for all repairs covered by
this warranty. If necessary repairs are not covered by this
warranty, or if a product is examined which is not in need or
repair, you will be charged for the repairs or examination.
The owner must pay any shipping charges incurred in getting
your La Crosse Technology, Ltd product to a La Crosse
Technology, Ltd authorized service center. La Crosse
Technology, Ltd will pay ground return shipping charges to
the owner of the product to a USA address only.
Your La Crosse Technology, Ltd warranty covers all defects
in material and workmanship with the following specified
exceptions: (1) damage caused by accident, unreasonable
use or neglect (including the lack of reasonable and
necessary maintenance); (2) damage occurring during
shipment (claims must be presented to the carrier); (3)
damage to, or deterioration of, any accessory or decorative
Page 11 of 12
surface; (4) damage resulting from failure to follow
instructions contained in your owner’s manual; (5) damage
resulting from the performance of repairs or alterations by
someone other than an authorized La Crosse Technology,
Ltd authorized service center; (6) units used for other than
home use (7) applications and uses that this product was not
intended or (8) the products inability to receive a signal due to
any source of interference.. This warranty covers only actual
defects within the product itself, and does not cover the cost
of installation or removal from a fixed installation, normal setup or adjustments, claims based on misrepresentation by the
seller or performance variations resulting from installationrelated circumstances.
LA CROSSE TECHNOLOGY, LTD WILL NOT ASSUME
LIABILITY FOR INCIDENTAL, CONSEQUENTIAL,
PUNITIVE, OR OTHER SIMILAR DAMAGES ASSOCIATED
WITH THE OPERATION OR MALFUNCTION OF THIS
PRODUCT. THIS PRODUCT IS NOT TO BE USED FOR
MEDICAL PURPOSES OR FOR PUBLIC INFORMATION.
THIS PRODUCT IS NOT A TOY. KEEP OUT OF
CHILDREN’S REACH.
This warranty gives you specific legal rights. You may also
have other rights specific to your State. Some States do not
allow the exclusion of consequential or incidental damages
therefore the above exclusion of limitation may not apply to
you.
For warranty work, technical support, or
information, please contact:
La Crosse Technology, Ltd
2817 Losey Blvd. S.
La Crosse, WI 54601
Phone: 608.782.1610 Fax: 608.796.1020
For online contact / support / e-mail:
www.lacrossetechnology.com/support
For information on other products visit
www.lacrossetechnology.com
FCC DISCLAIMER
This device complies with part 15 of the FCC rules.
Operation is subject to the following two conditions:
(1)This device may not cause harmful interference.
(2)This device must accept any interference received,
including interference that may cause undesired operation.
All rights reserved. This handbook must not be reproduced in
any form, even in excerpts, or duplicated or processed using
electronic, mechanical or chemical procedures without written
permission of the publisher.
This handbook may contain mistakes and printing errors.
The information in this handbook is regularly checked and
corrections made in the next issue. We accept no liability for
technical mistakes or printing errors, or their consequences.
All trademarks and patents are acknowledged.
Page 12 of 12