1
Pie maker
Use
• Insert the plug into the outlet. The red light will turn on, indicating that
the appliance is activated on and preheating.
• Grease the non-stick coating of the baking plate lightly with oil or butter.
• During use, the baking plates and the cabinet will become very hot,
avoid any contact.
• In approximately 5-10 minutes the green light will illuminate, which
indicates that the appliance is preheated and ready for use.
• The green light will switch on and off during the baking process,
indicating that the correct temperature is being maintained. Always
keep the lid closed when preheating or in-between uses.
Cakes & Muffins
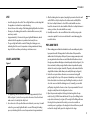
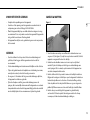
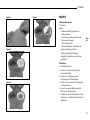
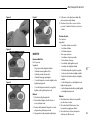
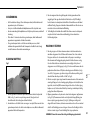
Figure 1
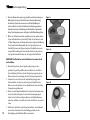
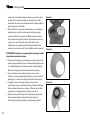
1. For preparing cakes and muffins, fill the mold approximately 2/3rds
full (see figure 1), unless the recipe states otherwise. Close the lid and
make sure it is locked by the safety lock.
2. Use a timer to set the specified time as indicated in your recipe. You will
notice the green ready light will switch on and off during the baking
process, indicating that the correct temperature is being maintained.
3. After the baking time has expired, unplug the pie maker from the wall
outlet. Pull the safety lock up from the bottom and carefully lift the
lid. Use a toothpick/skewer to check if the cakes/muffins are done.
Insert the skewer into the cakes/muffins. When the toothpick/skewer is
coming out clean, the cakes/muffins are ready.
4. Carefully remove the cake or muffin from the mold by using a nylon
or wooden spatula. Do not use metal utensils to avoid damaging the
nonstick surface.
EN
Pies and tarts
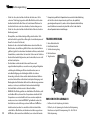
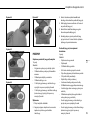
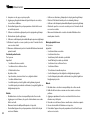
1. When making pies and tarts it is advisable to use the reversible pastry cutter
to prepare the molds. The larger side is for the bottom of the pie and the
smaller side is for the top layer of the pie. If you are using a premade pie crust,
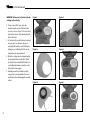
you can gain two bottoms from one crust. Make the first bottom as close to
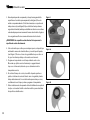
the edge as possible and firmly press down the pastry cutter (see figure 2). For
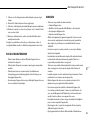
the second mold, cut the pie edges from the side and reposition the pastry
cutter in the center (see figure 3a and 3b). The pastry cutter creates slits in the
dough for the bottoms, which allows you to easily fold a cup (see figure 4).
2. Unless the recipe indicates otherwise, we recommend using puff
pastry dough for the tops of the pies and standard pie crust dough for
the bottom (tarts do not have tops; after filling the molds you should
close the cover and start the baking process). Generally, you can find
puff pastry dough in the freezer section of your supermarket. Pie crust
dough is usually found in the refrigerated section.
3. Open the pie maker and place the large bottom dough into the pie
molds (see fig 5). Fill the forms with about 3/4 cup of your fillings (unless
recipe states otherwise) (see figure 6). The weight of the filling will cause
the dough to drop down into the mold; you can also use a ladle or
rounded spoon to gently press the dough into the mold. Ensure you will
not tear the dough. Gently press the dough onto the edges.
5