1
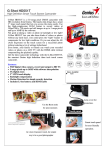
English WEEE Warning Message Symbol for Separate Collection in European Countries This symbol indicates that this product is to be collected separately. The following apply only to users in European countries: z This product is designated for separate collection at an appropriate collection point. Do not dispose of as household waste. z For more information, contact the retailer or the local authorities in charge of waste management. FCC STATEMENT This device complies with Part 15 of the FCC Rules. Operation is subject to the following two conditions: (1). This device may not cause harmful interference, and (2). This device must accept any interference received, including interference that may cause undesired operation. Note: This equipment has been tested and found to comply with the limits for Class B digital devices, pursuant to Part 15 of the FCC rules. These limits are designed to provide reasonable protection against harmful interference in a residential installation. This equipment generates uses and can radiate radio frequency energy and, if not installed and used in accordance with the instructions, may cause harmful interference to radio communications. However, there is no guarantee that interference will not occur in a particular installation. If this equipment does cause harmful interference to radio or television reception, which can be determined by turning the equipment off and on, the user is encouraged to try to correct the interference by one or more of the following measures: Reorient or relocate the receiving antenna Increase the separation between the equipment and receiver Connect the equipment into an outlet on a circuit different from that to which the receiver is connected Use of shielded cable is required to comply with Class B limits in Subpart B of Part 15 of the FCC rules. Do not make any changes or modifications to the equipment unless otherwise specified in the manual. If such changes or modifications should be made, you could be required to stop operation of the equipment. 1 English Software introduction This DVR Player provides seamless DVR recordings for use with a PC application program (AP). You do not need to install any program and you can quickly browse, playback or convert the recorded video. Here are some of the features: ¾ Green Software: Do not need to install, but can be based on the language version of windows. It will automatically display the language. ¾ Basic functions: Provides video of browsing, playback, speed switch and dump into AVI video or JPG photo of the function. ¾ Password protected: You can set a password for the SD card to protect the SD card contents from others. ¾ Video Repair: Can repair damaged video because of a suddenly pulled out card or power outage. This can ensure that critical evidence is not lost. How to use the Genius DVR Player System Requirements • • • • • • CPU: At least Pentium 4 2.4GHz or above Monitor: Required to support 1280 x 720 or 1280 x 1024 resolution of the screen RAM: At least 1 GB of memory OS: Supports Windows XP, Windows Vista (32/64bit), and Windows 7 (32/64bit) Audio: System must have audio device installed USB 2.0 High Speed support of SD / SDHC card reader Software Installation • • You do not need to install, you can execute the program directly, and the program can be executed in the SD card (SD card cannot be write-protected). In Windows Vista and Windows 7, the exec. shall be the system administrator to open the normal execution. 2 English Software Interface Description Image display area: Displays the current playback image. ➊Playback progress bar: Shows the progress of video playback, drag the mouse and you can playback the video position where you want. ➋Video section list: Displays the current SD card list of all videos. Videos in sections (Clip): Each section has a time listed when it started recording video segments. The SD card will list all the video segments. You can choose the video you want to view. ➌Video Groups List: The SD card shows the current group information list of all the videos. A continuous video group can be shown in video segments. Any video longs than two seconds is considered another group. General continuous-time recording of the section will be treated as the same group, but there are two circumstances would be regarded as another group: NOTE 1. Each group will consist of video clips till the memory is full to 125MB. 2. Press the Lock button to protect the video and display in a group. 3. If you pull out the CD card or there is no power, or the battery does not work properly, the videos damaged in the group will show and display in a red background. Damaged groups cannot be played back for conversion without the use of "Repair "function. For "Repair Video" function, refer to the button instructions. 3 English Buttons instructions Open Disk: Open the video with SD card drive Open SD card Disk, G:\ disk, choose G:\ and press “apply” button. If the SD card has a password, enter the correct password to open the SD card to view the video. If the disk and password are correct and SD card has the recorded image, the software interface will start playback of the section of the image. Snapshot button: Save the current screen captured into a JPG image file. During playback or pause playback of the video, you can press this button to save as a JPG image file, the file name will be saved as the screen name at the time. Video archive button: The recorded video image will be transferred as AVI video. 1. If you want to store in a single group or within a certain segment of the video, you can directly select the group list in the film. Press the button video archive. After the selection, the path you want to archive will appear, then you can choose to back up to check the video section, or choose to save the entire group all of the backup videos. On the bottom right, there is a file estimate, so you can see how much storage has been used. 4 English 2. If you want to save more than one group of files in the video group list, check the group you want to save (see below). Then press the video button to archive these groups to save them as an AVI File. If the video is long, the transfer process may take some time, and you can press stop to cancel the transfer processing. AVI files can have a max. file size of 2GB. If more than 2GB, it will be automatically saved as another AVI file. 5 English Delete video button: Delete recorded video in SD card. 1. To remove certain videos within a single section of the group: Select the files in the group list, and press the Delete button. Then delete the video section or use Delete All to delete the entire group. 2. To delete more than one group of videos: In the group list, check which groups you want to delete, then select the delete button, press “yes” button and the video will be removed. 6 English Tool button: For system setup Format SD card: You can format the SD card you use with the DVR-HD550 player. ¾ ¾ ¾ Before you format the SD card, check that it is not locked. Before recording with the DVR-HD550, you have to format the SD card in advance. All videos and data, the password will be removed after card is formatted. NOTE !!Warning!! All data will be removed after SD card formatted. Remove SD card DVR-HD550 exclusive file format: You can use the Genius DVR Player to remove the DVR-HD550 exclusive file format and restore the SD card to a common FAT format for other purpose, and you can use Windows to format the SD card. NOTE !!Warning!! All videos and data will be destroyed if you use the Remove SD card DVR-HD550 exclusive file format function. Download FW to SD card: You can upload DVR-HD550 firmware to the SD card in order to update the firmware. When Genius has released new firmware, use this function to load the firmware of the BIN file to the SD Card. ¾ Before using this feature, make sure you have selected the correct disk and it has been placed in the SD card and SD card is not locked. ¾ Make sure the SD card has been formatted to DVR-HD550 exclusive file format to use this function. ¾ If the firmware BIN file is correct and uploaded into SD card, a message "firmware upload complete!!" will appear. Follow the Firmware update instructions to update the firmware. Password settings: You can set a password for SD card protection. If you want to create a new password, you must enter the old password. To cancel the password, just keep the new password field blank. After setting, press the right column of the "Save to SD card" button that will set the password value SD card. You can input the password to open the SD card. 7 English NOTE !!Warning!! Remember the password you set in the SD card, otherwise, you will need to use”Format SD card: to remove the password, and will cause all videos or data to be destroyed. About: Displays Genius DVR Player version and release date. 8 English Stop button: Stops video during playback, also stops video transferring to AVI file. Play/ Pause button: Play video or pause video Slow down button: Slow downs video playing speed, provides 1/2X~ 1/5X speed, also can slow down speed when the video is under fast forward playing. Fast forward button: Increase video playback speed to 2X - 5X, if the video is in slow down speed, it can be adjusted quickly. Playback volume: Adjust playback volume. 9 English Unlock button: Unlocks the protected video. The list displayed in the protected group (yellow background): press this button to determine if you want to unlock the protected videos. NOTE !!Warning!! You cannot lock again once you unlock, so make sure you have saved the copy file before you perform the unlock function. Repair button: Repair damaged video. You can repair damaged videos in the group list (shown in red background), just press this button. You can check the video section you want to repair or you can repair all damaged videos. The video will be restored to normal video after it is repaired, and will be marked “fixed” in the group list. When you re-open SD card, the repaired video start time and end time is the difference between a group of less than two seconds, it will be shown in the last group, and will not show "fixed" in the group list. Small window size: For smaller desktop resolution. Medium window size: For normal desktop resolution. 10 English Large window size: For higher desktop resolution (such as Full HD). 11