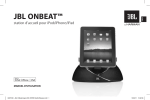
Download JBL OnBeat Venue
Transcript
JBL OnBeat™ VENUE
Quick Setup Guide
Welcome
Thank you for purchasing the JBL OnBeat™ Venue iPad dock. This quick setup guide will
show you how to connect and set up your dock. To download the free JBL Musicflow App
for your portable device, please go to the Apple App Store.
CONNECTIONS
1. If you are going to use your OnBeat Venue with another audio source, plug one end of
a 3.5mm (1/8”) stereo cable (not supplied) into the OnBeat Venue’s Aux In connector,
and plug the other end into the audio source’s audio out or headphone out connector.
2. If you are going to use your
OnBeat Venue with a video
display, use a component video
cable (not supplied) to connect
the OnBeat Venue’s Component
Video Out jacks to the video
display’s
component
video
inputs. When you play audio/
video content on the device
the video will appear on the
connected display.
3. Plug the OnBeat Venue’s power
supply into the Power connector
on the unit and into a working
AC power outlet. The OnBeat
Venue will automatically turn
on and go into the Bluetooth
pairing mode (the Bluetooth
LED will be flashing blue).
Power
Connector
Aux
Input
Component
Video Out
PLACEMENT
Place OnBeat Venue on a shelf or table with the rear of its enclosure is at least 3" (76mm)
away from a wall or other surface to allow the bass ports to operate properly.
CONTROLS AND INDICATORS
Dock Input
LED
Movie
Button
Bass Boost
Button
Aux Input
LED
Bluetooth
LED
Source
Button
Power
Button
Volume Up/Down
Buttons
Docking Slide (open)
Docking Connector
Bass Boost button: Press this button to enhance the bass performance. The button’s
LED will illuminate when Bass Boost is on.
Movie button: Press this button to activate the Movie EQ mode, which creates an
extra-wide sound field to compliment films and other video media. The button’s LED will
illuminate when the Movie mode is on.
• If the JBL MusicFlow app is active in a docked device, pressing the Movie button will
cycle between the Movie EQ mode and whatever EQ mode has been selected in the
MusicFlow app. The Movie button’s LED will illuminate when the Movie mode is on and
will turn off when the EQ mode selected in the app is on. (If Movie is the EQ mode
selected in the MusicFlow app, pressing the Movie button has no effect.)
Source button: Press this button to cycle through the audio sources: Bluetooth, iPod/
iPhone/iPad dock and Aux Input. The input LED for the active source will illuminate.
• If you begin to stream audio from a paired Bluetooth device or play audio from a
device connected to the dock while another source is playing, the OnBeat Venue will
automatically switch to the new source.
Aux Input LED: This LED illuminates when the Aux Input is the active source.
Dock Input LED: This LED illuminates when the iPod/iPhone/iPad dock is the active
source.
Bluetooth LED: This LED flashes blue when the OnBeat Venue is in the Bluetooth pairing
mode, and turns solid blue when it has successfully paired with a Bluetooth device.
2
Power button: When the OnBeat Venue is on, press the Power button to put it into the
standby mode. The button’s LED will illuminate solid amber when the unit is in standby.
When the OnBeat Venue is in standby, press the Power button to turn it on. The button’s
LED will illuminate solid white when the unit is on.
When the OnBeat Venue is in the standby mode it will automatically turn on when it detects
audio playing from a Bluetooth-connected device or from a docked device.
When the OnBeat Venue is on, it will automatically enter the standby mode after 10 minutes
of inactivity (no audio input and no user-control operation).
Note: When the OnBeat Venue enters the standby mode it will also bring a docked device
into standby mode.
Volume Up/Down buttons: Press these buttons to raise and lower the OnBeat Venue’s
volume. To mute the sound, press both buttons at the same time. (The Power button LED
will flash white when the sound is muted.) To restore the sound press both Volume buttons
together.
Docking slide: Press in on the JBL logo to open the docking slide and pull the slide all
the way open.
Docking connector: Place your device onto the docking slide so that it is firmly seated
on the docking connector.
Note: We recommend that you disable the”Shake to Shuffle” feature on your iPod nano,
iPod touch and iPhone before docking the device on the OnBeat Venue.
BLUETOOTH WIRELESS STREAMING
To wirelessly stream audio to the OnBeat Venue from a Bluetooth-enabled device:
1. If the OnBeat Venue’s Bluetooth LED is not flashing blue, press the Source button until
the Bluetooth LED begins flashing blue.
2. P
lace the Bluetooth-capable device in the pairing mode. Use the device’s Bluetooth
pairing menu to pair with OnBeat Venue. (If the device requires a pairing code, use
0000.)
3. W
hen OnBeat Venue’s Bluetooth LED illuminates blue continually, it is paired with the
device and you can stream audio via Bluetooth from the device to the OnBeat Venue.
To disconnect the Bluetooth device, press and hold the Source button. To pair OnBeat
Venue with a different Bluetooth-enabled device, repeat Steps 2 and 3 with the new device.
www.jbl.com
3
UPGRADING FIRMWARE
You can upgrade the OnBeat Venue’s firmware from within the JBL Musicflow App that is
installed on a docked device. When your portable device is docked in your JBL OnBeat
Venue, tap the “Firmware Upgrade” button within the app and it will compare the OnBeat
Venue’s firmware version with the latest version available on-line. If a newer version is
available, the Musicflow app will notify you that a firmware upgrade is available. Follow the
prompts to perform the upgrade.
The JBL Musicflow app is available at the Apple App Store.
HARMAN International Industries, Incorporated
8500 Balboa Boulevard, Northridge, CA 91329 USA
© 2012 HARMAN International Industries, Incorporated. All rights reserved.
JBL is a trademark of HARMAN International Industries, Incorporated, registered in the
United States and/or other countries.
JBL OnBeat is a trademark of HARMAN International Industries, Incorporated.
iPhone, iPod, iPod touch and iPad are trademarks of Apple Inc., registered in the U.S. and other countries. iPod,
iPhone and iPad not included. “Made for iPod,” “Made for iPhone” and “Made for iPad” mean that an electronic
accessory has been designed to connect specifically to iPod or iPhone or iPad, respectively, and has been certified
by the developer to meet Apple performance standards. Apple is not responsible for the operation of this device or its
compliance with safety and regulatory standards.
Please note that the use of this accessory with iPod, iPhone, or iPad may affect wireless performance.
Features, specifications and appearance are subject to change without notice.
Part No. JBLP3974 Rev. A
4


