1
Gebrauchsanweisung für Kühl-Gefrier-Kombination, NoFrost
Operating instructions for fridge-freezer combination, NoFrost
Consignes d'utilisation pour combiné réfrigérateur-congélateur, NoFrost
Gebruiksaanwijzing voor koel-vries-combinatie, NoFrost
Istruzione d'uso per combinazione frigo-congelatore, NoFrost
Instrucciones de manejo para combinado frigorífico-congelador, NoFrost
Instruções de utilização para o combinado frigorífico-congelador, NoFrost
Kullaným Kýlavuzu Soðutucu-Dondurucu-Kombinasyonu, NoFrost
7081 881-01
CN3033
4510
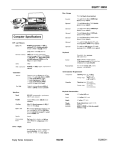
1 The appliance at a glance
Operating controls, fig. A1
1 Main on/off control for the complete appliance (refrigerator and freezer
compartment), with temperature control for freezer compartment
2 SuperFrost button with LED display for activated function - for
rapid freezing of fresh food
3 Temperature setting display for freezing temperature
4 Audible warning on/off button, with LED display for too high
temperature in freezer compartment
5 On/off switch and temperature control for refrigerator compartment
6 Temperature setting display for refrigerating temperature
Recommended temperature settings:
- Refrigerator compartment: Temperature setting display 6: 5 °C
- Freezer compartment: Temperature setting display 3: -18 °C
WBy moving the bottle and can holder, you can prevent bottles from tipping over when the door is opened and closed. The
holder can be removed for cleaning:
- fig. A2: The holder slides and releases left or right along the door
stops.
W You can remove all door racks for cleaning, fig. A2: lift rack and
pull forwards.
W The shelves* can be adjusted according to height of frozen
food, fig. A4.
- Lift the shelf, slide forwards and remove.
- Always insert shelves with the raised edge at the back pointing
upwards, otherwise food may freeze onto the rear wall.
W Removing drawers: Pull forward until the drawer stops and lift
out, fig. A3.
W Fig. A5: If you need space for large bottles and containers, then
simply push the front half of glass shelf 1 back. For cleaning,
the holder 2 can be used to remove the half glass shelves.
Rating plate specifications
1 Appliance designation
2 Service number
3 Appliance number
4 Freezing capacity ... kg/24hrs.
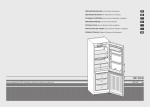
Description of appliance and equipment, fig. A
Refrigerator compartment, approx. 5 0C
Operating controls
Fan with switch 7, for increased air circulation
Butter stop
Adjustable storage shelves
Egg tray*
Interior light
Defrost drain
Adjustable door racks*
Adjustable bottle and can holder
Bottle shelf
Coldest zone of the refrigerator compartment, for sensitive
and perishable foodstuffs
Door rack for large bottles
Vegetable, salad and fruit bins
Rating plate
Freezer compartment, approx. -18 0C
Information system*
VarioSpace*
High drawers
Ice-cube tray*
Adjustable-height feet at front, transport castors at back
10
* depending on model and options
Congratulations on your purchase. Your appliance offers you all the advantages of modern refrigeration technology, guaranteeing you high quality, a long service life and high reliability.
The features on your appliance have been designed to ensure maximum convenience - day in, day
out.
This appliance has been manufactured with recyclable materials using an environmentally friendly
process, so together you and we are making an active contribution to the preservation of our environment.
To familiarise yourself with all the advantages your new appliance has to offer, please read the information contained in these operating instructions carefully.
We wish you much pleasure with your new appliance.
Contents
Page
Operating instructions
1 The appliance at a glance............................................. 10
Contents........................................................................ 11
Information system........................................................ 11
Safety regulations......................................................... 11
Saving energy............................................................... 11
2 Safety instructions and warnings ............................... 12
Disposal notes............................................................... 12
Technical safety............................................................. 12
Safety during use.......................................................... 12
Setting up...................................................................... 12
Connecting to the mains............................................... 12
3 Putting into operation and controls............................. 13
Switching the appliance on and off............................... 13
Setting the temperature................................................. 13
Temperature setting display.......................................... 13
Audible warning signal, red visual warning LED........... 13
4 Refrigerator compartment ........................................... 14
Arrangement of food..................................................... 14
Example of food arrangement....................................... 14
Refrigerating with fan.................................................... 14
Interior light................................................................... 14
5 Freezer compartment . ................................................. 15
Making ice-cubes.......................................................... 15
SuperFrost.................................................................... 15
Notes on freezing and storage...................................... 15
6 Defrosting, cleaning ..................................................... 16
7 Troubleshooting............................................................. 16
Customer service and type plate.................................. 16
8 Instructions for installation and modification
Changing over door hinges........................................... 17
Insertion into row of kitchen units.................................. 17
Keep these operating instructions in a safe place and pass
them on to the next owner, where applicable.
The operating instructions apply to several models. Differences may therefore occur.
§
Safety regulations
W The device is designed exclusively for the cooling
foodstuffs. The applicable statutory regulations are
to be observed in the event that the device is to be used
for commercial cooling of foodstuffs.
The device is not suitable for the storage and cooling of
drugs, blood plasma, laboratory preparations or similar
medicine-related materials and products as detailed in the
Medical Devices Directive 2007/47/EC. Improper use of
the device can cause the stored products stored in it to be
damaged or the items can be spoiled. In addition, the device is not suitable for operation in explosion-prone areas.
W The appliance is set to operate within specific ambient
temperature limits according to its climate rating. These
temperature limits should not be exceeded. The correct
climate rating for your appliance is indicated on the type
plate. This is explained as follows:
Climate rating
set for
ambient temperatures of
+10°C to
+16°C to
+16°C to
+16°C to
SN
N
ST
T
+32°C
+32°C
+38°C
+43°C
- The refrigerant circuit has been tested for leaks.
- The appliance complies with current safety regulations
and EC directives 2006/95/EC and 2004/108/EC.
Saving energy
- Always ensure good ventilation. Do not cover ventilation
openings or grille.
- Always keep fan louvres clear.
Information system*
- Do not place appliance in areas of direct sunlight or next to
Use frozen food within the recommended period.
a stove, heater or similar object.
The numbers between the symbols indicate the storage
- The energy consumption depends on the installation conperiod in months for different kinds of frozen foods.
ditions, e.g. the ambient temperature.
Storage times given are guide times for food frozen at home.
- Keep the time the appliance is open to a minimum.
Whether or not the lower or upper value is applicable de- Store food logically.
pends on the food quality and how it was processed prior to
- Ensure that all food is well packed and covered for storage.
freezing. The lower values always apply to food with a high
This will prevent frost from forming.
fat content.
- First cool warm food to room temperature before storing it.
- Defrost frozen food in the refrigerator.
The symbols have the following signification:
- Empty and switch off refrigerating unit for longer vacation
periods.
pre-cooked meals
sausages
Accumulated dust increases the enbread
ice-cream
ergy consumption:
- Once a year, dust the refrigerating
mushrooms
fish
unit together with the metal grille of
game
pork
the heat exchanger at the back of
poultry
vegetables
the appliance.
beef/veal
fruit
* depending on model and options
11
2 Safety instructions and warnings
Disposal notes
The packaging is made of recyclable materials.
- Corrugated board/board
- EPS moulded parts
- Polythene sheets
- Polypropylene straps
W Keep packaging materials away from children polythene sheets and bags can cause suffocation!
W Please return the packaging to an official collection point.
Your old appliance: This contains some
reusable materials and should be disposed of
properly - not simply with unsorted household
refuse.
W Discarded appliances should be disabled:
Remove the plug, cut through the connection
cable and render the catch unusable so that
children cannot become trapped inside.
W Ensure that the refrigerant circuit is not damaged when
the appliance that is no longer needed is
taken away for disposal.
W Details of the refrigerant can be found on the type plate.
W Appliances which are no longer needed must be disposed of in a professional and appropriate way, in accordance with the current local regulations and laws.
Technical safety
W To prevent injury or damage to the unit, the appliance should only be transported wrapped and
set up by two people.
W The refrigerant R 600a is environmentally friendly but flammable.
W Do not damage the refrigerant circuit pipes. Splashes of
refrigerant can harm your eyes or ignite.
W If refrigerant escapes, remove all naked flames or sources of ignition in the vicinity of the leak, disconnect the
appliance from the mains and ventilate the area well.
W In the event that the appliance is damaged, contact the
supplier immediately before connecting to the mains.
W To guarantee safe operation, ensure that the appliance
is set up and connected as described in these operating
instructions.
W In the event of a fault, disconnect the appliance from the
mains: disconnect mains plug (do not pull on the connection cable) or trigger or unscrew fuse.
W Any repairs and work on the appliance should only be
carried out by the customer service department, as unauthorised work could prove highly dangerous for the user.
The same applies to changing the mains power cable.
Safety during use
WDo not store explosives or sprays using combustible propellants such as butane, propane, pentane, etc. in the appliance. Electrical components
might cause leaking gas to ignite. You can identify
such sprays by the printed contents or a flame
symbol.
W Only store high-percentage alcohol in tightly sealed,
upright containers.
W Do not allow naked flames or ignition sources to enter the
appliance.
W Do not use electrical appliances inside the appliance (e.g.
steam cleaners, heaters, ice makers, etc.).
W Do not stand on the plinth, drawers or doors or use them
to support anything else.
W This appliance is not intended for use by persons (including
children) with reduced physical, sensory or mental capabilities or lack of experience and knowledge unless they have
been given initial supervision or instruction concerning use
of the appliance by a person responsible for their safety.
Children should be supervised to ensure that they do not
play with the appliance.
W Avoid prolonged skin contact with cold surfaces or chilled/frozen food. This could cause pain, numbness and
frostbite. In the case of prolonged skin contact, protective
measures should be taken, e.g. gloves should be worn.
W Do not consume food which has been stored for too long,
as it could cause food poisoning.
WSpecial-purpose lamps (incandescent lamps, LEDs,
fluorescent tubes) in the appliance serve to illuminate the
appliance interior and are not suited for room illumination.
12
Setting up
W When setting up/fitting ensure that the refrigerant circuit
pipes are not damaged.
W Once in position, use a 10 spanner to adjust the
feet so that the appliance is level and does not wobble.
WStandard EN 378 specifies that the room in which
you install your appliance must have a volume of 1 m3 per 8 g
of R 600a refrigerant used in the appliance, so as to avoid the
formation of inflammable gas/air mixtures in the room where
the appliance is located in the event of a leak in the refrigerant circuit. The quantity of refrigerant used in your appliance
is indicated on the type plate on the inside of the appliance.
W Always position the appliance directly up against the
wall.
W The ventilation grilles should not be obstructed. Please note the appendix concerning
installation instructions.
W Condensation may form on the outside of the refrigerator/freezer during periods of high humidity.
Constant ventilation of the installation site is recommend.
WDo not place heat-emitting appliances, e.g. microwave
oven, toaster, etc., on top of the refrigerator or freezer.
W In order to avoid the risk of fire, do not place any burning
candles, lamps or other objects with open flames on the
refrigerator/freezer.
W Fire hazard due to dampness!
If live parts or the mains lead become damp this may
cause short circuits.
- The appliance is designed for use in enclosed areas. Do
not operate the appliance outdoors or in areas where it is
exposed to splash water or damp conditions.
W CAUTION! Risk of injury and danger of damage as a
result of incorrect transport!
- Transport the appliance in a packed condition.
- Transport the appliance upright.
- Do not transport the appliance without assistance.
W The appliance may be moved only when it is empty.
Connecting to the mains
Power supply (AC) and voltage
at the operating point must comply with the details on
the rating plate, which is located on the inside left of
the appliance, next to the vegetable bins.
W Connect the appliance with a properly earthed fused
plug and socket only.
W The socket must be fused with a 10 A fuse or higher, it must
be away from the rear of the appliance and must be easily
accessible.
WDo not connect the appliance to the supply with other equipment using a distribution outlet - risk of overheating.
WWhen removing the mains cable from the back of the appliance,
remove the cable holder as well so as to avoid vibration noise.
The wires in the mains lead are coloured in accordance with
the following code:
green/yellow = earth,
blue = neutral,
brown = live.
Warning! This appliance must be earthed.
Non-rewireable plugs BS 1363
If this machine or appliance is fitted with a non-rewireable plug,
the following information applies: If the socket outlets are not
suitable for the plug supplied with this product, it must be cut
off and an appropriate plug fitted. The plug cut from the flexi-ble
cord should be disposed of and on no account be inserted into a
13 A socket elsewhere in the house (electric shock hazard).
The fuse cover must be re-fitted when changing the fuse, and if
the fuse cover is lost the plug must not be used until a suitable
replacement is obtained. The colour of the correct replacement
cover is that of the coloured insert in the base of the plug, or the
colour that is embossed in words on the base of the plug (as
applicable to the design of the plug fitted).
The correct rating of the replacement fuses that are ASTA approved to BS 1362 should be fitted. Replacement fuse covers
may be purchased from your local electrical suppliers, electricity showroom or approved service agent.
3 Putting into operation and controls
Temperature setting display, Fig. A1/36
- The illuminated temperature setting display indicates
operation of the appliance.
- Temperature ranges are allocated to the individual LEDs.
They indicate the selected setting of the refrigerating/
freezing temperature.
You are advised to clean the appliance before switching it on
for the first time (see "Cleaning").
Put the appliance into operation approximately 4 hours before loading with frozen food for the first time. Only insert
frozen food when the freezer compartment is cold.
Switching the appliance on and off
- Fig. A1: With the main On/Off control 1 you always
switch the complete appliance on or off, freezer and
refrigerator compartment.
Audible warning signal,
red visual warning LED
Fig. A1/4: The audible warning signal and the red visual
warning LED help you to protect the frozen food and to save
energy.
W The buzzer is switched off by pressing the audible warning on/off button 4,
- and automatically when the sufficiently low storage temperature has been reached again or
- when the door is closed.
W Switching on: Turn On/Off controls 1 and 5 with a
coin, so that the temperature setting displays 3 and 6
flash/light up.
- The refrigerator compartment is switched on when the
temperature setting display 6 is lit and the inside lamp is
on.
- The freezer compartment is switched on when the temperature setting display 3 is lit.
- When operating for the first time the warning LED lights
up and the audible alarm is turned off.
For more information, see section "Audible warning
signal, red visual warning LED".
Door alarm
- This always sounds when the refrigerator or freezer door
is open for more than approx. 60 sec.
The sound shut-off is active as long as the door is open.
When the door is closed, the alarm function is automatically activated again.
W Switching off the complete appliance: Turn the slot of
the main On/Off control 1 with a coin right back to position "0", so that the temperature setting displays are unlit.
The refrigerator and freezer compartment are switched
off.
W If you want to switch off only the refrigerator compartment, turn only the On/Off control 5 back to "0", so that
the temperature setting display of the refrigerator compartment 6 and the inside lamp are unlit. The temperature setting display of the freezer compartment 3 must
be lit.
Possible causes are:
- warm fresh food was inserted for freezing,
- when rearranging and removing frozen food, too much
warm air entered.
Temperature alarm
- This always sounds when the freezing temperature is not
cold enough (depending on the temperature setting).
- At the same time the red visual warning LED flashes.
The red visual warning LED continues to flash until the
alarm state is ended.
Setting the temperature
W Fig. A1: Turn temperature controls 1 and 5 with a coin
until the LEDs 3 and 6 of the required temperatures
are lit. The positions of the slot mean:
1st dot
= warmest temperature,
lowest refrigerating capacity
max.
= coldest temperature,
highest refrigerating capacity
W Recommended temperature setting:
- For the refrigerator compartment: 5 °C
- For the freezer compartment: -18 °C
During setting, the LED of the set temperature flashes.
NB: Please note that the temperature inside the appliance
is affected by the frequency with which the door is opened,
how full the appliance is and the room temperature at the
place where the appliance is installed.
The control is to be readjusted according to the temperature
required.
* depending on model and options
13
4 Refrigerator compartment
Arrangement of food
Due to the natural air circulation in the refrigerator compartment, different temperature ranges result, which are
beneficial for the storage of different foods. Just above the
vegetable bins and at the back of the refrigerator, the air is
colder, ideal for raw meat or cold meats; at the top front of
the compartment and in the door, the air is warmer, making
it ideal for cheese and for spreadable butter.
Notes on refrigerating
- Store food so that the air can circulate freely; do not place
items too close together. Do not cover the ventilator air
slots* on the rear wall - improtant for refrigerating capacity!
- Always keep foods which easily give off or take on odours
or flavours, and liquids, in closed containers or covered.
- Always store food which gives off or is sensitive to ethylene gases such as fruit, vegetables and salads separately
or wrapped in order not to affect their storage life; e.g. do
not store tomatoes together with kiwis or cabbage.
Example of food arrangement
Fig. B
butter, cheese
eggs
cans, drinks, bottles
preserves, baked goods
dairy products
coldest zone of refrigerator compartment:
sensitive foods, meat/sausages, fish, raw milk products,
convenience foods
7 fruit, vegetables, salad
1
2
3
4
5
6
Note
- Place food inside the appliance as shown in the diagram.
This allows the appliance to save energy during operation.
- Shelves, drawers and baskets are arranged for optimum
energy efficiency on delivery.
Refrigerating with fan*, fig. C/7
This achieves a relatively even temperature distribution over
at all storage levels; all foods are equally cool, at an adjustable temperature. Due to the enforced air circulation, the
various temperature ranges of normal operation are raised.
It is generally recommended:
- with high room temperature (above approx. 30 °C),
- with high humidity, e.g. on summer days.
W Switching on/off: Press fan switch 7.
I = on, 0 = off.
Note:
- When fan is switched on, power consumption is increased.
- To save energy, the fan switches off automatically when
the door is open.
The interior light
switches off automatically when door is open for more than
approx. 15 minutes. If the lamp does not light up when the
door is opened briefly, but the temperature setting display
does, the light bulb may be defective.
Replacing the bulb:
WLight-bulb specifications: max. 25 W, power supply and
voltage should match the details on the rating plate. Only
use light bulbs with the same dimensions, fitting: E 14.
W Switch off the appliance. Disconnect mains plug or trip
or unscrew fuse.
W Push the sides 1 of the lamp cover together according to
Fig. F1, unlatch and detach 2.
W Replace the light bulb according to Fig. F2. When inserting
the new bulb, make sure the seal is correctly positioned in
the socket.
W Attach the cover at the rear again and lock into place on
sides.
14
* depending on model and options
5 Freezer compartment
Making ice-cubes
W Always provide packaging with date and contents and do
not exceed the recommended storage time of the frozen
food, in order to prevent reductions in quality.
WAlways package food which you freeze yourself in suitable portions for your household. So that the food freezes
quickly through to the core, the following quantities per
package should not be exceeded:
- Fruit and vegetables up to 1 kg,
- meat up to 2.5 kg.
W After wasing and portioning, blanch vegetables (immerse
in boiling water for 2-3 minutes, then remove and cool
in cold water). If blanching with a steamer or microwave,
observe the relevant instructions).
W Do not salt or season food and blanched vegetables
before freezing. Only lightly salt and season other foods.
The intensity of flavour of certain seasonings changes.
W Do not freeze bottles and tins containing carbonated
beverages, as otherwise they may burst.
WFill the ice-cube tray* threequarters full with water and
freeze. The ice-cubes can
be removed from the tray by
twisting or by holding upside
down for a short time under
running water.
SuperFrost
The fresh foods should be frozen to the core as quickly as
possible and frozen foods already stored be given a "cold
reserve". This is enabled by the SuperFrost
system. This is the best way of maintaining the nutritional
value, appearance and flavour of frozen foods.
W The maximum amount of fresh food which can be frozen
in 24 hours is shown on the rating plate ("Freezing capacW For storage: The individual storage tray can support
ity ... kg/24h"), pos. 4. The maximum quantity of frozen
max. 25 kg of frozen goods.
food varies according to model and climatic class.
W VarioSpace: By removing the 2nd and 3rd draw and the
storage tray, you obtain the storage space for bulky goods
Freezing with SuperFrost
equivalent to two drawer heights. Poultry, meat, large
Fig. A1/2
game pieces and tall baked goods can be frozen whole
W Press SuperFrost button 2 briefly, so that the
and further prepared in one piece.
LED lights up.
W If you wish to use the max. holding capacity, you can
- The freezing temperature decreases, the appliance works
remove the drawers and store the frozen goods directly
with the greatest possible freezing capacity, at the same
on the storage trays .
time the -32 °C-LED lights up.
- Only the bottom draw must always be left
W With a smaller amount of food to be frozen, wait/prein the appliance.
freeze for approx 6 hours - normally sufficient, with the
- When the top drawer is removed, do not
maximum quantity, see freezing capacity on rating plate,
cover the fan air slots on the back. This is
approx. 24 hours.
important for proper functioning!
W Then insert the fresh food, preferably in the upper bins.
- Removing drawers, fig. G1:
- switches off automatically after approx. 65 hours. The
pull out to stop position and lift up at front.
freezing process is complete,
- Removing storage tray, fig. G2:
- the SuperFrost- and the -32°C-LED are unlit, the appliremove 2nd and 3rd drawer, lift storage
ance works again in energy-saving normal mode of the
tray up at front and pull out.
last temperature setting.
To insert: simply push storage tray in,
W In order to reach the maximum freezer performance,
snap into position at front.
warm food must be placed directly on the shelves, not in
W For defrosting, always only remove as much as will be
the drawers, or stored in direct contact to the inner side
needed immediately. Defrosted food should be used to
walls.
prepare
a meal as soon as possible.
Note: You do not have to switch SuperFrost on:
You can defrost frozen food:
- when inserting already frozen foods,
- in the oven/fan-assisted oven
- when freezing up to approx. 2 kg of fresh food daily.
- in the microwave
- at room temperature
- Defrosted flat meat and fish portions can be heated up.
Notes on freezing and storage
- Vegetables can be prepared in a frozen state (at half
W As a guideline for the storage time, the following applies
cooking time as fresh vegetables).
to various foodstuffs in the freezer compartment:
Ice cream
2 to 6 months
Bread, cakes and pastries
2 to 6 months
Sausage, ham
Game, pork
Fish, oily
Fish, lean
Cheese
Poultry, beef
Vegetables, fruit
2 to 6 months
6 to 10 months
2 to 6 months
6 to 12 months
2 to 6 months
6 to 12 months
6 to 12 months
W Suitable packing materials are conventional freezer
bags, reusable plastic, metal and aluminium containers.
W Do not allow fresh food to be frozen to come into contact
with food already frozen. Always insert packaging in a dry
condition to avoid packaging freezing together.
* depending on model and options
15
6 Defrosting, cleaning
7 Troubleshooting
Defrosting
Your appliance is designed and manufactured in such a way
as to provide fault.free operation and a long service life.
Nevertheless, if a fault should occur during operation, please check whether the fault is due to incorrect operation. In
this case we have to charge you for any costs incurred also
within the warranty period.
You can eliminate the following faults yourself by checking
the possible causes:
The NoFrost system defrosts the appliance automatically.
In the refrigerator compartment
The defrost water is evaporated by the heat from the compressor; drops of water on the rear wall are perfectly normal.
W Ensure that the defrost water can flow freely through the
drain hole in the rear wall (arrow in fig. A).
In the freezer compartment
The moisture produced accumulates on the evaporator, is
periodically defrosted and evaporates.
Due to the automatic defrosting principle, the freezing compartment remains free of ice at all times, no work or time is
required for manual defrosting.
Cleaning
W Before cleaning, always switch off the appliance. Disconnect from the mains or un-screw
or switch off the fuse.
W Wash shelves, glass plates and other options by
hand.
W Clean the outer walls, inside and equipment by hand with
lukewarm water and a little detergent. Because of the risk
of injury and damage to the appliance, steam cleaning
equipment should not be used.
W Do not use abrasive sponges or scourers, do not use
concentrated cleaning agents and never use cleaning
agents containing sand, chloride or acid or chemical
solvents, as these would damage the surfaces and could
cause corrosion.
W We recommend using a soft cloth and an all-purpose
cleaner with a neutral pH value. Only use food safe cleaning materials inside the appliance.
W For stainless-steel appliances*:
- Clean the side panels and door surfaces with a clean
and soft cloth. If necessary, use a moist cloth (water +
detergent). Alternatively, use a micro-fibre cloth.
W Ensure that no cleaning water penetrates into the electrical components, drain gulley* or ventilation grilles. Wipe
the appliance dry.
W Do not damage or remove the type plate on the inside of
the appliance. It is very important for servicing purposes.
W Clean the drain hole on the rear
wall above the vegetable bins
regularly, fig. A, arrow.
If necessary, clean with a thin
object, e.g. a cotton swab or
similar.
W Ensure that none of the wires or other components are
dislodged, bent or damaged.
W Then connect/switch on the appliance.
If the appliance is to be left switched off for any length of
time, empty the appliance, disconnect from the mains, clean
as described above and leave the door open so as to avoid
odours.
16
Fault
possible cause and remedy
Appliance not working, display is unlit
- Is the appliance switched on properly?
- Is the mains plug properly inserted in the socket?
- Is the socket fuse intact?
The interior light does not come on
- Is the refrigerator compartment switched on?
- Was the door open for longer than 15 min.?
- The bulb is defective. Change the bulb as described in
"Interior light".
Loud running noise
- Is the appliance standing firmly on the floor, or does the
compressor cause nearby items of furniture or objects to
vibrate?
If necessary, move the appliance slightly, align by adjusting the adjustable feet, or move bottles and containers
apart.
- The following are normal:
Flow noises, bubbling or dripping, coming from the
coolant in the refrigerating circuit.
A soft clicking sound, this always occurs when the refrigeration unit (the motor) switches on or off automatically.
Motor noise; this will be slightly louder for a brief period
when the refrigeration unit switches on. When SuperFrost
is switched on, fresh food is inserted, or when the door is
open for a long time, the refrigerating capacity increases
automatically. A deep humming sound occurs due to air
flow noises of the fan.
Alarm sounds, red visual warning LED flashes,
temperature is not low enough
- Were too large quantities of fresh food inserted without
SuperFrost? (see section "SuperFrost")
- Does the door close properly?
- Is the appliance sufficiently well ventilated?
Clear ventilation grilles if necessary.
- Is the ambient temperature too hot? (See "Safety regulations")
- Has the appliance been opened too often or left open too
long?
- If applicable, wait until the appliance reaches the required
temperature itself.
Customer service and type plate
If none of the above causes applies and you cannot
eliminate the fault yourself or if more than one LED
is flashing, please contact your nearest after-sales service
point (see list attached).
Please state the
appliance designation 1,
service number 2,
appliance number 3
of the rating plate (see fig.),
and which LED displays
are flashing so as to ensure
rapid, accurate servicing.
The rating plate is located
inside the appliance on the
left-hand side.
Keep the appliance closed until the after-sales service tech
nician arrives in order to prevent further loss of refrigeration.
* depending on model and options
8 Instructions for installation and modification
Before reading, please fold out the
reference page with the illustrations
at the back.
The external dimensions of the appliance can be seen on
fig. S.
Do not install the appliance side-by-side with another refrigerator or freezer. This is important to prevent condensation
and consequential damage from it.
Changing over door hinges
Fig. T: You can change over the door hinges if necessary.
Follow the order of the positions illustrated in fig. T/T1.
Insertion into row of kitchen units
Fig. U: The appliances can be installed in a row of kitchen
units. To adapt the height of the appliance to the surrounding
furniture a top unit 1 can be added.
A gap of at least 50 mm depth must be provided behind and
along the entire width of this unit so as to ensure sufficient
ventilation. The area of ventilation underneath the ceiling
should be at least 300 cm2. The greater the area the more
economically the appliance will run.
WWhen setting up the appliance next to a wall 4, a minimum distance of 30 mm must be provided on the hinge
side between the appliance and the wall.
1
3
top unit
kitchen unit side panel
2
4
refrigerator/freezer
wall
All types and models are subject to continuous improvement
and the manufacturer therefore reserves the right to make
modifications in the shape, equipment and technology.
17