1
Doro Comfort 4005
English
1
2
3
4
5
6
7
8
9
16
17
22
10
18
23
11
19
12
13
14
20
21
15
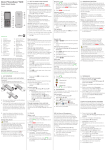
Corded Base station and DECT handset
1. Hanging peg for wall mounting
2. Menu key/OK
3. LED
4. Clear/Back/Mute
5. Call log/Phonebook
6. Delete message
7. Next message
8. Previous message
9. Play/Stop
10. Recall
11. Answering machine On/Off
12. Volume/V = Call log
13. Extra amplification (boost)
14. Speaker
15. Speed dial
16.
17.
18.
19.
20.
21.
22.
23.
24.
25.
26.
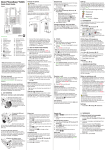
v /Call log
Left menu key/OK
Call key
V /Redial
Keypad lock
Speaker
Right menu key/Back/Internal call
End call/Switch On/Off handset
Ringer on/off
Recall
Phonebook
24
25
26
English
Contents
Installation ........................................................................................................ 1
Base station connection ................................................................................. 1
DECT Handset connection .............................................................................. 1
Base station – basic setup .............................................................................. 1
DECT Handset – basic setup ........................................................................... 1
Operation .......................................................................................................... 2
Base station – The display .............................................................................. 2
Base station – LED ....................................................................................... 2
Making a call ............................................................................................... 2
Mute .......................................................................................................... 3
Volume control ............................................................................................. 3
Temporary silent mode................................................................................... 3
Entering text................................................................................................ 4
DECT Handset – Keypad lock .......................................................................... 4
DECT Handset – Power on/off ......................................................................... 4
DECT Handset – Silent/Ringer off .................................................................... 4
Phonebook .................................................................................................. 4
Base station – Speed dial ............................................................................... 5
Caller ID, CALL LOG / CALL LIST .................................................................... 5
Settings ............................................................................................................ 6
DECT Handset settings (HS SETTINGS) ............................................................ 6
Base station settings (SETTINGS or BS SETTINGS) ............................................. 6
Expanded system (two or more DECT handsets) .................................................. 7
Answering machine ............................................................................................. 8
Setup from DECT handset .............................................................................. 8
Use from base station.................................................................................... 9
Outgoing message......................................................................................... 9
Personal message (MEMO) ............................................................................. 10
Screening ................................................................................................... 10
Out of memory ............................................................................................. 10
Remote access ............................................................................................. 10
Others .............................................................................................................. 11
Battery ....................................................................................................... 11
Range ........................................................................................................ 11
Eco Functionality.......................................................................................... 11
Troubleshooting ............................................................................................ 12
Care and Maintenance ................................................................................... 12
Warranty ..................................................................................................... 13
Specific Absorption Rate (SAR) ....................................................................... 13
Declaration of Conformity ............................................................................... 13
English
Installation
This device is intended for the analogue telephone network lines in AT, BE, BG, CH, CY,
CZ, DE, DK, EE, ES, FI, FR, GB, GR, HU, IE, IS, IT, LV, LT, LU, MT, NL, NO, PL, PT, RO,
SI, SK, SE.
Base station connection
1.
2.
3.
4.
5.
Connect the curly cord to the handset and to the socket marked q on the unit.
Connect the mains adapter to an electrical wall socket and to the socket marked y on
the unit.
Connect the telephone line cord to a network wall socket and to the socket marked
K on the unit.
Lift the handset and listen for the dial tone.
Position the cables in the grooves underneath the unit.
Note!
Use the telephone line cord supplied, an existing line cord from a previous phone may not
be compatible.
DECT Handset connection
1.
2.
3.
Connect the mains adapter to an electrical wall socket and to the socket markedy on
the base.
Insert the batteries 2 x 1.2 V AAA 400 mAh NiMH into the handset in accordance
with the markings.
Place the handset in the charger (24 hours the first time).
Base station – basic setup
Before using the phone the first time, the following basic settings should be made.
The phone will return to standby mode after 30 seconds.
1.
2.
3.
4.
5.
6.
7.
8.
9.
Press =/O on the base station.
Select LANGUAGE/LANGUAGE using v or V . Press =/O.
Select ENGLISH. Press =/O.
Select DATE & TIME. Press =/O.
Select TIME FORMAT. Press =/O.
Select 24 HR or 12 HR. Press =/O and press C/
to return.
Select SET CLOCK. Press =/O.
Select year using v or V . Press =/O.
Repeat step 7 to set month, date, hour, minute.
Press C/
to exit the menu.
DECT Handset – basic setup
LANGUAGE
1.
2.
3.
4.
5.
Press
.
Use v /V to reach HS SETTINGS/HS SETTINGS. Press OK.
Select LANGUAGE. Press OK.
Select ENGLISH. Press OK.
Press L to exit the menu.
1
English
DATE & TIME
Note!
If the DATE & TIME setup already is done on the Base station, the DECT handset displays
the same data.
1.
2.
3.
4.
5.
6.
7.
Press
.
Use v /V to reach HS SETTINGS. Press OK.
Select DATE & TIME. Press OK.
Select SET TIME. Press OK.
Enter current time. Press OK.
Select SET DATE. Press OK.
Enter current date. Press OK.
Note!
You need to set the correct date and time to gain full functionality.
Operation
Pressing q and L on the DECT handset is the same as lifting and hanging up the
handset on the corded phone (base station).
Base station – The display
In standby mode the date and time is indicated on the display, the total number of calls that
have been stored in the Call list memory, and the number of new calls.
Call timer
During a call HH:MM:SS is displayed, indicating the call duration.
Base station – LED
The LED on the base station displays the following:
LED
LED
LED
LED
•
•
•
•
on = Answering machine on
off = Answering machine off
flashes every 1 second = New message
flashes rapidly = Incoming call
Making a call
Regular dialling
1.
2.
Lift the handset or press q.
Enter desired phone number.
Pre-dialling
Allows you to enter and change a phone number before it is dialled.
1.
2.
Enter desired phone number. Delete with C.
Lift the handset to dial. Hang up or press L to end the call.
Note!
If auto answer is enabled, the call is answered when you pick up the handset from the charger,
see DECT Handset settings (HS SETTINGS), p. 6 .
2
English
Redialling
Press V OR r . Select among the 10 most recently dialled numbers. If the number is
already in the phonebook, the corresponding name will also be displayed. Press q to call
the displayed entry, or OK for a submenu, see Phonebook, p. 4 .
Handsfree dialling
1.
2.
Press , handsfree function is activated.
Enter desired phone number.
3.
Press
to terminate the call.
Note!
If you wish, you can switch between handset and handsfree mode by simply pressing or lifting
the handset. Please remember that in handsfree mode it is only possible for one person at a
time to talk. The switch-over between speaker and microphone is automatic. It is therefore
essential that there are no loud noises, e.g. music, in the immediate vicinity of the phone,
as this will disrupt the handsfree function.
Call during an outage
The base station can make call with the corded handset when the mains AC power is
disconnected.
IMPORTANT!
It is not possible to dial stored numbers when the mains power is off. You can answer incoming
calls with the corded handset.
Mute
Switch on/off the microphone during a call with C.
Volume control
Adjust the volume during a call with v or V . The volume level is indicated on the display.
When you end the call, the setting will remain at the last selected level.
To switch between handset/speaker on DECT handset press
. When activated
is displayed.
Note!
In speaker mode, it is only possible for one person at a time to talk.
Extra amplification (boost)
to activate amplification. The amplification is deactivated at the end
Press the button
of each call to avoid harming people with normal hearing.
WARNING
The base station handset volume can be turned up very loud. The amplification should only be
used by people with impaired hearing ability.
Temporary silent mode
When someone calls, you can press C to turn off the ring signal.
3
English
Entering text
Press each numerical key repeatedly until the desired character is displayed, then wait a few
seconds before entering the next character. Press C to delete. Press 1 to add space. Press
and hold C to delete the entire text string. Use L (several times) to exit the menu.
DECT Handset – Keypad lock
is displayed. Incoming calls can
Press and hold * to activate/deactivate. When activated
be answered by pressing q even if the keypad is locked. During the call, the keypad is
unlocked. When the call is ended or rejected, the keypad is locked again.
DECT Handset – Power on/off
Press and hold L in standby to power on/off the handset.
DECT Handset – Silent/Ringer off
Press and hold # in standby to turn on/off the handset ring signal, see DECT Handset
is displayed.
settings (HS SETTINGS), p. 6 . When ringer is deactivated
Phonebook
The phonebook on base station and DECT handset are separate. They will both store 50 sets
of names and phone numbers. Contacts in the phonebook are arranged alphabetically.
If you subscribe to a caller ID service, the name allocated to the caller in the phonebook
will be shown for incoming calls. It is possible to choose between various melodies for the
numbers saved in the phonebook (only functions if you subscribe to a caller ID service).
Storing contacts
1.
2.
3.
4.
5.
Press =/O and select PHONEBOOK. Press OK.
Select ADD and press OK.
Enter name. Delete with C. Press OK.
Enter phone number. Delete with C. Press OK.
Use v or V to scroll through the melodies. Press OK.
Phonebook dialling
1.
2.
3.
Press b .
Select contact using v or V . To quick-search in the phonebook, press the corresponding
number key one or more times for the first letter.
Press q or lift the handset to dial displayed number.
Editing contacts
1.
2.
3.
4.
5.
6.
Press =/O and select PHONEBOOK and press OK
Use v or V and select EDIT. Press OK.
Select contact using v or V . Press OK.
Edit name and press OK.
Edit phone number and press OK.
Use v or V to scroll through the melodies. Press OK.
Deleting contacts – Base station
1.
2.
3.
Press =/O and select PHONEBOOK. Press =/O.
Select DELETE Press =/O to confirm. Select contact using v
Or select DELETE ALL . Press =/O.
The display shows CONFIRM ?
4
or V . Press =/O.
English
4.
Press =/O to confirm or C/
to cancel.
Deleting contacts – DECT Handset
1.
2.
3.
4.
Press b .
Select the contact you want to edit. Press
Select DELETE. Press OK.
Or select DELETE ALL. Press OK.
Press OK to confirm.
.
Phonebook status (PB STATUS)
Here you can check how many phonebook entries that are stored and available storage
capacity.
Base station – Speed dial
The base station has 5 speed dialling keys (m1 – m5) that can be used for numbers that are
called frequently, or for emergency numbers.
Storing speed dial numbers
1.
2.
In standby mode, enter the telephone number you want to store.
Press and hold any speed dialling key (m1 – m5) for more than 2 seconds, until you hear
a tone, that indicate that the number has been stored.
Note!
Speed dial numbers can not be deleted. A new stored number always replace an old.
Speed dialling
In standby mode, press any speed dialling key (m1 – m5). The base station will automatically
dial the number in speakerphone mode.
Caller ID, CALL LOG / CALL LIST
Caller ID allows you to see who is calling before you answer and to see who has called in
your absence. If the number is stored in the phonebook, the caller’s name will be displayed.
The calls are stored in sequence. The last 20 incoming answered and unanswered calls are
stored along with the date and time. NEW CALL will be displayed in standby and « in the
list indicates a missed call.
Note!
This function requires a subscription from your service provider. Contact your service provider
for more information.
Retrieving and dialling
1.
2.
Press . Select contact with v /V .
for a submenu.
Press q to dial or press
ADD TO PB
Store number in phonebook.
DETAILS
View the date and time of the call. (only on DECT handset)
DELETE
Delete this number from the call log (not from phonebook).
DELETE ALL
Delete all numbers from the call log (not from phonebook).
5
English
ONLY on Base station: Press =/O and select CALL LOG and press =/O. Use v
select: MISSED, RECEIVED or DIALED. Press =/O.
or V and
Caller ID messages
The following messages will be displayed occasionally:
OUT OF AREA
Unknown number, e.g. international call.
WITHHELD
Information about the number is blocked. Number cannot be displayed.
a
Message indication from your network operator*.
* Only functions in certain countries.
To remove the message indicator: Press v
and then press and hold 4.
Settings
DECT Handset settings (HS SETTINGS)
1.
2.
3.
Press . Select HS SETTINGS. Press OK.
Select desired function e.g. LANGUAGE. Press OK.
Select desired setting. Press OK.
ALARM
is displayed in standby. When the alarm goes
When the alarm is activated
off, a signal will be heard for 45 seconds. The signal can be turned off with
any key. If SNOOZE is activated the alarm will go off again approximately 7
minutes later. Turn the alarm off permanently via the menu or by holding
L down for a few seconds. The volume is determined by the set ringer
level.
RING SETUP
Select ringer signal for INT. RING (internal calls) and for EXT. RING (external
calls).
RING VOLUME
The DECT handset ringer signal can be adjusted.1 = lowest, 5 = highest, or
VOLUME OFF. Press OK to confirm.
TONE SETUP
Any of the following warning tones can be disabled: KEY TONE, BATTERY
TONE and OUT OF RANGE.
LANGUAGE
Language of display texts.
RENAME HS
Text displayed in standby.
HS DISPLAY
Display either name or time in standby.
AUTO ANSWER
The call is answered when the DECT handset is lifted from the base.
DATE & TIME
Setting the date/time. The format of date/time can also be adjusted.
Base station settings (SETTINGS or BS SETTINGS)
1.
2.
3.
Press =/O OR . Select SETTINGS OR BS SETTINGS. Press OK.
Select function e.g RING SETUP OR BS RINGER. Press OK.
Enter desired setting. Press OK.
6
English
BS RINGER
Select ring tone for the base station. Press OK to confirm.
RING SETUP,
RING VOLUME
Base station ringer signal.
Select ringer signal for INT. RING (internal calls) and for EXT. RING (external
calls).
Base station ringer volume.
1 = lowest, 5 = highest, or VOLUME OFF. Press OK to confirm.
The base station’s ringer signal can be adjusted
KEY TONE
Key tone ON or OFF
DELETE HS
To de-register a DECT handset.
FLASH TIME
Recall time.
LONG =New Zeeland.
MEDIUM =France/Portugal.
SHORT =others including UK/AUS.
BS DEFAULT
Resets all base station settings to default.
CHANGE PIN
The code (default 0000) can be changed.
Note!
A de-registered DECT handset can no longer be used with the system!
Expanded system (two or more DECT handsets)
The call number for internal calls will be displayed in standby. The base station should be
positioned centrally so that the coverage area is roughly equal for all DECT handsets.
Register a new DECT handset
All DECT handsets included in the package are already registered to the base station. You
can register up to 5 handsets to one base station.
Note!
This model is GAP (Generic Access Profile) compatible, which means that the handset and
the base station can both be used with most other GAP compatible units irrespective of
manufacturer. However the GAP protocol cannot guarantee that all functions may be accessed.
1.
On Base station: Press =/O. Select REGISTRATION. Press =/O to confirm.
2.
On DECT handset: Press . Select REGISTRATION. Press OK.
Enter PIN code (default code is 0000). Press OK.
If the registration is successful the unit will return to standby within one minute.
3.
Intercom / internal call
1.
2.
3.
Press
or C/
.
On Base station: Use v or V to select the desired DECT handset. Press =/O.
On DECT handset: Enter call number 1-5 for the desired DECT handset or press 7 for
base station. Press 9 to call all units.
A tone will be heard if an external call comes in while an internal call is in progress.
End the internal call and then answer the external call.
Transferring calls/conference between units from DECT Handset
When an external call is connected;
1.
Press
.
7
English
2.
3.
Select INTERCOM. Press OK.
If using more than 2 handsets: Enter call number 1-5 for the desired handset or press
7 for base station. Press 9 to call all units.
To transfer: press L,
for conference: press and hold *.
Transferring calls/conference between units from Base station
When an external call is connected;
1.
2.
Press =/O.
If using more than 2 handsets: Use v
=/O.
To transfer: Hang up
For conference: press =/O.
or V to select the desired DECT handset. Press
Answering machine
When the answering machine is switched on, calls are answered after a set number of rings,
your outgoing message is heard and the caller can leave a message. Total memory capacity is
up to 15 minutes depending on the set sound quality.
Setup from DECT handset
1.
2.
3.
4.
Press . Select ANS. MACHINE. Press OK.
Select TAM SETTINGS. Press OK.
Select desired function. Press OK.
Select desired setting. Press OK.
ANSWER MODE
Select ANS & REC or ANSWER ONLY (caller cannot leave message).
TAM LANGUAGE
Select language for pre-recorded outgoing message.
OGM SETTINGS
Record/listen to outgoing messages.
ANSWER DELAY
Select after how many rings (2 RINGS — 8 RINGS or TIME SAVER) the
call will be answered.
RECORD TIME
Select maximum recording time for each message.
REMOTE ACC.
Select remote access off/on.
COMPRESSION
Higher compression gives longer recording time but reduced sound quality,
LOW = best sound quality but about half memory capacity.
BS SCREENING
Enable/disable the function in base station which is described in chapter
Screening, p.10.
CHANGE PIN
Change remote access code (default code is 0000).
Note!
The TIME SAVER function answers calls after 6 ring signals, until the first new message has
been registered - then the answering machine switches to answering after approximately 2
signals. This is useful when using remote access; if you call up the answering machine and
there is no reply after four rings that means there are no messages recorded and you can
hang up before you are charged for the call.
8
English
Use from DECT handset
New messages are indicated by
starts with new messages.
1.
2.
3.
flashing in the display in standby. Playback always
Press . Select ANS. MACHINE. Press OK.
Select MSG PLAYBACK. Press OK.
During playback following commands are available:
Delete current message.
2
Skip to previous.
4
Stop.
5
Skip forward.
6
Speaker Off/On.
Volume control.
v /V
On/off from DECT handset
1.
2.
3.
Press . Select ANS. MACHINE. Press OK.
Select TAM ON/OFF. Press OK.
Select desired setting. Press OK.
If the DECT handset’s displays
with a steady light the answering machine is switched on.
If there are new messages, the indicator will flash whether the answering machine is off or on.
Note!
Even when answering machine is OFF it will still answer after 10 rings, see Remote access, p.10.
Use from base station
Switch the answering machine on/off.
1
Start playback/Stop playback.
9 /n
/
X
Skip to previous/Skip forward.
Delete current message.
To delete all old messages after playback: Press and hold X until you hear
a beep.
On/off from base station
Press 1 (on the base station) to switch the answering machine on/off and indicated by
the Green LED above the display.
Outgoing message
The outgoing message (max 3 minutes) is heard by incoming callers. There are two separate
outgoing messages, one for ANSWER ONLY (callers cannot leave a message) and one for
normal answering function ANS & REC. Please also select desired answer mode ANSWER
MODE, see Setup from DECT handset, p. 8 .
9
English
1.
2.
3.
4.
5.
6.
Press =/O and select ANS. MACHINE and press =/O to confirm OR Press . Select
ANS. MACHINE. Press OK.
Select TAM SETTINGS. Press =/O / OK.
Select OGM SETTINGS/ANS & REC/ANSWER ONLY. Press =/O / OK.
Select RECORD MESS. Press =/O / OK.
After the long beep you can record your message (speak 20 cm from the handset).
Press =/O / OK. The message will be played back to you.
Note!
A pre-recorded message is used until you make your own recording, and that message can also
be restored if required. To restore this, press C during playback of outgoing message.
Personal message (MEMO)
1.
2.
3.
4.
5.
Press
or =/O. Select ANS. MACHINE. Press OK or =/O.
Select MEMO. Press OK or =/O.
After the long beep you can record your message (speak 20 cm from the handset).
Press OK or =/O. The message will be played back to you.
Memos are played back in the same way as ordinary incoming messages.
Screening
Incoming messages will be heard on the loudspeaker of the base station as they are received.
If nothing can be heard, check that the volume is turned up and that the function has been
activated, see Setup from DECT handset, p. 8 . You can also press OK on the DECT handset
while recording is in progress. The call can be intercepted by pressing q or lifting the
receiver of another phone connected to the same line.
Out of memory
The memory has room for up to 59 messages (including the outgoing message) max. 15
minutes depending on the compression you set. When TAM FULL is displayed, no new
messages can be recorded until the old ones have been played back and deleted. In that
case, the answering machine responds with the outgoing message for Answer Only.
Note!
Remember to delete messages regularly!
Remote access
The answering machine can be remotely accessed using an ordinary tone dial phone.
1.
2.
3.
4.
Call the answering machine (the number that your answering machine is connected
to, usually your home number).
Press * when the outgoing message is played.
Enter PIN code (default code is 0000), see Setup from DECT handset, p. 8 .
Select remote access command(s):
2
4
Delete current message
Press once to repeat current message. Press twice to skip to previous
message.
10
English
Playback of messages.
5
Skip forward
6
Turn the answering machine ON
7
Stop
8
Turn the answering machine OFF
9
Note!
Using a PIN code prevents other people from accessing your machine without permission. For
security reasons, it is recommended that you change the PIN code from the default setting of
0000, see Base station settings (SETTINGS or BS SETTINGS), p. 6 .
Others
Battery
CAUTION
Risk of explosion if battery is replaced by an incorrect type. Use only original batteries. The
use of non-original batteries may be dangerous and may invalidate the phone’s guarantee.
When the batteries are relatively new they will last for approximately 100 hours standby time
or approximately 10 hours call time. Full battery capacity will not be reached until the
batteries have been charged 4–5 times. It is not possible to overcharge or damage the
batteries by charging them for too long. It may take up to 10 minutes charging before display
illuminates, if batteries are totally empty.
When the batteries are running low,
will flash and a warning tone will be heard when a
call is in progress. The warning tone is optional, see DECT Handset settings (HS SETTINGS),
p. 6 . The battery charge indicator
in the display will flash as long as the handset is
charging. In order to save the batteries, the display is very dark on standby, press L once
to illuminate. To save power, speaker and the display light ceases to operate at low battery
strength. When the battery is low or when there is too great a distance to the base station
the phone will be unable to connect to a line. Do not place the base station close to other
electrical equipment, this is to minimize the risk of any interference. It is normal for the
device to become warm during charging and this is not dangerous.
Range
The telephone’s range depends on whether or not the radio waves carrying the call are
restricted by obstacles in their path, and is usually between 50 and 300 metres. Coverage
can be improved by turning one’s head so that the handset is aligned with the base unit.
Sound quality declines as the limit is reached until the call is finally interrupted.
Eco Functionality
We have introduced the ECO FUNCTIONALITY label to help customers identify products
within our assortment having a lower impact on the environment. Products carrying this
label feature:
•
•
Reduced power consumption in both operational and standby.
Adaptive transmission power depending on range on base station.
11
English
Troubleshooting
Check that the telephone cord is undamaged and properly plugged in. Disconnect any
additional equipment, extension cords and other phones. If the problem is resolved, the fault
is with some other equipment.
Test the equipment on a known working line (e.g. at a neighbour’s house). If the equipment
works there the fault is probably with your telephone line. Please report this to your network
operator.
No number shown when ringing
•
This function requires a Caller ID subscription from your service provider.
Warning tone/Not possible to make calls
•
•
The batteries may be running low (charge the handset).
The hand unit may be nearly out of range. Move closer to a base unit.
Phone does not work
•
•
•
Check that the adapter/phone cord is connected correctly.
Check the charge status of the handset batteries.
Connect another functioning telephone to the network wall socket.
Answering machine does not respond to remote access
•
•
Check that you are using a tone dial telephone.
Try holding the keys down longer, approximately 1 second per digit.
Phone continues to ring
•
Some of the telephone’s ringers do not follow the line signal, which means that the
signal may continue for up to 8 seconds after answering a call. Try changing ring signal
(melody).
Answering machine is not answering
•
•
•
Memory may be full. Delete old messages.
Check that the adapter/phone cord is connected correctly.
Check that the answering machine function is turned on.
If the phone still does not work, please contact the place of purchase for service. Don’t
forget the receipt or a copy of the invoice.
Care and Maintenance
CAUTION
Only use batteries, mains adapter and accessories that have been approved for use with this
particular model. Connecting other accessories may be dangerous and may invalidate the
phone's type approval and guarantee. The mains adapter is the disconnect device between
the product and mains power. The mains socket outlet must be close to the equipment and
easily accessible.
Your unit is a technically advanced product and should be treated with the greatest care.
Negligence may void the warranty.
12
English
•
•
•
•
•
•
•
Protect the unit from moisture. Rain/snowfall, moisture and all types of liquid can
contain substances that corrode the electronic circuits. If the unit gets wet, you should
remove the battery and allow the unit to dry completely before you replace it.
Do not use or keep the unit in dusty, dirty environments. The unit’s moving parts and
electronic components can be damaged.
Do not keep the unit in warm places. High temperatures can reduce the lifespan for
electronic equipment, damage batteries and distort or melt certain plastics.
Do not keep the unit in cold places. When the unit warms up to normal temperature,
condensation can form on the inside which can damage the electronic circuits.
Do not try to open the unit in any other way than that which is indicated here.
Do not drop the unit. Do not knock or shake it either. If it is treated roughly the circuits
and precision mechanics can be broken.
Do not use strong chemicals to clean the unit.
The advice above applies to the unit, battery and other accessories. If the unit is not working
as it should, please contact the place of purchase for service. Don’t forget the receipt or a
copy of the invoice.
Warranty
This product is guaranteed for a period of 12 months from the date of purchase. In the
unlikely event of a fault occurring during this period, please contact the place of purchase.
Proof of purchase is required for any service or support needed during the guarantee period.
This guarantee will not apply to a fault caused by an accident or a similar incident or damage,
liquid ingress, negligence, abnormal usage, non-maintenance or any other circumstances
on the user’s part. Furthermore, this guarantee will not apply to any fault caused by a
thunderstorm or any other voltage fluctuations. As a matter of precaution, we recommend
disconnecting the charger during a thunderstorm.
Batteries are consumables and are not included in any guarantee.
This guarantee does not apply if other batteries than DORO original batteries have been used.
Specific Absorption Rate (SAR)
This device meets applicable international safety requirements for exposure to radio waves.
Doro Comfort 4005 measures 0.032 W/kg measured over 10 g tissue.
The maximum limit according to WHO is 2.0 W/kg measured over 10 g tissue.
Declaration of Conformity
Doro hereby declares that Doro Comfort 4005 conforms to the essential requirements and
other relevant regulations contained in the Directives 1999/5/EC (R&TTE) and 2002/95/EC
(RoHS). A copy of the Declaration of Conformity is available at www.doro.com/dofc
13
LAST PAGE
English
Version 1.0
© 2012 Doro AB. All rights reserved.
www.doro.com
REV 4907 — STR 20111208