1
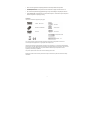
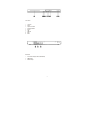
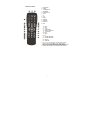
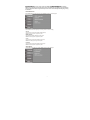
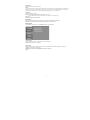
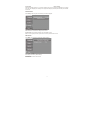
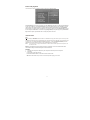
DVD-433K
Introduction Important Safety Instructions .......................................................................................................... 2
Caution .....................................................................................................................................................................3
Features.................................................................................................................................................................... 3
Front Panel and Rear Panel Illustration.................................................................................................................... 4
Remote Control........................................................................................................................................................ 5
Connections.............................................................................................................................................................. 6
Advanced Features System setup.................................................................................................................... 7
MP3/WMA/JPEG/MPEG4 playback........................................................................................................................ 10
Picture CD playback ............................................................................................................................................... 11
USB, Karaoke ........................................................................................................................................................ 11
Others Troubleshooting ....................................................................................................................................... 12
Specifications.......................................................................................................................................................... 13
1
Important Safety Instructions
1) Read these instructions.
2) Keep these instructions.
3) Heed all warnings.
4) Follow all instructions.
5) Do not use this apparatus near water.
6) Clean only with dry cloth.
7) Do not block any ventilation openings, install in accordance with the instructions.
8) Do not install near any heat sources such as radiations, heat registers, stoves or other apparatus (including
amplifiers) that produce heat.
9) Do not defeat the safety purpose of the polarized plug. If the provided plug does not fit into your outlet, consult an
electrician for replacement of the obsolete outlet.
10) Protect the power cord from being walked on or pinched particularly at plugs, convenience receptacles and the
point where they exit from the apparatus.
11) Only use attachments/accessories specified by the manufacturer.
12) Unplug this apparatus during lightning storms or when not used for long periods of time.
13) Refer all servicing to qualified service personnel. Servicing is required when the apparatus has been damaged
in any way, such as power supply cord or plug is damaged, liquid has been spilled or objects have fallen into the
apparatus, the apparatus has been exposed to rain or moisture, when it does not operate normally or has been
dropped.
14) Main plug is used as the disconnect device, the disconnect device shall remain readily operable.
15) The ventilation should not be impeded by covering the ventilation openings with items, such as newspapers,
table-cloth, curtains, etc.
16) No naked flame sources, such as lighted candles, should be placed on the apparatus.
17) Attention should be drawn to the environmental aspects of battery disposal.
18) The use of apparatus in moderate climate is advised.
19) Do not expose the apparatus to dripping or splashing by objects filled with liquids. Vases etc. must not be
placed on the apparatus.
WARNING: To reduce the risk of fire or electric shock, do not expose this apparatus to rain or moisture.
WARNING: The batteries shall not be exposed to excessive heat such as sunshine, fire or otherwise.
The symbol indicates that dangerous voltages constituting a risk of electric shock are present within this unit.
The symbol indicates that there are important operating and maintenance instructions in the literature
accompanying this unit. This symbol indicates that this product incorporates double insulation between
hazardous main voltage and user accessible parts. When servicing use only identical replacement parts.
2
•
Please use the original box and packing materials for safe transportation of this product.
•
It is normal for the cover and rear panel to become warm after the player has been active for an
extended period of time.
•
Do not move this product during playback. Doing so may cause damage to the pickup and the disc.
•
Press OPEN/CLOSE on the front panel or remote control to open or close the disc tray. Do not push or
touch the tray while it is opening or closing.
Features
Disc formats and features supported by this player:
You can help protect the environment! Please remember to respect the local regulations: hand over the
non-working electrical equipments to an appropriate waste disposal center.
This product incorporates copyright protection technology that is protected by U.S. patents and other intellectual
property rights. Use of this copyright protection technology must be authorized by Rovi Corporation, and is intended
for home and other limited viewing uses only unless otherwise authorized by Rovi Corporation. Reverse
engineering or disassembly is prohibited.
The product complies with the Picture CD format and will display Picture CDs.
Manufactured under license from Dolby Laboratories. Dolby and the double-D symbol are trademarks of Dolby
Laboratories.
3
Front Panel
1.
Tray Door
2.
Power
3.
Open/Close button
4.
Play/Pause Button
5.
Sensor
6.
7.
8
LED
USB Port
MIC 1
9
MIC 2
Back Panel
1.
5.1CH Audio output(FL,FR,SL,SR,CEN,SW)
2.
HDMI Output
3.
SCART Output
4
Remote Control
1.
OPEN/CLOSE
2.
POWER
3.
0-9 NUMBER KEY
4.
ZOOM/MENU
5.
SUBTITLE/TITLE
6.
SETUP
7.
UP
8.
LEFT
9.
DOWN
10. REVERSE
11. FORWARD
12. PREVIOUS
13. NEXT
14
MUTE
15
16
17
18
19
USB
GO TO
AUDIO/ANGLE
REPEAT/ PROGRAM
PLAY/PAUSE
20 STOP
21 RIGHT
22 OK
•
•
•
23
VOLUME INCREASE
24
VOLUME DECREASE
25
26
DISPLAY
KARAOKE
Press 4, 5, 17, 18 for more than 1.5s, there will be functions
marked on these buttons(MENU, TITLE, ANGLE, PROG).
Press 4, 5, 17, 18 for less than 1s, there will be functions marked
above these buttons(ZOOM, SUBTITLE, AUDIO, REPEAT).
CONNECT DVD PLAYER TO TV SET WITH SCART SOCKET
5
Connections
•
Connect DVD player to TV set with scart socket
Use the SCART cable to connect DVD player and your TV. Set the [Video Out] to [Composite] or [ RGB].
•
CONNECT DVD PLAYER TO TV SET WITH HDMI CABLE
Use the HDMI cable to connect DVD player and your TV. Set the [Video Out] to [HDMI].
6
System operation
MENU OPERATION
Press the SETUP button on the remote control, the SETUP MENU will be displayed. Use the up/down
buttons for up and down movement through the menu. Press RIGHT direction button to enter the submenu
and press left direction button to go back to the previous menu. Confirm the adjusted settings by pressing
the OK button
LANGUAGE SETUP
Select Language in the setup menu and the Language submenu will be displayed:
OSD Language
Use this item to select the language of the setup menu and screen display.
Subtitle
Use this option to select the default subtitle language.
Note: Not all dvd-players support this option.
MPEG4 Subtitle
Select different MPEG4 subtitle encoding option.
Note: Not all dvd-players support this option.
Audio
Use this option to select the default disc language.
Note: Not al dvd-players support this option.
DVD Menu
Use this option to select the default menu language.
Note: Not all dvd-players support this option
VIDEO SETUP
Select Video in the setup menu and the Video submenu will be displayed:
7
Aspect Ratio
Use this option to select the aspect ratio.
Notes:
The image display ratio is related to the recorded disc format. Some disc can not display images in the aspect ratio
you choose. If you play a disc recorded in 4:3 format on a wide screen-TV, black bars will appear on the left and
right side of the screen. Adjust the screen setting depending on the type of your television..
TV System
Select the desired TV system.
Note: The DVD player setting should be matched to your TV set.
For more information of output format, refer to the instructions of your television.
Video Out
Select the desired video output format.
HD Resolution
After you set the video output to HD output, you can choose the resolution of HDMI output.
Note: the resolution must match with the supported resolution of your television
AUDIO SETUP
Select Audio in the setup menu, and the Audio submenu will be displayed
Analog output
Analog out select 5.1CH or 2.0 CH(select down mix) audio output.
Note: This item is only for 5.1ch player.
Digital output
Adjust the audio output on Coaxial ports to work in perfect harmony with the audio equipment (e.g.receiver,
amplifier) that is connected to the player.
Off Digital audio output is disabled. PCM Transfer stereo 2 channels
signals
8
System Setup
Down sampling
Select down sampling function on or off. (Down sampling is the process of reducing the sampling rate of a signal)
Press ON: down sampling rate will change into a higher level sampling rate audio (more than 96K). OFF: Disable
this function.
RATING SETUP
Select Rating in the setup menu and the rating menu will be displayed:
Parental Control
Personalize the parental control feature of the dvd-player
Note: Password is needed before setting Parental Control.
Set Password Input four digits (password), then press OK to confirm.
Note: To reset forgotten password, please use the universal password 6666 to unlock.
MISC SETUP
Select MISC in the setup menu and the MISC will be displayed
Use Default Settings
Reset setup data to factory default settings.
Screen Saver
Enable/disable the screen saver function.
9
MP3/WMA/JPEG/MPEG4 Playback
The MP3/WMA/MPEG4 disc has the directory structure as shown in the picture above. Press Direction key to
choose the root directory ( the first directory in a hierarchy) and then press the OK button to enter the sub
directory. Use Direction keys to choose the desired track and press OK to play the selected file. To return to the
upper menu, press Direction keys and choose , press OK button to go back to the upper menu. Use direction keys
to enter the play settings menu (right part of the screen). Open option submenu by pressing OK. Select desired
setting and confirm with OK
Option menu
Filter: it allows user to select categories of files displayed in the browser list.
Repeat: it allows user to switch to a different repeat playing mode
Mode: How to select different playing modes:
Normal: Normal playback.
Shuffle: Shuffle mode enabled. When playback reaches the end of the current
chapter/track, playback jumps to a random chapter/track
Music Intro: In this mode, the media will play 10 seconds and then skip to next data.
Edit Mode: Use this option to enable programmed playback mode. Select the mode, press
LEFT Direction key to directory and press OK to choose the desired track
and press Add to program to program the playback list.
Program view: Display directory/folder.
Browser view: Display playback list directory.
Add to program: Use this in combination with Edit Mode to create a playlist.
Clear program: When entered the Browser View and in complete stop state(press STOP
button twice), use this option in combination with Edit Mode to delete
tracks from the playback list.
10
Picture CD playback
The PICTURE CD disc has a directory structure as shown in the following picture.
Press Direction key to choose the root directory ( the first directory in a hierarchy) and then press the OK button
to enter the sub directory. Press the Direction key to choose the desired picture and then press OK to open the
chosen picture. When picture is shown on screen the slideshow will start automatically. Press the Play/Pause
button to pause or to resume playing of the slideshow. To return to the upper menu, press Direction key to choose
the icon and press the OK button. To rotate the image (Image rotation) In the picture play state, press Direction
key to rotate the picture, press ANGLE button to change the picture scan mode.
USB, KARAOKE
USB
Before entering the USB Mode make sure there is no CD/DVD in the tray,(when there is, please remove it). Insert
a USB device or MP3 Player in the USB Interface to play the MP3 music or/and JPEG files. The controls are equal
to playing a disc, see chapter MP3/WMA/JPEG/MPEG4 playback. To open the USB Interface Mode press the
USB button and use the direction buttons to select USB Mode. Enter by pressing OK.
Note:
This system does not support all USB devices. If the file name contains special unknown symbols, the
file cannot be read.
Warning: The USB memory stick should be plugged in the unit directly. Do not use a USB extension cable.
This can lead to failing of data transferring and can cause interference.
KARAOKE
1. Connecting the microphone. Please insert your microphone to the MIC jack on the front panel..
2. Press Start
A. Put the DVD or VCD disc in the tray.
B. Press the KARAOKE button on the remote control to select function.
Note: Please set karaoke off if you want 5.1CH audio output when playing a 5.1CH disc.
11
Troubleshooting
If you have any questions, please consult the troubleshooting guide below.
NO PICTURE OR SOUND
• Ensure the power button is on.
• Ensure the power outlet is
operational.
• Ensure the power cord is not
damaged.
• Ensure the power plug is
connected firmly to the
outlet.
"BAD DISC" DISPLAYED
• Ensure the disc is not distorted,
damaged or deformed.
• Ensure the disc is not badly stained
or damaged.
• Ensure the disc format is
compatible with the player.
• Please check whether you have
tried to play a software CD.
If so, please restart the player.
PICTURE BUT NO SOUND
• Ensure the audio jacks are securely
connected.
• Ensure the audio connector is not
damaged.
• Ensure the volume is turned up in
VOUCH setup.
• Ensure you have set the player's
AUDIO settings correctly.
• Ensure you have entered the
correct AV input for your TV
• Ensure the audio is not set to mute.
REMOTE CONTROL IS NOT WORKING
• Make sure the Main units POWER button is
on
• Ensure the batteries are working.
• Point the remote control directly at the
player's Infra red sensor
• Remove any obstacles between the remote
and the Infra red sensor.
SOUND BUT NO PICTURE
• Ensure the video jacks are securely
connected.
• Ensure you have entered the correct AV
input for your TV
• Ensure the video connector is not damaged.
• Ensure you have set the player's VIDEO
settings correctly.
UNIT NOT WORKING
• Turn off the power, then turn it on again.
POOR PICTURE OR SOUND
• Ensure you have set the player's AUDIO
settings correctly.
• Ensure the disc is not scratched or stained.
• Ensure the AV connector or the output
terminal is not damaged.
"NO DISC" DISPLAYED
• Ensure you have put the disc on the tray.
• Ensure the disc is not upside down.
• Ensure the disc is not distorted, stained or
scratched.
12
Specifications
Power requirements: AC 100-240 Volt, 50/60Hz Power consumption: 15W Video standard: NTSC/PAL Discs
Compatibility: MPEG4,DVD,DVD+/-R/RW,VCD,JPEG.CD-DA,CD-R, CD-RW
Video out
Video out: 1.0V(p-p)/75., sync, negative polarity
Audio out
Audio out level: 2Vrms -1/+0.2 Frequency response: 20Hz to 20kHz S/N ratio: >90dB Total harmonic distortion:
<0.025%
Accessories
Remote Control x 1 User's Manual x 1 Microphone x 2
Note: Specifications are subject to change without notice.
For information and support, www.lenco.eu
13