1
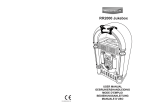
RMC250 6 in 1 MUSIC CENTER
SPANISH
910-284300-0150-100
ENGLISH
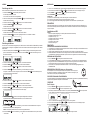
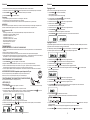
IMPORTANT SAFEGUARDS FOR AUDIO PRODUCTS
PLEASE READ CAREFULLY THE FOLLOWING IMPORTANT SAFEGUARDS THAT ARE APPLICABLE TO
YOUR EQUIPMENT.
1. Read Instructions - All the safety and operating instructions should be read before the
appliance is operated.
2. Retain Instructions - The safety and operating instructions should be retained for future
reference.
3. Heed Warnings - All warnings on the appliance and in the operating instructions should be
adhered to.
4. Follow Instructions - All operating and use instructions should be followed.
5. Water and Moisture - The appliance should not be used near
water-for example, near a bathtub, washbowl, kitchen sink, laundry tub,
in a wet basement, or near a swimming pool and the like.
6. Carts and Stands - The appliance should be used only with a cart or stand
that is recommended by the manufacturer.
6A.An appliance and cart combination should be moved with care. Quick stops, excessive force,
and uneven surfaces may cause the appliance and cart combination to overturn.
7. Wall or Ceiling Mounting - The appliance should be mounted to a wall or ceiling only as
recommended by the manufacturer.
8. Ventilation - The appliance should be situated so that its location or position does not interfere
with-its proper ventilation. For example, the appliance should not be situated on a bed, sofa,
rug, or similar surface that may block the ventilation openings; or, placed in a built-in installation,
such as a bookcase or cabinet that may impede the flow of air through the ventilation openings.
9. Heat - The appliance should be situated away from heat sources such as radiators, heat
registers, stoves, or other appliances (including amplifiers) that produce heat.
10.Power Sources - The appliance should be connected to a power supply only of the type
described in the operating instructions or as marked on the appliance.
11.Grounding or Polarization - Precautions should be taken so that the grounding or polarization
means of an appliance is not impeded.
12.Power - Cord Protection - Power-supply cords should be routed so that they are not likely
to be walked on or pinched by items placed upon or against them, paying particular attention
to cords at plugs, and the point where they exit from the appliance.
13.Cleaning - The appliance should be cleaned only as recommended by the manufacturer.
14.This product is designed for use with the antenna attached and should not be connected to
any other external antennas.
15.Nonuse Periods - The power cord of the appliance should be unplugged from the outlet
when left unused for a long period of time.
16.Object and Liquid Entry - Care should be taken so objects do not fall and liquids are not
spilled into the enclosure through openings
17.Damage Requiring Service - The appliance should be serviced by qualified service personnel
when:
A. The power-supply cord of the plug has been damaged; or
B. Objects have fallen, or liquid has been spilled into the appliance; or
C. The appliance has been exposed to rain; or
D. The appliance does not appear to operate normally or exhibits a marked change
inperformance; or
E. The appliance has been dropped, or the enclosure damaged.
18. Servicing - The user should not attempt to service the appliance beyond that
described in the operating instructions. All other servicing should be referred to
qualified service personnel.
1
ESPAÑOL
ENGLISH
Copiar MP3
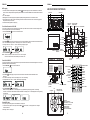
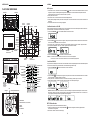
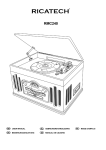
CONTROL LOCATORS
1. En modo C-MP3, USB o tarjeta SD, pulse REC /
para empezar a copiar MP3 desde un CD a USB/SD o USB a SD, o
viceversa. La reproducción se detendrá y el sistema buscará los contenidos del USB/tarjeta SD y creará una carpeta para
guardar la pista MP3.
2. Aparecerá el icono “REC”.
3. Aparecerá el mensaje COPY 01 junto al porcentaje del proceso de copiado en número decimal.
4. El icono del dispositivo correspondiente (“USB” o “CARD”) parpadeará y el número irá aumentando desde 01 hasta que el
proceso se detenga en 100.
5. El MP3 actual se reproducirá desde el principio.
SPEAKER
SPEAKER
STAND BY
INDICATOR
De Phono/Cassette a SD / USB
SD CARD
Este aparato le permite convertir señales de audio desde PHONO a formato MP3 y guardarlos en una memoria USB o
una tarjeta SD (por defecto USB, si se reconocen las dos).
1. Pulse FUNCTION /
VOLUME
UP/DOWN
KNOB
LCD DISPLAY
SENSOR
USB PORT
, para entrar en el modo PHONO.
2. Pulse REC /
, para empezar la grabación, el sistema analiza los contenidos del USB/ de la tarjeta SD y crea una
nueva carpeta para guardar los archivos en MP3.
3. El icono “ REC ” y el mensaje “ RIPP TO” aparecerán en la pantalla, el icono “ PHONO “ parpadeará.
4. El icono del dispositivo seleccionado “ USB ” o “ CARD ” parpadeará al grabar.
FUNCTION
PRESET +
PLAY/PAUSE
PRESET -
STOP/BAND
REPEAT/
STEREO
OPEN/
CLOSE
PROG/CLOCK
EJECT /F.F.
HEADPHONE
JACK
CASSETTE
DOOR
POWER
5. Pulse STOP/BAND /
, para detener la grabación.
Nota: 1.Quite el cassette de la unidad cuando no la utiliza.
2. La función Phono se detiene automáticamente al reproducir un cassette.
TIMER
CD DOOR
REC /
ERASE
UP/FF
DOWN/FB
De AUX a SD/USB
Este sistema puede convertir la señal de audio de la entrada AUX en formato MP3 y almacenarlo en un dispositivo de
almacenamiento masivo USB o tarjeta SD (por defecto USB si ambos dispositivos están conectados).
1. Pulse FUNCTION /
una o más veces para seleccionar AUX
POWER / STAND BY
EQ
EQ
PRESET +
REC
PRESET -
2. Pulse REC /
para comenzar el ripeo, el sistema buscará el contenido del USB/tarjeta SD y creará una carpeta para
3. El icono “REC” y el mensaje “RIPP TO” aparecerán en la pantalla y parpadeará el icono “AUX”.
4. El icono del dispositivo correspondiente ("USB” o "CARD”) empezará a parpadear cuando comience el ripeo.
INTERNAL/
EXTERNAL
SPEAKER
SWITCH
(INT. /EXT)
5. Pulse STOP/BAND /
para salir de esta función.
Nota: Aparecerá el mensaje “NO FUNCT” cuando pulse cualquier botón durante el proceso de ripeo AUX. Aparecerá
el mensaje “NO DEV” cuando no se detecte ni el USB ni la tarjeta SD. Aparecerá el mensaje “FULL” cuando no haya
suficiente memoria libre en el dispositivo seleccionado.
EXTERNAL
ANTENNA
RANDOM
ID3
SLEEP
VOLUME +
FUNC
FUNCTION
VOLUME -
RANDOM
SKIP FORWARD / +
ID3
BAND
REPEAT
PROG
MEM
CLOCK
0
1
2
TIMER
3
4
5
MONO
STEREO
6
7
8
9
AC POWER CORD
0-9
SPINDLE
TURNTABLE
ADAPTER FOR
45 RPM RECORDS
CUE LEVER
Este sistema le permite borrar archivos en MP3 o ficheros ya existentes.
SPEED CONTROL SWITCH (33 1/3, 45,78 RPM)
1. Mantenga pulsado REC /
durante 2 segundos durante el modo de reproducción de USB o tarjeta SD, la pista
actual se detiene y se borra.
2. El mensaje “ delete “ aparecerá en la pantalla.
ARM REST
SECURITY HOOK
TONE ARM
3
PROGRAM
REPEAT
STOP / BAND
SPEAKER JACK
CD OPEN / CLOSE
SLEEP
VOL
PRESET
Borrar archivos en MP3
54
OPEN/
CLOSE
MUTE
REC
PLAY / PAUSE
SKIP BACKWARD -
AUX IN JACK
MUTE
TIMER
MONO/STEREO
ESPAÑOL
ENGLISH
3. Se reproducirá automáticamente la pista 1 de la carpeta raíz (carpeta 1) cuando acabe la lectura de la SD.
or FB /
una o varias veces hasta que aparezca en pantalla el número de pista que desea.
4. Pulse FF /
Setting the clock
5. Pulse PRESET + /
or PRESET – /
para seleccionar el álbum que desee.
6. Pulse STOP/BAND /
para detener la reproducción.
Notas:
1. El puerto USB no soporta conexiones por alargadores de USB.
2. Este aparato no está diseñado para ser conectao directamente a un ordenador.
3. No se garantiza que todas las memorias USB y tarjetas SD sean compatibles con este sistema de audio.
IMPORTANTE:
No desconecte el dispositivo USB mientras esté en modo USB ya que puede dañar el dispositivo o los archivos. Por favor,
apague la unidad o pulse otro modo antes de desconectar el dispositivo USB.
Especificaciones del USB:
Interfaz
-
USB 2.0 gran velocidad, HOST (no soporta HUB USB) correspondiente a memoria Flash
Compatible con USB/SD versión 2.0 FAT32
Compatible con MPEG Audio 1, 2, 2.5
Compatible con Layer 1, 2, 3
Compatible con Bit rate: 128 – 320 Kbps
Niveles de subcarpetas: 8 niveles
Número de pistas / títulos: máx 999
Soporta ID3 tag V2.0
After connecting the system to power supply, set the clock first.
1. Press POWER /
to switch the unit to Standby mode
- The display shows the time
- “0:00” flashes by default if you have not set the clock
2 In the Standby mode, press and hold PROGRAM /
- The hours digit starts flashing
3. Press the FF /
or FB /
over 1 second.
repeatedly to set the hours.
4. Press PROGRAM /
again to confirm.
The minutes digit starts flashing
5. Hold down FF /
or FB /
repeatedly to set the minutes.
6. Press PROGRAM /
again to confirm.
The minutes digit stop flashing, the clock begins to run.
7. Press PROGRAM /
to select between 12 and 24 hours, shown as below
Setting the timer
TOCADISCOS
The unit can be used as an alarm clock, whereby the selected source (CD, TUNER, USB, SD CARD OR PHONO) to
start playback at a preset time. Make sure the clock is set before using the timer.
1. Levante la tapa y quite la brida negra desenrollándola y sacándola con cuidado del BRAZO
2. Saque el cartón protector para el envío
3. Quite la cubierta protectora blanca de la aguja tirando suavemente hacia la parte frontal de la unidad.
4. Libere el BRAZO y pulse suavemente hacia la derecha el clip de sujeción. Así liberará el brazo del SOPORTE.
Cuando mueva la unidad de lugar, vuelva a bloquear el brazo con el clip.
1. In the standby mode, press and hold TIMER /
PREPARACIÓN ANTES DE USAR EL TOCADISCOS
start flashing. Press TIMER /
on the remote over 1 second, icon " " and message” TURN ON”
again on the remote to begin the “SYSTEM POWER ON” timer setting.
FUNCIONAMIENTO DEL TOCADISCOS
1. Pulse FUNCTION /
para ajustar la unidad en modo PHONO.
2. Ajuste el CONTROL DE VELOCIDAD según la velocidad (3, 1/3, 45 ó 78 rpm) del disco seleccionado.
3. Use la PALANCA ELEVADORA para elevar el brazo sobre el soporte. Mueva el brazo sobre el disco y use la palanca
elevadora para bajar el brazo en el punto en el que quiera comenzar la reproducción.
4. Cuando el disco finalice, el BRAZO se detendrá automáticamente. Debe volver a colocarlo manualmente sobre el
SOPORTE.
ACCESORIOS INCLUIDOS: Adaptador para discos de 45 rpm
2. Press FF /
or FB /
3. Press TIMER /
4. Press FF /
repeatedly to set hours.
on the remote to enter minutes setting mode.
or FB /
5. Press TIMER /
repeatedly to set minutes.
on the remote again to begin “SYSTEM POWER OFF” timer setting.
Icon " " and message “TURN OFF” start flashing. Press TIMER /
on the remote again to begin timer setting.
Para reproducir un disco de 45 rpm, saque el adaptador con los dedos pulgar e índice
y tire de él. Colóquelo sobre el EJE. Ya podrá colocar el disco sobre el tocadiscos.
FUNCIONAMIENTO DEL CONECTOR
PARA AURICULARES
6. Press FF /
Para escuchar con auriculares / cascos (no incluidos)
8. Press FF /
REPRODUCTOR DE CD
Reproducción de un CD
1. Pulse FUNCTION /
para ajustar la unidad en modo CD.
2. Pulse CD OPEN / CLOSE
or FB /
7. Press TIMER /
repeatedly to set hours.
on the remote to enter minutes setting mode.
or FB /
repeatedly to set minutes.
on the remote again to begin setting the source from wake up.
9. Press TIMER /
Default at TUNER mode. Message TUNER start flashing.
para abrir el compartimento del CD.
3. Introduzca un disco con la parte impresa hacia arriba. Pulse CD OPEN / CLOSE
de nuevo para cerrar el
compartimento, aparecerá READ mientras el reproductor lee el contenido del disco.
10. Press FUNCTION /
to select wake up source.
The unit will be waked up from last tuned station if TUNER mode is selected.
4. Se reproducirá automáticamente la pista 1 cuando termine la lectura del contenido del CD.
5. Pulse FF /
or FB /
6. Pulse STOP/BAND /
una o varias veces hasta que aparezca en pantalla el número de pista que desea.
para detener la reproducción.
11. Press TIMER /
on the remote again to complete timer on/off setting. Icon " " will keep display on LCD if timer is set.
Note: The wake up sound level will be increased gently to preset volume level.
12. Press TIMER /
52
on the remote control to turn on/off the timer. The icon " " will be on/off respectively.
5
ESPAÑOL
ENGLISH
FUNCIÓN SLEEP
Puede ajustar el periodo de tiempo antes de que la unidad entre en modo Standby de forma automática.
3. Press PRESET + /
or PRESET – /
to allocate a number from 1 to 20 stations.
En el mando, pulse SLEEP /
repetidamente para seleccionar el periodo de tiempo (en minutos):
-En la pantalla aparecerá la secuencia: SLEEP 90, 80, 70, 60, 50, 40, 30, 20, 10
-En la pantalla aparecerá brevemente la opción seleccionada y volverá al estado anterior.
4. Press PROGRAM /
to confirm, display shows the preset number waveband and the frequency of the preset station.
5. Repeat steps 1-4 to store other stations to listen to a preset station. Press PRESET + /
more until the desired preset station in displayed.
Para desactivar, pulse SLEEP /
Standby.
de nuevo para volver a “00” o pulse POWER /
para que la unidad entre en modo
CONTROL DEL VOLUMEN
Pulse VOLUME UP /
/ VOLUME DOWN /
en el mando para ajustar el volumen.
or PRESET – /
once or
To listen to a preset station
Press PRESET + /
or PRESET – /
once or more until the desired preset station in displayed.
Automatic programming radio stations
Automatic programming will station preset 1, from this preset number upwards, former programmed tuner stations will be erased.
1. Press and hold PROGRAM /
button until Auto appears
- Icon “ memory” will start flashing
FUNCIÓN MUTE
Puede desconectar de forma temporal el sonido sin tener que apagar la unidad.
- Available stations are programmed
1. Pulse MUTE /
en el mando a distancia para desactivar el sonido,
la reproducción continuará sin sonido.
2. Para activar el sonido puede:
- pulsar MUTE /
de nuevo;
- ajustar los controles de volumen;
- cambiar la fuente
- After all stations are stored, the last preset station will then be played
ANTENNA
Antenna: for FM reception, the unit is provided with a FM WIRE ANTENNA, move the wire until the reception is clear and
with no interferences. For AM reception, the unit is provided with a directional build-in ferrite antenna. Rotate the set to find
the position in which the best reception is obtained. Do not connect the EXTERNAL FM ANTENNA to any outside antenna.
CASSETTE OPERATION
EQ
Pulse EQ /
en el mando a distancia para seleccionar el modo de EQ que desee.
Hay 5 modos de EQ:
1. Press the FUNCTION /
to set the unit to PHONO mode.
2. While in Phono mode, insert a prerecorded tape through the CASSETTE DOOR.
3. Adjust the volume level by turning the VOLUME DOWN/UP KNOB /
.
4. For fast forwarding, press the EJECT/F.F. half way in. Pressing again, will stop the fast forwarding and return the
cassette to the playing mode.
5. To stop and eject the cassette, press the EJECT/F.F. in completely.
6. When one side of the tape finishes playing, the cassette will automatically stop.
Note: 1.Remove the tape from the unit when it is not in use or stopped.
2.Phono function discontact automatically with cassette in use.
USB & SD-CARD OPERATION
USB operation:
RADIO
1. Press the FUNCTION /
to set the unit to USB mode.
2. Plug-in USB mass storage device. READ is displayed as the system scans the contents of USB device.
Sintonización de AM/FM
1. Pulse FUNCTION /
2. Pulse STOP/BAND /
para ajustar la unidad en modo TUNER (radio).
para seleccionar la banda que desee: FM o MW
3. Track no. 1 of root folder (Folder 1) will be playback automatically after finish reading USB device contents.
3. Sintonización automática – Mantenga pulsado FF /
or FB /
hasta que la se encuentre una emisora que se
escuche de forma correcta. Si se recibe una emisora en estéreo, aparecerá (ST). Repita el paso 3 si es necesario
hasta que encuentre la emisora que desea,
4. Press FF /
4. Sintonización manual - Pulse FF /
5. Press PRESET + /
or FB /
brevemente y de forma repetida hasta encontrar una emisora.
or FB /
Memorización de emisoras de radio
6. Press STOP/BAND /
Puede almacenar hasta un total de 40 emisoras de radio (FM y MW) en la memoria, de forma manual o automática.
1. Sintonice la emisora que desee.
1. Press the FUNCTION /
2. Pulse PROGRAM /
once or repeatedly until the desired track number appears in display.
or PRESET – /
to select desired album.
to stop playback.
SD-Card operation:
to set the unit to CARD mode.
para activar la memorización, parpadearán el icono "MEMORY” y P01.
2. Insert SD-Card into the card slot. “READ” is displayed as the system scans the contents of SD card.
50
7
ESPAÑOL
ENGLISH
PREPARACIÓN
DESEMBALAJE
CD-MP3 disc playback
1.Insert CD-MP3 format disc. Press CD OPEN / CLOSE /
CD player scans the contents of a disc.
1 Retire todos los materiales de embalaje de la unidad.
2
3
4
5
6
7
Nota: Guarde todos los materiales de embalaje.
El mando a distancia está colocado en la parte exterior de la espuma del embalaje.
Retire la bolsa de plástico que envuelve la radio y el mando a distancia.
Desenrolle el cable de la antena en la parte trasera de la radio.
Abra la tapa y saque el material de embalaje de espuma de poliestireno del plato.
Retire la brida negra de la parte inferior del BRAZO.
Quite la cubierta protectora blanca de la aguja tirando suavemente hacia la parte frontal de la unidad.
Notas:
a) Nota ESD: En caso de mal funcionamiento debido a descargas electrostáticas, simplemente resetee el producto
(desconéctelo y vuelva a conectarlo) para volver al funcionamiento normal.
b) Nota sobre rápidos transitorios eléctricos (explosiones) (I2): En caso de mal funcionamiento, simplemente
resetee el producto (desconéctelo y vuelva a conectarlo) para volver al funcionamiento normal.
again to close the compartment. READ is displayed as the
2.Track no. 1 of root folder (Folder 1) will be playback automatically after finish reading CD-MP3 disc contents.
3.Press FF /
or FB /
4.Press PRESET + /
once or repeatedly until the desired track number appears in display.
or PRESET – /
5.Press STOP/BAND /
to select desired album.
to stop playback.
CONFIGURACIÓN
1 Desenrolle el cable de corriente AC
2 Desate la antena FM y déjela colgada en línea recta para una óptima recepción de FM. Si tiene problemas al sintonizar una
emisora de FM, mueva la antena externa de FM para una mejor recepción. No conecte la antena FM a una antena externa.
PROGRAMMING TRACKS
You may store up to 20 tracks in the desired sequence.
ALIMENTACIÓN DE LA UNIDAD
Conecte el cable de corriente a un enchufe. Este sistema cambia a modo Standby automáticamente y en el LCD aparecerá lo
siguiente
Para encender la unidad, pulse POWER /
y la luz del LCD se encenderá.
El LED de STANDBY se apagará y aparecerá lo siguiente:
1.In the stop position, press PROGRAM /
2.Press FF /
or FB /
Press PRESET + /
to start programming. Icon “MEMORY” and P0-01 start flashing.
once or repeatedly until the desired track number appears in the display. For MP3:
or PRESET – /
3.Press PROGRAM /
to select the desired album.
to confirm, display shown stored track no. and next store position.
FUNCIONAMIENTO BÁSICO
Selección de función
1 Pulse FUNCTION /
4.Repeat step 2-3 to select and store all desired tracks. FULL is displayed if you attempt to program more than 20 tracks
paa seleccionar entre:
2 Cuando la unidad esté encendida, pulse POWER /
para apagarla. La luz del LCD se apagará y aparecerá el
mensaje “GOOD BYE” durante 2 segundos y después se encenderá el LED de STANDBY.
5.Press PLAY/PAUSE /
to play the program.
Erasing the program
Nota: En modo Standby, se almacenarán en la memoria de la unidad los ajustes de tono y sonido y el
nivel del volumen (hasta un nivel máximo de 30).
AJUSTE DEL RELOJ
You can erase the contents of the memory by:
- once if in stop position, twice during playback;
- Press POWER /
- Select another sound source
- Open the CD door
Después de enchufar el sistema, ajuste primero el reloj.
RECORDING
1. Pulse POWER /
para entrar al modo Standby
- En la pantalla aparecerá la hora
- “0:00” parpadeará por defecto si el reloj no está ajustado
2 En modo Standby, mantenga pulsado el botón PROGRAM /
- Los dígitos de las horas empezarán a parpadear.
3. Pulse los botones FF /
or FB /
From CD to SD/USB
más de un segundo.
repetidas veces para ajustar las horas.
4. Pulse PROGRAM /
de nuevo para confirmar.
Los dígitos de los minutos empezarán a parpadear.
The system is capable to convert whole CD disc to MP3 format and copy to USB mass storage device or SD card. And
also have the ability to copy one single MP3 track to and from on USB/SD card.
1.In CD playback mode, press REC /
to start ripping to USB/SD card (default USB if both device are detected), playback
will be stopped and skipped back to the beginning of current track, system will scan the contents of USB/SD card and
create folder to store MP3 track. Resume CD playback and start ripping from the moment. The corresponding target
device icon “ USB ” / “ CARD “ start flashing.
2.Press STOP/BAND /
48
to exit CD ripping.
9
ESPAÑOL
ENGLISH
ADVERTENCIA:
PARA EVITAR RIESGO DE INCENDIO
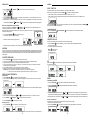
OPTIONAL EXTERNAL SPEAKERS
O DE DESCARGAS
ELÉCTRICAS, NO EXPONGA ESTE APARATO A LLUVIA O HUMEDAD.
NO QUITE LA CUBIERTA. LOS PILOTOS LUMINOSOS ESTÁN
SOLDADOS EN SU LUGAR. NO HAY PIEZAS ÚTILES EN SU
INTERIOR. EN CASO DE REPARACIONES, ACUDA SIEMPRE A
PERSONAL DE REPARACIONES CUALIFICADO.
ADVERTENCIA
RIESGO DE DESCARGAS
ELÉCTRICAS. NO ABRIR
1. With your new radio, you have the option of adding external speakers.
2. The speaker jacks for external speakers are located on the back of the radio.
Along with the speaker jacks is a switch labeled Int./Ext.
When using external speakers, this switch must be switched to the EXT. position. Doing this turns off the internal speakers
in the radio and redirects the power to the external speakers.
3. If you decide not to use the external speakers, be sure the switch is switch to INT.
AUDIO CONNECTIONS
AUX IN
AUX INPUT
Using the Aux Input allows you to hook up additional external audio
components and listen to them through your unit. Any component
with an audio output such as a Tuner, can be connected by using
the correct cables (not included). This unit uses standard RCA
cables. Simply plug the red and white connectors on one end of
the cable to the red and white Aux In jacks on the back of your unit.
The other end of the cable will plug into the Audio Output jack on
the external component. For more information on hooking up the
external component, see the owner s manual for that component.
R
R SP+ L
L
INT. EXT.
R
L
ANOTHER
AUDIO COMPONENT
AUDIO OUT
L
El símbolo del relámpago
con punta de flecha dentro
de un triángulo equilátero
pretende advertir al usuario
de la presencia de "voltaje
peligroso" sin aislar dentro
del producto. que puede
tener la suficiente magnitud
como para suponer un riesgo
de electrocución para las
personas.
ADVERTENCIA: PAPR REDUCIR
EL RIESGO DE DESCARGAS
ELÉCTRICAS, NO RETIRE LA
CUBIERTA (NI LA PARTE
TRASERA) NO HAYPIEZAS QUE
PUEDA USAR EN SU INTERIOR.
EN CASO DE REP ARACIONES
ACUDA SIEMPRE AL SERVICIO
TÉCNICO.
El signo de exclamación
dentro de un triángulo
equilátero pretemde advertir
al usuario de la presencia
de instrucciones de
funcionamiento
(reparaciones) importantes
en el manual que acompaña
el aparato.
Especificaciones
Rango de frecuencias
Puerto USB 2.0
Consumo de energía
Antenas
Corriente eléctrica
Tamaño altavoces
TROUBLESHOOTING
R
There is no power
1. Make sure radio is plugged in correctly.
2. Look at the STAND BY INDICATOR and check to see if it is red.
3. If the red light is on, press the POWER button /
to turn the unit on.
There is no sound
1. Make sure the mute function is turned off.
2. Check that the volume is turned up by pressing VOLUME UP button /
on the remote.
Note: Volume range on some units start at level 15 and ends at level 40.
3. Make sure INT./EXT. switch on back of radio is switched to INT. (Unless you are using external speakers, in which
case it should be on EXT. )
4. Check to make sure power is turned on.
CD does not play
: MW 522 - 1620 KHz
: FM 87.5 - 108 MHz
: VelocidadÊmáxima 512MB -4GB
(Soporta FAT16, FAT32)
: 23W
: Cable de antena externo para FM
: Antena de ferrita incorporada para AM
: AC 230V ~ 50Hz
: 4” 4 ohm tipo dinámico x 2
1. Check to make sure CD is inserted correctly (label side facing up).
2. Check to see that surface of CD is clean.
3. Make sure function switch is set to CD mode.
USB - There is no music playing when PLAY/PAUSE (USB) is pressed.
1. Make sure the MP3 device/Flash Drive has stored music files.
2. The unit will only play Flash Drives up to 512MB – 4GB
3. Reset USB by switching the unit Off or switching to another Mode.
4. Check if the file(s) is WMA file(s). The unit does not play WMA format, only MP3 format.
Remote not working
1. Replace battery.
2. Be sure to point the remote towards remote sensor when operating.
3. Remove obstacles in the path of the remote and radio so the remote signal has a straight path to the radio.
Turntable will not work
1. Check it the AC Power source is connected.
*DISEÑO Y ESPECIFICACIONES SUJETOS A CAMBIOS SIN PRECIO AVISO.
2. Press the POWER button /
(on front of unit or on RC) to turn the unit on, the STAND BY INDICATOR light should
be off.
3. Check that the unit is in PHONO Mode. Try moving the Tone Arm o the right until a click is heard.
No Sound is coming from the unit
1. The white protective needle cover has not been removed
2. The Volume is not turned up
The Tone Arm will not move
1. The black tie-wrap has not been removed from underneath Tone Arm.
2. Tone Arm hold down clip has not been released
Trademarks – MPEG Layer-3 audio coding technology licensed from Fraunhofer IIS and Thomson
46
11
ALEMÁN
NEDERLANDS
ZUSÄTZLICHE EXTERNE LUATSPRECHER
WAARSCHUWING:
1. Sie können an Ihr neues Radio zusätzliche externe Lautsprecher anschließen.
2. Die Anschlüsse für externe Lautsprecher befinden sich auf der Rückseite.
Neben den Anschlüssen befindet sich ein Schalter mit zwei Optionen: Int. / Ext.
Wenn Sie externe Lautsprecher verwenden, stellen Sie den Schalter auf EXT. So werden die internen Lautsprecher
deaktiviert und die Ausgangsleistung wird auf die externen Lautpsrecher geleitet.
3. Wenn Sie keine externen Lautsprecher verwenden, stellen Sie den Schalter auf INT.
AUDIO ANSCHLÜSSE
AUX INPUT
AUX IN
Mit dem zusätzlichen Anschluss Aux Input können Sie zusätzliche
Audiokomponenten anschließen und über Ihr Gerät wiedergeben.
Alle Komponenten mit einem Audio- Ausgang, so wie ein Radio,
können mit den richtigen Kabeln (nicht mitgeliefert) angeschlossen
werden. Dieses Gerät benötigt Standard RCA- Kabel. Verbinden
Sie einfach den weißen und roten Stecker mit dem roten und dem
weißen Anschluss an Ihrem Gerät. Das andere Ende des Kabels
verbinden Sie mit dem externen Komponenten. Für mehr
Informationen zum Anschluss lesen Sie bitte die Bedienungsanleitung
des zusätzlichen Komponenten.
R
R SP+ L
L
OPGELE
INT. EXT.
R
L
PROBLEMLÖSUNG
ANOTHER
AUDIO COMPONENT
GEVAAR VOOR ELEKTRISCHE
SCHOK, NIET OPENEN
AUDIO OUT
L
R
Kein Strom
1. Überprüfen Sie, ob das Radio korrekt angeschlossen ist.
2. Überprüfen Sie, ob die STANDBYANZEIGE rot leuchtet.
3. Drücken Sie POWER /
STEL DIT APPARAAT NIET BLOOT AAN REGEN OF VOCHT OM GEVAAR VOOR
BRAND OF EEN ELEKTRISCHE SCHOK TE VOORKOMEN. DE BEHUIZING NIET
VERWIJDEREN. CONTROLELAMPJES ZIJN OP HET APPARAAT GESOLDEERD.
GEEN DOOR DE GEBRUIKER TE ONDERHOUDEN ONDERDELEN AAN DE
BINNENKANT. LAAT ONDERHOUD OVER AAN GEKWALIFICEERD
ONDERHOUDSPERSONEEL.
, wenn das Licht rot leuchtet, um das Gerät einzuschalten.
Kein Ton
1. Überprüfen Sie, ob Ton aus eingeschaltet ist.
2. Überprüfen Sie die Lautstärke, indem Sie VOLUME UP /
an der Fernbedienung drücken.
Hinweis: Der Lautstärkebereich beginnt bei einigen Geräten bei 15 und endet bei 40.
3. Stellen Sie sicher, das der Schalter INT. / EXT auf der Rückseite des Gerätes sich auf der Position INT befindet. (Wenn
Sie externe Lautsprecher verwenden, sollte der Schalter auf EXT gestellt werden. )
4. Überprüfen Sie, ob der Stecker angeschlossen ist.
Het symbool van de
bliksemflits met pijlkop, in
een gelijkzijdige driehoek, is
bedoeld om de gebruiker
attent te maken op de
aanwezigheid van nietgeïsoleerde "gevaarlijke
spanning" in de behuizing
van het product die zo hoog
kan zijn dat ze gevaar voor
een elektrische schok
betekent voor personen.
OPGELET: OM HET GEVAAR VOOR EEN
ELEKTRISCHE SCHOK TE VERMINDEREN,
BEHUIZING (OF ACHTERKANT) NIET
VERWIJDEREN. GEEN DOOR DE
GEBRUIKER TE ONDERHOUDEN
ONDERDELEN AAN DE BINNENKANT. LAAT
ONDERHOUD OVER AAN
GEKWALIFICEERD
ONDERHOUDSPERSONEEL.
Het uitroepteken in een
gelijkzijdige driehoek is
bedoeld om de gebruiker
attent te maken op de
aanwezigheid van een
belangrijke instructie voor
bediening en onderhoud
(service) in de documentatie
bij het apparaat.
Der CD- Player funktioniert nicht
1. Überprüfen Sie, ob die CD richtig eingelegt ist (mit der bedruckten Seite nach oben).
2. Reinigen Sie die Oberfläche der CD.
3. Stellen Sie den CD- Modus ein.
Specificaties
USB – es wird keine Musik abgespielt, wenn PLAY/PAUSA (USB) gedrückt wird
Frequentiebereik
1. Überprüfen Sie, ob der USB- Speicher Musikarchive enthält.
2. Das Gerät gibt nur Flash Drives bis zu 512MB – 4GB wieder
3. Starten Sie den USB neu, indem Sie das Gerät ausschalten und den USB- Modus erneut einstellen.
4. Überprüfen Sie, ob es sich um WMA- Archive handelt. Das Gerät gibt WMA nicht wieder, nur MP3.
: AM 522 - 1620 KHz
: FM 87,5 - 108 MHz
USB-poort 2.0
:
:
:
:
:
:
:
Die Fernbedienung funktioniert nicht
1. Batterie erneuern.
2. Zielen Sie direkt auf den Empfänger des Signals.
3. Entfernen Sie mögliche Hindernisse zwischen Fernbedienung und Radio.
Stroomverbruik Antennes
Der Plattenspieler funktioniert nicht
1. Überprüfen Sie, ob das Gerät richtig angeschlossen ist.
2. Drücken Sie POWER /
(auf der Vorderseite des Gerätes oder an der Fernbedienung), um das Gerät einzuschalten,
die STANDBYANZEIGE sollte ausgeschaltet sein.
3. Stellen Sie den PHONO- Modus ein. Bewegen Sie den Tonarm nach rechts, bis Sie ein Klick hören.
Voedingsbron
Afmetingen
luidspreker
Full Speed 512 MB – 4 GB
(ondersteunt FAT16, FAT32)
23 W
Externe FM-draadantenne
Ingebouwde AM-ferrietstaafantenne
AC 230 V ~ 50 Hz
4 ohm dynamisch type x 2
Kein Ton
1. Die Schutzhülle der Nadel wurde nicht entnommen
2. Die Lautstärke ist ausgestellt
Der Tonarm des Plattenspielers bewegt sich nicht
*SPECIFICATIES EN UITERLIJK KUNNEN WORDEN GEWIJZIGD ZONDER
KENNISGEVING.
1. Sie haben die schwarze Klammer des Tonarms nicht entfernt.
2. Der Clip, der den Tonarm hält, wurde nicht gelöst.
Eingetragene Marken – Die Audioverschlüsselungstechnologie des MP3 Layer-3 ist von Fraunhofer IIS und Thomson
lizensiert.
44
13
ALEMÁN
NEDERLANDS
Wiedergabe einer MP3- CD
AAN DE SLAG UITPAKKEN
1. Legen Sie eine CD im MP3- Format ein. Drücken Sie CD OPEN / CLOSE/
erneut, um die Lade zu schließen. Auf
dem Display erscheint READ, während die Informationen der CD gelesen werden.
1
2. Es wird automatisch Lied 1 des ersten Ordners wiedergegeben, wenn die MP3- CD gelesen wurde.
2
3
4
5
6
7
Verwijder het verpakkingsmateriaal van het apparaat.
Opmerking: bewaar al het verpakkingsmateriaal
De afstandsbediening bevindt zich aan de buitenkant van de piepschuimverpakking
Neem de radio en afstandsbediening uit de plastic zak.
Maak de antennedraad op de achterzijde van de radio los.
Open het deksel en verwijder het piepschuimen transportmateriaal van de draaitafel.
Verwijder de zwarte tie-wrap onder de TOONARM.
Verwijder de witte naaldbescherming door deze voorzichtig naar de voorzijde van
het apparaat te trekken.
Opmerkingen:
3. Drücken Sie FF /
or FB /
4. Drücken Sie PRESET + /
5. Drücken Sie STOP/BAND /
einmal oder mehrmals, bis die Nummer des gewünschten Stückes angezeigt wird.
or PRESET – /
, um das gewünschte Album auszuwählen.
, um die Wiedergabe zu beenden.
a) Opmerking over ESD: in geval van storing wegens elektrostatische ontlading reset u het product (mogelijk moet u de
voedingsbron opnieuw aansluiten) om de normale bediening te hervatten.
b) Opmerking over elektrische snelle transiënt (Burst) (I2): in geval van storing wegens elektrische snelle transiënt (Burst)
reset u het product. (mogelijk moet u de voedingsbron opnieuw aansluiten) om de normale bediening te hervatten.
OPSTELLING
1
2
PROGRAMMIERUNG DER STÜCKE
Sie können bis zu 20 Stücke in der gewünschten Reihenfolge wiedergeben.
1. Drücken Sie im Stop- Modus PROGRAM /
P0-01 beginnen zu blinken.
2. Drücken Sie FF /
or FB /
Drücken Sie PRESET + /
3. Drücken Sie PROGRAM /
und die nächste Position.
, um die Programmierung zu beginnen. Das Symbol “MEMORY” und
einmal oder mehrmals, bis die Nummer des gewünschten Stückes erscheint. Für MP3:
or PRESET – /
, um das gewünschte Album auszuwählen.
Maak de draad op het wisselstroomsnoer los.
Maak de FM-antenne los en laat ze neerhangen in een rechte lijn voor optimale FM-ontvangst. Als u moeilijk kunt
afstemmen op een FM-zender, verplaatst u de externe FM-antenne voor een betere ontvangst. Sluit de FM-antenne
niet aan op een buitenantenne.
UW APPARAAT INSCHAKELEN
Sluit het wisselstroomsnoer aan op het stopcontact. Dit systeem wordt automatisch in stand-bymodus gezet en het LCD
toont het onderstaande
Om het apparaat in te schakelen, drukt u op POWER /
, de LCD-achtergrondverlichting gaat aan. Het STAND-BYledlampje gaat uit en het onderstaande wordt weergegeven.
, um zu bestätigen. Auf dem Display erscheint die Nummer der gespeicherten Stücke
HOOFDBEDIENING
Functie selecteren
4. Wiederholen Sie die Schritte 2-3 die gewünschten Stücke auszuwählen und zu speichern. Auf dem Display erscheint
FULL, wenn Sie 20 Stücke gespeichert haben.
5. Drücken Sie PLAY/PAUSA /
, um die Programmierung wiederzugeben.
Die Programmierung löschen
1. Druk op FUNCTION /
om te kiezen tussen:
2. Wanneer het toestel ingeschakeld is, drukt u op POWER /
om het apparaat uit te schakelen. De LCDachtergrondverlichting gaat uit en het bericht GOOD BYE" wordt 2 seconden weergegeven, daarna gaat het STANDBYledlampje aan.
Sie können die Programmierung aus dem Speicher löschen:
- Indem Sie Stop einmal im Stop- Modus oder drücken Sie zweimal während der Wiedergabe.
- Indem Sie POWER /
drücken
- Indem Sie einen anderen Modus wählen
- Indem Sie die CD- Lade öffnen.
Opmerking: in de stand-bymodus worden de toon- en geluidsinstellingen, voorinstellingen van de tuner en het volumeniveau
(tot een maximaal volumeniveau van 30) opgeslagen in het geheugen van het apparaat.
AUFNAHME
Von CD auf SD/USB
Das System kann eine ganze CD in MP3- Format konvertieren und auf einen USB- Speicher oder eine SD- Karte kopieren.
Sie können auch nur ein MP3- Stück auf oder von einer SD- Karte kopieren.
1. Drücken Sie im CD- Wiedergabemodus REC /
, um von USB/SD (automatisch USB, wenn beide Geräte angeschlossen
sind) zu brennen. Die Wiedergabe wird unterbrochen und kehrt zum Anfang des aktuellen Stückes zurück. Das System
sucht die Inhalte des USB/der SD- Karte und öffnet einen neuen Ordner, um das MP3- Stück zu speichern. Nehmen
Sie die CD-Wiedergabe wieder auf und beginnen Sie, zu kopieren. Das Symbol des jeweiligen Gerätes (“USB” / “CARD”)
blinkt.
2. Drücken Sie STOP/BAND /
, um diese Funktion zu beenden.
42
15
ALEMÁN
NEDERLANDS
3. Drücken Sie PRESET + /
or PRESET – /
, um eine Nummer zwischen1 und l 20 zuzuweisen.
SLUIMER
U kunt een bepaalde tijdsduur instellen waarna het toestel in stand-by wordt gezet.
4. Drücken Sie PROGRAM /
um zu bestätigen und bei diesem Sender werden die Nummer und Frequenz angezeigt.
5. Wiederholen Sie die Schritte 1-4 um weitere Sender zu speichern. Um einen gespeicherten Sender zu hören, drücken
Sie PRESET + /
or PRESET – /
einmal oder mehrmals, um den gewünschten Sender zu hören.
Druk herhaaldelijk op SLEEP /
op de afstandsbediening om de gewenste tijdsduuroptie (in minuten) te selecteren:
- Het display toont achtereenvolgens: SLEEP 90, 80, 70, 60, 50, 40, 30, 20, 10
- Het display toont kort de geselecteerde optie en keert terug naar de vorige status.
Einen gespeicherten Sender hören
Drücken Sie PRESET + /
or PRESET – /
einmal oder mehrmals, um den gewünschten Sender zu hören.
Automatisches Speichern der Radiosender
Bei der automatischen Speicherung werden alle Sender ab dem Speicherplatz 1 gespeichert, so dass alle vorher gespeicherten
Sender gelöscht werden.
1. Halten Sie PROGRAM /
gedrückt, bis Auto erscheint.
- Das Symbol “Speicher” beginnt zu blinken
- Alle verfügbaren Sender werden gespeichert
- Nach dem Speichern wird der zuletzt gespeicherte Sender wiedergegeben
Antenne
ANTENNE: Für den FM- Empfang wird dem Gerät eine FM- ANTENNE mit DRAHT mitgeliefert, bewegen Sie den Draht,
bis Sie einen optimalen Empfang ohne Interferenzen erzielen. Für den AM- Empfang wird eine Richtungs- Ferritantenne
mitgeliefert. Drehen Sie das Gerät, um einen besseren Empfang zu erzielen. Schlieâen Sie die EXTERNE FM- ANTENNE
nicht an andere externe Antennen an.
KASSETTENREKORDER
1. Drücken Sie den Knopf FUNCTION /
, um den PHONO- Modus am Gerät zu aktivieren.
2. Legen Sie während des PHONO- Modus eine bespielte Kassette in das KASSETTENFACH ein.
3. Stellen Sie die Lautstärk ein, indem Sie am LAUTSTÄRKE HÖHER/ NIEDRIGER KNOPF /
drehen.
4. Um vorzuspulen, drücken Sie den Knopf EJECT/F.F. halb. Wenn Sie ihn erneut drücken, stoppt das Vorspulen und
die normale Wiedergabe wird fortgesetzt.
5. Um die Wiedergabe abzubrechen und die Kassette zu entnehmen, drücken Sie EJECT/F.F. vollständig.
6. Wenn eine Seite der Kassette abgespielt wurde, wird die Wiedergabe automatisch angehalten.
Hinweis: 1. Entnehmen Sie die Kassette aus dem Gerät, wenn Si e nicht wiedergeben.
2. Die Phono- Funktion ist automatisch deaktiviert, wenn die Kassette abgespielt wird.
Om de sluimertimer uit te schakelen, drukt u opnieuw op SLEEP /
in stand-bymodus te zetten.
tot "00 " of drukt u op POWER /
om het apparaat
VOLUMEREGELING
VOLUME UP /
of VOLUME DOWN /
op de afstandsbediening om het volume te regelen.
De werkelijke waarde (tussen 00 en 40) wordt weergegeven.
DEMPEN
U kunt het geluid tijdelijk uitschakelen zonder het apparaat uit te schakelen.
1. Druk op MUTE /
op de afstandsbediening om het geluid uit te schakelen, het afspelen gaat verder zonder geluid.
2. Om het geluid weer in te schakelen, kunt u:
-
opnieuw op MUTE /
drukken;
de volumeregelknoppen bedienen;
de bron wijzigen
EQ
Druk op EQ /
- op de afstandsbediening om de gewenste EQ-modus te selecteren.
5 vooringestelde EQ-modi:
FUNKTIONEN DES USB / SD- KARTEN
Funktionen des USB:
1. Drücken Sie FUNCTION /
, um den USB- Modus zu aktivieren.
2. Schließen Sie das USB- Massenspeichergerät an. Auf dem Display wird READ angezeigt, während das System die
Informationen auf dem USB liest.
RADIO
Afstemmen op AM/FM
1. Druk op FUNCTION /
om het apparaat in TUNER-modus te zetten.
3. Die Wiedergabe beginnt automatisch mit dem ersten Stück des ersten Ordners, wenn das Lesen des USB abgeschlossen
wurde.
2. Druk herhaaldelijk op STOP/BAND /
4. Drücken Sie FF /
or FB /
5. Drücken Sie PRESET + /
einmal oder mehrmals, bis das gewünschte Stück auf dem Display angezeigt wird.
or PRESET – /
6. Drücken Sie STOP/BAND /
, um das gewünschte Album auszuwählen.
, um die Wiedergabe zu beenden.
Funktionen der SD- Karte:
1. Drücken Sie FUNCTION /
om de gewenste golfband te selecteren. FM of MW
3. Automatisch afstemmen - Houd FF /
or FB /
ingedrukt tot de frequentie begint te rollen, de radio stemt
automatisch af op een zender met voldoende goede ontvangst. Als een zender in stereo wordt ontvangen, wordt (ST)
getoond. Herhaal stap 3 indien nodig tot u de gewenste zender vindt.
4. Handmatig afstemmen – Druk kort en herhaaldelijk op FF /
or FB /
tot u een zender vindt.
Radiozenders programmeren
, um den KARTEN- Modus am Gerät zu aktivieren.
2. Führen Sie eine SD- Karte in den Kartenschlitz ein. Auf dem Display erscheint READ, während das System die
Informationen der SD- Karte liest.
40
U kunt in totaal maximaal 40 radiozenders (FM en MW) in het geheugen opslaan, handmatig of automatisch (Autostore).
1. Stem af op de gewenste zender
2. Druk op PROGRAM /
om het programmeren te activeren, het pictogram " MEMORY" en P01 beginnen te knipperen.
17
ALEMÁN
NEDERLANDS
Einstellungen der Uhr
3. Track nr. 1 van de hoofdmap (Map 1) wordt automatisch afgespeeld nadat de inhoud van de SD-kaart is gelezen.
4. Druk eenmaal of herhaaldelijk op FF /
or FB /
tot het gewenste tracknummer in het display verschijnt.
Wenn Sie das Gerät eingeschaltet haben, stellen Sie zuerst die Uhr ein:
5. Druk op PRESET + /
1. Drücken Sie POWER /
, um den Standby- Modus zu aktivieren
- Auf dem Display erscheint die Uhrzeit
- “0:00” erscheint, wenn die Uhrzeit nicht eingestellt ist
2 Halten Sie im Standby- Modus den Knopf PROGRAM /
- Die Ziffern der Stunden blinken.
3. Drücken Sie die Knöpfe FF /
or FB /
länger als eine Sekunde gedrückt.
mehrmals, um die Stunden einzustellen.
or FB /
Koppel het USB-apparaat niet los in de USB-modus, aangezien daardoor het externe apparaat of de bestanden ervan
kunnen worden beschadigd. Schakel het apparaat eerst uit of selecteer een andere modus alvorens het USB-apparaat
veilig te verwijderen.
mehrmals, um die Minuten einzustellen.
Specificaties van USB:
6. Drücken Sie PROGRAM /
erneut, um zu bestätigen.
Die Ziffern der Minuten blinken nicht mehr und die Uhrzeit ist aktiviert
7. Drücken Sie PROGRAM /
, um wie unten angezeigt zwischen 12 und 24 Stunden zu wählen
Einstellung des Weckers
Das Gerät kann mit verschiedenen Klangquellen (CD, TUNER, USB, SD- KARTE ODER PLATTENSPIELER) als Wecker
eingesetzt werden und klingelt zur eingestellten Uhrzeit. Achten Sie darauf, dass die Uhrzeit eingestellt ist, wenn Sie den
Wecker stellen.
1. Halten Sie im Standby- Modus den TIMER /
an der Fernbedienung länger als eine Sekunde gedrückt und das
Symbol und die Nachricht ”EIN” beginnen zu blinken. Drücken Sie TIMER /
den Wecker einzustellen.
om het gewenste album te selecteren.
BELANGRIJK:
4. Drücken Sie PROGRAM /
erneut, um zu bestätigen.
Die Ziffern der Minuten blinken.
5. Drücken Sie die Knöpfe FF /
or PRESET – /
Druk op STOP/BAND /
om het afspelen te stoppen.
Opmerkingen:
1) Gebruik van de USB-aansluiting met een USB-verlengsnoer wordt niet ondersteund.
2) Dit apparaat is niet ontworpen voor directe communicatie met een computer.
3) Er wordt niet gegarandeerd dat alle USB-geheugenapparaten en SD-kaarten werken op dit audiosysteem
an der Fernbedienung erneut, um
Interface
- USB 2.0 Full Speed, flashgeheugen via HOST (USB HUB wordt niet ondersteund)
- Compatibel met MPEG Audio 1, 2, 2.5
- Compatibel met Layer 1, 2, 3
- Compatibel met bitsnelheid: 128 - 320 Kbps
- Submappen nesten: 8 niveaus
- Aantal tracks / titels max 999
- Ondersteunt ID3 tag V2.0
DRAAITAFEL
DE DRAAITAFEL KLAARMAKEN VOOR GEBRUIK
1.
2.
3.
4.
Til het deksel op en verwijder de zwarte tie-wrap door deze los te draaien en voorzichtig van de TOONARM te schuiven
Verwijder het kartonnen transportmateriaal.
Verwijder de witte naaldbescherming door deze voorzichtig naar de voorzijde van het apparaat te trekken.
Maak de TOONARM en neerdrukker los door voorzichtig naar rechts te drukken. Hierdoor wordt de toonarm losgemaakt
van de ARMSTEUN. Vergrendel de neerdrukker opnieuw wanneer u het apparaat naar een andere locatie brengt.
BEDIENING VAN DE DRAAITAFEL
2. Drücken Sie die Köpfe FF /
3. Drücken Sie TIMER /
mehrmals, um die Stunden einzustellen.
an der Fernbedienung, um die Minuten auszuwählen.
4. Drücken Sie die Knöpfe FF /
5. Drücken Sie TIMER /
or FB /
1. Druk op FUNCTION /
om het apparaat in PHONO-modus te zetten.
2. Zet de TOERENTALSCHAKELAAR op het correcte toerental (33 1/3, 45 of 78 toeren) voor de geselecteerde plaat.
3. Breng de toonarm met de TOONARMHENDEL omhoog uit de steun. Breng de toonarm boven de plaat en laat hem
met de toonarmhendel neer op het punt waar u het afspelen van de plaat wilt starten.
4. Aan het einde van de plaat stopt de TOONARM automatisch. U moet hem handmatig terugplaatsen in de
TOONARMSTEUN.
or FB /
mehrmals, um die Minuten einzustellen.
erneut an der Fernbedienung, um die Einstellungen zu verlassen.
Das Symbol und die Nachricht “AUS” beginnen zu blinken. Drücken Sie TIMER /
um die Weckereinstellungen auszuwählen.
an der Fernbedienung erneut,
MEEGELEVERD ACCESSOIRE: Adapter voor 45-toerenplaten
Voor het afspelen van een 45-toerenplaat verwijdert u de adapter door duim & wijsvinger in
de uitsparingen te plaatsen en de adapter omhoog te trekken. Plaats hem vervolgens op de
SPIL. Daarna kunt u de plaat op de draaitafel plaatsen.
DE OORTELEFOONAANSLUITING GEBRUIKEN
6. Drücken Sie die Knöpfe FF /
7. Drücken Sie TIMER /
or FB /
mehrmals, um die Stunden einzustellen.
an der Fernbedienung, um die Minuten auszuwählen.
8. Drücken Sie die Knöpfe FF /
or FB /
mehrmals, um die Minuten einzustellen.
9. Drücken Sie TIMER /
an der Fernbedienung erneut, um die Klangquelle auszuwählen.
Der voreingestellte Modus ist RADIO. TUNER blinkt auf dem Display.
Om muziek te beluisteren via een oortelefoon/hoofdtelefoon (niet meegeleverd), sluit u deze aan op de hoofdtelefoonaansluiting.
Het geluid via de ingebouwde luidsprekers wordt onderbroken.
CD-SPELER
Een CD afspelen
1. Druk op FUNCTION /
om het apparaat in CD-modus te zetten.
2. Druk op CD OPEN / CLOSE /
om het CD-compartiment te openen
3. Plaats een disc met de bedrukte zijde naar boven. Druk opnieuw op CD OPEN / CLOSE /
te sluiten, READ wordt weergegeven terwijl de CD-speler de inhoud van een disc scant.
om het compartiment
10.Drücken Sie FUNCTION /
um zwischen den folgenden Möglichkeiten auszuwählen:
Das Gerät wählt den zuletzt eingestellten Radiosender aus, wenn Sie RADIO wählen.
4. Track nr. 1 wordt automatisch afgespeeld nadat de inhoud van de CD is gelezen.
5. Druk eenmaal of herhaaldelijk op FF /
or FB /
tot het gewenste tracknummer in het display verschijnt.
11.Drücken Sie TIMER /
erneut an der Fernbedienung, um den Wecker zu aktivieren/deaktivieren. Das Symbol
erscheint auf dem LCD, wenn der Wecker gestellt ist.
Hinweis: Die Lautstärke des Weckers erhöht sich bis zum eingestellten Niveau..
12. Drücken Sie TIMER /
/ verschwindet.
an der Fernbedienung, um den Wecker zu aktivieren/deaktivieren. Das Symbol erscheint
38
6. Druk op STOP/BAND /
om het afspelen te stoppen.
Opmerking: Het pictogram "ESP" knippert 40 seconden en blijft vervolgens branden.
19
ALEMÁN
NEDERLANDS
POSITION DER KNÖPFE
MP3 kopiëren
LAUTSPRECHER
1. Druk in de afspeelmodus voor CD-MP3, USB of SD-kaart op REC /
om te starten met het kopiëren van MP3 van
CD naar USB/SD-kaart, of van USB naar SD-kaart of omgekeerd. Het afspelen stopt en het systeem scant de inhoud
van USB/SD-kaart en maakt een map om de MP3-track op te slaan.
2. Het pictogram " REC " wordt weergegeven
3. Het bericht COPY 01 wordt weergegeven, het proportionele gekopieerde percentage wordt getoond met het decimale getal.
4. Het pictogram van het doelapparaat "USB" of "CARD" begint te knipperen, het decimale getal wordt verhoogd vanaf
01 wanneer het kopiëren van MP3 start, het proces stopt wanneer 100 is bereikt
5. De huidige MP3 wordt afgespeeld van bij het begin
LAUTSPRECHER
STAND BY
ANZEIGE
SD - KARTE
LAUTSTÄRKE HÖHER/
NIEDRIGER KNOPF
Van Phono/Cassette naar SD / USB
LCD DISPLAY
SENSOR
USB - ANSCHLUSS
Met dit systeem kunt u een audiosignaal vanaf de PHONOCASSETTE-ingang omzetten in MP3-formaat en opslaan op
een USB-massaopslagapparaat of SD-kaart (USB wordt standaard geselecteerd als beide apparaten worden gedetecteerd).
1. Druk op FUNCTION /
EJECT / F.F.
FUNKTION
PRESET +
PLAY / PAUSE
PRESET –
STOP/BAND
WIEDERHOLEN /
STEREO
PROG / UHR
CD ÖFFNEN /
SCHLIEßEN
CD- LADE
TIMER
AUFNAHME /
LÖSCHEN
POWER / STAND BY
AUFNAHME
PRESET –
SCHALTER
INTERNER /
EXTERNER
LAUTSPRECHER
(INT./EXT)
ZUFÄLLIGE WIEDERGABE
ID3
MUTE
REC
OPEN/
CLOSE
SLEEP
LAUTSTÄRKE +
FUNC
FUNKTION
LAUTSTÄRKE -
RANDOM
VOR +
ID3
BAND
REPEAT
PROG
MEM
CLOCK
PROGRAMMIERUNG
1. Druk een of meerdere keren op FUNCTION /
om AUX te selecteren
2. Druk op REC /
om het rippen te starten, het systeem scant de inhoud van USB / SD-kaart en maakt een map om
de MP3-track op te slaan.
3. Het pictogram "REC" en het bericht "RIPP TO" worden weergegeven, het pictogram "AUX" begint te knipperen.
4. Het pictogram van het doelapparaat "USB" of "CARD" begint te knipperen wanneer het rippen start.
WIEDERHOLEN
0
1
2
TIMER
STROMKABEL
3
4
5
MONO
STEREO
6
7
8
9
0–9
ACHSE
PLATTENSPIELER
ADAPTER FÜR 45 RPM PLATTEN
CD ÖFNEN /
SCHLIEßEN
TON AUS
SLEEP
VOL
STOP / BAND
LAUTSPRECHER
ANSCHLUSS
Van AUX naar SD/USB
Met dit systeem kunt u een audiosignaal vanaf de AUX-ingang omzetten in MP3-formaat en opslaan op een USBmassaopslagapparaat of SD-kaart
(USB wordt standaard geselecteerd als beide apparaten worden gedetecteerd).
PRESET
PLAY / PAUSE
ZURÜCK –
5. Druk op STOP/BAND /
om het rippen van PHONO af te sluiten
Opmerking: 1. Neem de cassette uit het apparaat wanneer het niet in gebruik is of gestopt is.
2. De Phono-functie wordt automatisch uitgeschakeld wanneer een cassette in gebruik is.
UP/FF
DOWN/FB
EQ
EQ
PRESET +
EXTERNE
ANTENNE
2. Druk op REC /
om het rippen te starten, het systeem scant de inhoud van USB/SD-kaart en maakt een map om
de MP3-tracks op te slaan.
3. Het pictogram "REC" en het bericht "RIPP TO" worden weergegeven, het pictogram " PHONO" begint te knipperen.
4. Het pictogram van het doelapparaat "USB" of "CARD" begint te knipperen wanneer het rippen start.
POWER
KASSETTE NLADE
KOPFHÖRERANSCHLUSS
ZUSÄTZLICHER
ANSCHLUSS
AUX IN
om het apparaat in PHONO-modus te zetten.
TIMER
MONO / STEREO
5. Druk op STOP/BAND /
om het rippen van AUX af te sluiten
Opmerking: het bericht "NO FUNCT" wordt weergegeven als op een toets wordt gedrukt tijdens het rippen van AUX.
Het bericht " NO DEV " wordt getoond als geen USB of SD-kaart wordt gedetecteerd. Het bericht "FULL" wordt
weergegeven als er onvoldoende geheugen in het doelapparaat beschikbaar is.
HEBEL
SCHALTER GESCHWINDIGKEIT
(33 1/3, 45, 78 RPM)
MP3-tracks verwijderen
Het systeem ondersteunt het verwijderen van eerder opgenomen MP3-tracks of bestaande bestanden.
TONARM
TONARMSTÜTZE
SICHERHEITSHAKEN
36
1. Houd in de afspeelmodus voor USB of SD-kaart REC / ERASE/
track stopt en wordt verwijderd.
2. Het bericht " delete " wordt weergegeven
21
2 seconden ingedrukt, de momenteel afgespeelde
ALEMÁN
FRANCAIS
WICHTIGE SICHERHEITSHINWEISE FÜR DIE
AUDIOWIEDERGABE
LESEN SIE BITTE AUFMERKSAM DIE FOLGENDEN ANLEITUNGEN ZUM GEBRAUCH
IHRES GERÄTES.
1. Lesen Sie alle Anleitungen – Lesen Sie alle Sicherheitsanweisungen, bevor Sie das Gerät
benutzen.
2. Verwahren Sie die Bedienungsanleitung auf – Bewahren Sie diese Sicherheitshinweise
für zukünftige Zwecke auf.
3. Beachten Sie die Warnungen – Befolgen Sie alle Anweisungen zum Gebrauch des Gerätes.
4. Befolgen Sie die Anleitungen – Befolgen Sie alle Funktionsanleitungen.
5. Wasser und Feuchtigkeit – Dieses Gerät sollte nicht in der Nähe von
Wasser benutzt werden, Zum Beispiel in der Nähe von Badewannen,
Waschbecken oder Schüsseln, auf feuchten Oberflächen oder
Schwimmbädern.
6. Wagen und Unterlagen – Benutzen Sie für dieses Gerät bitte nur vom
Hersteller empfohlene Wagen und Unterlagen.
6A. Bewegen Sie das Gerät auf dem Wagen vorsichtig. Abruptes Stoppen, oder unebene
Oberflächen können den Wagen zum Stürzen bringen.
7. Wand- oder Deckenbefestigung – Befestigen Sie dieses Gerät nur mit vom Hersteller
empfohlenen Vorrichtungen an der Wand oder Decke.
8. Lüftung – Dieses Gerät sollte so positioniert werden, dass die angemessene Lüftung nicht
behindert wird. Das Gerät sollte nicht auf Betten, Sofas, Teppichen oder ähnlichen Orten
gestellt werden, damit die Lüftungsöffnungen nicht blockiert werden. Stellen Sie es auch
nicht in Einbauschränke oder ähnliche Möbel, in denen die Lüftung behindert werden kann.
9. Hitze – Dieses Gerät sollte nicht in die Nähe von Wärmequellen wie Heizungen, Öfen oder
ähnlichen Apparaten, die Hitze ausstrahlen (einschließlich Verstärker).
10. Strom – Schließen Sie das Gerät nur an die auf dem Gerät angegebene Stromstärke an.
11. Erdung und Polarisierung – Achten Sie darauf, dass die Erdung und Polarisierung des
Gerätes nicht gestört werden.
12. Schutz des Stromkabels – Stromkabel sollten so gelegt werden, dass man nicht auf sie
tritt oder andere Geräte auf ihnen abgestellt werden. Achten Sie besonders auf Stecker und
das Kabel direkt am Stecker.
13. Reinigung – Reinigen Sie das Gerät so, wie der Hersteller empfiehlt.
14. Dieses Gerät sollte mit der mitgelieferten Antenne und keiner anderen externen Antenne
benutzt werden.
15. Zeiträume ohne Benutzung – Sollten Sie das Gerät über einen längeren Zeitraum nicht
benutzen, ziehen Sie den Stecker aus der Steckdose.
16. Objekte im Inneren und Flüssigkeiten – Achten Sie darauf, dass keine Objekte oder
Flüssigkeiten durch die Öffnungen in das Innere des Gerätes gelangen.
17. Schäden, die Reparatur benötigen – Bringen Sie das Gerät zum technischen Dienst, wenn:
A. Das Stromkabel oder der Stecker beschädigt sind.
B. Sich Objekte oder Flüssigkeiten im Inneren befinden.
C. Das Gerät im Regen stand.
D. Das Gerät nicht normal funktioniert oder Veränderungen im Betrieb aufweist.
E. Das Gerät hingefallen ist oder das Gehäuse beschädigt ist.
18. Reparaturen — Der Benutzer sollte nicht versuchen, das Gerät selbst zu reparieren, soweit
es hier nicht beschrieben ist. Alles weitere sollte von einem qualifizierten Reparaturdienst
repariert werden.
34
INSTRUCTIONS DE SECURITE IMPORTANTES POUR PRODUITS AUDIO
VEUILLEZ LIRE ATTENTIVEMENT LES INSTRUCTIONS SUIVANTES APPLICABLES
A VOTRE EQUIPEMENT
1. Lisez les instructions – Lisez toutes les instructions de sécurité et d’utilisation avant de
vous servir de l’appareil.
2. Conservez les instructions – Conservez les instructions de sécurité et d’utilisation pour
vous y référer ultérieurement.
3. Tenez compte des avertissements – Suivez tous les avertissements et instructions
d’utilisation de l’appareil.
4. Suivez les instructions – Suivez toutes les instructions de fonctionnement
et utilisation.
5. Eau et humidité – Cet appareil ne doit pas être utilisé à proximité de
pointsd’eau, comme par exemple près de baignoires, lavabos, éviers ou
lavoirs, sur surfaces mouillées ou près d’une piscine.
6. Chariots et supports – Utilisez cet appareil uniquement avec des chariots ou supports
recommandés par le fabricant.
6A.Déplacez avec précaution l’ensemble chariot et appareil. Les arrêts rapides, l’excès de
force ou les surfaces irrégulières peuvent renverser le chariot.
7. Support mural ou de plafond – Placez cet appareil uniquement sur les supports
muraux ou de plafond recommandés par le fabricant.
8. Ventilation – Cet appareil doit être placé de façon à ne pas compromettre une bonne
ventilation. Par exemple, il ne doit pas être placé sur un lit, un divan, tapis ou surface
semblable, qui puisse bloquer les ouvertures de ventilation.
Ne le placez pas non plus dans des placards, sur des étagères ou armoires, qui puissent
empêcher l’air de circuler par les ouvertures de ventilation.
9. Chaleur – Cet appareil doit être situé loin de sources de chaleur, telles que radiateurs,
chauffe-eaux, convecteurs ou autres appareils qui dégagent de la chaleur (y compris
les amplificateurs).
10.Courant – Cet appareil doit être branché uniquement au courant décrit dans le mode
d’emploi ou à celui décrit sur l’appareil lui-même.
11.Prise de terre ou polarisation – On doit prendre des précautions pour s’assurer que
la prise de terre ou la polarisation de l’appareil ne soient pas perturbées.
12.Protection du câble électrique – Les câbles électriques doivent être correctement
placés pour ne pas être piétinés ni aplatis avec des objets placés dessus ou contre
ceux-ci. On doit prêter une attention tout spéciale à la partie du câble proche de la prise
et au connecteur de l’appareil.
13.Nettoyage – Vous devez nettoyer cet appareil uniquement comme le recommande le
fabricant.
14.Ce produit a été conçu pour être utilisé avec une antenne intégrée et ne doit être
connecté à aucune autre antenne extérieure.
15.Périodes sans utilisation – Lorsque vous ne devez pas utiliser cet appareil pendant
de longues périodes, débranchez-le de la prise de courant.
16.Entrée d’objets et de liquides – Evitez que des objets ou liquides ne tombent à travers
les ouvertures du boîtier.
17.Dommages qui nécessitent réparation – Cet appareil doivent être apportés au service
technique si :
A.Le câble électrique ou la fiche sont endommagés.
B.Des objets ou liquides sont tombés à l’intérieur de l’appareil.
C.L’appareil a été exposé à la pluie.
D.L’appareil ne fonctionne pas normalement ou montre un changement dans son
fonctionnement.
E.L’appareil est tombé ou le boîtier est endommagé.
.
18. Réparations — L’usager ne doit pas tenter de réparer l’appareil au-delà de ce qui est
décrit dans le présent manuel. Tout le reste doit être réalisé par un personnel d’entretien
compétent.
23
FRANCAIS
FRANCAIS
Copier MP3
EMPLACEMENTS DES CONTROLES
1. En mode C-MP3, USB ou carte SD, pressez REC /
pour commencer à copier MP3 à partir d un CD sur USB/SD ou de
USB sur SD, ou viceversa. La lecture s’arrêtera et le système recherchera les contenus du USB/carte SD et créera un
dossier pour conserver la piste MP3.
2. L’icône “REC” apparaîtra.
3. Le message COPY 01 apparaîtra avec un pourcentage de copie en nombre décimal.
4. L’icône du dispositif correspondant (“USB” o “CARD”) clignotera et le nombre augmentera à partir de y el número irá 01 jusqu’à
atteindre 100.
5. Le MP3 actuel será lu depuis le début.
HAUT-PARLEURS
HAUT-PARLEURS
INDICATEUR
STAND BY
De Phono/Cassette à SD / USB
CARTE SD
Le système est capable de convertir un signal audio de PHONO au format MP3 et de le stocker en masse dans une clé
USB ou une carte SD (par défaut USB si les deux appareils sont détectés).
1. Pressez la FUNCTION /
BOUTON
VOLUME
HAUT/BAS
ECRAN LCD
VOYANT
PORT USB
pour initialiser l’appareil en mode PHONO.
2. Pressez REC /
pour démarrer la fonction, le système scannera les contenus USB/SD et créera un fichier de pistes MP3.
3. L’icône “ REC ” et le message “ RIPP TO” s’afficheront, l’icône “ PHONO commencera à clignoter.
4. L’icône de l’appareil “ USB ” ou “ CARD ” commence à clignoter lorsque la fonction démarre.
FONCTION
PROGRAMMER +
PLAY/PAUSE
PROGRAMMER -
REPETER/
STEREO
ARRET/BAND
OUVRIR/
FERMER CD
PROG/HORLOGE
EJECTER
/F.F.
5. Pressez STOP/BAND /
pour sortir de la fonction PHONO.
Note: : 1. Soulevez le couvercle de l’appareil lorsque vous ne l’utilisez pas ou lorsqu’il est arrêté.
2. Lorsque vous utilisez la fonction cassette, la function Phono est désactivée.
PORTE
CASSETTE
FICHE
ECOUTEURS
CONTACT
PORTE CD
HAUT/FF
ENR/
BAS/FB
EFFACER
MINUTEUR
De AUX à SD/USB
Ce système peut convertir le signal audio de l’entrée AUX au format MP3 et le stocker dans un dispositif de stockage USB ou
carte SD (par défaut USB si les deux dispositifs sont connectés).
1. Pressez une ou plusieurs fois FUNCTION /
pour sélectionner AUX
POWER/STAND BY
EQ
EQ
PROGRAMME +
2. Pressez REC /
pour démarrer le rippage, le système recherchera le contenu du USB/carte SD et créera un dossier pour
stocker les pistes en MP3.
3. L’icône “REC” et le message “RIPP TO” s’afficheront à l’écran et l’icône “AUX” clignotera.
4. L’icône du dispositif correspondant ("USB” o "CARD”) commencera à clignoter dès le début du rippage.
ENR
PROGRAMME -
BOUTON
HAUT-PARLEUR
INTERNE /
EXTERNE
(INT./EXT)
ANTENNE
EXTERIEURE
ALEATOIRE
ID3
OPEN/
CLOSE
SLEEP
SLEEP
VOLUME +
FUNC
FONCTION
VOL
PRESET
VOLUME RANDOM
AVANCE RAPIDE +
ID3
BAND
REPEAT
PROG
MEM
CLOCK
0
1
2
TIMER
CABLE SECTEUR
3
4
5
MONO
STEREO
6
7
8
9
0-9
EJE
PLATINE
5. Pressez STOP/BAND /
pour sortir de cette fonction.
Remarque : le message “NO FUNCT” s’affichera lorsque vous presserez n’importe quel bouton pendant le processus de
rippage AUX. Le message “NO DEV” s’affichera lorsqu’il ne détectera ni l’ USB ni la carte SD. Le message “FULL” s’affichera
s’il n’y a plus assez de mémoire vive dans le dispositif sélectionné.
Effacer des pistes MP3
ADAPTATEUR POUR
DISQUES 45 RPM
ENTRÉE LEVIER
MOLETTE CONTROLE VITESSES (33 1/3, 45, 78 RPM)
Le système supporte l’effacement de MP3 déjà enregistrés ou de fichiers existants.
1. En mode lecture USB ou carte SD, maintenez enfoncé REC /
s’arrêtera et sera effacée.
2. Le message “ delete “ s’affiche.
32
pendant 2 secondes, la piste de lecture en cours
BRAS STANDARD …. TONE ARM
SUPPORT DU BRAS
CROCHET DE SURETE
25
PROGRAMME
REPETER
ARRET / BANDE
FICHE HAUT-PARLEUR
OUVRIR/FERMER CD
MUTE
REC
PLAY / PAUSE
RETOUR ARRIERE
FICHE
ENTRÉE AUX
MUTE
MINUTEUR
MONO/STEREO
FRANCAIS
FRANCAIS
3. La piste 1 du dossier-racine (dossier 1) sera lue automatiquement à la fin de la lecture de la SD.
Réglage du réveil
4. Pressez une ou plusieurs fois FF /
Après avoir branché le système, réglez le réveil en premier.
1. Pressez POWER /
pour entrer en mode Standby
- L’heure s’affichera à l’écran
- “0:00” clignotera par défaut si le réveil n’est pas réglé.
2 En mode Standby, pressez PROGRAM /
au moins une seconde.
- Les chiffres des heures commenceront à clignoter.
3. Pressez les boutons FF /
FB /
plusieurs fois pour régler les heures.
5. Pressez PRESET+ /
6. Pressez STOP/BAND /
FB /
/ PRESET- /
jusqu’à ce que s’affiche à l’écran le numéro de piste que vous souhaitez.
pour sélectionner l’album que vous souhaitez.
pour arrêter la lecture.
Remarques:
1. Le port USB ne supporte pas la connexion à une rallonge de câble USB.
2. Cet appareil ne peut être connecté directement à un ordinateur.
3. Il n’est pas certain que toutes les clés USB ou cartes SD soient compatibles avec ce système audio.
IMPORTANT:
Ne déconnectez pas le dispositif USB tant que vous êtes en mode USB car cela peut endommager le dispositif ou les
dossiers. Veuillez éteindre l’appareil ou pressez un autre mode avant de déconnecter le dispositif USB.
Spécifications de l’ USB:
4. Pressez à nouveau PROGRAM /
pour confirmer.
Le chiffres des minutes commenceront à clignoter.
5 Pressez les boutons FF /
FB /
plusieurs fois pour régler les minutes.
6. Pressez PROGRAM /
à nouveau pour confirmer.
Les chiffres des minutes cesseront de clignoter et le réveil s’activera.
Interface
- USB 2.0 grande vitesse, HOST (ne supporte pas HUB USB) correspondant à mémoire Flash
- Compatible avec la version USB/SD 2.0 FAT32
- Compatible avec MPEG Audio 1, 2, 2.5
- Compatible avec Layer 1, 2, 3
- Compatible avec Bit rate: 128 – 320 Kbps
- Niveaux de sous-dossiers: 8 niveaux
- Nombre de pistes / titres: max 999
- Support ID3 tag V2.0
Pressez PROGRAM /
pour choisir entre 12 et 24 heures, comme il est montré ci-dessousÊ:
Réglage de l’alarme
On peut utiliser l’appareil comme réveil et la source sélectionnée (CD, TUNER, USB, SD CARD O PHONO) sonnera à l’heure
programmée. Assurez-vous de régler le réveil avant d’utiliser l’alarme.
TOURNEDISQUES
PREPARATION AVANT D’UTILISER LE TOURNEDISQUES
1. Levez le couvercle et ôtez la bride noire en la déroulant et en la retirant avec précaution et en la sortant délicatement
du BRAS
2. Retirez le carton protecteur pour le transport.
3. Enlevez le couvercle protecteur blanc de l’aiguille en tirant doucement vers la partie frontale de l’appareil.
4. Libérez le BRAS et pressez doucement vers la droite le clip de sujétion. . Vous libèrerez ainsi le bras du tournedisques
du SUPPORT . Lorsque vous déplacerez l’appareilÊ, bloquez à nouveau le bras avec le clip.
En mode Standby, maintenez pressé TIMER /
1. Pressez les boutons FF /
FONCTIONNEMENT DU TOURNEDISQUES
1. Pressez FUNCTION /
pour régler l’appareil en mode PHONO.
2. Réglez le CONTROLE DE VITESSE selon la vitesse (3, 1/3, 45 ó 78 rpm) du disque sélectionné.
3. Utilisez le LEVIER ELEVATEUR pour élever le bras sur le support. Déplacez le bras sur le disque et utilisez le
levier élévateur pour baisser le bras sur le point où vous voulez que commence la lecture.
4. A la fin du disque, le BRAS s’arrêtera automatiquement. Vous devrez le remettre manuellement sur le SUPPORT .
sur la commande plus de 1 seconde et l’icone " " et le message ”TURN ON”
se mettront à clignoter. Pressez à nouveau TIMER /
2. Pressez TIMER /
FB /
sur la commande pour régler l’alarme.
plusieurs fois pour régler les heures.
sur la commande pour entrer en mode réglage des minutes.
3. Pressez les boutons FF /
4. Pressez à nouveau TIMER /
FB /
plusieurs fois pour régler les minutes.
sur la commande pour terminer le réglage de l’alarme.
5. L’icone " " et le message “TURN OFF” se mettront à clignoter. Pressez à nouveau TIMER /
démarrer le réglage de l’alarme.
sur la commande pour
ACCESSOIRES FOURNIS: Adaptateur pour disques de 45 rpm
Pour lire un disque de 45 rpm, ôtez l’adaptateur avec le pouce et l’index et tirez-le.
Placez-le sur l’axe. Et vous pourrez placer le disque sur le tournedisques.
FONCTIONNEMENT DU CONNECTEUR POUR ECOUTEURS
6. Pressez les boutons FF /
Pour écouter avec des écouteurs / casque (non fourni)
7. Pressez TIMER /
FB /
plusieurs fois pour régler les heures.
sur la commande pour entrer en mode de réglage des minutes.
LECTEUR DE CD
8. Pressez les boutons FF /
1. Pressez FUNCTION /
9. Pressez TIMER /
à nouveau sur la commande pour régler la source avec laquelle vous voulez vous réveiller.
Par défaut ce sera le mode RADIO. TUNER qui clignotera à l’écran.
Lecture d’un CD
pour régler l’appareil en mode CD.
2. Pressez CD OPEN / CLOSE /
Le son des haut-parleurs est coupé.
FB /
plusieurs fois pour régler les minutes.
pour ouvrir le compartiment du CD.
3. Introduisez un disque avec la partie imprimée vers le haut. Pressez à nouveau CD OPEN / CLOSE /
le compartiment, READ s’affichera pendant que le lecteur lit le contenu du disque.
pour fermer
10. Pressez FUNCTION /
pour sélectionner la source entre:
L’appareil se positionnera sur la dernière station écoutée si le mode RADIO est sélectionné.
4. La piste 1 s’affichera lorsque la lecture du contenu du CD sera terminée.
5. Pressez une ou plusieurs fois FF /
6. Pressez STOP/BAND /
FB /
jusqu’à ce que s’affiche le numéro de piste que vous souhaitez. el
pour arrêter la lecture.
11. Pressez à nouveau TIMER /
sur la commande pour activer/désactiver l’alarme. L’icône " " s’affichera sur le LCD lorsque
l’alarme será réglée.
Remarque: Le niveau sonore du réveil augmentera progressivement jusqu’au niveau sélectionné.
12. Pressez TIMER /
sur la commande pour activer/désactiver l’alarme. L’icône " " apparaîtra/ disparaîtra.
Remarque / l’icône “ESP” clignotera pendant 40 secondes avant de rester fixe.
30
27
ENGLISH
ESPAÑOL
WARNING:
TO PREVENT FIRE OR SHOCK HAZARD, DO NOT EXPOSE THIS
ALTAVOCES EXTERNOS OPCIONALES
APPLIANCE TO RAIN OR MOISTURE. DO NOT REMOVE COVER.
PILOT LAMPS SOLDERED IN PLACE. NO USER SERVICEABLE
PARTS INSIDE. REFER SERVICING TO QUALIFIED SERVICE
PERSONNEL.
CAUTION
RISK OF ELECTRIC SHOCK
DO NOT OPEN
The lighting flash with
arrowhead symbol, within
an equilateral triangle, is
intended to alert user to
the presence of uninsulated
"dangerous voltage" within
the product's enclosure
that may be of sufficient
magnitude to constitute
risk of electric shock
to persons.
CAUTION: TO REDUCE
THE RISK OF ELECTRIC
SHOCK, DO NOT REMOVE
COVER (OR BACK). NO
USER - SERVICEABLE
PARTS INSIDE. REFER
SERVICING TO QUALIFIED
SERVICE PERSONNEL.
The exclamation point
within an equilateral
triangle is intended to
alert user to the
presence of important
operating and
maintenance (servicing)
instruction in the
literature accompanying
the appliance.
Specification
Frequency Range
USB Port 2.0
Power Consumption
Antennas
Power Source
Speaker Size
1. Con su nueva radio tiene la opción de acoplar altavoces externos.
2. Los conectores para altavoces externos están situados en la parte trasera de la radio. Junto a los conectores hay un
interruptor con dos opciones: Int. / Ext. Cuando use altavoces externos, este interruptor debe estar en posición EXT.
De esta forma desactiva los altavoces internos de la radio y redirige la potencia hacia los altavoces externos.
3. Si decide no usar altavoces externos, asegúrese de que el interruptor esté en INT.
CONEXIONES AUDIO
AUX IN
R SP+ L
AUX INPUT
Con la conexión Aux Input podrá conectar componentes de audio
adicionales y reproducirlos mediante su aparato. Todos los
componentes con salida de audio, como por ejemplo una radio, se
pueden conectar con los cables correctos (no incluidos). Este
aparato requiere cables RCA. Conecte simplemente los extremos
rojos y blancos con las entradas rojas y blancas de su aparato.
Conecte los otros extremos del cable con el componente externo.
Para más información sobre las conexiones, por favor lea el manual
del componente.
R
L
INT. EXT.
R
L
ANOTHER
AUDIO COMPONENT
AUDIO OUT
L
RESOLUCIÓN DE PROBLEMAS
No hay corriente
R
1. Asegúrese de que la radio esté conectada correctamente.
2. Mire el INDICADOR DE STANDBY y compruebe si está rojo.
3. Si la luz roja está encendida, pulse POWER /
para encender la unidad.
No hay sonido
1. Asegúrese de que la función Mute no está activada.
2. Compruebe el nivel del volumen pulsando VOLUME UP
en el mando a distancia.
Nota: El rango del volumen en algunas unidades comienza en 15 y finaliza en 40.
3. Asegúrese de que el interruptor INT. / EXT de la parte trasera de la radio esté en INT. (A no ser que esté usando
altavoces externos, en este caso debe estar en EXT. )
4. Compruebe si la corriente está conectada.
El CD no funciona
: MW 522 - 1620 KHz
: FM 87.5 - 108 MHz
: Full Speed 512MB - 4GB
(Support FAT16, FAT32)
: 23W
: External FM antenna wire
: Built-in ferrite AM bar
: AC 230V ~ 50Hz
: 4” 4 Ohm Dynamic type x 2
*DESIGN AND SPECIFICATIONS SUBJECT TO CHANGE WITHOUT NOTICE.
1. Asegúrese de que el CD está en la posición correcta (con la etiqueta hacia arriba).
2. Asegúrese de que la superficie del CD está limpia.
3. Asegúrese de que esté en modo CD.
USB – no suena música al pulsar PLAY/PAUSA (USB)
1.
2.
3.
4.
Asegúrese de que el dispositivo USB contiene archivos con música.
El aparato sólo reproduce Flash Drives hasta 512MB – 4GB .
Resetee el USB apagando la unidad o cambiando de modo.
Compruebe si los archivos están en WMA. Esta unidad no reproduce WMA, sólo MP3.
El mando a distancia no funciona
1. Cambiar pila.
2. Asegúrese de que apunta hacia el sensor remoto.
3. Retire posibles obstáculos entre el mando y la radio de forma que el camino esté despejado.
El tocadiscos no funciona
1. Compruebe que la corriente esté conectada.
2. Pulse POWER /
(en la parte frontal de la unidad o en el mando) para encender la unidad, el INDICADOR DE
STANDBY tendría que estar apagado.
3. Compruebe que la unidad esté en modo PHONO. Mueva el brazo hacia la derecha hasta que oiga un clic.
La unidad no se oye
1. No se ha quitado la cubierta protectora de la aguja
2. El volumen está desactivado
El brazo del tocadiscos no se mueve
1. No se ha quitado la brida negra del brazo.
2. El clip de sujeción del brazo no se ha soltado.
Marcas registradas – La tecnología de codificación de audio MP3 Layer-3 tiene licencia de Fraunhofer IIS y Thomson.
2
55
ENGLISH
ESPAÑOL
GETTING STARTED
UNPACKING
Reproducción de un CD de MP3
1 Remove packing materials from unit.
Note: Save all packing materials
2 Remote control is located in the outside of the Styrofoam packaging
3 Remove plastic bag covering radio and remote control.
4 Untie antenna wire on back of radio.
5 Open lid and remove Styrofoam shipping material from turntable.
6 Remove black tie-wrap from under the TONE ARM
7 Remove white protective needle cover by gently pulling towards the front of the unit.
Remarks:
a) ESD remark: In case of malfunction due to electrostatic discharge, just reset the product (reconnect of power source
may be required) to resume normal operation.
b) Electrical Fast Transient (Burst) Remark: In case of malfunction due to electrical fast transient (Burst), just reset the
product. (reconnect of power source may be required) to resume normal operation.
1. Introduzca un CD con formato MP3. Pulse CD OPEN / CLOSE
READ en pantalla mientras el sistema lee el contenido del CD.
de nuevo para cerrar el compartimento. Aparecerá
2. Se reproducirá automáticamente la pista 1 de la carpeta raíz (carpeta 1) cuando acabe la lectura del CD MP3.
3. Pulse FF /
or FB /
4. Pulse PRESET + /
una o varias veces hasta que aparezca en pantalla el número de pista que desea.
or PRESET – /
5. Pulse STOP/BAND /
para seleccionar el álbum que desee.
para detener la reproducción.
SET UP
1 Untie the wire on the AC power cord
2 Untie the FM antenna and allow it to hang down in a straight line for optimum FM reception. If you have trouble tuning
in an FM station, move the external FM antenna for best reception. Do not connect FM antenna to outside antenna.
PROGRAMACIÓN DE PISTAS
POWER UP YOUR UNIT
1. En posición Stop, pulse PROGRAM /
parpadear.
Puede guardar hasta 20 pistas en la secuencia que desee.
para iniciar la programación. El icono “MEMORY” y P0-01 empezarán a
Connect the AC power cord to the wall socket. This system switches to Standby mode automatically and LCD would shown
as below
2. Pulse FF /
To switch the unit on, press POWER /
LCD backlight will be turned on.
STANDBY LED is turned off and displayed as below.
or FB /
una o varias veces hasta que aparezca en pantalla el número de pista que desea. Para
MP3: pulse PRESET + /
or PRESET – /
para seleccionar el álbum que desee.
3. Pulse PROGRAM (52) para confirmar, en la pantalla aparecerá el nº de pistas almacenadas y la siguiente posición.
4. Repita los pasos 2-3 para seleccionar y guardar todas las pistas que desee. Aparecerá FULL cuando complete las 20
pistas.
BASIC OPERATION
Function select
1. Press FUNCTION /
to select among:
5. Pulse PLAY/PAUSA /
para reproducir el programa.
Borrar el programa
2. When the set is on, press POWER /
to switch the unit off. LCD backlight will be turned off and shown message
“GOOD BYE” for 2 seconds, then the STANDBY LED is turned on.
Note: In the standby mode, the tone, sound settings tuner presets and the volume level (up to a maximum volume level
of 30) will be stored in the unit’s memory.
Puede borrar el contenido de la memoria:
-
Pulsando Stop una vez en posición Stop, o pulsando dos veces durante la reproducción.
Pulsando POWER /
Seleccionando otra fuente de sonido
Abriendo el compartimento del CD.
GRABACIÓN
De CD a SD/USB
Este sistema puede convertir un CD entero en formato MP3 y copiarlo a un dispositivo de almacenamiento masivo USB
o a una tarjeta SD. También puede copiar una única pista de MP3 a o desde una tarjeta SD.
1. En modo reproducción CD, pulse REC /
para comenzar a ripear a USB/SD (por defecto USB, si ambos dispositivos
están conectados), la reproducción se detendrá e irá al principio de la pista actual, y el sistema buscará los contenidos
del USB/tarjeta SD y creará una carpeta para almacenar la pista de MP3. Vuelva a la reproducción del CD y comience
a ripear al momento. El icono del dispositivo correspondiente (“USB” / “CARD”) parpadeará.
2. Pulse STOP/BAND /
4
para salir de esta función.
53
ENGLISH
ESPAÑOL
SLEEP
3. Pulse PRESET + /
or PRESET – /
para asignar un número del 1 al 20.
You can set a certain period of time after which the set will switch to standby.
On the remote control, press SLEEP /
repeatedly to select the desired time period options (in minutes):
- Display shows in sequence: SLEEP 90, 80, 70, 60, 50, 40, 30, 20, 10
- Display shows the selected option briefly and returns to its previous status.
4. Pulse PROGRAM /
para confirmar, en la emisora aparecerá el número y la frecuencia de la emisora.
5. Repita los pasos 1-4 para guardar otras emisoras para escuchar una emisora guardada. Pulse PRESET + /
PRESET – /
To deactivate the sleep timer, press SLEEP /
again to “00 “ or Press POWER /
to switch the unit into standby mode.
VOLUME CONTROL
Press VOLUME UP /
/ VOLUME DOWN /
on the remote control to adjust the volume.
or
una vez o más hasta que aparezca la emisora que desea.
Escuchar una emisora memorizada
Pulse PRESET + /
or PRESET – /
una vez o más hasta que aparezca la emisora que desea.
Memorización automática de emisoras de radio
La memorización automática comenzará a memorizar emisoras desde la memoria 1, de modo que las emisoras memorizadas
anteriormente se borrarán.
1. Mantenga pulsado el PROGRAM /
hasta que aparezca Auto
- El icono “memory” empezará a parpadear
MUTE
You can temporarily switch off the sound without switching off the unit.
- Se memorizarán las emisoras disponibles
1. Press MUTE /
on the remote control to switch off the sound, playback continues without sound.
2. To switch on the sound , you can:
- press MUTE /
again;
- adjust the volume controls;
- change source
- Después de guardar todas las emisoras, se reproducirá la última que se encontró
Antena
ANTENA: para la recepción de la banda FM, junto con la unidad se proporciona una ANTENA FM de ALAMBRE , mover
el alambre hasta obtener una recepción clara y sin interferencias. Para la recepción de la banda AM, junto con la unidad
se proporciona una antena direccional de ferrita. Girar el equipo para encontrar la posición que ofrece una recepción mejor.
No conectar la ANTENA FM EXTERNA a cualquier antena externa.
EQ
Cassette
Press EQ /
on the remote control to select desired EQ mode.
5 modes preset EQ:
1. Pulse FUNCTION /
, para activar el modo PHONO en la unidad.
2. Durante el modo PHONO introduzca un cassette en la puerta del cassette.
3. Ajuste el volumen utilizando el botón de VOLUMEN ARRIBA /ABAJO /
.
4. Para avanzar rapidamente pulse EJECT/F.F.. Pulsando de nuevo el avance se para y la reproducción normal continúa.
5. Para detener la reproducción y quitar el cassette, pulse EJECT/F.F.
6. La reproducción se detendrá automáticamente una vez acabado un lado del cassette.
Nota: 1.Quite el cassette de la unidad cuando no la utiliza.
2. La función Phono se detiene automáticamente al reproducir un cassette.
FUNCIONAMIENTO DEL USB / TARJETA SD
Funcionamiento del USB:
RADIO
AM/FM Tuning
1. Press the FUNCTION /
2. Press STOP/BAND /
to set the unit to TUNER mode.
1. Pulse FUNCTION /
para ajustar la unidad en modo USB.
2. Conecte el dispositivo de almacenamiento masivo USB. Aparecerá READ en pantalla mientras el sistema lee el
contenido del dispositivo USB.
repeatedly to select your desired waveband. FM or MW
3. Se reproducirá automáticamente la pista 1 de la carpeta raíz (carpeta 1) cuando acabe la lectura del USB.
3. Auto Tuning – Press and hold FF /
or FB /
until frequency begins to scroll the radio automatically tunes to a
station with sufficient reception. If a station in received in stereo, (ST) is shown. Repeat step 3 if necessary until you
find the desired station.
4. Manual Tuning – Press FF /
or FB /
briefly and repeatedly until found a station.
4. Pulse FF /
or FB /
5. Pulse PRESET + /
Programming radio stations
6. Pulse STOP/BAND /
una o varias veces hasta que aparezca en pantalla el número de pista que desea.
or PRESET – /
You can store up to a total of 40 radio stations (FM and MW) in the memory, manually or automatically (Autostore)
1. Tune to your desired station
Funcionamiento de la tarjeta SD:
2. Press PROGRAM /
1. Pulse FUNCTION /
to activate programming, icon “ MEMORY” and P01 will start flashing.
para seleccionar el álbum que desee.
para detener la reproducción.
para ajustar la unidad en modo CARD.
2. Introduzca una tarjeta SD en la ranura. Aparecerá READ en pantalla mientras el sistema lee el contenido de la tarjeta SD.
6
51
ESPAÑOL
ENGLISH
3. Track no. 1 of root folder (Folder 1) will be playback automatically after finish reading SD card contents.
5. Pulse los botones FF /
4. Press FF /
6. Pulse PROGRAM /
de nuevo para confirmar.
Los dígitos de los minutos dejarán de parpadear y el reloj se activará.
or FB /
5. Press PRESET + /
6. Press STOP/BAND /
once or repeatedly until the desired track number appears in display.
or PRESET – /
to select desired album.
7. Pulse PROGRAM /
to stop playback.
or FB /
repetidas veces para ajustar los minutos.
para seleccionar entre 12 y 24 horas, como se muestra debajo
Remarks:
1. USB connector does not support connection with USB extension cable .
2. This unit is not designed for communication with computer directly.
3. It is not guarantee that all USB memory devices and SD cards will work on this audio system
IMPORTANT:
Do not disconnect the USB device during USB mode, as this may damage the external device or its files. Please power
off first or press another Mode before safely disconnecting the USB device.
AJUSTE DE LA ALARMA
USB Specification:
Interface
1. En modo Standby, mantenga pulsado TIMER /
-
USB 2.0 Full speed, HOST (USB HUB is not supported) Corresponding Flash memory
Compatible with USB/SD version 2.0 FAT32
Compatible with MPEG Audio 1, 2, 2.5
Compatible with Layer 1, 2, 3
Compatible with Bit rate: 128 – 320 Kbps
Subfolder nest : 8 levels
Number of track / titles max 999
Support ID3 tag V2.0
La unidad puede usarse a modo de despertador y la fuente seleccionada (CD, TUNER, USB, SD CARD O PHONO) sonará
a la hora establecida. Asegúrese de ajustar el reloj antes de usar la alarma.
ON” empezarán a parpadear. Pulse TIMER /
2. Pulse los botones FF /
3. Pulse TIMER /
5. Pulse TIMER /
PREPARING TO USE THE TURNTABLE
1. Lift up lid and remove black tie-wrap by untwisting and gently sliding out from TONE ARM
2. Remove cardboard shipper.
3. Remove white protective needle cover by gently pulling towards front of unit.
4. Release TONE ARM and hold-down clip by gently pushing to the right. This will unlock tone arm from its ARM REST.
Re-lock the hold-down clip when moving the unit to another location.
TURNTABLE OPERATION
or FB /
repetidas veces para ajustar los minutos.
de nuevo en el mando para finalizar el ajuste de la alarma.
El icono " " y el mensaje “TURN OFF” empezarán a parpadear. Pulse TIMER /
el ajuste de la alarma.
6. Pulse los botones FF /
1. Press the FUNCTION /
to set the unit to PHONO mode.
2. Set the SPEED CONTROL SWITCH to the correct speed (33 1/3, 45 or 78 rpm) for the selected record.
3. Use the CUE LEVER to raise the tone arm off its rest. Move the tone arm over the record and use the cue lever to lower
it to the point you want the record to start.
4. At the end of the record, the TONE ARM will stop automatically. You must return it to the TONE ARM REST by hand.
repetidas veces para ajustar las horas.
en el mando para entrar en el modo de ajuste de los minutos.
4. Pulse los botones FF /
TURNTABLE
or FB /
en el mando más de 1 segundo y el icono " " y el mensaje ”TURN
de nuevo en el mando para comenzar el ajuste de la alarma.
7. Pulse TIMER /
or FB /
de nuevo en el mando para comenzar
repetidas veces para ajustar las horas.
en el mando para entrar en el modo de ajuste de los minutos.
8. Pulse los botones FF /
or FB /
repetidas veces para ajustar los minutos.
9. Pulse TIMER /
de nuevo en el mando para ajustar la fuente con la que quiere despertar.
Por defecto será modo RADIO. TUNER parpadeará en la pantalla.
ACCESSORY SUPPLIED: Adaptor for 45 rpm records
To play a 45 rpm record, remove the adaptor by placing thumb & forefinger in recesses
and pulling it upwards. Then placing it on the SPINDLE.
The record can then be placed on the turntable.
10.Pulse FUNCTION
para seleccionar la fuente entre:
La unidad sintonizará la última emisora escuchada si está seleccionado el modo RADIO.
EARPHONE JACK OPERATION
Listening through Earphones / Headphones (not included)
CD PLAYER
Playing a CD
1. Press the FUNCTION /
to set the unit to CD mode.
2. Press CD OPEN / CLOSE /
to open the CD compartment
3. Insert a disc with the printed side facing up. Press CD OPEN / CLOSE /
displayed as the CD player scans the contents of a disc.
again to close the compartment, READ is
11. Pulse TIMER /
de nuevo en el mando para activar/desactivar la alarma. El icono " " aparecerá en el LCD cuando
la alarma esté ajustada.
Nota: El nivel de sonido del despertador irá aumentando progresivamente hasta el nivel seleccionado.
12. Pulse TIMER /
en el mando para activar/desactivar la alarma. El icono " " aparecerá / desaparecerá.
4. Track no. 1 will be playback automatically after finish the reading CD disc contents.
5. Press FF /
or FB /
6. Press STOP/BAND /
once or repeatedly until the desired track number appears in display.
to stop playback.
8
49
ENGLISH
ESPAÑOL
MP3 copying
UBICACIÓN DE CONTROLES
1. In CD-MP3, USB or SD card playback mode, press REC /
to start MP3 copying from CD to USB/SD card, or USB to SD
card or vice versa. Playback will be stopped and system will scan the contents of USB/SD card and create folder to store MP3
track.
2. icon “ REC displayed
3. Message COPY 01 will be displayed, the proportional copied percentage will be shown on the decimal number.
4. The target device icon “USB” or “CARD” start flashing, the decimal number will be increment from 01 as MP3 copying starts,
the process will stop as it reach 100
5. Current MP3 will be playback from beginning
ALTAVOCES
ALTAVOCES
INDICACIÓN
STAND BY
From Phono/Cassette to SD / USB
TARJETA SD
The system is capable to convert audio signal from PHONO input to MP3 format and store in USB mass storage device
or SD card (default USB if both devices are detected)
1. Press the FUNCTION /
to set the unit to PHONO mode.
2. Press REC /
to start ripping, the system will scan the contents of USB/SD card and create folder to store MP3 tracks.
3. Icon “ REC ” and message “ RIPP TO” are displayed, icon “ PHONO “ start flashing.
4. The target device icon “ USB ” or “ CARD ” start flashing as ripping begins.
BOTÓN VOLUMEN
ARRIBA/ ABAJO
PANTALLA LCD
SENSOR
FUNCION
PRESET +
PLAY / PAUSA
PRESET –
STOP / BAND
REPETIR /
STEREO
PROG / RELOJ
EJECT / F.F. PUERTA
CASSETTE
CD ABRIR /
CERRAR
ENTRADA
AURICULARES
POWER
5. Press STOP/BAND /
to exit PHONO ripping
Note: 1.Remove the tape from the unit when it is not in use or stopped.
2.Phono function discontact automatically with cassette in use.
PUERTA CD
TEPORIZADOR
UP / FF
DOWN / FB
GRABACIÓN /
BORRAR
From AUX to SD/USB
The system is capable to convert audio signal from AUX input to MP3 format and store in USB mass storage device or SD card
(default USB if both devices are detected).
1. Press FUNCTION /
once or more to select AUX
POWER / STAND BY
EQ
EQ
PRESET +
GRABACIÓN
PRESET –
2. Press REC /
to start ripping, the system will scan the contents of USB / SD card and create folder to store
MP3 track.
3. Icon “REC” and message “ RIPP TO “ are displayed, icon “ AUX “ start flashing.
4. The target device icon “ USB “ or “ CARD “ start flashing as ripping begins.
AUX IN
ANTENA
EXTERNA
ALEATORIO
ID3
The system support deleting previous recorded MP3 or existing files.
1. In USB or SD card playback mode, press and hold REC /
and will be deleted.
2. Message “ delete “ is displayed
10
for 2 seconds, current playback track is stopped
OPEN/
CLOSE
SILENCIO
SLEEP
VOLUMEN+
FUNC
FUNCION
VOL
PRESET
VOLUMEN RANDOM
AVANZAR +
ID3
BAND
REPEAT
PROG
MEM
CLOCK
1
2
TIMER
3
4
5
MONO
STEREO
6
7
8
9
0–9
TOCADISCO
ADAPTADOR PARA
DISCOS DE 45 RPM
BOTÓN CONTROL DE
VELOCIDAD (33 1/3, 45, 78 RPM)
BRAZO DE FONOCAPTOR
BASE DEL BRAZO
DE FONOCAPTOR
GANCHO DE SEGURIDAD
47
PROGRAMA
REPITIR
0
CABLE DE CORRIENTE
EJE
CD ABRIR / CERRAR
SLEEP
STOP / BAND
ENTRADA ALTAVOCES
PALANCA
Delete MP3 tracks
MUTE
REC
PLAY / PAUSA
RETROCEDER –
BOTÓN
ALTAVOCES
INTERNOS/
EXTERNOS
(INT./EXT)
5. Press STOP/BAND /
to exit AUX ripping
Note: The message “ NO FUNCT “ will be displayed if any key pressed during AUX ripping process. The message
“ NO DEV “ will be shown if neither USB or SD card not detected. The message “ FULL “ will be displayed if not enough memory
in target device.
ENTRADA USB
TIMER
MONO / STEREO
NEDERLANDS
ESPAÑOL
INSTRUCCIONES DE SEGURIDAD IMPORTANTES PARA
PRODUCTOS DE AUDIO
POR FAVOR LEA CON ATENCIÓN LAS SIGUIENTES INSTRUCCIONES DE SEGURIDAD
APLICABLES A SU EQUIPO.
1. Lea las instrucciones – Lea todas las instrucciones de seguridad y uso antes de utilizar
el aparato.
2. Guarde las instrucciones – Guarde las instrucciones de seguridad y uso para futuras
referencias.
3. Tenga en cuenta las advertencias – Siga todas las advertencias e instrucciones de
uso del aparato.
4. Siga las instrucciones – Siga todas las instrucciones de funcionamiento y uso.
5. Agua y humedad – Este aparato no debe usarse cerca del agua, por
ejemplo cerca de bañeras, lavabos, fregaderos o pilas, en superficies
mojadas o cerca de una piscina.
6. Carritos y soportes – Utilice este aparato sólo con carritos o soportes
recomendados por el fabricante.
6A.Desplace el conjunto de carrito y aparato con cuidado. Las paradas rápidas,
el exceso de fuerza o las superficies irregulares pueden hacer que el carrito vuelque.
7. Soporte de pared o techo – Coloque este aparato únicamente sobre soportes de pared
o techo recomendados por el fabricante.
8. Ventilación – Este aparato debe colocarse de forma que su posición no interfiera en
una ventilación adecuada. Por ejemplo, no debe colocarse sobre una cama, sofá,
alfombra o superficie similar, que pueda bloquear las aberturas de ventilación; tampoco
lo coloque en lugares empotrados, como estanterías o armarios, que puedan impedir
que el aire fluya por las aberturas de ventilación
9. Calor – Este aparato debe situarse lejos de fuentes de calor, como radiadores,
calentadores, estufas o demás aparatos (incluidos amplificadores) que desprendan
calor.
10. Corriente – Este aparato debe conectarse sólo a la corriente descrita en las instrucciones
de funcionamiento o a la que se describe en el propio aparato.
11. Toma de tierra o polarización – Deben tomarse precauciones para asegurarse de que
la toma de tierra o la polarización del aparato no se impiden.
12. Protección del cable de corriente – Los cables de la corriente deben estar correctamente
colocados para que no se pisen ni se aplasten con objetos colocados sobre o contra
ellos. Se debe prestar especial atención a la parte del cable cercana al enchufe y al
conector del aparato.
13. Limpieza – Debe limpiar este aparato solamente como recomienda el fabricante.
14. Este producto está diseñado para usarse con la antena acoplada y no debe conectarse
ninguna otra antena exterior.
15. Periodos sin uso – Cuando no vaya a utilizar este aparato durante periodos de tiempo
prolongados, desenchúfelo de la corriente.
16. Entrada de objetos y líquidos – Tenga cuidado de que no caigan objetos ni líquidos
a través de las aberturas de la carcasa.
17. Daños que precisan reparaciones – Este aparato debe llevarse al servicio técnico
cuando:
A. El cable de la corriente o la clavija estén dañados.
B. Hayan caído objetos o líquidos dentro del aparato.
C. El aparato se haya expuesto a la lluvia.
D. El aparato no funcione normalmente o muestre algún cambio en su funcionamiento.
E. El aparato se haya caído o la carcasa esté dañada.
18. Reparaciones — El usuario no debe intentar reparar el aparato más allá de lo descrito
en el presente manual. Todo lo demás debe realizarlo personal de mantenimiento
cualificado.
12
45
NEDERLANDS
ALEMÁN
PLAATS VAN ONDERDELEN
MP3 kopieren
LUIDSPREKER
1. Drücken Sie im C-MP3-, USB- oder SD- Kartenmodus REC /
um MP3 von einer CD auf USB/SD oder USB auf SD, oder
umgekehrt zu kopieren. Die Wiedergabe wird angehalten und das System sucht die Inhalte des USB- Speichers/ der SDKarte und öffnet einen neuen Ordner, um das MP3- Stück zu speichern.
2. Das Symbol “REC” erscheint.
3. Die Nachricht COPY 01 erscheint mit dem Fortschritt des Kopierprozesses.
4. Das Symbol des jeweiligen Gerätes (“USB” oder “CARD”) blinkt und der Fortschritt erhöht sich ab 01, bis der Prozess bei 100
beendet ist.
5. Das aktuelle MP3- Stück wird von Anfang an abgespielt.
LUIDSPREKER
VOLUME UP/
DOWN-KNOP
STAND-BYINDICATOR
SD CARD
LCD-SCHERM
SENSOR
FUNCTIE
Dieses Gerät kann Audiosignale von PHONO in MP3- Format konvertieren und auf einem USB- Speicher oder einer SD- Karte
(automatisch USB, wenn beide Geräte erkannt werden) zu speichern.
1. Drücken Sie FUNKTION /
, um den PHONO- Modus am Gerät zu aktivieren..
VOORINSTELLEN+
AFSPELEN/
PAUZEREN
VOORINSTELLEN HERHALEN/
STEREO
OPENEN/
SLUITEN
STOP/BAND
PROGRAMMEREN
/KLOK
UITWERPEN/
VOORUITSPOELEN
Von Phono/Kassette zu SD / USB
USB-POORT
HOOFDTELEFOONAANSLUITING
2. Drücken Sie REC /
, um die Aufnahme zu beginnen, das System überprüft die Inhalte des USB/ der SD- Karte und öffnet
einen neuen Ordner, um die MP3- Archive zu speichern.
3. Das Symbol “ REC ” und die Nachricht “ RIPP TO” erscheinen auf dem Display, das Symbol “ PHONO “ beginnt zu blinken.
4. Das Symbol des Zielgerätes “ USB ” oder “ CARD ” beginnt mit der Aufnahme zu blinken.
VOEDING
DEUR
CD DEUR
OMHOOG/VOORUITSPOELEN
TIMER
OPNEMEN /
OMLAAG/
WISSEN
TERUGSPOELEN
5. Drücken Sie STOP/BAND /
, um die PHONO- Aufnahme zu beenden.
Hinweis: 1.Entnehmen Sie die Kassette aus dem Gerät, wenn Sie nicht wiedergeben.
2.Die Phono- Funktion ist automatisch deaktiviert, wenn die Kassette abgespielt wird.
Von AUX auf SD/USB
VOEDING / STAND-BY-
EQ
EQ
VOORINSTELLEN +
OPNEMEN
VOORINSTELLEN -
SCHAKELAAR
INGEBOUWDE/
EXTERNE
LUIDSPREKER
(INT. /EXT)
EXTERNAL
ANTENNA
WILLEKEURIG
ID3
OPEN/
CLOSE
SLEEP
VOL
PRESET
FUNC
FUNCTIE
RANDOM
VOORUITSPOELEN / +
ID3
BAND
REPEAT
PROG
MEM
CLOCK
PROGRAMMEREN
HERHALEN
LUIDSPREKERAANSLUITING
0
1
2
TIMER
TIMER
3
4
5
MONO
STEREO
MONO/STEREO
6
7
8
9
WISSELSTROOMSNOER
As System kann das Audiosignal von AUX in MP3- Format konvertieren und auf einem Speichergerät wie einem USB- Massenspeicher
oder einer SD- Karte speichern (automatisch USB, wenn beide Geräte angeschlossen sind).
1. Drücken Sie FUNCTION /
einmal oder mehrmals, um AUX auszuwählen.
SLUIMER
VOLUME+
VOLUME -
STOP/BAND
2. Drücken Sie REC /
, um das Kopieren zu beginnen, das System durchsucht den Inhalt des USB/der SD- Karte und öffnet
einen neuen Ordner, um die MP3- Stücke zu speichern.
3. Das Symbol “REC” und die Nachricht “RIPP TO” erscheinen auf dem Display und das Symbol “AUX” blinkt.
4. Das Symbol des jeweiligen ("USB” oder "CARD”) beginnt zu blinken, wenn das Kopieren beginnt.
0-9
SPIL
DRAAITAFEL
CD OPENEN / SLUITEN
DEMPEN
REC
AFSPELEN / PAUZEREN
TERUGSPOELEN -
AUX INAANSLUITING
MUTE
ADAPTER VOOR 45-TOERENPLATEN
5. Drücken STOP/BAND /
, um die Funktion zu schließen.
Hinweis: Die Nachricht “NO FUNCT” erscheint, wenn Sie einen beliebigen Knopf während des Kopierens von AUX drücken .
Die Nachricht “NO DEV” erscheint, wenn weder USB noch SD- Karte erkannt werden. Die Nachricht “FULL” erscheint, wenn
nicht genügend Speicherplatz auf dem ausgewählten Gerät verfügbar ist.
TOONARMHENDEL
TOERENTALREGELAAR (33 1/3, 45,78 TOEREN)
MP3- Stücke löschen
TOONARM
ARMSTEUN
VEILIGHEIDSHAAK
Dieses System kann MP3 oder existierende Dateien löschen.
1. Halten Sie im USB oder SD- Karten- Abspielmodus REC /
wird unterbrochen und gelöscht.
2. Die Nachricht “ delete “ erscheint auf dem Display.
14
für 2 Sekunden gedrückt, das aktuell gespielte Stück
43
NEDERLANDS
ALEMÁN
De klok instellen
3. Es wird automatisch Stück 1 des ersten Ordners wiedergegeben, wenn die Erkennung der Daten erfolgt ist.
4. Drücken Sie FF /
or FB /
einmal oder mehrmals, bis die Nummer des gewünschten Stückes angezeigt wird.
Nadat u het systeem op de voeding hebt aangesloten, stelt u eerst de klok in.
5. Drücken Sie PRESET + /
1. Druk op POWER /
om het apparaat in stand-bymodus te zetten
- Het display toont de tijd
- "0:00" knippert standaard als u de klok niet hebt ingesteld
2
-
Houd in de stand-bymodus PROGRAM /
Het cijfer van het uur begint te knipperen
3. Druk herhaaldelijk op FF /
or FB /
4. Druk opnieuw op PROGRAM /
5. Houd FF /
or FB /
om het uur in te stellen.
WICHTIG:
Entfernen Sie den USB- Stick nicht, während Sie sich um USB- Modus befinden, Sie könnten das Gerät oder die Archive
beschädigen. Schalten Sie bitte vorher das Gerät aus oder wählen Sie einen anderen Modus, bevor Sie das USB- Gerät entfernen.
om te bevestigen. Het cijfer van de minuten stopt met knipperen, de klok begint te lopen.
om te kiezen tussen 12- en 24-uurweergave, zoals hieronder getoond
De timer instellen
Het apparaat kan als een wekker worden gebruikt, waarbij het afspelen van de geselecteerde bron (CD, TUNER, USB,
SD CARD OF PHONO) start op de vooringestelde tijd. Zorg dat de klok is ingesteld voordat u de timer gebruikt.
op de afstandsbediening langer dan 1 seconde ingedrukt, het pictogram " "
en het bericht "TURN ON" beginnen te knipperen. Druk opnieuw op TIMER /
instelling van de timer "SYSTEEMVOEDING AAN" te starten.
, um das gewünschte Album auszuwählen.
, um die Wiedergabe zu beenden.
1. Der USB- Anschluss unterstützt keine Anschlüsse über ein USB- Verlängerungskabel.
2. Dieses Gerät eignet sich nicht dazu, direkt an einen Computer angeschlossen zu werden.
3. Wir garantieren nicht, dass alle USB- Speichergeräte und SD- Karten mit diesem Audiosystem funktionieren.
om te bevestigen. Het cijfer van de minuten begint te knipperen
1. Houd in de stand-bymodus TIMER /
or PRESET – /
Bemerkungen:
langer dan 1 seconde ingedrukt.
herhaaldelijk ingedrukt om de minuten in te stellen.
6. Druk opnieuw op PROGRAM /
7. Druk op PROGRAM /
6. Drücken Sie STOP/BAND /
op de afstandsbediening om de
Technische Daten des USB:
Schnittstelle
-
USB 2.0 Hochgeschwindigkeit, HOST (unterstützt nicht HUB USB) entspricht einem Flash- Speicher
Kompatibel mit USB/SD Version 2.0 FAT32
Kompatibel mit MPEG Audio 1, 2, 2.5
Kompatibel mit Layer 1, 2, 3
Kompatibel mit Bitrate: 128 – 320 Kbps
Niveaus der Unterordner: 8 Niveaus
Anzahl der Stücke / Titel: max 999
Unterstützt ID3 tag V2.0
PLATTENSPIELER
VORBEREITUNG VOR DEM GEBRAUCH
1. Öffnen Sie den Deckel und entfernen Sie die schwarze Klammer und ziehen Sie sie vorsichtig vom TONARM
2. Entfernen Sie das Schutzpapier für den Versand.
3. Entfernen Sie die weiße Schutzhülle der Nadel, indem Sie leicht nach vorne ziehen.
4. Lösen Sie den TONARM und drücken Sie den Clip leicht nach rechts. So wird der Tonarm von seiner BASIS gelöst.
Wenn Sie das Gerät bewegen, befestigen Sie den Tonarm wieder mit dem Clip.
FUNKTIONEN DES PLATTENSPIELERS
2. Druk herhaaldelijk op FF /
3. Druk op TIMER /
or FB /
om het uur in te stellen.
op de afstandsbediening om naar de modus voor instelling van minuten te gaan.
4. Druk herhaaldelijk op FF /
or FB /
5. Druk opnieuw op TIMER /
op de afstandsbediening om de instelling van de timer "SYSTEEMVOEDING UIT" te
- om de minuten in te stellen.
starten.Het pictogram '' " en het bericht "TURN OFF" beginnen te knipperen. Druk opnieuw op TIMER /
afstandsbediening om de instelling van de timer te starten.
op de
1. Drücken Sie FUNCTION /
, um den PHONO-Modus am Gerät zu aktivieren.
2. Stellen Sie die GESCHWINDIGKEIT je nach Geschwindigkeit (3, 1/3, 45 oder 78 rpm) der gewählten Platte ein.
3. Benutzen Sie den HEBEL, um den Tonarm aufzunehmen. Bewegen Sie den Tonarm über der Platte und setzen Sie ihn
an der Stelle ab, wo Sie mit der Wiedergabe beginnen möchten.
4. Wenn die Platte abgespielt wurde, hält der TONARM automatisch an. Sie müssen ihn manuell wieder auf die BASIS
bewegen.
MITGELIEFERTES ZUBEHÖR: Adapter für 45 rpm- Platte
Um eine 45 rpm- Platte wiederzugeben, entnehmen Sie den ADAPTER mit beiden Daumen und
Zeigefinger und ziehen Sie. Legen Sie ihn auf die MITTE. Jetzt können Sie die Platte einlegen.
FUNKTIONEN FÜR DEN KOPFHÖRERANSCHLUSS
6. Druk herhaaldelijk op FF /
7. Druk op TIMER /
or FB /
om het uur in te stellen.
op de afstandsbediening om naar de modus voor instelling van minuten te gaan.
8. Druk herhaaldelijk op FF /
or FB /
- om de minuten in te stellen.
9. Druk opnieuw op FF /
or FB /
op de afstandsbediening om de instelling van de bron voor het wekken te
starten. De TUNER-modus is standaard ingesteld. Het bericht TUNER begint te knipperen.
Um mit Kopfhörern (nicht mitgeliefert) Musik zu hören
CD-PLAYER
Wiedergabe einer CD
1. Drücken Sie FUNCTION /
, um den CD- Modus zu aktivieren.
2. Drücken Sie CD OPEN / CLOSE /
, um die CD- Lade zu öffnen.
3. Legen Sie eine CD mit der bedrückten Seite nach oben ein. Drücken Sie CD OPEN / CLOSE /
Lade zu öffnen. Auf dem Display erscheint READ, während das Gerät die Informationen liest.
erneut, um die
10. Druk op FUNCTION /
om de bron voor het wekken te selecteren.
Het apparaat wordt ingeschakeld in de laatst afgestemde zender als de TUNER-modus is geselecteerd.
4. Es wird automatisch Lied 1 wiedergegeben, wenn die Informationen der CD gelesen wurden.
5. Drücken Sie FF /
or FB /
6. Drücken Sie STOP/BAND /
einmal oder mehrmals, bis die Nummer des gewünschten Stückes erscheint.
, um die Wiedergabe zu beenden.
11. Druk opnieuw op TIMER /
op de afstandsbediening om de instelling van timer aan/uit te voltooien. Het pictogram
" " blijft op het LCD staan als de timer ingesteld is.
Opmerking: het wekgeluidsniveau wordt langzaam verhoogd tot het vooringestelde volumeniveau.
12. Druk op TIMER /
aan/uit.
op de afstandsbediening om de timer in/uit te schakelen. Het pictogram " " gaat respectievelijk
16
41
NEDERLANDS
3. Druk op PRESET + /
ALEMÁN
or PRESET – /
om een aantal van 1 tot 20 zenders toe te wijzen.
SLEEP- FUNKTION
Sie können auswählen, wann das Gerät automatisch in den Standby- Modus umstellt.
4. Druk op PROGRAM /
om te bevestigen, het display toont de golfband van het vooringestelde nummer en de
frequentie van de vooringestelde zender.
5. Herhaal stappen 1-4 om andere zenders op te slaan om naar een vooringestelde zender te luisteren. Druk eenmaal
of herhaaldelijk op PRESET + /
or PRESET – /
Drücken Sie an der Fernbedienung mehrmals SLEEP /
, um die Dauer (in Minuten)einzustellen:
- Auf dem Display erscheinen nacheinander: SLEEP 90, 80, 70, 60, 50, 40, 30, 20, 10
- Auf dem Display wird kurz die gewählte Option angezeigt und anschließend kehrt das System in den Betrieb zurück.
tot de gewenste vooringestelde zender wordt weergegeven.
Naar een vooringestelde zender luisteren
Drücken Sie SLEEP /
erneut, um die Funktion zu deaktivieren und auf “00” zurückzustellen oder drücken Sie POWER /
damit das Gerät den Standby- Modus aktiviert.
Druk een of meerdere keren op PRESET + /
or PRESET – /
- tot de gewenste vooringestelde zender wordt
weergegeven. Radiozenders automatisch
programmeren
Bij het automatisch programmeren worden zenders vooringesteld, te beginnen met nummer 1, eerder geprogrammeerde
radiozenders worden gewist.
Lautstärkekontrolle
Drücken Sie VOLUME UP /
/ VOLUME DOWN /
,
an der Fernbedienung, um die Lautstärke einzustellen.
1. Houd de knop PROGRAM /
ingedrukt tot Auto verschijnt
- Het pictogram "MEMORY" begint te knipperen
-
FUNKTION TON AUS
Beschikbare zenders worden geprogrammeerd
Sie können vorübergehen den Ton ausschalten, ohne das Gerät auszuschalten.
-
Nadat alle zenders zijn opgeslagen, wordt de laatst vooringestelde zender afgespeeld
ANTENNE
Antenne: voor FM-ontvangst is het apparaat uitgerust met een FM-DRAADANTENNE, verplaats de draad tot de ontvangst
zuiver en zonder storingen is. Voor AM-ontvangst is het apparaat uitgerust met een ingebouwde ferrietstaaf-richtingsantenne.
Draai het toestel om de positie met optimale ontvangst te vinden. Sluit de EXTERNE FM-ANTENNE niet aan op een
buitenantenne.
1. Drücken Sie MUTE /
an der Fernbedienung, um den Ton auszuschalten, die Wiedergabe läuft weiter,
ohne dass Sie etwas hören
2. Um den Ton wieder zu aktivieren können Sie:
- MUTE /
erneut drücken;
- Die Laustärke einstellen;
- Die Klangquelle ändern
CASSETTE GEBRUIKEN
1.
2.
3.
4.
Druk op FUNCTION /
om het apparaat in PHONO-modus te zetten.
Plaats met het apparaat in Phono-modus een vooraf opgenomen cassette via de CASSETTEDEUR.
Regel het volumeniveau door aan de VOLUME DOWN/UP-KNOP te draaien.
Om vooruit te spoelen, drukt u EJECT/F.F. halfweg in. Als u opnieuw drukt, stopt het vooruitspoelen en keert de
cassette terug naar de afspeelmodus.
5. Om de cassette te stoppen en uit te werpen, drukt u EJECT/F.F. volledig in.
6. Wanneer een zijde van de cassette is afgespeeld, stopt de cassette automatisch.
Opmerking: 1. Neem de cassette uit het apparaat wanneer het niet in gebruik is of gestopt is.
2. De Phono-functie wordt automatisch uitgeschakeld wanneer een cassette in gebruik is.
EQ
Drücken Sie EQ /
an der Fernbedienung, um den gewünschten EQ- Modus einzustellen.
Es gibt 5 EQ- Einstellungen:
USB & SD-KAART GEBRUIKEN
USB gebruiken:
1. Druk op FUNCTION /
om het apparaat in USB-modus te zetten.
2. Sluit het USB-massaopslagapparaat aan. READ wordt weergegeven terwijl het systeem de inhoud van het USBapparaat scant.
RADIO
Abstimmung von AM/FM
1. Drücken Sie FUNCTION /
2. Drücken Sie STOP/BAND /
, um das Gerät im TUNER- Modus einzustellen (Radio).
, um die gewünschte Bandbreite einzustellen: FM oder MW
3. Track nr. 1 van de hoofdmap (Map 1) wordt automatisch afgespeeld nadat de inhoud van het USB-apparaat is gelezen.
4. Druk eenmaal of herhaaldelijk op FF /
5. Druk op PRESET + /
6. Druk op STOP/BAND /
SD-kaart gebruiken:
1. Druk op FUNCTION /
or PRESET – /
or FB /
tot het gewenste tracknummer in het display verschijnt.
om het gewenste album te selecteren.
3. Automatische Abstimmung Halten Sie FF FF /
or FB /
gedrückt, bis ein Sender gefunden wird, der gut zu hören ist.
Wenn Sie einen Stereosender empfangen, erscheint (ST). Wiederholen Sie Schritt 3, bis Sie den gewünschten Sender finden.
4. Manuelle Abstimmung - Drücken Sie FF FF /
or FB /
kurz und mehrmals hintereinander, bis Sie einen Sender finden.
Speicher der Radiosender
Sie können bis zu 40 Radiosender manuell oder automatisch speichern (FM und MW).
1. Stellen Sie den gewünschten Sender ein.
om het afspelen te stoppen.
om het apparaat in CARD-modus te zetten.
2. Drücken Sie PROGRAM /
, um den Speicher zu aktivieren, das Symbol "MEMORY” und P01 blinken.
2. Plaats de SD-kaart in de kaartsleuf. "READ" wordt weergegeven terwijl het systeem de inhoud van de SD-kaart scant.
18
39
NEDERLANDS
ALEMÁN
CD-MP3 afspelen
1. Plaats een CD in MP3-formaat. Druk opnieuw op CD OPEN / CLOSE /
wordt weergegeven terwijl de CD-speler de inhoud van een disc scant.
om het compartiment te sluiten. READ
2. Track nr. 1 van de hoofdmap (Map 1) wordt automatisch afgespeeld nadat de inhoud van de CD-MP3 is gelezen.
3. Druk eenmaal of herhaaldelijk op FF /
4. Druk op PRESET + /
or FB /
or PRESET – /
5. Druk op STOP/BAND /
(--- tot het gewenste tracknummer in het display verschijnt.
om het gewenste album te selecteren.
om het afspelen te stoppen.
VORBEREITUNG
VERPACKUNG
1 Entfernen Sie alles Verpackungsmaterial des Gerätes.
Hinweis: Bewahren Sie das Verpackungsmaterial auf.
2 Die Fernbedienung befindet sich außen an der Verpackung.
3 Entfernen Sie das Plastik, in das das Radio und die Fernbedienung verpackt sind.
4 Rollen Sie die Antenne an der Rückseite des Radios aus.
5 Öffnen Sie den Deckel und entfernen Sie das Verpackungsmaterial auf dem Plattenteller.
6 Entfernen Sie die Klammer am TONARM.
7 Entfernen Sie die weiße Schutzhülle an der Nadel , indem Sie leicht nach vorne ziehen.
Hinweise:
a)Hinweis ESD: Sollte das Gerät aufgrund von elektrostatischen Ladungen nicht funktionieren, starten Sie es neu.
(ziehen Sie den Stecker aus der Steckdose und schließen Sie ihn wieder an), um den normalen Betrieb aufzunehmen.
b)Hinweis zu schnellen elektrischen Übergängen (Explosionen) (I2): das Gerät nicht funktionieren, starten Sie es neu.
(ziehen Sie den Stecker aus der Steckdose und schließen Sie ihn wieder an), um den normalen Betrieb aufzunehmen.
EINSTELLUNG
TRACKS PROGRAMMEREN
U kunt maximaal 20 tracks opslaan in de gewenste volgorde.
1. Druk in de stopstand op PROGRAM /
te knipperen.
om het programmeren te starten. Het pictogram "MEMORY" en P0-01 beginnen
1 Rollen Sie das Stromkabel aus
2 Lösen Sie die FM- Antenne und lassen Sie sie in gerader Linie herunterhängen, um den FM- Empfang zu verbessern.
Sollten Sie Probleme bei der Einstellung von FM- Sendern haben, bewegen Sie die externe FM- Antenne, um den
Empfang zu verbessern. Schließen Sie die FM- Antenne nicht an eine externe Antenne an.
STROMVERSORGUNG DES GERÄTES
Schließen Sie Stromkabel an eine Steckdose an. Das System aktiviert automatisch den Standby – Modus und auf dem
LCD- Display erscheint folgendes:
2. Druk eenmaal of herhaaldelijk op FF /
MP3: druk op PRESET + /
3. Druk op PROGRAM /
or FB /
or PRESET – /
tot het gewenste tracknummer in het display verschijnt. Voor
om het gewenste album te selecteren.
om te bevestigen, het display toont het opgeslagen tracknummer en de volgende opslagpositie.
4. Herhaal stap 2-3 om alle gewenste tracks te selecteren en op te slaan. FULL wordt weergegeven als u meer dan 20
tracks probeert te programmeren
Drücken Sie POWER /
, um das Gerät einzuschalten und das Licht des LCD erleuchtet.
Das LED des STANDBY erlischt und Sie sehen Folgendes:
GRUNDFUNKTIONEN
Funktionsauswahl
1.Drücken Sie FUNCTION /
um zwischen folgenden Optionen auszuwählen:
5. Druk op PLAY/PAUSE --- om het programma af te spelen.
Het programma wissen
U kunt de inhoud van het geheugen wissen als volgt:
- eenmaal in de stopstand, tweemaal tijdens het afspelen;
- Drukken op POWER /
- Een andere geluidsbron selecteren
- De CD-deur openen
OPNEMEN
Van CD naar SD/USB
Met dit systeem kunt u een volledige CD omzetten in MP3-formaat en kopiëren naar een USB-massaopslagapparaat of
SD-kaart. U kunt ook één MP3-track kopiëren van en naar USB/SD-kaart.
1. Druk in de CD-afspeelmodus op REC /
om het rippen naar USB/SD-kaart te starten(USB wordt standaard
geselecteerd als beide apparaten worden gedetecteerd), het afspelen
stopt en het apparaat gaat terug naar het begin van de huidige track, het systeem scant de inhoud van USB/SD-kaart
en maakteen map om de MP3-track op te slaan. Het afspelen van de CD wordt hervat en het rippen start vanaf dit
moment. Het pictogram van het overeenkomstige doelapparaat " USB " / " CARD " begint te knipperen.
2. Druk op STOP/BAND /
om het rippen van CD af te sluiten.
20
2.Drücken Sie POWER /
, wenn das Gerät eingeschaltet ist, um es auszuschalten. Das Licht des LCD schaltet sich
aus und “GOOD BYE” erscheint für 2 Sekunden und danach leuchtet das LED des STANDBY.
Hinweis: Im Standby- Modus werden die Einstellungen des Klangs und der Lautstärke (bis zu einem Maximum von 30)
gespeichert.
37
NEDERLANDS
ALEMÁN
OPTIONELE EXTERNE LUIDSPREKERS
ACHTUNG:
1. U kunt optioneel externe luidsprekers toevoegen aan uw nieuwe radio.
2. De luidsprekeraansluitingen voor externe luidsprekers bevinden zich op de achterzijde van de radio. Naast de
luidsprekeraansluitingen zit een schakelaar met de aanduiding Int./Ext. Wanneer u externe luidsprekers gebruikt, moet
u deze schakelaar in de stand EXT. zetten. Hierdoor worden de ingebouwde luidsprekers in de radio uitgeschakeld
en wordt de voeding naar de externe luidsprekers omgeleid.
3. Als u beslist de externe luidsprekers niet te gebruiken, zorg dan dat u de schakelaar op INT. zet.
AANSLUITINGEN VOOR AUDIO
AUX IN
AUX-INGANG
Via de Aux-ingang kunt u extra externe audiocomponenten aansluiten
en deze beluisteren via uw apparaat. Elke component met een audiouitgang zoals een tuner kan worden aangesloten met behulp van
de correcte kabels (niet inbegrepen). Dit apparaat gebruikt RCAstandaardkabels. Sluit de rode en witte stekkers aan een uiteinde
van de kabel aan op de rode en witte Aux In-aansluitingen op de
achterzijde van uw apparaat. Het andere uiteinde van de kabel wordt
aangesloten op de audio-uitgangsaansluiting van de externe
component. Zie voor meer informatie over het aansluiten van de
externe component de gebruikershandleiding van die component.
R
R SP+ L
L
UM DIE BRAND- ODER STROMSCHLAGGEFAHR ZU VERMEIDEN,
SETZEN SIE DIESES GERÄT WEDER REGEN ODER FEUCHTIGKEIT
AUS.ENTFERNEN SIE NICHT DAS GEHÄUSE. DIE LAMPEN SIND
ANGESCHWEIßT. IM INNEREN BEFINDEN SICH KEINE
BRAUCHBAREN KLEINTEILE. WENDEN SIE SICH BEI REPARATUREN
IMMER AN QUALIFIZIERTES PERSONAL.
INT. EXT.
R
L
ADVERTENCIA
ANOTHER
AUDIO COMPONENT
AUDIO OUT
L
RIESGO DE DESCARGAS
ELÉCTRICAS. NO ABRIR
PROBLEMEN OPLOSSEN
Er is geen stroomtoevoer
1. Controleer of de stekker van het netsnoer goed in het stopcontact zit.
2. Controleer of het lampje van de STAND-BY-INDICATOR brandt (rood).
R
3. Als het rode lampje brandt, drukt u op de knop POWER /
om het apparaat in te schakelen.
Er komt geen geluid uit het apparaat
1. Controleer of het volume voldoende omhoog is gezet door te drukken op de knop VOLUM /
Opmerking: het volumebereik op sommige apparaten ligt tussen niveau 15 en niveau 40.
2. Controleer of de dempingsfunctie uitgeschakeld is ( --- op de afstandsbediening).
3. Controleer of de INT./EXT.-schakelaar op de achterzijde van het apparaat op INT. staat. (Tenzij u externe luidsprekers
gebruikt, dan moet hij op EXT. staan.)
4. Controleer of de voeding is ingeschakeld.
CD wordt niet afgespeeld
1. Controleer of de CD correct is geplaatst (labelzijde naar boven).
2. Controleer of het oppervlak van de CD schoon is. Reinig het oppervlak alleen met een zachte pluisvrije droge doek.
Gebruik geen reinigingsmiddelen.
3. Controleer of de functieschakelaar in CD-modus staat.
USB – Er wordt geen muziek afgespeeld wanneer u op PLAY/PAUSE (USB) drukt
1. Controleer of er MP3-muziekbestanden zijn opgeslagen op het MP3-apparaat/flashstation.
2. Het apparaat speelt alleen flashstations van 512 MB – 4 GB af
3. Reset USB door het apparaat uit te schakelen of in een andere modus te zetten.
4. Controleer of het WMA-muziekbestanden zijn. Het apparaat speelt geen WMA-bestanden af, alleen MP3-bestanden.
AUX-IN – Er wordt geen muziek afgespeeld wanneer u op PLAY/PAUSE drukt
1. Controleer of het aangesloten MP3-apparaat of ander audioapparaat ingeschakeld is.
2. Het aangesloten apparaat speelt alleen af wanneer het via de eigen bedieningsknoppen wordt bediend, maar het
volume kunt u regelen met de VOLUME UP/DOWN-KNOP op het hoofdapparaat of door te drukken op
of
op
de afstandsbediening.
Afstandsbediening werkt niet
1. Controleer de batterijlading en vervang de batterij indien nodig.
2. Zorg ervoor dat u de afstandsbediening naar de afstandsbedieningssensor richt tijdens het gebruik.
3. Verwijder obstakels tussen de afstandsbediening en het apparaat zodat het afstandsbedieningssignaal een recht pad
naar het apparaat heeft.
De draaitafel werkt niet
1. Controleer of het apparaat aangesloten is op de wisselstroombron.
2. Druk op de knop POWER /
(op de voorzijde van het apparaat of op de afstandsbediening) om het apparaat in te
schakelen, het lampje van de STAND-BY-INDICATOR moet uit zijn.
3. Controleer of het apparaat in PHONO-modus staat.
4. Beweeg de toonarm lichtjes naar rechts tot u een klik hoort – de draaitafel moet beginnen te draaien.
5. Controleer of de aandrijfriem niet is losgekomen, mogelijk moet hij terug worden aangebracht.
De toonarm beweegt niet
1. De zwarte tie-wrap onder de toonarm is niet verwijderd.
2. De neerdrukker van de toonarm op de armsteun is niet losgemaakt.
De toonarm schuift over de plaat
1. Controleer of de witte naaldbescherming verwijderd is.
2. Controleer of de naald beschadigd is of niet correct is aangebracht.
Das Symbol mit dem Blitz mit
Pfeilspitze im gleichseitigen
Dreieck weist den Benutzer
auf nicht isolierte „gefährliche
Spannung“ hin, die so groß
sein kann, das für Menschen
gefährlich werden kann.
ACHTUNG: STROMSCHLAGGEFAHR.
NICHT ÖFFNEN. ACHTUNG: UM
STROMSCHLÄGE ZU VERMEIDEN,
ENTFERNEN SIE NICHT DAS
GEHÄUSE (AUCH NICHT AN DER
RÜCKSEITE), IM INNEREN BEFINDEN
SICH KEINE BRAUCHBAREN
KLEINTEILE. WENDEN SIE SICH BEI
REPARATUREN IMMER AN DEN
TECHNISCHEN DIENST.
Technische Daten
Frequenzbereich
USB 2.0 Anschluss
Energieverbrauch
Antennen
Stromversorgung
Lautsprechergröße
: MW 522 - 1620 KHz
: FM 87.5 - 108 MHz
: Geschwindigkeit Größe 512MB - 4GB
(Unterstützt FAT16, FAT32)
: 23W
: Externes Antennenkabel für FM
: Eingebaute Antenne für AM
: AC 230V ~ 50Hz
: 4” 4 Ohm Dynamischer Type x 2
* ÄNDERUNGEN IM DESIGN UND BEI DEN TECHNISCHEN MERKMALEN
VORBEHALTEN.
Handelsmerken - MPEG Layer-3 audiocoderingstechnologie onder licentie van Fraunhofer IIS en Thomson
22
Das Ausrufezeichen im
gleichseitigen Dreieck weist
den Benutzer auf wichtige
Informationen über
Funktionen und Wartung
(Reparaturen) in der
beiliegenden
Bedienungsanleitung hin.
35
FRANCAIS
FRANCAIS
AVERTISSEMENT:
POUR EVITER DES RISQUES D´INCENDIE OU DE DECHARGES
ELECTRIQUES, N’EXPOSEZ PAS CET APPAREIL A LA PLUIEÊ NI A
L’HUMIDITE, N’ENLEVEZ PAS LE COUVERCLE. IL N’Y A AUCUNE
PIECE UTILE A L’INTERIEUR. EN CAS DE REPARATIONS VEUILLEZ
CONTACTER UN PERSONNEL QUALIFIE.
AVERTISSEMENT
RISQUE DE DECHARGE
ELECTRIQUE NE PAS OUVRIR
Le symbole de l’éclair à
pointe de flèche dans un
triangle équilatéral prétend
avertir l’utilisateur de la
présence de «Êvoltage
dangereuxÊ» sans isolation
à l’intérieur du produit,
pouvant être suffisamment
puissant pour supposer un
risque d’électrocution pour
les personnes.
AVERTISSEMENTÊ: POUR REDUIRE
LE RISQUE DE DECHARGE
ELECTRIQUE, N’ENLEVEZ PAS LE
COUVERCLE (NI LA PARTIE
ARRIERE) IL N’Y A PAS DE PIECES
QUI PUISSENT VOUS ETRE UTILES
A L’INTERIEUR. EN CAS DE
REPARATIONS VEUILLEZ FAIRE
APPEL A UN PERSONNEL
COMPETENT.
Le signe d’exclamation
dans un triangle équilatéral
prétend avertir l’utilisateur
de la présence
d’instructions de
fonctionnement et
d’entretien (réparations)
importantes dans le
manuel qui accompagne
l’appareil.
Spécifications:
Echelle de fréquences
Port USB 2.0
Consommation d’énergie
Antennes
Courant électrique
Dimensions Haut-parleur
: MW 522 - 1620 KHz
: FM 87.5 - 108 MHz
: Vitesse totale 512MB -4GB
(Support FAT16, FAT32)
: 23W
: Câble d’antenne externe pour FM
: Antenne de ferrite intégrée pour AM
: AC 230V ~ 50Hz
: 4” 4 Ohm Dynamic type x 2
*CONCEPTION ET SPECIFICATIONS SUJETS A MODIFICATIONS SANS AVERTIR
AU PREALABLE
HAUT-PARLEURS EXTERNES EN OPTION
1. Avec votre nouvelle radio vous avez l’option de connecter des haut-parleurs externes.
2. Les connecteurs pour haut-parleurs externes se situent sur la partie arrière de la radio.
3. A côté du connecteur il y a un interrupteur avec 2 options : Int. / Ext. Lorsque vous utilisez des haut-parleurs externes,
cet interrupteur doit être sur la position EXT. Il désactive alors les haut-parleurs internes et redirige la puissance vers
les haut-parleurs externes.
4. Si vous décidez de ne pas utiliser de haut-parleurs externes; assurez-vous que l’interrupteur soit sur INT.
CONNEXIONS AUDIO
ENTRÉE AUXILIAIRE
AUX IN
L’utilisation de l’entrée Aux vous permet de brancher des
composants audio externes et de les écouter par le biais de votre
appareil. Tout composant avec une sortie audio comme un Tuner,
peut être connecté en utilisant les câbles corrects (non fournis).
Cet appareil utilize des cables standard RCA. Branchez simplement
les fiches rouge et blanche à l’une des extrémités du câble aux
prises rouge et blanche Aux In sur votre appareil.
L’autre extrémité du câble sera branché sur la fiche Sortie Audio
du composant externe. Pour plus d’information au sujet du
branchement du composant externe, voyez le mode d’emploi de
chaque composant
R
R SP+ L
L
INT. EXT.
R
L
ANOTHER
AUDIO COMPONENT
AUDIO OUT
L
RESOLUTION DE PROBLEMES
Pas de courant
R
1. Assurez-vous que la radio soit correctement branchée.
2. Vérifiez le voyant de STANDBY et assurez-vous qu’il soit sur rouge.
3. Si la lumière rouge est allumée, pressez POWER /
pour allumer l’appareil.
Pas de son
1. Assurez-vous que la fonction Mute n’est pas activée.
2. Vérifiez le niveau de volume en pressant VOLUME + /
sur la télécommande.
Remarque : sur certains appareils l’échelle de volume démarre à 15 et termine à 40.
3. Assurez-vous que l’interrupteur INT. / EXT de la partie arrière de la radio soit sur INT. (cela si vous n’utilisez pas
de haut- parleurs externe, dans ce cas il doit être sur EXT. )
4. Vérifiez que le courant soit en marche.
Le CD ne marche pas
1. Assurez-vous que le CD soit sur la position correcte (étiquette en haut).
2. Assurez-vous que la surface du CD soit propre.
3. Assurez-vous qu’il soit en mode CD.
USB – pas de musique en pressant PLAY/PAUSE (USB)
1.
2.
3.
4.
Assurez-vous que le dispositif contienne des dossiers de musique.
L’appareil lira uniquement les Pilotes Flash supérieurs à 512MB – 4GB
Redémarrez l’ USB en éteignant l’appareil ou en changeant de mode.
Vérifiez si les dossiers sont en WMA. Cet appareil lit WMA, uniquement MP3.
La télécommande ne marche pas
1. Changer la batterie.
2. Assurez-vous que vous la pointez vers le contrôle à distance.
3. Retirez les obstacles possibles entre la télécommande et la radio pour dégager le chemin
Le tournedisques ne marche pas
1. Vérifiez que le courant soit en marche.
2. Pressez POWER /
(sur la partie frontale de l’appareil sur la télécommande) pour allumer l’appareil, le voyang
DE STANDBY devra être éteint.
3. Vérifiez que l’appareil soit en mode PHONO. Déplacez le bras vers la droite jusqu’à entendre un clic.
On n’entend pas l’appareil
1. Vous n’avez pas enlevé le couvercle protecteur de l’aiguille.
2. Le volume est désactivé.
Le bras du tournedisques ne bouge pas
1. La bride noire du bras n’a pas été retirée.
2. Le clip de sujétion du bras n’a pas été retiré.
Marques déposées – La technologie de codification audio MP3 Layer-3 possède une licence de Fraunhofer IIS y Thomson.
24
33
FRANCAIS
FRANCAIS
PREPARATION
DEBALLAGE
Lecture d’un CD de MP3
1 Retirez tous les matériels présents dans l’emballage de l’appareil
Remarque : conservez tous les emballages.
2 La télécommande est placée sur la partie extérieure de la mousse de l’emballage.
3 Retirez le sac de plastique qui enveloppe la radio et la télécommande.
4 Déroulez le câble d’antenne situé sur la partie arrière de la radio.
5 Ouvrez le couvercle et retirez le matériel d’emballage en mouse de polystyrène du plateau.
6 Retirez la bride noire de la partie inférieure du BRAS.
7 Enlevez le couvercle protecteur blanc de l’aiguille en tirant doucement vers la partie frontale de l’appareil.
1. Introduisez un CD de format MP3. Pressez à nouveau CD OPEN / CLOSE /
s’affichera à l’écran pendant que le système lira le contenu du CD.
pour fermer le compartiment. READ
2. La piste 1 du dossier-racine (dossier 1) lorsque terminera la lecture du CD MP3.
Remarques:
a) Remarque ESD: En cas de mauvais fonctionnement à cause de décharges électrostatiques, redémarrez simplement le produit
(déconnectez-le et reconnectez-le) pour revenir au fonctionnement normal.
b) Remarque sur les décharges électriques rapides transitoires (explosions) (I2): En cas de mauvais fonctionnement, redémarrez
simplement ce produit (déconnectez-le et reconnectez-le) pour revenir au fonctionnement normal.
3. Pressez une ou plusieurs fois FF /
Pulse PRESET+ /
FB /
/ PRESET- /
4. Pressez STOP/BAND /
jusqu’à ce que s’affiche à l’écran le numéro de piste que vous souhaitez.
para seleccionar el álbum que desee.
pour arrêter la lecture.
CONFIGURATION
1 Déroulez le câble électrique AC
2 Détachez l’antenne FM et laissez-la pendre en ligne droite pour une réception optimale de FM. Si vous avez des problèmes
en réglant une station FM, bougez l’antenne externe FM pour une meilleure réception. Ne branchez pas l’antenne FM à une
antenne externe.
PROGRAMMATION DE PISTES
Vous pouvez conserver jusqu’à 20 pistes dans la séquence que vous souhaitez.
1. En position Stop, pressez PROGRAM /
commenceront à clignoter.
ALIMENTATION DE L’APPAREIL
pour démarrer la programmation. Les icônes “MEMORY” et P0-01
Branchez le câble électrique sur une prise. Ce système passe automatiquement en mode Standby et le LCD affichera ceci :
2. Pressez une ou plusieurs fois FF /
Pour allumer l’appareil, pressez POWER /
et la lumière du LCD s’allumera.
Le LED de STANDBY s’éteindra et affichera ceci :
3. Pressez PROGRAM /
FB /
jusqu’à ce que s’affiche à l’écran le numéro de piste que vous souhaitez.
/ PRESET- /
pour sélectionner l’album que vous souhaitez.
pour confirmer, s’affichera à l’écran le nombre de pistes stockées et la position suivante.
4. Répétez les étapes 2-3 pour sélectionner et conserver toutes les pistes que vous souhaitez. FULL s’affichera lorsque
vous aurez complété les 20 pistes.
FONCTIONNEMENT DE BASE
Sélection de fonctions :
1 Pressez FUNCTION /
Pour MP3: pressez PRESET+ /
pour :
5. Pressez PLAY/PAUSE /
2. Lorsque l’appareil est allumé, pressez POWER /
pour l’éteindre. La lumière du LCD s’éteindra et le message
“GOOD BYE” apparaîtra pendant 2 secondes et ensuite le LED de STANDBY s’allumera.
Remarque : En mode Standby, dans la mémoire de l’appareil seront stockés les réglages de ton et son et le niveau de volume.
pour sélectionner le programme.
Effacer le programme
Vous pouvez effacer le contenu de la mémoire:
- En pressant STOP une fois en position Stop, ou en pressant deux fois pendant la lecture.
- En pressant POWER /
- En sélectionnant une autre forme de son.
- En ouvrant le compartiment du CD.
ENREGISTREMENT
De CD sur SD/USB
Ce système peut convertir un CD entier en format MP3 et le copier sur un dispositif de stockage massif USB Ou sur
une carte SD. Il peut aussi copier une piste unique de MP3 ou à partir d’une carte SD.
1. En mode lecture CD, pressez REC /
pour commencer à ripper sur USB/SD (par défaut USB, si les deux dispositifs
sont connectés), la lecture s’arrêtera et reviendra au début de la piste actuelle, le recherchera les contenus du USB/carte
SD et créera un dossier pour stocker pour stocker la piste MP3. Revenez à la lecture du CD et commencez à ripper
immédiatement. L’icône du dispositif correspondant (“USB” / “CARD”) clignotera.
2. Pressez STOP/BAND /
26
pour sortir de cette fonction.
31
FRANCAIS
FRANCAIS
FONCTION SLEEP
3. Pressez PRESET+ /
/ PRESET- /
pour attribuer un numéro de 1 à 20.
Vous pouvez régler la période de temps avant que l’appareil se mette automatiquement en mode Standby .
Sur la commande, pressez plusieurs fois SLEEP /
pour sélectionner la période de temps (en minutes):
- La séquence s’affichera à l’écran : SLEEP 90, 80, 70, 60, 50, 40, 30, 20, 10
- A l’écran s’affichera brièvement l’option sélectionnée puis il reviendra à son état antérieur.
4. Pressez PROGRAM /
pour confirmer, le numéro s’affichera ainsi que la fréquence de la station.
5. Répétez les étapes 1-4 pour conserver d’autres stations et pour écouter une émission conservée. Pressez une ou
plusieurs fois PRESET+ /
/ PRESET- /
jusqu’à ce que s’affiche la station que vous souhaitez.
Pour désactiver, pressez à nouveau SLEEP /
en mode Standby.
pour revenir à “00” ou pressez POWER /
pour que l’appareil entre
Contrôle du volume
Pressez VOLUME +/
/ VOLUME - /
sur la commande pour régler le volume.
Ecouter une station mise en mémoire
Pressez une ou plusieurs fois PRESET+ /
/ PRESET- /
jusqu’à ce qu’apparaisse la station que vous souhaitez.
Mise en mémoire automatique de stations radio
La mémorisation automatique démarrera à partir de la mémoire 1, ce qui effacera les stations précédemment mémorisées.
Maintenez pressé le bouton PROGRAM /
jusqu’à ce qu’apparaisse AUTO.
- L’ icone “memory” commencera à clignoter.
La valeur actuelle (entre 0 et 40) est affichée.
- Les stations disponibles seront mises en mémoire.
FONCTION MUTE
Vous pouvez débrancher le son temporairement sans avoir à éteindre l’appareil.
1. Pressez MUTE /
sur la télécommande pour désactiver le son, la lecture continuera sans le son.
2. Pour activer le son vous pouvez :
- Presser à nouveau MUTE /
;
- Régler les contrôles de volume;
- Changer la source
- Après avoir conservé toutes les stations, la dernière trouvée sera lue.
Antena
ANTENNE: pour la réception de la bande FM,une ANTENNE FM DE FER est fournie avec l’appareil, déplacer le câble
jusqu’à obtenir une réception claire et sans interférences. Pour la réception de la bande FM, une antenne directionnelle
de ferrite est fournie. Orienter l’appareil pour trouver la position qui offre une meilleure réception. Ne pas connecter
l’ANTENNE FM EXTERNE à n’importe quelle antenne externe.
UTILISATION CASSETTES
EQ
Pressez EQ /
sur la télécommande pour sélectionner le mode de EQ que vous souhaitez.
Il y a 5 modes de EQ:
1.
2.
3.
4.
Pressez la FUNCTION /
pour démarrer l’appareil en mode PHONO.
Dès que vous êtes en mode Phono, insérez une cassette déjà enregistrée dans la PORTE DU LECTEUR DE CASSETTES.
Réglez le niveau de volume en tournant le BOUTON VOLUME DOWN/UP /
.
Pour bobinage rapide, appuyez légèrement sur la touche EJECT/F.F. En appuyant à nouveau, vous arrêterez le
bobinage rapide et vous reviendrez au mode lecture de cassette.
5. Pour arrêter et éjecter la cassette, appuyez complètement sur EJECT/F.F..
6. Lorsque la lecture d’un côté est terminée, la cassette s’arrêtera automatiquement.
Remarque: 1. Soulevez le couvercle de l’appareil lorsque vous ne l’utilisez pas ou lorsqu’il est arrêté.
2.Lorsque vous utilisez la fonction cassette, la function Phono est désactivée.
FUNCIONAMIENTO DE L’USB / CARTE SD
Fonctionnement de l’USB:
RADIO
Réglage de AM/FM
1. Pressez FUNCTION /
2. Pressez STOP/BAND /
pour régler l’appareil en mode TUNER (radio).
1. Pressez FUNCTION /
pour régler l’appareil en mode USB.
2. Branchez le dispositif de stockage massif USB. READ s’affichera à l’écran pendant que le système lit le contenu du
dispositif USB.
pour sélectionner la bande que vous souhaitez: FM o MW
3. La piste 1 du dossier-racine sera lue (dossier 1) à la fin de la lecture de l’USB.
3. Réglage automatique – Maintenez pressé FF /
FB /
jusqu’à ce que vous trouviez une station qui puisse être
écoutée correctement. . Si vous recevez une émission en stéréo, il s’affichera (ST). Répétez l’étape 3 si nécessaire
jusqu’à ce que vous trouviez la station souhaitée.
4. Pressez une ou plusieurs fois FF /
4. Réglage manuel – Pressez brièvement FF /
5. Pressez PRESET+ /
FB /
et plusieurs fois jusqu’à trouver une station.
/ PRESET- /
Mise en mémoire de stations de radio
6. Pressez STOP/BAND /
Vous pouvez stocker en mémoire jusqu’à un total de 40 stations de radio (FM y MW), manuellement ou automatiquement.
1. Réglez la station que vous souhaitez.
Fonctionnement de la carte SD:
2. Pressez PROGRAM /
pour activer la mise en mémoire, les icones "MEMORY” et P01 clignoteront.
1. Pressez FUNCTION /
FB /
jusqu’à ce que s’affiche à l’écran le nombre de pistes que vous souhaitez.
pour sélectionner l’album que vous souhaitez.
pour arrêter la lecture.
pour régler l’appareil en mode CARD.
2. Insérez une carte SD dans la fente. READ s´affichera à l’écran pendant que le système lit le contenu de la carte SD.
28
29