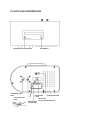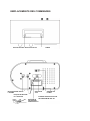
1
PR220
USER MANUAL
GEBRUIKERSHANDLEIDING
BEDIENUNGSANLEITUNG
MODE D’EMPLOI
MANUAL DE USUARIO
IMPORTANT SAFEGUARDS FOR AUDIO PRODUCTS
PLEASE READ CAREFULLY THE FOLLOWING IMPORTANT SAFEGUARDS THAT ARE APPLICABLE
TO YOUR EQUIPMENT.
1. Read Instructions - All the safety and operating instructions should be read before the appliance is
operated.
2. Retain Instructions - The safety and operating instructions should be retained for future
reference.
3. Heed Warnings - All warnings on the appliance and in the operating instructions should be adhered
to.
4. Follow Instructions - All operating and use instructions should be
followed.
5. Water and Moisture - The appliance should not be used
near water-for example, near a bathtub,washbowl, kitchen
sink,laundry tub, in a wet basement, or near a swimming
pooland the like.
6. Carts and Stands - The appliance should be used only with a
cart or stan that is recommendedby the manufacturer.
6A.An appliance and cart combination should be moved with care. Quick stops, excessive force, and
uneven surfaces may cause the appliance and cart combination to overturn.
7. Wall or Ceiling Mounting - The appliance should be mounted to a wall o r ceiling only as
recommended by the manufacturer.
8. Ventilation - The appliance should be situated so that its location or position does not interfere
with-its proper ventilation.For example, the appliance should not be
situated on a bed, sofa,
rug,or similar surface that may block the ventilation penings; or, placed in a built -in installation, such
as a bookcase or cabinet that may impede the flow of air through the ventilation openings.
9. Heat - The appliance should be situated away from heat sources such as radiators, heat
registers, stoves,or other appliances (including amplifiers) that produce heat.
10.Power Sources - The appliance should be connected to a power supply only of the type described in
the operating instructions or as marked on the appliance.
11.Grounding or Polarization - Precautions should be taken so that the grounding or
polarization means of an appliance is not impeded.
12.Power - Cord Protection - Power-supply cords should be routed so that they are not likely to be walked
on or pinched by items placed upon or against them, paying particular attention to cords at plugs, and the
point where they exit from the appliance.
13.Cleaning - The appliance should be cleaned only as recommended by the manufacturer.
14.This product is designed for use with the antenna attached and should not be connected to any other
external antennas.
15.Non-use Periods - The power cord of the appliance should be unplugged from the outlet when left
unused for a long period of time.
16.Object and Liquid Entry - Care should be taken so objects do not fall and liquids are not spilled into
the enclosure through openings
17.Damage Requiring Service - The appliance should be serviced by qualified service personnel when:
A. The power-supply cord of the plug has been damaged;or
B. Objects have fallen, or liquid has been spilled into the appliance;or
C. The appliance has been exposed to rain;or
D. The appliance does not appear to operate normally or exhibits a marked change inperformance; or
E.The appliance has been dropped, or the enclosure damaged.
18.Servicing - The user should not attempt to service the appliance beyond that described in
the operating instructions. All other servicing should be referred to qualified service personnel.
WARNING:
TO PREVENT FIRE OR SHOCK HAZARD, DO NOT EXPOSE THIS APPLIANCE TO RAIN OR MOISTURE.
DO NOT REMOVE COVER. PILOT LAMPS SOLDERED IN PLACE. NO USER SERVICEABLE PARTS
INSIDE. REFER SERVICING TO QUALIFIED SERVICE PERSONNEL.
CAUTION
The lighting flash with arrowhead symbol, within
an equilateral triangle, is intended to alert user to
the presence of uninsulated "dangerous voltage"
within the product's enclosure that may be of
sufficient magnitude to constitute risk of electric
shock to persons.
RISK OF ELECTRIC
SHOCK DO NOT OPEN
CAUTION: TO REDUCE THE RISK OF
ELECTRIC SHOCK, DO NOT REMOVE
COVER
(OR BACK).
NO
USER
–
SERVICEABLE PARTS INSIDE. REFER
SERVICING
TO
QUALIFIED SERVICE
PERSONNEL.
The exclamation point within an
equilateral triangle is intended to
alert user to the presence of
important
operating
and
maintenance (servicing) instruction
in the literature accompanying the
appliance.
Specifications
Frequency
Antenna
:
:
:
Audio output
Power source
USB 2.0 PORT
SD CARD SLOT
Speaker
:
:
:
:
:
AM 530 - 1600 KHz
FM 88 - 108 MHz
FM Wire Antenna
AM Built-in Ferrite Bar
700 mW max
AC Adaptor AC 230V/50Hz(DC 9V 600mA *)
The limit of this port is 4GB Max
The limit of the Card size is 4GB max
1 x 4 "(3W)
Unpacking
1.
2.
3.
Remove the plastic bag covering the unit.
Remove the AC/DC ADAPTOR from the packaging.
Remove the black wire tie from the A/C ADAPTOR.
Power Source
1.
2.
Plug the small end of the supplied ADAPTOR into the 9V DC INPUT JACK on the back of the unit.
Insert the 2-pin plug of the AC ADAPTOR into an appropriate 230V AC Mains wall outlet socket.
USB & SD CARD OPERATION
SD Card operation:
1. Switch the unit ON by turning the power ON-OFF SWITCH/VOLUME CONTROL switch to the ON position
and turn the Sound Volume to mid-range position.
2. Switch Function Switch to the Radio/SD/USB position.
3. Switch the AM/FM/USB/SD Band switch (on the back panel) to select the SD/USB mode.
4. Insert an SD Card with stored MP3 songs (size up to 4GB max, not
supplied) into the card slot in the direction as indicated below the slot.
5. Press the PLAY/PAUSE BUTTON to play the music tracks stored on
the SD Card. The green ACC LED will flash whilst the music is playing.
7. To pause the music, press the PLAY/PAUSE BUTTON again.
8. In Play Mode, press the SKIP+ / SKIP- BUTTON once or repeatedly until the desired track has been found.
9. To stop playing the music stored on the SD Card, press the PLAY/PAUSE BUTTON.
AT THIS STAGE, DO NOT DISCONNECT THE SD CARD yet!
10 Before removing the SD Card from the slot, switch the main unit off first
11 Press the memory card in gently & then release it, the card will be partially ejected and can then be removed
by hand.
CAUTION: Connecting a USB device/SD Card upside down or back to front could damage the audio system or
USB device/SD Card. Before connecting it, double check to make sure the direction of insertion is correct.
USB Operation:
1. Switch the unit ON by turning the power ON-OFF SWITCH/VOLUME CONTROL switch to the ON position
and turn the Sound Volume to mid-range position.
2. Turn the Function Knob on the front to the ―RADIO/SD/USB ON‖ position.
3. Switch the AM-FM-USB/SD Band switch (on the back panel) to select the SD/USB mode.
4. Insert an MP3 USB device or a Flash Drive containing MP3 songs
(size up to 4GB max, not supplied) into the USB Port on the side
panel. Make sure the USB plug is inserted correctly.
Notes:
* To operate the MP3 device, please refer to its manufacturer‘s operating manual.
* If both an SD Card and a USB device are connected, press the USB/SD button on the side panel to switch
to the preferred device to be played.
5 Press the PLAY/PAUSE BUTTON to play the music on the external device.
6 The green ACC LED will flash whilst the music is playing.
7 To pause the music, press the PLAY/PAUSE BUTTON again.
8 In Play Mode, press the SKIP+/ SKIP-BUTTON once or repeatedly until the desired track has been found.
9 To stop playing the music stored on the USB device/Flash Drive, press the PLAY/PAUSE
BUTTON. AT THIS STAGE, DO NOT DISCONNECT THE USB DEVICE/FLASH DRIVE!
10 Before disconnecting the USB device/Flash Drive, switch the main unit off first. Unplug the device from the
USB Socket by pulling it out straight.
WARNING:
1
2
Do not disconnect the USB/SD device whilst the music is playing, as this may damage the device or the
music files stored on it.
To disconnect the USB/SD device safely, turn off the unit first or switch to another Mode.
IMPORTANT NOTES:
a) This product may not be compatible with USB devices with multiple USB identifiers (such as a USB HUB +
USB Flash Drive), it ONLY works when connected directly to a USB Flash Drive or MP3 Player.
b) If there is no MP3 / USB device / Flash Drive / SD card connected or MP3 file detected, the red ERR LED
light will be on.
c) The green ACC LED light will flash during PLAY mode whilst MP3 data is transferring.
d) This unit only plays back MP3 music files, not WMA format music files.
e) If the USB/SD is not functioning, power off the unit to reset.
USB SPECIFICATION
Interface
*
USB2.0 Full speed, HOST (a USB HUB is not supported)
Corresponding Flash memory
*
*
*
*
USB1.1 Flash memory
USB2.0 High speed Flash memory
Minimum memory size: 512MByte
Maximum memory size: 4GByte (Only FAT16 corresponds)
NOTES:
a) The USB Port does not support connection with a USB Extension Cable.
b) It is not designed to connect to a Computer.
c) It is not guaranteed that all USB memory devices and SD cards will work on this audio
system.
MP3 Decoder
*
*
*
*
*
*
*
*
Compatible with MPEG Audio 1, 2, 2.5
Compatible with Layer 1, 2, 3
Compatible with Sampling Rate: 8k, 16k, 32k, 11.025k, 22.05k,
44.1k, 12k, 24k, 48 kHz
Compatible with Bit rate: 8k ~ 320kbps
Subfolder nest: 8
Number of maximum files for playback: 9999
File format for playback: .mp3. . mp2, . mp1.
RADIO OPERATION
*
*
*
*
*
*
Switch the unit ON by turning the power ON-OFF SWITCH/VOLUME CONTROL switch to the ON position
and turn the Sound Volume to mid-range position.
Turn the Function Knob to the Radio/SD/USB position – the Tuning Dial LED in the handle will light up.
Switch the AM-FM-USB/SD Band switch (on the back panel) to select the AM (MW) or FM Band.
Select the Radio Station by turning the TUNING Control on the top panel. The red Station Marker ribbon will
mark the desired radio station.
For FM reception, extend the fitted Wire Antenna so that FM sensitivity will be increased.
For optimum AM (MW) reception, turn the unit in the direction which gives the best results.
ALARM CLOCK OPERATION
SETTING THE TIME
*
Ensure the unit is connected to the AC Power source.
*
To set the current time, push and turn the TIME SET KNOB on the rear panel in a ‗clockwise‘ direction,
whilst facing the clock.
WARNING: Disconnecting the unit from the AC power source or any other power disruption will stop the clock
working. Make sure the current clock time is set. Do not expose the Clock to extremes of temperature and
humidity as this could damage the electronic mechanism and consequently affect its timekeeping.
SETTING THE ALARM TIME
Push and turn the Alarm Time Setting Knob clockwise (whilst facing the clock) to set the alarm time.
ALARM OPERATION
This unit has an Alarm and Snooze function.
Turn the FUNCTION KNOB on the front of the unit to select wake-up to: RADIO, SD/USB, AUTO or BUZZER.
Important Note: For the Alarm to work, the unit must be turned ON. Do this by turning the power ON-OFF
SWITCH/VOLUME CONTROL switch to the ―ON‖ position.
WAKE-UP-TO-RADIO
*
*
*
*
*
Set the desired alarm time by pushing and turning the ALARM SET knob on the rear panel.
Set the Band Switch to AM (= MW) or FM Band.
Tune in to the desired Radio Station and adjust the wake-up sound volume - keep the setting.
Turn the Function Knob to the ―AUTO‖ position. The sound and the Radio Dial LED light will go off.
The Radio will automatically switch on at the set alarm time.
WAKE-UP-TO-USB/SD
*
*
*
*
*
Set the desired alarm time as described previously.
Set the AM-FM-USB/SD Band Switch to the SD/USB position.
Insert an SD Card or USB device with stored MP3 songs, into the Card Slot or USB Port and adjust the
sound volume – leave the SD Card or USB device in position and keep the volume level setting.
Turn the Function Knob on the front to the ―AUTO‖ position.
The MP3 song on USB or SD will automatically play at the set alarm time.
WAKE-UP-TO-BUZZER ALARM
*
*
*
Set the desired alarm time as described previously.
Turn the Function Knob to the ―BUZZER‖ position.
The Buzzer sound will come on at the set alarm time.
ALARM OFF AND SNOOZE FUNCTION
*
*
*
To switch the alarm off, press the SNOOZE/BACKLIGHT ON/OFF Button on the top when the alarm sounds.
When waking up to Radio, USB/SD, or Buzzer, pressing the SNOOZE Button will switch the alarm off
immediately, but the alarm will sound again around 5 minutes later.
To turn the alarm off permanently, turn the front Function KNOB to the ―OFF‖ position.
CLOCK BACKLIGHT
*
*
Press the ―SNOOZE/BACKLIGHT ON/OFF‖ button on the top of the unit to turn the clock
backlight ‗ON‘.
Press this button again to turn the light ―OFF‖.
BATTERY BACK UP
The battery backup system to maintain your clock to keep working, during a power outage.
In the event of a power outage, the battery backup will keep you clock continue working(But at this time the alarm
clock don‘t working). To utilize the battery backup, you must install two AAA batteries. The battery backup will not
operate unless batteries are installed. To install batteries, follow the instructions below.
1
2
3
Remove the Battery Compartment cover from the back of the unit.
Install two new AAA batteries in the correct position as shown
inside the battery cover.
Reinstall the Battery Compartment cover.
NOTE:
Do not use different batteries
Do not mix old and new batteries
Troubleshooting
There is no Sound
*
Make sure the DC Adaptor pin is fully inserted into the DC Jack on the back of the unit,and
properly connected to the AC power supply.
*
Check if the unit has been switched on.
*
Check if the volume has been turned up.
*
Check that the Function Switch is set to the Radio/SD/USB position.
that the unit is
USB/SD - There is no music playing
*
*
*
*
Check that there are MP3 songs stored on the MP3/USB Device/Flash Drive/SD Card.
Check the MP3/USB Device/Flash Drive/SD Card is not larger than 4GB as the limit compatible with this unit
is 4GB max.
Try re-setting the USB/SD by powering off and then on again.
Check if the USB device/SD Card contains MP3 or WMA music files.
This unit does not play WMA format, only MP3 format.
The Alarm did not wake me up at the set time
*
*
*
Make sure the unit is connected to the AC power supply.
Check if the unit has been switched on.
The Clock or Alarm will not work or keep its settings when the power is disconnected and the unit is not
switched on.
CONTROL LOCATORS
CONTROL LOCATORS
Customer support
You can contact the Ricatech customer service when you have a question or a problem with your Ricatech
product. You can contact us by telephone and email.
Email
For customer support by email, please sent a email to
[email protected] Please make sure that you mention the model number and serial number of the product,
mention your name & address and describe your question or problem clearly.
Telephone
For customer support by telephone, please dial +32 3 3265694. One of our service staff will be ready to serve
you. For full procedure please visit the website of Ricatech at: www.ricatech.com
Ricatech B.V.
Cornusbaan 1
2908 KB Capelle a/d IJssel
The Netherlands
Nederlands
BELANGRIJKE VOORZORGSMAATREGELEN VOOR
AUDIOPRODUCTEN
LEES AANDACHTIG DE VOLGENDE BELANGRIJKE VOORZORGSMAATREGELEN DIE VAN TOEPASSING
ZIJN OP UW APPARATUUR.
1. Instructies lezen - Alle veiligheids - en bedieningsinstructies moeten worden gelezen voordat het
apparaat wordt gebruikt.
2. Instructies bewaren - De veiligheids- en bedieningsinstructies moeten worden
bewaard voor raadpleging in de toekomst.
3. Aandacht besteden aan waarschuwingen - Alle waarschuwingen op het apparaat
en in de bedieningsinstructies moeten in acht worden genomen.
4. Instructies opvolgen - Alle bedienings- en gebruiksinstructies moeten worden
opgevolgd.
5. Water en vocht - Het apparaat mag niet worden gebruikt in de buurt van water,
bijvoorbeeld nabij een badkuip, wasbak, gootsteen, wastobbe, in een vochtige kelder
of nabij een zwembad en dergelijke.
6A. Karretjes en staanders - Het apparaat mag alleen worden gebruikt met een karretje of staander
aanbevolen door de fabrikant.
6A.Een apparaat op een karretje moet voorzichtig worden verplaatst. Bruusk stoppen, overmatige
kracht en oneffen oppervlakken kunnen het karretje met apparaat doen omkantelen.
7. Wand- of plafondbevestiging - Het apparaat mag aan een wand of plafond alleen worden
bevestigd volgens de aanbevelingen van de fabrikant.
8. Ventilatie - De plaats en de stand van het apparaat mogen correcte ventilatie niet belemmeren.
Het apparaat mag bijvoorbeeld niet op een bed, sofa, vloerkleed of dergelijk oppervlak worden
geplaatst aangezien de ventilatieopeningen kunnen worden geblokkeerd; en evenmin in een
ingebouwde installatie zoals een boekenrek of kast aangezien de luchtstroom door de
ventilatieopeningen kan worden belemmerd.
9. Warmte - Het apparaat moet verwijderd zijn van warmtebronnen zoals radiators, warmteregisters,
kachels of andere toestellen (inclusief versterkers) die warmte produceren.
10. Voedingsbronnen - Het apparaat mag alleen worden aangesloten op een voeding van het type
beschreven in de bedieningsinstructies of aangegeven op het apparaat.
11. Aarding of polarisatie - Er moeten voorzorgsmaatregelen worden genomen zodat de middelen
voor aarding of polarisatie van een apparaat niet worden belemmerd.
12. Voeding - Netsnoerbescherming – Netsnoeren moeten zodanig worden geleid dat de kans om
erop te trappen of ze te knellen met voorwerpen die erop of ertegen staan minimaal is, met
bijzondere aandacht voor netsnoeren aan stekkers en op de plaats waar ze het apparaat verlaten.
13. Reiniging - Het apparaat mag alleen worden gereinigd volgens de aanbevelingen van de
fabrikant.
14. Dit product is ontworpen voor gebruik met de bevestigde antenne en mag niet worden
aangesloten op andere externe antennes.
15. Perioden van niet gebruik - Het netsnoer van het apparaat moet uit het stopcontact worden
getrokken wanneer het apparaat lange tijd niet wordt gebruikt.
16. Voorwerpen en vloeistoffen in het apparaat - U dient voorzichtig te zijn dan er geen
voorwerpen vallen of vloeistoffen worden gemorst in de behuizing via openingen
17. Schade die onderhoud vereist - Het apparaat moet door gekwalificeerd onderhoudspersoneel
worden onderhouden wanneer:
A. Het netsnoer van de stekker beschadigd is; of
B. Voorwerpen zijn gevallen of vloeistoffen zijn gemorst in het apparaat; of
C. Het apparaat werd blootgesteld aan regen; of
D. Het apparaat niet normaal lijkt te werken of de prestaties opvallend zijn gewijzigd; of
E. Het apparaat is gevallen, of de behuizing beschadigd is.
18.Onderhoud - De gebruiker mag niet proberen onderhoud van het apparaat uit te voeren behalve
het onderhoud beschreven in de bedieningsinstructies. Alle andere onderhoudswerkzaamheden
moeten worden uitgevoerd door gekwalificeerd onderhoudspersoneel.
WAARSCHUWING :
STEL HET APPARAAT NIET BLOOT AAN REGEN OF VOCHT OM GEVAAR VOOR BRAND OF
EEN ELEKTRISCHE SCHOK TE VOORKOMEN. DE BEHUIZING NIET VERWIJDEREN.
CONTROLELAMPJES ZIJN OP HET APPARAAT GESOLDEERD. GEEN DOOR DE
GEBRUIKER TE ONDERHOUDEN ONDERDELEN AAN DE BINNENKANT. LAAT
ONDERHOUD OVER AAN GEKWALIFICEERD ONDERHOUDS PERSONEEL.
Het symbool van de bliksemflits
met pijlkop, in een gelijkzijdige
driehoek, is bedoeld om de
gebruiker attent te maken op de
aanwezigheid van niet-geïsoleerde ―gevaarlijke spanning‖ in
de behuizing van het product die
zo hoog kan zijn dat ze gevaar
voor een elektrische schok
betekent voor personen.
OPGELET: OM HET GEVAAR VOOR EEN
ELEKTRISCHE SCHOK TE
VERMINDEREN, BEHUIZING (OF
ACHTERKANT) NIET VERWIJDEREN. GEEN
DOOR DE GEBRUIKER TE
ONDERHOUDEN ONDERDELEN AAN DE
BINNENKANT. LAAT ONDERHOUD OVER
AAN GEKWALIFICEERD
ONDERHOUDS- PERSONEEL.
Het uitroepteken in een
gelijkzijdige driehoek is bedoeld
om de gebruiker attent te maken
op de aanwezigheid van een
belangrijke
instructie
voor
bediening en onderhoud (service)
in de documentatie bij het
apparaat.
Specificaties
Frequentie
Antenne
:
:
:
Audio-uitvoer
Voedingsbron
USB 2.0 POORT
SD-KAARTSLEUF
Luidspreker
:
:
:
:
:
AM 530 - 1600 KHz
FM 88 - 108 MHz
FM-draadantenne
Ingebouwde ferrietstaaf voor AM
700 mW max
AC-adapter AC 230 V/50 Hz(DC 9 V 600 mA *)
De limiet van deze poort is 4 GB max
De limiet van de kaartgrootte is 4 GB max
1 x 4 "(3 W)
Uitpakken
1. Neem het apparaat uit de plastic zak.
2. Verwijder de AC/DC-ADAPTER uit de verpakking.
3. Verwijder de zwarte kabelbinder van de A/C-ADAPTER.
Voedingsbron
1. Steek het smalle uiteinde van de meegeleverde ADAPTER in de 9V DC AANSLUITING aan de achterzijde
van het apparaat.
2. Steek de 2-pinsstekker van de AC-ADAPTER in een geschikt 230 V stopcontact.
USB & SD-KAART GEBRUIKEN
SD-kaart gebruiken:
2.
3.
4.
5.
7.
8.
1.
Schakel het apparaat AAN door de voeding AAN/UIT-SCHAKELAAR/VOLUMEREGELAAR naar de
stand AAN te draaien en het geluidsvolume in de middelste stand te zetten.
Schakel de functieschakelaar naar de Radio/SD/USB-positie.
Schakel de AM/FM/USB/SD-golfbandschakelaar (op het achterpaneel) om de SD/USB-stand te selecteren.
Plaats een SD-kaart met opgeslagen MP3-muziek (tot maximaal 4 GB, nietmeegeleverd) in de kaartsleuf in
de richting zoals aangegeven onder de sleuf.
Druk op de AFSPELEN/PAUZE-KNOP om de muziek, opgeslagen op de SD-kaart, af te spelen.
De groene ACC LED zal gaan knipperen terwijl de muziek speelt.
Druk opnieuw op de AFSPELEN/PAUZE-KNOP om de muziek te pauzeren.
Druk in afspeelstand op de SKIP + / SKIP- KNOP tot het gewenste tracknummer werd gevonden.
9. Druk op de AFSPELEN/PAUZE-KNOP om het afspelen van muziekbestanden, opgeslagen op de
SD-kaart, te stoppen. VERWIJDER DE SD-KAART OP DIT MOMENT NOG NIET!
10 Zet het apparaat uit vooraleer de SD-kaart uit de sleuf te verwijderen
11 Druk de geheugenkaart zachtjes in en laat deze dan los, de kaart zal gedeeltelijk uitgeworpen worden en kan
vervolgens met de hand worden verwijderd.
OPGELET: Een USB-apparaat/SD-kaart ondersteboven of achterstevoren aansluiten kan het audiosysteem of
het USB-apparaat/de SD-kaart beschadigen. Voordat u deze aansluit dient u te controleren of de insteekrichting
juist is.
USB gebruiken:
1. Schakel het apparaat AAN door de voeding AAN/UIT-SCHAKELAAR/VOLUMEREGELAAR naar de stand
AAN te draaien en het geluidsvolume in de middelste stand te zetten.
2. Draai de Functie-knop op de voorkant naar de ―RADIO/SD/USB AAN ‖-positie.
3. Schakel de AM/FM/USB/SD-golfbandschakelaar (op het achterpaneel) om de SD/USB-stand te selecteren.
4. Plaats een MP3 of USB-apparaat of een Flash Drive met MP3- muziekbestanden (tot maximaal 4 GB niet
meegeleverd) in de USB-poort op het zijpaneel. Zorg ervoor dat de USB-stekker juist is geplaatst.
Opmerkingen:
* Raadpleeg de gebruiksaanwijzing van de fabrikant voor bediening van het MP3-apparaat.
* Als zowel een SD-kaart en een USB-apparaat worden aangesloten, druk op de USB/SD-knop op het
zijpaneel om naar het door u gewenste af te spelen apparaat over te schakelen.
5 Druk op de AFSPELEN/PAUZE-KNOP om de muziek op het externe apparaat af te spelen.
6 De groene ACC LED zal gaan knipperen terwijl de muziek speelt.
7 Druk opnieuw op de AFSPELEN/PAUZE-KNOP om de muziek te pauzeren.
8 Druk in de afspeelstand één keer of herhaaldelijk op de SKIP +/ SKIP- KNOP tot het gewenste nummer werd
gevonden.
9 Druk op de AFSPELEN/PAUZE-KNOP om het afspelen van muziekbestanden, opgeslagen op het USBapparaat/de Flash Drive, te stoppen. VERWIJDER HET USB-APPARAAT/DE FLASH DRIVE OP DIT
MOMENT NOG NIET!
10 Schakel het apparaat uit alvorens het USB-apparaat/de Flash Drive los te koppelen. Ontkoppel het apparaat
van de USB-poort door het er recht uit te trekken.
WAARSCHUWING:
1
2
Koppel het USB/SD-apparaat niet los terwijl de muziek wordt afgespeeld, want dit kan het apparaat of de
opgeslagen muziekbestanden beschadigen.
Schakel eerst het apparaat uit of schakel naar een andere stand om het USB/SD-apparaat veilig te
verwijderen.
BELANGRIJKE OPMERKINGEN:
a) Dit product is mogelijk niet compatibel met USB-apparaten met meerdere USB-identifiers (zoals USB HUB +
USB Flash Drive), het werkt ALLEEN wanneer het rechtstreeks is verbonden met een MP3-speler of USB
Flash Drive.
b) Als er geen MP3 / USB-apparaat / Flash Drive / SD-kaart aangesloten is of er geen MP3-bestand is
gedetecteerd, gaat het rode ERR LED-lampje branden.
c) Het groene ACC LED-lampje knippert tijdens PLAY-mode als MP3-gegevens worden overgezet.
d) Dit apparaat speelt geen WMA-bestanden, alleen MP3-bestanden.
e) Als de USB/SD niet werkt, zet het toestel dan uit om te resetten.
USB-SPECIFICATIE
Interface
*
USB2.0 Full speed, HOST (een USB-HUB wordt niet ondersteund)
Overeenkomstig Flash-geheugen
*
*
*
*
USB1.1 Flash-geheugen
USB2.0 High speed Flash-geheugen
Minimum geheugengrootte: 512 MByte
Maximum geheugengrootte: 4 GByte (alleen FAT16 komt overeen)
OPMERKINGEN:
a) De USB-poort ondersteunt geen verbinding met een USB-verlengsnoer.
b) Het is niet ontworpen voor aansluiting op een computer.
c) Het is geen garantie dat alle USB-geheugenapparaten en SD-kaarten op dit audiosysteem werken.
MP3-decoder
*
*
*
*
*
*
*
*
Compatibel met MPEG Audio 1, 2, 2.5
Compatibel met Layer 1, 2, 3
Compatibel met bemonsteringssnelheid: 8 k, 16 k, 32 k, 11,025 k, 22,05 k,
44,1 k, 12 k, 24 k, 48 kHz
Compatibel met bitsnelheid: 8k ~ 320 kbps
Submap nest: 8
Maximum aantal bestanden voor weergave: 9999
Bestandsformaat voor weergave: .mp3. . mp2, . mp1.
BEDIENING VAN DE RADIO
*
*
*
*
*
*
Schakel het apparaat AAN door de voeding AAN-UIT-SCHAKELAAR/VOLUMEREGELAAR naar de stand
AAN te draaien en het geluidsvolume in de middelste stand te zetten.
Draai de Functie-knop naar de Radio/SD/USB-stand - de Wijzerplaat-LED in het handvat gaat branden.
Schakel de AM-FM-USB/SD-golfbandschakelaar (op het achterpaneel) om de AM (MW)- of FM-golflengte te
selecteren.
Selecteer de radiozender door aan de AFSTEMMEN-bediening op het bovenpaneel te draaien. Het rode
markeringslint voor de zenderaanduiding zal de gewenste radiozender markeren.
Voor FM-ontvangst, verleng de gemonteerde draadantenne zodat FM-gevoeligheid wordt verhoogd.
Voor optimale AM (MW)-ontvangst, draai het apparaat in de richting die het beste resultaat oplevert.
BEDIENING WEKKER
DE TIJD INSTELLEN
*
*
Controleer of het apparaat aangesloten is op de voedingsbron.
Om de huidige tijd in te stellen drukt u op de TIJD INSTELLEN-KNOP op het achterpaneel en draait u die in
de richting van de klok.
WAARSCHUWING:
Het loskoppelen van het apparaat van de voedingsbron of eender welke andere stroomstoring zal ervoor zorgen
dat de klok stopt met werken. Zorg ervoor dat de huidige tijd wordt ingesteld.
Stel de klok niet bloot aan extreme temperaturen of vochtigheid, want dit kan het elektronische mechanisme
beschadigen en bijgevolg de tijdsmeting beïnvloeden.
DE ALARMTIJD INSTELLEN
Druk op de Alarmtijd Instellen-knop en draai hem met de klok mee om de alarmtijd in te stellen.
ALARMBEDIENING
Dit apparaat heeft een Alarm en Snooze-functie.
Draai aan de FUNCTIE-KNOP op de voorzijde van het apparaat om de wekfunctie te selecteren voor: RADIO,
SD/USB, AUTO of ZOEMER.
Belangrijke opmerking:
Het apparaat moet AAN gezet zijn opdat het Alarm kan werken. Dit doet u door de voeding AAN-UITSCHAKELAAR/ VOLUMEREGELAAR naar de ―AAN‖-positie te draaien.
WORDT-WAKKER-MET-RADIO
*
*
*
*
*
Stel de gewenste alarmtijd in door te drukken op en te draaien aan de ALARM INSTELLEN-knop op het
achterpaneel.
Zet de golfbandschakelaar op AM (= MW)- of FM-golflengte.
Stel af op de gewenste radiozender en pas het volume van de wekfunctie aan - houd de instelling.
Draai de Functie-knop naar de ―AUTO‖-positie. Het geluid en de LED-verlichting van de radioafstemschaal
gaan uit.
De Radio zal automatisch ingeschakeld worden op de ingestelde alarmtijd.
WORDT-WAKKER-MET-USB/SD
*
*
*
*
*
Stel de gewenste alarmtijd in zoals eerder beschreven.
Zet de AM-FM-USB/SD-golfbandschakelaar in de SD/USB-positie.
Plaats een SD-kaart of USB-apparaat met opgeslagen MP3-muziekbestanden in de kaartsleuf of USB-poort
en pas het geluidsvolume aan - laat de SD-kaart of het USB-apparaat in die positie en behoud de
volumeniveau-instelling.
Draai de Functie-knop op de voorkant naar de ―AUTO‖-positie.
Het MP3-muziekbestand op USB of SD zal automatisch afspelen op de ingestelde alarmtijd.
WORDT-WAKKER-MET-ZOEMER-ALARM
*
*
*
Stel de gewenste alarmtijd in zoals eerder beschreven.
Draai de Functie-knop naar de ―ZOEMER‖-positie.
Het zoemergeluid zal automatisch ingeschakeld worden op de ingestelde alarmtijd.
ALARM UITSCHAKELEN EN SNOOZE-FUNCTIE
*
*
*
Om het alarm uit te schakelen, druk op de SNOOZE/VERLICHTING AAN/UIT-knop op de bovenkant wanneer
het alarm afgaat.
Wanneer u wakker wordt met Radio, USB/SD of Zoemer, wordt bij het indrukken van de SNOOZE-knop het
alarm onmiddellijk uitgeschakeld, maar het alarm zal ongeveer 5 minuten later opnieuw ingeschakeld
worden.
Draai de Functie-KNOP naar de UIT-positie om het alarm permanent uit te schakelen.
KLOKVERLICHTING
*
*
Druk op de ―SNOOZE/VERLICHTING AAN/UIT―-knop op de bovenkant van het apparaat om de
klokverlichting ―AAN‖ te zetten.
Druk nogmaals op deze knop om de verlichting ―UIT‖ te zetten.
BACK-UP VAN BATTERIJ
Het back-upsysteem van de batterij bewaart uw klokinstellingen tijdens een stroomonderbreking.
In geval van een stroomonderbreking zorgt een back-upbatterij ervoor dat de klok verder kan werken (maar de
wekker zal op dat moment niet werken).
Om gebruik te maken van de back-upbatterij moet u twee AAA-batterijen plaatsen. De back-upbatterij werkt
alleen als de batterijen zijn geplaatst. Volg de onderstaande instructies om de batterijen te plaatsen.
1 Verwijder het deksel van het batterijvak op de achterzijde van het apparaat.
2 Plaats twee nieuwe AAA-batterijen in de juiste richting zoals getoond aan de binnenkant van het
batterijdeksel.
3 Plaats het deksel van het batterijvak terug.
OPMERKING:
Gebruik geen verschillende batterijen
Gebruik geen oude en nieuwe batterijen door elkaar
Probleemoplossing
Er is geen geluid
*
*
*
*
Controleer of de DC-adapterstekker volledig in de DC-aansluiting aan de achterkant van het toestel zit en of
het apparaat behoorlijk op de netvoeding is aangesloten.
Controleer of het apparaat is ingeschakeld.
Controleer of het volume harder is gezet.
Controleer of de functieschakelaar is ingesteld op Radio/SD/USB-positie.
USB/SD - Er wordt geen muziek afgespeeld
*
*
*
*
Controleer of er MP3-muziekbestanden zijn opgeslagen op het MP3/USB-apparaat/de Flash Drive/de SDkaart.
Controleer of het MP3/USB-apparaat/de Flash Drive/de SD-kaart niet groter is dan 4 GB aangezien de
maximumlimiet van dit apparaat 4 GB is.
Probeer de USB/SD te resetten door het apparaat uit te schakelen en vervolgens weer aan te zetten.
Controleer of het USB-apparaat/de SD-kaart MP3 of WMA-muziekbestanden bevat.
Dit apparaat speelt geen WMA-bestanden af, alleen MP3-bestanden.
Het alarm wekte me niet op de ingestelde tijd
*
*
*
Controleer of het apparaat aangesloten is op de voedingsbron.
Controleer of het apparaat is ingeschakeld.
De klok en het alarm werken niet en houden hun instellingen niet bij wanneer de stroom wordt onderbroken
en het apparaat niet ingeschakeld is.
PLAATS VAN ONDERDELEN
AFSTEMSCHAAL
AAN/UIT/MAX
VOLUME-KNOP
ACC LED
ERR LED
SD-KAARTSLEUF
FUNCTIE-KNOP
(UIT/RADIO/USB/SD AAN/AUTO/ZOEMER)
AFSPELEN/PAUZE
REN
SKIP +
SKIP USB/SD
USB-POORT
PLAATS VAN ONDERDELEN
SNOOZE/VERLICHTING AAN-UIT
ALARMINSTELLINGKNOP
TIJDSINSTELLINGKNOP
AFSTEMKNOP
ADAPTERAANS
LUITING
FM-DRAADANTENNE
AM FM USB/SD
GOLFLENGTESCHAKELAAR
BACKUP VAN BATTERIJ
AC-ADAPTER
KLANTENONDERSTEUNING
U kunt contact opnemen met Ricatech klantenservice als u een vraag of een probleem heeft met uw Ricatech
product. U kunt contact met ons opnemen per telefoon en e-mail.
E-mail
Voor klantenondersteuning per e-mail, gelieve een e-mail te sturen naar [email protected]. Zorg ervoor dat u
het modelnummer en het serienummer van het product vermeldt, onder vermelding van uw naam & adres en een
duidelijke omschrijving van uw vraag of probleem.
Telefoon
Voor telefonische klantenondersteuning belt u naar
+32 3 3265694. Een van onze servicemedewerkers zal u dan te woord staan. Voor de volledige
procedure kunt u terecht op de website van Ricatech: www.ricatech.com
Ricatech
Cornusbaan 1
2908 KB Capelle a/d IJssel
The Netherlands
FRANÇAIS
INSTRUCTIONS DE SECURITE IMPORTANTES POUR PRODUITS AUDIO
VEUILLEZ LIRE ATTENTIVEMENT LES INSTRUCTIONS SUIVANTES APPLICABLES
A VOTRE EQUIPEMENT
1. Lisez les instructions – Lisez toutes les instructions de sécurité et d‘utilisation avant de
vous servir de l‘appareil.
2. Conservez les instructions – Conservez les instructions de sécurité et d‘utilisation pour
vous y référer ultérieurement.
3. Tenez compte des avertissements – Suivez tous les avertissements et instructions d‘utilisation
de l‘appareil.
4. Suivez les instructions – Suivez toutes les instructions de fonctionnement et utilisation.
5. Eau et humidité – Cet appareil ne doit pas être utilisé à proximité de
pointsd‘eau, comme par exemple près de baignoires, lavabos, éviers
ou lavoirs, sur surfaces mouillées ou près d‘une piscine.
6. Chariots et supports – Utilisez cet appareil uniquement avec des
chariots ou supports recommandés par le fabricant.
6A.Déplacez avec précaution l‘ensemble chariot et appareil. Les arrêts rapides,
l‘excès de force ou les surfaces irrégulières peuvent renverser le chariot.
7. Support mural ou de plafond – Placez cet appareil uniquement sur les supports muraux ou de
plafond recommandés par le fabricant.
8. Ventilation – Cet appareil doit être placé de façon à ne pas compromettre une bonne ventilation.
Par exemple, il ne doit pas être placé sur un lit, un divan, tapis ou surface semblable, qui puisse
bloquer les ouvertures de ventilation. Ne le placez pas non plus dans des placards, sur des
étagères ou armoires, qui puissent empêcher l‘air de circuler par les ouvertures de ventilation.
9. Chaleur – Cet appareil doit être situé loin de sources de chaleur, telles que radiateurs,
chauffe-eaux, convecteurs ou autres appareils qui dégagent de la chaleur (y compris
les amplificateurs).
10.Courant – Cet appareil doit être branché uniquement au courant décrit dans le mode
d‘emploi ou à celui décrit sur l‘appareil lui-même.
11.Prise de terre ou polarisation – On doit prendre des précautions pour s‘assurer que la prise de
terre ou la polarisation de l‘appareil ne soient pas perturbées.
12.Protection du câble électrique – Les câbles électriques doivent être correctement placés pour
ne pas être piétinés ni aplatis avec des objets placés dessus ou contre ceux-ci. On doit prêter une
attention tout spéciale à la partie du câble proche de la prise et au connecteur de l‘appareil.
13.Nettoyage – Vous devez nettoyer cet appareil uniquement comme le recommande le fabricant.
14.Ce produit a été conçu pour être utilisé avec une antenne intégrée et ne doit être connecté à
aucune autre antenne extérieure.
15.Périodes sans utilisation – Lorsque vous ne devez pas utiliser cet appareil pendant de longues
périodes, débranchez-le de la prise de courant.
16.Entrée d’objets et de liquides – Evitez que des objets ou liquides ne tombent à travers
les ouvertures du boîtier.
17.Dommages qui nécessitent réparation – Cet appareil doivent être apportés au service
technique si :
A.Le câble électrique ou la fiche sont endommagés.
B.Des objets ou liquides sont tombés à l‘intérieur de l‘appareil.
C.L‘appareil a été exposé à la pluie.
D.L‘appareil ne fonctionne pas normalement ou montre un changement dans son fonctionnement.
E.L‘appareil est tombé ou le boîtier est endommagé.
18. Réparations — L‘usager ne doit pas tenter de réparer l‘appareil au-delà de ce qui est décrit dans
le présent manuel. Tout le reste doit être réalisé par un personnel d‘entretien compétent.
AVERTISSEMENT:
POUR RÉDUIRE LES RISQUES DE CHOC ÉLECTRIQUE, N‘EXPOSEZ PAS CET APPAREIL À LA
PLUIE NI À L‘HUMIDITÉ. N‘ENLEVEZ PAS LE COUVERCLE. LES VOYANTS SONT SOUDÉS SUR
PLACE. L‘INTÉRIEUR NE CONTIENT AUCUN COMPOSANT À RÉPARER PAR L‘UTILISATEUR.
CONFIEZ VOTRE APPAREIL SEULEMENT AU PERSO DE SERVICE QUALIFIÉ.
Le symbole de l‘éclair avec
la pointe de flèche à l‘intérieur
d‘un triangle équilatéral a pour but
d‘alerter l‘utilisateur de la
présence de «voltage dangereux»
non isolé à l‘intérieur du coffret du
produit qui est suffisamment grave
pour causer un risque de choc
électrique aux personnes.
AVERTISSEMENT:POUR RÉDUIRE
LES RISQUES DE CHOC ÉLECTRIQUE,
N‘ENLEVEZ PAS LE COUVERCLE (OU
LE DOS). L‘INTÉRIEUR NE CONTIENT
AUCUN COMPOSANT À RÉPARER PAR
L‘UTILISATEUR. CONFIEZ VOTRE
APPAREIL SEULEMENT AU
PERSONNELDE SERVICE QUALIFIÉ
Le point d‘exclamation à
l‘intérieur d‘un triangle
équilatéral a pour but
d‘alerter l‘utilisateur de la
présence d‘instructions
importantes sur l‘opération
et l‘entretien dans le
manuel de l‘utilisateur livré
avec l‘appareil.
Caractéristiques techniques
Fréquence
Antenne
:
:
:
Sortie audio
Source d'alimentation
Port USB 2.0
EMPLACEMENT CARTE SD
Haut-parleur
:
:
:
:
:
AM 530 à 1 600 KHz
FM 88 à 108 MHz
Antenne FM filaire
Barre de ferrite intégrée AM
Max 700 mW
Adaptateur secteur CA 230 V / 50 Hz(CC 9V 600mA *)
Le port est limité à 4 Go max
La capacité maximale de la Carte est de 4 Go
1 x 4 ―(3W)
Déballage
1. Retirez le sac en plastique recouvrant l‘appareil.
2. Retirez l‘adaptateur CA / CC de l‘emballage.
3. Retirez le lien noir de l‘ADAPTATEUR A/C.
Source d’alimentation
1. Branchez la petite extrémité de l‘ADAPTATEUR fourni dans la prise d‘entrée JACK 9V DC située à l'arrière
de l'appareil.
2. Insérez la fiche à deux broches de l‘ADAPTATEUR secteur CA dans une prise murale appropriée à la prise
d‘alimentation secteur 230V CA.
FONCTIONNEMENT DU PÉRIPHÉRIQUE USB ET DE LA CARTE SD
Utilisation avec une carte SD :
1. Mettez l‘appareil sous tension en plaçant le COMMUTATEUR MARCHE-ARRÊT/CONTRÔLE DU VOLUME
sur la position ON et réglez le volume sonore en position médiane.
2. Positionnez l‘interrupteur de changement de fonctions sur Radio/SD/USB.
3. Positionnez le sélecteur AM / FM / USB / SD (commutateur de bandes situé sur le panneau arrière) pour
sélectionner le mode USB / SD.
4. Insérez une carte SD qui contient des chansons MP3 (la capacité maximale est de 4 Go, nonfournie) dans la
fente pour carte en suivant le sens indiqué sous la fente.
5. Appuyez sur le BOUTON PLAY/PAUSE pour lire les pistes musicales de la carte SD. La DEL verte ACC
clignote lors de la lecture de la musique.
7. Pour mettre la musique en pause, appuyez à nouveau sur le BOUTON PLAY/PAUSE.
8. En mode de Lecture, appuyez sur le BOUTON SKIP +/ SKIP - une seule ou plusieurs fois jusqu‘à ce que la
piste souhaitée ait été trouvée.
9. Pour arrêter la lecture des fichiers musicaux stockés sur la carte SD, appuyez sur le BOUTON PLAY/PAUSE.
À CE STADE, NE RETIREZ PAS ENCORE LA CARTE SD !
10 Avant de retirer la carte SD de la fente, éteignez d‘abord l‘unité principale
11 Appuyez doucement sur la carte mémoire puis relâchez-la, la carte est partiellement éjectée et peut alors
être retirée avec les doigts.
ATTENTION : Si vous connectez un périphérique USB ou une carte SD dans le mauvais sens, le système
audio, le périphérique USB et la Carte SD risquent d‘être endommagés. Avant de connecter le périphérique,
vérifiez de nouveau que le sens d'insertion soit correct.
Fonctionnement en mode USB :
1. Mettez l‘appareil sous tension en plaçant le COMMUTATEUR MARCHE-ARRÊT/CONTRÔLE DU VOLUME
sur la position ON et réglez le volume sonore en position médiane.
2. Positionnez le bouton de fonctions situé sur le devant de l‘appareil sur «RADIO / SD / USB».
3. Positionnez le sélecteur de bande AM / FM / USB / SD (commutateur de bandes situé sur le panneau arrière)
pour sélectionner le mode USB / SD.
4. Insérez un périphérique USB MP3 ou un périphérique à mémoire Flash contenant des chansons MP3 (taille
maximale de 4 Go, non fourni) dans le port USB situé sur le panneaulatéral. Assurez-vous que la prise USB
est correctement insérée.
Remarques :
* Pour faire fonctionner le périphérique MP3, veuillez vous référer au mode d'emploi du fabricant.
* Si une carte SD et un dispositif USB sont connectés en même temps, appuyez sur le bouton USB / SD du
panneau latéral pour passer à l'appareil qui doit être lu.
5 Appuyez sur le BOUTON PLAY/PAUSE pour lire les pistes musicales stockées sur le périphérique externe.
6 La DEL verte ACC clignote lors de la lecture de la musique.
7 Pour mettre la musique en pause, appuyez à nouveau sur le BOUTON PLAY/PAUSE.
8 En mode de Lecture, appuyez sur le BOUTON SKIP +/ SKIP - une seule ou plusieurs fois jusqu‘à ce que la
piste souhaitée ait été trouvée.
9 Pour arrêter la lecture des fichiers musicaux stockés sur le périphérique USB/le périphérique à mémoire
Flash, appuyez sur le BOUTON PLAY/PAUSE. À CE STADE, NE RETIREZ PAS ENCORE LE
PÉRIPHÉRIQUE USB/À MÉMOIRE FLASH !
10 Avant de déconnecter le périphérique flash USB / à mémoire Flash, mettez d‘abord l'appareil hors tension.
Débranchez le périphérique de la prise USB en tirant dessus horizontalement.
AVERTISSEMENT :
1
2
Ne déconnectez pas le périphérique USB / SD lors de la lecture de la musique, car cela pourrait
endommager le périphérique ou les fichiers musicaux qui y sont stockés.
Pour déconnecter en toute sécurité le périphérique USB/SD, éteignez d'abord l'appareil ou passez à un autre
mode.
REMARQUES IMPORTANTES :
a) IL se peut que ce produit ne soit pas compatible avec les dispositifs USB à identifiants multiples (comme un
hub USB + mémoire flash USB), il ne fonctionne que lorsqu‘il est connecté directement à une clé USB ou un
lecteur MP3.
b) Si aucun périphérique MP3 / USB / à mémoire flash ou carte SD n‘est connecté et si aucun fichier MP3 n‘est
détecté, la DEL ERR rouge s'allume.
c) La DEL verte ACC clignote pendant le mode de Lecture lors du transfert des données MP3.
d) Cet appareil ne lit que les fichiers musicaux MP3, et non les fichiers musicaux au format WMA.
e) Si le périphérique USB / SD ne fonctionne pas, veuillez éteindre l‗appareil pour le réinitialiser.
SPÉCIFICITÉS USB
Interface
*
USB 2.0 Full speed, HOST (le format USB HUB n'est pas supporté)
Périphérique à mémoire flash correspondant
*
*
*
*
Mémoire flash USB 1.1
Mémoire Flash USB 2.0 High speed
Taille minimale de la mémoire : 512 Mo
Taille maximale de la mémoire : 4 Go (seul FAT16 correspond)
REMARQUES :
a) Le port USB ne prend pas en charge la connexion via un câble USB prolongateur.
b) Il n'est pas conçu pour être connecté à un ordinateur.
c) Il n'est pas garanti que tous les périphériques à mémoire USB ni que toutes les cartes SD puissent être
reconnus par ce système audio.
Décodeur MP3
*
*
*
*
*
*
*
*
Compatible avec MPEG Audio 1, 2, 2.5
Compatible avec Layer 1, 2, 3
Compatible avec la fréquence d‘échantillonnage : 8k, 16k, 32k, 11,025k, 22,05k,
44,1k, 12k, 24k, 48 kHz
Compatible avec le débit binaire : 8 k ~ 320 kb/s
Emboîtement de sous-dossier : 8
Nombre de fichiers maximum pour la lecture : 9999
Format de fichier pour la lecture : .mp3. . mp2, . mp1.
UTILISATION DE LA RADIO
*
*
*
*
*
*
Mettez l‘appareil sous tension en plaçant le COMMUTATEUR MARCHE-ARRÊT/CONTRÔLE DU VOLUME
sur la position ON et réglez le volume sonore en position médiane.
Positionnez le bouton FUNCTION sur Radio / USB / SD – la molette de réglage LED dans la poignée
s‘allume.
Utilisez le sélecteur de bande AM / FM / USB / SD (commutateur de bandes situé sur le panneau arrière)
pour sélectionner la bande AM (MW) ou FM.
Sélectionnez la station de radio en tournant le bouton de réglage sur le panneau supérieur. Le ruban rouge
indicateur de station indiquera la station de radio de votre choix.
Pour la réception FM, tirez le fil de l'antenne incorporé de manière à ce que la sensibilité soit augmentée.
Pour optimiser la réception AM (MW), orientez l‘unité dans la direction qui donne les meilleurs résultats.
FONCTIONNEMENT DU RÉVEIL
RÉGLAGE DE L’HEURE
*
*
Assurez-vous que l‘appareil soit connecté à la source d‘alimentation CA.
Pour régler l‘heure actuelle, poussez et tournez le bouton de réglage de l‘heure du panneau arrière dans le
sens des aiguilles d‘une montre, tout en vous placant face à l‘horloge.
AVERTISSEMENT : Débrancher l'appareil de la source d‘alimentation CA, ou tout autre type de rupture de
l‘alimentation, arrêtera l‘horloge. Assurez-vous que l‘heure actuelle soit réglée.
N‘exposez pas l‘horloge à des température trop extrêmes ni à l‘humidité car cela pourrait endommager le
mécanisme électronique et par conséquent affecter son bon fonctionnement.
RÉGLAGE DE L’HEURE DE L’ALARME
Poussez et tournez le bouton de réglage de l‘heure de l‘alarme dans le sens des aiguilles d‘une montre (tout en
faisant face à l‘horloge) pour régler l‘heure de l‘alarme.
UTILISATION DE L’ALARME
Cet appareil est doté d‘une alarme et d‘une fonction répétition de l‘alarme.
Faites tourner le bouton FUNCTION situé sur le devant de l‘appareil pour sélectionner le type d‘alarme : RADIO,
SD/USB, AUTO ou SIGNAL SONORE.
Remarque importante : Pour que l‘alarme fonctionne, l'appareil doit être en marche. Effectuez cette opération
en plaçant le COMMUTATEUR MARCHE-ARRÊT / CONTRÔLE DU VOLUME sur la position ―ON ‖.
RÉVEIL-RADIO
*
*
*
Régler l‘heure de l‘alarme en appuyant sur et en tournant le bouton de réglage ALARME SET situé sur le
panneau arrière.
Réglez le sélecteur de bande sur AM (= MW) ou FM.
Sélectionnez la station radio de votre choix et réglez le volume sonore de l‘alarme - maintenez le réglage.
*
*
Mettez le bouton Fonctions en position «AUTO». Le son et la lumière de la commande LED de la radio
s‘éteignent.
La radio se mettra automatiquement en marche à l‘heure à laquelle vous avez réglé l‘alarme .
ALARME-USB/SD
*
*
*
*
*
Réglez l‘heure de l‘alarme comme décrit précédemment.
Réglez le sélecteur de bande AM-FM-USB/SD en position SD / USB.
Insérez une carte SD ou un périphérique USB avec de la musique MP3 stockée dans la fente pour carte ou
le port USB et réglez le volume sonore - Laissez la carte SD ou le périphérique USB en position pendant le
réglage du volume sonore.
Positionnez le bouton de fonctions situé sur le devant de l‘appareil sur «AUTO».
Le titre MP3 sur le périphérique USB ou SD sera lancé à l‘heure à laquelle vous avez réglé l‘alarme.
ALARME-SIGNAL SONORE
*
*
*
Réglez l‘heure de l‘alarme comme décrit précédemment.
Mettez le bouton Fonctions en position «BUZZER».
Le signal sonore se mettra automatiquement en marche à l‘heure à laquelle vous avez réglé l‘alarme .
ÉTEINDRE L’ALARME ET FONCTION RÉPÉTITION DE L’ALARME
*
*
*
Pour éteindre l‘alarme, appuyez sur le bouton SNOOZE/BACKLIGHT ON/OFF situé au-dessus de l‘appareil
lorsque l‘alarme retentit.
En mode Alarme Radio, USB/SD, ou Signal sonore, l‘alarme s‘arrêtera immédiatement en appuyant sur le
bouton SNOOZE, pour retentir de nouveau 5 minutes plus tard.
Pour désactiver l'alarme de façon permanente, tourner le bouton FUNCTION situé sur le devant de l‘appareil
jusqu‘à la position «OFF».
RÉTRO-ÉCLAIRAGE DE L’HORLOGE
*
*
Appuyez sur la touche de rétro-éclairage «SNOOZE / BACKLIGHT ON / OFF» sur le dessus de l‘appareil
pour activer le rétroéclairage de l‘horloge (ON).
Appuyez de nouveau sur cette touche pour désactiver le rétro-éclairage («OFF»).
BATTERIE DE SAUVEGARDE
La batterie de sauvegarde permet à l‘horloge de continuer à fonctionner en cas de coupure de courant.
En cas de panne de courant, la batterie de sauvegarde permet à l‘horloge de continuer à fonctionner (cependant
l‘alarme ne fonctionnera pas).
Pour utiliser la batterie de sauvegarde, vous devez installer deux piles AAA. La batterie de sauvegarde ne
fonctionnera pas en l‘absence de piles. Pour mettre les piles, suivez les instructions ci-dessous.
1 Retirez le couvercle du compartiment de la batterie qui se trouve à l‘arrière de l‘appareil.
2 Placez deux piles AAA dans la bonne position comme indiqué à l‘intérieur du compartiment des piles.
3 Replacez le couvercle du compartiment des piles.
REMARQUE :
N‘utilisez que des piles identiques
Ne mélangez pas de vieilles piles avec des piles neuves
Dépannage Il n’y a pas de son
* Assurez-vous que la prise de l‘adaptateur CC est complètement insérée dans la prise Jack CC à l'arrière de
l'appareil, et que l'appareil est bien connecté à l'alimentation CA.
* Vérifiez que l‘appareil est sous tension.
* Vérifiez que le volume est activé.
* Vérifiez que le sélecteur de fonction soit réglé sur la position radio / USB / SD.
USB / SD - Aucune musique n'est jouée
*
*
*
*
Vérifiez qu‘il y ait des chansons MP3 stockées sur le périphérique MP3 / USB / mémoire flash / Carte SD.
Vérifiez que le périphérique USB / la mémoire flash / la carte SD ne dépassent pas 4 Go, étant donné que la
limite de cet appareil est de 4 Go.
Essayez de réinitialiser le périphérique USB / SD en éteignant puis en rallumant l‘appareil.
Vérifiez que le périphérique USB / la carte SD contiennent des fichiers de musique MP3 ou WMA.
Cet appareil ne lit pas le format WMA mais uniquement le format MP3.
L’alarme ne m’a pas réveillé(e) à l’heure prévue
*
*
*
Assurez-vous que l‘appareil soit connecté à la source d‘alimentation CA.
Vérifiez que l‘appareil est sous tension.
L‘horloge et l‘alarme ne fonctionnent pas ni ne conservent leurs paramètres lorsque l‘alimentation est
déconnectée et que l‘appareil n‘est pas en marche.
EMPLACEMENTS DES COMMANDES
BANDE DE
FRÉQUENCES
BOUTON FUNCTION
BOUTON VOLUME
ON / OFF / MAX
(OFF / RADIO / USB / SD ON / AUTO / BUZZER)
LECTURE/PAUSE
DEL ACC
DEL ERR
SKIP +
SKIP USB / SD
EMPLACEMENT
CARTE SD
PORT USB
EMPLACEMENTS DES COMMANDES
BOUTON SNOOZE / BACKLIGHT ON-OFF
BOUTON DE RÉGLAGE DE
L’ALARME
TUNING
ADAPTATEUR
JACK
BOUTON DE RÉGLAGE
DE L’HORLOGE
ANTENNE FM
FILAIRE
INTERRUPTEUR DE SELECTION
DE BANDE AM FM USB / SD
BATTERIE DE
SAUVEGARDE
ADAPTATEUR CA
SERVICE CONSOMMATEUR
Vous pouvez contacter le service consommateur de Ricatech si vous avez une question ou un
problème avec votre produit Ricatech. Vous pouvez nous contacter par téléphone ou par email.
Email
Pour une assistance par email, veuillez nous écrire à l‘adresse [email protected].
Assurez-vous de bien nous communiquer le numéro de modèle et le numéro de série du produit,
vos nom et adresse ainsi qu‘une description claire de votre problème ou votre question.
Téléphone
Pour contacter le service consommateur par téléphone, composez le +32 3 3265694. Un membre de notre
personnel se tiendra à votre service.
Pour toutes les procédures, rendez vous sur le site web de
Ricatech : www.ricatech.com
Ricatech
Cornusbaan 1
2908 KB Capelle a/d IJssel
The Netherlands
Deutsche
WICHTIGE SICHERHEITSHINWEISE FÜR AUDIOGERÄTE
BITTE LESEN SIE SORGFÄLTIG DIE FOLGENDEN WICHTIGEN SICHERHEITSHINWEISE,
DIE FÜR IHRE GERÄTE GELTEN.
1 Lesen Sie die Anleitungen - Alle Sicherheits- und Bedienungsanleitungen sollten gelesen
werden, bevor das Gerät betrieben wird.
2 Bewahren Sie die Anleitungen auf - Die Sicherheits-und Bedienungsanleitungen
sollten für zukünftige Fragen aufbewahrt werden.
3 Beachten Sie die Warnungen - Alle Warnhinweise auf dem Gerät und in der
Bedienungsanleitung sollten beachtet werden.
4 Befolgen Sie die Anweisungen - Alle Bedienungs-und Gebrauchsanleitungen
sollten befolgt werden.
5 Wasser und Feuchtigkeit - Das Gerät sollte nicht in der Nähe von Wasser verwendet
werden- wie z.B. in der Nähe einer Badewanne, Wasch- und Spülbecken,
Waschmaschine, in einem feuchten Keller oder in der Nähe eines Schwimmbad
und dergleichen.
6 Wagen und Gestelle - Das Gerät sollten nur mit einem Wagen oder Gestell benutzt werden, die
vom Hersteller empfohlen werden.
6A Ein Gerät auf einem Wagen sollte mit Vorsicht bewegt werden. Schnelles Anhalten, übermäßige
Krafteinwirkung und unebene Oberflächen können zum Umkippen des Geräts und dem Wagen
führen.
7 Wand-oder Deckenmontage - Das Gerät sollte an einer Wand oder Decke nur so montiert
werden, wie vom Hersteller empfohlen.
8 Belüftung - Das Gerät muss so aufgestellt werden, dass der Standort oder die Position nicht die
einwandfreie Belüftung verhindert. Zum Beispiel sollte das Gerät nicht auf einem Bett, Sofa,
Teppich oder einer ähnlichen Oberfläche, die die Lüftungsöffnungen blockieren könnte, platziert
oder in eine fest eingebaute Vorrichtung, z.B. einem Bücherregal oder Schrank, wo der Luftstrom
durch die Lüftungsöffnungen behindert werden könnten, gestellt werden.
9 Wärme - Das Gerät sollte von Wärmequellen, wie Heizkörpern, Wärmespeichern, Öfen oder
anderen Geräten (einschließlich Verstärkern), die Wärme erzeugen, entfernt liegen.
10 Stromquellen - Das Gerät sollte nur an eine solche Stromversorgung angeschlossen werden,
wie sie in der Bedienungsanleitung beschrieben oder auf dem Gerät markiert ist.
11 Erdung oder Polarisation - Vorsichtsmaßnahmen sollten ergriffen werden, damit die Erdung oder
Polarisation eines Geräts nicht behindert wird.
12 Strom - Kabelschutz - Stromkabel sollten so gelegt werden, dass man nicht auf sie tritt oder sie
von Gegenständen, die auf ihnen abgestellt sind, zusammengedrückt werden. Besonderes
Augenmerk gilt den Kabelstücken an der Steckdose und am Gerät selbst.
13 Reinigung - Das Gerät sollte nur wie vom Hersteller empfohlen gereinigt werden.
14 Dieses Produkt ist für den Gebrauch mit der beigefügten Antenne konzipiert und sollten nicht´an
externe Antennen angeschlossen werden.
15 Nicht-Verwendungs - Perioden – Das Netzkabel des Geräts sollte aus der Steckdose gezogen
werden,wenn das Gerät für eine längere Zeit ungenutzt bleibt.
16 Eindringen von Gegenständen oder Flüssigkeiten - Achten Sie darauf, dass keine
Gegenstände und keine Flüssigkeiten durch die Öffnungen des Geräts in das Gerät gelangen.
17 Schäden die Reparatur erfordern - Das Gerät sollte von qualifiziertem Fachpersonal gewartet werden, wenn:
A. Das Netzkabel des Steckers beschädigt wurde; oder
B. Gegenstände oder Flüssigkeiten in das Geräteinnere gelangt sind; oder
C. Das Gerät Regen ausgesetzt wurde; oder
D. Das Gerät scheinbar nicht ordnungsgemäß funktioniert oder sich in seiner Leistung deutlich
verändert hat; oder
E. Das Gerät fallengelassen wurde oder das Gehäuse beschädigt wurde.
18 Wartung - Der Benutzer sollte nicht versuchen, das Gerät, über die in den
Bedienungsanleitungen beschriebenen Hinweise hinaus, zu warten. Jede weitere Wartung sollte
von qualifiziertem Fachpersonal durchgeführt werden.
WARNUNG:
UM FEUER ODER STROMSCHLAG ZU VERMEIDEN, SETZEN SIE DIESES GERÄT NIE REGEN ODER
FEUCHTIGKEIT AUS. ENTFERNEN SIE NICHT DIE ABDECKUNG. DIE KONTROLLLEUCHTEN SIND
VERLÖTET. IM GERÄT BEFINDEN SICH KEINE VOM
BENUTZER ZU WARTENDEN TEILE. ÜBERLASSEN SIE DIE WARTUNG
QUALIFIZIERTEM
KUNDENDIENST
PERSONAL.
Das Symbol eines Blitzes mit
Pfeilspitze in einem gleichseitigen
Dreieck soll den Benutzer auf die
im
Gehäuse
des
Produkts
vorhandene,
nicht
isolierte
―gefährliche Spannung‖ hinweisen,
welche so stark sein kann, dass
sie eine Gefahr für Personen
darstellt.
VORSICHT: UM DAS RISIKO EINES
STROMSCHLAGS ZU VERMEIDEN,
ENTFERNEN SIE NICHT DIE ABDECKUNG
(ODER DIE RÜCKVERKLEIDUNG). IM GERÄT
BEFINDEN SICH KEINE VOM BENUTZER ZU
WARTENDEN TEILE. ÜBERLASSEN SIE DIE
WARTUNG QUALIFIZIERTEM KUNDEN
DIENSTPERSONAL.
Das Ausrufezeichen in einem
gleichseitigen Dreieck soll den
Benutzer auf das Vorhandensein
von wichtigen Betriebs- und
Wartungshinweisen in der dem
Gerät beiliegenden Unterlagen
aufmerksam machen.
Spezifikationen
Frequenz
Antenne
:
:
:
Audioausgang
Stromquelle
USB 2.0-ANSCHLUSS
SD-KARTENSCHLITZ
Lautsprecher
:
:
:
:
:
MW 530 – 1600 KHz
UKW 88 – 108 MHz
UKW Drahtantenne
MW Eingebauter Ferritstab
Max. 700 mW
Netzadapter Wechselstrom 230 V/50 Hz(Gleichstrom 9 V 600 mA *)
Die Grenze dieses Anschlusses liegt bei max. 4 GB
Die maximale Kartengröße beträgt 4 GB
1 x 4 "(3 W)
Auspacken
1. Entfernen Sie den Plastikbeutel, welcher das Gerät umhüllt.
2. Nehmen Sie den AC/DC-ADAPTER aus der Verpackung heraus.
3. Entfernen Sie den schwarzen Kabelbinder vom A/C-ADAPTER.
Stromquelle
1. Stecken Sie das kleine Ende des mitgelieferten ADAPTERS in die DC-EINGANGSBUCHSE für 9V an der
Rückseite des Gerätes.
2. Stecken Sie den 2-poligen Stecker des AC-ADAPTERS in eine geeignete Wandsteckdose mit 230 V
Wechselstrom.
USB- & SD-KARTENBETRIEB
SD-Kartenbetrieb:
1. Schalten Sie das Gerät EIN, indem Sie den EIN/AUS-SCHALTER/LAUTSTÄRKEREGLER in die EIN-Position
stellen, und drehen Sie die Lautstärke auf die mittlere Position.
2. Stellen Sie den Funktionsschalter auf die Position Radio/SD/USB.
3. Wählen Sie mit dem AM/FM/USB/SD-Frequenzschalter (auf der Rückseite des Geräts) den Modus SD/USB.
4. Legen Sie eine SD-Karte mit gespeicherter MP3-Musik (maximale Größe 4 GB, nichtmitgeliefert) in der
Richtung, die unter dem Kartenschlitz angegeben ist, in den Kartenschlitz ein.
5. Drücken Sie die PLAY/PAUSE-TASTE (Wiedergabe/Anhalten), um die aufder SD-Karte gespeicherten
Musikstücke abzuspielen. Die grüne ACC-LED (Zugriffsanzeige) blinkt während der Musikwiedergabe.
7. Um die Musikwiedergabe zu unterbrechen, drücken Sie die PLAY/PAUSE-TASTE erneut.
8. Drücken Sie im Wiedergabemodus einmal oder mehrmals die TASTE SKIP+ / SKIP-, bis Sie den
gewünschten Titel gefunden haben.
9. Um die Wiedergabe der auf der SD-Karte gespeicherten Musikstücke anzuhalten, drücken Sie die
PLAY/PAUSE-TASTE. TRENNEN SIE ZU DIESEM ZEITPUNKT noch NICHT DIE SD-KARTE!
10 Schalten Sie das Gerät zuerst aus, bevor Sie die SD-Karte aus dem Kartenschlitz nehmen
11 Drücken Sie die Speicherkarte vorsichtig hinein & lassen Sie sie dann los. Die Karte wird teilweise
ausgeworfen und kann dann per Hand entnommen werden.
VORSICHT: Wird ein USB-Gerät/eine SD-Karte verkehrt herum oder mit der falschen Seite nach oben weisend
angeschlossen, kann das Audiosystem bzw. das USB-Gerät/die SD-Karte beschädigt werden. Vergewissern Sie
sich vor dem Anschließen, dass die Einsteckrichtung korrekt ist.
USB-Betrieb:
1. Schalten Sie das Gerät EIN, indem Sie den EIN/AUS-SCHALTER/LAUTSTÄRKEREGLER in die EIN-Position
stellen, und drehen Sie die Lautstärke auf die mittlere Position.
2. Stellen Sie den Funktionsknopf auf der Vorderseite des Geräts auf die Position „RADIO/SD/USB ON‖.
3. Wählen Sie mit dem AM/FM/USB/SD-Frequenzschalter (auf der Rückseite des Geräts) den Modus SD/USB.
4. Stecken Sie ein MP3-USB-Gerät oder einen USB-Stick mit MP3-Musikstücken
(Größe max. 4 GB,
nicht mitgeliefert) in den USB-Anschluss an der Seite des Geräts ein. Vergewissern Sie sich, dass das USBGerät korrekt eingesetzt ist.
Hinweise:
* Informationen zum Betrieb des MP3-Geräts finden Sie in der Bedienungsanleitung des Geräteherstellers.
* Wenn sowohl eine SD-Karte als auch ein USB-Gerät angeschlossen sind, drücken Sie die USB/SD-Taste
an der Seitenwand, um das gewünschte Gerät für die Musikwiedergabe einzustellen.
5 Drücken Sie die PLAY/PAUSE-TASTE, um die auf dem externen Gerät gespeicherte Musik abzuspielen.
6 Die grüne ACC-LED blinkt während der Musikwiedergabe.
7 Um die Musikwiedergabe zu unterbrechen, drücken Sie die PLAY/PAUSE-TASTE erneut.
8 Drücken Sie im Wiedergabemodus einmal oder mehrmals die TASTE SKIP+/ SKIP-, bis Sie den
gewünschten Titel gefunden haben.
9 Um die Wiedergabe der auf dem USB-Gerät/USB-Speicherstick gespeicherten Musik anzuhalten, drücken
Sie die PLAY/PAUSE-TASTE. TRENNEN SIE ZU DIESEM ZEITPUNKT NICHT DAS USB-GERÄT/DEN
USB-SPEICHERSTICK!
10 Schalten Sie zuerst das Gerät aus, bevor Sie das USB-Gerät/den USB-Speicherstick trennen. Trennen Sie
das Gerät vom USB-Anschluss, indem Sie es gerade herausziehen.
WARNUNG:
1
2
Trennen Sie das USB/SD-Gerät nicht während der Musikwiedergabe, da dies zu Beschädigungen des Geräts
oder der darauf gespeicherten Musikdateien führen kann.
Um das USB/SD-Speichergerät sicher zu entfernen, schalten Sie das Gerät zuerst aus oder schalten Sie auf
einen anderen Modus um.
WICHTIGE HINWEISE:
a) Dieses Gerät ist möglicherweise nicht mit USB-Geräten mit mehreren USB-Kennungen kompatibel (wie z. B.
ein USB HUB + USB-Speicherstick), es funktioniert NUR dann, wenn es direkt an einen USB-Speicherstick
oder einen MP3-Player angeschlossen wird.
b) Wenn kein(e) MP3- / USB-Gerät / Speicherstick / SD-Karte angeschlossen ist bzw. keine MP3-Datei erkannt
wird, leuchtet die rote ERR-LED (Fehleranzeige) auf.
c) Die grüne ACC-LED blinkt im PLAY-Modus, während MP3-Daten übertragen werden.
d) Mit diesem Gerät können nur MP3-Musikdateien abgespielt werden, keine Musikdateien im WMA-Format.
e) Wenn das USB/SD-Speichermedium nicht funktioniert, schalten Sie das Gerät aus, um es zurückzusetzen.
USB-SPEZIFIKATION
Schnittstelle
*
USB2.0 Full Speed, HOST (USB HUB wird nicht unterstützt)
Entsprechender Flashspeicher
*
*
*
*
USB1.1-Flashspeicher
USB2.0 Hochgeschwindigkeits-Flashspeicher
Minimale Speichergröße: 512 MByte
Maximale Speichergröße: 4 GByte (Entspricht nur FAT16)
HINWEISE:
a) Der USB-Anschluss unterstützt keine Verbindung mit einem USB-Verlängerungskabel.
b) Er ist nicht für einen Anschluss an einen Computer geeignet.
c) Es kann nicht garantiert werden, dass alle USB-Speichergeräte und SD-Karten mit diesem Audiosystem
funktionieren.
MP3-Decoder
*
*
*
*
*
*
*
*
Kompatibel mit MPEG Audio 1, 2, 2.5
Kompatibel mit Layer 1, 2, 3
Kompatibel mit Abtastrate: 8 k, 16 k, 32 k, 11,025 k, 22,05 k,
44,1 k, 12 k, 24 k, 48 kHz
Kompatibel mit Bitrate: 8 k ~ 320 kbps
Unterordnerstruktur: 8
Maximale Anzahl der Dateien für die Wiedergabe: 9999
Dateiformat für die Wiedergabe: .mp3. . mp2, . mp1.
RADIOBETRIEB
*
*
*
*
*
*
Schalten Sie das Gerät EIN, indem Sie den AN/AUS-SCHALTER/LAUTSTÄRKEREGLER in die EIN-Position
stellen, und drehen Sie die Lautstärke auf die mittlere Position.
Drehen Sie den Funktionsknopf auf die Position Radio/SD/USB – die Senderwahlrad-LED im Griff leuchtet
auf.
Wählen Sie mit dem AM/FM-USB/SD-Frequenzschalter (auf der Rückseite) den Frequenzbereich AM (MW)
oder FM (UKW).
Wählen Sie einen Sender aus, indem Sie den SENDERWAHL-Regler auf der Gehäuseoberseite drehen. Der
rote Streifen für die Sendermarkierung zeigt den gewünschten Radiosender an.
Ziehen Sie für UKW-Empfang die eingebaute Drahtantenne aus, um die Empfangsempfindlichkeit für UKW
zu erhöhen.
Drehen Sie für optimalen MW-Empfang das Gerät in die Richtung, in der das beste Ergebnis erzielt wird.
WECKERBETRIEB
EINSTELLEN DER UHRZEIT
*
*
Vergewissern Sie sich, dass das Gerät an die Stromversorgung (Wechselstrom) angeschlossen ist.
Stellen Sie die aktuelle Uhrzeit ein, indem Sie den ZEITEINSTELLUNGSKNOPF auf der Rückseite im
Uhrzeigersinn drehen, während Sie der Uhr zugewandt sind.
WARNUNG: Wenn das Gerät von der Stromversorgung getrennt wird oder eine andere Störung in der
Stromversorgung auftritt, funktioniert die Uhr nicht mehr. Vergewissern Sie sich, dass die aktuelle Uhrzeit
eingestellt ist.
Setzen Sie die Uhr nicht extremen Temperaturen oder extremer Luftfeuchtigkeit aus, da hierdurch das
elektronische Uhrwerk beschädigt und die Zeiterfassung beeinträchtigt werden kann.
EINSTELLEN DER ALARMZEIT
Drücken Sie den Einstellungsknopf für die Alarmzeit hinein und drehen Sie ihn im Uhrzeigersinn (während Sie
der Uhr zugewandt sind), um die Alarmzeit einzustellen.
ALARMBETRIEB
Dieses Gerät verfügt über eine Alarm- und Schlummerfunktion.
Drehen Sie den FUNKTIONSKNOPF auf der Vorderseite des Geräts, um aus folgenden Optionen eine
Weckfunktion auszuwählen: RADIO, SD/USB, AUTO oder SUMMER.
Wichtiger Hinweis: Das Gerät muss eingeschaltet sein, damit der Alarm funktioniert. Drehen Sie hierzu den
EIN-AUS-SCHALTER/LAUTSTÄRKEREGLER auf die Stellung „EIN―.
RADIOWECKER
*
*
*
*
*
Stellen Sie die gewünschte Alarmfunktion ein, indem Sie den Knopf ALARMEINSTELLUNG auf der Rückseite
eindrücken und drehen.
Stellen Sie den Frequenzschalter auf AM (= MW) oder FM (= UKW).
Stellen Sie den gewünschten Radiosender ein und stellen Sie die Lautstärke der Weckfunktion ein - behalten
Sie die Einstellung bei.
Drehen Sie den Funktionsschalter in die Stellung „AUTO―. Die LEDs für Ton und Radiowahlrad erlöschen.
Das Radio schaltet sich zu der eingestellten Weckzeit automatisch ein.
USB/SD-WECKFUNKTION
*
*
*
*
*
Stellen Sie die gewünschte Weckzeit wie zuvor beschrieben ein.
Bringen Sie den AM-FM-USB/SD-Frequenzschalter in die Stellung SD/USB.
Stecken Sie eine SD-Karte oder ein USB-Gerät mit gespeicherten MP3-Songs in den Kartenschlitz oder den
USB-Anschluss ein und stellen Sie die Lautstärke ein – lassen Sie die SD-Karte bzw. das USB-Gerät in
ihrer/seiner Position und behalten Sie die eingestellte Lautstärke bei.
Drehen Sie den Funktionsknopf auf der Vorderseite des Geräts auf die Position „AUTO‖.
Der auf USB oder SD gespeicherte MP3-Song wird automatisch zu der eingestellten Weckzeit abgespielt.
WECKFUNKTION MIT SUMMER
*
*
*
Stellen Sie die gewünschte Weckzeit wie zuvor beschrieben ein.
Drehen Sie den Funktionsknopf in die Stellung „BUZZER― (Summer).
Der Summer schaltet sich zu der eingestellten Weckzeit ein.
ALARM AUS UND SCHLUMMERFUNKTION
*
*
*
Zum Ausschalten des Alarms drücken Sie die Taste SCHLUMMERFUNKTION/BELEUCHTUNG EIN/AUS auf
der Oberseite des Geräts, wenn der Alarm ertönt.
Wenn Sie sich durch Radio, USB/SD oder Summer wecken lassen, wird der Alarm durch Drücken der Taste
SCHLUMMERFUNKTION sofort beendet, er ertönt jedoch nach etwa 5 Minuten erneut.
Zum dauerhaften Abstellen des Alarms drehen Sie den FUNKTIONSKNOPF auf der Vorderseite in die
Stellung „AUS―.
UHRBELEUCHTUNG
*
*
Drücken Sie die Taste „SCHLUMMERFUNKTION/BELEUCHTUNG EIN/AUS― auf der Oberseite des Geräts,
um die Hintergrundbeleuchtung der Uhr auf ,EIN‘ zu stellen.
Drücken Sie diese Taste erneut, um die Beleuchtung auf „AUS― zu schalten.
NOTSTROMVERSORGUNG DURCH BATTERIEN
Das Batteriereservesystem sorgt dafür, dass bei einem Stromausfall Ihre Uhr weiterhin in Betrieb bleibt. Bei
einem Stromausfall sorgt das Batteriereservesystem dafür, dass Ihre Uhr weiterhin funktioniert (Der Wecker ist in
diesem Fall jedoch nicht betriebsbereit).
Um das Batteriereservesystem zu verwenden, müssen Sie zwei AAA-Batterien einlegen. Die
Notstromversorgung mit Batterien funktioniert nur, wenn Batterien eingelegt sind. Zum Einlegen der Batterien
folgen Sie den unten stehenden Anweisungen.
1 Entfernen Sie den Batteriefachdeckel von der Rückseite des Geräts.
2 Setzen Sie zwei neue AAA-Batterien in der richtigen Position ein, so wie innen auf der Batterieabdeckung
gezeigt.
3 Bringen Sie die Batteriefachabdeckung wieder an.
HINWEIS:
Verwenden Sie keine unterschiedlichen Batterietypen
Kombinieren Sie nicht gebrauchte und neue Batterien
Fehlerbehebung
Es gibt keinen Ton
*
*
*
*
Vergewissern Sie sich, dass der DC-Adapterstecker vollständig in die DC-Buchse an der Geräterückwand
eingesteckt ist und dass das Gerät ordnungsgemäß an die Stromversorgung angeschlossen ist.
Überprüfen Sie, ob das Gerät eingeschaltet ist.
Überprüfen Sie, ob die Lautstärke aufgedreht wurde.
Überprüfen Sie, ob sich der Funktionsschalter in der Stellung Radio/SD/USB befindet.
USB/SD - Es wird keine Musik wiedergegeben
*
*
*
*
Überprüfen Sie, ob auf dem MP3-/USB-Gerät/Speicherstick/der SD-Karte MP3-Songs gespeichert sind.
Stellen Sie sicher, dass das MP3-/USB-Gerät/der Speicherstick/die SD-Karte nicht größer als 4 GB ist, da der
Grenzwert für die Kompatibilität mit diesem Gerät bei maximal 4 GB liegt.
Versuchen Sie, das USB/SD-Gerät zurückzusetzen, indem Sie es aus- und anschließend wieder einschalten.
Überprüfen Sie, ob das USB-Gerät/die SD-Karte MP3- oder WMA-Musikdateien enthält.
Dieses Gerät kann kein WMA-Format abspielen, nur das MP3-Format.
Der Alarm hat mich nicht zum eingestellten Zeitpunkt geweckt
*
*
*
Vergewissern Sie sich, dass das Gerät an die Stromversorgung angeschlossen ist.
Überprüfen Sie, ob das Gerät eingeschaltet ist.
Die Uhr bzw. der Alarm funktioniert nicht und die Einstellungen werden nicht beibehalten, wenn die
Stromversorgung unterbrochen und das Gerät nicht eingeschaltet wird.
BEDIENELEMENTE
SKALASCHEIBE
EIN/AUS/MAX
LAUTSTÄRKEKNOPF
FUNKTIONSKNOPF
(AUS/RADIO/USB/SD EIN/AUTO/SUMMER)
PLAY/PAUSE
ACC-LED
(Zugriffsanzeige)
ERR-LED
(Fehleranzeige)
SKIP + (Vorwärts)
SKIP - (Zurück)
USB/SD
SDKARTENSCHLITZ
USB-ANSCHLUSS
BEDIENELEMENTE
SCHLUMMERFUNKTION/BELEUCHTUNG EIN-AUS
ALARMEINSTELLUNGSK
NOPF
ZEITEINSTELLUNGSK
NOPF
SENDERWAHLKNOPF
ADAPTERBUCH
SE
UKWDRAHTANTENNE
AM FM USB/SDFREQUENZSCHALTER
NOTSTROMVERSORGUN
G DURCH BATTERIEN
NETZADAPTER
KUNDENBETREUUNG
Sollten Sie eine Frage haben oder ein Problem mit Ihrem Ricatech-Produkt auftauchen, können Sie den
Ricatech-Kundenservice kontaktieren. Sie können uns per Telefon und E-Mail erreichen.
E-Mail
Senden Sie uns für die Kundenbetreuung per E-Mail bitte eine E-Mail an [email protected]. Achten Sie bitte
darauf, dass Sie Ihre Modellnummer und die Seriennummer des Produkts angeben, teilen Sie uns außerdem
Ihren Namen & Ihre Adresse mit und beschreiben Sie Ihre Frage oder
problem deutlich.
Telefon
Für Kundenbetreuung per Telefon wählen Sie bitte
+32 3 3265694. Ein Mitarbeiter aus unserem Serviceteam wird Ihnen gern behilflich sein.
Besuchen Sie für ein vollständiges Verfahren die Webseite von Ricatech unter: www.ricatech.com
Ricatech
Cornusbaan 1
2908 KB Capelle a/d IJssel
The Netherlands
ESPAÑOL
INSTRUCCIONES DE SEGURIDAD IMPORTANTES PARA
PRODUCTOS DE AUDIO
POR FAVOR LEA CON ATENCIÓN LAS SIGUIENTES INSTRUCCIONES DE SEGURIDAD
APLICABLES A SU EQUIPO.
1. Lea las instrucciones – Lea todas las instrucciones de seguridad y uso antes de utilizar
el aparato.
2. Guarde las instrucciones – Guarde las instrucciones de seguridad y uso para futuras
referencias.
3. Tenga en cuenta las advertencias – Siga todas las advertencias e instrucciones de
uso del aparato.
4. Siga las instrucciones – Siga todas las instrucciones de funcionamiento y uso.
5. Agua y humedad – Este aparato no debe usarse cerca del agua, por
ejemplo cerca de bañeras, lavabos, fregaderos o pilas, en superficies
mojadas o cerca de una piscina.
6. Carritos y soportes – Utilice este aparato sólo con carritos o soportes
recomendados por el fabricante.
6A.Desplace el conjunto de carrito y aparato con cuidado. Las paradas rápidas,
el exceso de fuerza o las superficies irregulares pueden hacer que el carrito vuelque.
7. Soporte de pared o techo – Coloque este aparato únicamente sobre soportes de pared
o techo recomendados por el fabricante.
8. Ventilación – Este aparato debe colocarse de forma que su posición no interfiera en
una ventilación adecuada. Por ejemplo, no debe colocarse sobre una cama, sofá,
alfombra o superficie similar, que pueda bloquear las aberturas de ventilación; tampoco
lo coloque en lugares empotrados, como estanterías o armarios, que puedan impedir
que el aire fluya por las aberturas de ventilación
9. Calor – Este aparato debe situarse lejos de fuentes de calor, como radiadores,
calentadores, estufas o demás aparatos (incluidos amplificadores) que desprendan
calor.
10.Corriente – Este aparato debe conectarse sólo a la corriente descrita en las instrucciones
de funcionamiento o a la que se describe en el propio aparato.
11. Toma de tierra o polarización – Deben tomarse precauciones para asegurarse de que
la toma de tierra o la polarización del aparato no se impiden.
12.Protección del cable de corriente – Los cables de la corriente deben estar correctamente
colocados para que no se pisen ni se aplasten con objetos colocados sobre o contra
ellos. Se debe prestar especial atención a la parte del cable cercana al enchufe y al
conector del aparato.
13.Limpieza – Debe limpiar este aparato solamente como recomienda el fabricante.
14.Este producto está diseñado para usarse con la antena acoplada y no debe conectarse
ninguna otra antena exterior.
15.Periodos sin uso – Cuando no vaya a utilizar este aparato durante periodos de tiempo
prolongados, desenchúfelo de la corriente.
16.Entrada de objetos y líquidos – Tenga cuidado de que no caigan objetos ni líquidos
a través de las aberturas de la carcasa.
17.Daños que precisan reparaciones – Este aparato debe llevarse al servicio técnico
cuando:
A. El cable de la corriente o la clavija estén dañados.
B. Hayan caído objetos o líquidos dentro del aparato.
C. El aparato se haya expuesto a la lluvia.
D. El aparato no funcione normalmente o muestre algún cambio en su funcionamiento.
E. El aparato se haya caído o la carcasa esté dañada.
18. Reparaciones — El usuario no debe intentar reparar el aparato más allá de lo descrito
en el presente manual. Todo lo demás debe realizarlo personal de mantenimiento
cualificado.
ADVERTENCIA:
PARA EVITAR RIESGO DE INCENDIO O DE DESCARGAS
ELÉCTRICAS, NO EXPONGA ESTE APARATO A LLUVIA O HUMEDAD.
NO QUITE LA CUBIERTA. LOS PILOTOS LUMINOSOS ESTÁN
SOLDADOS EN SU LUGAR. NO HAY PIEZAS ÚTILES EN SU
INTERIOR. EN CASO DE REPARACIONES, ACUDA SIEMPRE A
PERSONAL DE REPARACIONES CUALIFICADO.
El símbolo del relámpago
con punta de flecha dentro
de un triángulo equilátero
pretende advertir al usuario
de la presencia de "voltaje
peligroso" sin aislar dentro
del producto. que puede
tener la suficiente magnitud
como para suponer un riesgo
de electrocución para las
personas.
ADVERTENCIA: PAPR REDUCIR EL
RIESGO DE DESCARGAS ELÉCTRICAS,
NO RETIRE LA CUBIERTA (NI LA PARTE
TRASERA) NO HAYPIEZAS QUE
PUEDA USAR EN SU INTERIOR. EN
CASO DE REP ARACIONES ACUDA
SIEMPRE AL SERVICIO TÉCNICO.
El signo de exclamación
dentro de un triángulo
equilátero pretemde advertir
al usuario de la presencia
de instrucciones de
funcionamiento
(reparaciones) importantes
en el manual que acompaña
el aparato.
Especificaciones
Frecuencia
Antena
:
:
:
Salida de audio
Fuente de alimentación
Puerto USB 2.0
RANURA DE TARJETA SD
Altavoz
:
:
:
:
:
AM 530 - 1600 KHz
FM 88 - 108 MHz
Cable de antena FM
Barra de ferrita integrada AM
700 mW máx.
Adaptador de CA 230 V CA/50 Hz(CC 9 V 600 mA *)
El límite de este puerto es 4GB Máx
El límite de tamaño de esta tarjeta es 4GB máx
1 x 4 "(3W)
Desembalaje
1. Retire la bolsa de plástico que cubre la unidad.
2. Saque el ADAPTADOR CA/CC del paquete.
3. Quite el amarre de alambre negro del adaptador de CA.
Fuente de alimentación
1. Conecte el extremo pequeño del ADAPTADOR suministrado en el CLAVIJA DE ENTRADA CD 9V en la parte
trasera de la unidad.
2. Introduzca el enchufe de 2 clavijas del ADAPTADOR DE CA en una toma eléctrica de pared apropiada de
230 V.
USB & FUNCIONAMIENTO DE LA TARJETA SD
Funcionamiento de la tarjeta SD:
1. ACTIVE la unidad girando el interruptor de alimentación ACTIVADO-DESACTIVADO/CONTROL DE
VOLUMEN a la posición ACTIVADO y gire el volumen del sonido a la posición intermedia.
2. Cambie el selector de función a la posición Radio/SD/USB.
3. Cambie el selector de Emisora AM/FM/USB/SD (en el panel trasero) para seleccionar el modo SD/USB.
4. Meta una tarjeta SD con canciones MP3 almacenadas (tamaño de 4GB máx., nosuministrada) en la ranura
de la tarjeta tal como se indica debajo de la ranura.
5. Pulse el BOTÓN REPRODUCCIÓN/PAUSA para reproducir las pistas de música almacenadas enla tarjeta
SD. El LED ACC verde destellará durante la reproducción de música.
7. Para pausar la música, pulse el BOTÓN REPRODUCCIÓN/PAUSA otra vez.
8. En el modo de reproducción, pulse el botón SKIP+/SKIP- una vez o repetidamente hasta que se haya
encontrado la pista deseada.
9. Para dejar de reproducir la música almacenada en la tarjeta SD, pulse el BOTÓN REPRODUCCIÓN/PAUSA
. ¡EN ESTE MOMENTO, NO DESCONECTE LA TARJETA SD aún!
10 Antes de extraer la tarjeta SD de la ranura, desconecte la unidad principal
11 Presione la tarjeta de memoria hacia adentro suavemente y luego suéltela. La tarjeta será parcialmente
expulsada y podrá extraerse manualmente.
PRECAUCIÓN: La conexión de un dispositivo USB/tarjeta SD boca abajo o del revés podría dañar el sistema
de audio o el dispositivo USB/tarjeta SD. Antes de realizar la conexión, asegúrese de que la dirección de
inserción es correcta.
Funcionamiento del USB:
1. ACTIVE la unidad girando el interruptor de alimentación ACTIVADO-DESACTIVADO/CONTROL DE
VOLUMEN a la posición ACTIVADO y gire el volumen del sonido a la posición intermedia.
2. Gire el control de función a la posición ―RADIO/SD/USB ACTIVADO‖.
3. Cambie el selector de Emisora AM-FM-USB/SD (en el panel trasero) para seleccionar el modo SD/USB.
4. Introduzca un dispositivo USB MP3 o una Memoria Flash USB que contenga canciones MP3 (tamaño de
4GB máx., no suministrada) en el puerto USB en el panel lateral. Asegúrese de que la clavija USB ha sido
introducida correctamente.
Avisos:
* Para hacer funcionar el dispositivo MP3, consulte su manual de funcionamiento.
* Si se encuentran conectados tanto una tarjeta SD como un dispositivo USB, pulse el botón USB/SD en el
panel lateral para cambiar al dispositivo que desee reproducir.
5 Pulse el BOTÓN REPRODUCCIÓN/PAUSA para reproducir la música del dispositivo externo.
6 El LED ACC verde destellará durante la reproducción de música.
7 Para pausar la música, pulse el BOTÓN REPRODUCCIÓN/PAUSA otra vez.
8 En el modo de reproducción, pulse el botón SALTAR+/SALTAR- una vez o repetidamente hasta que se haya
encontrado la pista deseada.
9 Para dejar de reproducir los archivos de música almacenados en la Memoria Flash/dispositivo USB, pulse el
BOTÓN REPRODUCCIÓN/PAUSA. ¡EN ESTE MOMENTO, NO DESCONECTE EL
DISPOSITIVO/MEMORIA USB!
10 Antes de desconectar el dispositivo/Memoria USB, desconecte primero la unidad principal. Desconecte el
dispositivo del conector USB tirando de él derecho hacia fuera.
ADVERTENCIA:
1
2
No desconecte el dispositivo USB/SD durante la reproducción de música, ya que podría dañar el dispositivo
o los archivos de música almacenados en este.
Para desconectar el dispositivo USB/SD de forma segura, apague la unidad primero o cambie a otro modo.
AVISOS IMPORTANTES:
a) Este producto puede no ser compatible con dispositivos USB con identificadores USB múltiples (tales como
un HUB USB + Memoria USB), si SOLAMENTE funciona cuando se conecta directamente a una Memoria
USB o a un reproductor MP3.
b) Si no existe ningún MP3 / dispositivo USB / Memoria USB / Tarjeta SD conectada o no se detecta un archivo
MP3, se encenderá la luz roja del LED ERR.
c) La luz verde del LED ACC destellará durante el modo de reproducción mientras se transfieren los datos
MP3.
d) Esta unidad solamente reproduce archivos de música MP3. No reproduce archivos de música en formato
WMA.
e) Si el USB/SD no funciona, apague la unidad para que se reinicie.
ESPECIFICACIÓN DE USB
Interfaz
*
USB2.0 Full Speed, HOST (no compatible con HUB USB)
Memoria Flash correspondiente
*
*
*
*
Memoria Flash USB1.1
Memoria Flash USB2.0 de alta velocidad
Tamaño mínimo de la memoria: 512MByte
Tamaño máximo de la memoria: 4GByte (Solo FAT16)
AVISOS:
a) El puerto USB no permite la conexión de un Cable de Extensión USB.
b) No está diseñado para conectarse a un ordenador.
c) No hay garantía de que todos los dispositivos de memoria USB y tarjetas SD funcionen en este sistema de
audio.
Decodificador MP3
*
*
*
*
*
*
*
*
Compatible con Audio MPEG 1, 2, 2.5
Compatible con Layer 1, 2, 3
Compatible con tasa de muestreo: 8 k, 16 k, 32 k, 11,025 k, 22,05 k,
44,1k, 12k, 24k, 48 kHz
Compatible con tasa de bits: 8 k ~ 320 kbps
Subcarpetas anidadas: 8
Número máximo de archivos para la reproducción: 9999
Formato de archivo para la reproducción: .mp3. . mp2, . mp1.
FUNCIONAMIENTO DE LA RADIO
*
*
*
*
*
*
ACTIVE la unidad girando el interruptor de alimentación ACTIVADO-DESACTIVADO/CONTROL DE
VOLUMEN a la posición ACTIVADO y gire el volumen del sonido a la posición intermedia.
Gire el botón de función giratorio a la posición Radio/SD/USB – se encenderá el LED del dial de
sintonización de la empuñadura.
Cambie el selector de Emisora AM-FM-USB/SD (en el panel trasero) para seleccionar la Banda AM (MW) o
FM.
Seleccione la emisora de radio girando el control de SINTONIZACIÓN del panel superior. La cinta roja
Marcadora de Emisora señalará la emisora de radio deseada.
Para la recepción de FM, extienda el cable de antena incorporado para que aumente la sensibilidad FM.
Para lograr la mejor recepción AM (MW), gire la unidad en la dirección que proporcione los mejores
resultados.
FUNCIONAMIENTO DEL DESPERTADOR
AJUSTE DE LA HORA
*
*
Asegúrese de que la unidad se encuentra conectada a una fuente de alimentación de CA.
Para ajustar la hora actual, pulse y gire el CONTROL DE AJUSTE HORARIO en el panel trasero en el
sentido de las agujas del reloj mientras observa el reloj.
ADVERTENCIA: La desconexión de la unidad de la fuente de alimentación CA o cualquier otra interrupción en la
alimentación detendrá el funcionamiento del reloj. Asegúrese de que se ha ajustado la hora actual.
No exponga el reloj a temperaturas y humedades extremas, ya que ello podría dañar el mecanismo electrónico,
y por consiguiente, afectar a su precisión.
AJUSTE DEL DESPERTADOR
Pulse y gire el Control de Ajuste de la Alarma en el sentido de las agujas del reloj (mientras observa el reloj) para
ajustar la hora de la alarma.
FUNCIONAMIENTO DE LA ALARMA
Esta unidad cuenta con una función de repetición de alarma.
Gire el CONTROL GIRATORIO DE FUNCIÓN de la parte delantera de la unidad para seleccionar despertador a:
RADIO, SD/USB, AUTO o ZUMBADOR.
Aviso importante: Para que funcione la alarma, la unidad deberá estar ACTIVADA. Realice esto girando el
interruptor de alimentación ACTIVADO-DESACTIVADO/CONTROL DE VOLUMEN a la posición ―ACTIVADO‖.
DESPERTARSE CON LA RADIO
*
*
*
*
*
Ajuste la hora deseada de la alarma y gire el control de AJUSTE DE ALARMA en el panel trasero.
Ajuste el selector de emisora a AM (= MW) o FM.
Sintonice la emisora de radio deseada y ajuste el volumen del despertador - guardar configuración.
Gire el control de función a la posición ―AUTO‖. El sonido y la luz del LED del dial de la radio se apagarán.
La radio se encenderá automáticamente a la hora ajustada de la alarma.
DESPERTARSE CON EL USB/SD
*
*
*
*
*
Ajuste la hora deseada de la alarma tal y como se ha descrito anteriormente.
Ajuste el selector de emisora AM-FM-USB/SD a la posición SD/USB.
Introduzca, en la ranura para tarjetas o en el puerto USB, una tarjeta SD o un dispositivo USB con canciones
MP3 almacenadas, y ajuste el volumen del sonido – deje la tarjeta SD o el dispositivo USB en la posición y
mantenga el ajuste del nivel de volumen.
Gire el control de función de la parte delantera a la posición ―AUTO‖.
La canción MP3 en el USB o SD se reproducirá automáticamente a la hora ajustada de la alarma.
DESPERTARSE CON LA ALARMA DE ZUMBIDO
*
*
*
Ajuste la hora deseada de la alarma tal y como se ha descrito anteriormente.
Gire el control de función a la posición ―ZUMBIDO‖.
El sonido del Zumbador se ejecutará a la hora ajustada de la alarma.
DESACTIVACIÓN DE LA ALARMA Y FUNCIÓN DE REPETICIÓN
*
*
*
Para desactivar la alarma, pulse el botón de ACTIVAR/DESACTIVAR DORMITAR/LUZ DE FONDO en la
parte superior cuando suene la alarma.
Cuando se despierte con la radio, USB/SD o el Zumbador, al pulsar el botón DORMITAR se desactivará la
alarma inmediatamente, pero sonará otra vez unos 5 minutos más tarde.
Para desactivar la alarma permanentemente, gire el control de función frontal a la posición ―DESACTIVADO‖.
RETROILUMINACIÓN DEL RELOJ
*
*
Pulse el botón ―ACTIVAR/DESACTIVAR DORMITAR/LUZ DE FONDO‖ en la parte superior de la unidad para
‗ACTIVAR‘ la retroiluminación del reloj.
Pulse este botón otra vez para ―DESACTIVAR‖ la iluminación.
ALIMENTACIÓN AUXILIAR
El sistema de batería auxiliar mantiene su reloj en funcionamiento durante un corte en la alimentación eléctrica.
En el caso de un corte en la alimentación eléctrica, la alimentación auxiliar mantendrá su reloj en funcionamiento
(aunque en este momento la alarma no estará disponible). Para utilizar la alimentación auxiliar, deberá instalar
dos pilas AAA. La alimentación auxiliar no funcionará a no ser que las pilas se encuentren instaladas. Para
instalar las pilas, siga el procedimiento que se describe a continuación.
1 Quite la tapa del compartimento de las pilas en la parte trasera de la unidad.
2 Instale dos pilas AAA nuevas en la posición correcta, tal y como se muestra en el interior de la cubierta de la
batería.
3 Reinstale la tapa del compartimento de las pilas.
NOTA:
No use pilas diferentes
No mezcle pilas usadas y nuevas
Resolución de problemas
No hay sonido
*
*
*
*
Asegúrese de que el adaptador del conector CC ha sido introducido completamente en el conector de CC en
la parte trasera de la unidad, y que la unidad esté correctamente conectada al suministro de alimentación de
CA.
Compruebe si la unidad ha sido activada.
Compruebe si se ha aumentado el volumen.
Compruebe que el selector de función esté ajustado a la posición Radio/SD/USB.
USB/SD - No se está reproduciendo música
*
*
*
*
Compruebe la existencia de canciones MP3 almacenadas en el dispositivo MP3/USB/Memoria Flash/Tarjeta
SD.
Compruebe que el volumen del dispositivo MP3/USB/Memoria Flash/Tarjeta SD no sea mayor a 4GB, puesto
que el límite compatible con esta unidad es de 4GB máx.
Intente re-ajustar el USB/SD apagando y encendiendo de nuevo.
Compruebe si el dispositivo USB/Tarjeta SD contiene archivos de música MP3 o WMA.
Esta unidad no reproduce el formato WMA, solo formato MP3.
La alarma no me ha despertado a la hora establecida
*
*
*
Asegúrese de que la unidad se encuentra conectada a la fuente de alimentación de CA.
Compruebe si la unidad ha sido activada.
El reloj o la alarma no funcionarán ni mantendrán sus ajustes cuando se desconecte la alimentación y la
unidad no esté activada.
LOCALIZADORES DE CONTROL
ESCALA DE DIAL
ACTIVADO/DESACTIVADO/MÁX
CONTROL DEL VOLUMEN
CONTROL DE FUNCIÓN
(DESACTIVADO/RADIO/USB/SD ACTIVADO/AUTO/ZUMBADOR)
REPRODUCCIÓN/PAUSA
LED ACC
SALTO +
LED ERR
SALTO –
USB/SD
RANURA DE
TARJETA SD
PUERTO USB
LOCALIZADORES DE CONTROL
REPETICIÓN/RETROILUMINACIÓN
ACTIVADA-DESACTIVADA
CONTROL DE AJUSTE DE
LA ALARMA
CONTROL DE AJUSTE
HORARIO
CONTROL DE SINTONIZACIÓN
ADAPTADOR DE
CLAVIJA
CABLE DE ANTENA
FM
SELECTOR DE EMISORA AM FM
USB/SD
ALIMENTACIÓN
AUXILIAR ADAPTADOR DE CA
ATENCIÓN AL CLIENTE
En caso de dudas o problemas con su producto Ricatech, puede contactar con el servicio de
atención al cliente de Ricatech. Puede ponerse en contacto con nosotros por teléfono o correo
electrónico.
Correo electrónico
Para recibir asistencia técnica por correo electrónico, escriba a [email protected]. Asegúrese
de mencionar el nombre del modelo y número de serie del producto. Mencione asimismo su nombre
y dirección y describa claramente su pregunta o problema.
Teléfono
Para ponerse en contacto con el servicio de atención al cliente por teléfono, marque +32 3 3265694.
Uno de los miembros de nuestro personal se pondrá a su disposición. Para más información sobre el
procedimiento completo, visite el sitio web de Ricatech en : www.ricatech.com
Ricatech
Cornusbaan 1
2908 KB Capelle a/d IJssel
The Netherlands