1
IMPORTANT NOTE
IMPORTANT NOTES
Your hearing is very important to you and to us so please take care when operating this
equipment. It is strongly recommended that you follow the listed guidelines in order to
prevent possible damage or loss of hearing:
1.
This product does not contain a separate Power On / Off switch. After
inserting a disc and installing batteries / AC adaptor, simply press the Play
button to switch on and play a disc.
2. In order to maximize battery life and provide optimum playing time this
product incorporates an Auto Power Off function.
The power to the player will automatically switch off approximately 60
Seconds after a disc has finished playing or when the CD lid is opened.
3. The ESP function is automatically engaged. When playback starts for more
information. Please refer to page 9 of these instructions.
ESTABLISH A SAFE SOUND LEVEL
•
•
•
•
Over time your hearing will adapt to continuous loud sounds and will give the
impression that the volume has in fact been reduced. What seems normal to
you may in fact be harmful. To guard against this BEFORE YOUR HEARING
ADAPTS set the volume at a low level.
Slowly increase the level until you can hear comfortably and clearly and without
distortion.
Damage to your hearing is accumulative and is irreversible.
Any ringing or discomfort in the ears indicates that the volume is too loud.
Once you have established a comfortable listening level, DO NOT INCREASE THE
SOUND LEVEL FURTHER.
The following list of typical sound levels may assist you in recognizing just how loud you
have set the volume level.
SAFETY PRECAUTION
1.
As the laser beam used in this compact disc player is harmful to the eyes, do not
attempt to disassemble the casing.
2.
Stop operation immediately if any liquid or solid object should fall into the cabinet.
Unplug the unit and have it checked by qualified personnel.
3.
Do not touch the lens or poke at it. If you do, you may damage the lens and the
player may not operate properly.
4.
Do not put anything in the safety slot. If you do, the laser diode will be ON when
the lid is still opened.
5.
If the unit is not to be used for a long period of time, make sure that all power
sources are disconnected from the unit. Remove all batteries from the battery
compartment, and unplug the AC adaptor from the wall outlet. Make it a practice
to remove the AC adaptor by grasping the main body and not by pulling the cord.
6.
This unit employs a laser. The use of controls or adjustment or performance of
procedures other than those specified herein may result in exposure to hazardous
radiation.
DECIBEL
Level dB
Example
30dB
Quiet Library, soft whispers
40
Living room, fridge freezer bedroom away from traffic.
50
Normal conversation, quiet office, light traffic.
60
Electric sewing machine.
70
Vacuum cleaner, hair dryer, noisy restaurant.
THE FOLLOWING NOISES CAN BE HARMFUL UNDER CONSTANT EXPOSURE
80dB
Average city traffic, alarm clock buzzer at 2 feet, food mixer.
90
Motorcycle, heavy goods vehicle, petrol lawn mower.
100
Pneumatic drill, chain saw, garbage truck, discotec / night - club.
120
Rock band concert, thunderclap.
WARNING
PERMANENT LOSS OF HEARING
To prevent fire or shock hazard, do not expose the unit to rain or moisture.
140
180
THRESHOLD OF PAIN Gunshot 2 feet away.
Rocket Launching pad.
To avoid electrical shock, do not open the cabinet. Refer servicing to qualified personnel
only.
GB-1
GB -2
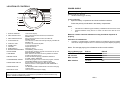
LOCATION OF CONTROLS
5
16
15
14
3
2
13
11
12
10
6
9
1
4
POWER SUPPLY
Batteries (not supplied)
With this set you can use:
•
Alkaline batteries (type AA size)
Inserting batteries
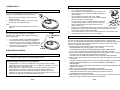
1. Open the battery compartment and insert 2 alkaline batteries.
Follow the polarity as indicated in the battery compartment.
7
Notes:
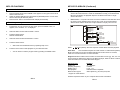
•
•
8
1. DISPLAY WINDOW
2. SKIP-/SEARCH LEFT
3. SKIP+/SEARCH RIGHT
4. PLAY/PAUSE /UP
5. LINE OUT JACK
6. PHONE JACK
7. VOLUME
8. OPEN SWITCH
9. BATTERYCOMPARTMENT
10.STOP/DOWN
11.ESP/MENU
12.MODE/ CLEAR
13.PROGRAM/EQ /”ENTER”
14.RECHARGE SWITCH
15.RECHARGE LED
16.DC INPUT JACK
LCD function display
Skip or fast search tracks backward, and MP3 file
SEARCH-LEFT
Skip or fast search tracks forward, and MP3 file
SEARCH-RIGHT
Turns the set on, starts and interrupts CD play, and MP3 file
SEARCH-UP
Connect to an external amplifier
3.5mm headphone jack
Adjusts the volume
Opens the CD lid
Install Battery (inside CD door)
Stops CD play, erases a program and turns the set off, and
MP3 file SEARCH-DOWN
MP3: select the file search function by MENU CD AUDIO:
Anti-Shock Protection on/off
Selects the different playing possibilities; REPEAT1/
ALL/DIR., INTRO, RANDOM
Selects the program mode or enters the program, and MP3
file SEARCH-ENTER, choose equalizer setting
Set the switch to ON position to start charging. Both
batteries must be of rechargeable NICKEL-CADMIUM or
NI-MH type.
The Red LED indicator will illuminate to show that charging
is taking place.
Jack for 4.5V external power supply
Old and new or different types of battery combinations should not be used.
Remove batteries if they are low or if the unit will not be used for a long
time.
Batteries contain chemical substance so they should be disposed of
properly.
Indication of low batteries
•
A flashing “ LOW BATTERY” indication appears on the display when the batteries
need to be changed. Replace them or connect the AC power adapter (Supplied).
Notes: The average playing time of batteries under normal condition.
Playing Battery type
ESP on
ESP off
CD / Normal
CD / Alkaline
MP3 / Normal
MP3 / Alkaline
3 hours
8 hours
4 hours
10 hours
4 hours
9 hours
N/A
N/A
CAUTION
Use of controls or adjustments or performance of procedures other than herein may
result in hazardous radiation exposure.
GB-3
GB -4
CD player and CD handling
POWER SUPPLY
•
•
Power adapter (supplied )
Only use a 4.5V/600mA DC, positive center pin power
adapter. Any other adapter may damage the set.
1
Make sure the local voltage corresponds to the
adapter’s voltage.
Connect the power adapter to the 4.5V DC jack
of the player and to the wall outlet.
2
Note:
Always disconnect the adapter when you are not
using it.
Line out
You can connect the CD player to an additional
appliance. E.g. amplifier, radio cassette recorder, etc.,
with a LINE IN jack.
1.
2.
3.
Turn down the volume on the additional appliance.
Connect the audio signal cable (not supplied,) to
the LINE OUT jack of the CD player and the CD IN,
AUX IN or LINE IN jack of the additional appliance.
To adjust the sound and volume, use the controls
on the connected appliance.
EARPHONES CONTROL
Connecting the earphones
•
Connect the earphone into the PHONE (GREEN) socket.
Important safety notes when using earphone
•
•
Hearing safety: Do not play your headset at a high volume. Hearing experts
advise against continuous extended play. If you experience a ringing in your ears,
reduce the volume or discontinue use.
Traffic safety: Do not use while operating a motorized vehicle. It may create a
traffic hazard and it’s illegal in areas. You should use extreme caution or
temporarily discontinue use in potentially hazardous situations. Even if your
headset is an open-air type designed to let you hear outside sounds, don’t turn up
the volume so high that you can’t hear what’s around you.
GB-5
•
•
•
•
•
Do not touch the lens of the player.
Do not expose the set, batteries or CDs to humidity, rain,
sand or excessive heat (caused by heating equipment or
direct sunlight).
You can clean the CD player with a soft, slightly
dampened lint-free cloth. Do not use any cleaning agents
as they may have a corrosive effect.
To clean the CD, wipe it in a straight line from the center
toward the edge using a soft, lint-free cloth. A cleaning
agent may damage the disc! Never write on a CD or
attach a sticker to it.
Playing is not possible when the lens may cloud over when the set is moved
suddenly from cold to warm surroundings. Leave the CD player in a warm
environment until the moisture evaporates.
Active mobile phones in the vicinity of the CD player may cause malfunctions.
Avoid dropping the set as this may cause damage.
Rechargeable Battery Operation
This unit can fully recharge the specified rechargeable battery, in approximately
15 hours. The rechargeable batteries (NOT supplied) should be recharged before they
are used form the first time because they are low in power or if they have not been
used for a long period (over 60 days)
1. Open the battery compartment cover and insert two of the recommended
rechargeable batteries, matching polarity. (1.2V 1200mA)
ALL BATTERIES MUST BE OF RECHARGEABLE NICKEL-CADMIUM OR
NI-MH TYPE, OTHERWISE THE BATTERIES MAY EXPLODE OR LEAK.
2. Plug in the AC adaptor and set the Recharge switch to ON position to start charging.
During charging the RED LED charge indicator will illuminate.
USE ONLY THE AC ADAPTOR SUPPLIED WITH THE SET FOR CHARGING.
3. After 15 hours. Please unplug the AC adaptor and switch the Recharge switch to the
OFF position.
DO NOT CHARGE CONTINUOUSLY FOR 24 HOURS OR MORE. DOING SO CAN
CAUSE THE PERFORMANCE OF THE RECHARGEABLE BATTERIES TO
DETERIORATE.
IMPORTANT: IF NI-CAD BATTERIES ARE USED ,THE RECHARGE TIME WILL BE
APPROX 7-8 HOURS.
Note: You may play DISC'S whilst charging the batteries.
4. If the operating time decreases drastically even when the rechargeable
nickel-cadmium batteries are properly recharged, purchase a new set of
rechargeable nickel-cadmium batteries.
5. When charging for the first time or after a long time, playing time may be reduced. In
this case, charge and discharge the batteries several times.
GB-6
CD PLAY
CD PLAY
Playing a CD
Playback information
This CD player plays Audio CDs and MP3 CDs such as CDRs and CDRWs. Do not try
to play a Cdi, CDV or computer CD or DVD.
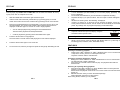
1
Slide the OPEN slider towards the right and the lid opens.
2
Insert an audio CD or MP3-CD, printed side up, by pressing gently on the CD
center so that it fits onto the hub. Close the lid by pressing it down on the left side.
3
Press the PLAY/PAUSE button for approximately 1 second to turn the set on and
the start playback. The current track number and the elapsed playing time are
displayed. It will take approx. 5 seconds for a CD to begin playback.
•
•
4
You can interrupt playback by pressing the PLAY/PAUSE button.
The time where playback was interrupted flashes.
•
•
•
•
•
Volume and sound adjustment
•
Continue playback by pressing the PLAY/PAUSE button again.
•
Press the STOP button again to turn off the set.
6
To remove the CD, hold it by its edge and press the hub gently while lifting the CD.
Adjust the volume level up to 32 steps by using the
electrical Volume up/down button.
Preset Equalizer
Press the STOP button to stop playback.
The total number of tracks and the total playing time of the CD are displayed.
5
If a CD Rewritable (CD Recordable) is not recorded properly (finalized). “Disc
Error” is displayed.
For CD Audio, use FINALIZE on your CD recorder to complete the recording.
Playback will stop if you open the CD lid. The “Door-Open” indicator will appear in
LCD.
While the CD is being read, “Now Reading” is displayed.
If there is no activity for 10 seconds, the set will clear the display, If there is no
activity after another 50 seconds, the set will turn off automatically to save battery
power. Any settings such as program and playing modes will be kept.
While a CD is playing, press the PROG./ EQ/ ENTER button to cycle though the
EQ setting (FLAT, CLASSIC, POP, JAZZ AND ROCK).
FEATURES
Selecting a track and searching
Selecting a track during playback
•
Briefly press +SKIP / SEARCH or -SKIP / SEARCH button once or several times
to skip to the current, previous or subsequent track start.
Playback continues with the selected track.
Selecting a track when playback is stopped
1
Briefly press +SKIP / SEARCH or -SKIP / SEARCH button once or several times.
The selected track number is displayed.
2
Press the PLAY / PAUSE button to start CD play. The playback starts with the
selected track.
Searching for a passage during playback
1.
Press and hold +SKIP / SEARCH or -SKIP / SEARCH button to find a particular
passage in a backward or forward direction.
Search starts and playback continues at a low volume. After 2 seconds the search
speeds up.
2.
Release the button when you reach the desired passage.
Normal playback continues from this position.
Note: During SCAN, searching is not possible.
GB-7
GB-8
FEATURES
FEATURES
Selecting different playing options – MODE
Programming track numbers
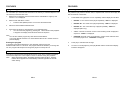
You can select up to 24 tracks and store them in the memory in a desired sequence. You
can store any track more than once.
1.
While the unit is stopped, press the PROG. button. PROGRAM “P” lights up and
"CD 00 P- 01" is displayed.
2.
Select a track with SKIP+/- button.
•
Press the ENT.(ENTER) button once to store the desired track.
3.
Select and store additional desired tracks.
4.
Press the PLAY button to start playback of your selected tracks.
•
You can review the program by pressing the PROG. button when playback
is stopped. The display shows all stored tracks in sequence.
It is possible to play tracks in random order, to repeat a track or the CD and to play the
first few seconds of each track.
1
Note :
You can also edit the program any time with the PROG. Button.
If you press PROG. and there is no track selected after 60 sec. readout reverts to
previous display.
Press MODE during playback once or repeatedly until the display shows either:
•
REPEAT 1 : The current track is played repeatedly. “ REP 1” is displayed.
•
REPEAT ALL: The entire CD is played repeatedly. “ REP A” is displayed.
•
REPEAT “D”: The current directory is played repeatedly. “ REP D” is
displayed.(MP3 only).
•
“Intro”: The first 10 seconds of each of the remaining tracks are played in
sequence. “ INTRO ” is displayed.
•
RANDOM: All tracks of the CD are played in random order until all of them
have been played once. “ RANDOM “ is displayed.
Erasing the program
2
Press play in selected mode to begin.
If necessary, press the STOP button to stop playback and then press the
MODE/CLEAR button for 3 seconds. The program will also be erased if you change the
CD. The program will be kept even though the player is turned power off.
3
To return to normal playback, press play MODE until the mode feature display
indication disappears.
ESP
This player incorporates the latest digital anti shock circuit, which prevents interruption
of the sound output if the unit is subject to shock or vibration during disc playback.
Note:
When playing MP3 tracks, the display will read “Welcome MP3”, The ESP
feature will not appear but is automatically activated regardless of the ESP
switch setting.
GB-9
GB-10
MP3-CD PLAYBACK
MP3-CD PLAYBACK
Track select
To play MP3-CDs
IMPORTANT INFORMATION
•
•
•
•
1
2
3
Use mp3 as the file extension when creating audio files onto CDR-R/Ws. Do not
use any other extensions such as doc, txt, pdf, etc., when creating audio files into
MP3 format.
Do not use the .mp3 extension for text or other non-audio data files. This may
result in serious malfunction of the set and harmful noise interference.
Single session means only one session created on the CDR-R/W.
Do not attempt to combine CD audio and MP3 tracks within a CDR-R/W, the
unit will only be able to playback CD audio tracks from a CD with mixed
formats.
Place a MP3 CDR-R/W with the label side up and push the CD center lightly to
set it in position.
Press the PLAY/PAUSE” button to start playback “welcome MP3” number of
directions and the number of tracks show on the display. Please note reading
an MP3 CD will take 10 to 30 seconds depending on quantity of files to be read.
Press STOP button to stop playback.
Playback stops and the display shows the total number of tracks and total number
of directories/folders.
Selecting and searching a track
The following table shows the different functions available when playing Audio CD or
MP3 CDs.
•
•
Single file is displayed when playing an MP3 CD with only a root directory which
contains no additional albums (folders).
With albums means a MP3 CD with more than one album (folders), and is shown
by directory and a number on the display, as Root 01, Root02, etc.
Function
Track select
Music search
Fast track select
Fast album select
CD audio
[
[
GB-11
MP3
[
[
[
MP3
(with multiple
Files)
[
[
[
[
To select the next or previous track.
•
Press the +SKIP / SEARCH button or -SKIP / SEARCH button once or
repeatedly during playback.
Playback is interrupted and starts from the beginning of the selected track.
Music search
To fast search only within a CD Audio track.
•
During playback, press and hold down the +SKIP / SEARCH button or -SKIP /
SEARCH button. Release button at the desired passage.
File search function for MP3 CD with "MENU" button
You can search directly "FILE NAME " and "FILE SELECT" with menu button.
FILE NAME SEARCH
For example; rock.mp3 (file name)
1.
Press the MENU button once, The display shows "ABCDEFGHIJKL" and the
cursor is blinking.
2.
Press the direction(UP) button, Display shows "MNOPQRSTUVWX" and the
cursor is blinking.
3.
Select the "R" letter with the direction(RIGHT/LEFT) button, Cursor begins
blinking on "R"
4.
Press the ENT. button.
Auto playback occurs after searching and finding the "rock.mp3" file. If there are
more than 2 files beginning with the same letter. it will show the fist file name
blinking. At that time, select the desired file name with Direction (RIGHT/LEFT)
button and than press the ENT. button.
Note :
Any mp3 files, i.e. file name containing symbols (examples: *,/,-,!,=,etc) are
recognized and can be used for file name search. In this case, select the "special
symbol" on display.
GB-12
MP3-CD PLAYBACK
MP3-CD PLAYBACK (Continued)
Single session / Multi session
ALBUM / FILE SELECT
1.
2.
3.
Press the MENU button twice ALBUM name appears on the upper row and FILE
name on the lower row.
Select the desired ALBUM name with Direction(UP/DOWN) button or FILE name
with the direction(LEFT/RIGHT) button.
Press the ENT. button. The selected track will play automatically.
•
Multi-session - Computer user does not need to finalize the CDR-R/W disc when
(E) CD-ROM drive
Programmes can only be set in the stop mode, press the PROG. button, "P"
appears, and " 00 000 P - 01 " is displayed.
2.
Select the album number with the SKIP+/- button.
3.
Press the PROG. button.
TRACK number blinks.
4.
The following chart is an example of a Windows Explorer display for a single
session MP3 CDR-R/W disc. Check the added Notes to help you understand the
MP3 CD unit display, the playback sequence of albums and tracks on single
session MP3 CDs.
the music is down-loaded from the internet. The music can be downloaded in
different times until the whole disc is fully loaded and can play out in the unit.
Track Programming
1.
•
AL 01
Blur01.mp3
Blur02.mp3
Blur03.mp3
Blur04.mp3
AL 02
Spice05.mp3
Spice06.mp3
AL 04
2men09.mp3
2men10.mp3
Select the track number with the SKIP+/- button.
Skipped
Blur.jpg
Lyric.doc
AL 03
Girl07.mp3
Girl08.mp3
AL 05
Boyz11.mp3
Boyz12.mp3
Skipped
AL 06
5.
Press the PROG. button.
•
6.
Abba01.wav
Abba02.wav
AL 07
Marx14.mp3
Twain15.mp3
Select and store all desired tracks by repeating steps 2 to 5.
Press the PLAY button to start playback of your selected tracks.
•
Bread13.mp3
You can review or edit the program track by pressing the PROG. button.
Notes:
Arrow pathway show the sequence of MP3 album and track playback.
AL01-AL07
This CD ROM example has a total number of 7 MP3 albums (folders).
Blur01.mp3-Twain15.mp3 This CD ROM example has a total number of 15 tracks,
where ‘01’ is the first track and ‘15’ is the last track.
Skipped indicates an album which contains non-audio files such as: jpg, wav., doc. etc.
These cannot be detected nor played on the MP3-CD player, When an album contains
mixed format files, the non-MP3 files will be skipped.
MP3 Properties
Standard
MPEG rate
Sampling Frequency
MPEG 1/2/2.5
MP3 playback
Maximum file support
* Support for “Multi session”
:32 ~ 384Kbps
:8-48KHz
:Layer 2/3
:ISO9660 format compatible
:Album (Directory ) 99, File (Track) 300
Software Properties section of your computer will have this confirmation.
GB-13
GB-14
TROUBLESHOOTING
TROUBLESHOOTING
WARNING
Under no circumstances should you try to repair the set yourself as this will
void the warranty.
If a fault occurs, check the following hints.
If you are unable to solve a problem by following these hints, consult your dealer or
service center.
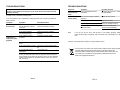
Symptom
Power cannot
be turned on
Playback is
impossible or
stops during CD
playback
Symptom
Symptom
Playback does not Is the PROGRAM function
start from first
activated?
track
Possible Solution
Switch off the function or clear
the PROGRAM.
No sound or poor
sound quality
Are connection plugs inserted
properly?
Check all connections.
Is the volume set too low?
Adjust the volume.
Symptom
Batteries
Are the batteries inserted
correctly?
Are the batteries dead?
Possible Solution
Is the headphone plug dirty?
Clean the headphone plug.
Insert the batteries correctly.
Is the set located near strong
magnetic fields?
Move the set away from
strong magnetized fields.
Is the power adapter
connected properly?
Connect the power adapter
properly.
Is the CD door closed
properly?
Close the CD door tightly.
Replace batteries.
Is there condensation on the Wait until the lens has cleared.
lens?
Is the CD inserted properly? Place the CD with the label side
up.
Is the CD scratched or
damaged?
Use another CD.
If using an MP3 CD burned from a computer, there could have
been transfer errors during the process. This is an error between
modem and computer or computer and CD. This is not an error
with the Player
GB-15
Note:
If you do not find an error and the disc is not reading properly, simply
power-off the player completely, wait 5 seconds and re-power(turn on) the
unit.
Features and specifications subject to change without notice.
If at any time in the future you should need to dispose of this product please
note that Waste electrical products should not be disposed of with
household waste. Please recycle where facilities exist. Check with your
Local Authority or retailer for recycling advice.(Waste Electrical and
Electronic Equipment Directive)
GB-16
The unit complies with the maximum 100dBA sound level with the original
provided earphones. In case this one needs replacement, you should use an
earphones with the same specifications.
Earphones specifications
Impedance: 32Ohm 1kHz
Sensitivity: 95dB @1mW
Frequency response: 20Hz - 20kHz
GB-17
MP3 PORTABLE CD PLAYER WITH
60 SEC. ANTI-SKIP PROTECTION
MPA20
INSTRUCTION MANUAL
BENUTZERHANDBUCH
INSTRUCCIONES DE UTILIZACIÓN
MANUEL D’UTILISATION