1
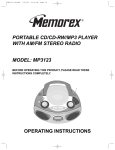
MP3 PERSONAL COMPACT DISC PLAYER
WITH 45-SECOND DIGITAL
ANTI SKIP PROTECTION
MODEL # JX-CD900
BEFORE OPERATING THIS PRODUCT PLEASE
READ THESE INSTRUCTIONS COMPLETELY
OPERATING INSTRUCTIONS
TABLE OF CONTENTS
WARNINGS AND
PRECAUTIONS……………………………….……………………………………………………………….P. 1
LOCATION OF
CONTROLS……………………….…………………………...…………………………… ………………….P.2
CONTROLS…………………………………………………………………………………….……………….P.3
POWER SUPPLY / LINE OUT……………………………………………………………………………P.4-P.5
HEADPHONES……………………………………………………………………...………………………….P.5
MAINTENANCE……………………………………………………………………………………..………….P.6
IN-CAR CONNECTION…………………………………………………………………….………………….P.7
CD PLAY……………………………………………………………………………………………………P.8-P.9
FEATURES………………………………………………………………..………………………………P.9 -P.11
MP3-CD PLAYBACK………………………………….………………………………………………..P.12-P.15
TROUBLESHOOTING……………………………………………….…………………………………P.16-P.17
LIMITED WARRANTY………………………………………………………………………………………..P.18
• Places subject to constant vibration.
• Humid or moist places.
LOCATION OF CONTROLS
1 2
3
4
5
6
7 8
WARNINGS
TO REVENT FIRE OR SHOCK HAZARDS, DO NOT EXPOSE THIS UNIT TO RAIN OR MOISTURE.
This symbol is intended to alert the user to the presence of uninsulated “ dangerous
voltage ” within the products enclosure that may be of sufficient magnitude to
constitute a risk of electric shock to persons.
9
10
11
This symbol is intended to alert the user to the prese nce of important operating and
maintenance ( servicing ) instructions in the literature accompanying the appliance.
This product utilizes a Class 1 laser to read Compact Discs. This laser Compact Disc
Player is equipped with safety switches to avoid exposure when the CD door is open
and the safety interlocks are defeated. Invisible laser radiation is present when the
CD Player’s lid is open and the system’s interlock has failed or been defeated. It is
very important that you avoid direct exposure to the laser beam at all times. Please do
not attempt to defeat or bypass the safety switches.
12
Any use of the controls or an adjustment to the procedures other than those specified herein may
result in hazardous radiation.
TO REDUCE THE RISK OF ELECTRIC SHOCK, DO NOT REMOVE COVER ( OR BACK ). THERE
ARE NO USER-SERVICEABLE PARTS INSIDE. PLEASE REFER ANY SERVICING TO QUALIFIED
SERVICE PERSONEL.
•
•
•
•
•
•
•
PRECAUTIONS
Do not open the CD compartment while the CD is rotating.
Always keep the CD compartment closed when not in use.
Keep all foreign objects out of the CD compartment.
If TV or radio interference occurs during operation, move the unit to a different location within the
room or building.
Place the unit on a stable surface. A vibration or shock to the unit can cause the CD mechanism to
mistrack or skip. If operating the unit under circumstances, which may subject the unit to these
conditions, utilize the digital Anti -shock.
Playing some CD’s at high volume can cause vibration leading to mistracking. In this case, lower
the volume or relocate the speakers further away from the unit.
Avoid installing the unit in the locations described below:
• Where it will be in direct contact with water.
• Where it will be in direct contact with a magnet.
• Places exposed to direct sunlight or close to heat radiating appliances such as electric heaters.
• On top of stereo equipment that radiates too much heat.
• Places lacking ventilation or dusty places.
19
18
17
16
15
14
13
The player complies with the FCC- Rules, Part 15 and with 21 CFR 1040.10.
Operation is subject to the following two conditions:
1. This device may not cause harmful interference, and
2. This device must accept any interference received, including interference
that may cause undesired operation.
1
CONTROLS
Key Normal Mode
No.
1. Battery
compartment
2. +SKIP/SEARCH
3. PLAY MODE
4.
5.
6.
Display
Window
PROGRAM
ESP
7.
PLAY/ PAUSE
8.
9.
DC INPUT JACK
LINE OUT JACK
10. PHONE JACK
11. VOLUME
12. DBBS SWITCH
13. STOP
14.
15.
16.
17.
18.
FILE SEARCH
DISPLAY
OPEN SWITCH
FILE/DIR.
RESUME
19. –SKIP/ SEARCH
POWER SUPPLY
Key Operation
Search Mode
Batteries (not included)
Install Battery
CD Audio: skips or fast search tracks forwards
MP3: skips or search a previous track or album
(AL)
Selects the different playing possibilities:
RANDOM, INTRO, REPEAT ALL and
REPEAT 1
LCD Function Display
3, G, H, I
With this set you can use:
l Alkaline batteries (type LR6, UM3 or AA)
5, M, N, O
Inserting batteries
1.
Open the battery compartment and insert 2 alkaline batteries.
Follow the polarity as indicated in the battery compartment.
Enter program mode
6, P, Q, R, S
ELECTRONIC SKIP PORTECTION ensures 7, T, U, V
continuous playback regardless of vibrations
and shocks
Switches the set on, starts and interrupts CD 1, A, B, C
play
Jack for 4.5V external power supply
3.5mm line out jack to connect the set to an
audio input of an additional appliance
3.5mm headphone and remote control jack
Adjusts the volume
DYNAMIC BASS BOOST switches the bass
enhancement on/off
Stops CD play, eases a program and switches 2, D, E, F
the set off
MP- 3 File Search
“Enter”
MP- 3 Display Select
0, “clear”
Opens the CD lid
MP- 3 Select
9, “Space”
CD Audio: stores and continues playback from 8, W, X, Y, Z
the last track
MP3: stores and continues playback from the
last track played
CD Audio: skips or fast search tracks
4, J, K, L
backwards
MP3: skips or search a next track or album
(AL)
Notes:
- Old and new or different types of batteries
Should not be used in combination.
- Remove batteries if they are empty or if the
Set will not be used for a long time.
Batteries contain chemical substances, so they should be disposed of
properly.
Indication of empty batteries
l A flashing “LOW BATTERY” indication appears
on the display when the battery need to be
changed. Replace the batteries or connect the
power adapter.
Notes: The average playing time of batteries under normal condition.
Battery type
CD Normal
CD Alkaline
MP3 Normal
MP3 Alkaline
ESP on
3 hours
6 hours
4 hours
10 hours
ESP off
4 hours
7 hours
N/A
N/A
CAUTION
Use of controls or adjustments or performance of procedures other than herein may result in
hazardous radiation exposure.
2
3
POWER SUPPLY/LINE OUT
CD player and CD handling
Power adapter (supplied or optionally available)
l
Do not touch the lens of the player.
Only use the 4.5V/600mA direct current,
positive pole to center pin power adapter. Any
other adapter may damage the set.
l
Do not expose the set, batteries or CDs to humidity,
rain, sand or excessive heat (caused by heating
equipment or direct sunlight).
1
Make sure the local voltage corresponds to
the adapter’s voltage.
l
2
Connect the power adapter to the 4.5V DC jack of the player and to the wall outlet.
You can clean the CD player with a soft, slightly
dampened lint-free cloth. Do not use any cleaning
agents as they may have a corrosive effect.
l
To clean the CD, wipe it in a straight line from the
center toward the edge using a soft, line-free cloth.
A cleaning agent may damage the disc! Never write
on a CD or attach a sticker to it.
l
The lens may cloud over when the set is moved
suddenly from cold to warm surroundings. Playing a
CD is not possible then. Leave the CD player in a
warm environment until the moisture evaporates.
l
Active mobile phones in the vicinity of the CD player may cause
malfunctions.
l
Avoid dropping the set as this may cause damage.
Note: Always disconnect the adapter when you are not using it.
Line out
You can connect the CD player to an additional
appliance. E.g. amplifier, radio cassette
recorder, etc., with a LINE IN jack.
1
2
3
To Line Out
Turn down the volume on the additional
appliance.
To CD / AUX INPUT
Connect an audio signal cable (not supplied,) to the LINE OUT jack of the CD player
and the CD IN, AUX IN or LINE IN jack of the additional appliance.
To adjust the sound and volume, use the controls on the connected appliance.
Environmental information
HEADPHONES
l
All redundant packing material has been omitted. We have done our utmost
to make the packaging easily s eparable into three materials: cardboard
(box), polystyrene foam (buffer) and polyethylene (bags, protective foam
sheet).
l
Your set consists of materials, which can be recycled if disassembled by a
specialized company. Please observe the local regulations regarding the
disposal of packing materials, dead batteries and old equipment.
Connecting the headphone
l
Connect the supplied headphones into the PHONE (GREEN) socket.
Use your head when using headphones
l
l
Hearing safety: Do not play your headset at a high volume. Hearing experts advise
against continuous extended play. If you experience a ringing in your ears, reduce
the volume or discontinue use.
Traffic safety: Don not use while operating a motorized vehicle. It my create a traffic
hazard and it’s illegal in may areas. You should use extreme caution or temporarily
discontinue use in potentially hazardous situations. Even if your headset is an
open-air type designed to let you hear outside sounds, don’t turn up the volume so
high that you can’t hear what’s around you.
4
5
IN-CAR CONNECTION
CD PLAY
In-car use (connections supplied or optionally available)
Playing a CD
Only use the car voltage converter (4.5V, DC, positive pole to the center pin) and the car
adapter cassette. Any other product may damage the set.
1
2
This CD player can play all kinds of Audio Discs and MP3 CD- ROM such as CD
Recordables and CD Rewritables. Do not try to play a Cdi, CDV or computer CD or DVD.
Put the CD player on a horizontal, vibration-free and stable surface. Make sure it is a
safe place, where the player is not a danger or obstacle to the driver and
passengers.
1
Push the OPEN slider and the lid opens.
The “ Door Open” indicator will appear in LCD.
Connect the DC plug of the voltage converter to the 4.5V DC jack of the CD player
(only for a 12V car battery, negative grounding).
2
Insert an audio CD, printed side up, by pressing
gently on the CD center so that it fits onto the hub.
Close the lid by pressing it down on the left side.
3
Press PLAY/PAUSE button for approximately 1
second to switch t he set on and start playback.
The current track number and the elapsed playing
time are displayed. It will take approx. 5 seconds
for a CD to begin playback.
To DC IN Jack
3
Insert the voltage converter into the cigarette lighter jack. If necessary, clean the
cigarette lighter jack to obtain a good electrical contact.
4
Turn down the volume and connect the adapter cassette plug to the LINE OUT of the
CD player.
5
Carefully insert the adapter cassette into the car radio’s cassette compartment.
l
You can interrupt playback by pressing
PLAY/PAUSE button.
The time where playback was interrupted is
flashing.
l
Continue playback by pressing
PLAY/PAUSE button again.
Car Cassette
C
e
as s
t te
De
Press STOP button to stop playback.
The total number of tracks and the total playing
time of the CD are displayed.
5
Press STOP button again to switch off the set.
6
To remove the CD, hold it by its edge and press
the hub gently while lifting the CD.
ck
To
6
Make sure the cord does not hinder your driving.
7
Start the CD player, set VOL to the lower position and adjust the sound with the car
radio controls.
l
4
Always remove the voltage converter from the cigarette lighter jack when the CD
player is not in use.
•
Notes:
-
Avoid excessive heat from the car heating or from direct sunlight (e.g. in
a parked car in the summer).
If your car radio has a LINE IN jack, use the LINE IN jack for the car
radio connection instead of the adapter cassette. Connect the signal lead
to this LINE IN jack and the LINE OUT jack of the CD player.
6
When the unit is turned on, the “ESP” function is
automatically turned on, and shown on display
“ESP”. If ESP function is not required, please press
ESP button to turn it off.
7
2
Note:
CD PLAY
l
l
l
If a CD Rewritable (CD Recordable) is not recorded properly. “Disc Error” is
displayed.
For CD Audio, use FINALIZE on your CD recorder to complete the recording.
Playback will stop if you open the CD lid.
While the CD is read, “ESP” flashes.
If there is no activity for 10 seconds, the set will clear the display, and if there is no
activity after another 50 seconds, the set will switch off automatically to save energy.
Any settings like program and playing modes will be then lost.
You can select up to 24 tracks an d store them in the memory in a desired sequence. You
can store any track more than once.
1
While playback is stopped, press PROGRAM to store
the track.
PROGRAM “ P “ lights up, the track number
programmed and the total number of stored tracks
are displayed.
2
Select a track by directly entering track number.
(Example press “1” and “3” to program track 13).
* Press ENTER button once after each track number
have desired.
3
Select and store all desired tracks in this way.
* Press one more ENTER button to select the
programming.
Adjust the volume by using VOLUME control .
DBBS – Dynamic bass boost System
l
During SCAN, searching is not possible.
Programming track numbers
Volume and sound adjustment
l
-
FEATURES
Playback information
l
Release the button when you reach the desired passage.
Normal playback continues from this very position.
Switch the DBBS slider to ON position to activate
the DBB sound.
4
Note: The DBB sound option is only activated in the Headphone mode.
l
FEATURES
Press PLAY button to start playback of your selected
tracks.
You can review the program by pressing SKIP button
when playback is stopped. The display shows all
stored tracks in sequence.
Selecting a track and searching
Note :
Selecting a track during playback
l
Briefly press +SKIP / SEARCH or - SKIP / SEARCH button once or several times to
skip to the current, previous or subsequent track start.
Playback continues with the selected track and its number is displayed.
Erasing the program
Selecting a track when playback is stopped
1
Briefly press +SKIP / SEARCH or - SKIP / SEARCH button once or several times.
The selected track number is displayed.
2
Press PLAY / PAUSE button to start CD play. The play back starts with the selected
track.
Searching for a passage during playback
1
Keep +SKIP / SEARCH or - SKIP / SEARCH button to find a particular passage in a
backward or forward direction.
Search is started and playback continues at a low volume. After 2 seconds the
search speeds up.
8
-
If you press PROGRAM and there is no track selected, after 10 sec. It will go
back to Normal position.
If necessary, press STOP button to stop playback.
Note:
The
-
program will also be erased if you
interrupt the power supply,
open the CD lid, or
the set is switched off automatically.
ESP
With a conventional portable CD player, you might have experienced that the music
stopped e.g. when jogging. The ELECTRONIC SKIP PROTECTION protects against loss
of sound caused by vibrations and shocks.
Continuous playback is ens ured. However, it does not protect the set against any damage
caused by dropping!
9
Note:
When playing MP3 tracks, the display will read “Welcome MP3”, and the ESP
feature will not appear but will automatically be activated, regardless of the ESP
switch setting.
FEATURES
MP3-CD PLAYBACK
Selecting different playing options – MODE
To play MP3-CDs
It is possible to play tracks in random order, to repeat a track or the CD and to play the first
few seconds of each track.
IMPORTANT INFORMATION
1
Press play MODE during playback as often as necessary until the display shows
either:
REPEAT 1 : The current track is played
repeatedly. “REP 1” is displayed.
-
REPEAT ALL: The entire CD is played
repeatedly. “REP A” is displayed.
-
REPEAT “D”: The current directory file is
played repeatedly. “REP D” is display.
-
“Intro”: The first 10 seconds of each of the
remaining tracks are played in sequence.
“ INT ” is displayed.
-
-
RANDOM: All tracks of the CD are played in
random order until all of them have been
played once. “ RND “ is displayed.
Repeat Directory all songs within a directory are played repeatedly in order
(MP3 only).
2
Press play in selected mode to begin.
3
To return to normal playback, press play MODE until
the mode feature display indication disappears.
l
l
l
l
l
Use mp3 as the extension to save audio files onto CD-R(W) or CD ROM, e.g. mp3.
Do not use any other extensions e.g. doc, txt, pdf, etc., when making audio files into
MP3.
Do not use the .mp3 extension for text or other non- audio data files . This may result
in serious malfunction of the set and harmful noise interference.
Single session means only one session created in the CD- ROM.
File Directory: this is the set’s display abbreviation for “album or folder”. On a PC
display, an album is show n as Folder in Window Explorer.
Do not attempt to combine CD audio and MP3 tracks within a CD- ROM, as the
set will only be able to playback your CD audio tracks from mixed CD formats.
1
Place a MP3 CD-ROM with the label side up.
Push the CD center lightly to set it in position.
2
Press STOP button to stop playback.
Playback stops and the display shows the total number of tracks and total number of
directory’s.
Selecting and searching a track/album
The following table shows the different function available for the controls when playing CD
Audio or MP3 CDs.
l
Single file is the set’s display for a MP3 CD with only a root directory. This has no
additional albums (folders).
l
With albums means a MP3 CD with more than one album (folders), and is shown by
directory and a number on the set’s display, e.g. AL 09.
Function
Select track
Music search
Fast track select
Fast album select
10
CD audio
MP3
[
[
[
[
[
11
MP3
(with multiple
Files)
[
[
[
[
MP3-CD PLAYBACK
MP3-CD PLAYBACK
Select track
To select the next or previous track.
l
Press the +SKIP / SEARCH button or -SKIP / SEARCH button briefly once or more
during playback.
Playback is interrupted and starts from the beginning of the selected track.
Album (selecting songs name “Funny”) **Max. enter 6 letter** 67 songs
Music search
To fast search only within a CD Audio track.
l
During playback, press and hold down the +SKIP / SEARCH button or
-SKIP / SEARCH button. Release button at the desired passage.
1
2
3
4
Note :
Fast track select
In the stop position, you can select tracks form your directory. The display will show the
total number of tracks, and directory’s.
1
2
3
4
Press the FILE / DIR. button once, the track number is flashing.
Press the ENTER button.
Press track number button / E.g. Track 160; press “1”, “6”, “0”.
Press the ENTER button to start playback.
Fast album select
In the stop position, you can select an album if your root directory holds more than one
directory.
The display will show the total number of tracks, and the total number of albums.
1
2
3
4
Press the FILE / DIR. button two times, the directory number is flashing.
Press the ENTER button
Press Album no. (e.g. Album 12, press “1” and “2” then press enter).
The track will automatically play.
Any mp3 files , i.e. title containing symbols (examples: *, / , ( , ) , = etc.) are not
recognized and there cannot be used for search purposes.
File name contain spaces (example John Harper.mp3) can be searched by
inputting in the space. However, of the files is actually johnharper.mp3 do not use
any spaces when input for search.
(Tip) : in case of spaces inputting with three letters or less will avoid the space
issue.
Dir search (must be more than 2 file)
1
2
Press the FILE SEARCH button two time will show (Dir. Name)
Press the MP3 file name exp. CD02 Press C enter D …… enter two time will auto
playback.
Programming track numbers
1
2
3
4
Note:
12
Press the FILE SEARCH button one time will show (file name?)
Press the F button than press the enter button, and press U button
… NNY …
Press the ENTER button two times will auto playback.
Or press only letter “F” than ENTER button two times and press PLAY button.
(Flashes mean more than two of “F” letter songs.
Press the STOP button than press PROGRAM Button (will show display “P”) select
the file no. enter. Than select the track no. press the ENTER button. Will change to
Prog. 2 (total 24 track prog.) If press the ENTER button 2 time than press the PLAY
button will auto playback.
Press the STOP button will return to TOC.
Press the PROGRAM button again and press the PLAY button will playback before
memory Prog.
Check the Prog. no. Press the SKIP button will show the Prog. no.
If you make an error while searching or programming hold the CLEAR button
for 2 seconds to return to main “welcome MP3” display.
13
Software Properties section of your compu ter will have this confirmation.
MP3-CD PLAYBACK
TROUBLESHOOTING
Single session
WARNING
Under no circumstances should you try to repair the set yourself as this will
invalidate the warranty.
The following chart is an example of a Windows Explorer display for a single session
MP3 CD ROM with albums. Check the added Notes to help you understand the MP3 CD
unit display, and the playback sequence of albums and tracks on single session MP3 CDs.
If a fault occurs, first check the points listed, before taking the set of repair.
If you are unable to solve a problem by following these hints, consult your dealer or service
center.
(E) CD-ROM drive
AL 01
Symptom
Power cannot be
turned on
Skipped
Blur.jpg
Lyric.doc
Blur01.mp3
Blur02.mp3
Blur03.mp3
Blur04.mp3
AL 02
AL 04
Girl09.mp3
Girl10.mp3
Spice05.mp3
Spice06.mp3
AL 03
AL 05
Boyz11.mp3
Boyz12.mp3
2men07.mp3
2men08.mp3
Skipped
AL 06
Abba01.wav
Abba02.wav
Notes:
AL01-AL07
Bread13.mp3
AL 07
Marx14.mp3
Twain15.mp3
Arrow pathway show the sequence of MP3 album and track playback.
Playback is
impossible or
stops during
playback CD
Blur01.mp3- Twain15.mp3 This CD ROM example has a total number of 15 tracks, where
‘01’ is the first track and ‘15’ is the last track.
Skipped Denotes an album which contains non- audio files only, e.g. jpg, wav., doc. These
cannot be detected nor played on the MP3- CD player, and are hence ‘skipped’. Where an
album contains mixed format files, the non- MP3 files will be skipped.
Note:
Standard
MPEG rate
Sampling Frequency
MPEG 1
MP3 playback
32 ~ 128Kbps
44.1KHz
Layer 3
ISO9660 format compatible
14
Treatment
Insert batteries in correctly.
Replace batteries.
Connect the adapter securely
Connect the power adapter properly.
Switch on ignition or insert batteries.
Switch on ignition or insert batteries.
Close the disc cover tightly.
Is there condensation on the Wait until the lens has cleared.
lens?
Is the CD inserted properly? Place the CD with the label side up.
Is the CD scratched or
Use another CD.
damaged?
If using an MP3 CD burned from a computer, there could have been a
transfer error in the process. This is an error between modem and
computer or computer and CD. This is not an error with the Memorex
Discman.
This CD ROM example has a total number of 7 MP3 albums (folders).
MP3 Properties
Check point
Batteries
Are the batteries inserted
correctly?
Are the batteries dead?
Power adapter
Loose connection?
Is the power adapter
connected properly?
In-car use
Cigarette lighter is not
powered when ignition is off?
Is the cigarette lighter power
on?
Is the disc cover closed
properly?
If you make an error while programming or searching hold the “clear” button for
2 seconds to return to main “welcome MP3” Display.
15
TROBLESHOOTING
Symptom
Playback does not
start from not start
from first track
No sound or poor
sound quality
Check point
Is the RESUME or PROGRAM
function activated?
Treatment
Switch off the RESUME function or
clear the PROGRAM.
Are connection plugs inserted
properly?
Is the volume set too low?
Is the headphone plug dirty?
Is the set located near strong
magnetic fields?
In-car use
Adapter cassette is inserted
incorrectly?
Is the adapter cassette inserted
properly?
Is the temperature inside car too
high/low?
Is the cigarette lighter socket
dirty?
Is the playback direction of car
cassette player’s auto-reverse
feature?
Check all connections.
Adjust the volume.
Clean the headphone plug.
Move the set away from strong
magnetized fields.
Insert the adapter cassette
correctly.
Insert the adapter cassette
correctly.
Let the set adjust to the
temperature.
Clean the cigarette light socket.
Change the auto reverse direction.
The typeplate is located on the bottom of the set.
Note:
If you find an error and the disc is not reading properly simply power -off the unit
completely, wait 5 seconds, and re- power, turn on, the unit.
16
17