1
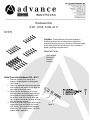
Wood Stud Hardware Kit –A105
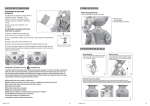
1. Remove contents from carton and
examine for damaged or missing parts.
See Figure 2.
2. Drill a 3/16” diameter hole through the
wall surface and into a stud to the depth
of the screw length.
3. Position the mount, insert the screw and
tighten until secure. Use a flat washer
where applicable.
Figure 2
Hollow Block/Steel Stud Hardware Kit –A109
1. Remove contents from carton and
examine for damaged or missing parts.
See Figure 3.
2. Drill a 3/4” diameter hole through the wall
surface and into the structural part of the
wall to accommodate the required
fastener length.
3. Fold the metal channel flat to the plastic
straps and slide the channel through the
hole in the wall. Allow channel to “unfold”
inside of the wall. Make sure the channel
is vertically positioned when used on steel
studs. Pull plastic loop toward yourself so
channel is flush behind wall and slide cap
down the plastic straps until cap is against
the wall. Break plastic straps off at the
cap by placing thumb in between the
straps and on the cap and sliding thumb
side to side.
4. Position the mount, insert the screw and
tighten until secure. Use a flat washer
where applicable.
Figure 3
Metal Joist/Beam Hardware Kit –A111
1. Remove contents from carton and examine
for damaged or missing parts. See Figure 4.
2. Drill a 7/16” diameter hole through the steel
base material.
3. Position the mount, insert the screw, thread
on nut and tighten until secure. Use a flat
washer where applicable.
Figure 4