1
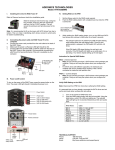
The Panel
Addonics
There are four buttons and an LCD on the panel of DVD Duplicator.
1 – LCD shows a function or a message.
2 – it is used to scroll up function menus.
3 – it is used to scroll down function menus.
4 – it is used to execute a function.
5 – it is used to cancel a function.
T E C H N O L O G I E S
HDD Duplicator Panel
HDUSI3TDR, HDUS3325DX,
HDUSI5TDR, HDUS5325DX
Functions
The HDD Duplicator has 6 functions in total.
User’s Guide
Technical Support
If you need assistance to get your unit functioning properly, please call Addonics Technical
Support. Our technical staff will be happy to assist you, but they will need your help to do
so. Calling the technical support staff without all the proper information can be both time
consuming and frustrating. Here are some tips to help you out:
Contact Information
Phone:
408-573-8580
Fax:
408-573-8588
Email:
http://www.addonics.com/sales/query/
Internet:
http://www.addonics.com
TECHNICAL SUPPORT
Phone:
408-453-6212
Hours:
8:30 am - 6:00 pm PST
Email:
http://www.addonics.com/support/query/
In Function 8, there are 13 subfunctions.
on the source hard disk. Once the copying process is complete the LCD will
display the following results.
2 Async Copy HDD
Copy HDD copies data directly from the source hard disk to the target hard disks.
While duplication process is on-going, allows you to plug-in additional target
drives and duplication will automatically start for the added target drive.
Choose option 2 from the menu:
Press ENT to begin copy. The system will auto-detect the hard disks and show
the following info on the LCD.
If the duplicator detects a drive whose capacity is less than the source drive, the
th
LCD will display the corresponding channel number. For example, the 5 drive.
The LCD will show the following info during the copying process: remaining time,
completed percentage. The copy speed, capacity and time will vary depending
on the source hard disk. Once the copying process is complete the LCD will
display the following results.
1 Copy HDD
Copy HDD copies data directly from the source hard disk to the target hard disks.
Make sure that the capacity of the target hard disk is equal or larger than
the source hard disk.
Choose option 1 from the menu:
3 Compare HDD
Compare HDD is used to see if the data on a source hard disk is identical to the
target hard disk after the Copy HDD operation.
Choose option 3 from the menu:
Press ENT to begin the comparison. The LCD will display the following info
Press ENT to begin copy. The system will auto-detect the hard disks and show
the following info on the LCD.
Once the comparison is complete the LCD will display the following info as well
as the amount of data on the source hard disk.
The LCD will show the following info during the copying process: remaining time,
completed percentage. The copy speed, capacity and time will vary depending
4 Async Compare
Compare HDD is used to see if the data on a source hard disk is identical to the
target hard disk after the Copy HDD operation. While compare process is ongoing, allows you to plug-in additional target drives and comparison will
automatically start for the added target drive.
Choose option 4 from the menu:
7 Source HDD Size
Source HDD Size is used to show the capacity of the source hard disk.
Choose option 7 from the menu:
Press ENT and the LCD will show the following info.
Press ENT to begin the comparison. The LCD will display the following info
Once the comparison is complete the LCD will display the following info as well
as the amount of data on the source hard disk.
5 PreScan HDD
PreScan HDD is used to check if the source hard disk can be accessed properly.
It also tests the read speed.
Choose option 5 from the menu:
8 Set up
Setup allows various system settings to be changed. There are 8 sub-options:
Language, Copy Size, Startup Menu, Auto Compare, Copy with detect, Button
Sound, Device Info and System Info.
Choose option 8 from the menu:
8.1 Language
This option is used to select the system's language support. By default this is set
to English. Press ENT to change the Language settings.
Press ENT to begin scan. The LCD will display the following info
8.2 Copy Size
This option is used to specify the size of the source hard disk for simplifying
further copying operations.
Once the scan is complete, the LCD will display the corresponding results
Press ENT and the LCD will display a detailed list of options as shown below
6 ReScan Bus
Choose option 6 from the menu:
Press ENT to re-scan hardware. The LCD will display the following info.
Press ENT to begin scanning IDEO0:Master/Save ~ IDE1:Master/Slave.
When the scan is complete the LCD will display the following info.
Use the Up and Down arrow keys to choose different copy sizes. The system will
offer their corresponding percentages so the user can specify the amount to copy
from the source hard disk.
Press ENT to confirm and save the changes.
8.3 Startup Menu
This option allows you to set an option other than "Setup" to be displayed as the
first available option on the menu every time you start the system.
Press ENT then use the Up and Down arrow keys to choose other options. By
default the first menu option is Copy HDD.
8.4 Auto Compare
This option automatically compares the source hard disk with the target hard disk
after a copy operation is completed.
Press ENT to access option. By default it is set to Off. Use the Up and Down
arrow keys to choose On.
8.5 Button Sound
Press ENT and the LCD will display the following info. Use the Up and Down
arrow keys to choose whether button sound is on or off.
8.6 Device Info
This option is used to display the details of all hard disks connected to the copy
controller.
8.8 Fast Copy
This option displays Fast Copy. Fast Copy only copies data on the source drive
to the target drives.
Press ENT and the LCD will display the following info. Use the Up and Down
arrow keys to choose whether fast copy is on or off. (This function currently only
supported in FAT, FAT32, NTFS, HFS, Ext2 and Ext3 partitions.)
8.9 Auto Start Drive
This option is used to copy automatically once you inserted a HDD on target port.
Press ENT to enter the following figure. The default is OFF. Use the Up and
Down arrow keys to choose 1-5.
8.10 Auto Start Timer
This option is used to set the period of time when the duplicator starts copying
automatically once you insert HDD on target port.
Press ENT to enter the following figure. The default is OFF. Use the Up and
Down arrow keys to choose 5 Sec-50 Sec.
8.11 Tolerance Size
This option is used to set the tolerance in terms of percentage the difference in
the source and target capacity. This is to ensure that when the target drive is
smaller than the source drive, the duplication process will not start.
Press ENT and the LCD will display each hard disk' information in order as
shown below.
Press ENT to enter the following figure. The default is Off. Use the Up and Down
arrow keys to choose 1%~100% of source.
8.7 System Info
This option displays system information.
8.12 BootTime Delay
This option is used to set boot delay time.
Appendix A
LCD Messages
Press ENT to enter the following figure. The default is 5 sec. Use the Up and
Down arrow keys to choose 0~99 sec.
5.8.13 Quick Compare
This option is used to set the size of each comparison unit.
Press ENT to enter the following figure. The default is OFF. Use the Up and
Down arrow keys to choose 1 Byte/1K/10K/100K/1MB/10MB/100 Mbytes. (In
order to improve the accuracy of pure data can maintain the default settings.)
Basic Troubleshooting
9.1 LCD
If the LCD display is blank after the device is turned on, check that the power
cable is properly connected and that the power supply is on.
9.2 Error Message
When the system is running a copy operation or hardware diagnostics then
operation was manually terminated by pressing ESC, an error message will be
shown by the LCD. This may lead to an illegal operation and cause the device to
stop reminding. If this happens, the device must be restarted.
9.3 Hard Disk
If unable to read the hard disk please check that the data and power cables are
properly connected. When making a copy please make sure that you have set
the source hard disk correctly.
9.4 Keys
If pressing the keys on the front panel produces no response from the system,
the keys may have malfunctioned.
9.5 Startup/Shutdown
Do not suddenly turn off the power while the system is performing an operation.
After shutting down normally, wait a moment (usually around 2 seconds) before
starting the system again so it can run its self-diagnostics.
Connecting with a HDD:
All data will be lost, format?............. All data on the hard disk will be lost. Confirm the
formatting of hard disk.
Delete Image in Partition xx?.............Confirm the deleting of data image in partition xx.
Format HDD?...................................…………... Ask if you want to format the hard disk.
Format HDD OK! ...............................The Formatting of hard disk has been completed.
HDD not Format!................................…….......The hard disk hasn’t been formatted yet.
HDD too small ...................................................... The capacity of hard disk is too small.
HDD too small to handle image!.......... The hard disk hasn’t enough capacity to store the
data image (at least 5Gbytes).
Image Exists Overwrite?........... There is a data image in the current partition. Confirm the
overwriting of data.
Image load Fail.....................The image isn’t successfully loaded from DVD to the hard disk.
Image load OK.........…......... The image is successfully loaded from DVD to the hard disk
No Image in Partition xx...............................................There is no data image in partition xx.
No Valid HDD!.......................................................... The system cannot find a hard disk.
Partition Damage.................................................................The partition is damaged.
Select HD First!......................................................... Select a formatted hard disk at first.
Verify Disk or Partition?.................... Do you want to verify the hard disk or just a partition?
Verify Hard Disk Fail!..................................... The hard disk is not verified successfully.
Firmware Update:
Check Sum Error!...................................................... The updated firmware has errors.
Flash ROM fail!.................................................... Data cannot be written into Flash ROM.
Invalid firmware .............................................. The disc doesn’t contain a valid firmware.
Last update F/W Fail!.................................... The firmware is not updated successfully.
Last update F/W OK!.............................................. The firmware is updated successfully.
Searching F/W ............................................... The system is searching for a valid firmware.
Source can’t be Hard Disk!.....................During comparison the source cannot be hard disk.