1
INTRODUCTION
CHOOSING A LOCATION AND
MOUNTING THE AMPLIFIER
THANK YOU for purchasing an Infinity® Reference
Series amplifier. In order that we may better serve
you should you require warranty service for your
new amplifier, please retain your original
purchase receipt and read the enclosed warranty
information card.
Choose a mounting location in the trunk or cargo
area where the amplifier will not be damaged by
shifting cargo. Amplifier cooling is essential for
proper amplifier operation. If the amplifier is to
be installed in an enclosed space, make sure
there is sufficient air circulation for the amplifier
to cool itself.
WARNING!
Playing loud music in an automobile can hinder
your ability to hear traffic and permanently
damage your hearing. We recommend listening
at low or moderate levels while driving your car.
Infinity accepts no liability for hearing loss, bodily
injury or property damage resulting from the use
or misuse of this product.
When mounting the amplifier under a seat,
ensure that it is clear of all moving seat parts and
does not affect the seat adjustments. Mount the
amplifier so it is not damaged by the feet of backseat passengers. Make sure that the amplifier is
mounted securely using nuts and bolts or the
supplied mounting screws.
IMPORTANT
To get the best performance from your Reference
Series amplifiers, we strongly recommend that
installation be entrusted to a qualified
professional. Although these instructions explain
how to install Reference amplifiers in a general
sense, they do not show specific installation
methods that may be required for your particular
vehicle. If you do not have the necessary tools or
experience, do not attempt the installation yourself. Instead, please ask your authorized Infinity
car audio dealer about professional installation.
INSTALLATION WARNINGS AND TIPS
• Always wear protective eyewear when using
tools.
• Turn off the audio system and other electrical
devices before you start. Disconnect the (–)
negative lead from your vehicle’s battery.
• Check clearances on both sides of a planned
mounting surface before drilling any holes or
installing any screws. Remember that the
screws can extend behind the surface.
• At the installation sites, locate and make a note of
all fuel lines, hydraulic brake lines, vacuum lines
and electrical wiring. Use extreme caution when
cutting or drilling in and around these areas.
• Before drilling or cutting holes, use a utility knife
to remove unwanted fabric or vinyl to keep
material from snagging in the drill bit.
• When routing cables, keep input-signal cables
away from power cables and speaker wires.
• When making connections, make certain they
are secure and properly insulated.
• If the amplifier’s fuse must be replaced, use only
the same type and rating as that of the original.
Do not substitute another kind.
2
Mount the amplifier so that it remains dry – never
mount an amplifier outside the vehicle or in the
engine compartment.
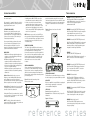
The amplifier’s trim panel must be removed to
gain access to the mounting tabs. To remove the
panel, grasp the ends (indicated by arrows) and
pull upward gently. To replace the panel, align the
fasteners and press downward gently.
POWER CONNECTIONS
GROUND CONNECTION
Connect the amplifier’s ground (GND) terminal to
a solid point on the vehicle’s metal chassis,
as close to the amplifier as possible. Refer to the
chart to the right to determine minimum wiregauge size. Sand away any paint from this location; use a star-type-lock washer to secure the
connection.
POWER CONNECTION
Connect a wire (see chart at right for appropriate
gauge) directly to the vehicle’s positive battery
terminal, and install an appropriate fuse holder
within 18" of the battery terminal. Do not install
the fuse at this time. Route the wire to the
amplifier’s location, and connect it to the
amplifier’s positive (+12V) terminal. Be sure to
use appropriate grommets whenever routing
wires through the firewall or other sheet metal.
Failure to adequately protect the positive wire
from potential damage may result in a vehicle
fire. When you are done routing and connecting
this wire to the battery and to the amplifier, you
may install the fuse at the battery. The fuse value
should be selected based on total amplifiercurrent draw; see chart at right.
REMOTE CONNECTION
Connect the amplifier’s remote (REMOTE)
terminal to the source unit’s remote turn-on lead
using a minimum of 18-gauge wire. If your source
unit does not have a remote turn-on connection,
connect the amplifier’s (REMOTE) terminal to the
vehicle’s accessory circuit.
WIRE-GAUGE CHART
Amplifier
Maximum
Model
Current Draw
475a
72A
5350a
75A
1300a
37A
1600a
58A
Minimum
Wire Gauge
#8 AWG
#8 AWG
#10 AWG
#8 AWG
SPEAKER CONNECTIONS
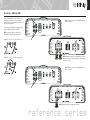
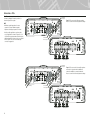
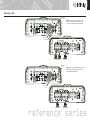
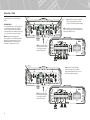
Refer to the application guides on the pages
that follow. Speaker connections should be made
using a minimum of 16-gauge wire.
Figure 1. Amplifier’s trim panel.
PULL
Figure 2. Terminal-connection end plate.
PRESS
Vehicle
Battery
Scrape away
paint on vehicle’s
chassis metal for
good connection.
To Remote Connection
of Head Unit