1
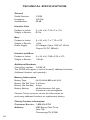
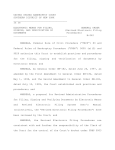
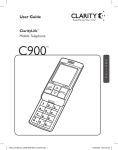
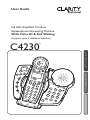
User Guide
5.8 GHz Amplified Cordless
Speakerphone /Answering Machine
With Caller ID & Call Waiting
(Supports up to 3 additional handsets)
C4230
TM
E
N
G
L
I
S
H
BOOST
ON
OFF
REC
OGM
DEL
PLAY
OGM
C4230
PLAY
TALK
STOP
M EN U
1
REW
2
4
GH
8
TUV
0
9
IN U
SE
CHA
RGE
*
TUV
0
RIN
ON/OGER
FF
6
MN
O
8
S
MUT
E
POW
ER
5
PQR
#
DEF
JKL
7
WXYZ
ST
3
C
GHI
MNO
BOO
2
AB
4
6
L
7
PQRS
IAL
DEF
5
JK
I
*
RED
1
3
ABC
F FWD
FLA
SH
CL/FL
RD/P
E
S
P
A
Ñ
O
L
9
WXY
#
Z
F
R
A
N
Ç
A
I
S
TABLE OF CONTENTS
Getting Started
Safety Instruction .......................................................................... 4
Parts Checklist .............................................................................. 7
Quick Reference Guide ............................................................... 8
Installation ........................................................................................ 13
Telephone Operation .................................................................... 14
Basic Handset Operation .......................................................... 14
Basic Base Operation .....................................................................18
Other Features on Handset ...................................................... 21
Date and Time ............................................................................. 23
Initial Setup ...................................................................................... 24
Phonebook ................................................................................... 26
Caller ID ....................................................................................... 30
Telephone Answering Machine ................................................. 33
Access from handset .................................................................. 35
Access from a Remote Location .............................................. 40
Troubleshooting .............................................................................. 42
Technical Specifications ............................................................. 44
FCC Requirements and Regulations ....................................... 45
Warranty and Service .................................................................. 48
Introduction
Thank you for purchasing the C4230, 5.8 GHz amplified cordless
phone, from Clarity. Using our patented Digital Clarity Power, the
C4230 clearly amplifies incoming sound up to 50 dB while cutting
out background noise. This phone has many features including a
digital answering machine and speakerphone.
This User Guide and Quick Start Guide will provide you with the
information you need to use your C4230 effectively, easily and safely.
Read this manual thoroughly before using this telephone. Keep the
manual near the phone for easy reference.
IMPORTANT SAFETY INSTRUCTIONS
When using your telephone equipment,
basic safety precautions should always
be followed to reduce the risk of fire,
electric shock and injury to persons
including the following:
1. Read and understand all instructions.
2. Follow all warnings and instructions marked on the telephone.
3. Do not use this telephone near
a bath tub, wash basin, kitchen
sink or laundry tub, in a wet
basement, near a swimming pool
or anywhere else there is water.
4. Avoid using a telephone (other
than a cordless type) during a
storm. There may be a remote risk
of electrical shock from lightning.
5. Do not use the telephone to report
a gas leak in the vicinity of the leak.
6. Unplug this telephone from the wall
outlets before cleaning. Do not use
liquid cleaners or aerosol cleaners
on the telephone. Use a damp cloth
for cleaning.
7. Place this telephone on a stable
surface. Serious damage and/or injury
may result if the telephone falls.
8. Do not cover the slots and openings on this telephone. This telephone
should never be placed near or over
a radiator or heat register. This telephone should not be placed in a
built-in installation unless proper
ventilation is provided.
9. Operate this telephone using the
electrical voltage as stated on
the base unit or in the owner’s
manual. If you are not sure of the
voltage in your home, consult your
dealer or local power company.
4
10. Do not place anything on the
power cord. Install the telephone
where no one will step or trip on
the cord.
11. Do not overload wall outlets or
extension cords as this can increase
the risk of fire or electrical shock.
12. Never push any objects through
the slots in the telephone. They can
touch dangerous voltage points or
short out parts that could result in
a risk of fire or electrical shock.
Never spill liquid of any kind on
the telephone.
13. To reduce the risk of electrical
shock, do not take this phone apart.
Opening or removing covers may
expose you to dangerous voltages
or other risks. Incorrect reassembly
can cause electric shock when the
appliance is subsequently used.
14. Unplug this product from the wall
outlet and refer servicing to the
manufacturer under the following
conditions:
A. When the power supply cord
or plug is frayed or damaged.
B. If liquid has been spilled into
the product.
C. If the telephone has been
exposed to rain or water.
D. If the telephone does not
operate normally by following
the operating instructions.
Adjust only those controls that
are covered by the operating
instructions. Improper adjustment may require extensive
SAVE THESE INSTRUCTIONS
IMPORTANT SAFETY INSTRUCTIONS
work by a qualified technician
to restore the telephone to
normal operation.
using the handset. To protect your
hearing, some hearing experts suggest
that you:
E. If the telephone has been
dropped or the case has
been damaged.
1. Set the volume control in a low
position and then adjust the
volume to a comfortable level.
F. If the telephone exhibits a
distinct change in performance.
2. Limit the amount of time you use
the handset at high volume.
15. Never install telephone wiring
during a lightning storm.
16. Never install telephone jacks in wet
locations unless the jack is specifically designed for wet locations.
17. Never touch uninsulated telephone
wires or terminals unless the telephone line has been disconnected
at the network interface.
18. Use caution when installing or
modifying telephone lines.
19. Use only the power cord and
batteries indicated in the manual.
Do not dispose of batteries in a
fire. They may explode. Check with
local codes for possible special
disposal instructions.
20. Plug the AC adaptor into the outlet
that is nearest and most accessible
to the telephone.
Exposure to high volume sound levels
may damage your hearing. Although
there is no single volume setting that
is appropriate for everyone, you should
always use the handset with the volume
set at moderate levels and avoid prolonged exposure to high volume sound
levels. The louder the volume, the less
time is required before your hearing
could be affected. If you experience
hearing discomfort, you should stop
3. Avoid turning up the volume to
block out noisy surroundings.
CHILDREN: Never allow children to
play with the product – small parts may
be a choking hazard and the amplified
volume may cause hearing damage.
SAFETY INSTRUCTIONS
FOR BATTERIES
Caution: Risk of explosion if battery
is replaced by an incorrect type.
Dispose of used batteries according
to the instructions.
1. Use only the approved battery
pack in the handset of your
cordless phone.
For Handset Unit:
3.6V 800mAh Ni-MH AAA
GPI International Ltd.:
GP80AAAH3BXZ
For Base Unit:
Four (4) AA alkaline batteries
2. Do not dispose of the battery in a
fire as it may explode. Check with
local codes for possible special
disposal instructions.
3. Do not open or mutilate the battery.
Released electrolyte is corrosive and
may cause damage to the eyes and
skin. It may be toxic if swallowed.
SAVE THESE INSTRUCTIONS
5
IMPORTANT SAFETY INSTRUCTIONS
4. Exercise care in handling batteries
in order not to short the battery
with conducting materials such as
rings, bracelets and keys. The battery
or conduction material may overheat and cause burns.
5. Charge the battery (ies) provided
with or identified for use with this
product only in accordance with the
instructions and limitations specified
in this manual.
6. Observe proper polarity orientation between the battery pack
and the battery charger.
Pacemaker Warning
If you or a member of your
household has a pacemaker or
other medical devices, consult your
physician or the manufacturer of the
pacemaker or medical device before
using this product. The product
should be used in accordance with
the guidelines provided by your
physician or the manufacturer of
the pacemaker or medical device.
6
SAVE THESE INSTRUCTIONS
CONTENTS & PARTS CHECKLIST
ON
OFF
DEL
BOOST
PLAY
OGM
REC
OGM
PLAY
STOP
FLAS
H
REDI
REW
1
F FWD
7
MUTE
*
0
RIN
ON/OFGER
F
#
E
3
DEF
5
6
JKL
MNO
8
TUV
PQRS
R
IN US
4
7
Z
*
CL/FL
RD/P
2
ABC
GHI
9
WXY
ME NU
1
MNO
8
TUV
TALK
T
6
JKL
PQRS
POWE
BOOS
3
DEF
5
I
PA GE
AL
2
ABC
4
GH
0
9
WXYZ
#
CHAR
GE
Handset
Base
Phone cord
Battery pack
TONE
CONTROL
TONE
Battery
compartment cover
INTERCOM
Belt clip
AC power adapter
User guide
7
Quick Reference Guide
C4230
FUNCTION KEYS
1 Speaker
Press On or Off.
8 Mute button
Press to turn OFF speakerphone
microphone.
2 Flash
Press to receive an incoming call
while on a call. (Call Waiting must
be activated)
9 Port for (optional) C2210
Bed Shaker
10 AC Adapter
3 Redial
Press to Redial last number dialed.
11 Phone Line Connection
4 Boost
Press to add an extra level of
amplification over the entire range
of volume control.
9
10
11
5 Input for (optional) C2210
Lamp Flasher
6 Ringer Style
Press to adjust the style of ring.
7 Volume
Press to control the outgoing
Speaker Volume.
4
3
2
1
ON
OFF
PLAY
OGM
REC
OGM
DEL
PLAY
STOP
5
FLA
SH
RED
IAL
REW
1
F FWD
4
8
TU
S
V
MUTE
*
0
POW
ER
RING
ON/O ER
FF
6
6
JKL
7
PQR
ST
3
DEF
5
GHI
PA GE
BOO
2
ABC
MN
O
9
7
WXY
Z
#
8
IN US
E
Power LED – LED will
illuminate when the
power is on
8
CHAR
GE
In Use LED – LED will illuminate
when the phone is in use
Charge LED – LED will light up
when handset is in base charging
Quick Reference Guide
C4230
ANSWERING MACHINE DEVICE
12 Answering Machine Display
Displays number of messages.
18 Stop
Press to STOP message playing.
13 On/Off
Press to turn answering machine
On or Off.
19 Rew
Press to Rewind message.
14 OGM/Play
Press to Play outgoing message.
20 FFWD
Press to Fast Forward through
the message.
15 Delete
Press to Delete a message.
21 Page
Press to Page handset.
16 OGM/REC
Press to Record outgoing message.
22 Base Microphone
Speak into when recording outgoing
answering machine message.
17 Play
Press to Play message.
12
13
ON
OFF
14
15
16
17
18
REC
OGM
DEL
PLAY
OGM
PLAY
STOP
FLA
SH
RED
IAL
REW
1
19
F FWD
4
PA GE
22
POW
ER
IN US
*
RIN
ON/OGER
FF
MN
O
8
TUV
ST
6
L
7
MUT
E
F
5
JK
PQR
S
21
3
DE
C
GHI
20
BOO
2
AB
9
WXY
Z
0
#
E
CHAR
GE
9
Quick Reference Guide
C4230
HANDSET
1 Volume Control
The dial controls the volume level of
the handset, headset or neckloop, and
ringer volumes.
6 Talk
To make a call Press the TALK button
then dial number.
2 Boost
When pressed, an extra level of
amplification is added over the entire
range of volume.
Press Help Key button to dial preprogrammed number.
7 Help Key
8 Flash/Clear
Flash: Call Waiting service is required.
While on a call Press (CL/FL) to receive
another incoming call.
Clear: While in the menu Press (CL/FL)
to go back to the main menu.
3 Speaker
Press to activate handset speakerphone.
Press again to switch back to earpiece.
4 Soft Keys
Press a soft key to select a menu item
displayed just above the key.
9 Redial/Pause
Press to redial (RD/P) last number
dialed or insert Pause (2 seconds) when
programming memories or pre-dialing.
5 Arrow Buttons
Press up or down Arrows to navigate
through the menus.
1
BOOST
2
7
3
C4230
4
TALK
5
6
M EN U
CL/FL
RD/P
1
2
3
ABC
4
5
GHI
8
TU
V
10
6
JKL
7
PQRS
*
DEF
0
MNO
9
WXYZ
#
8
9
Quick Reference Guide
C4230
HANDSET
10 Headset
A 2.5 mm headset can be used in
the Headset Port.
(We recommend the Plantronics
M214C headset.)
14 Neck Loop
A 3.5 mm neck loop can be used
in the Neck Loop Port.
15 Belt clip
Slide belt clip onto handset
as shown.
11 Tone
Press to select the audio tone for
the handset. Boost must be
ON to activate tone selection.
16 Speaker grill
17 Battery
Insert battery pack such that (+)
and (-) on battery touch spring in
battery compartment.
12 Intercom
Press to call Base or other handset
on system.
13 Ringer ON/OFF
Switch to turn Handset Ringer On.
HEA
HEAD
SET
10
DSET
15
OP
14
17
NE CK LO
INT ERC OM
12
16
INTERCOM
13
RINGER
ON/OFF
TONE
TO NE
11
OPTIONAL:
Install belt clip to back of phone as shown.
For hands-free conversations, headset with a
2.5mm plug may be purchased separately.
IMPORTANT:
Circular metal contacts on battery need
to touch the metal springs inside battery
compartment.
11
Quick Reference Guide
C4230
Charging your battery
Battery must be initially charged for a full 12 hours before first use. Failure to fully
charge the battery may result in the battery developing a memory. If the battery
develops a memory, it will hold less charge with each following charge. Eventually
the battery would have to be replaced. Important:You must charge the handset
12 hours before using in order for the handset to register properly to the base.
Place handset in base
for battery charge
IMPORTANT
Handset battery must charge
for12 hours before using.
BOOST
ON
OFF
Installing the Backup Batteries
PLAY
OGM
REC
OGM
DEL
C4230
PLAY
TALK
STOP
MEN U
2
4
REDIA
L
DEF
5
GHI
9
TUV
#
MUTE
*
0
RIN
ON/OFGER
F
MN
O
8
PQRS
POW
3
DEF
6
JKL
7
WXYZ
T
5
GHI
MNO
8
TUV
0
BOOS
2
ABC
4
6
JKL
7
PQRS
*
H
1
3
ABC
F FWD
FLAS
CL/FL
RD/P
1
REW
9
WXYZ
#
ER
If there is a power outage, the C4230
will operate up to four hours with
(4) AA Alkaline (non-rechargeable)
batteries (not included).
IN USE
CHA
RGE
CHAR
GE
To install or replace battery
backup batteries
1. Disconnect telephone line cord.
2. Remove batteries from phone.
3. Install four (4) AA Alkaline batteries
with negative (–) end of battery
touching the spring.
Warning: Disconnect telephone line
cord before replacing batteries.
12
Note: Operation time depends on
what features are being used.
STEP 3
STEP 1
–
STEP 2
+
+
–
–
+
+
–
(4) AA Size 1.5V
After installing the four (4) AA
Alkaline batteries, please refer to the
chart below.
Power Supply
Power LED Status
AC adapter and good batteries
AC adapter and no batteries
AC adapter and low batteries
Power failure and good batteries
Power failure and bad batteries
Steady Green
Steady Red
Blinks Green/Red
Slow flashing Red
Fast flashing Red
C4230
Quick Reference Guide
HOW TO CONNECT YOUR C4230 PHONE
THE C4230 PHONE IS DESK
MOUNTABLE ONLY.
Wall phone jack
Phone cord
AC adapter, connect to 120V
power source and phone
The phone cord plugs into the C4230 phone base as shown above. Plug the other end
of the phone cord into a telephone wall jack.
Connect the AC adapter to the back of the base and a 120V wall outlet as
shown above.
To avoid potential interference, the phone should not be located near electronic
equipment, such as personal computers, televisions or microwave ovens.
HOW TO DIAL OR RECEIVE A CALL
1. Complete connection instructions
shown in this guide.
2. Install and charge battery as shown
on page 11-12.
3. Make sure Red LED light is on at
bottom of base.
HANDSET
4. To answer a call, press TALK on
the handset.
5. When placing a call press TALK and
dial number.
6. After completing a call press TALK
again and return handset to base unit.
BASE
7. When receiving a call press
SPEAKER button on base.
8. When placing a call press SPEAKER
button then dial number from base.
9. After completing a call press the
SPEAKER button again.
10. Sound will reset to normal level on
both handset and base unit after
completing calls. Pressing the BOOST
button on subsequent calls will return
the volume to your set sound level.
13
TELEPHONE OPERATIONS
BASIC HANDSET OPERATIONS
ANSWERING AND MAKING CALLS
Answering Calls
To answer a call press TALK.
TALK
MENU
CL/FL
Press FLASH during a call to answer a second call.
(If you have call waiting service)
Making Calls
To make a call, press TALK, then dial number.
To end call, press TALK again, or place handset
onto base.
BOOST
Hands-Free Speakerphone Calls
Press Speaker
to answer incoming calls.
To make an outgoing call, press Speaker; then dial
number. To change back for normal handset use,
press Speaker again.
To end call, press TALK.
Digital Clarity Power™ Technology
With Digital Clarity Power, high frequency sounds are
amplified more than low frequency sounds so words
are not just louder but clearer and easier to understand. It also provides intelligent amplification to make
soft sounds audible, while keeping loud sounds bearable.
BOOST ON/OFF
BOOST
14
BOOST On/Off
The BOOST button controls the loudness of the
receiver. Once the BOOST button is pressed, an extra
level of amplification is added over the entire range of
volume control.
TELEPHONE OPERATIONS
BASIC HANDSET OPERATIONS
VOLUME CONTROL
Volume Control
During a call, the dial on the side controls the level of
volume for the handset and speakerphone. The volume
dial provides up to 16dB of volume before the BOOST
button is activated. Once the BOOST button is pressed,
the C4230 will provide up to 50dB of amplification.
BOOST
When phone is not in use, the dial on the side controls
the level of the ringer volume.
SELECT BOOST OVERRIDE
Boost Override
Select Boost Override on the Main Menu. Use the
Arrow buttons to scroll from ON to OFF. Select
your choice and then press the (soft key) Save.
12:09 AM 04/06
Visual Ringer
Boost Override
Initial Setup
Exit
Select
MENU
ON – When the Boost override is set to ON, the
Boost function will be ON every time a call starts.
If the phone hangs up, the Boost will remain ON.
OFF – When the Boost is set to OFF, the Boost
function will be OFF. Every time a call starts, the user
will need to press the BOOST button in order to gain
the extra level of amplification. If the phone hangs up,
the BOOST button will reset to OFF.
Audio Tone
12:09 AM 04/06
Boost Override
ON
Back
Save
MENU
ADJUSTING TONE
TO NE
IN TE RC OM
Press the Tone button to change the style of amplification. Switching audio tones will change how the
telephone conversation sounds to you. See the matrix
on page 16 for general recommendations on audio
tones based on your particular hearing situation.
BOOST OVERRIDE (ON/OFF)
15
TELEPHONE OPERATIONS
General Recommendations for Tone Settings on the C4230TM Telephone*
Amplification Type
Setting Emphasis
Audio Tone 1
Audio Tone 2
Audio Tone 3
Audio Tone 4
Bass
Low Frequency
Amplification
Flat
Frequency
Amplification
Clarity Power
Multiband
CompressionLow
Power/Loudness
Power/Loudness
Power/Loudness
Speech
Intelligibility
User listens while wearing
Digital Hearing Aids
User listens while wearing
Analog Hearing Aids
User has difficulty understanding
speech on telephone
User with Noise Induced
Hearing Loss
Mild to Moderate Hearing Loss
With some High Frequency
Hearing Loss
With significant High Frequency
Hearing Loss
With Low Frequency Hearing Loss
Moderate to Severe Hearing Loss
With High Frequency Hearing Loss
With Low Frequency Hearing Loss
With Loss across All Frequencies
Notes:
1. These are general recommendations. Hearing loss is specific to each individual; therefore, Clarity® recommends
an end user tries all four setting to see which will work best for their particular hearing condition.
2. Boost must be on for audio tone settings to activate.
3. Noise reduction, acoustic echo cancellation and all other DCP™ features are active regardless of the tone setting.
*
16
TELEPHONE OPERATIONS
BASIC HANDSET OPERATIONS
Flash
The FLASH (CL/FL) button is activated to use custom
calling services such as Call Waiting or Three Way
Calling. Please contact your local telephone company
for information on these services.
TALK
MENU
CL/FL
RD/P
Last number dialed
Press RD/P to call last number dialed.
The last number dialed (up to 32 digits) is stored in the
redial memory until another number is dialed.
TALK
MENU
CL/FL
RD/P
Intercom
TO
Press the Intercom button to page base. To answer a
call from the base, press the intercom button or the
Talk button.This will allow you to talk to the person
on the handset.
NE
IN
TE
RC
OM
Pause Feature
Programming in a pause will cause the phone to wait
two (2) seconds before dialing additional numbers.
This feature may be used when it is necessary to dial
an access code (9, for example). Wait for the second
dial tone, and then dial the outgoing number. Press the
RD/P button at the required point during the memory
storage process to program a pause.
Mute and Hold
Press the (soft key) Mute on the handset and “Mute”
will be displayed. This will turn the microphone off on
the handset.
12:09 AM 04/06
TALK
Mute
Hold
17
TELEPHONE OPERATIONS
Press the (soft key) Hold on the menu to hold
the line.
12:09 AM 04/06
TALK
Mute
Hold
Press the (soft key) Unhold to return to the
dialing screen and to your call.
Dialing (Tone/Pulse)
(See Page 25 for instructions)
BASIC BASE OPERATIONS
Making and answering calls
If you have call waiting service, press FLASH during a
call to answer a second call. To make a call, press
SPEAKERPHONE, then dial number. To end call,
press SPEAKERPHONE again.
FLA
SH
RED
IAL
1
DEF
5
JK
6
L
MN
O
8
9
WXY
Z
0
ST
3
ABC
TUV
BOO
2
#
RIN
ON/OGER
FF
Volume Control
VOLUME UP and VOLUME DOWN buttons are
used to adjust the volume of the ringer when
SPEAKERPHONE is not in use.
When using the SPEAKERPHONE, VOLUME UP and
VOLUME DOWN buttons are used to adjust the
volume of the speaker.
When using the Answering Machine,VOLUME UP
and VOLUME DOWN buttons are used to adjust
the volume of the answering machine during
message playback.
18
TELEPHONE OPERATIONS
Boost On/Off
The BOOST button controls the loudness of the
SPEAKERPHONE. Once the BOOST button is pressed,
an extra level of amplification is added over the entire
range of volume control.
Last number redialed
Press REDIAL to dial last number dialed from the base.
The last number dialed (up to 32 digits) is stored in
the redial memory until another number is dialed.
Flash
The FLASH button is activated to use custom calling
services such as Call Waiting or Three Way Calling.
Please contact your local telephone company for
information on these services.
FLA
SH
RED
IAL
1
ST
FLA
SH
RED
IAL
1
BOO
ST
2
ABC
FLA
SH
RED
IAL
1
2
BOO
ST
ABC
Mute
Press the MUTE button to turn the microphone off
on the SPEAKERPHONE.
BOO
2
UV
MUT
E
*
0
#
Page
Press PAGE button to page handset. To stop Paging, do
one of the following:
1. Press the PAGE button again on the base.
2. Press the (soft key) EXIT on the handset.
3. Wait for 2 minutes until paging times out.
PA G E
MUT
E
19
TELEPHONE OPERATIONS
Intercom from Base
INTERCOM AND PAGING
(The intercom will allow the person on the Handset to
speak to the person at the Base station.)
PA G E
Press the PAGE button on the base.
*
The screen on the handset will display “Page from Base.”
Press the (soft key) OK. This will turn the intercom ON.
To turn the intercom OFF, press the (soft key) EXIT
on handset.
12:09 AM 04/06
Page from base
OK
Exit
RINGER STYLE
6
JKL
Ringer Style
MN
O
8
The ringer style adjustments are located on the side of
the telephone base. The style of ring can be adjusted by
pressing the RING STYLE key. Six (6) styles are available
allowing you to customize the ring on the base. To
help choose a ring style, each ring tone will sound for
two (2) seconds as the choices are scrolled through.
9
TUV
WXY
Z
0
#
REC
OGM
DEL
Visual Ringer
PLAY
OGM
PLAY
STOP
FLAS
H
REW
1
F FWD
4
GHI
PA GE
7
PQRS
20
If additional handsets have been purchased, press the
page button on the base and the handset number you
wish to page on the base dial pad. To Page all handsets,
press Page then 0.
Visual ringers are located in the base. When an
incoming call is received, these lights will flash.
TELEPHONE OPERATIONS
Lamp Flasher
This function is only available with the optional C2210
Lamp Flasher Notification Accessory. Instructions
on use will come with purchase of Lamp Flasher. For
more information on purchasing contact Clarity at
1-800-426-3738.
Bed Shaker
This function is only available with the optional C2210
Bed Shaker Notification Accessory. Instructions on use
will come with purchase of Bed Shaker. For more information on purchasing contact Clarity at 1-800-426-3738.
OTHER FEATURES ON HANDSET
Ringer Setup
Use the Arrow buttons to scroll down the main menu
to Ringer Setup. Press the (soft key) Select to choose
Ringer Setup. Then choose from the submenu: Ringer
Tone or Keypad Tones.
Note: This is not a USB
port. Please see the C2210
Lamp Flasher instructions
for installation.
Note: Please see C2210
Bed Shaker instructions for
installation.
RINGER SETUP
12:09 AM 04/06
Phonebook
Ringer setup
Visual ringer
Exit
Select
MENU
Ringer Tone: The default Ringer tone will be set to
(Ring Tone 1). To change ring tone, select Ringer tone
from the submenu. Note: There are six (6) Ring
Tones to choose from.
Use the Arrow buttons to scroll up and down to choose
the ringer style. The ring styles will play as the selections
are scrolled through. (The ringer Off/On switch must
be On). Select the desired ring tone and then press the
(soft key) Save. This will take you back to the submenu.
12:09 AM 04/06
Ringer tone
Keypad tones
Back
Select
12:09 AM 04/06
Ringer tone
Ring Tone 1
Back
Save
21
TELEPHONE OPERATIONS
Keypad Tones: The Keypad Tones are defaulted to
On. To turn the keypad tones Off, go to the Keypad
tones, and press the (soft key) Select.
12:09 AM 04/06
Ringer tones
Keypad tones
Back
Select
12:09 AM 04/06
Keypad tones
On
Back
Save
Use the Arrow buttons to scroll down to On or Off.
Make your selection, and then press the (soft key) Save.
HANDSET VISUAL RINGER
Visual Ringer
A Visual ringer is located in the handset. When an
incoming call is received, the light will flash.
To turn off the Visual Ringer select Menu, scroll down
to Visual Ringer and press Select. Next, scroll to Off
and press the (soft key) Save.
The visual ringer will also blink when there are new
messages on the answering machine.
HELP KEY/MEMORY STORAGE
HELP Key / Memory Storage
BOOST
IMPORTANT: The
HELP Button is NOT
pre-programmed for
911. We do not recommend programming 911 into your
phone memory.
22
The HELP Button can be programmed with up to
24 digits.
1.
2.
3.
4.
Press the HELP Button.
Dial the number you wish to store.
Press the HELP Button again.
A long beep will indicate the programming
process is complete.
To Place Call Using Help Key
Press the Help Button
(The phone will dial the preprogrammed number)
TELEPHONE OPERATIONS
Date and Time
Note: If you have Caller ID service the Date and
Time will automatically set when you receive your
first call. (Caller ID will not auto set Day of Week)
SELECT DATE AND TIME
12:09 AM 04/06
Boost override
Initial setup
Date & Time
Exit
Select
Select DATE AND TIME on the menu screen.
The screen will then display a time with the
hour blinking.
Use the key pad to enter the desired time.
Four digits must be entered: (08:25). Press the
(soft key) AM/PM to change from AM to PM.
SET TIME
12:09 AM 04/06
Time:
03:42 PM
Save
AM/PM
Press the Arrow buttons down and Time format will
appear on the screen. Use the (soft key) Change to
select the desired time format: 12 hour clock or a
24 hour clock.
SELECT TIME FORMAT
Press the Arrow button down again and choose Date
format. Use the (soft key) Change to select DD/MM
or MM/DD. (DD/MM stands for Date/Month and
MM/DD stands for Month/Date.) Press the Arrow
button down again to enter the Date. Four digits
must be entered: (04/06).
SELECT DATE FORMAT
12:09 AM 04/06
Time format:
12 hour clock
Save
Change
12:09 AM 04/06
Date format:
MM/DD
Save
Change
23
TELEPHONE OPERATIONS
SET MONTH AND DATE
12:09 AM 04/06
Date (MM/DD)
04/06
Once the date and time have been entered, press the
(soft key) Save to save settings.
Save
12:09 AM 04/06
WEEKDAY
FRI
Save
Change
Press the Arrow button down again and choose the
weekday. Use the (soft key) Change to select day of the
week. Once the day of the week has been entered, press
the (soft key) Save to save setting.
INITIAL SETUP
INITIAL SETUP
12:09 AM 04/06
Boost Override
Initial setup
Date & Time
Exit
Select
INITIAL SETUP
12:09 AM 04/06
Registration
Auto Talk
Answer Setup
Back
Select
24
Select Initial Setup on the main menu. The sub menu
will then display:
Registration
Auto Talk
Answer Setup
Language
Dialing Mode
LCD Contrast
Registration
The handset that comes with the base will automatically
be registered to the base. It will be named Handset 1.
The C4230 will support up to 3 additional handsets. If
any additional handsets are purchased, the registration
instructions will come with the purchased handset.
Contact Clarity Customer Service for information on
purchasing additional handsets.
TELEPHONE OPERATIONS
Auto Talk
Auto Talk allows the user to remove the Handset from
the base during an incoming call and immediately start
talking without pressing the Talk Button.
Auto Talk’s default is set to Off. When picking the
handset off the base, press the Talk button to answer
the phone.
SETTING AUTO TALK
12:09 AM 04/06
Auto Talk:
ON
Back
Save
MENU
For the handset to automatically answer after removing
it from the base, set Auto Talk to ON.
Select Auto Talk on the submenu. Scroll to ON or
OFF, select the preferred setting, and then press the
(soft key) Save.
Telephone Answering Machine (Answer Setup)
(See page 33 for setup instructions.)
Dialing Mode
Tone or Pulse
Based on the type of telephone service you have, use
tone for touch-tone service or pulse for rotary dialing.
SETUP DIALING MODE
12:09 AM 04/06
Auto Talk
Answer Setup
Dialing Mode
Back
Select
Select Dialing Mode on the submenu. “Tone” or “Pulse”
will then be displayed. The pointer will be pointed to
the current setting.
Use the Arrow buttons to scroll between Tone
and Pulse.
Press the (soft key) Save to save the setting and return
to the Main Menu Screen.
Or
SELECT DIALING MODE
12:09 AM 04/06
Tone
Pulse
Back
Save
Press the * button and dial number to temporarily
switch from pulse to tone.
25
TELEPHONE OPERATIONS
LCD Contrast
SET LCD CONTRAST
12:09
AM
Select LCD Contrast on the submenu.
04/06
LCD contrast
Lo
Hi
Back
Save
MENU
Use the Arrow buttons to scroll from Lo to Hi. Select
the desired setting and then press the (soft key) Save.
This will save the setting and return to the Main
Menu Screen.
Language Menu
12:09 AM 04/06
Auto Talk
Answer Setup
Language
Back
Select
Select Initial setup on the main menu.
MENU
12:09 AM 04/06
English
Francais
Español
Back
MENU
Save
Use the Arrow buttons to scroll down and select
language on the menu. Choices include English, French
or Spanish. Make selection, and press the (soft key) Save.
Press the MENU button to return to the main screen.
Handset Phonebook /Memory Storage
The C4230 will hold up to 40 names in the phonebook.
The maximum characters for the name entry are 10.
Up to 24 digits can be entered for the phone number.
Error tones and timeouts
If more than 10 characters for the name or 24 digits for
the phone number are entered an error tone will sound
and the character or number will not be accepted.
To enter a pause, dial the number, and press the pound
# button twice or press the RD/P Button. This will
enter a two (2) second pause.
26
TELEPHONE OPERATIONS
New Phone book entries
SELECT PHONEBOOK
To enter names:
12:09 AM 04/06
Caller list
Messages
Phonebook
Exit
Select PhoneBook in the main menu.
Select “Add New Name”on the sub menu. “Name:”
will be displayed on the screen. Type in the name using
the dialing pad. If a mistake is made press the (soft key)
Clear to clear the last letter. To add a space between
names press the POUND (#)button.
Select
NEW PHONEBOOK ENTRY
12:09 AM 04/06
(Add New/Name)
Select
Search
EXAMPLE
Press once to enter “A”
ABC Press twice to enter “B”
2 Press 3 times to enter “C”
Press 4 times to enter “2”
TALK
ME NU
4
GHI
CL/FL
RD/P
1
2
ABC
5
3
DEF
Next, press the Arrow button down to enter
phone number.
ADDING NAME TO PHONEBOOK
12:09 AM 04/06
Name:
–
Save
Clear
MENU
To enter phone number:
After pressing the Arrow button down, “Number: ” will
be displayed on the screen.
Type in the number using the keypad. If a mistake is
made press the (soft key)Clear to clear the last digit.
NEW PHONE NUMBER ENTRY
12:09 AM 04/06
NUMBER:
–
Save
Clear
Press the (soft key) Save and the number and the name
will be saved.
If the Names list is full while the user selects New
Entry, the word “FULL” is displayed on the screen.
Press Exit to return to the NAMES menu. If the Names
memory is full, a new entry can be entered after the
deletion of another entry.
27
TELEPHONE OPERATIONS
To Edit or Erase Entries
12:09 AM 04/06
(Add new name)
Clarity
Options
View
Use the Arrow buttons to browse through the phonebook. Select the desired name to edit or delete, and
press the (soft key) Option.
MENU
The screen will display Edit or Erase. Select Edit.
12:09 AM 04/06
Edit
Erase
Select
Exit
MENU
To edit name use the (soft key) Clear to clear the letters
of the name. Retype in the changes then press the (soft
key) Save to save the changes.
12:09 AM 04/06
Name
Clarity
Save
Clear
MENU
To Erase Name and Number select the (soft key) Erase.
“Erase phonebk Entry” will appear.
12:09 AM 04/06
Edit
Erase
Select
Erase
MENU
Choose Yes to erase entry or No to keep entry as is.
After making a selection, the main phonebook menu will
reappear on the screen.
12:09 AM 04/06
Erase
Phonebk Entry
Yes
No
MENU
28
TELEPHONE OPERATIONS
Saving Caller ID information into Phonebook
Select Caller List on the Main Menu. Then select the
desired name to be stored into the phonebook.
12:09 AM 04/06
Caller List
Messages
Phone Book
Exit
Select
MENU
Press the (soft key) Options. Then use the Arrow
buttons to scroll down to Store.
Press the (soft key) Select to store the name and
number into the phonebook.
Phonebook Search
12:09 AM 04/06
1 of 3
Clarity
(800) 426-3738
Options
12:09 AM 04/06
Erase
Erase all
Store
Exit
12:09 AM 04/06
Select Phonebook on the main menu.
Use the Arrow buttons to scroll down the list of
names stored in the phonebook. The list of names
will be stored alphabetically.
Press the (soft key) View to view name and number.
Select
Clarity
PhoneBk
Menu
MENU
12:09 AM 04/06
If there is no entry to select, “Empty List” will display.
Clarity
Options
View
MENU
29
TELEPHONE OPERATIONS
12:09 AM 04/06
Clarity
(800) 426-3738
Exit
Format
When viewing the phonebook entry, press the (soft key)
Format to place the area code in parenthesis or add 1 in
front of the area code.
To dial from phonebook
Select the desired name and number from the phonebook and press the TALK button. This will automatically
dial the selected phonebook entry.
CALLER ID OPERATIONS
NOTE: This is a service that is provided through your local
telephone company.
This telephone will automatically display the incoming
caller’s name and number along with the date and time
of the call. It will record up to forty (40) calls and store
the data into memory.
12:09 AM 04/06
Clarity
(800) 426-3738
Incoming Call
Phone Bk
Menu
MENU
Incoming Call
“Incoming Call” will blink on the handset display when
a new call is received. The first row on the display will
have the caller’s ID. If there is no information, the row
will be blank. The second row displays the incoming
telephone number. If the number is longer than 12
digits, the LCD will toggle the displayed number
between the first 12 digits and the remaining digits.
Receiving Call Waiting Caller ID
When you are on an existing call, a tone will emit,
and the caller ID will display the incoming caller’s
information.
If the 2nd incoming call is not accessed, the Caller
ID information will be transferred into the Caller log.
This caller information is considered “old”.
30
TELEPHONE OPERATIONS
Caller ID Review
If there is new call information, the display will show
the number of new calls received before they have
been reviewed.
12:09 AM 04/06
Caller List
Messages
Phone Book
Exit
Select
Select Caller List from the main menu. Use Arrow
buttons to scroll up or down to view the Caller ID
content. The first row of the display indicates the
sequence of calls received. Press the Arrow button
down to scroll through the Caller ID information
from the most recent record to the oldest.
No calls
If the Caller ID list is empty, the display will show
“No Calls.”
MENU
12:09 AM 04/06
No Calls
Exit
MENU
Unknown call
If a call is from another country or the caller’s number
is not available, UNKNOWN is displayed and stored in
the Caller ID log.
Block Call
If the number is blocked or withheld, PRIVATE is
displayed and stored in Caller ID log.
12:09 AM 04/06
Incoming call
Unknown
Phone Bk
Menu
12:09 AM 04/06
Incoming call
Private
Phone Bk
Menu
Callback From Caller ID Information
The desired CID record should be selected from the
CID list. Press TALK once. The unit will automatically
go off-hook and dial the selected number.
31
TELEPHONE OPERATIONS
Erasing Caller ID Information
12:09 AM 04/06
3 of 3
Clarity
(800) 426-3738
Options
Choose erase on the sub-menu, and then press the
(soft key) Select.
12:09 AM 04/06
Erase
Erase all
Store
Exit
Select
To erase all entries, scroll down to Erase All.
12:09 AM 04/06
Erase
Erase all
Store
Exit
Press the (soft key) Select.
Select
The screen will display “Erase All”. Press the
(soft key) Yes.
12:09 AM 04/06
Erase all
Exit
Yes
The screen will then display “Caller ID Entries Erased.”
12:09 AM 04/06
Caller ID
Entries erased
Exit
32
Select the desired CID record you would like to delete.
Next, press the (soft key) Options.
TELEPHONE OPERATIONS
BASIC BASE FUNCTIONS
ANSWERING MACHINE
Message Capacity
The answering machine will hold up to 10 minutes
of messages.
The Telephone Answering Machine can be accessed in
the following three ways:
• Access from the Base
• Access from the Handset
• Access from a remote location.
ACCESS ANSWERING MACHINE
FUNCTIONS FROM BASE
On/Off
Press the ON/OFF button on the base to turn the
answering machine ON or OFF.
ON
OFF
DEL
REC
OGM
PLAY
OGM
Rew (Rewind)
Press the REW (Rewind) button to rewind the message
being played.
Press REW mulitiple times to go to the
previous messages.
STOP
1
REW
4
F FWD
GHI
7
Stop
Press the STOP button to stop the Message being played.
33
TELEPHONE OPERATIONS
FFWD
Press the FFWD (Forward) button to forward to the
next message.
Play
DEL
REC
OGM
PLAY
OGM
Press the PLAY button to play the messages received.
When playback begins, the number of new messages
received will be announced, as well as the day and time
message was recorded.
PLAY
STOP
Delete
DEL
REC
OGM
Press the DELETE button to delete the message being
played back on the answering machine.
PLAY
OGM
PLAY
Press and hold the DELETE button when a message is
playing until the number of messages begins to blink.
After the number of messages begins blinking, press the
DELETE button again. This will Delete all messages.
STOP
OGM Rec (Outgoing Message)
(The outgoing message will be the message a caller
hears when the answering machine answers the call.)
Note: The answering machine comes with a
pre-recorded message that can be used.
DEL
REC
OGM
Press the REC OGM button (1) release and record
your own personal outgoing message, press the
REC OGM button again to stop your recording. Your
message will automatically play back to you. If you do
not like your message, record your message again.
PLAY
OGM
1
PLAY
STOP
See page 36 for additional OGM Options.
OGM Play (Outgoing Message)
DEL
REC
OGM
PLAY
STOP
34
PLAY
OGM
2
Press the PLAY OGM button (2) to play the
outgoing message.
TELEPHONE OPERATIONS
LED Screen
3
The screen will display the number of messages
received on the answering machine.
ON
OFF
DEL
Access Answering Machine functions
from Handset
Select Messages from the Main Menu screen. The sub
menu will then be displayed. Press the number key on
the handset or press the (soft-key) Select on the menu
to activate each of the following functions.
1: Review
2: Play/Stop
3: Skip
4: Answer On/Off
5: Memo
6: Repeat Menu
0: Erase
REC
OGM
PLAY
OGM
12:09 AM 04/06
Caller List
Messages
Phonebook
Exit
Select
12:09 AM 04/06
1. Review
2. Play/Stop
3. Skip
Select
Exit
12:09 AM 04/06
4. Answr ON/OFF
5. Memo
6. Repeat Menu
Select
Exit
MENU
12:09 AM 04/06
5. Memo
6. Repeat Menu
0. Erase
Select
Exit
Note: For best results when recording the outgoing
message, speak directly into the base microphone (see
diagram on page 9) or record message through the
handset (see instructions on page 37).
MENU
35
TELEPHONE OPERATIONS
OTHER HANDSET OPTIONS
FOR ANSWERING MACHINE
12:09 AM 04/06
Data Transfer
Mute Talk
Answer Setup
Back
Select
12:09 AM 04/06
Answer ON/OFF
Outgoing Msg
Ring Number
Back
Select
12:09 AM 04/06
Answer ON/OFF
Outgoing Msg
Ring Number
Select
Exit
The options below can be accessed by going to the
Main Menu and selecting Initial Setup. Use the Arrow
keys to scroll to Answer Setup, and press the
(soft-key) Select.
Answer On/Off
To turn Answering Machine ON/OFF from the handset.
Select Answer ON/OFF. Then Save your choice.
Outgoing Messages
Select Outgoing Msg. Choose one of the following
options: Play OGM, Record OGM, Change OGM, or
Erase OGM.
MENU
12:09 AM 04/06
Ring Number
Security ID
Playback Speed
Select
Exit
12:09 AM 04/06
Message Play Speed
Slow
Save
Exit
36
Slowdown Message Playback Speed
Select Playback Speed from the submenu. Then, scroll
and select the desired speed to playback messages.
Choose one of the following: Normal, Slow, or Slowest
and press the (soft key) Save.
TELEPHONE OPERATIONS
Play OGM
Press the (soft key) Select to play outgoing message.
Record OGM
Use the Arrow button to scroll to Record OGM and
the press the (soft key) Select.
12:09 AM 04/06
Play OGM
Record OGM
Change OGM
Select
Exit
12:09 AM 04/06
Play OGM
Record OGM
Change OGM
Exit
Select
MENU
A new screen will appear. Select Yes to record outgoing
message or No to return to previous menu.
12:09 AM 04/06
Record
OGM
No
Yes
MENU
Change OGM
Use the Arrow button to scroll to Change OGM and
press the (soft key) Select.
12:09 AM 04/06
Record OGM
Change OGM
Erase OGM
Exit
Select
MENU
A new screen will appear. Then select Recorded OGM
or Default OGM (the prerecorded message).
12:09 AM 04/06
Default OGM
Recorded OGM
Exit
Select
37
TELEPHONE OPERATIONS
Erase OGM
12:09 AM 04/06
Erase
Recorded OGM
No
Yes
12:09 AM 04/06
Answer ON/OFF
Outgoing Msg
Ringer Number
Exit
Select
Use the Arrow button to scroll to Erase OGM. A new
screen will appear. Select Yes or No to Erase.
Ring Number
Select Ringer Number.
MENU
12:09 AM 04/06
Set Ring Number
5 Rings
6 Rings
Exit
Save
Scroll up or down to select the desired number of rings
to have before the Answering Machine answers.
Note: The options are 3-6 rings or toll saver.
Toll Saver
Toll Saver is for remote access.
If you call your phone from a remote location and your
answering machine picks up on the second ring, you have
a new message. If your answering machine picks up after
three (3) or more rings, you do not have a new message.
See page 40 for more Remote Access Options.
38
TELEPHONE OPERATIONS
Security ID
The Security ID is to access the Answering Machine
from a Remote Location. The ID is defaulted as 1 2 3.
To change the Security ID, select Security ID and enter
the three (3) digit code you wish to set as your new
Security ID number.
• First select Initial Setup on the main menu.
12:09 AM 04/06
Visual Ringer
Boost Override
Initial Setup
Exit
Select
• Select Answer Setup.
12:09 AM 04/06
Data Transfer
Auto Talk
Answer Setup
Back
Select
• Select Security ID.
12:09 AM 04/06
Outgoing Msg
Ring Number
Security ID
Exit
Select
• Enter the three (3) digit code you wish to set as
your new Security ID number.
12:09 AM 04/06
Security ID
Exit
Save
39
TELEPHONE OPERATIONS
Access from a Remote Location
The answering machine can be accessed from any
touch-tone telephone by entering the three (3) digit
security code after hearing the outgoing message.
Access Procedure:
1. Dial your phone number
2. Wait for the Answering Machine to pick up and
issue the tone. Enter the security code. The
DEFAULT CODE is 1 2 3. (The security code can
be changed by the user. See section Security
ID on page 39)
3. The menu will announce the following:
Press Two to Play Messages, Press Two again to Stop
Press Zero while playing a Message to Erase
Press One to Review
Press Three to Skip
Press Four to Turn OFF/ON
Press Seven to Review Menu Again
Bypass the Outgoing Message
Press any number after the announcement starts. The
outgoing message will be bypassed, and a tone will be
heard. The caller will be able to leave a message or
enter the security code.
Remote ON while Answering Machine is OFF
If the Answering Machine is OFF, it will automatically
answer on the 10th ring and announces “TAM off.”
Wait 7 seconds to enter the security ID.
The answering machine can be turned ON by pressing
key four (4) after the security code is entered.
40
TELEPHONE OPERATIONS
Memory is full
If the answering machine memory is full, the answering
machine will answer on the 10th ring and announce
“Memory Full.” Wait seven (7) seconds to enter the
security code.
Recording and playing memos
Memos are self-recorded messages. For example, a
reminder to yourself or a message for someone else in
your household. The memos can be saved, played back
and deleted like incoming messages.
Recording Memos
Select Memo from the Message Menu.
12:09 AM 04/06
3: Skip
4: Answer ON/OFF
5: Memo
Select
Exit
MENU
It will automatically start recording. After a memo
is recorded, press the (soft key) End. This will save
the memo.
The TALK button will then flash displaying a new
MEMO (message).
12:09 AM 04/06
Recording
Memo
End
Exit
Note: Memos reduce
the overall recording
time available on the
answering machine.
41
TROUBLESHOOTING
The unit will not operate / no dial tone:
• Verify the AC Adapter is securely plugged into AC outlet, the
base and the telephone.
• Verify the telephone line cord is securely plugged into the wall
jack and the telephone.
• Make sure the battery has been placed in the battery compartment correctly. (The circular metal contacts on battery need
to touch the metal springs inside battery compartment.)
• Make sure the handset battery is fully charged.
• Verify the telephone is in the correct dialing mode tone (touch)
or pulse (rotary).
• Make sure you are in the usable range of the base station.
The phone does not ring when you receive a call:
• Make sure the RINGER switch on the handset and base are
set to ON.
• Verify the AC Adapter is securely plugged into the AC outlet,
the base and the telephone.
• Verify the telephone line cord is securely plugged into the
wall jack and the telephone.
• Make sure you are within the usable range of the base station.
• You may have too many extensions on your line. Try unplugging
a few devices.
Noise, Static, Interference or Other Calls Heard while
Using the Handset:
• Make sure you are within the usable range of the base station.
• Make sure the handset battery is fully charged.
• Try relocating the base unit to another location.
• Make sure the AC Adapter is not plugged into the wall outlet
with other appliances.
42
TROUBLESHOOTING
Phone Will Not Hold Charge:
• Make sure the charging contacts on the handset and base
are free of dust and dirt. While unplugged, clean the contacts
with a soft cloth.
• Make sure CHARGE LED on the base is lit when the handset
is in the cradle.
• Handset battery may have developed a memory, due to user
improperly charging, and may need to be replaced. (Battery
must be charged a full 12 hours before the first use.)
Difficulty in Placing or Receiving Calls:
• Move closer to the base and try again.
• Make sure you have selected the correct dialing mode, tone
or pulse.
• Make sure the AC Adapter is not plugged into a wall outlet
with other appliances. Disconnect for 5-10 seconds then
reconnect. Place the handset back on the base and reinsert
the AC Adapter.
• Make sure the handset battery is fully charged.
Your handset screen is showing Out of Range
• Move closer to the base.
• Place the handset into the base until the screen displays:
“Handset Registered.” It will take approximately 5-10
seconds for the handset to register to the base.
• Handset may need to be re-registered to the base manually.
First, select INITIAL SETUP on the main menu. Second, select
REGISTRATION on the sub-menu. The screen will then display
“Please hold the page button until beep.” This will register your
handset to the base. The screen will then display the
handset number.
43
TECHNICAL SPECIFICATIONS
General
Model Number:
Frequency:
Amplification:
C4230
5.8 GHz
50 dB
Handset Unit
Product in Inches:
Weight in Pounds:
(L x W x H): 7.25 x 2 x 1.25
0.5 lb.
Base
Product in Inches:
Weight in Pounds:
Power Supply:
(L x W x H): 7 x 7 .75 x 4.75
1.0 lb.
AC Adaptor (Input: 120V AC, 60 Hz;
Output: 9V DC, 500mA)
Handset and Base
Product in Inches:
Weight in Pounds:
(L x W x H): 7.80 x 5.25 x 5.75
1.50 lbs.
Additional Handsets
Clarity Part number: C4230 HS
The C4230 will support a total of three (3) additional handsets.
(Additional Handsets sold separately.)
Battery Information
Battery Type:
Battery Life Talk Time:
Battery Life Standby:
Battery Backup:
Ni-MH AAA 800 mAh 3.6V
3-4 Hours
6 days
alkaline batteries, AA type
4 batteries, not rechargeable
Contact Clarity customer service for information on
purchasing additional handsets or replacement battery.
Clarity Contact information:
Customer Service: 1-800-426-3738
Address:
4289 Bonny Oaks Drive,
Suite 106
Chattanooga, TN 37406
44
REGULATORY COMPLIANCE
Part 68 of FCC Rules
Information
a) This equipment complies with Part
68 of the FCC rules and the requirements adopted by the ACTA. On the
bottom of this equipment is a label that
contains, among other information, a
product identifier in the format US:
AAAEQ##TXXXX. If requested, this
number must be provided to the telephone company.
d) If this telephone equipment causes
harm to the telephone network, the
telephone company will notify you in
advance that temporary discontinuance of service may be required. But
if advance notice isn’t practical, the
telephone company will notify the
customer as soon as possible. Also,
you will be advised of your right to
file a complaint with the FCC if you
believe it is necessary.
b) A plug and jack used to connect this
equipment to the premises wiring and
telephone network must comply with the
applicable FCC Part 68 rules and requirements adopted by the ACTA. A compliant
telephone cord and modular plug, RJ11C
USOC, is provided with this product. It is
designed to be connected to a compatible modular jack that is also compliant.
See installation instructions for details.
e) The telephone company may make
changes in its facilities, equipment,
operations or procedures that could
affect the operation of the equipment.
If this happens the telephone company
will provide advance notice in order
for you to make necessary modifications to maintain uninterrupted service.
The digits represented by ## are the
REN without a decimal point (e.g., 03 is
a REN of 0.3). For earlier products, the
REN is separately shown on the label.
state public utility commission, public
service commission or corporation
commission for information.
f) If trouble is experienced with this
telephone equipment, for repair or
warranty
information, please contact
c) The REN is used to determine the
Clarity,
1-800-552-3368.
If the equipnumber of devices that may be connected
to a telephone line. Excessive RENs on a ment is causing harm to the telephone
network, the telephone company may
telephone line may result in the devices
request that you disconnect the equipnot ringing in response to an incoming
ment
until the problem is resolved.
call. In most but not all areas, the sum of
RENs should not exceed five (5.0). To be
g) This telephone equipment is not
certain of the number of devices that may intended to be repaired and it contains
be connected to a line, as determined
no repairable parts. Opening the equipby the total RENs, contact the local tele- ment or any attempt to perform repairs
phone company. For products approved
will void the warranty. For service or
after July 23, 2001, the REN for this prorepairs, call 1-800-552-3368.
duct is part of the product identifier that h) Connection to party line service is
has the format US:AAAEQ##TXXXX.
subject to state tariffs. Contact the
45
REGULATORY COMPLIANCE
i) If your home has specially wired alarm
equipment connected to the telephone
line, ensure the installation of this telephone equipment does not disable your
alarm equipment. If you have questions
about what will disable alarm equipment,
consult your telephone company or a
qualified installer.
j) This telephone equipment is hearing
aid compatible.
Customer-Owned Coin/Credit
Card Phones:
This equipment generates, uses and can
radiate radio frequency energy and, if
not installed and used in accordance
with the instructions, may cause harmful
interference to radio communications.
However, there is no guarantee that
interference will not occur in a particular installation; if this equipment does
cause harmful interference to radio
or television reception, which can be
determined by turning the equipment
off and on, you are encouraged to try
to correct the interference by one of
the following measures:
To comply with state tariffs, the telephone company must be given notifica- 1. Where it can be done safely,
reorient the receiving television
tion prior to connection. In some states,
or radio antenna.
the state public utility commission, public service commission or corporation
2. To the extent possible, relocate
commission must give prior approval
the television, radio or other
of connection.
receiver with respect to the
telephone equipment. (This
Part 15 of FCC Rules
increases the separation between
Information
the telephone equipment and
the receiver.)
This device complies with Part 15 of the
FCC Rules. Operation is subject to the
following two conditions: (1) This device
may not cause harmful interference, and
(2) this device must accept any interference received, including interference
that may cause undesired operation.
Your equipment has been tested and
found to comply with the limits of
a Class B digital device, pursuant to
Part 15 of FCC rules. These limits are
designed to provide reasonable protection against harmful interference in
residential installation.
46
3. Connect the telephone equipment into an outlet on a circuit
different from that to which
the television, radio, or other
receiver is connected.
4. Consult the dealer or an
experienced Radio/TV
Technician for help.
CAUTION: Changes or modifications to this equipment not
expressly approved by the party
responsible for compliance could
void the user’s authority to operate
the equipment.
REGULATORY COMPLIANCE
Privacy of communications may not be
ensured when using this phone.
CAUTION: To maintain the compliance with the FCC’s RF exposure
guideline, place the base unit at least
20 cm from nearby persons.
For body worn operation, this handset
has been tested and meets the FCC
RF exposure guidelines when used
with the (Plantronics) accessories
supplied or designated for this product.
Use of other accessories may not
ensure compliance with FCC RF exposure guidelines.
Industry Canada Technical
Specifications
This product meets the
applicable Industry Canada
technical specifications.
Before installing this equipment, users
should ensure that it is permissible to
be connected to the facilities of the
local telecommunications company. The
equipment must also be installed using
an acceptable method of connection. In
some cases, the company’s inside wiring
associated with a single line individual
service may be extended by means of
a certified connector assembly (telephone extension cord). The customer
should be aware that compliance with
the above conditions may not prevent
degradation of service in some situations. Repairs to certified equipment
should be made by an authorized
Canadian maintenance facility designated by the supplier.
Any repairs or alterations made by the
user to this equipment, or equipment
malfunctions, may give the telecommunications company cause to request the
user to disconnect the equipment.
Users should ensure for their own
protection that the electrical ground
connections of the power utility, telephone lines and internal metallic water
pipe system, if present, are connected
together. This precaution may be particularly important in rural areas.
CAUTION: Users should not
attempt to make such connections
themselves, but should contact the
appropriate electrical inspection
authority, or electrician, as appropriate.
The Ringer Equivalence Number is an
indication of the maximum number of
terminals allowed to be connected to a
telephone interface. The termination on
an interface may consist of any combination of devices subject only to the
requirement that the sum of the Ringer
Equivalence Numbers of all the devices
does not exceed five.
(The term “IC:” before the certification/
registration number only signifies that
the Industry Canada technical specifications were met.)
This Class B digital apparatus complies
with Canadian ICES-003.
The party responsible for
regulatory compliance:
Clarity, A Division of Plantronics, Inc.
4289 Bonny Oaks Drive, Suite 106
Chattanooga, TN 37406
Phone: 1-800-552-3368
47