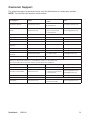
1
ViewSonic ® VNB141 NetBook - User Guide - Guide de l’utilisateur - Bedienungsanleitung - Guía del usuario - Pyководство пользователя - Οδηγός χρηστών - 使用手冊(繁中) - 使用手冊 (簡中) Model No. : VS13235 Compliance Information For U.S.A. This device complies with part 15 of FCC Rules. Operation is subject to the following two conditions: (1) this device may not cause harmful interference, and (2) this device must accept any interference received, including interference that may cause undesired operation. This equipment has been tested and found to comply with the limits for a Class B digital device, pursuant to part 15 of the FCC Rules. These limits are designed to provide reasonable protection against harmful interference in a residential installation. This equipment generates, uses, and can radiate radio frequency energy, and if not installed and used in accordance with the instructions, may cause harmful interference to radio communications. However, there is no guarantee that interference will not occur in a particular installation. If this equipment does cause harmful interference to radio or television reception, which can be determined by turning the equipment off and on, the user is encouraged to try to correct the interference by one or more of the following measures: • Reorient or relocate the receiving antenna. • Increase the separation between the equipment and receiver. • Connect the equipment into an outlet on a circuit different from that to which the receiver is connected. • Consult the dealer or an experienced radio/TV technician for help. Warning: You are cautioned that changes or modifications not expressly approved by the party responsible for compliance could void your authority to operate the equipment. For Canada This Class B digital apparatus complies with Canadian ICES-003. Cet appareil numérique de la classe B est conforme à la norme NMB-003 du Canada. FCC Radiation Exposure Statement This equipment should be installed and operated with minimum distance 20cm between the radiator & your body. Industry Canada Notice This wireless module device complies with Canadian RSS-210.To prevent radio interference to the licensed service, this device is intended to be operated indoors and away from windows to provide maximum shielding. Equipment (or its transmitting antenna) that is installed outdoors is subject to licensing. The installer of this radio equipment must ensure that the antenna is located or pointed such that it does not emit RF field in excess of Health Canada limits for the general population; consult Safety Code 6, obtainable from Health Canada’s web site www.hc-sc.gc.ca/rpb. ViewSonic VNB141 Important Safety Instructions 1. DO NOT press or touch the LCD Screen. DO NOT place notebook PC with small items, they may scratch LCD Screen or penetrate the vents of notebook PC. 2. DO NOT expose notebook PC to dirty or dusty environment. Keep the environment clean and dry. 3. DO NOT place notebook PC on uneven or unstable work surface. 4. DO NOT place or drop objects on the top of notebook PC. DO NOT shove any foreign objects into notebook PC. DO NOT close with force the LCD Screen lid. 5. DO NOT expose notebook PC to strong magnetic or electrical fields; DO NOT place floppy disks near or on notebook PC as this may cause the loss of data on the floppy disks. 6. DO NOT leave notebook PC facing the sun as it can damage the LCD Screen, especially when in a car. 7. SAFE TEMPERATURE: This notebook PC should only be used in environments with ambient temperatures between 5°C (41°F) and 35°C(95°F). 8. DO NOT expose notebook PC to or use near liquids, rain, or moisture. 9. Caution: there is a risk of explosion if the battery is replaced by an incorrect type. Dispose of used batteries according to the instructions. 10. DO NOT throw notebook PC in municipal waste. Check local regulations for disposal of electronic products. Please recycle the Battery Pack, and check with your Local Authority or retailer for an advice on recycling. 11. Notebook PC and its power adapter may produce some heat during operation or charging of its internal battery. DO NOT leave notebook PC on your lap or any part of your body in order to prevent discomfort or injury from heat exposure. 12. INPUT RATING: Refer to the rating label on notebook PC and make sure that the Power Adapter complies with that rating. Only use accessories recommended by ViewSonic. 13. Check the connections between the main unit and attached devices before turning on your notebook PC. 14. DO NOT use notebook PC during eating to avoid dirtying your notebook PC. 15. DO NOT insert anything into notebook PC that may result in short circuit or can damage the electronic circuits. 16. Power off your notebook PC, if you want to install or remove some external devices, which do not support hot-plugging-in. 17. Disconnect your notebook PC from the electrical outlet and remove any installed batteries before cleaning the notebook PC. Keep your notebook PC away from children. 18. DO NOT disassemble notebook PC. Only a certified service technician should perform repairs on your computer. 19. Use only the Battery Packs approved by ViewSonic. 20. Notebook PC has vents to disperse heat. DO NOT place notebook PC on soft objects (e.g.: bed, sofa, your lap) as this can block the air flow from those vents and cause system halt due to overheating. ViewSonic VNB141 ii Declaration of RoHS Compliance This product has been designed and manufactured in compliance with Directive 2002/95/ EC of the European Parliament and the Council on restriction of the use of certain hazardous substances in electrical and electronic equipment (RoHS Directive) and is deemed to comply with the maximum concentration values issued by the European Technical Adaptation Committee (TAC) as shown below: Substance Proposed Maximum Concentration Actual Concentration Lead (Pb) 0,1% < 0,1% Mercury (Hg) 0,1% < 0,1% Cadmium (Cd) 0,01% < 0,01% Hexavalent Chromium (Cr6+) 0,1% < 0,1% Polybrominated biphenyls (PBB) 0,1% < 0,1% Polybrominated diphenyl ethers (PBDE) 0,1% < 0,1% Certain components of products as stated above are exempted under the Annex of the RoHS Directives as noted below: Examples of exempted components are: 1. Mercury in compact fluorescent lamps not exceeding 5 mg per lamp and in other lamps not specifically mentioned in the Annex of RoHS Directive. 2. Lead in glass of cathode ray tubes, electronic components, fluorescent tubes, and electronic ceramic parts (e.g. piezoelectronic devices). 3. Lead in high temperature type solders (i.e. lead-based alloys containing 85% by weight or more lead). 4. Lead as an allotting element in steel containing up to 0.35% lead by weight, aluminium containing up to 0.4% lead by weight and as a cooper alloy containing up to 4% lead by weight. ViewSonic VNB141 iii Copyright Information Copyright © ViewSonic® Corporation, 2010. All rights reserved. Microsoft®, Windows®, Windows NT®, and the Windows® logo are registered trademarks of Microsoft® Corporation in the United States and other countries. ViewSonic®, the three birds logo, OnView®, ViewMatch™, and ViewMeter® are registered trademarks of ViewSonic® Corporation. Intel®, Pentium®, and Atom™ are registered trademarks of Intel Corporation. Disclaimer: ViewSonic® Corporation shall not be liable for technical or editorial errors or omissions contained herein; nor for incidental or consequential damages resulting from furnishing this material, or the performance or use of this product. In the interest of continuing product improvement, ViewSonic® Corporation reserves the right to change product specifications without notice. Information in this document may change without notice. No part of this document may be copied, reproduced, or transmitted by any means, for any purpose without prior written permission from ViewSonic® Corporation. Product Registration To meet your future needs, and to receive any additional product information as it becomes available, please register your product on the Internet at: www.viewsonic.com. The ViewSonic® Wizard CD-ROM also provides an opportunity for you to print the registration form, which you may mail or fax to ViewSonic®. For Your Records Product Name: Model Number: Document Number: Serial Number: Purchase Date: VNB141 ViewSonic NetBook VS13235 VNB141-1_UG_ENG Rev. 1A 01-11-10 Product disposal at end of product life ViewSonic® is concerned about the preservation of our environment. Please dispose of this product properly at the end of its useful life. For the recycling information, please refer to our website: 1. USA: www.viewsonic.com/company/green/recycle-program/ 2. Europe: www.viewsoniceurope.com/uk/support/recycling-information/ 3. Taiwan: recycle.epa.gov.tw ViewSonic VNB141 iv Contents Specifications .................................................................................................................................................. 1 Chapter 1 Introducing Your Notebook........................................................................................................... 4 1.1 Front Side ................................................................................................................................................... 5 1.1.1 MIC .................................................................................................................................... 6 1.1.2 Camera.............................................................................................................................. 6 1.1.3 Power Buttons ................................................................................................................... 6 1.1.4 Wireless (Blue) Bluetooth (Blue) Led ................................................................................ 6 1.1.5 Power (Blue) Led............................................................................................................... 6 1.1.6 Battery (Blue/Amber) Led.................................................................................................. 6 1.1.7 HDD (Blue) Led ................................................................................................................. 6 1.1.8 Number Lock (Blue) Led ................................................................................................... 6 1.1.9 Caps Lock (Blue) Led ........................................................................................................ 6 1.1.10 Program DJ (Blue) Led.................................................................................................... 7 1.1.11 WOW Audio Button.......................................................................................................... 7 1.1.12 WOW Video Button ......................................................................................................... 7 1.2 Right Side ................................................................................................................................................... 8 1.2.1 Headphone ........................................................................................................................ 8 1.2.2 Microphone........................................................................................................................ 8 1.2.3 USB 2.0 ............................................................................................................................. 9 1.2.4 ODD (Green) ..................................................................................................................... 9 1.3 Left Side.................................................................................................................................................... 10 1.3.1 Kensington Lock .............................................................................................................. 10 1.3.2 DC-in ............................................................................................................................... 11 1.3.3 CRT ................................................................................................................................. 11 1.3.4 HDMI ............................................................................................................................... 11 1.3.5 RJ-45 ............................................................................................................................... 11 1.3.6 e-SATA + USB ............................................................................................................... 11 1.3.7 Keyboard Shortcuts ......................................................................................................... 12 Chapter 2 The Power System (Windows 7)................................................................................................. 14 2.1 Power Management ................................................................................................................................. 15 2.1.1 Managing Your Notebook’s Power .................................................................................. 15 2.1.2 Power Management Modes ............................................................................................ 15 2.1.2.1 Sleep Mode ...................................................................................................... 15 2.1.2.2 Hibernate Mode ............................................................................................... 16 ViewSonic VNB141 v 2.1.3 Power Options Properties ............................................................................................... 16 2.1.3.1 Select a power plan ........................................................................................ 17 2.1.3.2 Power buttons and password protection ..................................................... 17 2.1.3.3 Create a power plan........................................................................................ 18 2.1.4 Speed Step ...................................................................................................................... 18 2.2 Battery ...................................................................................................................................................... 20 2.2.1 Battery Performance ....................................................................................................... 20 2.2.2 Checking the Battery Charge .......................................................................................... 20 2.2.3 Power Meter .................................................................................................................... 21 2.2.4 Low-Battery Warning ....................................................................................................... 21 2.2.5 Charging the Battery ....................................................................................................... 21 2.2.6 Low-Battery Warning ....................................................................................................... 22 2.2.7 Removing the Battery...................................................................................................... 22 2.2.8 Installing a Battery ........................................................................................................... 22 2.2.9 Storing a Battery .............................................................................................................. 22 2.2.10 Working With Extra Battery Packs ................................................................................ 23 2.2.11 Maximizing Battery Life.................................................................................................. 23 Chapter 3 The BIOS Setup Program ............................................................................................................ 24 3.1 Introduction.............................................................................................................................................. 25 3.2 Navigating through the BIOS Setup Program ...................................................................................... 26 3.2.1 System Setup ........................................................................................................................................ 26 3.2.2 Invoking setup ...................................................................................................................................... 26 3.2.2.1 Main Menu ....................................................................................................... 27 3.2.2.2 Advanced Menu .............................................................................................. 28 3.2.2.3 Security Menu ................................................................................................. 28 3.2.2.4 Boot Menu ....................................................................................................... 29 3.2.2.5 Exit Menu ......................................................................................................... 30 ViewSonic VNB141 vii Specifications CPU support • • • • Intel Celeron-M 723 ULV , 743 ULV Intel Pentium ULV and Celeron dual core series Core 2 Solo ULV series Core 2 Duo ULV series Chipset • • GS40 + ICH9M SFF (UMA ) GS45 + ICH9M SFF (Discrete ) Memory • DDR3, 1066Mhz, 2 slots; up to 8G • 2.5” SATA HDD HDD Display • 14“ WXGA(1366x768) Slim type 3.6mm Glare LCD Graphics Chip • Discrete ATI A12 M92 512MB DDR3/64-bit Camera • 1.3M (Build in Mic) Audio • • • • • 2-channel Stereo speaker , HD Audio Internal Mic (Digital type with camera module) 18Φ, 2 Watt Speaker x2 Audio Codec Realtek ALC272 Headphone-out/Line-out Communication • • • LAN: Giga-bit Ethernet Wireless LAN, 802.11 b, g, n / 802.11 b, g Bluetooth 2.1 ,EDR Keyboard • Compal generic Standard type , dimension 300X108.9X5.1mm • Support Super-multi DVD ODD Pointing Device • 2D Touch Pad without buttons Mini-card • 1 half-size WLAN card ViewSonic VNB141 1 I/O Ports • • DC-in jack • HDMI • One VGA port, 15 pins • RJ-45 jack x 1 • 3-in-1 Flash Card Reader(SD/MMC/MS) x 1 • Kensington lock x 1 USB 2.0 x 2 ports, E-SATA+USB x1 System Status Indicators (UI spec) LED indicator: • • • • Power Button (Blue) Caps Lock(Blue) Num Lock(Blue) Wireless Status Wireless (Blue) Bluetooth (Blue) • • • Power (Blue) Battery (Blue / Amber) HDD (Blue) Control buttons • Power On/ Off button Killer Switch • YES, for WLAN/Bluetooth AC Adapter • 45watt UMA , 65W DIS , Energy Star compliant Battery • • 6-cell, 18650 type, 2250mAh;6-cell, 18650 type, 2600mAh Battery Life ( estimation ) : UMA : 2.25A , 6.5 Hours 2.6A, 7.5 Hours Discrete : 2.25A , 4.4 Hours 2.6A, 5 Hrs Users Keys • • 1 button for Program DJ 2 Button for WoW AV to Change mode ViewSonic VNB141 2 Software • • • • • • • • • Phoenix BIOS • • Windows Vista Premium (32bits) Flash ROM 1MB Support multi-boot Suspend to RAM (S3)/Disk (S4) Support SMBIOS 2.4 ,PCI2.2 DMI utility for BIOS serial number configurable/asset tag Support PXE Wake on LAN from S3 Wake on LAN from S4 in AC mode OS Windows 7 32 bits (TBD by marketing) Security • Kensington lock Application SW Optional, Compal proprietary • • • • • • • • • Entrance Guard EzRemote EzTube Green Charger Program DJ3 Safety Guard SmartWD Wireless Enable Disable ( with hot-key OSD ) Wow Video & Audio3 Regulatory • • • EMI: FCC-B, CE, CCC, C-Tick, BSMI Safety: Compliant to UL/CSA, TUV, CB WHQL LOGO (Windows Vista / Win 7 ) ViewSonic VNB141 3 Chapter 1 Introducing Your Notebook ViewSonic VNB141 4 1.1 Front Side The following picture shows the front side of your notebook. 1 MIC 7 HDD Led 2 Camera 8 Num Lock Led 3 Power Button 9 Caps Lock Led 4 Wireless Led 10 Program DJ Led 5 Power Led 11 WOW Video Led 6 Battery Led 12 WOW Audio Led ViewSonic VNB141 5 1.1.1 MIC The camera supports a 1.3 mega pixels CMOS via USB2.0 interface, built in MIC. 1.1.2 Camera The built-in camera supports a 1.3 mega pixels CMOS via USB2.0 interface. 1.1.3 Power Buttons Press to turn your notebook on. Windows Vista, which comes preinstalled, goes into the shutdown sequence automatically if you press the power button while on. In Windows Vista, you can configure this in Control Panel > System and Maintenance or Hardware and Sound > Power Options > Change plan settings > Change advanced power settings. 1.1.4 Wireless (Blue) Bluetooth (Blue) Led It will enable/disable Wireless function. 1.1.5 Power (Blue) Led Power LED and Suspend LED indicate the systems power states by user combinations. 1.1.6 Battery (Blue/Amber) Led ( ) Battery states LED is one dual-color LED indicator both of Blue and Amber color. 1.1.7 HDD (Blue) Led ( ) Reflect the activities of Blue LED. Note: LED is controlled directly by hardware. 1.1.8 Number Lock (Blue) Led Reflect the activities of Blue LED. Note: LED is controlled directly by hardware. 1.1.9 Caps Lock (Blue) Led Reflect the activities of Blue LED. Note: LED is controlled directly by hardware. ViewSonic VNB141 6 1.1.10 Program DJ (Blue) Led Reflect the activities of Blue LED. Note: LED is controlled directly by hardware. 1.1.11 WOW Audio Button WOW Audio is a setting assortment for audio conditions preset in Tone, Bass, Balance and Volume. 1.1.12 WOW Video Button WOW Video is a setting assortment for Video conditions preset in color Defines. ViewSonic VNB141 7 1.2 Right Side 1 Headphone 2 Microphone 3 USB 2.0 4 ODD (Green) 1.2.1 Headphone The High-Definition Multimedia Interface (HDMI) is a compact audio/video connector interface for transmitting uncompressed digital streams. It represents a digital alternative to consumer analog standards such as Radio Frequency (RF) coaxial cable, composite video, S-Video, SCART, component video, D-Terminal, and VGA 1.2.2 Microphone The High-Definition Multimedia Interface (HDMI) is a compact audio/video connector interface for transmitting uncompressed digital streams. It represents a digital alternative to consumer analog standards such as Radio Frequency (RF) coaxial cable, composite video, S-Video, SCART, component video, D-Terminal, and VGA ViewSonic VNB141 8 1.2.3 USB 2.0 USB is a peripheral expansion standard that supports data-transfer rates up to 480 Mbps. USB peripherals has a single standard for cables and connectors. You can install and remove USB devices while the computer is on. This is called “hot swapping”. 1.2.4 ODD (Green) The optical disc drive provides a means for you to import/export data into/from your notebook. Depending on the configuration of your notebook, you may either be able to record or play CDs/DVDs. ViewSonic VNB141 9 1.3 Left Side 1 Kensington Lock 2 DC-in 3 CRT 4 HDMI 5 RJ-45 6 e-SATA + USB 1.3.1 Kensington Lock A Kensington Security Slot is a small, metal-reinforced hole found on almost all small or portable computer and electronics equipment, particularly on expensive and/or relatively light ones, such as laptops, computer monitors, desktop computers, gaming consoles, and video projectors. It is used for attaching a lock-and-cable apparatus, in particular those from Kensington. ViewSonic VNB141 10 1.3.2 DC-in Use this connector to attach the AC adapter to your notebook. You can connect an AC adapter when your notebook is switched on or off. While the AC adapter works with electrical outlets worldwide, power connectors and power strips vary by country. Ensure you use a compatible cable or correctly connect the cable to the power strip or electrical outlet. Failure to do so may cause fire or damage to equipment. 1.3.3 CRT Use this port to connect an external monitor to your computer. 1.3.4 HDMI The High-Definition Multimedia Interface (HDMI) is a compact audio/video connector interface for transmitting uncompressed digital streams. It represents a digital alternative to consumer analog standards such as Radio Frequency (RF) coaxial cable, composite video, S-Video, SCART, component video, D-Terminal, and VGA. 1.3.5 RJ-45 The RJ-45 network jack allows you to connect your notebook to a local area network (LAN). Be careful not to plug the telephone line into the slightly larger network connector. 1.3.6 e-SATA + USB Use this port to connect an e-SATA or USB device, such as a mouse, external storage device, external keyboard, or printer to the computer. ViewSonic VNB141 11 1.3.7 Keyboard Shortcuts Hotkey Help Sleep LCD/CRT switch Brightness Down Brightness Up TouchPad ON TouchPad OFF Speaker ON/OFF Volume Down Volume Up Window Mobility Center Blank ViewSonic VNB141 12 Wireless/Bluetooth on/off Media Play Media Stop Media Previous Track Media Next Track ViewSonic VNB141 13 Chapter 2 The Power System (Windows 7) ViewSonic VNB141 14 2.1 Power Management ¾ Managing Your Notebook’s Power ¾ Power Management Modes ¾ Power Options Properties ¾ Speed Step 2.1.1 Managing Your Notebook’s Power See 7.2 Battery for more information on getting the best performance from the battery packs. Use your notebook connected to an electrical outlet as often as possible as the battery life expectancy is affected by the number of times it is charged. Your notebook comes with built-in power management. You can configure it through the Power Options program in the Control Panel, to sleep, hibernate, and wake according to the specific situations. The Advanced settings can be accessed via Start > Control Panel > System and Maintenance > Power Options. On the Select a power plan page, click Change plan setting under the plan that you want to change. Click Change advanced power settings. Expand the Power buttons and lid category to configure the settings. When leaving your notebook unattended for the long period, place it in Standby or Hibernate Mode. You can exit either power management mode by pressing the Power Button. 2.1.2 Power Management Modes 2.1.2.1 Sleep Mode This mode conserves power by switching off the hard drive and display after the preset period of inactivity (a time-out). When Sleep Mode is exited, your notebook will return to the same operating state it was before entering sleep. In Sleep Mode, if your notebook loses power from both of the electrical outlet and the battery, the data in your notebook may be lost. ViewSonic VNB141 15 To enter Sleep Mode in Windows Vista: Start > > Sleep. Or Set your notebook to enter Sleep Mode, as you: • Close the lid of your notebook • Press the power button • Press the start menu power button The settings can be accessed via Power Options: Advanced settings window. See 7.1.1 Managing Your Notebook’s Power. To exit Sleep Mode, please press the Power Button. You cannot exit Sleep Mode by using any key or the Touch Pad. For more information on Sleep Mode, see 2.1 Turning Your Notebook On and Off. 2.1.2.2 Hibernate Mode In Hibernate Mode, power is conserved by system data being copied to the hard drive, and your notebook is completely shut down. While Hibernate Mode is exited, your notebook will return to the same operating state it was in before entering Hibernate Mode. Hibernate Mode can be enabled/disabled in the Power Options window. Your notebook will go into Hibernate Mode if the battery charge level becomes critically low. Depending on how you set the Power Management Options in the Power Options window, use one of the following methods to enter Hibernate Mode: • Close the lid of your notebook • Press the power button • Press the Start menu power button • Start > > Hibernate. The settings can be accessed via Power Options: Advanced settings window. See 7.1.1 Managing Your Notebook’s Power. To exit Hibernate Mode, press the Power Button. You cannot exit Hibernate Mode by using any key or the Touch Pad. For more information about Hibernate Mode, see 2.1 Turning Your Notebook On and Off 2.1.3 Power Options Properties To access the Windows Power Options window: Start > Control Panel > System and Maintenance > Power Options ViewSonic VNB141 16 2.1.3.1 Select a power plan Windows Vista provides three preset power plans-Balanced, Power saver, and High performance. Each plan has the different time-out settings for turning off the display and entering Sleep Mode. You do not need to make any further adjustments to set the performance level. To change setting for the plan, click the following three items on the left pane of the Power Options window. • Choose when to turn off the display • Change when the computer sleeps • Adjust the display brightness After selecting a plan, you can see the percentage of battery charge remaining and active power plan by moving the mouse pointer over the battery meter icon on the taskbar. For more information on changing advanced power settings, see the Windows Help and Support. To maximize battery power, use the Power saver plan. 2.1.3.2 Power buttons and password protection Select Require a password on wakeup, Choose what the power buttons does, or Choose what closing the lid does from the left pane of the Power Options window. There are two main settings in this section: • Power button and lid settings • Password protection on wakeup Depending on your operating system, program the following functions by clicking an option from the corresponding pull-down menu in Advanced settings window, and then clicking OK to save your settings and close this window. For more information on accessing the Advanced settings window, see 7.1.1 Managing Your Notebook’s Power. Set the computer to Do nothing / Sleep / Hibernate / Shutdown when you press the power button. • Set the computer to Do nothing / Sleep / Hibernate / Shutdown when you close the laptop lid • ViewSonic Select the password requirement when the computer wakes from sleep. VNB141 17 2.1.3.3 Create a power plan Besides three preset power plans offered in Windows Vista, you can also customize your own power plan. Select create a power plan on the left pane of the Power Options window to begin configuring your power settings. 2.1.4 Speed Step Your notebook is equipped with Speed Step technology to better manage power consumption. It changes the processor speed to find the best balance between your computing performance and power consumption needs. Higher speeds bring better performance, but the slower speed conserves more power. In Windows Vista, the processor’s performance level depends on the Power Scheme you select (see 7.1.3 Power Options Properties). You do not need to make any further adjustments to set the performance level. Each preset power scheme has different time-out settings for entering Sleep Mode, Hibernate Mode, shutting down the display, or turning off the hard drive. For example, the Windows Vista automatically changes Speed Step Modes depending on running the AC power or batteries in order to prolong the battery usage while still providing optimal performance. You can also individually alter and save each of these settings and schemes if desired. Choose from the following three power plans that describe the desired relationship between power and performance. ViewSonic VNB141 18 Windows Vista automatically chooses the Speed Step Mode to find the most appropriate speed for your processor according to the type of plan you choose and your current system demands. ViewSonic VNB141 19 2.2 Battery ¾ Battery Performance ¾ Checking the Battery Charge ¾ Power Meter ¾ Low-Battery Warning ¾ Charging the Battery ¾ Removing a Battery ¾ Installing a Battery ¾ Storing a Battery ¾ Working With Extra Battery Packs ¾ Maximizing Battery Life 2.2.1 Battery Performance The Battery Performance can be varied with on the different operating conditions. Your battery may last less time if you are running power-intensive programs, playing CDs or DVDs, or setting the high display-brightness. The Power Management Options can be set to alert you when the battery charge is low. Ensure any battery you use is compatible. Failure to do so may risk fire or explosion. For more details on purchasing compatible batteries, please contact your notebook retailer. Batteries should never be disposed of the household waste. Contact your local waste disposal or environmental agency for advice on disposing of the used lithium-ion batteries. 2.2.2 Checking the Battery Charge Battery Status Indicator behavior Charging Flashes blue Fully Charged Solid blue Critical Low Amber > approximately 3 minutes left; system beeps ViewSonic VNB141 20 2.2.3 Power Meter The power meter indicates the remaining battery charge. When your notebook is running on battery power, you can double click the icon on the taskbar to check the remaining battery charge. If you want to know more details about how to make the icon appear on the taskbar if it is not already, please see 7.1 Power Management 2.2.4 Low-Battery Warning After a low-battery warning, save your work immediately and then connect your notebook to an electrical outlet. Hibernate Mode will begin automatically if the battery runs completely out of power. You will hear the low-battery warning when the battery charge is approximately 90 percent depleted. Your notebook will beep once, indicating approximately 10 to 15 minutes of battery operating time remain. If you do not connect your notebook to alternative power source during that time, there will be a periodic beep. Your notebook will automatically enter Hibernate Mode if battery charge reaches a critically low level. For more information, see 7.1 Power Management. 2.2.5 Charging the Battery When connected to an electrical outlet, a completely discharged 4-cell battery needs to be charged in 3.5 to 12 hours, and an 8-cell battery in 5 to 12 hours (depending on whether your notebook is on or off and what programs are running). You can leave the battery in your notebook as long as you like. The battery’s internal circuitry prevents the battery from overcharging. Before using the battery for the first time it must be charged. Connect your notebook to an electrical outlet and allow the battery to fully charge, indicated by the battery indicator light on the front panel of your notebook. Once a battery pack is fully charged for the first time, please use your notebook on battery power until the battery discharges completely. This will extend the battery life, and helps to ensure the accurate monitoring of the battery capacity. ViewSonic VNB141 21 If necessary, the battery will be charged whenever your notebook is connected to an electrical outlet. The battery will not be charged if it or your notebook is too hot to use. If this situation occurs, the battery indicator will light amber. Disconnect your notebook from any electrical outlet, and allow it and the battery to cool down. You can then reconnect your notebook to the electrical outlet and charge the battery. The battery indicator will also light amber if the battery is bad and needs replacing. 2.2.6 Low-Battery Warning After a low-battery warning, save your work immediately and then connect your notebook to an electrical outlet. Hibernate Mode will begin automatically if the battery runs completely out of power. You will hear the low-battery warning when the battery charge is approximately 90 percent depleted. Your notebook will beep once, indicating approximately 10 to 15 minutes of battery operating time remain. If you do not connect your notebook to alternative power source during that time, there will be a periodic beep. Your notebook will automatically enter Hibernate Mode if battery charge reaches a critically low level. For more information, see 7.1 Power Management. 2.2.7 Removing the Battery Before removing the battery, ensure your notebook is turned off. Move the battery lock to switch to the right (Unlock position). Slide and hold the battery to release latch. Remove the battery. 2.2.8 Installing a Battery Slide the battery into the bay. Press it into place gently but firmly until the latch locks it into place. Slide the battery lock to switch back to the locked position. 2.2.9 Storing a Battery If storing your notebook for an extended period of time, please remove the battery. Fully charge the battery before using your notebook again. ViewSonic VNB141 22 2.2.10 Working With Extra Battery Packs If you spend a lot of time traveling or work without connecting your notebook to an electrical outlet, it may be a good idea to carry the additional battery packs so you can quickly replace a discharged battery and continue working. 2.2.11 Maximizing Battery Life A battery can be recharged many times, but over time it will lose its ability to hold a charge. To maximize the battery life: • If you are not using your notebook for a long period, please remove the battery. • If you have a spare battery pack, please alternate the batteries. • Ensure your notebook is off when replacing the battery. Store the spare battery packs in a cool, dry place, out of the direct sunlight. ViewSonic VNB141 23 Chapter 3 The BIOS Setup Program ViewSonic VNB141 24 3.1 Introduction The BIOS (Basic Input and Output System) Setup program is a menu driven utility that enables you to make changes to the system configuration and tailor the operation of your notebook to your individual work needs. A ROM-based configuration utility displays the system’s configuration status and provides you with a tool to set system parameters. These parameters are stored in nonvolatile battery backed-up CMOS RAM, which saves this information even when the power is turned off. When the computer is turned back on, the system is configured with the values found in CMOS. Via easy-to-use menus, you can configure such items as: Boot devices The settings made in the Setup program intimately affect how your notebook performs. It is important, therefore, to first understand all the available options, and second, to make settings appropriate for the way you use your notebook. This chapter guides you through the Setup program by providing the clear explanations for all Setup options. A standard configuration has already been set in the Setup program by the factory technicians. However, eventually you may want to customize your system to suit your own performance needs. It is recommended that you read this chapter and become familiar with the configurations that can be made in the BIOS. The next section explains how to move around in the Setup program, as well as how to specify and save your new settings. A brief discussion of the optional settings among the different submenus follows. ViewSonic VNB141 25 3.2 Navigating through the BIOS Setup Program ¾ Accessing the BIOS Setup Program ¾ Launching Submenus ¾ Saving Changes and Exiting the Setup Program The Setup program has been designed to make it as easy to use as possible. It is a menu driven program, which means you can scroll through the various directories and make your selections among the various predetermined choices. If you accidentally configure a setting, use the BIOS hot keys to return to the previous value. The hot keys are discussed in more detail later in this chapter. When turning on your notebook for the first time you may be prompted to run the BIOS Setup program. A warning message may appear on the screen if the hardware configuration is changed or the POST fails. This message will inform you of any errors or invalid settings and prompt you to run the Setup program to correct the problem. Even if you are not prompted by a message instructing you to use the Setup program, at some time in the future you may want to change the configuration of your notebook. It will then be necessary to reconfigure your system using the Setup program so that your notebook can recognize these changes. The list below gives a few examples of reasons why you may want or need to run the BIOS Setup program. You have set up your notebook for the first time and you got a message stating that you should run the BIOS Setup program. You want to redefine the communication ports to prevent any conflicts. The few examples listed above are by no means complete. 3.2.1 System Setup 3.2.2 Invoking setup The setup function can only be invoked by pressing F2 when “Press <F2> to enter Setup” message is prompted on the bottom of screen during POST. The features are divided into 2 parts as follows: Main Allows the user to check system BIOS information.. Advanced Allows the user to set SATA Controller Mode. ViewSonic VNB141 26 Security Allows the user to set Supervisor Password. Boot Allows the user to select boot device. Exit Allows the user to exit Setup. During setup, all Fn function keys and power saving functions are disabled. Setup screens 3.2.2.1 Main Menu Phoenix Secure Core(tm) Setup Utility Main Advanced Security Boot Exit Item specific Help System Time: [XX:XX:XX] System Date: [XX/XX/XXXX] Product Name: N/A Serial Number: N/A Total Memory: 1024MB BIOS Version: 1.06 UUID Number: XXXXXXXXXXXX XXXXXXXXXXXX F1 Help ↑↓ select Item Esc Exit ←→ select menu -/+ Change Values Enter Select→Sub-Menu F9 Setup Defaults F10 Save an Exit System Time and System Date The hour is displayed with 24-hour format. The values set in these two fields take effect immediately. System Memory This field reports the memory size of system base memory. The size is fixed to 640KB. Extended Memory This field reports the memory size of the extended memory with an integer in the system, but 32Bit SMI will occupy 1 MB and UMA frame buffer (Integrated VGA uses only). Extended Memory size = Total memory size - 1 MB – 1 MB – UMA frame buffer ViewSonic VNB141 27 BIOS Version This field displays current version of the BIOS. UUID This field displays the platform UUID number. 3.2.2.2 Advanced Menu Phoenix Secure Core(tm) Setup Utility Phoenix Secure Core(tm) Setup Utility Main Advanced Security Boot Exit Item specific Help SATA Controller Mode [AHCI] ↑↓ select Item F1 Help Esc Exit Exit ←→ select menu -/+ Change Values F9 Enter Select→Sub-Menu Setup Defaults F10 Save an SATA Controller Mode Allows the user to set AHCI Enable or Disable. 3.2.2.3 Security Menu Phoenix Secure Core(tm) Setup Utility Main Advanced Security Boot Exit Item specific Help Supervisor Password Is: Clear Set Supervisor Password [Enter] Password on boot: [Enabled] F1 Help ↑↓ select Item Esc Exit ←→ select menu ViewSonic VNB141 -/+ Change Values F9 Enter Select→Sub-Menu Setup Defaults F10 Save an Exit 28 Supervisor Password Is: This field displays the Supervisor Password state(Set or Clear). Set Supervisor Password Press <Enter> key on this field for setting the supervisor password. Password on boot: Enable (or disable) the password checking in the POST for booting or entering Setup. 3.2.2.4 Boot Menu Phoenix Secure Core(tm) Setup Utility Main Advanced Security Boot Exit Item specific Help Boot priority order: HDD CD/DVD FDD LAN F1 Help ↑↓ select Item Esc Exit ←→ select menu ViewSonic VNB141 -/+ Change Values F9 Enter Select→Sub-Menu Setup Defaults F10 Save an Exit 29 3.2.2.5 Exit Menu Phoenix Secure Core(tm) Setup Utility Main Advanced Security Boot Exit Item specific Help Exit Saving Changes Exit Discarding Changes Load Setup Defaults Discard Changes Saves Changes F1 Help ↑↓ select Item Esc Exit ←→ select menu -/+ Change Values F9 Enter Select→Sub-Menu Setup Defaults F10 Save an Exit Exit setup menu. Setup Confirmation Exit now? [Yes] [No] Yes: Exit SETUP No: Back to previous screen ViewSonic VNB141 30 Customer Support For technical support or product service, see the table below or contact your reseller. NOTE: You will need the product serial number. Country/Region Website T = Telephone F = FAX Email Australia/New Zealand www.viewsonic.com.au AUS= 1800 880 818 NZ= 0800 008 822 [email protected] Canada www.viewsonic.com T (Toll-Free)= 1-866-463-4775 T (Toll)= 1-424-233-2533 F= 1-909-468-1202 [email protected] Europe www.viewsoniceurope.com Contact your reseller Hong Kong www.hk.viewsonic.com T= 852 3102 2900 [email protected] India www.in.viewsonic.com T= 1800 11 9999 [email protected] Korea www.kr.viewsonic.com T= 080 333 2131 [email protected] Latin America (Argentina) www.viewsonic.com/la/ T= 0800 666 0194 [email protected] Latin America (Brazil) www.viewsonic.com/la/ T= 0800 891 6984 [email protected] Latin America (Chile) www.viewsonic.com/la/ T= 800 440 303 [email protected] Latin America (Columbia) www.viewsonic.com/la/ T= 01 800 915 6588 [email protected] Latin America (Mexico) www.viewsonic.com/la/ T= 001 800 514 6518 [email protected] Renta y Datos, 29 SUR 721, COL. LA PAZ, 72160 PUEBLA, PUE. Tel: 01.222.891.55.77 CON 10 LINEAS Electroser, Av Reforma No. 403Gx39 y 41, 97000 Mérida, Yucatán. Tel: 01.999.925.19.16 Other places please refer to http://www.viewsonic.com/la/soporte/index.htm#Mexico Latin America (Peru) www.viewsonic.com/la/ T= 0800 53458 [email protected] Macau www.hk.viewsonic.com T= 853 700 303 [email protected] Puerto Rico & Virgin Islands www.viewsonic.com T= 1-800-688-6688 (English) T= 1-866-379-1304 (Spanish) F= 1-909-468-1202 [email protected] [email protected] Singapore/Malaysia/Thailand www.ap.viewsonic.com T= 65 6461 6044 South Africa www.viewsoniceurope.com www.viewsoniceurope.com/uk/Support/Calldesk.htm United States www.viewsonic.com T (Toll-Free)= 888-572-9237 T (Toll)= 909-444-8801 ViewSonic VNB141 [email protected] [email protected] 31 Limited Warranty VIEWSONIC® NETBOOK What the warranty covers: ViewSonic warrants its products to be free from defects in material and workmanship during the warranty period. If a product proves to be defective in material or workmanship during the warranty period, ViewSonic will, at its sole option, repair or replace the product with a similar product. Replacement Product or parts may include remanufactured or refurbished parts or components. The replacement unit will be covered by the balance of the time remaining on the customer’s original limited warranty. ViewSonic provides no warranty for the third-party software included with the product or installed by the customer. How long the warranty is effective: ViewSonic NetBook products are warranted for (1) year from the first consumer purchase for parts and labor. User is responsible for the back up of any data before returning the unit for service. ViewSonic is not responsible for any data lost. Who the warranty protects: This warranty is valid only for the first consumer purchaser. What the warranty does not cover: 1. Any product on which the serial number has been defaced, modified or removed. 2. Damage, deterioration or malfunction resulting from: a.Accident, misuse, neglect, fire, water, lightning, or other acts of nature, unauthorized product modification, or failure to follow instructions supplied with the product. b. Any damage of the product due to shipment. c. Removal or installation of the product. d. Causes external to the product, such as electrical power fluctuations or failure. e. Use of supplies or parts not meeting ViewSonic’s specifications. f. Normal wear and tear. g. Any other cause which does not relate to a product defect. 3. Any product exhibiting a condition commonly known as “image burn-in” which results when a static image is displayed on the product for an extended period of time. 4. Removal, installation, one way transportation, insurance, and set-up service charges. How to get service: 1. For information about receiving service under warranty, contact ViewSonic Customer Support (Please refer to Customer Support page). You will need to provide your product’s serial number. 2. To obtain warranty service, you will be required to provide (a) the original dated sales slip, (b) your name, (c) your address, (d) a description of the problem, and (e) the serial number of the product. 3. Take or ship the product freight prepaid in the original container to an authorized ViewSonic service center or ViewSonic. 4. For additional information or the name of the nearest ViewSonic service center, contact ViewSonic. 4.3: ViewSonic NetBook Warranty ViewSonic VNB141 Page 1 of 2 NB_LW01 Rev. 1a 02-11-09 32 Limitation of implied warranties: There are no warranties, express or implied, which extend beyond the description contained herein including the implied warranty of merchantability and fitness for a particular purpose. Exclusion of damages: ViewSonic’s liability is limited to the cost of repair or replacement of the product. ViewSonic shall not be liable for: 1. Damage to other property caused by any defects in the product, damages based upon inconvenience, loss of use of the product, loss of time, loss of profits, loss of business opportunity, loss of goodwill, interference with business relationships, or other commercial loss, even if advised of the possibility of such damages. 2. Any other damages, whether incidental, consequential or otherwise. 3. Any claim against the customer by any other party. 4. Repair or attempted repair by anyone not authorized by ViewSonic. Effect of state law: This warranty gives you specific legal rights, and you may also have other rights which vary from state to state. Some states do not allow limitations on implied warranties and/or do not allow the exclusion of incidental or consequential damages, so the above limitations and exclusions may not apply to you. Sales outside the U.S.A. and Canada: For warranty information and service on ViewSonic products sold outside of the U.S.A. and Canada, contact ViewSonic or your local ViewSonic dealer. The warranty period for this product in mainland China (Hong Kong, Macao and Taiwan Excluded) is subject to the terms and conditions of the Maintenance Guarantee Card. For users in Europe and Russia, full details of warranty provided can be found in www. viewsoniceurope.com under Support/Warranty Information. 4.3: ViewSonic NetBook Warranty ViewSonic VNB141 Page 2 of 2 NB_LW01 Rev. 1a 02-11-09 33