1
FUNKTION
FEHLERSUCHE UND BEHEBUNG
Anschluss an das Netz und Laden der Batterien
Wir danken Ihnen, dass sie unser Produkt gewählt haben!
WICHTIGE SICHERHEITSHINWEISE
Nach vorheriger AUFMERKSAMER UND SORGFÄLTIGER LEKTÜRE DER VORLIEGENDEN
BEDIENUNGSANLEITUNG kann dieses Gerät durch jede Person installiert werden.
Diese Bedienungsanleitung enthält detaillierte Anweisungen zur Bedienung und Installation der USV.
Für Informationen zur Bedienung, und um mit Ihrem Gerät die besten Leistungen zu erzielen, muss
diese Bedienungsanleitung sorgfältig in der Nähe der USV aufbewahrt und VOR ARBEITEN AN
DER USV ZU RATE GEZOGEN WERDEN.
© Vorbehaltlich der Genehmigung durch die Herstellerfirma, ist die Wiedergabe jedweden Teils,
auch auszugsweise, der vorliegenden Bedienungsanleitung verboten. Für Verbesserungen behält
sich der Hersteller das Recht vor, das beschriebene Produkt jederzeit und ohne Vorankündigung
abzuändern.
Achtung:
Die folgenden Anleitungen sorgfältig lesen und diese Bedienungsanleitung zum schnellen
Nachschlagen aufbewahren.
Der Netzanschluss der USV muss an einen Anschluss mit Erdung angeschlossen werden.
Auch bei ausgeschalteter USV gibt es im Gerät potentiell gefährliche Spannungen. Alle
Reparaturarbeiten dürfen ausschließlich von autorisiertem Personal ausgeführt werden.
Auch wenn die USV nicht am Netz angeschlossen ist, können die Ausgänge unter Spannung
stehen.
Bei einem Netzausfall (USV-Batteriebetrieb) das Speisekabel nicht trennen, um die Erdung der
angeschlossenen Abnehmer sicherzustellen.
Vermeiden, dass Flüssigkeiten bzw. Fremdkörper in die USV gelangen.
Da das Speisekabel als Trennvorrichtung angesehen wird, muss der USV-Anschluss bzw. die
Rückseite der USV zugänglich und leicht trennbar sein.
Bei Gefahr bzw. beim Trennen der USV von den Energiequellen, Stromnetz und Batterien, das
Speisekabel vom Netzstecker oder an der Rückseite der USV trennen und die USV mit dem
Schalter STAND-BY/ON (6) abschalten.
Stromschlaggefahr. Auch nachdem das Gerät vom Netz getrennt worden ist, stehen Bauteile in der
USV unter Spannung, weil sie an die Batterien angeschlossen sind, und sind daher gefährlich. Vor
allen Reparatur- und Wartungsarbeiten die Batterien trennen und prüfen, dass keine Spannung
anliegt.
Die USV erzeugt einen Fehlerstrom. Sicherstellen, dass die Summe der Fehlerströme der USV und
der an ihr angeschlossenen Lasten in Richtung Erde kleiner als der Grenzwert von 3,5mA ist.
Ausgewechselte Batterien sind SONDERMÜLL und müssen entsprechend entsorgt werden.
Batterien nicht ins Feuer werfen.
Nicht versuchen die Batterie zu öffnen: Es sind wartungsfreie Batterien. Außerdem ist das
Elektrolyt gefährlich für Haut und Augen und kann giftig sein.
Die Batterien können Stromschläge verursachen und haben einen hohen Kurzschlussstrom. Beim
Umgang mit Batterien die nachstehenden Vorsichts- und Schutzmaßnahmen treffen:
- Keine Uhren, Ringe, Ketten oder andere Metallmaterialien tragen.
- Nur Werkzeuge mit isoliertem Griff benutzen.
Die USV entsprechend der in der Bedienungsanleitung vorgesehenen Spezifikationen und
Anleitungen verwenden.
BESCHREIBUNG DER USV
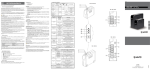
Ansichten der Vorder- und Rückseite
1.
2.
Backup-Steckdosen (lokal)
Steckdosen mit Überspannungsschutz (lokal)
Prüfen, dass die der USV vorgeschaltete Anlage gegen Überstrom geschützt ist. Der empfohlene
Schutzwert beträgt 10A.
¾
Die USV mit dem mitgelieferten Speisekabel ihres Computer an das Netz anschließen.
¾
Die USV lädt die Batterien jedes Mal, wenn sie an das Stromnetz angeschlossen wird (auch
wenn die USV ausgeschaltet ist). Die USV für 6 – 8 Stunden laden, bevor Lasten
angeschlossen werden.
Nach dem Aufladen des UPS können die verschiedenen Lasten (wie z.B. Computer, Monitor, etc.
…) unter Beachtung der nachstehenden Hinweise an die Ausgangssteckdosen angeschlossen
werden:
¾
Backup-Steckdosen (1)(9): Diese Steckdosen sind nur bei eingeschaltetem UPS
spannungsversorgt. Bei Netzausfällen werden die Backup-Steckdosen batteriegespeist.
Hinweis: Es wird empfohlen, keine Laserdrucker bzw. Laserdruckvorrichtungen an die
Backup-Steckdosen (1)(9) gemeinsam mit anderen Peripheriegeräten des Computers
anzuschließen. Derartige Geräte haben im Vergleich zur Ruhestellung normalerweise einen
höheren Energieverbrauch. Bei solchen Konfigurationen kann es zu einer Überlast des UPS
und dementsprechend zum Ausfall aller angeschlossenen Geräte kommen.
¾
Surge Steckdosen (2): Zusätzliche Filtersteckdosen, die Überspannung und Netzstörungen
senken; sie bieten keinen Schutz gegen die Folgen von Netzausfall oder kurze
Versorgungsunterbrechungen. Sie können zur Versorgung von nicht grundlegenden
Vorrichtungen wie z.B. Drucker, Scanner, usw. verwendet werden. Derartige Steckdosen
eignen sich zum Anschluss kleiner Laserdruckgeräte.
Hinweis: Die Steckdosen sehen auch spannungsversorgt, wenn das UPS auf Standby steht.
Einschalten/ Ausschalten
Zum Einschalten der USV und zur Stromversorgung der Lasten den Hauptschalter STAND-BY/ON
drücken.
Zum Ausschalten der USV und zum Trennen der Stromversorgung der Lasten erneut den
Hauptschalter drücken.
Batteriestart (Kaltstart)
Wird der Hautschalter bei ausgeschalteter USV bei einem Stromausfall gedrückt, wird sie in
Batteriebetrieb eingeschaltet.
Achtung: Bei einem Batteriestart ist die Ausgangsfrequenz auf 50Hz eingestellt.
Die USV ist
ausgeschaltet
Prüfen, ob der Schalter STAND-BY/ON auf Position
ON gestellt ist.
Der Sicherung am USVEingang ist ausgelöst
worden.
Alle unwichtigen Geräte von der USV trennen.
Die Sicherung (11) rücksetzen. Dazu die Taste
solange drücken, bis sie einrastet. Die USV
einschalten und die Geräte nach und nach einzeln
wieder anschließen Wird die Sicherung erneut
ausgelöst, ist wahrscheinlich eines der
angeschlossenen Geräte die Ursache für die Überlast.
Der Sicherung am USVEingang ist ausgelöst
worden.
Alle unwichtigen Geräte von der USV trennen. Die
Sicherung (11) rücksetzen. Dazu die Taste solange
drücken, bis sie einrastet.
Die Steckdose, an die
die USV angeschlossen
ist, liefert keine
Stromversorgung zum
Gerät.
Die USV an eine andere Steckdose anschließen oder
das Stromnetz von einem Fachelektriker überprüfen
lassen.
Die USV-Batterie ist
nicht ausreichend
geladen, da sie nach
einem Netzausfall nicht
ausreichend Zeit hatte
sich aufzuladen.
Abwarten, dass sich die Batterie entlädt. Die Batterie
wird jedes Mal geladen, wenn die USV an eine
Steckdose angeschlossen wird. Allgemein werden 8
Stunden für ein vollständiges Aufladen der Batterie
benötigt. Die Betriebsdauer der USV ist
eingeschränkt, solange die Batterie nicht vollständig
geladen ist.
Die Batterie muss
gewechselt werden.
Die Batterie wechseln.
Das Alarm-Symbol (3)
schaltet sich ein und das
akustische Signal ist
aktiv.
Die USV hat eine
Störung erfasst.
Die Geräte von der USV trennen. Die USV
ausschalten und die Stromversorgung trennen. Die
Stromversorgung wieder herstellen und die USV
wieder einschalten. Tritt die Anzeige erneut auf,
wenden Sie sich bitte an Ihren Kundendienst.
Die Anzeige
Batteriestörung schaltet
sich ein.
Batterie defekt.
Die Batterie wechseln.
Die Software sendet ein
Kommunikationssignal,
das nicht ankommt.
Prüfen, ob das USB-Kabel sowohl an der USV als
auch am PC angeschlossen ist und in der Software
prüfen, ob USB als Kommunikations-Schnittstelle
ausgewählt ist.
Die Software ist nicht
installiert.
Die für das Betriebssystem Ihres Computers
spezifische Software installieren.
Die USV arbeitet in
Batteriebetrieb, obwohl
das Stromnetz zur
Verfügung steht.
Bei einer Störung am
Stromnetz arbeitet die
USV nicht solange wie
vorgesehen.
USB-Anschluss
Die USV kann mit einem USB-Verbindungskabel für die Überwachung und das Runterfahren des
Betriebssystems an einen Computer angeschlossen werden. Die entsprechende Steuersoftware und
die zugehörige Bedienungsanleitung stehen auf der Internetseite www.riello-ups.com zum
Download zur Verfügung.
Die USV kommuniziert
nicht mit dem PC.
Batterieersatz
VORSICHT: Der Wiedereinbau der Batterien muß von qualifiziertem Personal bewirkt werden.
Wenden Sich für Informationen zur Wahl des geeigneten Batteriemodells an unseren technischen
Kundendienst.
TECHNISCHE DATEN
- Die USV ausschalten und das Versorgungskabel trennen. Die Schrauben, die den unterhalb der
USV angebrachten Batterieraum befestigen, lösen. (Abb. A)
3.
/LED ROT: Unterschiedliche Anzeigen (siehe Tabelle "Alarme und Anzeigen")
4.
/LED GELB: USV in Batteriebetrieb
- Danach die beiden Leitungen von der Batterie abtrennen (indem sie einfach gezogen werden).
Die Batterie durch eine desselben Typs ersetzen, wobei verstärkt das Augenmerk darauf zu
richten ist, dass die Polarität beachtet wird. Das gesamte Gerät wieder zusammenbauen.
(Abb. C)
/LED GRÜN: USV eingeschaltet mit Netzbetrieb
Hauptschalter STAND-BY/ON
Verriegelungsschraube Batteriegehäuse
Batteriegehäuse
IEC Backup-Steckdosen
USB-Anschluss
Eingangs-Sicherung
Speisekabel
VERFAHREN
Die USV schaltet sich
nicht ein
Anschließen der Lasten
- Nach dem Entfernen des Deckels die Batterie behutsam aus ihrem Gehäuse nehmen. (Abb. B)
5.
6.
7.
8.
9.
10.
11.
12.
MÖGLICHE
URSACHE
PROBLEM
MODELL
AUSGANG
ALARME UND ANZEIGEN
Beschreibung
Öffnen der Verpackung und Kontrolle des Inhalts
Die USV aus der Verpackung nehmen und auf sichtbare Transportschäden überprüfen. Werden
Schäden festgestellt, die USV wieder einpacken und bei der Verkaufsstelle zurückgeben.
USV
Bedienungsanleitung
Garantieschein
Aufstellung
Für die Installation und das Aufstellen der USV folgende Anweisungen befolgen:
¾
Die USV muss auf einer waagerechten Fläche aufgestellt werden.
¾
Die USV darf nicht direkter Sonneneinstrahlung ausgesetzt werden.
¾
Sicherstellen, dass die Raumtemperatur zwischen 0°C und 40°C liegt. Für einen optimalen
Betrieb sollte die maximale Raumtemperatur 25°C betragen.
¾
Die Raum-Luftfeuchtigkeit muss unter 90% liegen.
¾
Staubige Räume vermeiden.
¾
Um eine ausreichende Lüftung sicherzustellen, muss die USV in einem Abstand von
mindestens 5 cm von den umliegenden Wänden aufgestellt werden.
¾
Sicherstellen, dass weder die USV noch andere schwere Gegenstände das Speisekabel
quetschen.
¾
Das Kabel, mit dem die Lasten an die USV angeschlossen werden, darf nicht länger als 10
Meter sein.
Lagerung
Ist eine längere Lagerung vorgesehen, muss die USV vollständig aufgeladen werden. Um einen
guten Batterie-Zustand zu erhalten, muss alle 6 Monate ein vollständiger Entlade-/ Ladezyklus
vorgenommen werden.
Spannung
SchalterPosition
(6)
Grün led
Gelb led
Rot led
Andere Anzeigen
SURGE STECKDOSEN
Stand-by
STAND-BY
Netzbetrieb
ON
Batteriebetrieb
ON
Blinkt
Akustisches Signal langsam
aussetzend
Voralarm
Entladungsende
ON
Blinkt
Aussetzendes akustisches
Signal
Überlast
ON
Batterie defekt
ON
Blinkt
Alarm oder
Schutzabschaltung
(nicht durch
Überlast)
ON
Dauernd
eingeschaltet
Dauernd
eingeschaltet
Frequenz
50 oder 60Hz +/-5% (mit Selbsterlernung)
Spannung (bei
Batteriebetrieb)
230Vac +/-10% (Pseudo-sinusförmige Welle)
Frequenz (bei
Batteriebetrieb)
50 oder 60Hz +/-1Hz (mit Selbsterlernung)
Auslösezeit
Verpackungsinhalt
¾
¾
¾
800VA
230V +20%/ -25%
EINGANG
Funktion Led
INSTALLATION
600VA
SCHUTZ UND FILTER
Blinkt
Aussetzendes akustisches
Signal
Dauernd
eingeschaltet
Aussetzend akustisches
Signal
Dauernd
eingeschaltet
Anhaltendes akustisches
Signal
600
800
Nennleistung W
360
480
Max. Strom
5A
8A
Bei Netzbetrieb: Sicherung am Eingang gegen Überlast.
Bei Netzbetrieb: Automatisches Abschalten nach 5
Minuten mit Last von >110%. Sofortiges Abschalten bei
Schutz gegen Überlast
Last von >120% oder Kurzschluss.
und Kurzschluss
Bei Batteriebetrieb: Automatisches Abschalten nach 5
Sekunden bei Überlast von >110%. Sofortiges
Abschalten bei Überlast von >120% oder Kurzschluss.
Typ
Modell
BATTERIE
UMGEBUNGSBEDINGU
NGEN
Typisch 2 – 6 mSek
Nennleistung VA
Wartungsfreie Bleibatterie
12V 7Ah
12V 9Ah
Typische Ladedauer
6-8 Std.
Sicherungen
Schutz gegen Tiefenentladung und Anzeige
Batteriewechsel.
Arbeitsbedingungen
Max. Höhe 6.000 m, 0-90% Feuchtigkeit ohne
Kondenswasser, 0-40°C
Geräuschentwicklung
<40dB (im Abstand von 1 m von der Quelle)
Erd-Verluststrom
<1mA
VERSCHIEDENES
OPERATION
Connection to mains and battery charging
Thank you for choosing our product.
IMPORTANT SAFETY NOTES
This device can be installed by anyone, provided that they READ THIS MANUAL CAREFULLY
AND FOLLOW THE INSTRUCTIONS WITHIN IT.
This manual contains detailed instructions for the use and installation of the UPS.
This manual should be kept close to the UPS and READ BEFORE THE UPS IS INSTALLED
AND USED
Please ensure that the mains power supply to be used with this UPS has upstream protection rated
at either 10A.
¾
Connecting the UPS to the mains with the power supply cable provided.
¾
The UPS will recharge its battery each time it is connected to a mains power supply (even if
it is powered down). We recommend that the UPS is charged for 6-8 hours before connecting
the loads.
Connecting the loads
After having loaded the UPS, loads can be connected (e.g.: computer, monitor, etc.) to the output
sockets, according to the following indications:
¾
© No part of this manual may be reproduced, even partially, without the manufacturer’s
authorisation. For purposes of improvements the manufacturer reserves the right to change
specifications at any time and without notice.
Warning:
Read the following instructions carefully and keep this manual handy for easy referral.
The mains power supply socket used to power the UPS must have an earth connection.
Potentially dangerous electrical voltages are generated inside this device, even when the UPS is
switched off. All repairs must be carried out by authorised personnel only.
Voltage may be present on the UPS output sockets even when the UPS is not connected to a mains
power supply.
In the event of a mains power supply failure (emergency UPS operation), do not unplug the power
supply cable to the UPS, to ensure earth continuity to the connected loads.
Do not allow liquids and/or other foreign bodies to enter the UPS.
Since the mains power supply cable acts as a separation device, the mains power supply socket
used that connects to the rear of the UPS must be accessible and easy to disconnect.
In dangerous conditions and/or to disconnect the UPS from sources of energy, (whether mains or
batteries), disconnect the power supply cable from the mains socket or from the back of the UPS
and shut down the UPS using the STAND-BY/ON switch (6).
Risk of electric shock. Since internal components are connected to the batteries, they will remain
powered, and therefore dangerous, even after the device has been disconnected from a mains power
supply. Disconnect the batteries and ensure no voltage is present before carrying out any repair or
maintenance operations.
The UPS generates an earth leakage current. Ensure that the sum of the UPS and load earth leakage
current is less than 3.5mA.
Replaced batteries should be considered as TOXIC WASTE and treated as such.
Do not throw the batteries into a fire.
Do not try to open the batteries: they do not require any maintenance. Furthermore the electrolyte is
dangerous if it comes into contact with skin or eyes and may be toxic.
The batteries can cause electric shock and have a high short circuit current. Take the necessary
safety measures and precautions when handling them:
- do not wear watches, rings, necklaces or any other metallic material
- only use tools with insulated handles
Only use the UPS following the specific instructions in this user manual.
DESCRIPTION OF THE UPS
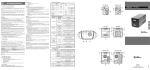
Front and rear views:
1.
2.
3.
4.
5.
6.
7.
8.
9.
10.
11.
12.
Back-up sockets (local type)
Surge sockets (local type)
/RED LED: various messages (see the “Alarms and Report Signals table”)
/YELLOW LED: the UPS operates on battery
/GREEN LED: the UPS operates from the mains power supply
Main STAND-BY/ON switch
Battery compartment locking screws
Battery compartment
Back-up sockets (IEC type)
USB port
Input protection device
Power supply cable
INSTALLATION
Opening of packing and verification of its contents
Remove the UPS from its packaging and check that there is no visible damage caused during
shipping. If there is any noticeable damage to the UPS, pack the product up and return to
where it was purchased.
¾
Back-up sockets (1) (9): these sockets are only powered when the UPS is on. Should mains
power fail, the back-up sockets are battery-powered.
N.B.: we recommend not running laser printers or laser print devices from back-up sockets
(1) (9) together with other computer peripheral equipment. On odd occasions, this equipment
uses a greater quantity of energy than when at rest. This set-up may lead to UPS overload and
cause all equipment connected to be switched off.
Surge sockets (2): additional filtered sockets limiting line surge and mains disturbances.
They do not protect the load from power failures or short blackouts. They can be used to
power non-essential devices such as, for example, printers, scanners and suchlike. Small
laser printer devices can be installed on these sockets.
N.B.: the sockets are also powered when the UPS is in stand-by.
Starting up/Shutting down
Press the main STAND-BY/ON switch to start-up the UPS and power the loads.
Press the switch again to shut down the UPS and power down from the loads.
The UPS does not
switch on
The UPS input thermal
protection device has
been triggered
Disconnect non-essential equipment from the UPS.
Reset the protection (11) by depressing the button. If
the switch resets, start up the UPS and reconnect the
equipment one device at a time. If the protection
activates again, one of the connected devices is
causing an overload condition.
UPS
User manual
Warranty card
Wait for the battery to recharge. It recharges each time
the UPS is connected to a mains socket. It usually
takes 8 hours for the battery to recharge fully. UPS
operation time is a function of how charged the
battery is.
The battery needs to
be replaced.
Replace the battery.
The alarm icon (3) is lit
and the acoustic signal
sounds.
The UPS has a fault.
Remove the external devices from the UPS. Turn off
the UPS and disconnect it from the mains. Connect
the UPS to the mains and turn on again. If the UPS
message the anomaly again, contact your authorized
service centre.
Battery fault message.
Battery fault.
Replace the battery.
The software sends a
message that
communication has
been lost.
Check that the USB cable is connected between the
UPS and the PC and that ‘USB’ has been selected as
the communication port in the software configuration.
The software is not
installed
Install the specific software for your computer’s
operating system.
The UPS is not
communicating with a
PC.
- Shut down the UPS and disconnect the power cable. Remove the screws that hold the battery
compartment in place under the UPS. (Fig. A)
- After removing the cover, carefully remove the battery from its housing. (Fig. B)
- Disconnect the two wires from the battery (simply by pulling them). Replace the battery with
another of the same type, taking care to respect the polarity. Re-assemble the compartment. (Fig.
C)
TECHNICAL DATA
MODEL
Led functioning
Description
Stand-by
Operation on mains
power
Operation on battery
Switch
position
(6)
Green led
Yellow led
Blinking
ON
Overload
ON
SURGE
SOCKETS
Steady
ON
End of discharge
warning
Red led
Other report signals
OUTPUT
STAND-BY
ON
600VA
Slow blinking acoustic
signal
Blinking
Blinking
Blinking acoustic signal
Follow the instructions below to correctly install and position the UPS:
¾
The UPS must be placed on a horizontal surface.
¾
The UPS must not be exposed to direct sunlight.
¾
Ensure that the ambient temperature is between 0°C and 40°C, for optimal performance use
at a maximum temperature of 25°C.
¾
The ambient humidity is less than 90%.
¾
Avoid dusty environments.
¾
Place the UPS at least 5cm from a wall to ensure adequate ventilation.
¾
Ensure that the UPS or any other heavy object is clear of the power supply cable.
¾
Ensure that the cables connecting loads to the UPS are not longer than 10metres.
Storage
The UPS must be fully recharged if it is to be stored for a long time. A full discharge and charge
cycle should be carried out every 6 months to keep the battery in good condition.
Blinking
Steady
ON
Questa apparecchiatura può essere installata da qualsiasi persona, previa ATTENTA E
SCRUPOLOSA LETTURA DEL PRESENTE MANUALE.
Questo manuale contiene le istruzioni dettagliate per l’uso e l’installazione dell’UPS.
Per informazioni sull’utilizzo e per ottenere il massimo delle prestazioni dalla Vostra
apparecchiatura, il presente manuale dovrà essere conservato con cura vicino all’UPS e
CONSULTATO PRIMA DI OPERARE SULLO STESSO.
© E’ vietata la riproduzione di qualsiasi parte del presente manuale anche se parziale salvo
autorizzazione della ditta costruttrice. Per scopi migliorativi, il costruttore si riserva la facoltà di
modificare il prodotto descritto in qualsiasi momento e senza preavviso.
Attenzione:
Leggere con cura le seguenti istruzioni e tenere a disposizione questo manuale per una rapida
consultazione.
La presa di rete cui l’UPS è collegato deve essere dotata di connessione di terra.
All’interno di questa apparecchiatura vi sono tensioni potenzialmente pericolose, anche con UPS
spento. Tutte le riparazioni dovranno essere effettuate esclusivamente da personale autorizzato.
Le prese di uscita dell’UPS potrebbero essere in tensione anche quando l’UPS non è collegato alla
rete.
In caso di mancanza di rete (funzionamento dell’UPS da batteria), non staccare il cavo di
alimentazione per garantire la continuità di terra all’utenza collegata.
Evitare che liquidi e/o altri corpi entrino nell’UPS.
Poiché il cavo di alimentazione separabile è inteso come dispositivo di sezionamento, la presa di
rete cui l’UPS è collegato e/o il retro dell’UPS devono essere accessibili e facilmente scollegabili.
In condizioni di pericolo e/o per scollegare l’UPS dalle sorgenti di energia, rete e batterie,
sconnettere il cavo di alimentazione dalla presa di rete o dal retro dell’UPS e spegnere tramite
l’interruttore STAND-BY/ON (6).
Rischio di scossa elettrica. Anche dopo aver scollegato l’apparecchiatura dalla rete elettrica di
alimentazione, i componenti interni dell’UPS essendo collegati alle batterie, sono ancora in
tensione, quindi pericolosi. Prima di effettuare qualsiasi tipo di riparazione o manutenzione,
scollegare le batterie e verificare che non sia presente tensione.
L’UPS genera una corrente di dispersione. Assicurarsi che la somma della corrente di dispersione
verso terra dell’UPS e del carico connesso sia inferiore del limite di 3,5mA.
Le batterie sostituite vanno considerate RIFIUTO TOSSICO e trattate di conseguenza.
Non gettare le batterie sul fuoco.
Non tentare di aprire le batterie: sono prive di manutenzione. Il liquido elettrolita è pericoloso per la
pelle e per gli occhi, e può risultare tossico.
Le batterie possono essere causa di scossa elettrica e sono dotate di un alta corrente di cortocircuito.
Prendere le necessarie precauzioni e misure di sicurezza, di seguito elencate, quando si maneggiano
delle batterie:
- non indossare orologi, anelli, catenine o qualsiasi altro materiale metallico
- usare solo attrezzi con impugnatura isolata
Usare l’UPS seguendo le specifiche previste secondo quanto prescritto dal presente manuale d’uso.
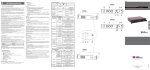
DESCRIZIONE DELL’UPS
800VA
230V +20%/ -25%
Frequency
50 or 60Hz +/-5% (with auto-sensing)
1.
2.
Voltage (from battery)
230Vac +/-10% (Pseudo-sinusoidal wave)
3.
Frequency (from battery)
50 or 60Hz +/-1Hz (with auto-sensing)
Trigger time
2-6 ms typical
Rated power VA
600
800
Rated power W
360
480
Max. current
PROTECTION
Overload and shortcircuit
DEVICES AND
protection
FILTERS
Steady
5A
Steady
5.
6.
7.
8.
9.
10.
11.
12.
/LED GIALLO: UPS in funzionamento da batteria
/LED VERDE: UPS acceso con rete presente
Interruttore principale STAND-BY/ON
Vite bloccaggio vano batteria
Vano batteria
Prese di backup tipo IEC
Porta USB
Protezione di ingresso
Cavo di alimentazione
INSTALLAZIONE
Apertura dell’imballo e verifica del suo contenuto
Rimuovere l’UPS dall’imballo e verificare che non vi siano danni visibili causati durante il
trasporto. Qualora si notassero danni all’UPS reimballare il prodotto e restituire presso il centro di
acquisto.
Model
Sealed lead batteries, maintenance-free
12V 7Ah
12V 9Ah
Continuous acoustic
signal
Typical recharge time
Protection
AMBIENT
CONDITIONS
UPS
Manuale d’uso
Cartolina Garanzia
6-8 hours
Protection against total discharge, battery replacement
indicator
Operating conditions
Max altitude 6,000 m, 0-90% non condensing humidity,
0-40°C
Noise
<40dB (at 1m from source)
Earth leakage current
<1mA
VARIOUS
Connessione dei carichi
Dopo aver caricato l’UPS è possibile collegare i diversi carichi (es: computer, monitor, ecc…) alle
prese presenti sull’UPS.
¾
Prese Backup (1)(9):queste prese sono alimentate solo quando l’UPS è acceso. In caso di
mancanza rete le prese di backup sono alimentate tramite batteria.
Nota: si consiglia di non applicare stampanti laser o dispositivi di stampa a laser sulle prese
di backup (1)(9) assieme ad altre periferiche del computer. Queste apparecchiature assorbono
occasionalmente una quantità maggiore di energia rispetto a quando sono a riposo. Questa
configurazione potrebbe portare in sovraccarico l’UPS e allo spegnimento di tutte le
apparecchiature collegate.
¾
Prese Surge (2): prese addizionali filtrate, limitano le sovratensioni e disturbi di rete; non
proteggono il carico dagli eventi di mancanza rete o brevi interruzioni. Possono essere
utilizzate per alimentare dispositivi non essenziali quali ad esempio stampanti, scanner o
altro. Su queste prese è possibile installare piccoli dispositivi di stampa a laser.
Nota: le prese sono alimentate anche quando l’UPS è in stand-by.
Accensione/Spegnimento
Premere l’interruttore principale STAND-BY/ON per accendere l’UPS ed alimentare i carichi.
Per spegnere l’UPS e togliere l’alimentazione ai carichi premere nuovamente l’interruttore
principale.
Accensione da batteria (Cold start)
In caso di assenza di rete, premendo l’interruttore principale, l’UPS effettua l’accensione da
batteria.
Attenzione: quando viene effettuata l’accensione da batteria la frequenza di uscita è impostata
a 50Hz.
L'UPS funziona da
batteria sebbene sia
disponibile la rete
elettrica.
Immagazzinamento
È necessario ricaricare completamente l’UPS se necessita di un lungo periodo di
immagazzinamento. Ogni 6 mesi effettuare un ciclo di scarica e carica completa per conservare in
buono stato la batteria.
L’UPS è spento.
È scattata la protezione
d’ingresso dell’UPS.
Scollegare gli apparecchi non essenziali dall'UPS.
Ripristinare la protezione (11) premendo il relativo
pulsante fino al blocco. Accendere l'UPS e ricollegare
gli apparecchi uno alla volta. Se la protezione
interviene di nuovo, probabilmente uno degli
apparecchi collegati è la causa del sovraccarico.
È scattata la protezione
d’ingresso dell'UPS.
Scollegare gli apparecchi non essenziali dall'UPS.
Ripristinare la protezione (11) premendo il relativo
pulsante fino al blocco.
La presa di
alimentazione a cui è
collegato l’UPS non
fornisce alimentazione al
dispositivo.
Collegare l'UPS a un’altra presa di alimentazione o far
controllare l’impianto di rete da un elettricista
qualificato.
La batteria dell'UPS non
Attendere che la batteria si ricarichi. La ricarica
è adeguatamente carica avviene ogni qualvolta l'UPS è collegato a una presa di
Quando si verifica un in quanto non ha avuto il alimentazione. In genere occorrono 8 ore per ricaricare
guasto della rete
tempo di ricaricarsi dopo completamente la batteria. Il tempo di funzionamento
elettrica l'UPS non
una recente mancanza
dell'UPS da batteria è ridotto finché la batteria non è
funziona per il periodo
della rete elettrica.
completamente carica.
di tempo previsto.
La batteria è da
Sostituire la batteria.
sostituire.
Il simbolo di allarme
(3) si accende e il
segnale acustico è
attivo.
L’UPS ha rilevato
un’anomalia.
Scollegare gli apparecchi dall’UPS. Spegnere l’UPS e
togliere l’alimentazione. Alimentare l’UPS e
riaccenderlo nuovamente. Se la segnalazione si
ripresenta rivolgersi al vostro centro di assistenza
autorizzato.
L’UPS può essere collegato tramite un cavo di collegamento USB ad un computer per funzioni di
monitoraggio e shutdown del sistema operativo. È possibile scaricare il software di gestione ed il
relativo manuale dal sito internet www.riello-ups.com.
Si attiva la
segnalazione di
batteria guasta.
Batteria guasta.
Sostituire la batteria.
Il software manda un
messaggio di
comunicazione persa.
Controllare che il cavo USB sia collegato all’Ups e al
pc e che nella configurazione del software di
comunicazione sia selezionata USB come porta di
comunicazione.
Il software non è
installato
Installare il software specifico per il sistema operativo
del vostro pc.
Sostituzione della batteria
ATTENZIONE:La sostituzione delle batterie deve essere effettuata esclusivamente da personale qualificato.
Contattare l'assistenza tecnica per informazioni relative al modello esatto di batteria da utilizzare.
L’UPS non comunica
con il pc.
- Spegnere l’UPS e scollegare il cavo di alimentazione. Rimuovere le viti che fissano il vano
batterie situate sotto L’UPS (Fig. A)
- Dopo aver rimosso il coperchio, rimuovere con delicatezza la batteria dal proprio alloggiamento
(Fig. B)
- Scollegare quindi i due fili dalla batteria (semplicemente tirandoli). Sostituire la batteria con una
dello stesso tipo facendo molta attenzione a rispettare la polarità. Riassemblare il tutto (Fig. C)
DATI TECNICI
MODELLO
ALLARMI E SEGNALAZIONI
600VA
800VA
Tensione
230V +20%/ -25%
INGRESSO
Descrizione
Posizione
interruttore
(6)
Altre segnalazioni
Led Verde
Led Giallo
Led Rosso
USCITA
Stand-by
Frequenza
50 or 60Hz +/-5% (con autoapprendimento)
Tensione (da batteria)
230Vac +/-10% (Onda pseudo sinusoidale)
Frequenza (da batteria)
50 or 60Hz +/-1Hz (con autoapprendimento)
Tempo di intervento
Tipico 2-6 ms
Funzionamento Led
STAND-BY
Intermittente
Funzionamento
da rete
ON
Funzionamento
da batteria
ON
Intermittente
Segnale acustico
intermittente lento
Preavviso di fine
scarica
ON
Intermittente
Segnale acustico
intermittente
Sovraccarico
ON
Potenza nominale VA
600
800
Potenza nominale W
360
480
Corrente max.
5A
8A
Fisso
PRESE SURGE
Intermittente
Segnale acustico
intermittenti
Fisso
Segnale acustico
intermittente
PROTEZIONE
Da Rete: protezione d’ingresso per sovraccarico.
Da Rete: spegnimento automatico dopo 5 minuti con carico
Protezione sovraccarico e >110% e immediato con carico >120% o con cortocircuito.
Da Batteria: spegnimento automatico dopo 5 secondi con
cortocircuito
sovraccarico >110% ed immediato con sovraccarico >120% o
con cortocircuito.
Tipo
Batteria guasta
Allarme o blocco
(diverso dal
sovraccarico)
ON
Fisso
Modello
Sigillate, al piombo, senza manutenzione
12V 7Ah
12V 9Ah
BATTERIA
ON
Fisso
Tempo di ricarica tipico
Segnale acustico continuo
Collocazione
Seguire le seguenti indicazioni per installare e posizionare correttamente l’UPS:
¾
L’UPS deve essere posto su di un piano orizzontale
¾
L’UPS non deve essere esposto alla luce diretta del sole
¾
Assicurarsi che la temperatura dell’ambiente sia compresa tra 0°C e 40°C, per un
funzionamento ottimale utilizzare a una temperatura massima di 25°C.
¾
Il tasso di umidità dell’ambiente deve essere inferiore al 90%
¾
Evitare ambienti polverosi
¾
Posizionare l’UPS almeno a 5 cm di distanza dai muri circostanti al fine di permettere
un’adeguata aerazione
¾
Assicurarsi che ne l’UPS ne qualche altro oggetto pesante schiacci il cavo di alimentazione
¾
Il cavo che connette i carichi all’UPS non deve superare i 10 metri di lunghezza
PROCEDURA
Verificare che l’interruttore STAND-BY/ON sia in
posizione ON.
Porta USB
Contenuto dell’imballo
¾
¾
¾
POSSIBILE
CAUSA
PROBLEMA
L’UPS non si accende.
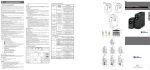
/LED ROSSO: segnalazioni varie (vedi tabella “Allarmi e segnalazioni”)
4.
8A
From mains: overload input protection.
From mains: automatic shutdown after 5 minutes with load
>110% and immediate shutdown with load >120% or for
shortcircuit.
From battery: automatic shutdown after 5 seconds with load
>110% and immediate shutdown with load >120% or for
shortcircuit.
Prese di backup (tipo locale)
Prese Surge (tipo locale)
Blinking acoustic signal
Blinking acoustic signal
Verificare che nell’impianto a monte dell’UPS vi sia una protezione da sovracorrenti. Il valore della
protezione consigliata è di 10A.
¾
collegare l’UPS alla rete elettrica tramite il cavo di alimentazione fornito in dotazione.
¾
L’UPS effettua la ricarica della batteria ogni qualvolta viene collegato all’alimentazione di
rete (anche se spento). Caricare per 6-8 ore l’UPS prima di collegare i vari carichi.
Viste frontali e posteriori:
BATTERY
Alarm or fault (other
than overload)
NOTE IMPORTANTI PER LA SICUREZZA
Voltage
Type
ON
Vi ringraziamo per la scelta del nostro prodotto!
INPUT
ALARMS AND REPORT SIGNALS
Battery fault
Positioning
Disconnect non essential equipment from the UPS.
Reset the protection (11) by depressing the button.
The UPS battery is
not sufficiently
charged as there was
not enough time for it
to recharge after a
recent power failure
When there is a mains
power supply failure,
the UPS does not work
for the expected
runtime
Replacing the batteries
CAUTION: The models require replacement by qualified service personnel.
Contact technical support for information concerning the exact model of battery to use.
Check that the STAND-BY/ON switch is in the ON
position
Connect the UPS to another mains power supply
socket or have the mains supply checked by a
qualified electrician.
Starting up on battery (Cold start)
The UPS can be connected to a computer for remote monitoring and shutdown operations using a
USB cable. The UPS management software and related manual can be downloaded from
www.riello-ups.com.
The UPS is switched
off
The mains power
supply socket the UPS
is connected to is not
supplying power to the
device
If there is no mains power supply present, pressing the main power switch will cause the UPS to
start up using its battery as a source of power.
Warning: when starting up on battery, the output frequency is set to 50Hz.
USB port
PROCEDURE
The UPS input
thermal protection
device has been
triggered
The UPS is working on
battery even though
mains power is
available
RISOLUZIONE PROBLEMI
Collegamento alla rete e carica delle batterie
POSSIBLE
CAUSE
PROBLEM
Packing contents
¾
¾
¾
FUNZIONAMENTO
TROUBLESHOOTING
Protezioni
CONDIZIONI
AMBIENTALI
VARIE
Condizioni operative
6-8 ore
Protezione contro la scarica totale, indicatore di sostituzione
batteria
Altitudine max 6,000 m, 0-90% di umidità non condensata, 040°C
Rumorosità
<40dB (a 1 m dalla sorgente )
Correnti di dispersione
verso terra
<1mA