1
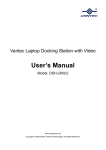
Copyright
2009 Vantec Thermal Technologies. All Rights Reserved.
USER’S MANUAL
Package Contents:
®
NexStar LX Ultra Gigabit NAS Hard Drive Enclosure
1
2
3
4
5
6
7
8
9
NexStar® LX Ultra
USB Cable
eSATA Cable
RJ45 Ethernet Cable
SATA to eSATA Bracket
Power Adapter
User’s Manual
Screws
User's CD
1
2
3
SATA
4
SATA
5
6
7
8
9
TRADEMARKS
MS-DOS, Microsoft, Windows NT/2000/ME/XP/Vista are trademarks of Microsoft Corporation.
Apple, Macintosh and Mac are trademarks of Apple Computer
*All other third-party brands and names are the property of their respective owners.
Table of Contents:
1. Introduction ............................................................................................................... 02
2. Specifications / Features............................................................................... 03
3. System Requirements ......................................................................................04
4. Parts Layout.................................................................................................................05
5. Installation
5.1 Installation of the hard drive......................................................................................06
5.2 How to find the NexStar LX Ultra..............................................................................08
5.3 Formatting the hard disk for the first time.............................................................09
6. Status Page
6.1 Changing the host name and group name............................................................10
6.2 Changing the administrator's password..................................................................11
7. FTP Server
7.1 Creating a new FTP account.......................................................................................12
7.2 Modify the FTP user account......................................................................................13
7.3. Enable /Disable FTP user account.............................................................................13
7.4. Deleting FTP user accounts.........................................................................................13
7.5. Sharing folders in the FTP server...............................................................................14
7.6. How to use the FTP server...........................................................................................14
8. SMB Server
8.1
8.2
8.3
8.4
8.5
8.6
Creating a user account...............................................................................................15
Modifying a user's account.........................................................................................15
Enabling/Disabling SMB user accounts...................................................................16
Deleting SMB user accounts.......................................................................................16
Sharing folders in SMB Server....................................................................................16
Logging into the NAS by using a user account.....................................................17
9. IP Configuration Page
10. Printer Setup
11. Media Server
11.1 iTunes..............................................................................................................................23
12. How to use the BitTorrent™ function
12.1 Uploading BitTorrent™ Files.................................................................................... 24
12.2 Mail notification...........................................................................................................25
13. Maintenance Page
13.1 Upgrading firmware....................................................................................................27
13.2 System reboot..............................................................................................................28
13.3 Restoring factory defaults .......................................................................................28
14. Disk Utility
14.1 Formatting the hard disk...........................................................................................29
14.2 Setting up sleep mode.............................................................................................. 29
14.3 Scan disk........................................................................................................................29
15. Hardware Reset....................................................................................................30
16. Warranty ......................................................................................................................31
17. Contact ..........................................................................................................................31
Table of Contents
1
1. Introduction:
Introducing the sleek contemporary design of the
Vantec NexStar ® LX Ultra—blending the finest
functions of a Network Attached Storage (NAS)
solution into a powerful little package that fits any
home or office. Crafted with versatility in mind to
conform to different user’s needs, the NexStar ®
LX Ultra is equipped with three interfaces (Gigabit
Ethernet/eSATA/USB 2.0). Whether you have a
PC or Mac, setting up the LX is a breeze with the
easy-to-use web control panel. Within a few clicks,
your NexStar LX Ultra will be storing and sharing
your favorite music, photos, videos and data files
over the network through a blazing fast Gigabit
Ethernet connection. It comes packed with SMB,
FTP as well as Media Server functions supporting
a wide range of platforms including your computer
via iTunes and your PS3 or Xbox 360.The NexStar ®
LX Ultra also boasts a BitTorrent™ client eliminating
the need for a computer to be on constantly for all
those downloads. The 80 millimeter fan ensures that
this NAS can stay constantly on while keeping your
hard drive cool for a reliable network storage sharing
solution. With a long list of features all bundled
in a powerful little package, the Vantec NexStar ®
LX Ultra is an ideal addition to any home or office
network.
Introduction
2
NST-475LX-BK
2. Specifications/Features:
®
NexStar LX Ultra Gigabit NAS Hard Drive Enclosure
Features:
• Easy-To-Use Web Control Panel
• Gigabit Ethernet Supports 10/100/1000 Mbps
• FTP & SMB Server To Store And Share Your Files
• Media Server To Stream Files Over Your Network:
-PS3 & Xbox 360 For Music, Photos & Videos
-Share Your MP3 Over iTunes
• Built-In BitTorrent™ Client To Download Contents Over Internet
• Share Your Printer Over Home Or Office Network
• Supports Triple Interface (Ethernet/eSATA/USB 2.0)
• Hi-Performance 80mm Fan For Effective Cooling
• Supports 3.5” SATA I/II Hard Drive Up To 2 TB*
Specifications:
Model
Drive Supported:
External Interface:
Data Transfer Rates:
: NST-475LX-BK
: 3.5” SATA I/II Hard Drive
: Ethernet/eSATA/USB 2.0
: LAN (10/100/1000 Mbps)
eSATA (Up To 3 Gbps)
USB 2.0 (Up To 480 Mbps)
Storage Capacity:
: Up to 2 TB*
Power Supply:
: AC Adapter
Material:
: Plastic
Dimensions:
: 185mm x 168 mm 65 mm
*For the most updated Storage capacity, please check our website: www.vantecusa.com
USB Printer Port
USB 2.0 Port
Power Switch
Power Connector
SATA
eSATA Port
Ethernet Port
Specifications / Features
3
3. System Requirements:
Microsoft Windows 2000/2003 server/XP x86/
XP 64 bit/Vista X86/Vista 64 bit
1. USB port, internal SATA port, eSATA port or
RJ45 Ethernet port.
2. For USB 2.0 speeds, the system must
support USB 2.0 specifications.
3. For SATA speeds, the system must support
SATA specifications.
4. CD-ROM drive.
Mac OS X & greater
1. USB port, internal SATA port, eSATA port or
RJ45 Ethernet port.
2. For USB 2.0 speeds, the system must
support USB 2.0 specifications.
3. For SATA speeds, the system must support
SATA specifications.
4. CD-ROM drive.
System Requirements
4
4. Parts Layout:
®
NexStar LX Ultra Gigabit NAS Hard Drive Enclosure
SATA/Power connector
Parts Layout
5
5. Installation:
®
NexStar LX Ultra Gigabit NAS Hard Drive Enclosure
5.1. Installation of the hard drive.
(1) Unscrew the screws on the underbody
as shown. ( Figure 5.1-A )
( Figure 5.1-A )
XD
SD
2.5”
SATA
(2) Slide out the hard drive tray and place
the hard drive in. Be sure to fasten the
hard drive in with screws.
( Figure 5.1-B ) ,( Figure 5.1-C )
Universal Storage Adapter
3.5”/5.25”
MS
CF
( Figure 5.1-B )
XD
CF
( Figure 5.1-C )
Installation
6
(3) Slide the hard drive tray back into the LX Ultra
and re-screw the screws back on to the
underbody. ( Figure 5.2-D ) ( Figure 5.2-E )
( Figure 5.2-D )
( Figure 5.2-E )
Installation
7
®
5.2 How to find the NexStar LX Ultra :
(1) Find and execute “SDisk jar” from the CD
and begin the search for the NAS device.
( Figure 5.2-A )
( Figure 5.2-A )
(2) Click “Connect” to link to the NAS web
page.
(3) The administrator management will ask
you to enter the user name and password.
Default account settings
User name:anonymous
Password: admin ( Figure 5.2-B )
( Figure 5.2-B )
NOTE :
1. If there is more than one NAS device attached
in the same local area network, you will see
the other IP addresses in the IP block.
2. If you are unable to open “SDisk jar”, please
download and install JAVA from (www.java.com).
Installation
8
(4) After entering the web UI, please select
a language of your choice. ( Figure 5.2-C )
( Figure 5.2-C )
5.3 Formatting the hard disk for the
first time.
(1) Click on “Disk Utility” located on the
left list.
(2) Next click “Format” to begin the format
of the hard disk. ( Figure 5.3-A )
( Figure 5.3-A )
(3) Click “OK” to confirm the format.
( Figure 5.3-B )
( Figure 5.3-B )
Installation
9
(4) By clicking "Status", you will see information
pertaining to your NAS and Hard Drive.
( Figure 5.3-C )
( Figure 5.3-C )
6. Status Page
The Status Tab is where you can change the
host name, group name and administrator's
password. You may also disable or enable
features on the NAS such as DHCP server,
SMB server and FTP server. Information
about the NAS are also displayed in the
“Status” tab also such as the information of
Hard disk, IP address, MAC address and
current installed firmware version.
( Figure 6.1-A )
6.1 Changing the host name and
group name.
(1) Click on "Change"
( Figure 6.1-A )
( Figure 6.1 A )
(2) Enter desired Host and Group name.
When finished, press "OK". (Figure 6.1-B)
( Figure 6.1-B )
Status Page
10
6.2 Changing the administrator’s
password.
(1) Click on "Change". ( Figure 6.2-A )
( Figure 6.2-A )
(2) Enter desired password. Retype the
password once more and press "OK"
when finished. ( Figure 6.2-B )
( Figure 6.2-B )
(3) The Date/Time can be set and synced
to the PC. Clicking on Sync from PC
enables th e NAS t o automatically
synchronize itself to your computer's
time.If your region or country routinely
changes time such as daylight savings
time, you might also want to use this
feature.
NOTE :
The administrator’s name is unchangeable and
cannot be modified.
Status Page
11
7. FTP Server
The FTP Tab allows you to easily setup your
FTP Server. You may manage accounts and
control the files/folders that are being shared.
( Figure 7.1-A )
Default account settings
User name: anonymous
Password: “empty”
( Figure 7.1-A )
7.1 Creating a new FTP account
(1) Click "New" ( Figure 7.1-B )
( Figure 7.1-B )
(2) Enter the desired "Name" and "Password".
Select whether you want the account
holder to have Read Only access or
Read/Write acce s s . W hen f inis hed,
click "Add". ( Figure 7.1-C )
( Figure 7.1-C )
NOTE :
1. The Access authority of “Read Only” means that
the user can only read files from the NAS only.
“Read/Write” means that the user is able to read
and write to the NAS freely.
2. Spaces is not an acceptable character.
FTP Server
12
7.2 Modifying the FTP user account
(1) Select the account you wish to modify.
When selected, click on the "Modify".
( Figure 7.2-A )
( Figure 7.2-A )
(2) You may now change the account's
p asswo rd a nd ac c es s aut hor it y .
When finished, click on the "Modify".
( Figure 7.2-B )
( Figure 7.2-B )
7.3. Enable / Disable FTP user account.
(1) Select the user you wish to enable
or disable.
(2) When user is selected click on the
"En/Disable". ( Figure 7.3-A )
( Figure 7.3-A )
7.4. Deleting FTP user accounts
(1) Select the user account you wish to
delete.
(2) When the user account you wish to
delete is selected, click “Delete”.
( Figure 7.4-A )
( Figure 7.4-A )
FTP Server
13
7.5. Sharing folders in the FTP server
Here you can share the folder for
established user :
(1) Select a user and click "Modify".
( Figure 7.5-A )
(2) Begin by choosing a folder from the
Folder List you wish to share with the
user. Press the "Direction Arrow"
button so that the folder shows up
under Sharing List.
( Figure 7.5-A )
(3) When finished, click "Back" to return
to the previous page. ( Figure 7.5-B )
( Figure 7.5-B )
7.6. How to use the FTP server?
(1) Open up "Internet Explorer".
( Figure 7.6-A )
( Figure 7.6-A )
(2)
1
1
Enter the NAS IP address.
2
The "Log On" window will pop up.
Enter the "User Name" and "Password".
3
2
Once everything is entered, click
"Log On". You should have access
to your FTP now. ( Figure 7.6-B )
3
( Figure 7.6-B )
FTP Server
14
8. SMB Server
If someone wants to share the NAS disk from
the network, they must apply for a user account
first. Creating, deleting, modifying and enabling/
disabling accounts can all be done on SMB
Server page. Once the user account has been
setup, they may access the NAS disk by using
their set user name and password.
8.1 Creating a user account
( Figure 8.1-A )
(1) Click on "New" to setup a new account.
( Figure 8.1-A )
(2) Enter the desired "Name" and "Password"
for the account and click "Add".
( Figure 8.1-B )
NOTE :
1. The Access authority of "Read Only" means
that the user can only read files from the NAS
only. "Read/Write" means that the user is able
to read and write to the NAS freely.
2. Spaces is not an acceptable character.
( Figure 8.1-B )
8.2 Modifying a user's account
(1) Select the user account you wish to
modify. Once selected, click "Modify".
( Figure 8.2-A )
( Figure 8.2-A )
(2) You may change the user's password and
access authority. When finished, click
"Modify". ( Figure 8.2-B )
( Figure 8.2-B )
SMB Server
15
8.3 Enabling /Disabling SMB user
accounts
(1) Select the user you want to enable
or disable.
(2) Click "En/Disable".
( Figure 8.3-A)
( Figure 8.3-A )
8.4 Deleting SMB user accounts
(1) Select the user account you wish to delete.
(2) Click "Delete". ( Figurea 8.4-A )
( Figure 8.4-A )
8.5 Sharing folders in SMB Server
(1) Select a user and click "Modify".
( Figure 8.5-A )
( Figure 8.5-A )
(2)
1 Begin by choosing a folder from the
Folder List you wish to share with the
user. Press the "Direction Arrow" button
so that the folder shows up under Sharing
List.( Figure 8.5-B )
2
2 When finished, click on "Back" to return
to the previous page. ( Figure 8.5-B )
( Figure 8.5-B )
SMB Server
16
1
8.6.Logging into the NAS by using a
user account
(1) Open up "My Network Places". ( Figure 8.6-A )
( Figure 8.6-A )
(2) Double click “Workgroup”.
( Figure 8.6-B )
( Figure 8.6-B )
(3) Here you will find the NST-475LX storage.
D ou ble click th e st or age t o login.
(Figure 8.6-C)
( Figure 8.6-C )
(4) Type the User Name and Password to
login. Once logged in, you may start
sharing files from the NAS. (Figure 8.6-D)
( Figure 8.6-D )
SMB Server
17
9. IP Configuration
Here you can change the NAS to either
automatically obtained an IP address or
manually set a static IP. When set to Automatic,
the NAS will automatically obtain the an
assigned IP address which is given by the
DHCP server. When set to Static, the IP
address is a fixed IP address which will require
you to enter everything manually.(Figure 9-A)
( Figure 9-A )
IP Configuration
18
10. Printer Setup
(1) Plug the printer into the USB
Printer Port.( Figure 10- A )
USB CABLE
USB Printer Port
( Figure 10-A )
(2) Ensure the printer is installed on the
NAS's web page.( Figure 10- B )
( Figure 10- B )
(3) Locate your computer's "Printers and
Faxes" settings. ( Figure 10- C )
( Figure 10-C )
(4) Click "Add a printer". ( Figure 10-D)
( Figure 10-D )
Printer Setup
19
(5) Click "Next". ( Figure 10-E )
( Figure 10-E )
(6) Select the "Local printer attached
to this computer" but un-check the
option of "Automatically detect and
install my Plug and Play printer".
When finished, click "Next".
( Figure 10-F )
( Figure 10-F )
(7) Select "Create a new port" and choose "
Standard TCP/IP". When finished,
click "Next". ( Figure 10-G )
( Figure 10-G )
(8) Click "Next". ( Figure 10-H )
( Figure 10-H )
Printer Setup
20
(9) Type the IP Address in the "Printer
Name or IP Address" box and when
finished click "Next". ( Figure 10-I )
( Figure 10-I )
(10) If you do not know the IP address
please see the 'Search Disk
Application'. ( Figure 10-J )
( Figure 10-J )
(11) Select "Custom" and click "Next".
( Figure 10-K )
( Figure 10-K )
Printer Setup
21
(12) Select Protocol "LPR" and in the
LPR Settings under Queue Name
type "LP1" as shown in the picture.
(Figure 10-L)
( Figure 10-L )
(13) When finished, click "Finish".
( Figure 10-M )
( Figure 10-M )
Printer Setup
22
11. Media Server
The Media Server is a powerful tool that
allows the NAS to host an array of files
on the network. Photos, music and videos
are shared over the network and support
a variety of platforms which includes but
not limited to computers, iTunes, PS3,
Xbox360.
In (Figure 11-A), when in the Media Server
tab you must Enable/Disable which type of
media you desire to be shared. You will also
need to set the folder to be shared from the
Sharing List. Once the folder has been
selected, click "Set". From this point on,
everything is all setup on your media and
can be accessed on the network anytime.
( Figure 11-A )
11.1. iTunes
(1) Playing music has never been simpler
with the help of iTunes. Please make
sure that the "Music Directory" is
Enabled and the folder containing
the music files are selected.
( Figure 11-A )
( Figure 11-B )
(2) Find the LX Ultra under the SHARED
section of iTunes. Select the LX Ultra
and enjoy your music collection with
the help of iTunes. ( Figure 11-B )
Media Server
23
12. How to use the
BitTorrent™ function
12.1 Uploading BitTorrent™ Files.
(1) Setup the download location and
select "Apply". ( Figure 12.1-A )
( Figure 12.1-A )
(2) Browse for the BitTorrent™ file and
then click "Open". ( Figure 12.1-B )
(3) Once the torrent file has been selected
and the path is correct. Please then go
ahead and click "Upload" to start the
download of the torrent. During the
download process you have features
of stop, pause, restart and delete of
the BitTorrent™ files.You may also
check the BitTorrent's files information
by using the "Review" feature.
( Figure 12.1-C ) , ( Figure 12.1-D )
( Figure 12.1-B )
( Figure 12.1-C )
NOTE :
This product can upload many BitTorrent™ files at
the same time however when downloading, there
is a max that can be downloaded at one time. The
LX Ultra will put the rest of the BitTorrent™ files that
are not currently being downloaded into que.
When one of the current downloads finish, the LX
Ultra will automatically start the next in que.
( Figure 12.1-D )
How to use the BitTorrent™ function
24
12.2 Mail Notification :
When BitTorrent™ downloads are finished,
you ma y re ce ive e- m ail not if ic at ions .
If you use this function, you will need to
have an e-mail address which is on a
SMTP server. Bellow is a sample.
(1) In this example, Microsoft Outlook
will be used.
( Figure 12.2-A )
(2) Select "Accounts" in "Tools".
( Figure 12.2-A )
(3) Under the "Mail" tab select the
account and then check its
"Properties".
( Figure 12.2-B )
( Figure 12.2-B )
(4) Under the "Servers" tab, make sure
the required SMTP information fields
are filled in. Also make that "My server
requires authentication" is selected.
When finished, click "Apply".
( Figure 12.2-C )
( Figure 12.2-C )
How to use BT download
25
(5) Type the "Account name and Password"
for the Outgoing Mail Server. Make
sure this information is also the same
in the BitTorrent™ Mail Notification
function also. When finished, click
"Apply". ( Figure 12.1-E )
( Figure 12.1-E )
(6) Enter the e-mail address into the
sender and receiver box. When
finished, press "Apply".(Figure 12.1-F)
(7) When downloads are complete, an
e-mail notification will be sent to you
to inform you that your download has
been completed.
( Figure 12.1-F )
How to use BT download
26
13. Maintenance Page
On the maintenance page, you are able to
do Firmware Upgrades, preform a System
Reboot and restore Factory Defaults.
( Figure 13.1-A )
( Figure 13.1-A )
13.1 Upgrading firmware
(1) Click "Browse" and locate the firmware
file. When the firmware file is selected
click "Open". (Figure 13.1-B)
( Figure 13.1-B )
(2) Check to make sure the file and pathway
of the firmware file is correct. If everything
is correct, click "Upload". ( Figure 13.1-C )
( Figure 13.1-C )
(3) When the upgrade of the firmware is
complete, click on "OK". Preform a power
cycle of the NAS by powering off and on
the NAS. ( Figure 13.1-D )
( Figure 13.1-D )
Maintenance Page
27
13.2 System reboot
A reboot of the NAS is possible without
the need of powering off. If you feel the
network or NAS is not smooth or a bit
sluggish, try a reboot of the NAS.
( Figure 13.2-A )
( Figure 13.2-A )
13.3 Restoring Factory Defaults
A reset will reset the NAS to Factory
Default Settings. It will reset User Names,
Passwords, IP Addresses to DHCP
servers, Workgroups and Time. However
it will not reset the FTP, SMB and Folder
Sharing portions of the NAS. ( Figure 13.3-A )
( Figure 13.3-A )
Maintenance Page
28
14. Disk Utility
14.1. Formatting the Hard Disk
Please refer to 5.3 of this
manual.
14.2. Setting up sleep mode
( Figure 14-A )
Select the sleep time and click "Set"
( Figure 14-A )
14.3. Scan Disk
Click on "Start" to begin the scanning
of the hard disk. Once complete, a
report will be displayed; Number of
Files, Number of Directories, Used
Size and Number of Errors. You may
erase the information displayed by
clicking "Clear". ( Figure 14-B )
( Figure 14-B )
Disk Utility
29
15. Hardware Reset
A hardware reset will do a complete
Factory restore to default settings. All
settings on the NAS will be erased and
will need to be reentered.
(1) Power off the NexStar® LX Ultra.
( Figure 15-A )
Power off
( Figure 15-A )
Reset button
(2) Press and hold the reset button
while you turn on the LX Ultra.
( Figure 15-B )
(3) Co ntin ue to h old t he r es et but t on
for 2 0 secon ds. Once 20 seconds
h as ela psed , pleas e let go of t he
reset button. Now preform a power
cycle of the LX Ultra by turning
off an d o n th e LX Ultra. You have
completed the Factory Reset
pro ce du re.
Power on
( Figure 15-B )
Hardware Reset
30
16. Warranty:
The NexStar® LX Ultra comes with a 1 year
limited warranty ( 90 day parts ). If your unit
should become defective within that time
frame, please go to http://www.vantecusa.com
for information on how to receive warranty
exchange or repair. Cosmetic defects and missing
parts are not covered under this warranty. Please
check the contents of the unit to make sure you
received all parts. Also, check for any cosmetic
flaws. If any parts are missing or if there are
cosmetic defects, please contact the retailer from
which you purchased the unit immediately and
ask for a replacement.
17. Contact :
Vantec Thermal Technologies
43951 Boscell Rd.
Fremont, CA 94538
tel: 510-668-0368
fax: 510-668-0367
website: www.vantecusa.com
Copyright © 2009 Vantec Thermal Technologies. All Right Reserved.
All Registered Trademarks Belong To Their Respective Companies.
Warranty /Contact
31