1
8
English
If you have set the timer and the preset cooking process has not yet started when a power failure
occurs, the process starts when the power supply resumes, provided it resumes within 12 hours.
Preparing for use
Before first use
1 Remove the sheet between the inner pot and the heating element.
2 Clean the parts of the rice cooker thoroughly before you use the appliance for the first time
(see chapter ‘Cleaning’).
3 Dry all parts thoroughly before you start to use the appliance.
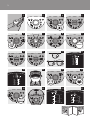
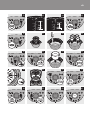
4 Attach the scoop holder to the body of the rice cooker (Fig. 2).
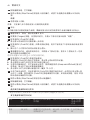
Control panel and display
The control panel has 12 buttons with which you operate the appliance. The display gives
information on the selected processes.
The display has different colours to show the status of the rice cooker. When the display is white,
the appliance is in standby mode or you are programming it. When the display is red the appliance is
cooking or reheating. When the display is green, the appliance is in keep-warm mode.
Note:When the appliance is cooking or reheating, the red display light switches off after 10 minutes. In
the keep-warm mode, the green display light switches off after 10 minutes.
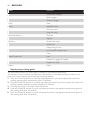
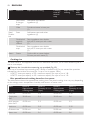
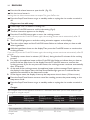
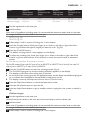
-- Control panel and display (Fig. 3)
Buttons
A flashing button indicates that you can press this button to go to the next step. You can use the
Stop/Cancel button to stop a cooking process or to stop a preset timer. You can also use this button
as an “undo” button when you are programming a cooking process to go back to the previous
screen.
Menu
 Some of the menus have submenus. When you press the buttons for these menus, the submenu
appears on the display. If a menu does not have a submenu, the first step of the cooking process
is shown on the display.
In some of the menus, text and animations are shown on the display to guide you through the
cooking process step by step.
Control ring
You can move your finger up or down on the left or right side of the control ring to adjust settings
(e.g. the clock, the timer and the cooking time) or to select the desired menu. Press and hold one of
the 4 points to move the settings forward or backward quickly.
Setting the clock time
Note:You cannot adjust the clock time during a cooking process or when the appliance is in keep-warm
mode.
1 Put the plug in the wall socket and switch on the mains.
,, The display shows the greeting message (‘Good morning’, ‘Good afternoon’ or ‘Good
evening’).
2 Press the Preset/Clock button twice (Fig. 4).
3 Move your finger up or down on the left or right side of the control ring to select ‘Clock
setting’ (Fig. 5).
4 Press the Cook/OK button (Fig. 6).