Transcript
QUICKGuide FS-C5100DN/C5200DN/C5300DN
Clearing paper jams
Possible Paper Jam
Locations
Clearing paper jams
Paper Jam at Cassette
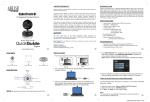
The figure below explains the printer’s
paper paths including the options. The
locations where paper jams might occur are also shown here, with each location explained in the table below.
Paper jams can occur in more than
one component on the paper paths.
MP Tray
Paper Cassette
Paper Jam at MP
Tray
➊ First, open the printer‘s front cover
and check for paper jams in the paper
transfer unit.
➋ Pull out the paper cassette and remove the jammed paper.
➊ First, open the printer‘s front cover
and check for paper jams in the paper
transfer unit.
➋ Remove the jammed paper.
②
②
Paper Feeder
PF-500, PF-510
Paper Jam in
Printer
➊ Press the lever to release the lock.
①
②
➋ Pull the front cover towards you.
➌ If the paper has jammed near the
Cleaning the
Paper Transfer
Unit
➊ Press the lever to release the lock.
①
registration roller, as shown in A, remove the paper by pulling it up from
the center.
If the paper has jammed inside the
fuser unit, as shown in B, open the
fuser cover and remove the paper by
pulling its edge.
If the paper has jammed inside the
duplex unit, as shown in C, lift the duplex unit and remove the paper by
holding it in the middle.
➍ Close the front cover.
②
➋ Pull out the front cover.
➌ Wipe away the paper dust on the
registration roller and the paper ramp
using the cleaning cloth.
Note Be careful not to touch the
black transfer roller and black transfer
belt during cleaning as this may adversely affect print quality.
➍ Push the front cover back in completely.
Duplex Unit
③
Duplex Unit
Dry Cloth
Paper Ramp
Transfer Belt
(Black)
Registration
Roller (Metal)
Paper Jam at Cassette ➊ Pull out the paper feeder and remove the jammed paper.
2 (to 4)
Fuser
Cover
Registration
Roller
Paper
Transfer Unit
Transfer Roller
(Black)
A
①
C
④
B