1
INSTALLATION
INSTRUCTIONS
LCD DISPLAY STATIC MOUNT
PSM-2155
(1)
(1)
(4)
(4)
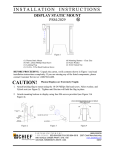
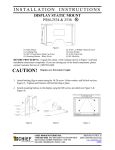
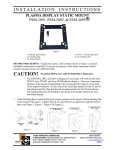
Figure 1
LCD Display Static Mount
Latching Flag
M5 x 25mm Phillips Head Cap Screws
Mounting Buttons-Green
(1) 10-24 x .5 Phillips Flat Head Screw
(1) Nylon Washer
(1) 10-24 Nylock Nut
BEFORE PROCEEDING: Unpack the carton, verify contents shown in Figure 1 and read
installation instructions completely. If you are missing any of the listed components, please
contact Customer Service at 1-800/582-6480.
CAUTION!
LCD Displays are Extremely Fragile.
1. Attach latching flag to mount using the 10-24 Phillips flat head screw, Nylon washer, and
Nylock nut (see Figure 2). Tighten until friction will hold the flag in place.
2. Attach mounting buttons to display using the M5 screws provided (see Figure 3 & Figure 4).
Figure 2
Figure 3
CHIEF MANUFACTURING INC.
1-800-582-6480 952-894-6280 FAX 952-894-6918
8401 EAGLE CREEK PKWY, STE. 700
SAVAGE, MINNESOTA 55378 USA
Figure 4
8805-000075
2004 Chief Manufacturing
www.chiefmfg.com
08/04
WARNING
ALL COMPONENTS MUST BE SECURELY FASTENED TO A
STRUCTURAL MEMBER CAPABLE OF SUPPORTING 4
TIMES THE COMBINED WEIGHT OF ALL COMPONENTS
PLUS THE EQUIPMENT BEING MOUNTED. IF IT CANNOT
SUPPORT THIS WEIGHT, THE STRUCTURE MUST BE
REINFORCED.
THE MAXIMUM WEIGHT TO BE INSTALLED ON THE
MOUNT IS 175 POUNDS (79.38 KG).
3. Securely anchor the LCD static mount to wall studs or supporting framework (see
WARNING).
4. Make sure the flag is lowered to the side before attempting to place the display on the mount.
5. With the aid of another person, lift the display up to the mount, align the mounting buttons
with the teardrop slots in the mount, and set the LCD into place (see Figure 5).
6. Position (raise) the flag to secure the LCD.
Figure 5