1
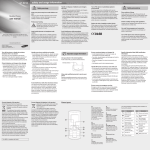
Install the SIM card and battery
Insert a memory card (optional)
1.Remove the battery and cover then insert the SIM
card.
Your phone accepts microSD™ or microSDHC™
memory cards up to 2 GB (depending on memory card
manufacturer and type).
1.Remove the battery cover and battery.
2.Unlock the memory card cover.
Instructional icons
Note: notes, usage tips, or additional information
<
3.Lift the memory card cover and insert a memory card
with the label side facing up.
Battery
Memory card
Charge the battery
1.Plug the supplied travel
adapter.
2.When charging is
finished, unplug the
travel adapter.
4.Close and lock the memory card cover.
5.Replace the battery and battery cover.
2.To end the call, press [
You may need to press the Confirm key to access
Menu mode depending on your region or service
provider.
Square brackets: phone keys; for example: [
(represents the Power/Menu exit key)
3.Press <Select>, <OK>, or the Confirm key to confirm
the highlighted option.
>
Angled brackets: softkeys that control different
functions at each screen; for example: <OK>
(represents the OK softkey)
]
Turn your phone on or off
To turn your phone on,
4.Press <Back> to move up one level; Press [
return to Idle mode.
• When you access a menu requiring the PIN2, you must
enter the PIN2 supplied by the SIM card. For details,
contact your service provider.
• Samsung is not responsible for any loss of passwords
or private information or other damages caused by
illegal software.
2.Enter your PIN and press <OK> (if necessary).
To turn your phone off, repeat step 1 above.
To transfer data from a PC to your phone, you need
Windows XP Service Pack 2.
1.In Idle mode, enter an area code and a phone
number.
2.Press [
• Press [ ] to switch to Symbol mode.
2.Scroll to the profile you are using.
If you are using the silent or offline profile, you are
not allowed to change the ringtone.
3.Press <Options> → Edit → Call ringtone.
4.Select a ringtone category → a ringtone.
To switch to another profile, select it from the list.
Call a recently dialled number
].
2.Scroll left or right to a call type.
3.Scroll up or down to select a number or name.
4.Press the Confirm key to view details of the call or
[
] to dial the number.
Enter text
• Press and hold [ ] to switch between T9 and ABC
modes.
• Press [ ] to change case or switch to Number
mode.
T9 mode
1.Press the appropriate alphanumeric keys to enter an
entire word.
2.When the word displays correctly, press [0] to insert
a space. If the correct word does not display, press
the Navigation key up or down to select an alternate
word.
ABC mode
Press the appropriate alphanumeric key until the
character you want appears on the display.
Number mode
Press the appropriate alphanumeric key to enter a
number.
Press the appropriate alphanumeric key to enter a
symbol.
• To move the cursor, press the Navigation key.
• To delete characters one by one, press <Clear>. To
delete the characters on the left side of the cursor,
press and hold <Clear>.
• To insert a space between characters, press [0].
• To enter punctuation marks, press [1].
To view photos
5.Select a contact.
6.Select a number (if necessary).
7.Press <Options> → Save to save the recipients.
8.Scroll down and set the number of times to repeat
the SOS message.
In Menu mode, select My files → Images → a photo file.
To capture videos
1.In Menu mode, select Camera to turn on the camera.
2.Press <Options> → Camcorder to switch to
Recording mode.
9.Press <Save> → <Yes>.
To send an SOS message
1.With the keys locked, press [
] four times to send
an SOS message to preset numbers.
The phone switches to SOS mode and sends the
preset SOS message.
2.To exit SOS mode, press [
• Press and hold [ ] to select an input mode or change
the input language.
Symbol mode
To change the text input mode
].
Use the camera
To capture photos
1.In Menu mode, select Camera to turn on the
camera.
2.Aim the lens at the subject and make any
adjustments.
Adjust the volume
To adjust the volume of the ringtone
1.In Menu mode, select Settings → Profiles.
2.Scroll to the phone profile you are using.
If you are using the silent profile, you are not allowed
to adjust the volume of the ringtone.
3.Press <Options> → Edit → Volume → Call alert.
4.Scroll left or right to adjust the volume level.
5.Press <Save>.
To adjust the volume of voice during a call
] to dial the number.
In noisy environments, you may have difficulty hearing
the calls while using the speakerphone feature. For
better audio performance, use the normal phone mode.
].
The volume through mono earphones is very low or
virtually inaudible. Use stereo earphones only.
Do not remove the battery while the phone is connected
to the travel charger. Otherwise, the phone may be
damaged.
1.In Menu mode, select Settings → Profiles.
].
].
While a call is in progress, press the Navigation key up
or down to adjust the volume.
Make a call
3.To end the call, press [
Change your ringtone
] to
].
To AC power outlet
1.In Idle mode, press [
1.When a call comes in, press [
1.In Idle mode, press <Menu> to access Menu mode.
]
1.Press and hold [
Memory card cover
To access your phone's menus,
2.Use the Navigation key to scroll to a menu or option.
→
[
2.Insert the battery and cover.
Answer a call
Followed by: the order of options or menus you
must select to perform a step; for example: In Menu
mode, select Messages → Create new message
(represents Messages, followed by Create new
message)
SIM card
Battery cover
Access menus
3.Aim the lens at the subject and make any
adjustments.
Add a new contact
Your phone is preset to save contact to the phone
memory. To change the memory location, in Menu mode,
select Settings → Application → Phonebook → Save
new contact to → a memory location.
1.In Idle mode, enter a phone number and press
<Options>.
2.Select Create contact → a number type (if
necessary).
3.Enter contact information.
You can simulate an incoming call when you want to get
out of meetings or unwanted conversations.
• Press and hold the Navigation key down in Idle
mode.
Send and view messages
Activate the mobile tracker
To send a text or multimedia message
1.In Menu mode, select Messages →
Create new message → Message.
2.Enter a destination number and scroll down.
3.Enter your message text. ► Enter text
For sending as a text message, skip to step 5.
For attaching multimedia, continue with step 4.
When someone inserts a new SIM or USIM card in your
phone, the mobile tracker feature will automatically send
the contact number to two recipients to help you locate
and recover your phone. To activate the mobile tracker,
1. In Menu mode, select Settings → Security →
Mobile Tracker 2.0.
2.Press <OK> to set a phone lock password.
4.Press <Options> → Add multimedia and add an
item.
3.Enter a new 4-to 8-digit password and press <OK>.
5.Press the Confirm key to send the message.
5.Select Settings.
4.Enter the new password again and press <OK>.
6.Enter a new 8-digit password for the mobile tracker
and press <OK>.
8.Scroll left or right to On.
9.Scroll down and press the Confirm key to open the
recipient list.
10.Press the Confirm key to open your contact list.
11.Scroll to a contact and press the Confirm key.
12.Select a number (if necessary).
13.When you are finished selecting contacts, press the
Confirm key to return to the recipient list.
14.Press <Options> → OK to save the recipients.
15.Scroll down and enter the sender's name.
16.Press <Options> → Save → <Accept>.
To change the password for the mobile tracker, select
Change Mobile tracker 2.0 Password.
Activate and send an SOS message
In an emergency, you can send SOS messages to your
family or friends for help.
To activate the SOS message
1.In Menu mode, select Messages → Settings →
SOS messages → Sending options.
2.Scroll left or right to On.
3.Scroll down and press the Confirm key to open the
recipient list.
7.Enter the new password againg and press <OK>.
4.Press the Confirm key to open your contact list.
Listen to music
Listen to the FM radio
Activate the torch light
1.In Menu mode, select Music.
1.In Menu mode, select Applications → FM radio.
2.Press <Options> → Create playlist.
2.Press the Confirm key to start the FM radio.
3.Enter a title for your new playlist and press the
Confirm key.
3.Press <Yes> to start automatic tuning.
The radio scans and saves available stations
automatically.
The torch light feature helps you see in dark places by
making the display and backlight as bright as possible.
To activate the torch light, press and hold the Navigation
key up in Idle mode or with the keypad locked.
4. Select the new playlist.
5.Press <Options> → Add → a memory location → a
music category (if necessary).
6.Select the files you want to include and press <Add>.
8.Control playback using the following keys:
In Menu mode, select My files → Videos → a video file.
Make fake calls
• Press the Navigation key down four times when the
keys are locked.
5.Press the Confirm key or <Stop> to stop recording.
The video is saved automatically.
To view videos
2.Select a text or multimedia message.
4.Press the Confirm key to add the contact to memory.
4.Press the Confirm key to start recording.
After capturing videos, select <Album> to view videos.
To view text or multimedia messages
1.In Menu mode, select Messages → Inbox.
7.Press the Confirm key to begin playback.
Key
Function
Confirm
Pause or resume playback
Navigation
• Left: Skip backward; Scan backward in a file
(press and hold)
• Right: Skip forward; Scan forward in a file
(press and hold)
• Up/Down: Adjust the volume
To deactivate the torch light, press <Back> or [
].
The first time you turn on the FM radio, you will be
prompted to start automatic tuning.
4.Press and hold the Navigation key left or right to a
saved radio station.
Press the Navigation key left or right to tune a radio
staion.
5.To turn off the FM radio, press the Confirm key.
• Listen to the FM radio without the headset when the
radio signal is strong and when the current radio signal
is weak, use the supplied headset.
• Listening to the FM radio without the headset may
reduce battery charge more quickly.
• The battery cover serves as the antenna for the FM
radio. Handle the battery cover with care and keep the
contact points clean.
3.Press the Confirm key to take a photo. The photo is
saved automatically.
4.Press <Back> to take another photo (step 2).
After capturing photos, select <Album> to view photos.
GT-E2120_UM_SEA_Eng.indd 2
2009-07-31 �� 4:26:23