1
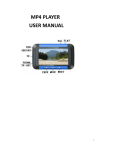
Trio V430 Manual Features: 3.0-inch supporting 400*240 resolution Supports MP3, WMA, and most other common audio formats Supports Micro SD cards, to expand your storage Support for AVI, RM, RMVB, and FLV video formats Supports JPEG, BMP, GIF format images Built-in microphone for long recordings at high quality Energy-saving settings, brightness adjustment, automatic shutdown A variety of sound and equalizer options Supports FM radio Support multiple languages High-speed USB2.0 interface Congratulations on purchasing your Trio Personal Media Player! To get the most out of your purchase, please take the time to carefully read through this manual. Foreword If any problems occur during while using your Trio, please feel free to contact Mach Speed technical support at 580-272-0035. Thank you for your support and cooperation! Mach Speed Technologies bears no responsibility for any damage or loss of personal data due to misuse of software and/or hardware, damage to the player caused by human factors, replacement of battery, or other unforeseen circumstances. To prevent loss of your data, please backup your data regularly. Information in the manual is subject to any change without notice and is subject to copyright protection. Copying or otherwise reproducing this material without prior written consent is prohibited. Due to Firmware changes, some of the pictures and functions described in this manual may not be the same as are included with your player. Precautions • • • Avoid using your Trio under extremely hot, cold, dusty or wet environments. Striking, dropping, or severe jolts to your Trio may cause physical damage, battery loosening, or other hardware damage. The following conditions indicates a low battery level and signifies that the player should be charged: o The battery icon displays in normal operation with low battery prompt. o Where there is no response when pressing keys and the battery icon displays . o The player turns off automatically. • • • • • • Static electricity may cause damage to interior hardware of the player. Do not disconnect the player while formatting, uploading, or downloading files to the player, as it may cause program errors, or cause the unit to be unable to power on. When the player is used as a removable hard disk, users should store files following correct file management methods. We are not liable for any data loss or damage. Do not disassemble the unit in any way as this will void all warranties. Please contact your place of purchase if you experience any problems with your unit. Ensure that your player is powered off before connecting or removing your Micro SD card. The player may warm slightly when charging. This is normal. Button explanation: 1. 2. 3. 4. 5. 6. 7. 8. 9. Mode Button Volume Adjustment Previous/Next buttons Play/Pause buttons USB port Micro SD card slot Earphone jack Power switch Microphone Basic operations: Power on/off: To power the player on, set the power switch to the ON position, then press and hold the PLAY button for 5 seconds. To power the player off, Press and hold the PLAY button for 5 seconds, then set the power switch to the OFF position. • Volume control: In the music player and video player, pressing the V- or V+ buttons will decrease or increase the volume. • Fast forward and rewind: When playing a file in Music Mode or Video Mode, pressing and holding the Previous or next buttons will rewind or fast forward the current file. • Menu Navigation When in a menu, use the Next and Previous buttons to select different items in the menu. Briefly press the PLAY button to access that item, and briefly press the Mode button to go back one menu level. Pressing the mode button several times will return you to the main menu. • Main Menu: After powering the player on, you will enter the main menu interface, which allows you to access the functions of the player. Use the Next and Previous buttons to select function you would like to access, and press the PLAY button to enter it. Music Mode: Once you select the Music Mode, you will enter the Media Library, which allows you to select the file you wish to play. Once you have selected a file, press the PLAY button to begin playing the file. While a file is playing, press the PLAY button to pause it, or quickly press the Mode button to return to your media library. Pressing and holding the Mode button will open the Music Mode Submenu as displayed blow. 1. Repeat Mode- Allows you to set your repeat mode. Select from Once, Repeat, All, All Repeat, and Intro 2. Play Mode- Allows you to select to play your files in order, or in a shuffle mode. 3. MSEQ- Allows you to select one of three specialized equalizer settings. 4. EQ Selection- Allows you to select one of 8 general equalizer settings 5. User EQ setup- Allows you to create a custom equalizer setting. Use the Next and Previous buttons to select the item to change, and use the V- and V+ buttons to adjust the setting. Pressing the PLAY button will save your changes and return you to the Music Mode Submenu, while pressing the Mode button will exit without saving. 6. Display- Allows you to display the ID3 information for files, the lyrics, or a frequency chart. Video Mode: Once you select the Video Mode, you will enter the Media Library, which allows you to select the file you wish to play. Once you have selected a file, it will begin to play automatically. While a file is playing, press the PLAY button to pause it, or quickly press the Mode button to return to your media library. Note 1: The maximum supported resolution for RM/RMVB video files is 720*576. Files with a larger resolution will not play. Note 2: The maximum supported resolution for AVI video files is 800*480. Files with a larger resolution will not play. Note 3: Whenever you convert a video file, please ensure that the converted file will play on your computer before loading to the player, to prevent damage. Photo Mode: Once you select the Photo Mode, you will enter the Media Library, which allows you to select the file you wish to view. Once you have selected a file, it will display automatically. While viewing a picture, press the PLAY button to enter the Photo Mode Submenu. 1. Rotate Right- Rotates the current photo 90 degrees to the right 2. Rotate Left- Rotates the current photo 90 degrees to the left 3. Zoom In- Zoom in to the current photo 4. Zoom Out- Zoom out of the current photo 5. Browse- Allows you to have pictures automatically scroll, similar to a slideshow Note: The zoom function will only work on pictures which are 430*234 or higher resolution. EBook Mode: Once you select the eBook Mode, you will enter the Media Library, which allows you to select the file you wish to view. Once you have selected a file, it will display automatically. While viewing a file, press the PLAY button to enter the Photo Mode Submenu. While in your text viewer, pressing the Next or Previous buttons will skip to the next or previous page, while using the V- or V+ buttons will advance by line. Page Jump- Allows you to jump to a page in the current file Save Mark- save the current page as a bookmark Load Mark- Return to a saved bookmark Del Mark- Delete a bookmark Set Font- Set your font size Set Color- Set your font color Browser Mode- Allows you to select between manual page turning, or having the player do it for you, like a slideshow 8. Flip Time- Allows you to set the time between “page turns” in auto browsing mode 9. Mode- Allows you to select one of three backgrounds for your text reader 1. 2. 3. 4. 5. 6. 7. Note: This player only supports files coded in “ANSI” format. If your txt file will not display, open it on your computer in notepad, and select “save as” Make sure that the encoding line is set to “ANSI” Radio: Before selecting Radio Mode, Please insert your headphones, as they will act as the player’s antenna. Once you select the Radio Mode, you will automatically begin receiving a radio signal. Use the Previous and Next buttons to advance your station by 0.1MHz. Pressing and holding the Mode button will enter the Radio submenu. 1. Search by hand- Allows you to search manually through frequencies. This is the default search mode. 2. Auto Search- Automatically scans all channels and saves any w9ith a strong channel as a preset. You will then enter preset mode. 3. Preset Mode- Switched your scan mode to preset mode. Pressing the Next or Previous buttons will switch between saved presets. 4. Save Channel- Saves the current channel as a preset 5. Delete Channel- Delete a Preset channel 6. Stereo switch- Enable or disable automatic stereo switching 7. Receive area- Set your region for radio reception. 8. FM Record- Begin recording your FM channel Record: Once you select the Record Mode, the player will be ready to record your voice notes. Press PLAY to begin recording, when recording, press PLAY again to pause the file. Briefly pressing the Mode button will save the recording SETTINGS 1. 2. 3. 4. 5. 6. Display settings- Adjust your display settings System Settings- Adjust your system settings Desktop- Select one of several desktop pictures Language- Select your display language. System Information- Displays your system information. Auto Shut time- Set up t a timer to power the player down COMPUTER COMMUNICATION Using Windows Media Player (Note: you must use Windows Media Player 10 or later to use this feature.) (Note: this player does not support DRM encrypted audio files, such as those downloaded from the Windows Media Player download service.) 1. Open Windows Media Player and connect the MP3 player to a working USB port. Windows Media player will prompt you with a setup screen asking you to name the MP3 player. 2. Once you have named your MP3 player, select Finish, and your Windows Media Player will open to the Sync tab. 3. Drag your music to the sync list (on the right of the screen) from the list on the left. Once you have selected the music you wish to add to the player, press Sync. 3. Windows Media player will load the songs on to your MP3 player. 4. Once all the songs you have added are synced to the unit, and Windows Media Player says that is safe to disconnect your MP3 player, disconnect the device. COPY AND PASTE 1. Connect the MP3 player to a working USB port. 2. When the unit is connected to your computer, it will create a gray and green icon in the system tray (lower right hand corner of your desktop). The icon will be called safely remove hardware. 3. Go to the “My Computer” section of your computer. In there you will find a section called “devices with removable storage” 4. Locate the drive created by the unit, generally just called Removable Disk, with a letter in Parenthesis. Drive letters vary depending on your system configuration. 5. Open the drive by either double left clicking on the drive itself, or by right clicking to open the option menu then left click on the desired drive. 6. Locate the music stored on your computer. Generally this is stored in the “My Music” folder of your computer. NOTE: if you are unable to locate the music on your computer, click on start, search, files and folders, then search for “*.MP3, *.WMA”. 7. Once you have located the song files, you can right click on the song itself, and select “copy”. Open the removable disk drive, right click on in the empty space, and select Paste. This will transfer the song on to your MP3 player. 8. Repeat step 7 for as many songs as you want to copy on to the unit. NOTE: MAC Computers When connected to your MAC computer, the device will act as a removable drive. Simply drag your MP3 files to the device. Product specifications: TFT colored display Date transmission speed Storage media Usable time of battery Record 3.0 TFT,diagram(400*240) High speed USB 2.0 (HIGH SPEED) 512MB—8GB li-ion battery Video player : 3-4 hours (headphone output) Audio player f:15 hours (power-saving clearance screen, headphone output) Sampling rate 8KHZ/16KHZ MIC WAV(32K bps/64Kbps) MIC time 64 hours(1GB) Max.output power Music player Working temperature Language support Supporting operating system (L)10mw+(R )10mw(32ohm) MP3 bit rate 64Kbps 320Kbps WMA bit rate 64k bps 384k bps Frequency 20Hz---20KHz response SNR >90DB Distortion rate 0.03% -5℃to 40℃ Multiple languages Windows 2000/XP/Vista