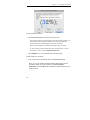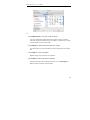
1
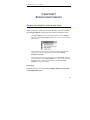
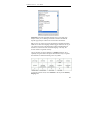
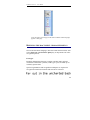
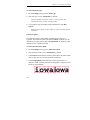
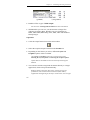
ReadirisTM Pro 12 User Guide ReadirisTM Pro 12 – User Guide Table of Contents Copyrights ........................................................................................... 1 Chapter 1 Introducing Readiris ............................................... 3 Save time, no more retyping ............................................. 3 Readiris series ................................................................... 5 Chapter 2 Installing Readiris ................................................... 9 System requirements ......................................................... 9 Software installation ......................................................... 9 Uninstalling the software ................................................ 10 Software registration ....................................................... 11 Product support ............................................................... 11 Chapter 3 Getting started ....................................................... 13 Running Readiris ............................................................ 13 User interface .................................................................. 13 Changing the user interface language ............................. 16 Configuring your scanner in Readiris ............................. 16 Chapter 4 Using Drop2Read .................................................. 19 Chapter 5 Scanning and opening documents ........................ 21 Selecting the options ....................................................... 21 Opening image files ........................................................ 22 Scanning paper documents.............................................. 24 iii Table of Contents Chapter 6 Adjusting scanned documents .............................. 29 Chapter 7 Zoning documents ................................................. 35 Zoning documents automatically .................................... 35 Zoning documents manually ........................................... 37 Using zoning templates ................................................... 42 Chapter 8 Recognizing documents......................................... 45 Introduction..................................................................... 45 Selecting the document language .................................... 46 Defining the document characteristics ............................ 49 Using interactive learning ............................................... 51 Using font dictionaries .................................................... 54 Chapter 9 Formatting and saving documents ....................... 55 Formatting documents .................................................... 55 Selecting the Layout options ........................................... 57 Selecting the Graphics options ........................................ 60 Saving documents as image files .................................... 62 Creating PDF documents ................................................ 63 Selecting the PDF options ............................................... 65 Repurposing PDF documents.......................................... 68 Selecting the page size .................................................... 68 Chapter 10 Saving and loading settings ................................ 71 iv ReadirisTM Pro 12 – User Guide Chapter 11 Recognizing handprinted text ............................ 73 Index .................................................................................... 75 v ReadirisTM Pro 12 – User Guide Copyrights ReadirisPro12-dgi-200609-01 Copyrights © 1987-2009 I.R.I.S. All Rights Reserved. I.R.I.S. owns the copyrights to the Readiris software, to the online help system and to this publication. The information contained in this document is the property of I.R.I.S. Its content is subject to change without notice and does not represent a commitment on the part of I.R.I.S. The software described in this document is furnished under a license agreement which states the terms of use of this product. The software may be used or copied only in accordance with the terms of that agreement. No part of this publication may be reproduced, transmitted, stored in a retrieval system, or translated into another language without the prior written consent of I.R.I.S. This user guide utilizes fictitious names for purposes of demonstration; references to actual persons, companies or organizations are strictly coincidental. Trademarks The Readiris logo, Readiris and Drop2Read are trademarks of Image Recognition Integrated Systems S.A. OCR, ICR and barcode technology by I.R.I.S. AutoFormat and Linguistic technology by I.R.I.S. BCR and field analysis technology by I.R.I.S. iHQC compression technology by I.R.I.S. XML parser developed by Apache. This product includes software developed by the Apache Software Foundation. All other products mentioned in this user guide are trademarks or registered trademarks of their respective owners. 1 ReadirisTM Pro 12 – User Guide CHAPTER 1 INTRODUCING READIRIS SAVE TIME, NO MORE RETYPING Introduction Congratulations on acquiring Readiris. This software package will undoubtedly be of great help in recapturing your texts, tables and graphics, barcodes and handprinted text. As efficient as computers are, you have to key in your information first. If you have ever retyped a 15 page report or a large table of figures, you know how tedious and time-consuming it can be. Use this state-of-the-art OCR package to automatically convert paper documents or scanned image files into text searchable and editable documents that can be archived and shared. Scan a printed or typed document, indicate the zones you want to recognize with Readiris - or have the system detect them for you execute the character recognition and export the document to your word processor. Documents composed of many pages are processed from start to finish in a single effort. A few mouse clicks beat long hours of work as Readiris converts your paper documents into editable computer files: it’s up to 40 times faster than manual retyping. To speed up the process even more you can also use the Drop2Read utility. Simply specify four basic settings - recognition language, output format, destination folder and target application - 3 Chapter 1 – Introducing Readiris and drag your scanned documents to the Dock icon. They will be processed on the spot. General information Readiris is based on the most advanced recognition technologies. Font-independent text recognition is complemented by self-learning techniques. The system is able to learn new characters and words through contextual and linguistic analysis. This means that the OCR accuracy of the recognition system will improve as it goes along. Readiris also recognizes tabular data and recreates them as worksheets in your spreadsheet software or as table objects inside your word processor; your numeric data are immediately ready for further processing. Readiris supports up to 125 languages: all American and European languages are supported, including the Central-European, Baltic and Cyrillic languages as well as Greek and Turkish. Optionally, Readiris can read Hebrew documents and four Asian languages Japanese, Simplified and Traditional Chinese and Korean. Readiris even copes with mixed alphabets: the software detects “Western” words that occur in Greek, Cyrillic, Hebrew and Asian documents many untranscribable proper names, brand names, etc. are written using the Western symbols. Readiris uses linguistics during the recognition phase, not afterwards. As a result, Readiris recognizes all kinds of documents with top accuracy, including low-quality documents, faxes and dot matrix printouts. It copes beautifully with badly scanned and copied documents containing too light or dark font shapes. Joined characters are resolved while fragmented characters, such as dot matrix symbols, are recomposed. Besides that, Readiris has a user verification function. When activated, the user verification function (Interactive learning) not only flags the characters the recognition system isn't sure of but also allows to increase the system's accuracy. All solutions you confirm 4 ReadirisTM Pro 12 – User Guide are memorized, increasing the system speed and confidence and rendering the system more intelligent as you go along. This powerful learning tool also allows you to train Readiris on special characters such as mathematical symbols and dingbats and to handle distorted fonts. To increase your productivity further, Readiris not only recognizes your texts, but can format them for you as well. Various levels of formatting are available. When you make use of “autoformatting”, Readiris recreates a facsimile copy of the scanned document: the word, paragraph and page formatting of the original document are retained. Similar typefaces are used and the point sizes and type styles as used in the source document are maintained across the recognition. The placement of columns, text blocks and graphics follows your original documents. Readiris can even include the background photo of a scanned page in the recognized document. And as Readiris supports grayscale and color scanning effortlessly, you can recapture any graphics - be they line art, black-and-white photos or color illustrations. When a document contains tables, Readiris reorganizes them in real cells and recreates the cell borders of the original tables. In other words, Readiris allows you to archive a true copy of your documents, be it editable and compact text files instead of scanned images. Readiris is Twain and Image Capture compliant and supports a wide range of flatbed and sheetfed scanners, “all-in-one” devices or “MFPs” (“multifunctional peripherals”) and digital cameras. READIRIS SERIES The Readiris series consists of the following versions: 5 Chapter 1 – Introducing Readiris Readiris Pro 12 Readiris Corporate 12 Readiris Pro 12 Asian Readiris Corporate 12 Asian The table below gives an overview of the available versions: Readiris Pro 12 Readiris Corporate 12 Basic features Basic features 125 recognition languages 125 recognition languages Generates 4 types of PDF files, PDF- Generates 4 types of PDF files, PDF- iHQC files, ODT, DOCX, XLSX, HTML, iHQC files, ODT, DOCX, XLSX, HTML, RTF, Unicode files RTF, Unicode files Generates PDF/A output Large volume recognition Automated processing Barcode recognition Business card recognition Readiris Pro 12 Asian Readiris Corporate 12 Asian Basic features Basic features 130 recognition languages, including: 130 recognition languages, including: Japanese recognition Japanese recognition Traditional and Simplified Chinese Traditional and Simplified Chinese 6 ReadirisTM Pro 12 – User Guide recognition recognition Korean recognition Korean recognition Hebrew recognition Hebrew recognition Generates 4 types of PDF files, PDF- Generates 4 types of PDF files, PDF- iHQC files, ODT, DOCX, XLSX, HTML, iHQC files, ODT, DOCX, XLSX, HTML, RTF, Unicode files RTF, Unicode files Generates PDF/A output Large volume recognition Automated processing Barcode recognition Business card recognition 7 ReadirisTM Pro 12 – User Guide CHAPTER 2 INSTALLING READIRIS SYSTEM REQUIREMENTS This is the minimal system configuration required to use Readiris: A Mac OS computer with Intel or G3 processor. The operating system Mac OS X 10.4 or higher. Earlier versions of the Mac OS operating system are not supported. 220 MB of free hard disk space. SOFTWARE INSTALLATION How to install Readiris: Log on to your Mac operating system as an administrative user. Or make sure you have the necessary administration rights to install the software. Connect your scanner to your Mac and install the corresponding software. Test your scanner. If you experience any problems contact your scanner manufacturer. Insert the Readiris CD-ROM and double-click the CD-ROM icon. 9 Chapter 2 – Installing Readiris Double-click the Readiris installer and follow the on-screen instructions. Agree with the terms of the license agreement. A standard installation type is offered. This will install Readiris, Drop2Read and the sample images. To modify the installation type, click Customize. Then click Install to start the actual installation. When the installation is finished, click Close. The Readiris folder will have been created automatically by the installation program in the Applications folder. The Readiris and Drop2Read icons will be automatically created on the Dock. UNINSTALLING THE SOFTWARE To uninstall Readiris: Click Finder and open the Applications folder. Drag the Readiris folder to the Trash. Readiris will be removed from your machine. Note: the Readiris preferences are not removed by dragging the Readiris folder to the trash can, in case you should want to re-install the software later on. To remove the preferences, drag the folder Readiris Prefs to the trash. You will find this folder in Users - xxx (your user name) - Library - Preferences. 10 ReadirisTM Pro 12 – User Guide SOFTWARE REGISTRATION Remember to register your Readiris license. By doing so, you will: be kept informed of future product developments and related I.R.I.S. products; be entitled to product support; be entitled to special offers on I.R.I.S. products. To register: Click Register Readiris on the Help menu. You will be directed to the registration web page. Simply follow the on-screen instructions. PRODUCT SUPPORT Once you have registered your product, you are entitled to product support from I.R.I.S. on basic software functionalities. Contact I.R.I.S. at: Europe: www.irislink.com/support Tel:+32 10 45 13 64 USA: www.irislink.com/support Tel.:+1 800 447 4744 Asia-Pacific: www.irislink.com/support Tel.: +852 22646133 11 ReadirisTM Pro 12 – User Guide CHAPTER 3 GETTING STARTED RUNNING READIRIS To run Readiris: Click the Readiris icon on the dock. Or double-click the Readiris application in the Readiris folder under Applications. If you acquired Readiris Corporate you will be prompted to register. Click Register on the Internet and complete the registration process to acquire your software key. Enter the software key you receive by e-mail in the required field. The Readiris interface will open. USER INTERFACE The Readiris interface is composed of: 13 Chapter 3 – Getting started the main toolbar (left toolbar) Use the main toolbar commands and options to scan and recognize documents. the image toolbar (right toolbar) Use the image toolbar buttons to edit documents in the Readiris interface. Point to the different buttons to display their tooltips. the Readiris menu bar (top of screen) The Readiris menu bar contains all the commands and options you also find on the main and image toolbars. The Readiris menu bar also allows you to set several advanced settings. 14 ReadirisTM Pro 12 – User Guide When a document has been opened or scanned in Readiris you can view its page thumbnails in the image drawer. Click the drawer icon to open it. The drawer can open both on the right-hand and left-hand side of the Readiris interface, depending on its position on your screen. The drawer allows you to move pages inside a document: simply click the pages you want to move and drag them to another position. It also allows you to mark pages as cover pages and change the recognition language per page by Ctrl-clicking. 15 Chapter 3 – Getting started The drawer also allows you to delete pages by dragging them to the Dock trash. CHANGING THE USER INTERFACE LANGUAGE Readiris opens in the user interface language that is currently activated in your system preferences. To change the user interface language in Readiris: Click the System Preferences icon on the Dock. Then open the International section. Drag the language of your choice to the top of the list and close the International window. The user interface of Readiris is available in a wide range of languages. Restart Readiris to apply the new language settings. CONFIGURING YOUR SCANNER IN READIRIS Readiris supports all Twain 1.9 and Image Capture compliant scanners. Before you can use a scanner, however, its drivers need to be installed on your Mac. 16 ReadirisTM Pro 12 – User Guide Operation: Connect your scanner to your Mac and install the corresponding drivers and/or software. Test your scanner. If you experience any problems contact your scanner manufacturer. Run Readiris. On the Readiris menu click Preferences. When the scanner drivers have been installed successfully, a list of supported scanners will be available. Select your scanner from the list. Make sure you activate the option Enable Image Capture Scanners when you are using an Image Capture scanner. A number of scanner and preprocessing options are available. Refer to the section Scanning paper documents for more information. 17 ReadirisTM Pro 12 – User Guide CHAPTER 4 USING DROP2READ Drop2Read is a simple yet efficient utility that allows you to recognize documents instantly, without the Readiris being displayed. The Drop2Read utility is installed in a default installation of Readiris. To process documents: Simply drag your documents to the Drop2Read icon on the Dock. The Drop2Read window will open and Drop2Read will process your documents using default settings. Drop2Read, by default, treats documents as English documents, formats them as RTF files and stores them in the source folder of your original files. 19 Chapter 4 – Using Drop2Read Click the lists to change the settings. Any settings you change will be saved when you close the Drop2Read window. The next time you want to process documents using the same settings, simply drag the documents to the Drop2Read icon on the Dock. Note that Drop2Read uses basic settings. Use Readiris if you want to apply advanced settings when processing documents. Tip: for more information about the available output formats, see the section Formatting documents. Again, not all options apply to Drop2Read. 20 ReadirisTM Pro 12 – User Guide CHAPTER 5 SCANNING AND OPENING DOCUMENTS SELECTING THE OPTIONS Before scanning paper documents or opening image files, you can determine several image enhancement options. When selected, these options will be applied during the opening and scanning of documents. Operation Click the Options button on the main toolbar to select several image enhancement options. o Click Page Deskewing to straighten pages scanned at an angle. If you forgot to enable this option, click the Deskew Page icon on the image toolbar or click the corresponding command on the Process menu. The image will be straightened and the page analysis will be re-executed. 21 Chapter 5 – Scanning and opening documents o Click Detect Page Orientation to rotate pages automatically to the correct orientation. Note that these two options slow down the scanning process somewhat. Only select them when necessary. o Click Despeckling and move the slider to indicate the size of the dots you want to remove from the binarized images. The above-mentioned options are also available on the Settings menu. o Page Analysis is enabled by default. This way, scanned or opened images will be split up in zones automatically. You can also use the zoning tools on the image toolbar to modify the page analysis results or to zone your documents manually. For more information, see the section Zoning documents manually. When you are done selecting the options, click the Scan or Open button to scan documents or open image files. OPENING IMAGE FILES With Readiris you can either process paper documents you scan with your scanner or process already existing images files of various formats. To open existing image files: Click the Open button to search for image files. Tip: you can also drag image files to the Readiris icon on the Dock to open them. 22 ReadirisTM Pro 12 – User Guide Tip: Ctrl-click any image file you want to open, point to Open With and click Readiris. The Readiris software will open and display the image. Tip: when loading multipage image files (TIFF images) and PDF documents, you can define the page range (in case you only need a certain chapter of a document for instance). Readiris supports the following graphic formats: GIF images, JPEG images, JPEG2000 images, MacPaint images, Photoshop images, PICT images, PNG images, QuickDraw GX images, QuickTime images, Silicon Graphics images, Targa images, (uncompressed, packbits and Group 3 compressed) TIFF images, multipage TIFF images, Windows bitmaps (BMP) and PDF documents. Select the image file of your choice and click Open. To zoom in on the opened image, use the magnifying glass on the image toolbar or Cmd-click inside the image. You can also open multiple images files at a time: o Select the first image file and hold down the Cmd-key as you select additional images or; o Select a continuous range of image files by clicking the first image and holding down the Shift key as you select the last image. Should you want to terminate the loading process, press Esc on your keyboard. When you open multiple image files at a time, the drawer will open and display the page thumbnails. Note that you can also drag-and-drop image files from the Desktop to the Readiris icon on the Dock to open them. Note: when you click the Open button on the main toolbar after you have saved your current document, you will be prompted whether 23 Chapter 5 – Scanning and opening documents you want to delete the current document or not. Click No to add image files to the recognized document or click Yes to start a new document. SCANNING PAPER DOCUMENTS With Readiris you can either process paper documents you scan with your scanner or process already existing images files of various formats. To scan documents: First select the scanner settings. To access them, click Preferences on the Readiris menu. Make sure your scanner is connected to your Mac and configured correctly. If not, the Scanner settings will be disabled. Scanner Select your scanner from the list. Readiris is both Twain and Image Capture compliant. Note: some scanners that support both Twain and Image Capture drivers may appear twice in the list. 24 ReadirisTM Pro 12 – User Guide Calibrate Click the Calibrate button should it be necessary to calibrate your scanner. Format You can either choose an automatic scanning format or a custom format for which you can indicate the page height and width. Depth Readiris supports black-and-white, grayscale and color images. Resolution Select a scanning resolution of 300 dpi. Invert image Sometimes Twain scanners display white text on a black background when scanning in black-and-white. To invert those images select the Invert image option. Note: this option is only available for Twain scanners. Several preprocessing options are available in the Preferences window as well: o You can choose to smoothen color and grayscale images. During scanning this option renders grayscale and color images more homogeneous by smoothening out differences in intensity. As a result, a stronger contrast is created between the foreground (text) and background (artwork). Sometimes smoothening is the only way to separate text from a colored background. 25 Chapter 5 – Scanning and opening documents Note that this function is not the same as the one you find in the Adjust image options on the Process menu. o Select Process as 300 dpi when you are processing images of an incorrect or unknown resolution. The images will be processed as if they had a 300 dpi resolution. The resolution of digital camera images is nearly always unknown. o Select Digital camera when you are using a camera as scan source. Readiris uses special recognition routines to process digital camera images. Readiris supports Sony, HP, Canon, Casio and Fuji camera's as scan source. Note that you can load already existing TIFF and JPEG pictures from any type of camera, however. Tips for using a digital camera as scan source: Calibrate the camera by photographing a white document. Always select the highest image resolution. Enable the macro mode of the camera to take close-ups. Only use optical zoom, not digital zoom. Hold the camera directly above the document. Avoid photographing the document at an angle. Produce stable images. Use a tripod if necessary. Disable the flash when capturing glossy paper. Avoid opening compressed camera images. Adapt the Readiris brightness and contrast settings to the environment (daylight, lamp light, neon light). Select color or grayscale as color mode. When you are done defining all the settings, click OK. Then click the Scan button to scan documents. 26 ReadirisTM Pro 12 – User Guide Note: pay attention to line skew. Line skew over 0.5° increases the risk of OCR errors. 27 ReadirisTM Pro 12 – User Guide CHAPTER 6 ADJUSTING SCANNED DOCUMENTS During recognition Readiris converts color and grayscale images into binarized, black-and-white images, on which it performs the OCR. When opening or scanning extremely light or extremely dark grayscale and color images, it may be necessary to adjust their binarized counterparts in order to obtain satisfactory OCR results. To adjust images: Open or scan a color-grayscale document. Make sure that the scanner settings are correct. On the Process menu, click Adjust image. Or click the corresponding icon on the image toolbar. Readiris uses intelligent binarization routines to convert colorgrayscale images into black-and-white images, which are used to perform OCR on. o Select Smoothen color or grayscale image to even out the image. This option renders grayscale and color images more homogeneous by smoothening out differences in intensity. As a result, a stronger contrast is created between the foreground (text) and background (artwork). Note: this option appears to be the same as the one on the Preferences menu but is applied at a different stage of the recognition process. 29 Chapter 6 – Adjusting scanned images Note: sometimes smoothening is the only way to separate text from a colored background. (Original image) (Binarized black-and-white image) (Smoothened image) o Use the slider to increase or decrease the Brightness. The Brightness settings determine the overall brightness of the image. Use these settings to darken or lighten the image when the text is illegible. Example 1: lighten a dark image to eliminate the page background. (Color image) 30 ReadirisTM Pro 12 – User Guide (Binarized image. The default binarization settings yield a black image) (The lightened image yields satisfactory recognition results) Example 2: darken an image when the text is so light it doesn't show up in the binarized image. (Color image) (Binarized image. The default brightness settings yield fragmented characters) (The darkened image yields satisfactory recognition results) 31 Chapter 6 – Adjusting scanned images o Use the slider to increase or decrease the Contrast. The Contrast settings determine the contrast between darker and lighter zones of an image. Use these settings to make character shapes stand out against a colored background. (Color image) (Default contrast settings yield broken characters) (Increased contrast settings yield satisfactory recognition results) o Use the slider to increase or decrease the Despeckle options. Despeckling removes small spots from black-and-white images. Note that this Despeckling function is not the same as the ones you find on the Settings menu and under Options on the main toolbar: the former function applies to binarized images while the latter functions are applied during scanning. Click Apply to preview the results. If the results are satisfactory, click OK to save and close the settings. If not, click Cancel and modify the settings. Click Recognize + Save to recognize the document. Or use the command Save document on the File menu. 32 ReadirisTM Pro 12 – User Guide You can also save a selection of pages by clicking Save Selected Pages on the File menu. 33 ReadirisTM Pro 12 – User Guide CHAPTER 7 ZONING DOCUMENTS ZONING DOCUMENTS AUTOMATICALLY When scanning or opening documents, Readiris will automatically apply Page Analysis to split up the documents in different zones. The Page Analysis option is selected by default. Click the Options button and disable Page Analysis should you want to avoid automatic page analysis. The page analysis results can be modified manually after automatic page analysis. For more information, see the section Zoning documents manually. The page analysis results can also be saved in a layout file, which you can use afterwards as a zoning template every time you are scanning documents with a similar layout. See the section Using zoning templates for more information. Zone types Readiris uses five zone types: text, graphic, table, barcode zones and handprinted zones. 35 Chapter 7 – Zoning documents Page analysis detects text, graphic, table and barcode zones automatically. Handprinting zones need to be drawn manually. For more information, see the section Zoning documents manually. Each zone type has its own icon: The zones are sorted top-down, left to right. Numbers indicate the sort order of the zones. The sort order and zone types can be changed, however. For more information, see the section Zoning documents manually. Do not Detect Zones on Borders When your scanner generates black borders around the actual image, page analysis tends to find zones where there’s only noise. To avoid this, click Do Not Detect Zones on Borders on the Layout menu and scan the document again. Frame the Area to Analyze As an alternative to zoning documents automatically, the function Frame the Area to Analyze can be used. This function is useful when only one particular area on the document pages needs to be OCRed. Select Frame the Area to Analyze by clicking the corresponding button on the image toolbar. Draw a frame around the part of the page you want Readiris to recognize. Then click Recognize + Save. 36 ReadirisTM Pro 12 – User Guide ZONING DOCUMENTS MANUALLY Besides zoning documents automatically by means of Page Analysis, Readiris allows you to zone documents manually. Manual zoning comes in handy when having to modify the automatic page analysis results. It also allows you to create zoning templates. For more information on zoning templates, see the section Using zoning templates. Note that handprinting zones always need to be zoned manually. Operation In order to zone a document manually, first click the Options button and deselect Page Analysis. Open or scan the document by clicking the Scan or Open button. Select the zone type of the zones you want to draw: click the pointer button on the right toolbar and select the required zone type. Readiris uses five zone types: text, graphic, table, barcode and handprinting zones. Draw a frame around the zones you want to analyze. 37 Chapter 7 – Zoning documents For information about recognizing barcodes and handprinting, see the sections Recognizing barcodes and Recognizing handprinted text, respectively. To select other zone types, click the zone type icon that is currently selected, and choose another zone type. Or click the Layout menu, point to Layout Mode and select the zone you want to draw. When you are done splitting up the document in recognition zones, click the Recognize + Save button to execute the OCR. Sorting zones To change the sort order of zones, click the Sort button on the image toolbar and click the zones one by one in the required order. Or click the Layout menu and then click Sort Zones. To end the sorting, click outside a zone. When you are done, click the Recognize + Save button to execute the OCR. Zones you do not click, will be excluded from recognition. 38 ReadirisTM Pro 12 – User Guide Drawing polygons Zoning documents manually is not limited to rectangular shapes. You can create polygonal zones by merging rectangular ones. Whenever two zones of the same type intersect, they become a polygon automatically. Automatic page analysis Should the current page be too complex to zone manually, click the Analyze page button on the image toolbar to zone the page automatically. Note that barcode zones and handprinting zones always need to be drawn manually. 39 Chapter 7 – Zoning documents Changing the zone type To change the zone type of a zone, Ctrl-click the zone and select the required zone type. You can also change the zone type of several zones simultaneously: Click the pointer button on the image toolbar, then click Select Zones Tip: when the pointer is not visible on the image toolbar this means one of the 5 zone types is currently selected. Click the corresponding icons on the image toolbar, then click Select Zones. Hold down the Shift key while selecting multiple zones. On the Layout menu point to Zone Type and click the required zone type. Modifying the zone size Click inside the zone you want to modify. Place the mouse pointer over a marker (on the sides and in the corners of the zone). Click the marker and drag the mouse to modify the zone size. 40 ReadirisTM Pro 12 – User Guide Moving zones Select the zone you want to move. Click inside the zone and drag the mouse to modify the position of the zone. Recognizing a particular zone Ctrl-click the zone you want to recognize and select Copy as Text. The results are sent to the pasteboard as body text. This also works for handprinted text. Graphic zones and barcode zones can also be copied to the pasteboard. Recognizing all text zones To recognize all text zones on a page, click the command Copy Text Zones on the Layout menu. They will be copied to the pasteboard. Recognizing all graphic zones To recognize all graphic zones on a page, click the command Copy Graphic zones on the Layout menu. They will be copied to the pasteboard. Deleting zones Select the zone(s) you want to delete or click the command Delete All Zones on the Layout menu. Select the commands Cut or Clear on the Edit menu to cut or delete the zones. 41 Chapter 7 – Zoning documents Deleting small zones Some documents, faxes for instance, often have "stray" dots on pages, causing Readiris to create superfluous zones that do not contain text. To erase all small zones, click Delete Small Zones on the Layout menu. This option erases all zones smaller than 0.5" and re-sorts the remaining zones. USING ZONING TEMPLATES When OCRing many documents with a similar page layout, it may be useful to use zoning templates instead of automatic page analysis. That way, the same zoning structure is applied to all scanned or opened documents, which speeds up the process. Operation Click Options on the main toolbar and deactivate Page Analysis. Open your document and zone the first page of the document manually by using the image toolbar buttons. For more information, see the section Zoning documents manually. On the Layout menu, click the command Save. Open or scan the other pages of the document by clicking the Open or Scan button on the main toolbar. The layout will be applied to the scanned or opened documents. 42 ReadirisTM Pro 12 – User Guide The layout will be applied to the scanned or opened documents. When you want to use the same zoning template next time you use Readiris, click the command Open in the Layout menu. Frame the Area to Analyze As an alternative to zoning templates, you can use the option Frame the Area to Analyze. That way, you can define one particular area on the page that needs to be OCRed. Any data outside the OCR area will be excluded from recognition. Operation Select Frame the Area to Analyze by clicking the corresponding button on the image toolbar. Draw a frame around the area you want Readiris to recognize. You will be prompted whether you want to apply the same recognition area to all pages of the current document. To cancel this function, re-execute Page Analysis by clicking the Analyze page button on the image toolbar. Click Recognize + Save to execute the OCR. Or use the command Save document on the File menu. You can also save a selection of pages by clicking Save Selected Pages on the File menu. 43 ReadirisTM Pro 12 – User Guide CHAPTER 8 RECOGNIZING DOCUMENTS INTRODUCTION To recognize documents, Readiris applies linguistics during the recognition phase. As a result, Readiris recognizes text, tables and graphics, barcodes and handprinted text in all kinds of documents. Readiris even copes with complex columnized documents, lowquality documents, faxes, dot matrix printouts, badly scanned and copied documents containing too light or dark font shapes, etc. Readiris supports 125 languages: all American and European languages are supported, including the Central-European, Baltic and Cyrillic languages as well as Greek and Turkish. Optionally, Readiris can read Hebrew documents and four Asian languages Japanese, Simplified and Traditional Chinese and Korean. Readiris even copes with mixed alphabets: the software detects “Western” words that occur in Greek, Cyrillic, Hebrew and Asian documents many untranscribable proper names, brand names etc. are written using the Western symbols. Readiris is based on the most advanced recognition technologies. Font-independent text recognition is complemented by self-learning techniques. The system is able to learn new characters and words through contextual and linguistic analysis. This means that the OCR accuracy of the recognition system will improve as it goes along. Besides that, Readiris has a user verification function. When activated, the user verification function (Interactive learning) not only flags characters the recognition system isn't sure of but also 45 Chapter 8 – Recognizing documents allows to increase the system's accuracy. All solutions you confirm are memorized temporarily during recognition, increasing the system speed and confidence and rendering the system more intelligent as you go along. This powerful learning tool also allows you to train Readiris on special characters such as mathematical symbols and dingbats and to handle distorted fonts. The interactive learning results can also be stored permanently in font dictionaries for future use. SELECTING THE DOCUMENT LANGUAGE Readiris offers OCR in 125 languages. Readiris supports all American and European languages including the Central-European, Cyrillic and Baltic languages, as well as Greek and Turkish. Readiris Pro Asian and Readiris Corporate Asian additionally recognize documents in Japanese, Simplified Chinese, Traditional Chinese, Korean and Hebrew. In order for Readiris to recognize a document, the document language must be specified. To do so: Click the globe button on the main toolbar and select the language of your choice in the Primary language list. 46 ReadirisTM Pro 12 – User Guide Important: select the document language before executing page analysis when you are dealing with Asian or Hebrew documents. Specific page analysis routines are used for these documents. Tip: in case you want to recognize documents in multiple languages, make sure to select the language with the biggest character set. E.g. if you want to recognize a document that contains both English and French text, select French as document language. This way, the accents will be recognized correctly. The recognition can also be limited to a Numeric character set to optimally recognize tables and figures. Readiris then only recognizes the numerals 0-9 and the following series of symbols: To activate numeric mode, select Numeric at the top of the Primary language list. 47 Chapter 8 – Recognizing documents Recognizing documents with mixed languages Readiris also allows you to enable mixed character sets. That way Readiris switches languages in the middle of a sentence automatically and recognizes English words (proper names etc.) that occur in "exotic" languages. Click the globe button on the main toolbar and select the required language combination in the Primary language list. Note: when processing Asian or Hebrew documents, mixed characters sets are used automatically. Selecting the language per page When specific pages use a different language than the overall document, you don't need to define a secondary language. You can apply a different language to those pages. Select the pages in the drawer, Ctrl-click them and use the command Language to assign another language than the overall document language to that/those page/pages. Pages with a different language than the overall language are marked in red in the drawer. 48 ReadirisTM Pro 12 – User Guide Note: the tooltip of each page in the drawer indicates which language applies to that page. DEFINING THE DOCUMENT CHARACTERISTICS Next to the document language, other document characteristics such as the Font type and Character pitch play an important role in the recognition process. Font type Readiris distinguishes between "regular" and dot matrix printed documents. Dot matrix symbols (of the type 9 pin) are made up of isolated, separate dots. Special segmentation and recognition techniques are required to recognize dot matrix documents and need to be activated. 49 Chapter 8 – Recognizing documents To select the font type: On the Settings menu, point to Font type. The font type is set to Automatic by default. That way, Readiris recognizes "25 pin" or "NLQ" (Near Letter Quality) dot matrix, or other "normal" printing. To recognize only dot matrix printed documents, click Dot matrix. Readiris will recognize so-called "draft" or "9 pin" dot matrix printed documents. Character pitch The character pitch is the number of characters per inch in a typeface. The character pitch can either be fixed, in which case all characters have the same width, or proportional, in which case the characters have a different width. To select the character pitch: On the Settings menu, point to Character Pitch. The character pitch is set to Automatic by default. Click Fixed if all characters of the typeface have the same width. This is often the case in old typewriter documents. Click Proportional if the characters of the typeface have a different width. Virtually all fonts in newspapers, magazines and books are proportional. 50 ReadirisTM Pro 12 – User Guide Important: these document characteristics do not apply to Asian or to Hebrew documents. USING INTERACTIVE LEARNING Readiris offers an interactive learning function. By means of Interactive learning you can train the recognition system on fonts and character shapes, and correct the OCR results if necessary. During interactive learning, any characters the recognition system isn't sure of are displayed in a preview window, in combination with their parent word and the proposed solution. Interactive learning can substantially enhance the accuracy of the recognition system and is particularly useful when recognizing distorted, defaced forms. Interactive learning can also be used to train Readiris on special symbols it is unable to recognize initially, such as mathematical and scientific symbols and dingbats. To enable interactive learning: On the Learn menu, click Interactive Learning. Click the Recognize + Save button to recognize the document. Readiris enters the interactive learning phase. The characters the recognition system isn't sure of are displayed. 51 Chapter 8 – Recognizing documents If the results are correct: o Click the Learn button to save the result as sure. The learning results are temporarily stored in the computer memory, for the duration of the recognition. Readiris will no longer display the learned characters when OCRing the rest of the document. When a new document is OCRed, the learning results are erased. To save learning results permanently, use a font dictionary. For more information, see the section Using font dictionaries. o Click Finish to save all solutions the software offers. If the results are incorrect: o Type in the correct characters and click the Learn button. Note: if you are dealing with documents that contain special characters make sure you click the command Special Characters on the Edit menu. Double-click the characters you want to insert. 52 ReadirisTM Pro 12 – User Guide or o Click Don't learn to save the result as unsure. Use this command for damaged characters which could be confused with other characters if learned. E.g. the number 1 and the letter I, which have an identical form in many fonts. o Click Delete to delete characters from the output. Use this button to prevent document noise from appearing in the output file. o Click Undo to correct mistakes. Readiris keeps track of the last 32 operations. o Click Abort to abort interactive learning. All learning results will be deleted. Next time you click Recognize + Save, interactive learning will start again. 53 Chapter 8 – Recognizing documents USING FONT DICTIONARIES When scanning many documents of the same type, font quality and printing quality, you may not want to repeat the learning process every time. Therefore, it is useful to use font dictionaries. Font dictionaries contain font information learned during interactive learning and can substantially increase the recognition results. Note that font dictionaries are limited to 500 shapes. You are recommended to create separate dictionaries for specific applications. To create a new font dictionary: On the Learn menu click the command New Dictionary. Click Interactive Learning on the Learn menu to activate it. Click Recognize + Save to recognize the document. Readiris enters the interactive learning phase. Use the buttons of the dialog box to save characters in the font dictionary. When the recognition is completed, click Save to save the document. Then return to the Learn menu and click Save Dictionary to save it. Enter the name of the dictionary and click Save. To use an existing font dictionary: On the Learn menu click Open Dictionary. Select the dictionary you want to use and click Open. Click Recognize + Save to recognize the document. 54 ReadirisTM Pro 12 – User Guide CHAPTER 9 FORMATTING AND SAVING DOCUMENTS FORMATTING DOCUMENTS Readiris allows you to recognize and save your documents in numerous output formats: With Readiris you can generate several types of text-based documents. Readiris offers OpenDocument text, Open XML (docx), RTF and Unicode text output. Note that it takes the latest version of Microsoft Word (2008) to open docx files. To open docx files in Microsoft Word 2004 you need to download a Docx convertor. This can be downloaded from the Microsoft website. Earlier versions of Microsoft Word do no support docx files. You can output tabular data to spreadsheets (Open XML (xlsx)), word processors (RTF) and web browsers (HTML): tables are reconstructed cell by cell in spreadsheets and inserted as table objects in word processor files. Readiris recognizes both gridded and non-gridded tables. Note that it takes the latest version of Microsoft Excel (2008) to open xlsx files. To open xlsx files in Microsoft Excel 2004 you need to download a xlsx convertor. This can be downloaded from the Microsoft website. Earlier versions of Microsoft Excel do not support xlsx files. 55 Chapter 9 – Formatting and saving documents (gridded) (non-gridded) Readiris offers 4 types of PDF output. See the section Creating PDF doccuments for more information. With Readiris you can save your documents as image files without recognizing them. Readiris can save documents as JPEG, JPEG 2000, Photoshop, PICT, PNG, TIFF and Windows bitmap images. Operation Click the output format icon on the main toolbar. Select the required output format from the Format list. Depending on the format you select, different Layout and Graphics options will be available. The Layout and Graphics options are covered in the sections Selecting the Layout options and Selecting the Graphics options. Options that are unavailable for the selected output format appear dimmed. You can also send the recognized documents directly to a target application, which will open automatically. Readiris outputs to all major office suites, word processors and spreadsheets, such as Microsoft Word and Excel (Mac Office), AppleWorks and Apple Pages, the major web browsers, such as Apple 56 ReadirisTM Pro 12 – User Guide Safari, to Adobe Acrobat and Adobe Reader, Preview and plain-text applications such as TextEdit. Depending on the output format you select in the Format list, Readiris will propose the default application that you currently use to open such files. To select a different application, click the Choose button next to the Send to list and search for the required application. In case you just want to save your documents without opening them, select None in the Send to list. Tip: select your default e-mail software as target application. This way, Readiris will open a new e-mail message when you click Recognize + Save and add the recognized document as attachment. Then click OK to save the settings and click Recognize+Save on the main toolbar. Or use the command Save document on the File menu. You can also save a selection of pages by clicking Save Selected Pages on the File menu. The OCR results can be exported several times without repeating the recognition. Click the output format icon again and change the text format and formatting options. Then click Recognize + Save or Save document again. SELECTING THE LAYOUT OPTIONS Depending on the output format you select, different layout options are available. To access the Layout options: Click the output format icon on the main toolbar. 57 Chapter 9 – Formatting and saving documents Select the required output format from the Format list. The available layout options for the selected format will be displayed: Options that are not available appear dimmed. o The option Create body text avoids text formatting by Readiris. Readiris generates a continuous, running text. o The option Retain word and paragraph formatting takes an intermediate position between body text and autoformatting. The font type, size and type style are maintained across the recognition. The tabs and the alignment of each block are recreated. The text blocks and columns aren't recreated; the paragraphs just follow each other. The tables are recaptured correctly. o The option Recreate source document recreates a facsimile copy of the original document. Readiris generates a true copy of the source document, no longer a scanned image. Readiris also recreates any hyperlinks to e-mail addresses and web sites. The option Use columns instead of frames creates columnized documents. Columnized texts are easier to edit than documents containing multiple frames: the text flows naturally from one column to the next. 58 ReadirisTM Pro 12 – User Guide Note: when the system is unable to detect columns in the source document, this formatting mode uses frames as a fallback position. The option Insert column breaks inserts a hard column break at the end of each column. Any text you edit, add or remove remains inside its column; no text ever flows automatically across a column break. Tip: disable this option when you have columnized body text. You'll ensure the natural flow of the text from one column to the next. The option Add image as page background places the scanned image as page background beneath the recognized text. This option increases the file size of the output files substantially, however. The format PDF Text-Image provides the same result for PDF files. The option Retain colors of background on the Options tab provides a less drastic, more compact alternative. The option Merge lines into paragraphs enables automatic paragraph detection. Readiris wordwraps the recognized text until a new paragraph starts, and "reglues” hyphenated words at the end of a line. The option Include graphics includes the graphics in autoformatted files. This is essential to create a true copy of a document. Use the graphic options on the Graphics tab to determine the color mode and resolution of the graphics stored inside the output files. 59 Chapter 9 – Formatting and saving documents The option Retain colors of text maintains the original colors of the text across the recognition. The option Retain colors of background maintains the spot colors of the page background across the recognition. Note: this option recreates the background color of each cell when recognizing tables. When you are done selecting the options, click OK. Then click Recognize+Save to recognize the document. SELECTING THE GRAPHICS OPTIONS Depending on the output format you select, advanced graphics options may be available. The graphics options can be used to alter the image quality and resolution. To access the graphics options: Click the output format icon on the main toolbar. Select the required output format from the Format list. Click the Graphics tab to display the options. Options that are not available appear dimmed. 60 ReadirisTM Pro 12 – User Guide Depth Readiris saves graphics in their original depth by default. Readiris can also save graphics in black-and-white, grayscale and color. Quality You can choose between Low, Normal and High quality graphics. Resolution Readiris retains the original resolution by default. You can also choose to reduce the resolution to a lower dpi. Note that you cannot increase the resolution. Tip: When saving documents as HTML files to post on a website, reduce the resolution to 72 dpi (screen resolution). When you are done selecting the options, click OK. Then click Recognize+Save to recognize the document. 61 Chapter 9 – Formatting and saving documents SAVING DOCUMENTS AS IMAGE FILES Although Readiris is an OCR application it also allows you to save your documents as image files without recognizing them. Readiris can save documents as JPEG, JPEG 2000, Photoshop, PICT, PNG, TIFF and Windows bitmap images. Operation Click the output format icon on the main toolbar. Select the required image format from the Format list. 62 ReadirisTM Pro 12 – User Guide Note: the options on the Graphics tab DO NOT apply when you are saving documents as image files. They do apply to graphics inside recognized documents, however. See the section Selecting the Graphics options for more information. You can open the images you save immediately after export in an application of your choice. Click the Choose button next to the Send to list to select an application. In case you just want to save your images without opening them, select None in the Send to list. Then click Recognize+Save on the main toolbar to save your document as image file. Or click Save document on the File menu. Notes: You can also use the command Copy graphic zones on the Layout menu to move all graphics on a page to the pasteboard. You can also drag the image thumbnails from the Drawer to the Desktop to save them in the JPEG format. CREATING PDF DOCUMENTS Readiris generates four types of PDF output: Text, Text-Image, Image-Text and Image. 63 Chapter 9 – Formatting and saving documents To generate PDF output: Click the output format icon on the main toolbar and select PDF from the Format list. Then select the PDF type you want Readiris to generate: PDF Text When you select PDF Text, Readiris recognizes text and creates searchable PDF files. The page image is not contained in these single-layered PDF files. PDF Text-Image When you select PDF Text-Image, Readiris recognizes text and creates searchable PDF documents that contain the page image and the recognized text. The page image is contained beneath the text. PDF Image When you select PDF Image, Readiris generates image-only PDF documents, it does not execute OCR. 64 ReadirisTM Pro 12 – User Guide PDF Image-Text When you select PDF Image-Text, Readiris recognizes text and creates searchable PDF files that contain the page image and the recognized text. The page image is placed on top of the text. With this format you can always see the original document (as it was scanned) while you are able to search for and copy-paste the OCRed text, which is hidden beneath the image. As a result, this format is useful for archiving purposes. When you are done selecting the options, click OK. Then click Recognize+Save to recognize the document. SELECTING THE PDF OPTIONS To select the PDF options: Click the output format icon on the main toolbar and select PDF. Depending on the PDF type you select, several options are available. Click the PDF options tab to access them: 65 Chapter 9 – Formatting and saving documents Version Select which version of the PDF format you want to generate. Note: It takes Adobe Acrobat 5.0 and higher to open PDF 1.4 documents. It takes Adobe Acrobat 6.0 and higher to open PDF 1.5 documents. It takes Adobe Acrobat 7.0 and higher to open PDF 1.6 documents. It takes Adobe Acrobat 8.0 and higher to open PDF 1.7 documents. Embed fonts Select the option Embed fonts to embed the fonts in PDF files. 66 ReadirisTM Pro 12 – User Guide Embedding fonts prevents font substitution and ensures that readers, regardless of their computer configuration, see the text in its original fonts. Embedding fonts increases the file size of recognized documents somewhat. Create bookmarks The option Create bookmarks creates bookmarks for each text block, graphic and table in PDF files. iHQC - intelligent High-Quality Compression Besides four types of "regular" PDF output, Readiris offers iHQC compressed PDF output: PDF documents of the types Image-Text and Image can be hyper-compressed by means of iHQC without loss of image quality. iHQC stands for intelligent High-Quality Compression, I.R.I.S.' proprietary, efficient compression technology. iHQC is to images what MP3 is to music and what DivX is to movies. Select either Good size to obtain the smallest possible documents or Good Quality to obtain slightly larger documents of higher quality. Or select Custom and move the slider to set the right balance between minimal size and maximal quality. Note that it takes Adobe Reader to open iHQC-compressed PDF files. They will not open correctly in the default Preview application. 67 Chapter 9 – Formatting and saving documents REPURPOSING PDF DOCUMENTS Next to generating PDF documents, Readiris can also repurpose PDF files: Readiris converts image PDFs into text PDFs or any other supported text format and unlocks read-only PDF content. Warning: Readiris does not open user password-protected PDF documents. Operation Click the Open button on the main toolbar and select the PDF file you want Readiris to repurpose. If necessary, indicate the pages you want to open. Click the output format icon on the main toolbar and select PDF from the Format list. Then select the PDF type of your choice and click OK to close the settings. For more information on the PDF types, see the section Creating PDF documents. Click the Recognize + Save button to repurpose the document. SELECTING THE PAGE SIZE In Readiris the page size of the documents you scan and open does not necessarily have to be the same as the page size of your output documents. 68 ReadirisTM Pro 12 – User Guide When you generate OpenDocument text, Open XML (docx and xlsx) or RTF documents, you can select or exclude the preferred page sizes. To do so: Click the output format icon on the main toolbar and select one of the output formats mentioned above from the Format list. Then click the Page Sizes tab to access the options. Check the page sizes you want to include and clear the ones you want to exclude. Readiris goes through the active page sizes in the indicated order and uses the first page size that is sufficiently large to hold the scanned document. If you want to change the sort order, simply drag the page sizes to another position in the list. Click Default to restore the default settings. When you are done, click OK to save and close the settings. 69 ReadirisTM Pro 12 – User Guide CHAPTER 10 SAVING AND LOADING SETTINGS When you exit Readiris you will be prompted so save any settings you specified and use them as default settings. The next time you run Readiris, the program will open using the new default settings. To restore the factory settings, click the command Restore Factory Settings on the Settings menu. When scanning various groups of documents which all require different settings, it is useful to save separate settings files for each group. Operation Select the settings you want to use for a certain document group. On the Settings menu click the command Save. Or click Save as default if you want to use them as default settings. The following settings will be saved: primary language, favor recognition accuracy over speed, font type, character pitch, output format and any selected output format options, target application, page sizes, page analysis, despeckling and deskewing options and interactive learning options. When scanning or opening a document of the same group at a later time, click the command Open on the Settings menu. Select the correct settings file and click the Open button. Click Recognize + Save to recognize the document, using the correct settings. 71 Chapter 10 – Saving and loading settings 72 ReadirisTM Pro 12 – User Guide CHAPTER 11 RECOGNIZING HANDPRINTED TEXT Next to typed text, tables, graphics and barcodes, Readiris recognizes handprinted text. Handprinting consists of separated block letters. To recognize handprinting: Click the pointer button on the image toolbar. Select Draw Handprinting Zones. Draw a frame around the handprinted text you want to recognize. Click Recognize + Save on the main toolbar. The entire document including the handprinted text will be recognized. Important: make sure you write clearly. Tip: when less than optimal results are obtained, use the I.R.I.S. writing form and adapt your writing style. The blank I.R.I.S. writing form serves as a full-page template on which block letters can be filled out correctly and in the right size. The form can be found on the Readiris CD-ROM and in the Readiris installation folder. Note: Ctrl-click the handprinted zone and click Copy as Text to recognize only the handprinted zone and send it to the pasteboard. 73 Chapter 11 – Recognizing handprinted text Recognized symbols Handprinting recognition is limited to the Latin alphabet and supports numerals (0-9), uppercase letters (A-Z) and the punctuation symbols comma, period, plus sign and hyphen. Accents, umlauts and other special characters are not supported. Notes Readiris supports handprinting, not handwriting. Uppercase characters are replaced by lowercase characters after recognition, unless they occur at the beginning of a sentence. The document characteristics language, font type and character pitch do not apply to handprinting. Interactive learning does not apply either. The ICR technology is based on more than one million writing samples. 74 ReadirisTM Pro 12 – User Guide INDEX A despeckling ..................... 22, 32 accuracy vs. speed................ 47 digital camera ....................... 27 adjusting scanned documents 29 document characteristics ...... 49 Asian documents .............. 4, 45 document language ............... 46 Asian edition ...................... 4, 6 dot matrix ............................. 50 automatic zoning .................. 35 drawer ................................... 15 B background color ................. 62 background color of table cells ............................................. 57 Drop2Read ........................... 19 E Excel output.......................... 57 F black-and-white image ... 26, 29 factory settings ..................... 73 brightness ............................. 30 font dictionaries .................... 54 C font type ............................... 50 character pitch ...................... 50 G color image .................... 26, 29 graphics options.................... 63 color mode ........................... 26 grayscale image .............. 26, 29 contrast ................................ 29 H D handprinting ......................... 75 deskewing ............................ 21 75 Index Hebrew documents .......... 4, 45 HTML output ....................... 57 I N numeric ................................. 47 O I.R.I.S................................... 11 OpenDocument output.......... 57 Image Capture ...................... 16 options .................................. 21 image drawer ....................... 15 output formats ...................... 57 image files............................ 23 P image toolbar ....................... 13 page analysis ........................ 22 installation ............................. 9 page deskewing .................... 21 interactive learning .............. 51 page sizes ............................. 71 inverted images .................... 26 pages..................................... 16 L deleting ............................. 16 language ............................... 46 moving .............................. 16 layout files ........................... 42 PDF documents .................... 66 layout options....................... 60 PDF-IHQC output ................ 68 line skew .............................. 28 primary language .................. 46 loading settings .................... 73 product support ..................... 11 M R main toolbar ......................... 13 recreate source document ..... 61 manual zoning ...................... 37 registration............................ 11 mixed languages .................. 48 repurposing PDF documents 70 multipage documents ..... 23, 25 resolution .............................. 26 76 ReadirisTM Pro 12 – User Guide restoring factory settings ...... 73 spreadsheet documents ......... 57 right toolbar ......................... 13 supported image formats ...... 23 rotation ................................. 22 system requirements ............... 9 RTF output ........................... 57 Running Readiris ................. 13 S saving as image file.............. 65 saving settings...................... 73 T tables .................................... 57 text documents...................... 57 Twain ................................... 16 U Scanner configuration .......... 17 Unicode output ..................... 57 scanner settings .................... 25 uninstalling Readiris ............. 10 scanning documents ............. 25 user interface ........................ 13 smoothening color images .. 26, 29 user interface language ......... 16 Z speed vs. accuracy................ 47 zoning templates ................... 42 77