1
Chapter 5 Installation
>
5.2 Rack Installation
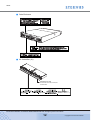
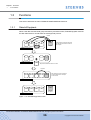
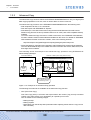
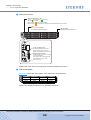
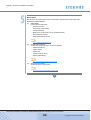
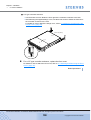
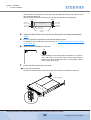
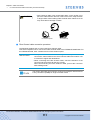
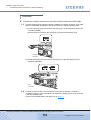
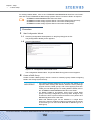
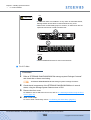
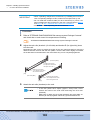
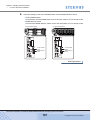
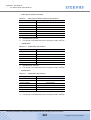
Reposition the M4 screws to adjust the length of the rack rails (brackets) to match the
distance between the front and rear rack pillars. Leave the M4 screws slightly unscrewed,
as the bracket must be attached to the rack before they can be completely tightened.
(Rear rack pillars)
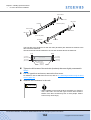
Loosen the M4 screws,
and adjust the rack rails to
the depth of the rack.
Bracket L (for left side)
"L" is stamped on the inner
side of the left rack rail.
[Left]
(Front rack pillars)
Bracket R (for right side)
"R" is stamped on the inner
side of the right rack rail.
[Right]
3
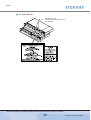
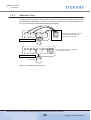
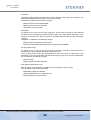
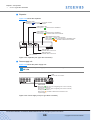
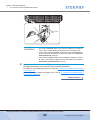
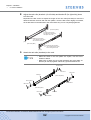
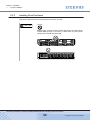
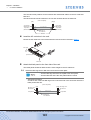
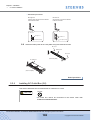
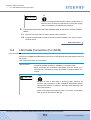
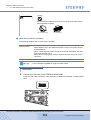
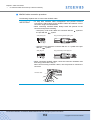
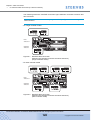
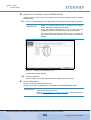
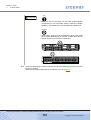
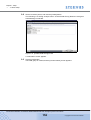
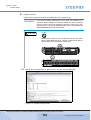
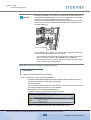
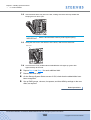
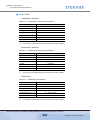
Attach the rack rails (brackets) to the rack.
• If the rack pillars have square (approx. 9mm) holes, screw
holders will need to be used when attaching the rack rails
(brackets).
• Make sure to attach the rack rails (brackets) and rack pillars so
that they fit exactly together without any space between them.
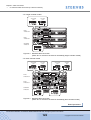
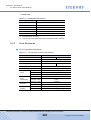
Screw holders
M5 screws
M5 screws
Bracket L
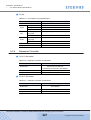
(Rear rack pillars)
Screw holders
Screw holders
M5 screws
(Front rack pillars)
Bracket R
M5 screws
Screw holders
P3AM-3042-06ENZ0 ETERNUS DX60/DX80/DX90 Disk storage system User Guide
97
Copyright 2010 FUJITSU LIMITED