Download Vantec NBV-100U
Transcript
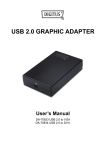
Vantec USB External Video Adapter
User’s Manual
Model: NBV-100U
www.vantecusa.com
Copyright © 2008 Vantec Thermal Technologies. All Rights Reserved.
Safety Instructions
Always read the safety instructions carefully
Keep this User’s Manual for future reference
Keep this equipment away from humidity
If any of the following situations arise, get the equipment checked by a service technician:
• The equipment has been exposed to moisture.
• The equipment has been dropped and damaged.
• The equipment has obvious sign of breakage.
• The equipment has not been working well or you cannot get it work according to User’s Manual.
Copyright Statement
No part of this publication may be reproduced in any form by any means without the prior written permission. Other
trademarks or brand names mentioned herein are trademarks or registered trademarks of their respective
companies.
Disclaimer
Information in this document is subject to change without notice. The manufacturer does not make any
representations or warranties (implied or otherwise) regarding the accuracy and completeness of this document
and shall in no event be liable for any loss of profit or any commercial damage, including but not limited to special,
incidental, consequential, or other damage.
1
Table of Contents
1. Introduction.............................................................................................................. 3
Applications......................................................................................................... 3
Features.............................................................................................................. 4
Specifications………………………………………………………………………..... 4
Package Contents............................................................................................... 5
System Requirements........................................................................................ 5
2. Installation................................................................................................................ 6
3. Using the Adapter..................................................................................................... 9
Display Modes..................................................................................................... 9
Extend Your Windows Desktop to Add-on Monitor (Default)................................... 9
Video and DVD Playback in Extended Mode...........................................................10
Mirror Your Windows Desktop................................................................................. 11
Be the Primary Monitor............................................................................................ 12
Adjusting Resolution, Color Depth and Refresh Rate........................................ 12
Standby and Hibernate, Shut Down and Restart............................................... 14
Disconnecting the Adapter................................................................................. 14
Using Dual Adapters.......................................................................................... 14
Uninstall the Adapter and Driver........................................................................ 16
4. Troubleshooting...................................................................................................... 17
5. Regulatory Compliance.......................................................................................... 18
FCC Conditions.................................................................................................. 18
CE...................................................................................................................... 18
WEEE Information............................................................................................. 18
2
1. Introduction
The Vantec USB External Video Adapter is a quick and easy way to add an additional
monitor to your computer. An additional monitor provides more desktop area allowing you
to multitask more efficiently or run several programs at once. Adding an additional monitor
usually meant having to buy an expensive video card and installing it inside your case. With
the Vantec USB External Video Adapter, installation is as simple as connecting it to a USB
port and connecting it to your monitor. Adding a monitor to your computer has never been
easier.
Applications
Office
View large spreadsheet across two screens
Multitask more effectively without overlapping windows
Read email on one screen and open attachments on the other
Presentation
Display multiple screens presentation with one computer
Provide multiple screens exhibition at trade shows
Graphics
Use second display for palettes or tools menu bar
Display a panoramic view of large image
Data Entry
Type documents on one screen while viewing reference material on the other
Wall Street
Display multiple screens at same time with one computer
View charts and live data at the same time
Entertainment
View videos/TV on one screen and your desktop on the other
3
Features
•
•
•
•
•
•
•
•
•
Easily add an additional monitor without opening your computer
Supports up to 1600 x 1200
Supports Widescreen resolutions
Supports Video Playback
Supports Extended Desktop, Mirror and Primary Modes
Supports up to 2 USB External Video Adapters simultaneously
Compatible with DVI or VGA monitors
Hot Swappable; Add or remove monitor without rebooting
USB Powered
Specifications
Model:
Device Support:
Supported Resolutions:
Display Modes:
Computer Interface:
Monitor Interface:
Power Supply:
Material:
Dimensions:
OS Supported
NBV-100U
Monitor & Projector
Color
Depth
Resolution
640x480
Refresh rates
available at 16 bit
color quality
60 72 75
Refresh rates
available at 32 bit
color quality
60 72 75
800x600
56 60 72 75 85
56 60 72 75 85
1024x768
60 75 85
60 75 85
1280x960
60 85
60 85
1280x1024
60 75 85
60 75
1360x768
60
60
1366x768
60
60
1368x768
60
60
1400x1050
60 75 85
60 75 85
1440x900
60
60
1600x1200
60
60
1680x1050
59 60
59 60
Extended Desktop/Mirror/Primary
USB 2.0
DVI or VGA
USB Powered
Plastic
84.3 x 54 x 17.8 mm
Windows 2000/XP/Vista 32-bit
4
Package Contents
Before installation, please check the items in the package. The package should contain the
following items:
•
USB External Video Adapter
x1
•
Driver CD
x1
•
USB Cable
x1
•
Quick Installation Guide
x1
•
DVI to VGA Converter
x1
System Requirements
The minimum requirements for the PC are:
•
CPU 1.2GHz or higher. Intel Pentium/Celeron family, or AMD
K6/Athlon/Duron family, or compatible processor
•
256 MB of RAM
•
At least one USB2.0 port
•
30Mb of available disk space
•
Windows® 2000 SP4, XP SP2 32-bit, Vista™ 32-bit
•
Super VGA (800 x 600) or higher resolution monitor
Additional requirements for DVD playback on adapter-attached monitor:
•
Dual core CPU 2.0 GHz or higher
•
The adapter screen resolution set to 800x600 with 16bit color
5
2. Installation
Follow the procedures below to install the driver and then connect the adapter:
1. Insert the provided driver CD into your CD-ROM drive. The setup program will run
automatically. If not, locate and double-click the Setup.exe file under the Driver folder
on the CD.
Notice for Windows Vista users:
Windows Vista users will encounter a User Account Control dialog box when
attempting to install a program. Enter an administrator password or click Allow to
start the installation.
When prompted with Windows Security dialog box, select Install this driver
software anyway.
Notice for Windows 2000 users:
If the following message appears, please download and install the required patch first
and then execute the Setup.exe file on the CD.
2. Select I accept the terms in the License Agreement and click Next.
6
3. Install Core software.
4.
Install NBV-100U Driver
5. If prompted to restart your computer, click Yes to restart or No to manually restart later.
Note that a reboot is always needed for a successful installation. If the reboot prompt
doesn’t appear, make sure to manually reboot your computer.
7
6. Connect the adapter to your computer and monitor.
Connect the mini-B (smaller) end of the USB cable to the adapter. Then connect the
Type-A (larger) end of the USB cable to a USB 2.0 port on your computer
If your monitor is not yet connected to the adapter, connect it and power on your
monitor.
The equipped DVI-I (DVI-Integrated) connector transmits both the digital and analog
signals. This means it supports either of these two connection types:
•
It can be connected to a DVI-D (digital) monitor using a DVI cable (not provided)
Or, it can be connected to an analog VGA monitor using the provided DVI to VGA
Converter and a VGA cable (not provided).
7. After you connect the adapter, Windows will automatically complete the installation.
8. Once the installation is done, an extended screen will appear on the add-on monitor.
For Windows Vista, if the add-on monitor is blank, please reboot your system
again.
If required, you can connect and disconnect the add-on monitor at any time without
disconnecting the adapter from the USB port on your computer.
Sometimes it takes time for the add-on monitor to show the video.
8
3. Using the Adapter
Display Modes
There are several ways you can utilize the monitor attached on the adapter. The add-on monitor can be
configured to use either “mirror mode”, “extended mode” or be the primary display as described in this
section.
Extend Your Windows Desktop to Add-on Monitor (Default)
In this so-called “extended mode”, your display will be spread over the add-on monitor(s). This mode
allows you to perform multiple tasks more effectively without overlapping windows.
Extended mode is the default setting. To set up the adapter to use or restore extended mode, follow these
steps:
1. Position the mouse anywhere on your computer desktop, right-click and select Personalize >
Display Settings on Vista or Properties > Settings on XP/2000.
2. In the Display drop-down menu, select the option: “DisplayLink Graphics Adapter”.
3. Check the Extend the desktop onto this monitor box on Vista or Extend my Windows desktop
onto this monitor box on XP/2000.
4. Drag the icons in the window at the top of the screen to match the physical arrangement of your
primary monitor and add-on monitor.
The add-on monitor connected to the adapter may be identified as either "2" or “3”, depending on
your computer, although there may not be a total of 3 screens connected.
5. Click OK to close the settings screen.
Once the setting is done, to use your extended desktop, simply drag and drop your open windows
over to your second monitor. However, note that some applications may not support display on the
extended desktop.
9
Cursor disappeared ?
If you’re in extended mode but the add-on monitor is not connected, the desktop still extends to the add-on
monitor and it’s possible that your cursor has moved to the extended desktop so that you cannot find it on
the primary display. To solve the problem in such a case, connect the add-on monitor to the adapter or
keep moving your mouse to try or unplug the adapter first to bring the cursor back to the primary display.
Video and DVD Playback in Extended Mode
On Windows Vista with extended mode, it’s suggested that you run video or DVD playback programs on
your primary monitor instead of the add-on monitor to give better playback performance.
Mirror Your Windows Desktop
This mode is referred to as “mirror” or “clone” mode. In this mode, your original screen (the primary display)
will be mirrored to the add-on monitor.
In mirror mode, the adapter will automatically select the settings (screen resolution, color quality, and
refresh rate) for the add-on monitor. You can manually adjust the settings as desired, however, the
settings of the add-on monitor are limited to those of the primary monitor. For example, even though your
add-on monitor supports a resolution of up to 1680x1050, if your primary monitor only supports a
resolution of 1280x1024, the add-on monitor will only be able to use a resolution of 1280x1024.
If you change the video output to extended mode and then want to switch back to mirror mode, follow
these steps:
1. Position the mouse anywhere on your computer desktop, right-click and select Personalize >
Display Settings on Vista or Properties > Settings on XP/2000.
2. In the Display drop-down menu, select the option: “DisplayLink Graphics Adapter”.
3. Uncheck the Extend the desktop onto this monitor on Vista or Extend my Windows desktop
onto this monitor on XP/2000.
4. Click OK to close the settings screen.
10
Be the Primary Monitor
To make the add-on monitor the primary display:
1. Position the mouse anywhere on your computer desktop, right-click and select Personalize >
Display Settings on Vista or Properties > Settings on XP/2000.
2. In the Display drop-down menu, select the option ends with DisplayLink Graphics Adapter.
3. Check the This is my main monitor box on Vista or Use this device as the primary monitor box
on XP/2000.
On some PCs and laptops it is necessary to disable the main display (i.e. uncheck the Extend the
desktop onto this monitor or Extend my Windows desktop onto this monitor box for the main
display) as part of the same settings change.
4. Click OK to close the settings screen.
The add-on monitor will remain as the primary if the PC enters hibernate or suspend mode or is
rebooted. If the add-on monitor is unplugged, the main display becomes primary again.
Adjusting Resolution, Color Depth and Refresh Rate
There are three components that make up the screen mode:
Resolution: In common usage, this refers to the number of pixels displayed on the screen
horizontally and vertically.
Color Depth: This defines the number of different colors that can be shown on the screen at the
same time.
Refresh rate: Measures the rate that the entire screen is rescanned. Higher frequencies reduce
flicker.
Some monitors advertise the supported modes through the video connector. If this is the case, the
adapter identifies the supported modes from the monitor. If the monitor does not advertise the
supported modes, the adapter software chooses a set of common screen modes for the monitor.
11
The software supports the modes listed below.
Resolution
Color Depth Refresh rates available at 16 bit
color quality
Refresh rates available at 32 bit
color quality
640x480
60 72 75
60 72 75
800x600
56 60 72 75 85
56 60 72 75 85
1024x768
60 75 85
60 75 85
1280x960
60 85
60 85
1280x1024
60 75 85
60 75
1360x768
60
60
1366x768
60
60
1368x768
60
60
1400x1050
60 75 85
60 75 85
1440x900
60
60
1600x1200
60
60
1680x1050
59 60
59 60
*Note that interlaced modes are not supported.
About the resolutions and refresh rates available to users
The resolutions and refresh rates available to the user through Windows are a compromise of the support
from the following elements:
■ The
USB display adapter
■ The
primary monitor and the add-on monitor
■ The
primary video card on your computer and installed drivers
Therefore, for example, if your monitor doesn’t support a resolution of 1600x1200, then 1600x1200 is not
possible even if you are using a USB display adapter with 1600x1200 support. This ensures that the
monitor cannot be put into an unsupported mode, which might damage it.
If cloning the primary display, the video component will try to use the preferred monitor mode. In some
cases, this may not be the most appropriate mode for the cloned desktop. It is recommended that the
primary display resolution be changed to closer match the default resolution of the add-on monitor.
12
To configure the three components (resolution, color depth and refresh rate) of a screen mode, follow
these steps:
1. Position the mouse anywhere on your computer desktop, right-click and select Personalize >
Display Settings on Vista or Properties > Settings on XP/2000.
2. In the Display drop-down menu, select the option:
DisplayLink Graphics Adapter.
3. To change the screen resolution or color quality, select those options on the screen. Be sure to
select one of the supported resolutions and color quality numbers in the table above. For the
add-on monitor, you can also select any resolution or color quality supported by that monitor.
4. To change the refresh rate, click Advanced… and then click Monitor.
5. Select a refresh rate from the Screen refresh rate drop-down list and then click Apply.
6. Click OK to close the settings screen.
13
Standby and Hibernate, Shut Down and Restart
When the adapter is connected to a computer and an external monitor, if the computer goes into
standby or hibernate mode, the external monitor display will go blank.
When the computer returns to an active state, the external monitor display will keep the same
settings it had before the computer went into standby or hibernate mode. However, if the add-on
monitor was set for extended mode, windows that were previously on the external monitor will not
move back to that secondary monitor. Also, if the add-on monitor is in extended mode and the
computer requires a login after standby or hibernate mode, the login screen will appear on the
primary computer monitor, not the external monitor.
If the computer is shut down, restarted and logged in, again the add-on monitor will return to the
same mode as it was before shutdown.
Disconnecting the Adapter
If the adapter is unplugged from the computer, the add-on monitor will go blank. All windows and
icons will move to the primary screen.
On reconnection of the adapter, the adapter will return to the same mode as it was before
disconnection. However, windows and icons that were previously on the screen will not be moved
back.
Using Dual Adapters
Up to two adapters can be simultaneously attached to one computer. To use two adapters:
1. Install the driver as described in the “2. Installation” section and connect the first adapter to your
computer.
2. Then connect the second adapter to your computer. The system will automatically complete the
installation.
While two adapters are connected to a computer, in most cases both adapters support extended
and mirror modes. The only exception is Windows Vista XDDM mode as described below.
Limitation for dual adapters on Windows Vista in XDDM mode: In this mode one extended
screen and one mirrored screen is supported. Only the first connected adapter can be configured to
use extended mode; the second adapter is forced to use mirror mode. When you bring up the
Windows display settings dialog box, you will find that only one …DisplayLink Graphics Adapter
(representing your first attached adapter) is configurable.
14
What is Vista XDDM mode?
XDDM refers to Windows XP Driver Mode. It is a video card driver mode used in some legacy
computers that running the new generation Vista OS. It provides an interface similar to Windows
XP user Interface on Vista and one of its characteristics is that it doesn’t support Windows Aero
interface. To see the current display video driver mode, right-click on Computer and select Device
Manager. Then expand the Display adapters item.
15
Uninstall the Adapter and Driver
If for any reason you want to uninstall the video adapter and its driver, please take these steps:
1. Open the Control Panel and double-click Programs and Features on Vista or Add or
Remove Programs on XP/2000.
2. Select NBV-100U and click Uninstall or Remove.
3. Click Yes to confirm the removal. During the removal process a couple of DOS windows will
pop up.
4. Click Yes to restart your computer and then unplug the adapter now.
16
4. Troubleshooting
Q1: The display on the add-on monitor is blank.
A: If the monitor power LED is green (in most cases), wait a moment for the monitor to show the
video as sometimes it takes time for the secondary monitor to show the video. You can also reboot
your system to try again. Also make sure the computer is not in standby or hibernation mode,
which will lead the add-on monitor to be blank.
If the monitor power LED is red (in most cases), check that the connection is properly made. If the
problem still exists, uninstall the driver, unplug the adapter, reinstall the driver and try again.
Q2: The add-on monitor is flickering.
A: This is usually caused by a low refresh rate. To solve this problem:
•
In mirror mode, increase the refresh rate of the main monitor. This will in turn increase the
refresh rate of the add-on monitor.
•
In extended mode, increase the refresh rate of the add-on monitor.
Q3: When I play MPEG file by Windows Media Player on the extended monitor, how come the
display becomes abnormal when I switch it to full screen mode?
A: If your system is Windows XP SP1, we suggest you upgrade it to SP2 to solve this problem.
Q4: When playing the video in full screen mode, the motion is not smooth.
A: Try the following tips to improve the smoothness of movie playback:
•
Reduce the resolution of the display to 640x480 or 800x600.
•
Use the adapter in extended mode.
• Terminate any other CPU intensive applications running on the computer.
If you still have issues playing media content on the adapter, try the following steps:
•
As some media players require DirectX hardware support to correctly operate, try a
different media player which requires less DirectX support.
•
Drag the media player to the add-on screen and close the player. Restart the player and it
should open on the add-on monitor. Now try playing the media file again.
•
Try reducing the hardware acceleration level of the primary display (NOT the add-on
monitor) to levels 1,2 or 3 and restarting the media player. The hardware acceleration can
be found by right-clicking on your desktop and click Properties > Settings > Advanced >
Troubleshoot. Some players use this setting even when playing on a different display.
•
The video playback may be unusual when the add-on monitor is mirroring the primary
display and there is another extended screen connected to the computer. The extended
screen must be disabled before the content will be correctly cloned to the add-on monitor.
Q5: In extended mode, the add-on monitor appears to have a black border around the desktop.
A: This happens when the resolution used by the add-on monitor is larger than the resolution used
by the primary monitor. To solve this problem, configure the add-on monitor to use the same
resolution as the primary monitor.
17
5. Regulatory Compliance
FCC Conditions
This equipment has been tested and found to comply with Part 15 of the FCC Rules. Operation is
subject to the following two conditions:
(1) This device may not cause harmful interference
(2) This device must accept any interference received. Including interference that may cause
undesired operation.
Important! Changes or modifications not expressly approved by the manufacturer responsible for
compliance could void the user’s authority to operate the equipment.
CE
This equipment is in compliance with the requirements of the following regulations: EN 55 022:
CLASS B
WEEE Information
For EU (European Union) member users: According to the WEEE (Waste electrical and electronic
equipment) Directive, do not dispose of this product as household waste or commercial waste. Waste
electrical and electronic equipment should be appropriately collected and recycled as required by
practices established for your country. For information on recycling of this product, please contact
your local authorities, your household waste disposal service or the shop where you purchased the
product.
Vantec Thermal Technologies.
43951 Boscell Road
Fremont,CA 94538
Tel:(510) 668-0368
Fax(510) 668-0367
Web: www.vantecusa.com
18


