1
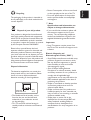
User Manual
32PFL7332
32PFL7932
42PFL7432
52PFL7432
philips
English
FLAT TV
The packaging of this product is intended to
be recycled. Apply to the local authorities for
correct disposal.
Disposal of your old product
Your product is designed and manufactured
with highly quality material and components,
which can be recycled and reused. When this
crossed-out wheeled bin symbol is attached
to a product, it means the product is covered
by the European Directive 2002/96/EC.
Please inform yourself about the local
separate collection system for electrical and
electronic products. Please act according to
your local rules and do not dispose your old
products with your normal household waste.
The correct disposal of your old product will
help prevent potential negative consequences
for the environment and human health.
Disposal of batteries
The batteries supplied do not contain the
heavy metals mercury and cadmium. Please
check on how to dispose exhausted
batteries according to local regulations.
Left hand
underside of TV
Rear
of TV
• The Model and Serial number can be
found at the rear and the left hand
underside of your television set and
on the packaging.
• This TV consumes minimal energy in
standby mode to minimise environmental
impact.
Note
Specifications and information are
subject to change without notice.
• If you need further assistance, please call
the customer support service in your
country. The corresponding telephone
numbers and addresses are given in the
supplied Worldwide guarantee booklet.
Important
• Some TV antennas require power from
the TV set. This set does not support such
a feature.
Electric, Magnetic and
Electromagnetic Fields (“EMF”)
• Royal Philips manufactures and sells many
products targeted at consumers, which,
like any electronic apparatus, in general
have the ability to emit and receive
electromagnetic signals.
• One of Philips’ leading Business
Principles is to take all necessary health
and safety measures for our products, to
comply with all applicable legal
requirements and to stay well within the
EMF standards applicable at the time of
producing the products.
• Philips is committed to develop, produce
and market products that cause no
adverse health effects.
• Philips confirms that if its products are
handled properly for their intended use,
they are safe to use according to scientific
evidence available today.
• Philips plays an active role in the
development of international EMF and
safety standards, enabling Philips to
anticipate further developments in
standardization for early integration in its
products.
English
Recycling
• Power Consumption of the set can found
on the type plate at the rear of the TV.
• For more specifications of the product
see the product leaflet on www.philips.
com/support.
English
Safety
General
•
•
•
•
•
•
•
Two people are required to lift and
carry a TV that weighs more than 25 kg.
Improper handling of the TV can cause
serious injury.
The surface on which the TV is placed
has to be level and able to withstand its
weight.
Air must be able to circulate freely
through the ventilation slots. Do not
place the TV in a confined place.
Do not place naked flame sources such
as lighted candles close to the TV.
Do not place a vase filled with water
near the TV. Spills can results in
electric shock. If water gets into the TV,
disconnect the TV from the mains and
have it checked by a qualified technician.
Do not expose the TV or the batteries
of the remote control to heat, direct
sunlight, rain or water.
During a thunderstorm, do not touch
any part of the TV, power cord or
antenna cable.
•
•
Do not leave the TV in standby mode
for an extended period of time. Instead
disconnect it from the mains.
Do not connect too many equipment
to the same mains socket because it can
result in fire or electric shock.
Wall mounting the TV
•
•
•
•
To wall mount the TV, please consult a
qualified technician. Improper mounting
of the TV can cause serious injury.
Please check that the structure of the
wall is suitable to carry the weight of
the TV.
Before mounting, all cables must be
inserted into the connectors of the TV.
connections can be done later.
Wherever you place or hang the TV,
ensure that air can circulate freely.
through the ventilation slots. Do not
position the TV in a confined space.
Caring and cleaning of the TV
•
Do not remove the protective sheet until you have completed the stand/wall mounting
and connections.
•
Use only the soft cloth provided to clean the glossy area of the TV. For the other parts
of the TV, use a soft dry cloth. Disconnect the TV from the mains before you clean the
TV.
•
Do not touch, push, rub or strike the screen with anything hard as this may scratch or
damage the screen permanently.
Getting started ....................................................................................... 1
Connecting the antenna .........................................................................................................1
Connecting / disconnecting from the mains ......................................................................1
Installing batteries into the remote control .....................................................................2
Switching on the TV ................................................................................................................2
Controls and connectors ....................................................................... 3
Side controls .............................................................................................................................3
Side connectors .......................................................................................................................3
Rear connectors ......................................................................................................................4
Remote control keys and functions ...................................................... 5
Selecting the menu languages .............................................................. 7
Searching and storing channels ........................................................... 8
Automatic searching ...............................................................................................................8
Manual Searching .....................................................................................................................9
Selecting Colour or Sound System..................................................................................9
Searching for your channels ...........................................................................................10
Fine Tuning your channels ...............................................................................................11
Sorting your channels .......................................................................... 12
Naming your channels ......................................................................... 13
Storing your favorite channels ............................................................ 14
Adjusting your picture settings ........................................................... 15
Adjusting your sound settings ............................................................. 16
Setting the timer .................................................................................. 17
Setting the sleep timer .........................................................................................................17
Setting the clock ....................................................................................................................18
Displaying the clock permanently ......................................................................................18
Setting the time to switch channels ..................................................................................19
Setting the time to switch TV to standby.........................................................................20
Setting ways to activate the timer .....................................................................................20
Locking and unlocking the TV side control ....................................... 21
Activating the Child Lock ....................................................................................................21
Deactivating the Child Lock ................................................................................................21
Controlling TV program access ......................................................... 22
Accessing Parental Lock.......................................................................................................22
Changing the access code....................................................................................................23
Locking all channels...............................................................................................................24
Unlocking all channels ..........................................................................................................24
English
Contents
English
Contents
Switching on and off Active Control ................................................. 25
Switching on Active Control ...............................................................................................25
Switching off Active Control ...............................................................................................25
Ambilight ............................................................................................. 26
Switching on Ambilight .........................................................................................................26
Switching off Ambilight .........................................................................................................26
Settings for Ambilight .......................................................................... 27
Adjusting brightness ..............................................................................................................27
Selecting Ambilight modes ...................................................................................................27
Selecting Ambilight colour ...................................................................................................28
Using custom colours ...........................................................................................................29
Selecting Ambilight balance..................................................................................................29
Displaying Demo mode ....................................................................... 30
Displaying Demo mode ........................................................................................................30
Accessing Teletext ................................................................................ 30
Switching on/off Teletext ......................................................................................................30
Selecting a page ......................................................................................................................30
Fastext (only applicable when Fastext is in broadcast) .................................................30
Selecting index (contents) page..........................................................................................30
Selecting subpage directly ....................................................................................................30
Enlarging a page ......................................................................................................................30
Page hold .................................................................................................................................30
Hidden information ...............................................................................................................30
Selecting picture formats .................................................................... 31
Selecting Smart picture and Smart sound settings.......................... 32
Smart sound settings ............................................................................................................32
Smart picture settings...........................................................................................................32
Using the TV as a computer monitor ................................................ 33
Setting the picture, sound and features in VGA mode ..................................................33
Using the TV in High Definition (HD) mode ..................................... 34
Connecting the HD equipment ..........................................................................................34
Controlling the TV settings while in HD mode ..............................................................34
Mode Selection in Features menu .....................................................................................35
Display (native 1080) in Features menu ...........................................................................35
Connecting to other devices ............................................................... 37
Troubleshooting.................................................................................... 38
Symptom..................................................................................................................................38
Possible solutions ..................................................................................................................38
Specifications ........................................................................................ 40
English
Getting started
NOTE: If you intend to mount the TV on the wall, all cables must be inserted into the
connectors of the TV first.
Connecting the antenna
The antenna socket is located at the rear
panel (underside) of the TV.
& Insert the antenna connector into the
TV antenna socket.
é Insert the connector at the other end of
the cable into your wall antenna socket.
Connecting / disconnecting
from the mains
& Insert the power cord connector
(appliance coupler) into the socket located
at the rear (underside) of the TV.
é Insert the plug into the wall power
socket.
NOTE:
The appliance coupler of the power cord
on the TV is used as the disconnect device.
Ensure that the power cord is fully inserted
into the TV mains socket and the wall
socket. To disconnect from the mains,
remove the power cord from the TV
mains socket or the wall socket. Verify
that the mains supply voltage in your home
corresponds to the voltage information
printed on the sticker at the rear of the TV.
WARNING:
For TV mounted on a swivel base or arm,
please ensure that the power cord is not
strained during swivelling. Straining the
power cord will loosen connections. This
may cause arcing and result in fire.
1
English
Getting started
Installing batteries into the
remote control
& Remove the cover at the back of the
remote control.
é Insert the two supplied batteries with
the (+) and (-) ends lined up correctly.
Switching on the TV
The TV controls are located at the left side
of the set.
& Press the POWER button.
A blue indicator light comes on.
é Press CHANNEL + / - to change the
channels.
“ If the TV is in standby mode (red
indicator lights up), press the CHANNEL
+ / - to switch on the TV.
2
English
Controls and connectors
Side controls
The side controls are on the left side of the
TV set.
1 VOLUME + / To increase volume level, press VOLUME +,
to decrease level, press VOLUME -.
2 MENU
To display the on-screen menus or to exit
from the on-screen menus.
The CHANNEL + / - buttons can be used to
navigate the menu items.
The VOLUME + / - buttons can be used to
select the menu items.
3 CHANNEL + / To select the TV channel numbers upwards
or downwards.
4 POWER
To turn off or turn on the TV set.
Side connectors
The side connectors are on the left side of
the TV set.
1 Headphones
To connect to your headphones.
2 Audio / Video / S-Video
To connect your devices such as camera or
player.
3
English
Controls and connectors
Rear connectors
The rear connectors are at the back
(underside) of the TV set.
1 CVI-1 / CVI-2
To connect to your devices such as DVD
players, decoders and Home Theatre systems.
2 Antenna
To connect to the antenna.
3 Audio / Video / S-Video
To connect your devices such as
camera, camcorder, or video player.
4 HDMI1 / HDMI2
To connect your devices such as
set-top box, DVD player/recorder, high definition equipment or personal computer.
5 VGA / Audio for PC
To use the TV as a computer monitor.You
can view the computer’s content in the TV’s
different screen sizes and listen to the audio
content.
6 Audio / Video
To connect your devices such as
Home Theater systems and DVD recorders.
4
English
Remote control keys and functions
2 ù button
To select Stereo and forced Mono sound
effect.
3 Teletext *
*Not applicable for models sold in China
(see page 30)
4 Sleeptimer
To switch off TV to standby at a
specified time (see page 17).
5 Smart Sound button
To select the pre-set Sound settings.
6 Incredible Surround button
To enable Incredible Surround in stereo
mode and Spatial in mono mode.
7 Mute button
To turn off or turn on sound.
8 Ambilight On/Off button
To switch on or off Ambilight.
9 Volume buttons
To turn up or turn down the sound level.
10 Ambilight mode button
To select the Ambilight mode set in
Features menu.
11 Number (0-9) buttons
1 Standby button
To switch the TV to standby mode if it
is already turned on. Or to turn on TV
when it is in standby mode.
To enter channel number, set time or
timer.
12 On screen information button
To display information on the current
channel or to exit on-screen menus.
13 Alternate Channel button
To display the last viewed channel.
5
English
Remote control keys and functions
14 Picture Format button
To cycle through list of available picture
formats.
15 AV button
To display AV source list or to cycle
through list of AV sources by pressing
the button repeatedly.
16 Pixel Plus Demo button
To turn on Pixel Plus Demo. One half
of screen will display image with Pixel
Plus enabled and the other half without.
17 Smart Picture button
To select the pre-set picture settings.
18 Program List button
To display the list of available channels
which you can scroll through using the
cursor buttons.
19 Cursor buttons
To navigating and selecting menu items
and adjusting individual settings.
20 OK button
To select menu items or confirm
selection.
21 Menu button
To display the on-screen menus and exit
menus from the screen.
22 Channel buttons
To select the higher or lower channel
number.
NOTE:
The u button is used to select menu items
or confirm your selection.
You can also press the
Æ
button instead of
the u button. Either of the
button will work in the same context.
6
English
Selecting the menu languages
Before using the on-screen menus, select your
menu language.
& Press
menus.
h
button to display the on-screen
é Press ï button until Install is
highlighted.
“ Press u button to select Language.
The available languages for your TV will be
displayed on the right panel.
‘ Press u button to highlight the first
ï to select the other available
language or
languages.
(
Press
u
§ Press h
button to select the language.
button to exit the on-screen
menus.
7
English
Searching and storing channels
When you are using the TV for the first
time, it is recommended that you run the
automatic or manual searching of channels.
Automatic searching
& Press h button to display the onscreen menus.
é Press ï button until Install is
highlighted.
“ Press u button to select Install.
‘ Press ï button until Auto Store is
highlighted.
( Press u button to start Auto Store.
The TV will start scanning for channels
automatically. When it finds a channel, it
will assign the channel number 1 to it and
continue scanning for the next available
channel. When scanning has completed, the
progress bar display will exit from the screen.
The first channel found will be displayed on
the screen.
§ Press h
button to exit the on-screen
menus.
TIP:
To cancel or interrupt auto searching, press
the h button. Only channels that were
found before interruption, will be stored.
8
English
Searching and storing channels
Manual Searching
In manual searching, you can select the
following items to tune for channels:
Colour System
Sound System
Search
Channel
Fine Tune
Store (To store your settings)
Selecting Colour or Sound
System
& Press h button to display the onscreen menus.
é Press ï button to highlight Install and
Æ button to select it.
then press the
“ Press ï button to highlight Manual
Æ button to
Store and then press the
select it.
‘ Press ï button to highlight Colour
System or Sound System and then press
the
Æ button to select it.
( Press Î or ï button to select the type
of system and press the u button.
§ Press Í button to exit and then press
ï button to highlight Store.
è Press the Æ button to select it and then
u button to store the settings.
press the
! Press h
button to exit the on-screen
menus.
9
English
Searching and storing channels
Searching for your channels
You can search for channels manually by
using the Search feature.
& Press h button to display the onscreen menus.
é Press ï button to highlight Install and
then press the Æ button to select it.
“ Press ï button to highlight Manual
Store and then press the Æ button to
select it.
‘ Press ï button to highlight Search and
Æ button to select it.
then press the
( Press the Æ button again to start
scanning for the next available channel or
key in the frequency directly. Next you will
need to assign a channel number to this
channel.
§ Press ï button to highlight Channel
and then press the Æ button to enter your
assigned channel number.
è Press Í button to exit and then press
ï button to highlight Store.
! Press the Æ button to select it and then
u button to store the settings.
press the
ç Press h button to exit the on-screen.
10
English
Searching and storing channels
Fine Tuning your channels
You can fine tune the channels after you have
searched them automatically by using the
Fine Tune feature. Switch to the channel
number that you want to fine tune.
& Press h button to display the onscreen menus.
é Press ï button to highlight Install and
then press the Æ button to select it.
“ Press ï button to highlight Manual
Æ button to
Store and then press the
select it.
‘ Press ï button to highlight Fine Tune
and then press the Æ button to select it.
( Press Î or ï button to adjust the
slider on the tuning bar until you get the
best reception.
§ Press Í button to exit and then press
ï button to highlight Store.
è Press the Æ button to select it and then
press the u button to store the settings.
! Press h button to exit the on-screen.
11
English
Sorting your channels
You can rearrange the numbers assigned to the channels previously.
& Press h button to display the onscreen menus.
é Press ï button to highlight Install.
“ Press u button to select Install.
‘ Press ï button to highlight Sort.
(
Press
u
button to select Sort.
§ Press ï button to highlight the channel
number you want to rearrange from.
è
Press
Æ button to confirm.
! Press Î or ï button to highlight the
new channel number you want to change to.
ç Press Í button to confirm.
Repeat steps
§ to ç
to rearrange more
channels, otherwise proceed to step
à Press h
menus.
12
à.
button to exit the on-screen
English
Naming your channels
You can assign a short name for your channels with the Name feature.
& Press h button to display the onscreen menus.
é Press ï button to highlight Install.
“ Press u button to select Install.
‘ Press ï button to highlight Name.
(
Press
u
button to select Name.
§ Press ï button to highlight the channel
number you want to name.
è
Press
Æ button to start the process.
! Press Î or ï button to cycle through
the list (A-Z, 0-9) to select the characters
or numbers to use for the channel name.
You can use up to a combination of 5
characters or numbers for naming your
channels.
ç Press Í button to end the process.
Repeat steps
§ to ç
to name more
channels, otherwise proceed to step
à Press h
à.
button to exit the on-screen
menus.
13
English
Storing your favorite channels
The Favorite Program feature lets you store only the channels you want on your favorite
list which you can access using the Channel +/- buttons.
& Press h button to display the onscreen menus.
é Press ï button to highlight Install.
“ Press u button to select Install.
‘ Press ï button to highlight Fav.
Program.
The list of channel numbers are displayed
on the right panel. All channel numbers will
have a $ symbol beside them to indicate as
favorite channel by default.
( Press ï button to highlight a channel
number you want to remove or add to the
favourite list.
§ Press u button to remove the channel
(no $ symbol) or add the channel (with $
symbol) to the favourite list.
Channels in the favourite list can be call up
with the Channel +/- button while those not
in the list can be call up with the number
buttons.
è Press h
menus
14
button to exit the on-screen
English
Adjusting your picture settings
The items on the Picture menu features lets you adjust various picture settings.
& Press h button to display the onscreen menus.
The Picture sub-menu is highlighted by
default.
é Press
menu.
u button to select Picture
“ Press Î or ï button to highlight the
items you want to adjust.
‘ Press u button to select the item.
Picture settings:
• Brightness: Adjust the brightness of the
picture.
• Colour: Adjust the intensity of the colors.
• Contrast: Adjust how light or dark the
picture tones should be.
• Sharpness: Adjust the detail level of the
picture.
• Color Temp: Set the color to Cool (more
blue), Normal (balanced) or Warm (more
red).
• Contrast +: Increases the contrast range
of the TV. Select On to activate feature.
• Noise Reduction (NR): Improves “noisy”
picture (little dots on picture) due to weak
signal transmission. Select On to activate
feature.
Depending on which Picture item you are
adjusting, some items will have the level
indicator bar, some with settings such as
Cool, Warm and Normal or On and Off.
( Press
settings.
Î or ï button to adjust the
§ Press h
button to exit the on-screen
menus.
15
English
Adjusting your sound settings
The items on the Sound menu features lets you adjust various picture settings.
& Press h button to display the onscreen menus.
é Press
menu.
ï button to highlight Sound
“ Press
menu.
u button to select the Sound
‘ Press Î or ï button to highlight the
items you want to adjust.
( Press u button to select the item.
Sound settings:
Equalizer – Adjusts each individual
frequency (tone).
Balance – Balances the left and right
speaker’s sound level.
AVL (Automatic Volume Leveler) – Controls
the sudden sound level increase when
changing channels or during commercial
break.
Incr. Surround – Enhances stereo effect.
Select Incredible Surround or Stereo
(when in stereo mode) or Mono or Spatial
(when in mono mode).
Depending on which Sound item you are
adjusting, some items will have the level
indicator bar, some with settings such as
Mono and Spatial, or On and Off.
§ Press
settings.
Î or ï button to adjust the
è Press h
menus.
16
button to exit the on-screen
NOTE:
Stereo and Incredible Surround
modes can only be selected when the
TV broadcast is in stereo. You can
also press the f button to toggle the
sound modes.
English
Setting the timer
The TIMER sets the sleep timer, time to switch channel.
Setting the sleep timer
& Press h button to display the onscreen menus.
é Press
menu.
ï button to highlight Features
“ Press u button to select Features
menu.
‘ Press u button to select Timer.
( Press u button to select Sleep.
The right panel will display the sleep timer
settings: Off, 15, 30, 45, 60, 90, 120, 180 and
240 minutes.
Depending on which Sound item you are
adjusting, some items will have the level
indicator bar, some with settings such as
Mono and Spatial, or On and Off.
§ Press Î or ï button to the time
before the TV switches to standby mode.
è Press u button to confirm the setting.
! Press h
button to exit the on-screen
menu.
TIP:
You can check if the sleep timer is enabled or the remaining time by pressing the
Ë button on the remote control. The status will be displayed on the bottom of the
screen. To cancel sleep timer, select Off in the Sleep sub-menu.
17
English
Setting the timer
Setting the clock
Repeat steps & to ‘ from the previous
section “Setting the sleep timer” to access
the “Time” menu.
( Press ï button to highlight Time.
§ Press u button to select Time menu.
The entry fields --:-- will be displayed for you
to enter the time in HH:MM format.
è Press the number buttons (0-9) to enter
the time. Example: 10:45.
! Press h
button to exit the on-screen
menus.
Displaying the clock
permanently
Repeat steps & to ‘ from the previous
section “Setting the sleep timer” to sccess
the “Time” menu.
( Press u button to select Display.
§ Press Î or ï button to select On.
è
Press
menus.
h
button to exit the on-screen
TIP:
Press Ë button on the remote control
to see the time.
18
English
Setting the timer
Setting the time to switch
channels
Repeat steps & to ‘ from the previous
section “Setting the sleep timer” to access
the “Time” menu.
( Press ï button to highlight Start Time.
§ Press u button to select Start Time.
The entry fields --:-- will be displayed for you
to enter the time in HH:MM format. This
is the time when the TV will switch over
automatically to the channels number you
will set in later steps.
è Press the number buttons (0-9) to enter
the time. Example: 20:00.
! Press Í button to return to the Timer
menu.
ç Press ï button to highlight Channel.
à Press u button to select Channel.
11 Press the number buttons (0-9) to enter
a channel number. Example: The TV will
switch over to this channel at the “Start
Time” that was set earlier on.
12 Press h button to exit the on-screen
menus.
19
English
Setting the timer
Setting the time to switch TV
to standby
Repeat steps & to ‘ from the previous
section “Setting the sleep timer” to sccess
the “Time” menu.
! Press ï button to highlight Stop Time.
§ Press u button to select Stop Time.
The entry fields --:-- will be displayed for you
to enter the time in HH:MM format. This
is the time when the TV will switch over
automatically to standby.
è Press h
button to exit the on-screen
menus.
Setting ways to activate the
timer
Repeat steps & to ‘ from the previous
section “Setting the sleep timer” to sccess
the “Time” menu.
! Press ï button to highlight Activate.
§ Press u button to select Activate.
ç Press ï button to highlight Off, Once
or Daily.
Activate settings:
• Off – To cancel wake up clock.
• Once – To set wake up clock to activate
once only.
• Daily – To set wake up clock to activate
everyday at this time.
à Press h
menus.
20
button to exit the on-screen
Use the Child Lock feature if you need to lock the functions of all the control buttons except
the power button on your TV. The buttons on the remote control still works.
Activating the Child Lock
& Press h button to display the onscreen menus.
é Press
menu.
ï button to highlight Features
“ Press u button to select Features
menu.
‘ Press ï button to highlight Child Lock.
( Press u button to select Child Lock.
§ Press ï button to highlight On.
è Press u button to confirm the setting.
! Press h
button to exit the on-screen
menus.
Deactivating the Child Lock
Repeat steps & to ( from the previous
section of “Activating the Child Lock”.
§ Press Î button to highlight Off.
è Press u button to confirm the setting.
! Press h
button to exit the on-screen
menus.
21
English
Locking and unlocking the TV side control
English
Controlling TV program access
The Parental Lock feature lets you control the type of TV programs that can be accessed
with the built-in program ratings based on age and content.
Accessing Parental Lock
& Press
menus.
h
é Press
menu.
ï button to highlight Features
button to display the on-screen
“ Press u button to select Features
menu.
‘ Press
Lock.
ï button to highlight Parental
( Press u button to select Parental Lock.
If you are using Parental Lock for the first
time, you must enter the default code 0711.
§ Press the number buttons (0-9) to enter
the code.
If you see “Incorrect” below the code you
have just entered, press the numbers again.
If you see “Correct”, the TV will display the
Parental Lock menu and highlight the item
“Lock Channel”.
è Press u button to select Lock Channel.
! Press Î or ï button to highlight the
channel number that you want to lock.
ç Press u button to confirm locking the
channel. A S symbol appears next to the
channel number shows that it is locked. To
unlock, press u button again. The S symbol
disappears.
Repeat steps ! to ç for other channel
numbers that you want tostep lock
à Press h
button to exit the on-screen
menus.
Locking and unlocking the
22
English
Controlling TV program access
Changing the access code
Repeat steps & to § from the previous
section of “Controlling TV program access”.
è Press
Code.
ï button to highlight Change
! Press
Code.
u button to select Change
ç Press the number buttons (0-9) to enter
a new code.
à Press u button to enter code into the
TV’s memory.
When “Confirm code” appears below
the code you have just entered, press the
numbers again. You will see “Confirmed” and
the code is changed.
11 Press u button to confirm the setting.
12 Press h button to exit the on-screen
menus.
23
English
Controlling TV program access
Locking all channels
Repeat steps & to § from the previous
section of “Accessing Parental Lock”.
è Press ï button to highlight Lock All.
! Press u button to select Lock All.
ç Press u button to select Yes.
“Locked” appears below to confirm your
selection. From now on you have to key in
the access code before you can call up all
channels with the number buttons.
à Press h
button to exit the on-screen
menus.
Unlocking all channels
Repeat steps & to § from the previous
section of “Accessing Parental Lock”.
è Press ï button to highlight Clear All.
! Press u button to select Clear All.
ç Press u button to select Yes.
“Cleared” appears below to confirm your
selection.
à Press h
menus.
24
button to exit the on-screen
English
Switching on and off Active Control
Switch on the Active Control feature to optimise picture quality from whatever the source.
Switching on Active Control
& Press h button to display the onscreen menus.
é Press
menu.
ï button to highlight Features
“ Press u button to select Features
menu.
‘ Press ï button to highlight Active
Control.
( Press u button to select Active
Control.
§ Press ï button to highlight On.
è Press u button to confirm the setting.
! Press h
button to exit the on-screen
menus.
Switching off Active Control
Repeat steps & to ( from the previous
section of “Switching on Active Control ”.
§ Press Î button to highlight Off.
è Press u button to confirm the setting.
! Press h
button to exit the on-screen
menus.
25
English
Ambilight (Applicable on selected models)
The Ambilight feature offers you a relaxed viewing and unique ambiance via a soft light glow
on the two sides of the TV. Research has shown that watching television with adapted
ambient lighting promotes more relaxed TV viewing. The Ambilight colours automatically
adapt to the images on the screen to add a new sensation to the viewing experience.
Switching on Ambilight
& Press h button to display the onscreen menus.
é Press
menu.
ï button to highlight Features
“ Press u button to select Features
menu.
‘ Press ï button to highlight Ambilight.
( Press u button twice to select
Ambilight.
§ Press ï button to highlight On.
è Press u button to confirm the setting.
! Press h
button to exit the on-screen
menus.
Switching off Ambilight
Repeat steps & to ( from the previous
section of “Switching on Ambilight”.
§ Press Î button to highlight Off.
è Press u
button to confirm the setting.
! Press h
button to exit the on-screen
menus.
26
Active Control
English
Settings for Ambilight (Applicable on selected models)
Adjusting brightness
Repeat steps & to ‘ from the previous
section of “Switching on Ambilight”.
( Press u button to select Ambilight.
Active Control
§ Press ï button to highlight Brightness.
è Press u
button to select Brightness.
! Press Î or ï button to adjust the
amount of light output of ambient light.
ç Proceed to other settings, otherwise
press h button to exit the on-screen
menus.
Selecting Ambilight modes
Repeat steps & to ‘ from the previous
section of “Switching on Ambilight”.
§ Press ï button to highlight Mode.
è Press u button to select Mode.
! Press Î or ï button to select the
different modes available.
ç Press u button to confirm setting.
Colour – ensures constant light according to
the settings in the Colour menu.
Relaxed – smoothens the rate of brightness
and colour. This gives a more relaxed viewing
experience.
Moderate – this is a pre-defined rate of
brightness and colour change.
Dynamic – ensures a dynamic change of
rate of brightness and colour.
à Press h button to exit the on-screen
menu.
27
English
Settings for Ambilight (Applicable on selected models)
Selecting Ambilight colour
Repeat steps & to ‘ from the previous
section of “Switching on Ambilight”.
( Press u button to select Ambilight.
§ Press ï button to highlight Colour.
è Press u button to select Colour.
! Press Î or ï button to select.
ç Press u button to confirm setting.
List of colours available:
• Warm white
• Cool white
• Blue
• Red
• Green
• Yellow
• Magenta
• Custom – This is the settings selected
in the “Custom Colour” menu.
à Proceed to other settings, otherwise
press h button to exit the on-screen
menus.
28
Active Control
English
Settings for Ambilight (Applicable on selected models)
Using custom colours
Repeat steps & to ‘ from the previous
section of “Switching on Ambilight”.
( Press u button to select Ambilight.
§ Press
Colour.
Active Control
ï button to highlight Custom
è Press u button to select Custom
Colour.
! Press Î or ï button to select Palette
or Saturation.
Palette – adjusts the general colour of the
light output.
Saturation – adjusts the colour intensity of
light output.
ç Press u button to confirm setting.
à Press Î or ï button to adjust.
11 Proceed to other settings, otherwise
press h button to exit the on-screen menus.
Selecting Ambilight balance
Repeat steps & to ‘ from the previous
section of “Switching on Ambilight”.
( Press u button to select Ambilight.
Active Control
§ Press ï button to highlight Balance.
è Press u button to select Balance.
Use this feature to adjust the colour intensity
on the sides of the picture.
! Press Î or ï button to adjust.
ç Proceed to other settings, otherwise
50
0
press h button to exit the on-screen menus.
-50
29
English
Displaying Demo mode
Displaying Demo mode
& Press
button to start.
The screen split into two. The right
side (Off) shows the picture before
enhancement. The left side (On) shows the
picture after enhancement.
é Press
button to return to normal
screen.
Accessing Teletext
(Not applicable for models sold in China)
Teletext is an information system broadcast by certain channels. This service can be operated
with specific buttons on the remote control.
Switching on/off Teletext
Selecting subpage directly
& Press the number buttons to select a
channel which broadcast teletext.
& Press Í button to select the previous
page or Æ button to select the next page.
é Press ¤ button to switch on the
teletext service.
Selecting a page
& Press the number buttons to select a
page e.g. 800. Press the CH + or – to select
a higher or lower page number.
Fastext (only applicable when
Fastext is in broadcast)
& Press the colour buttons corresponding
to the colour menu at the bottom of the
page to select that item.
Enlarging a page
& Press Î or ï button to enlarge the
top half of the page. Press again to enlarge
the bottom half of the page. Press again will
return to normal size.
Page hold
& Certain pages contain sub-pages which
are automatically displayed successively.
This key
is used to stop or resume
sub-page progression. Use the Í Æ keys to
select previous or next sub-page.
Hidden information
&
Selecting index (contents)
page
Press
button to display or hide the
concealed information such as solutions to
games or riddles.
& Press the
button to select or return
to the index page.
*Not applicable for models sold in China.
30
English
Selecting picture formats
The pictures you get on your TV may be in the widescreen (16:9) or standard (4:3)
format depending on your broadcast stations. You can select various screen formats to suit
the type of programs you watch.
& Press ë button repeatedly to select
4 :3
the picture that you want.
Picture Formats:
4:3 – Entire picture is reproduced on the screen
with black bands on left and right of screen.
Movie Expand 14:9 – The picture is enlarged
Movie Expand
14 : 9
to fit horizontally with black bands visible at the
sides of the screen.
Movie Expand 16:9 – The picture is enlarged
to fill up the screen and eliminate the top and
bottom black bands. Some information at the top
and bottom of the picture is cropped off.
Movie Expand
16 : 9
Subtitle Zoom – The 4:3 format programme
is displayed on the entire screen leaving the
subtitles area visible. Some information at the top
of the picture is cropped off.
Super Zoom – Removes black bands on sides
of the screen of 4:3 format programmes with
minimal distortion.
Subtitle
Zoom
Widescreen – The picture is displayed in its
original proportions as transmitted.
Super Zoom
Widescreen
31
English
Selecting Smart picture and Smart sound settings
The TV comes with pre-set Smart Sound and Smart Picture settings to match different
listening and viewing environment.
Smart sound settings
& Press Ú button repeatedly to select
the sound settings that you want.
Movie – Gives you the sensation of being in
the middle of the action.
MOVIE
Music – Low tones to emphasize music.
Voice – High tones to emphasize dialogue.
Personal – Your own sound settings can
be stored here. You can only change the
settings for Personal.
MUSIC
VOICE
PERSONAL
Smart picture settings
& Press
button repeatedly to select
the picture settings that you want.
Rich– Brilliant and sharp pictures for bright
environment.
Natural – suitable for living room
conditions.
Soft – Suitable for poor signals and living
room conditions.
RICH
NATURAL
SOFT
Multimedia – Optimal settings for graphical
media.
Personal – Your own picture settings can
be stored here. You can only change the
settings for Personal.
NOTE:
If you change any settings in the Picture
or Sound menus, your previous Personal
setting will be overwritten with the current
changes you made.
32
MULTIMEDIA
PERSONAL
The TV is equipped with a VGA port for you to use as a computer monitor. Connect your
computer to the TV via the VGA cable (not supplied). Refer to the Quick Connect Guide for
connecting the computer to your TV.
& Press
button to call up the source
list.
é Press ï button to highlight VGA.
“ Press u button to select VGA.
Setting the picture, sound
and features in VGA mode
Most of the picture, sound and features
settings are the same as those in the TV
mode. The additional items are:
Picture settings:
Horizontal – To adjust the picture to the
left or right.
Vertical – To adjust the picture upwards or
downwards.
Feature settings:
Phase / Clock – To match the TV’s and
computer’s display settings.
Auto Adjust – To synchronise the TV and
computer’s Phase/Clock rate automatically.
The geometry will also be adjusted.
Reset – To set back to the factory default
setting.
NOTE:
The best supported format is 1024 X 768
@ 60 Hz.
NOTE:
• If you are using the DVI output from
your computer to connect to the TV, use
a DVI to HDMI adapter cable. The audio
cable needs to be connected to the L /
R Audio jacks (AV) of the TV.
• Press the
key to display Source List
and use the Î ï key to select HDMI 1
or HDMI 2.
33
English
Using the TV as a computer monitor
English
Using the TV in High Definition (HD) mode
The HD (High Definition) mode allows you to enjoy clearer and sharper pictures if you are
using HD equipment that can produce high definition video signals.
Connecting the HD
equipment
& Connect the HDMI or DVI output from
your HD equipment to the HDMI 1 or
HDMI 2 connector of the TV. Use a DVI to
HDMI cable if DVI output is connected.
é If you are using DVI output from your
HD equipment to connect to the TV, the
audio cable needs to be connected to the L /
R Audio jacks (AV) of the TV.
“
Press the
key to display Source List
and use the Î ï key to select HDMI 1 or
HDMI 2.
‘ Press the Æ / u
key to switch to the
selected source.
Controlling the TV settings
while in HD mode
& Press the h
key to display the main
menu.
é Press the Î ï keys to select Picture,
Sound or Features and the Æ / u key to
enter the selected item menu.
“
Î ï key to select the
settings and the Í Æ key to select or
Press the
adjust setting.
‘ To return to previous menu, press the
Í key.
34
(
To exit the menu, press the
h
key.
Picture menu
• The Picture menu comprises Brightness,
Colour, Contrast, Sharpness, Colour
Temp., Contrast+, Horizontal Shift,
and Vertical Shift.
• Except for the Horizontal Shift and
the Vertical Shift features, all the other
functions work exactly in the same way as
the features in the TV Picture menu.
• Horizontal Shift feature allows you to
adjust horizontal position of the image.
• Vertical Shift feature allows you to
adjust vertical position of the image.
Sound menu
• The Sound menu comprises Equalizer,
Balance, AVL and Incr. Surround
features and work exactly in the same way
as the TV Sound menu.
Features menu
• The Features menu comprises Timer,
Child Lock, Parental Lock and Active
Control features. Except for Mode
Selection feature, all the other features
work exactly in the same way as the TV
Sound menu.
English
Using the TV in High Definition (HD) mode
Mode Selection in Features
menu
Note:
Applicable only to 480p and 720p.
When you connect HD (High Definition)
equipment (HDMI only) supporting
resolution of 480p or 720p, the Mode
Selection feature will be available in the
Features menu. The Mode Selection
allows you to select between the PC and
HD mode.
& Press the h
key.
é Press the Î ï keys to access the
Features menu and press the Æ / u key.
“ Press the ï key to select Mode
Selection.
‘ Press the Æ key to access Mode
Selection mode.
( Press the
HD mode.
§
Î ï keys to select PC or
To exit the menu, press the
h key.
Display (native 1080) in
Features menu *
Note
This Display (native 1080) feature is only
applicable to 1080p models only.
When you connect HD (High Definition)
equipment (HDMI or Y, Pb, Pr) supporting
resolution of 1080i, the Display (native
1080) feature will be available in the
Features menu. This feature allows you to
watch the original HD format (1080i only).
This is a true HD resolution from your input
signals.
*Applicable on selected models only.
35
English
Using the TV in High Definition (HD) mode
& Press the h
Supported formats
key.
é Press the Î ï keys to access the
Features menu and press the Æ / u key.
“
‘
Press
ï key to select Display.
Press the
mode.
Æ key to access Display
Non 1080p models
HD format
480p,
SD format
576p, 720p, 1080i
480i,
576i,
( Press the Æ key twice to access the
Off/On option in the native 1080.
§
Press the Î ï keys to select Off/On
option. Select On option to allow you to
watch original HD format (1080i only).
è
To exit the menu, press the
h key.
1080p models
HD
480p 576p 720p 1080p 1080i
format
SD
format
Note
Your Philips TV is HDMI compliant. If you do
not get a good picture, please change the
video format on your device (DVD player,
cable set-top box, etc.) to a standard format.
For example, for DVD player, select 480p,
576p, 720p, 1080i or 1080p.
Please note that this is not a defect of
the TV set.
36
480i,
576i,
The TV is equipped with several audio and video connection jacks for you to connect to
devices such as DVD players and recorders, home theatre systems, high-definition equipments,
etc. Refer to the Quick Connect Guide for connection instructions.
& Press
button call up the source list.
é Press ï button to highlight the
connection input.
“ Press u button to confirm selection.
Sources:
TV – Normal TV broadcast via the 75 ohm
antenna connector.
AV – Composite video and audio input.
SIDE – Headphone jack, Composite video
and audio and S-Video input.
CVI 1 – Component video (Y Pb Pr) with
audio input.
CVI 2 – Component video (Y Pb Pr) with
audio input.
VGA – Video Graphics Array with audio
input.
HDMI 1 – High Definition Multimedia
Interface input.
HDMI 2 – High Definition Multimedia
Interface input.
37
English
Connecting to other devices
English
Troubleshooting
Before calling Service, refer to the Troubleshooting topic for a list of symptoms and solutions
which may address your problem.
Symptom
Possible solutions
No display on screen
Check that the power cable is connected properly into the
mains socket and to the TV.
Disconnect power plug from the wall socket. Wait for about
60 seconds and re-connect the plug. Switch on the TV.
button on the remote control.
Press the
Poor reception
(or “snowy” picture)
Check antenna connection is connected properly from the TV
to the antenna source.
Adjust the picture manually.
Check that the correct TV system is selected.
button to check the incoming signal strength
Press the
indication at the top of the TV screen.
No picture
Check that the antenna and power cables are connected
properly.
Check that the correct input source is selected.
Check that the Parental Lock function is switched off.
No sound on certain
channels
Check that the correct TV system is selected.
No sound
Check that the volume is not set to the minimum.
Check that the “Mute” function is not switched on.
Check that the correct connection source is selected.
Sound interference
Switch off any nearby electrical appliances such as hair dryer
or vacuum cleaner.
TV not responding to
remote
Check that there is no obstacle between the remote control
and the TV.
Check that the batteries are correctly inserted into the
remote control.
Replace batteries if necessary.
Spots on the TV screen
that do not change colour
No action needed because the LCD panel is built with very
high precision technology giving you the fine picture details.
Occasionally, a few non-active pixels may appear on the screen
as a fixed point of red, blue, green or black. This does not affect the performance of the set.
38
Symptom
English
Troubleshooting
Possible solutions
Intermittent flickering
when in HD mode
• Check the user manual of the digital equipment you are
connecting. Picture noise is noticeable if the connected digital
equipment such as DVD player or Set-Top box fail.
• Use a standard-compliant (high-quality) HDMI cable.
No sound or picture but
front panel red light is lit
Press the
The Colour becomes faint
in S-Video mode
Check that the S-Video cable is connected properly.
VGA mode does not work
Check VGA cable is connected securely.
Check that the correct AV source is selected. Press the
button to display the source list and select the correct one.
Check whether you have configured the computer to a
compatible display resolution.
Check the graphics card setting of the computer.
Black bar on the top and
bottom of the screen in
VGA mode
Change PC refresh rate to 60 Hz.
button on the remote control.
39
English
Specifications
TV Models
32PFL7332
TV System
32PFL7932
42PFL7432
52PFL7432
PAL I, PAL B/G, PAL D/K, SECAM B/G, SECAM D/K
Video Playback
NTSC, SECAM, PAL
Power
Mains
100-250 V, 50/60 Hz
Standby consumption
<1W
Display
Type
Screen size
LCD WXGA Active matrix TFT
32” (80 cm)
32” (80 cm)
42” (107 cm)
52” (132 cm)
Resolution
Panel resolution
1366 X 768p
1920 X 1080p
Computer formats
640 x 480 - 60, 72, 75, 85Hz
720 x 400 - 70Hz
1024 x 768 - 60, 70, 75, 85Hz
Supported Display
Video formats
640 x 480i - 60Hz
640 x 480p - 60Hz
720 x 576p - 50Hz
1280 x 720p - 50, 60Hz
720 x 576i - 50Hz
1920 x 1080i - 50, 60Hz
Sound
Output power
2 x 10 W
Connectivity
AV
CVBS In, Audio L/R In, S-Video In
CVI 1
Y Pb Pr, Audio L/R In
CVI 2
Y Pb Pr, Audio L/R In
HDMI 1
y
y
y
y
HDMI 2
y
y
y
y
PC
AV Out
PC VGA In, PC Audio In
CVBS Out, Audio L/R Out
SIDE
CVBS In, Audio L/R In, S-Video In, Headphone Out
Aerial Input
75 Ohm coaxial (IEC75)
40
TV Models
Accessories
32PFL7332
32PFL7932
42PFL7432
English
Specifications
52PFL7432
Quick Start Guide, User Manual, Registration card, Warranty certificate,
Power cord, Table-top stand, Remote control, AAA batteries x2
Dimensions
Set weight
Set weight with stand
14.2 kg
14.2 kg
26.5 kg
40 kg
17 kg
17 kg
33.5 kg
50 kg
Set dimensions
W 805
W 805
W 1046
W 1288.6
(W x H x D) mm
H 546.5
H 546.5
H 686
H 834.5
D 115.5
D 115.5
D 116
D 123.5
W 805
W 805
W 1046
W 1288.6
H 609
H 609
H 748.6
H 901.3
D 210
D 210
D 264.5
D 325
Set dimensions with
stand (Wx H x D) mm
Specifications subject to change without notice.
41
3139 125 38213