1
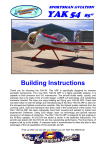
S U P E R DE CAT H L O N
Thank you for choosing the Super Decathlon. With this model you can truly enjoy the feeling
and grace of flying. The (49in) wing span has a “Clark-Y” type airfoil section which makes it
easy to fly, yet will perform a wide variety of aerobatic maneuvers with ease.
When the Citabria Decathlon was introduced, it was the only airplane being commercially
produced in the United States which was certified for aerobatics. From the mid 1960s through
the end of the 1970s, sport flying in the United States enjoyed great popularity. Pilots who flew
for personal enjoyment were interested in the unusual and exciting, and aerobatics provided an
avenue for this interest. They were popular as trainers—because of their conventional gear and
their aerobatic capabilities—and as personal aircraft. They were also found in utility roles such
as bush flying—thanks to their short take off and landing ability, agriculture, pipeline patrol, and
as glider tow planes. Though variants of the design, and other better-suited designs, have
largely taken over the Citabria's utility roles, they still remain popular as trainers, glider tow
planes, and for personal use.
Performance
General characteristics
•
•
•
•
•
•
•
•
•
Length: 22 ft 9 in (6.9 m)
Wingspan: 33 ft 5 in (10.2 m)
Height: 6 ft 9 in (2.4 m)
Wing area: 165 ft² (15.3 m²)
Airfoil: NACA 4412
Empty weight: 1,110 lb (503.5 kg)
Loaded weight: 1,650 lb (748 kg)
Useful load: 540 lb (244.5 kg)
Max takeoff weight: 1,650 lb (748 kg)
•
•
•
•
•
•
•
•
Never exceed speed: 162 mph
(260.7 km/h)
Cruise speed: 126 mph (202.8
km/h)
Stall speed: 51 mph (82.1 km/h)
Range: 500 mi (804.7 km)
Service ceiling: 12,000 ft (3660 m)
Rate of climb: 1,120 ft/min (5.69
m/s)
Wing loading: 10 lb/ft² (48.9
kg/m²)
Power/mass: 11 lb/hp (6.7 kg/kW)
Specifications – Decathlon 49” EP
Wing span—49” 1245mm
Wing area --370sqin
Flying weight—1200g
Length—33” 840mm
Radio required –4 channel
Motor ----electric Recommend a EMAX 2810 power pack
CONTENTS
SOME USEFUL HINTS AND TRICKS TO HELP YOUR BUILDING AND FLYING TECHNIQUES….. ....................3
PREPARATION AND IMPROVEMENTS PRIOR TO STARTING .................................................................................................................... 3
PRE INSPECTION OF THE AIRFRAME .....................................................................................................................3
GOING OVER THE COVERING ..................................................................................................................................3
CONTROL SURFACE LINKAGES ................................................................................................................................................................... 4
MOTOR............................................................................................................................................................................................................. 4
FLIGHT CONTROLS: ENSURE ....................................................................................................................................................................... 4
PROPELLER:.................................................................................................................................................................................................... 4
SETTING THE CONTROL THROWS............................................................................................................................................................... 4
CENTRE OF GRAVITY..................................................................................................................................................................................... 5
SOME SUGGESTIONS FOR YOUR RADIO CONTROL SYSTEM USE ......................................................................................................... 5
GETTING READY TO FLY: .........................................................................................................................................7
PRE FLIGHT CHECKS ..................................................................................................................................................................................... 8
BATTERIES: ..................................................................................................................................................................................................... 8
FASTENERS..................................................................................................................................................................................................... 8
RADIO:.............................................................................................................................................................................................................. 8
FIRST FLIGHTS ...........................................................................................................................................................8
TIPS FROM THE PRO’S..............................................................................................................................................8
PLEASE READ CAREFULLY BEFORE COMMENCING.........................................................................................10
INTENDED USE .........................................................................................................................................................10
WARRANTY ...............................................................................................................................................................10
WARNINGS ................................................................................................................................................................10
CAUTIONS .................................................................................................................................................................10
ADDITIONAL PARTS REQUIRED ............................................................................................................................11
MAIN WING ASSEMBLY...........................................................................................................................................11
MAIN WING ASSEMBLY...........................................................................................................................................12
TAIL ASSEMBERLY..................................................................................................................................................13
MOTOR ASSEMBERLY ............................................................................................................................................14
WINDOW FITTING .....................................................................................................................................................15
SET UP .......................................................................................................................................................................15
Contents
PAGE 2 OF 16
SOME USEFUL HINTS AND TRICKS TO HELP YOUR BUILDING
AND FLYING TECHNIQUES…..
The following information is generic in nature and may not be applicable to your specific model. Please check with
your local hobby retailer, an experienced R/C club member or contact Tates Performance Hobbies on :Ph. 03 5224201 or Email: [email protected]
Preparation and Improvements Prior to Starting
There are a few areas where, at this unassembled stage, you can improve the final results of your assembly
project. There are many items that cannot be addressed on the assembly line due to cost and possibly because not
every improvement would be welcomed by every builder. Here are a few items that have come up over time.
Clean out the hinge slots or holes. Without removing any wood, use a very sharp X-acto knife and remove any
covering that may have been pushed into the hinge holes. It is very important that the glue sticks to the wood and
not to the covering.
Hardening of mounting holes. Using wood screws in balsa or light ply is difficult because wood is very soft. It’s a
good idea whenever you drill a hole that must accept a wood screw to put a drop of thin CA into the hole and then if
necessary re-drill the hole. The CA will wick into the wood and harden it, adding strength in that area.
Pre Covered components. Be sure to trim away any plastic covering on places like where the tail plane is glued
to the fuselage. The glue will NOT stick to the shiny plastic covering and only sticks to the wood. So mark out and
carefully cut away the covering to expose the bare wood. Glue to the wood areas only – mask off with some tape if
needed. Do not cut too deep into the wood as this will weaken the structure.
PRE INSPECTION OF THE AIRFRAME
This step is a must. This model uses very lightweight construction. During the long shipping in a closed container
the climate differences can cause the film to over-shrink in some areas causing a warp in some areas. This is a
common occurrence and does not indicate faulty covering or work quality. It is extremely important that you go over
the tail feathers and wings (at the pre assembly stage) and look for any warp or twist in the parts. Place the rudder,
elevator and ailerons on a flat surface to check for any warp. If you find any, counter twist the parts while carefully
using a heat gun, hair dryer or iron to shrink the side with the wrinkles. Do it gradually and keep the heat gun far
enough away to prevent burning the covering.
GOING OVER THE COVERING
Before beginning the assembly of your model remove each part from its bag for inspection. If you find any wrinkles
in the covering, use a covering iron, heat gun or hair dryer to remove them. Keep in mind that this film is much
thinner than Ultra-cote (to reduce the weight of this ARF) so your heat setting should be lowered. Use a very low
heat setting first then increase until the iron is the proper temperature. Use caution while working around areas
where the colors overlap to prevent separation of the colors. Make sure you go over the edges with your iron as
well.
The covering material used on your airplane is real iron-on, heat-shrink covering material. It is possible with heat and
humidity changes that the covering material on your airplane may wrinkle or sag. This trait is inherent in all types of
heat-shrink material. To remove any wrinkles that might be visible you will need to use a heat-sealing covering iron.
Follow this simple procedure to remove the wrinkles:
Plug in and turn on the sealing iron to the medium-high temperature setting. Allow the sealing iron to heat up for
approximately 5 - 7 minutes.
After the sealing iron has reached temperature, lightly apply the sealing iron to the wrinkled section of the covering
material. Move the sealing iron slowly over the wrinkled section until the covering material tightens and the wrinkles
disappear.
You will notice that the color of the covering material will darken when it is heated. When the covering material
cools back down, it will return to its normal color. If the color layer smears from any of the seams the temperature
of the sealing iron is too hot. Turn the temperature dial down and wait about 5 minutes for the sealing iron to
adjust to the lower temperature. You can remove any excess color streaks using a paper towel soaked with a
small quantity of Acetone.
TRIAL FIT PARTS TWICE AND GLUE ONCE….
Make sure to test-fit the parts together before applying glue. This will ensure that the parts fit properly before gluing
them together. When gluing anything that has a smooth surface, its important to lightly roughen the gluing surfaces
PAGE 3 OF 16
with 220 grit sandpaper. This will allow the glue to stick better. Also, never glue directly to the covering material.
Always remove the covering material from the gluing surfaces prior to gluing the parts together.
When cutting away the covering material from the gluing surfaces, be careful to cut only through the covering
material. Try not to cut down into the balsa structure because that can compromise the integrity of the airframe.
We do not suggest storing your airplane in an extremely hot environment (like the back of your car in direct
sunlight) for any length of time. The extreme heat could cause the covering material to wrinkle or sag and possibly
damage the fragile components of the radio control system. Epoxy can be cleaned up before it dries using rubbing
alcohol or Methalyted Spirits and C/A can be cleaned up before it dries using C/A Debonder.
IMPORTANT INFORMATION ABOUT THE C/A-STYLE HINGES IF INCLUDED WITH YOUR AIRPLANE
The airplane uses C/A-style hinges to hinge the control surfaces. These hinges are designed to be glued into place
using thin C/A. Do not glue the hinges into place using any other type of glue, such as thick C/A or epoxy. Use of
any adhesive other than thin C/A could result in failure of the hinges during flight.
For flutter-free control surfaces and crisp control response, it is imperative that the hinges be glued in properly.
This is achieved by having a tight hinge gap (no more than 1/32" (.7mm) wide) and using plenty of thin C/A glue.
Poor hinge installation can lead to control surface flutter, which can result in a catastrophic failure of the airframe.
If the hinge(s) can't be pushed in far enough to achieve the proper hinge gap, you'll need to use a modeling knife to
cut the hinge slot(s) deeper.
Make sure to check the integrity of the hinges after the C/A fully cures.
It is important that the aileron and elevator hinge gaps be sealed. Failure to do this can lead to control surface flutter,
which can cause your airplane to crash. Sealing the hinge gaps will also provide crisper control response and
allow the airplane to track straighter and fly truer, making trimming much easier. TY1 make a convenient, easy to
use hinge tape for this purpose. Its not as necessary to seal the rudder hinge gap.
CONTROL SURFACE LINKAGES
If you don't maintain the proper mechanical advantage on the control surfaces, control surface flutter may result,
which can cause your airplane to lose control and crash. Mechanical advantage refers to the distance that the
pushrod attachment points (pivot points) are from the servos and the control surfaces.
Keeping the pushrods as close to the center of the servo arms as possible will increase the servo's resolution.
What this means is that when you move the control sticks on the transmitter, the servo arms will have to travel
farther to achieve the desired amount of control input. This makes the resolution higher, therefore causing the
control surface deflection to be more precise. We don't recommend moving the pushrods any farther away from the
center of the servo arms than absolutely necessary.
Keeping the pushrods as far away as possible from the control surfaces is better than moving them closer. The
mechanical advantage is greatly reduced the closer the pushrods are moved toward the control surfaces. We don't
recommend moving the pushrods any closer to the control surfaces than absolutely necessary.
Make sure that you've installed 1/4" long pieces of silicone fuel tubing over the devises and snap-keepers to
prevent any chance of them opening during flight.
If your radio transmitter is equipped with dual rate switches, double-check that they are on the low-rate setting for
your first few flights.
Check to ensure that all of the control surfaces are moving the proper amount in both low and high rate settings.
Motor: The motor should run smoothly at all power settings with smooth transition from low to high RPM. Do not
fly with an unreliable motor. Completely read motor instructions before flying.
Flight Controls: Ensure all flight controls are free from binding and are centered. Check all hinges are flexible
and glued in securely so they will not pull out. Control linkages must be rigid and tight and have no slop. Confirm
proper direction of ailerons, rudder and elevator. ( See Illustrations below ) Experienced flyers have lost airplanes
due to reversed ailerons.
Right roll is right aileron up and left aileron down. Left roll is left aileron up and right aileron down. ( Seen
from behind )
Propeller:
It is essential to ensure that your propeller is accurately balanced prior to use. Check and
balance using a commercially available prop balancer. If necessary, remove material from the
front curved part of the blades only. Do not alter the blade length. Ask your local hobby shop or
club for assistance if needed.
SETTING THE CONTROL THROWS
We recommend initially setting up the airplane using Mid Range control throws. These control throws are
suggested for initial test flying and general sport flying because they will allow the airplane to fly smoother and
make it easier to control. For 3D flying, use more control throws, but only AFTER you've become very familiar with
the flight characteristics of the airplane. Refer to the specific setting in the instructions.
PAGE 4 OF 16
CENTRE OF GRAVITY:
Check CG or Wing Balance Point is set properly.
See the specific location instructions for your particular model.
VERY IMPORTANT – FAILURE TO DO THIS WILL RESULT IN A CRASH IN MOST CASES…
Place your fingers on the wing tips at the balance point, and carefully lift the airplane. ( turn the airplane upside
down for some low wing models to help ) If the nose of the airplane drops, the airplane is nose heavy. To correct
this, move the battery pack and/or receiver back far enough to bring the airplane into balance. If the tail of the
airplane drops, the airplane is tail heavy. To correct this, move the battery pack and/or receiver forward far enough
to bring the airplane into balance. Because of the limited space to move the receiver and/or battery fore and aft,
you may also need to add weight to the tail or the nose to balance the airplane. When balanced correctly, the
airplane should sit level or slightly nose down when you lift it up with your fingers
Balance the airplane with the fuel tank empty.
SOME SUGGESTIONS FOR YOUR RADIO CONTROL SYSTEM USE
Some of these generic procedures may not apply to your model – depending on the power system used - electric
or Glow Motor.
Before each flight check your transmitter and flight pack battery for proper charge levels to
make sure you attain maximum flight time and safety. Always switch on your transmitter
first and move the right hand throttle stick to the low throttle position to avoid accidentally
starting the motor. Then only connect the plane battery to the aircraft when you are going
to fly. Match the red and black wires up correctly. When you have finished the flight, unplug
the LiPo flight battery before turning off the transmitter. If the plane battery is connected
without the transmitter being on, it can pick up signals from other radio transmitters and
cause your plane to respond unintentionally, controls will start to move as well as the motor revving up! This is not
a malfunction of the system, but a standard behaviour for all radio controlled models.
Before turning on your transmitter, make sure no other people are flying other aircraft on the same frequency you
are using. ( Not necessary with most new 2.4Ghz systems ) This will cause interference and result in crashing the
other pilot’s aircraft. The frequency of your model may be determined by looking at the small orange label attached
to the module in the back of the transmitter. It will show a number, this the frequency of your radio in Mhz. make
sure you do not operate the model when another model of any type, or R/C car is on this frequency.
After switching on your transmitter and plane check the positions of the control surfaces on your plane. Initially they
all should be in a neutral position. Adjust to the correct position when needed by turning the “kwick link” connectors
attached to the push rods which operate the control surfaces.
Check if the controls are moving in the correct direction for the directions the sticks are moved. Do this for ALL
control surfaces! See transmitter setup below.
Dual Aileron Servo Installations. If you will be flying your airplane using a standard radio system without mixing
capabilities, you will need to plug a Y-Harness into the two aileron servo leads at this time. This will allow both
aileron servos to be plugged into the aileron channel in your receiver.
If you will be flying your airplane using a radio with mixing capabilities, you should plug each aileron servo lead into
your receiver separately (one into Ch. 1 and one into Ch. 6) to take advantage of your radio's mixing capabilities.
Mode 1 –
The left stick - 2, moved forward and back,
gives down and up elevator, forward for dive
and back for climb; moved left and right – 4
it gives left and right rudder.
The right stick - 3, moved forward and back
gives high and low throttle; 1 - moved left and
right it controls the ailerons, giving left and
right bank.
PAGE 5 OF 16
Checking Control Surfaces for Correct Direction of Travel – VERY IMPORTANT :
The direction the model will go, depends on the direction the control surfaces move when you move the stick on
the transmitter. Please check that the Ailerons ( wings ) and the Elevator ( Tail ) work in accordance with the
following diagrams. NOTE – These diagrams relate to MODE 1 ONLY. Consult an expert for other modes.
Using the Receiver :
The receiver antenna is best fully extended and routed away from other wires where
practical. Run the antenna out of the fuselage and up to the top of the fin for best
results. Use some tape to hold in place.
DO NOT shorten, cut or roll up the antenna as this will reduce the range of control.
If using a 2.4 Ghz Receiver – install as per the manufacturers instructions.
PAGE 6 OF 16
GETTING READY TO FLY:
Avoid flying in bad weather conditions. Since you are flying a relatively light aircraft, it is not recommended to fly in
high winds as the plane can travel downwind very quickly and become very difficult to retrieve!
Always keep the aircraft within visual range. It is very important that you can see which direction the plane is going.
Also keep the plane away from people and objects.
If you notice that the plane is starting to loose power then it is suggested you land and recharge the motor battery
LiPo pack ( If electric powered ). If you continue flying and the power is suddenly lost, it will be hard to control and
land the plane in a controlled manner and could result in a crash and damage to the plane! The battery may also
be damaged if it is over discharged.
You can only become a good pilot if you realise that it is most important to operate your aircraft in a secure and
responsible manner. An out of control aircraft can cause damage to people and property!
Always ensure that the transmitter is switched on, that the antenna is extended fully , that the throttle lever
is set at its lowest point ( stick to the bottom on the gimbal ) and the model is being held securely before
connecting the motor battery or starting a glow powered engine, this will prevent unexpected start ups
which could cause injury.
If your model is electric powered, the battery can now be placed in its compartment and connected to the ESC
( electronic speed controller ). After a pause you will hear some “beeping” telling you that the battery, the electronic
speed control and the motor are all in communication. When the beeping stops, slowly advancing the throttle will
cause the motor to start and continue to speed up until full throttle is reached.
Having checked the motor, stop it by bringing the throttle lever back to full low and then, by moving the elevator,
aileron and rudder sticks, check that all surfaces move in the correct direction and by the required amount. If any of
these move in the wrong direction – Check the radio manufacturers manual for the reversing switches, which may
be able to correct the problem.
With the trims, (they are the small sliders alongside the sticks), in the central position, check that the ailerons,
rudder and elevator are properly aligned or level, if not, make adjustments to the appropriate clevises. Having the
surfaces properly aligned with the trims in the central position will ensure that the model on its first flight will be near
to being “in trim” and any minor out of trim condition will then be correctable by use of the trim sliders. You may
wish to engage the assistance of a modeller with some R/C experience to guide you through this all important
phase and also to cast his eye over the model to ensure all is correct.
The next task is to range check the radio equipment. Go to an area clear of trees and metal fences, like the middle
of a sports field to ensure clear reception.
Checking Radio Range
The range of radio control sets will vary according to the brand, type, and environment as well as the battery levels.
Refer to the manufacturers instructions for this section.
Before your first flight, it is a necessary to check whether you will have sufficient radio range to maintain control of
the model. This is achieved by getting a helper to hold the plane while you walk away from the plane, with the radio
control and plane both turned on and the aerial on the transmitter fully down. With everything set up correctly you
should be able to walk 20 to 30 paces away before the servos begin to twitch around. If you only achieve a short
distance before erratic behaviour of the servos or motor then you must not fly. Check out and rectify the problem
before attempting to fly. Re-routing the aerial away from the battery and servo / motor leads will often help, or low
batteries may be the course!
This can all be done on a day while you are waiting for the best weather and an experienced radio flyer is available
to give you a hand.
LIMITATIONS OF FLYING AREAS :
Only fly your plane in areas that are suitable or selected for remote controlled aircraft. You must realise that certain
public areas are not allowed to be used for flying remote controlled aircraft. Check with your local Council for
approval before flying on sports ovals or parkland!
Keep your plane away from high power/ high voltage cables as they can cause interference of the radio control
system. Interference can result in loosing control of your plane, ultimately leading to a crash.
Don’t fly over or towards spectators or their vehicles. Don’t fly over buildings or houses. Fly where there is enough
space to safely land anywhere in the surrounding area. Don’t fly where there are lots of trees in the area. ( trees
are magnets to model aeroplanes!)
Stay away from busy roads. Flying in these areas can distract drivers and lead to an accident.
Don’t fly within a 6 kilometre radius of any airport or where full sized aircraft are flying.
PAGE 7 OF 16
PRE FLIGHT CHECKS
Batteries: Make sure Transmitter and receiver/motor batteries are fully charged before each flight. Also double
check before each take off.
Fasteners: Check all motor screws, prop nuts, servo screws, control horns, wheel collars, and clevis keepers are
tight and secure.
Radio: Check trims set to neutral and controls centered. Check rate and condition switches set properly. Check
the receiver antenna is fully extended.
FIRST FLIGHTS
It will be VERY helpful if you are able to obtain help from an experienced model pilot during your first flights. It is a
very good idea to find a model club in your area or at least someone that can fly RC planes. They can help with the
final setup and flight testing of your plane. Making sure it is an enjoyable experience and not a disaster!
Flying a radio controlled model aircraft is difficult, due to the good hand to eye co-ordination required. Good
eyesight is needed to see what the model is doing and a basic knowledge of the theory of flight is useful.
Practice – like anything worthwhile is required to master the skills for the hobby.
Accidents DO occur and damage WILL be caused to the model when this happens. So if you are not prepared to
accept this – do not attempt to fly this model.
That is the bad news ! But the development of new and exciting skills and the enjoyment of seeing your own radio
controlled model obeying your every command is well worth it !!
This is a great hobby for all ages and abilities, so ENJOY !!
Now, if the day has arrived when there is practically no breeze and you have found an area about the same size as
a football oval with a smooth surface, place the model on the ground, facing directly into that slight breeze and
have your helper hold it.
After checking again that the control surfaces are moving in the correct direction, extend the transmitter antenna,
give your helper the nod and start your take off by slowly advancing the throttle to full power, at the same time
holding in some up elevator to prevent a nose-dive and being ready to apply aileron to correct any tendency to roll .
Unless you have a long smooth surface to take off from – it may be best to “hand launch” the smaller R/C models
with the help of a friend. Some models are not designed to take off from grass, only smooth hard surfaces.
Hand launching is a good method to get your model airborne as there is less risk of getting caught up in holes Etc.
in the runway.
( Do not try this with larger heavy models )
Have a helper fold the model above their head, gripping the fuselage around the middle, so it is evenly balanced.
While facing into any wind, run forward and “push” the model forward and slightly down so the model can attain
flying speed quickly. Do not “throw” the model as this can cause an unstable launch.
Once airborne and at about 100 feet altitude, commence your first turn by the application of aileron ( Right hand
stick ) and a small amount of up elevator ( pull back on the Left hand stick ) to hold the nose into the turn. If you
find that the model is getting too high, reduce throttle, then continue making turns left and right to familiarize
yourself with its flight characteristics, keeping the model within clear view at a distance of no more than 200 meters.
After a few minutes you’ll be ready to land, so reduce the throttle setting to about 10% and prepare to land into the
breeze at the end of a sweeping 180 degree approach, being ready to increase power if you are about to land
short, or reduce it further if the model is about to overshoot.
TIPS FROM THE PRO’S
If you have a computer flight simulator, it is a good idea to practice with it before actually flying a model for the first
time. These simulators are readily available at a reasonable price for the basic versions.
It is a good idea to taxi the plane around on the ground with a moderate amount of throttle. This will help you get
use to the rudder ground controls.
You must learn to use only gentle movements of the controls. When using proportional radio control systems, only
slight corrections are necessary to change the direction of the plane.
Do not push the joysticks to maximum deflection for more than three seconds. This will result in a crash!
It is a very good idea to find a model club in your area or at least someone that can fly RC planes. They can help
with the final setup and flight testing of your plane. Making sure it is an enjoyable experience and not a disaster!
Take off and land into the wind.
Always try to keep the model in front of you.
PAGE 8 OF 16
Trim Chart
After you have test-flown and made the initial trim changes to the airplane, use this trimming chart to begin trimming your
airplane. Following this chart will result in the ability to diagnose trim problems and correct those problems using the
simple adjustments shown below. Making these observations and related corrections will result in an airplane that
tracks straighter and flies truer.
TRIM FEATURE
MANEUVER
OBSERVATION
CORRECTION
Fly general circles and
r a n d o m maneuvers
Try for hands off straight and
level flight
Readjust linkages so the transmitter trim
levers are centered
Control Throws
Fly random maneuvers
A)
Engine Thrust Angle*
From straight and level flight,
quickly chop the throttle for a short
distance
Control Centering
Controls are too sensitive or
airplane feels "jerky"
If A ) Adj ust li nkag es to red uce
B)
Controls are not sensitive
control throws
enough or airplane feels "mushy"
If B) Adjust linkages to increase
control throws
If A) Engine thrust angle is correct
If B) Decrease engine down thrust If
C) Increase engine down thrust
Airplane continues in a
level attitude for a short distance
B) Airplane pitches nose up C)
Airplane pitches nose down
A)
Airplane continues in the
bank for a short distance
B)
Nose pitches up
C) Nose pitches down
A)
Center of Gravity
From level flight, roll to a 45° bank
and neutralize the controls
Yaw**
Into the wind, perform inside
loops using only elevator. Repeat
test performing outside loops
A)
Wing is level throughout
from an inverted entry.
B)
Airplane yaws to right in both
inside and outside loops
C)
Airplane yaws to left in both
inside and outside loops
D)
Airplane yaws to the right in
inside loops and yaws to the left
in outside loops
E) Airplane yaws to the left in
inside loops and yaws to the
right in outside loops.
If A) Trim settings are correct If B)
Add left rudder trim
If C) Add right rudder trim
If D) Add left aileron trim
If E) Add right aileron trim
Lateral Balance**
Into the wind, perform tight inside
loops using only elevator
A)
Wing is level and airplane
falls to either side
B)
Airplane falls off to the
left. Worsens as loops tighten
C) Airplane falls off to the right.
Worsens as loops tighten
If A) Lateral balance is correct
If B) Add weight to right wing tip
If C) Add weight to left wing tip
Aileron Control System
With the wing level, pull to a
vertical climb and neutralize the
controls
A)
Climb continues along the
same path
B)
Nose tends to go toward an
inside loop
C) Nose tends to go toward an
outside loop
If A) Trim settings are correct
If B) Raise both ailerons very
slightly
If C) Lower both ailerons very slightly
If A) Center of gravity is correct
If B) Add nose weight
If C) Remove nose weight or add tail
weight
*Engine thrust angle and center of gravity interact. Check both.
'''Yaw and lateral balance produce similar symptoms. Note that the fin may be crooked. Right and left references are as if you were in the cockpit.
PAGE 9 OF 16
WARNING!!
An R/C aircraft is not a toy! If misused, it can cause serious bodily harm and property damage. Fly only in open areas, and MAAA approved
flying sites. Follow all instructions included with your plane, radio, and engine.
PLEASE READ CAREFULLY BEFORE COMMENCING
This model is not a toy. It is a highly detailed functional scale model. We hope that this product will bring you hours of enjoyment and
entertainment. Due to the sophisticated technical nature of this product, it is important that you carefully review all of the following warnings,
cautions, and warranty terms. Likewise you should review and follow the following instructions for usage.
Due to the fact that Tates Performance Hobbies is constantly improving the quality and functional characteristics of its products some details,
colours, and functions may differ slightly from the images presented on the box and in the instructions.
IMPORTANT!
Before starting the assembly of your new model, please check the box inventory and inspect all parts and hardware for imperfections or
damage. Notify your local hobby shop or Tates Performance Hobbies immediately if there are missing or damaged parts.
Please read through the assembly manual carefully and follow the order of assembly while you are building the aircraft. This will help save time
and reduce the chance of building errors. It is important to notify the place of purchase of any damage or problems with the model immediately
INTENDED USE
This plane should not be regarded as a toy. This is a potentially dangerous flying object and can cause injury to people and damage to property
if an accident occurs or is not used as intended.
If you wish to return this aircraft for any reason a fee may be charged. In addition the customer is responsible for all return shipping cost and all
prior shipping cost will not be refunded. Parts will be exchanged or replaced once the original item is returned at the owner’s expense. If you
have any problems, please contact your place of purchase or Tates Performance Hobbies.
We cannot insure the skill of the modeler and can not influence the builder during the construction or use of this aircraft, therefore, we will not be
accountable for any property damage, bodily injury or death caused by this aircraft.
WARRANTY
Tates Performance Hobbies guarantees that this model is free from defects both in material and craftsmanship on the date of purchase. This
guarantee does not cover any component parts damaged by use or modification. Tates Performance Hobbies liability will under no
circumstances exceed the original cost of the purchased model. Moreover, Tates Performance Hobbies reserves the right to change or modify
this warranty without notice.
If upon purchasing this product the buyer finds defects to the product as a result of the manufacturing process we recommend that you return
this product to the place of purchase to exchange or refund the product.
Given that Tates Performance Hobbies has no control over the final assembly or use of this product, Tates Performance Hobbies shall assume
no liability for damage caused resulting from the use by the user of the final user-assembled product. By using this product the user accepts all
resulting liability.
If the purchaser of this product is not prepared to accept the liability associated with the use of this product, they are advised to return this model
within 14 days to the place of purchase. The product must be in complete and unused condition, and must be accompanied with proof and date
or receipt of purchase .
WARNINGS
•
•
•
•
•
•
•
•
•
•
•
•
•
•
•
Never leave the model in direct sunlight for prolonged periods of time.
Never fly this model near an AIRPORT, check with your local airport authorities for minimum distance to available sites.
Never use this model near power lines, radio towers, or other locations where there is known high radio wave or electromagnetic activity.
Do not allow water or liquid to touch the model or any of the components.
Store the model in a cool dry location as high humidity can damage the model and its components.
Protect the model from bumps, jolts, and concussions from other hard objects as this could damage the model.
Keep the model clean of dust, mud and dirt.
Never place foreign objects on top of the model.
Use the model ONLY in wide open spaces that are free of people, or at your local RC flight club.
NEVER use the model near populated pedestrian areas. This could lead to damage of property or injury to bystanders.
Prior to take off, always check that transmitter and receiver batteries are fully charged and are fresh. As battery power decreases the
quality of the radio signal diminishes and control over the model could fail.
Please dispose of used batteries and electronic components in accordance with your municipal and federal Regulations relating to these
types of products.
Keep in mind that those in your vicinity may also use radio control models. Please check prior to take off that you are using a unique
frequency to all those around you. Not doing so may cause you and others to lose control of the model.
If the model does not properly respond to control inputs, land immediately and do not attempt to use the model until the cause has been
determined and fixed.
After flying, switch off the power on the model and then the transmitter.
CAUTIONS
•
This product is not suitable for children under 14 years of age, adult supervision of children is highly recommended.
•
This kit contains a number of small parts which are fragile and may act as choking hazards.
•
Please store and assemble this model well out of the reach of small children.
PAGE 10 OF 16
•
•
•
•
•
•
•
Only use batteries of the same or equivalent type.
The power supply terminals are not to be short-circuited.
Do not use new and old batteries together. Do not mix different brands or kinds of batteries.
Make sure to insert batteries with correct (+) and (-) polarity.
If the aircraft gets wet, dry it, and stop operating to avoid short-circuiting that may cause hazards.
Do not put fingers, hair, or clothes into the shafts or rotating parts of the model.
NEVER LEAVE CHARGING BATTERIES UNATTENTED!!!!!!
PRODUCT CONTAINS SMALL PARTS - KEEP AWAY FROM YOUNG CHILDREN
NOT SUITABLE FOR CHILDREN UNDER 14 YEARS OF AGE UNLESS SUPERVISED BY AN ADULT
COLORS, SPECIFICATONS AND CHARACTERISTICS MAY BE DIFFERENT FROM PICTURE AND DESCRIPTONS ON THE BOX AND IN
THE MANUAL.
Tates Performance Hobbies may be contacted by E Mail on – [email protected] or Phone 03 52224201
By choosing to operate this model, the purchaser/operator accepts all responsibility of any and all
structural or mechanical failures.
ADDITIONAL PARTS REQUIRED
•
•
•
•
•
•
•
•
•
EMAX BL2810 or BL2815 outrunner brushless motor
EMAX 45-60 amp programmable ESC
10x5-11x5-12x7 XOAR electric prop
POWER HD 1581HB servos
EMAX 11.1V 3-cell Lipo x 2250 Mah
4-6 channel receiver
Transmitter
TY 6 inch servo extension
TY ‘Y’ lead
Tools
•
•
•
Modeling knife
Electric drill and selection of
Phillips screwdriver
•
•
•
•
•
•
•
•
•
•
•
Needle nose pliers
Wire Cutters
Pins
Ruler and tape measure
Pen, pencil or felt tipped
Flat building board
Building squares and blocks
Masking tape
Clear tape (optional)
TY Allen keys
TY Z Bender
Optional
Cell Pro 4S charger
bits
TY H
Mercury Adhesives
Thin CA (M5T)
High Performance CA (M100XF)
CA Kicker (optional)
marker
PAGE 11 OF 16
MAIN WING ASSEMBLY
Locate CA hinges in hard ware pack.
Use a T pin and push it in to the centre of the
hinge. This will ensure you get the hinge 50%
in to the wing and aileron.
Use a hobby knife to enlarge hinge slot in
wing and aileron. This will make fitting the
hinges much easier.
Slide all hinges into the wing up to the T pin.
Now fit aileron on to hinges. Push all the way
up to the T pin.
Remove T pin to close hinge gap to a
minimum. Make sure you can still achieve
maximum deflection.
Apply thin mercury CA to each hinge. Now
turn wing over and repeat along bottom of
wing.
Locate the servo holes in the wing and cut
covering out with a hot wire or a hobby
knife.
Connect TY extension lead to servo wire
and secure with tape. Now tape the
extension to the string and feed it though
the wing.
Mount the servo into the wing. Repeat
process on other wing.
Align servo arm to where the control horn
will go on the aileron. Mark the aileron and
drill two holes to allow for the control horn
pins.
Push control horn in to place and mark
where the covering has to be cut away
under the control horn. Remove horn and
remove covering. Apply a medium mercury
CA to the horn and the pins. Place horn
back on to the aileron and leave to dry.
Repeat process on other wing.
Use rod stoppers supplied and fit to servo
arm. Connect Z bend in push rod to control
arm and slide push rod through rode
stopper and secure. If flying aerobatic
maneuvers it will be better to Z bend both
ends of the push rod for piece of mind.
Slide wing struts in to side of fuselage and
secure with self taper.
Slide wing tube into the fuselage. Slide each
wing panel on to wing tube and secure with
bolt to fuselage.
Lay plane on its back. Fit wing struts to
wings on each side with self tapers.
Feed servo wires in to fuselage ready for
connection to receiver.
PAGE 12 OF 16
TAIL ASSEMBERLY
Place fin into the fuselage. Mark with a felt tip
pen where the fuselage meats the fin. Or mark
with tape.
Use a ruler and a hobby knife to cut the covering
along the line. Be carful not to cut to deep, just
enough to remove covering.
Place fin back in to the fuselage. Make sure the
fin is vertical to the wings then glue in with
mercury thin CA.
Slide the CA hinges into the fin in the same
process as with the ailerons. Fit rudder and glue
hinges into place.
Locate the elevator joiner bar and give the two
ends a file to roughen them up so the glue will
stick better.
Fit the elevator bar through the fuselage
stabilizer slot.
Slide the stabilizer into position on the fuselage.
Measure the stabilizer tips to the wing tips to
determine the correct alignment and check if the
wings are parallel to the stabilizer.
When you are satisfied with the position of the
stabilizer, mark the covering on the stabilizer
where it meets the fuselage. Remove stabilizer
and cut the covering away from stabilizer where
you have marked.
Slide stabilizer back in to position and remeasure. Apply thin CA along the join to glue in
place.
Slide the hinges into the stabilizer ready to hinge
the elevator.
Apply thick CA glue to the elevator joining
rod hole and the end of the rod
Slide the elevator on to the joining rod and
align hinges at the same time.
Remove T pins from hinges and glue
hinges with thin CA.
PAGE 13 OF 16
Glue control horn on to the rudder and
the elevator in the same way as the
ailerons.
Fit the rod stoppers to the control horns.
Slide the push rods down the tubes from
the inside until they hit the covering at
the end.
Prick the covering with a hobby knife to
let the control rod come through.
Guide the wire in to the rod stopper and
secure with grub screw.
Fit servo in to servo tray in the fuselage.
Fit Z bend to the servo arm.
Power servo up and centre. Fit arm to
servo. Centre control surface and
tighten up grub screw in rod stopper.
Cut excess push rod wire off.
Locate tail wheel assembly.
Screw in position on to tail of fuselage.
Make sure the pivot wire in the tail
wheel is in line with the rudder hinge
line.
Drill a small hole in the rudder to allow
for the steering wire and glue in place
with thin CA.
Slide wheel on to tail wheel wire and
hold in place with wheel collet.
Tail assembly complete
MOTOR ASSEMBERLY
Locate engine stand off box. Clip it in to
the front of the fuselage. Secure with the
self tapping screws supplied.
For extra safety apply a bit of mercury
high performance CA (MX100XF) glue
around the join.
“It is a good idea to go around the entire
glue joint in the fuselage with this glue
just for piece of
mind”.
Bolt the EMAX
motor in to the
engine mount.
The speed
controller is
then attached and secured underneath the motor mount.
PAGE 14 OF 16
Fit the prop adaptor to the motor shaft.
You may have to fit a few washers to the prop
adaptor to space the spinner out enough to
clear the front of the cowl.
Fit cowl over motor and replace spinner back
plate to prop adaptor. Now align the cowl on
the fuselage and the spinner plate. Secure the
cowl to the fuselage with self tapping screws.
Fit prop and spinner cone in place.
The battery will fit just behind the firewall.
Place the EMAX 2250mah battery as far
forward as possible for a nose heavy C.G on
the first flight.
Secure battery in place with Velcro and a TY
Velcro strap.
Motor assembly complete
WINDOW FITTING
Locate the tinted window. Test fit all windows so
you can work out which widow fits where. Apply a
bead of silicon or canopy glue to the perimeter of
the window.
Tape the window in place until dry.
The top roof window is held in place with self tapers.
The airframe is fitted with latching magnets to attach the front
window. This will allow easy access to the battery.
SET UP
Refer to you radio Manuel to set all the control surfaces.
Here is a recommendation to how mush control deflection there should be on each surface for the first flight.
PAGE 15 OF 16
Use the battery to adjust the CG location. If the battery is not heavy enough add more weight using TY lead
weights in the nose or tail location. Set all the control surfaces within the maximum displacement range or you may
have a hard time flying the airplane. During your first test flight you should have the CG at 38mm from the
leading edge location. This will provide a stable flying performance. After you have trimmed the servo and radio,
you may move the CG backward for more aggressive maneuvers.
Measure CG location from Leading Edge
Other kits from the sportsman aviation range - Available at your local hobby shop
See Enclosed DVD for more Hints & Tips and product information.
Distributed in Australia by
Tates Performance Hobbies
135 Shannon Ave Geelong West. VIC 3218
Ph 03 52224201
Fax 03 52231257
E Mail ; [email protected]
Web : www.rcworld.com.au ABN 80007437523
Importers and Distributors of Quality Radio Control Hobby Products
PAGE 16 OF 16