1
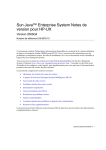
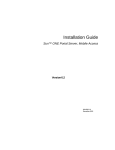
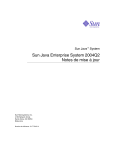
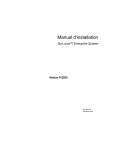
Grid Engine Portal Installation Guide
Asia Pacific Science and Technology Center, Sun Microsystems
Nanyang Center for Supercomputing and Visualization
Nanyang Technology University, Nanyang Avenue, Singapore 639798
[email protected]
The purpose of this document is to guide administrators in their installation of Grid
Engine Portal (GEP) on the Bio-ClusterGrid. There are three parts to this guide. The
first part describes the steps taken to install the Sun ONE Portal Server. The second
part describes the steps taken to install the Gateway. The third and last part describes
the steps taken to install the Grid Engine Portal integration package. The following
instructions and screen shots illustrates the steps taken by the authors and does not
take into account errors that may be encountered by the administrator using this
guide.
PART 1 – To start installation of the Sun ONE Portal Server:
1. Log in to the Bio-ClusterGrid as a root user.
2. Open a console, type cd /etc and add the following to the hosts file using a text
editor:
[ip address]
[hostname] loghost [fully qualified name]
E.g. 192.168.0.126
v120
loghost
v120.sun.apstc
3. Type cd /export/GridEnginePortal/ps6.0
4. Type ./pssetup then accept the licensing agreement by answering yes to the Do
you accept? Question.
5. Choose option 4 in the pssetup script as shown in Screen 1 to install the Portal
Server.
6. If the default settings are listed by the script, answer no to the Use these settings?
question. The following example dialog as shown in Screens 1 and 2 will occur.
Note that for the question on JDK below, the recommended version of JDK is
1.31.1_04. Using other versions may result in instability or lowered performance.
For the purposes of this installation guide, it will be assumed that the Sun ONE
Portal Server components will be installed on a server with a fully qualified name
of v120.sun.apstc, having an IP address of 192.168.0.126. Most defaults can be
taken except for hostname, sub-domain name, domain name, IP address,
organization name and passphrase which need to be modified depending on your
own environment. The dialog for this portion of the installation is as follows:
1
Do you want to use an existing JDK?
n
What is the installation base directory?
/opt
What is the hostname of this server?
v120
What is the sub-domain name for v120?
.
What is the domain name for v120?
sun.apstc
What is the ip address of v120.sun.apstc?
192.168.0.126
Run SSL on v120?
n
What port should be used to access the Portal Server?
80
What is the organization name?
APSTC
Use an existing Directory Server?
n
What is the Directory Server base directory?
/usr/ldap
What port should be used to access the Directory Server?
389
What is the Directory Server administration port?
8900
What is the root suffix of the directory tree?
o=isp
What is the directory manager?
cn=Directory Manager
What is the Web Server administrator?
admin
What is the Web Server Administration port?
8088
What is the passphrase for this server?
********
Again?
********
What is the deployment URI?
/portal
Install the sample portal?
y
What is the hostname of the gateway?
v120
What is the sub-domain name for v120?
.
What is the domain name for v120?
sun.apstc
What is the ip address of v120.sun.apstc?
192.168.0.126
Will gateway be running SSL?
y
What port will gateway listen on?
443
Will the gateway be using a web proxy?
n
What is the name of the gateway profile?
Default
Screen 1
Screen 2
2
7. The settings that you have just supplied will then be listed as shown in Screens 3 5. Answer yes to Use these settings? as shown in Screen 5. If you answered no to
the question regarding JDK, a new JDK will then be installed as shown in Screen
6. Then the Identity Server, the Portal Server and Secure Remote Access support
will be installed. This process can take 25 to 30 minutes. Ignore any uxwdog
errors that might occur during the installation; they will not re-occur after
installation.
Screen 3
Screen 4
3
Screen 5
Screen 6
PART 2 – To start installation of the Gateway:
1. Choose option 1 in the pssetup script as shown in Screen 7 to install the Gateway.
4
Screen 7
2. If the default settings are listed by the script, answer no to the Use these settings?
question. The following example dialog as shown in Screen 8 will occur:
What is the gateway base directory?
What is the hostname of the gateway?
What is the sub-domain name for v120?
What is the domain name for v120?
What is the ip address of v120.sun.apstc?
Will gateway be running SSL?
What port will gateway listen on?
What is the name of this gateway profile?
Do you want to create a self-signed certificate?
What is the name of your organization?
What is the name of your division?
What is the name of your city or locality?
What is the name of your state or province?
What is the two-letter country code?
What is the password for Certificate Database?
Again?
What is the deployment URI?
Start the gateway after installation?
/opt
v120
.
sun.apstc
192.168.0.126
y
443
default
y
APSTC
MyDivision
MyCity
MyState
US
********
********
/portal
y
5
Screen 8
3. The settings that you have just supplied will then be listed. Answer yes to Use
these settings? as shown in Screen 9. Once the installation has completed, you can
exit from the pssetup script.
6
Screen 9
PART 3 – To start installation of the Grid Engine Portal integration package:
1. Open a console, type cd /export/GridEnginePortal/
2. Type setenv COMMD_PORT 536
3. Edit the file 'install' and replace the word “sunbiobox” with “$ADMINPW”
4. Type ./install -gp
7
5. As shown in Screen 10, do not use the default parameters. If default choice is [n],
press RETURN or ENTER on the keyboard. Otherwise, type n then press
RETURN or ENTER on the keyboard.
Screen 10
8
6. At the prompt Please enter the O'Reilly servlet path, type /
export/GridEnginePortal/WEB-INF/lib/cos.jar as shown in Screen 11.
7. At the prompt Please enter the Application home path, type /
home/GridEnginePortal/apps as shown in Screen 11.
8. At the prompt Please enter the S1PS install directory, type /opt as
shown in Screen 11.
9. At the prompt Please enter the Grid Engine Portal domain, type your
organization name e.g. APSTC as shown in Screen 11.
10.At the prompt Please enter the S1WS host instance, type https-[fully
qualified name] e.g. https-v120.sun.apstc as shown in Screen 11.
11.At the prompt Please enter the S1WS virtual server, type https-[fully
qualified name] e.g. https-v120.sun.apstc as shown in Screen 11.
12.Enter choice to use VNC as shown in Screen 11. If default choice is [y], press
RETURN or ENTER on the keyboard. Otherwise, type y then press RETURN or
ENTER on the keyboard.
13.Enter the VNC root directory /home/GridEnginePortal/vnc-3.3.7sparc_solaris_2.5 as shown in Screen 11.
Screen 11
9
14.Use the parameters as shown in Screen 12. If default choice is [y], press
RETURN or ENTER on the keyboard. Otherwise, type y then press RETURN or
ENTER on the keyboard.
Screen 12
15.Install Grid Engine Portal servlets as shown in Screen 13. If default choice is [y],
press RETURN or ENTER on the keyboard. Otherwise, type y then press
RETURN or ENTER on the keyboard.
Screen 13
10
16.As shown in Screen 14, do not edit the deployment descriptor. If default choice is
[n], press RETURN or ENTER on the keyboard. Otherwise, type n then press
RETURN or ENTER on the keyboard.
Screen 14
17.Install the GEPTableContainer as shown in Screen 15. If default choice is [y],
press RETURN or ENTER on the keyboard. Otherwise, type y then press
RETURN or ENTER on the keyboard.
Screen 15
11
18.Enter the amAdmin password as shown in Screen 16.
19.Configure Sun ONE Portal Server for GEP as shown in Screen 16. If default
choice is [y], press RETURN or ENTER on the keyboard. Otherwise, type y then
press RETURN or ENTER on the keyboard.
Screen 16
20.Automatically assign GEPUserRole role to dynamically created user as shown in
Screen 17. If default choice is [y], press RETURN or ENTER on the keyboard.
Otherwise, type y then press RETURN or ENTER on the keyboard.
Screen 17
12
21.Installation of Grid Engine Portal is now complete. However to have GEP admin
privileges such as adding of applications to the portal, you need to complete the
remaining steps. Otherwise. You can log in the Grid Engine Portal from the URL
https://[fully qualified name]/amserver/login e.g.
https://v120.sun.apstc/amserver/login. As a user, you can submit and run
jobs on the grid.
22.Open a browser and type http://[fully qualified name]/amconsole E.g.
http://v120.sun.apstc/amconsole for the URL. You should see a log in
screen as shown in Screen 18.
Screen 18
23.As shown in Screen 19, click on the name of the organization that you had
13
configured in earlier steps e.g. APSTC. Then select Roles from the Show drop
down menu. Click on the hyperlink GEPUserRole.
Screen 19
24.On the left hand pane, there will be a user called default. Tick the checkbox beside
14
default and click on Remove as shown in Screen 20.
Screen 20
25.On the top pane, click on the name of the organization that you had configured in
15
earlier steps e.g. APSTC and click on the hyperlink GEPAdminRole. Then click
on Add on the left hand pane and click on Search as shown in Screen 21.
Screen 21
26.As shown in Screen 22, tick the checkbox beside the default user and click on
16
Submit.
Screen 22
27.Finally click on the arrow symbol beside default on the left pane. Under the User
17
Section on the right pane, change the Last Name and Full Name to gepadmin for
both fields as shown in Screen 23. Then scroll down and click on Save.
Screen 23
28.Log out of amconsole and log into the Grid Engine Portal. Type https://[fully
qualified name]/amserver/login e.g.
https://v120.sun.apstc/amserver/login for the URL. Log into the system
using gepadmin as the username and password, and you can now add or delete
applications from the portal.
--- End of Document ---
18