1
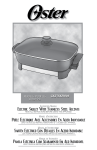
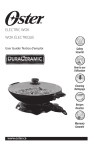
ELECTRIC SKILLET
User Guide:
Safety
For product questions contact:
Sunbeam Consumer Service
USA : 1.800.334.0759
Canada : 1.800.667.8623
www.oster.com
How to use
©2013 Sunbeam Products, Inc. doing business as
Jarden Consumer Solutions. All rights reserved.
Distributed by Sunbeam Products, Inc. doing business as
Jarden Consumer Solutions, Boca Raton, Florida 33431.
Cleaning
Recipes
Warranty
GCDS-OST29810-JC
Printed in China
CKSTSKFM12WM-ECO_13EM1.indd 24-1
P.N. 166145
www.oster.com
5/16/13 3:12 PM
IMPORTANT SAFEGUARDS
When using your electric skillet, basic safety precautions should always be followed,
including the following:
READ AND SAVE THESE INSTRUCTIONS
1. Be sure that lid handles are assembled and fastened properly per this manual.
2. Do not touch hot surfaces, use handles.
3. To protect against electric shock, do not immerse the temperature controller, cord or
plug in water or other liquids.
4. Close supervision is necessary when any appliance is used by or near children.
5. Unplug the appliance from the outlet when not in use and before cleaning. Allow
appliance to cool before putting on or taking off parts and before cleaning appliance.
6. Do not operate any appliance with a damaged cord or plug, or after the appliance
malfunctions, or has been damaged in any manner. Return to an Authorized Service
Station for examination, repair or electrical or mechanical adjustment. You can locate
the nearest service center by calling 1.800.334.0759.
7. The use of accessory attachments not recommended by the appliance manufacturer
may cause injuries.
8. Do not use outdoors.
9. Do not let cord hang over edge of table or counter or touch hot surfaces.
10.Do not place on or near a hot gas or electric burner or in a heated oven.
11.Use extreme caution when moving the appliance if it contains hot oil or any other hot
liquid.
12.Always attach the temperature controller to the appliance first, then plug into the wall
outlet. To disconnect, switch off, remove plug from the wall outlet, then remove the
temperature controller from the appliance.
13.Only use the appliance with the OSTER® Electric Skillet Temperature
Controller.
14.Do not use appliance for anything other than its intended use.
15.It is recommended that you do not cook with the OSTER® Electric Skillet or
the OSTER® Electric Skillet Temperature Controller standing on temperature
sensitive surfaces.
16.Please use recommended probe P/N: 040258 or 040288 in the U.S. and P/N:
040289 or 040290 in Canada.
2
www.oster.com
CKSTSKFM12WM-ECO_13EM1.indd 2-3
17.To prevent the risk of burns, never fill oil in the Skillet Pan more than 1/2 inch
(12.7 mm) high.
18.This appliance is not intended for deep frying foods.
SAVE THESE INSTRUCTIONS
POLARIZED PLUG
This appliance has a polarized plug, (one blade is wider than
the other). As a safety feature to reduce the risk of electrical
shock, this plug is intended to fit in a polarized outlet only
one way. If the plug does not fit fully in the outlet, reverse the
plug. If it still does not fit, contact a qualified electrician. Do
not attempt to defeat this safety feature or modify the plug in any way. If the plug fits loosely
into the AC outlet or if the AC outlet feels warm do not use that outlet.
EXTENSION CORD USE
A short power supply cord is provided to reduce the hazards resulting from entanglement
or tripping over a longer cord. AN EXTENSION CORD MAY BE USED WITH CARE; HOWEVER,
THE MARKED ELECTRICAL RATING SHOULD BE AT LEAST AS GREAT AS THE ELECTRICAL RATING
OF THE APPLIANCE. The extension cord should not be allowed to drape over the counter or
tabletop where it can be pulled on by children or tripped over.
Thank you for purchasing the OSTER® 12” Skillet. Before
you use this product for the first time, please take a few moments
to read these instructions and keep it for reference. Pay particular
attention to the Safety Instructions provided. Please review the
product service and warranty statements. Please do not return to the
place of purchase. To learn more about Oster® products, please visit
us at www.oster.com or call us at 1-800-334-0759.
www.oster.com
3
5/16/13 3:12 PM
Congratulations on your purchase of a DuraCeramic™ appliance!
This appliance features a DuraCeramic™ non-stick natural ceramic
coating which is 4X more durable than other non-stick coatings. This
means there’s no flaking or peeling off to worry about. Furthermore,
the ultra-durable ceramic coating cooks faster than other non-stick
coatings, saving time and energy. The natural DuraCeramic non-stick
coating also offers greater health and benefits as it’s free of PTFE and
PFOA. 4X More Durable – DuraCeramic™!
PARTS IDENTIFICATION
KNOW YOUR ELECTRIC SKIKILLET
2
1
3
4
Before using your new appliance, wash the inside of the pan
with warm, soapy water and dry. When washing the skillet,
make sure the temperature controller is removed.
The OSTER® Electric Skillet is now ready for use.
4. H andle
5. T emperature Controller
6. S killet Pan
1. L id Handle
2. S team Vent
3. Glass Lid
4
ASSEMBLING THE HANDLES
1. Do not use skillet without handles attached.
2. P
lace left handle onto mounting
studs under skillet pan.
3. U
se screwdriver to attach 2 screws
through holes in the leg into the
skillet pan.
4. Place right handle onto mounting
studs under skillet pan.
5. U
se screwdriver to attach 2 screws through holes in the leg
into skillet pan.
6. C
AUTION: Overtightening can result in stripping of screws or
nuts or cracking of handle or feet.
INTRODUCTION
5
6
HOW TO:
www.oster.com
CKSTSKFM12WM-ECO_13EM1.indd 4-5
www.oster.com
5
5/16/13 3:12 PM
USING THE OSTER® ELECTRIC SKIKILLET
1. Push the temperature controller firmly into its socket found at
the side of the appliance. Plug into a standard 120 Volt AC
outlet.
2. Set the temperature you want by turning the knob on the
temperature controller. The indicator light will come on. Set
the temperature of your choice opposite the indicator light.
When the light goes off, the chosen cooking temperature has
been reached. During cooking, the light will blink on and off
indicating the temperature is being maintained. Guidance in
the choice of temperatures is supplied later in this book.
3. It is recommended that you not cook with the Electric Skillet
standing on temperature sensitive surfaces.
4. For simmering, set the temperature controller to SIMMER and
wait until the liquid boils. Turn the knob toward the WARM
setting. Set the dial to this point each time SIMMER is
specified in a recipe.
5. To remove the temperature controller, first unplug from the
wall outlet, then gently remove the controller from the socket.
6. No preheating is needed when using the product.
6
www.oster.com
CKSTSKFM12WM-ECO_13EM1.indd 6-7
TEMPERATURE GUIDE
The cooking temperatures listed in this user manual are estimates. Adjust the cooking
temperature slightly up or down to achieve the results you prefer.
Food
Temperature
Approximate
Time
Bacon
350º F
5 – 8 Minutes
Eggs (Fried)
300º F
3 – 5 Minutes
Eggs (Scrambled)
325º F
2 – 3 Minutes
Pancakes
375º F
1 – 3 Minutes
Hamburger
(1/2-inch Thick)
375º F
Ham (1/2-inch – 1/4 -inch Slices)
325º F
10 – 20 Minutes
Potatoes
(Country Fried)
(Crispy Brown)
325º F
350º F
10 – 12 Minutes
10 – 12 Minutes
Sausage
340º F
12 – 15 Minutes
Fish
375º F
5 – 8 Minutes
Pork Chops
(Breaded)
(Brown)
375º F
225º F
10 – 15 Minutes
30 – 40 Minutes
Cube or Minute Steak
400º F
2 – 4 Minutes
Liver (Calf’s, Lamb or Tender Beef)
350º F
5 – 10 Minutes
French Toast
325º F
4 – 6 Minutes
Crusty Chicken (Use 4 Tbsp. Oil)
Do Not add water
400º F
300º F
12 – 18 Minutes
10 – 15 Minutes
www.oster.com
Rare
4 – 8 Minutes
Well Done
9 – 12 Minutes
7
5/16/13 3:12 PM
CARE & CLEANING
HOW TO CLEAN YOUR SKI LLET
Your DuraCeramic™ Skillet should be cleaned after every use.
1. Unplug the skillet and allow it to cool before cleaning.
NOTE: To protect the DuraCeramic™ coating, do not run cold
water over cooking surface immediately after use.
2. Remove the temperature control probe. DO NOT IMMERSE
TEMPERATURE CONTROL PROBE or SKILLET IN LIQUIDS.
3. Wipe down the cooking surface with a damp cloth and dry
thoroughly. DO NOT use steel wool or other metal pads as this
may scratch the surface.
4. The skillet is NOT dishwasher safe. You may wash it with hot
soapy water, rinse and dry thoroughly.
CAUTION: TEMPERATURE CONTROL PROBE must always be
completely dry before use.
STORAGE AND MAINTENANCE
• U
nplug cord and remove temperature controller. Allow
appliance to cool before storing. Store your Electric Skillet in a
dry location, such as on a tabletop or countertop, or on a
cupboard shelf. Wind the electrical cord into a coil and secure
with a twist fastener. For convenience, the temperature
controller and cord can then be stored inside the skillet.
Other than recommended cleaning, no further user
maintenance is necessary.
For proper care of your DuraCeramic™ coated skillet, follow
the following steps if suborn stains appear:
1. Sprinkle some baking soda on the stained area.
2. Add enough water to moisten the baking soda, making a
paste like texture.
3. Let sit for a few minutes (for tougher stains let sit up to an hour).
4. Lightly scrub with a plastic scouring pad or damp cloth and
dry thoroughly.
5. Repeat if necessary.
Should any stubborn stains appear, they will not affect the
performance and non-stick quality of the DuraCeramic™ coating.
8
www.oster.com
CKSTSKFM12WM-ECO_13EM1.indd 8-9
www.oster.com
9
5/16/13 3:12 PM
Cheese and Bacon Potatoes
RECIPES
6 slices bacon 4 large potatoes, thinly sliced with skins on 1 can (4 ounces) green
chilies, chopped
Pork Chops with Spanish Rice
1
2 to 4 center cut pork chops, ⁄ 3 cup raw long grain rice
1
about 1⁄ 2-inch thick ⁄ 2 teaspoon chili powder
1
⁄ 3 cup onion, chopped 1 can (14 1⁄ 2 ounces) whole
1
⁄4 cup green bell pepper, chopped tomatoes
Set skillet temperature to 350° F. Add chops and cook on first side
5 minutes. Turn chops; add onion and green bell pepper. Cook,
stirring vegetables occasionally, 2 minutes. Reduce temperature to
“WARM”. Add rice, chili powder and tomatoes and stir to blend into
vegetables. Cover and cook 25 to 30 minutes, stirring occasionally.
Chicken Cacciatore
2 tablespoons vegetable oil 3 to 4 pieces chicken (thighs, legs or halved breasts) 1
⁄ 3 cup onion, chopped 1 bay leaf 1 clove garlic, minced 1 can (14 1⁄ 2 ounces) peeled,
diced tomatoes
⁄ 3 cup green bell pepper, chopped
1 can (4 ounces) sliced
mushrooms, drained
1 teaspoon Italian seasoning
Salt and ground black
pepper to taste
Hot cooked spaghetti
or other pasta
1
Set skillet temperature to 350° F. Add oil. Arrange chicken pieces,
skin side-down in skillet. Cook chicken until well browned on first
side, about 5 minutes. Turn chicken. Add onion and garlic around
chicken. Cook 3 minutes, or until onion is cooked, but not brown.
Reduce temperature to “WARM”. Add remaining ingredients, except
spaghetti. Cover and cook 30 to 40 minutes, or until chicken is
cooked. Stir sauce and spoon over chicken occasionally. Serve
chicken and sauce over spaghetti or other pasta.
10
www.oster.com
CKSTSKFM12WM-ECO_13EM1.indd 10-11
⁄4 cup onion, finely chopped
1 1⁄ 2 cup (6 ounces) cheddar cheese,
shredded
1
Place bacon in cold skillet. Set skillet temperature to 350° F. Fry
bacon until crisp, remove and drain. Carefully remove grease,
reserving 2 tablespoons bacon grease in skillet. Add potatoes to
skillet; cover and cook 10 minutes. Turn potatoes and cook an
additional 5 minutes. Crumble bacon and combine with green
chilies and onion. Sprinkle over potatoes. Top with cheese; cover
and cook 5 more minutes.
Pasta with Pepp ers and Chicken
1 clove garlic, minced 1 tablespoon olive oil 1 whole boneless, skinless chicken breast, cut into
1
⁄ 2 inch x 2 inch strips 1 cup red, green or yellow bell pepper (or combination), sliced
1
⁄ 2 teaspoon basil
Pinch ground red pepper
Salt and ground black
pepper to taste
1 1⁄ 2 teaspoons cornstarch
3
⁄4 cup chicken broth
4 ounces linguine or fettuccine,
cooked and drained
Set skillet temperature to 350° F. Add garlic and oil and sauté 2
minutes.
Add chicken; cook and stir for 5 minutes. Stir in bell peppers and
allow to cook additional 2 minutes or until vegetables are crisp
tender and chicken is done. Reduce temperature to 250° F. Blend
seasonings and cornstarch into chicken broth, stirring until well
blended. Pour broth mixture into skillet. Heat, stirring gently, 1
minute or until mixture is hot and thickened.
Serve over pasta. Makes 2 servings.
www.oster.com
11
5/16/13 3:12 PM
Shrimp and Vegetable Stir-Fry
Denver Omelet
⁄4 lb. raw shrimp, shelled and deveined
2 stalks celery, sliced
2 tablespoons light soy sauce 1 small sweet red bell pepper,
2 tablespoons dry sherry wine in thin strips
2 teaspoons cornstarch 1 cup broccoli flowerets
1
1 teaspoon grated gingerroot ⁄ 2 medium onion, thinly sliced
1 tablespoon vegetable oil 5 large fresh mushrooms, sliced
1
⁄ 2 package (3 ounces) frozen snow peas, thawed
1
3
Place cleaned shrimp in bowl. Combine soy sauce, sherry,
cornstarch, and gingerroot; pour over shrimp. Preheat skillet to
400° F. Add oil to skillet.
Stir-fry celery, red bell pepper, broccoli and onions for 2 minutes.
Add shrimp with marinade and stir-fry additional 2 minutes or until
shrimp turn pink. Add mushrooms and snow peas. Stir-fry until
heated through.
Easy Beef Fajitas
Juice of 2 limes 2 tablespoon olive oil 1
⁄ 2 teaspoons ground cumin 1
⁄4 teaspoon salt cheddar 1 clove garlic minced 1
⁄ 2 teaspoon red pepper flakes 1 small onion, thinly sliced 1
⁄ 3 lb. top round steak, thinly sliced Freshly ground black pepper to taste
⁄ 2 green or red bell pepper,
thinly sliced
4 flour tortillas
1
⁄ 2 cup (2 ounces) monterey jack or
cheese, shredded
Guacamole, optional
Salsa, optional
Sour cream/Chopped tomatoes,
optional
1
Combine lime juice, 1 tablespoon olive oil, cumin, salt, garlic, red
pepper and black pepper in a bowl. Add beef and allow to stand,
at room temperature, for 30 minutes. Set skillet temperature to
350º F / 180º C. Add remaining 1 tablespoon olive oil, onion and
pepper and stir gently. Cover and cook 1 to 2 minutes or until
vegetables are tender. Remove vegetables and keep warm. Drain
meat, discard marinade and place meat in skillet, sauté meat 7 to
9 minutes or until done. Meanwhile wrap tortillas in aluminum foil
and heat in oven for 5 minutes. To assemble, spoon about 1⁄4 of
meat and vegetables into center of each warmed tortilla. Sprinkle
with 2 tablespoons cheese. Roll tortilla and place on serving plate.
Garnish, as desired, with guacamole, salsa, sour cream and/or
chopped tomatoes.
12
www.oster.com
CKSTSKFM12WM-ECO_13EM1.indd 12-13
⁄ 2 cup ham, diced and cooked
3 eggs
⁄4 cup green bell pepper, chopped
2 tablespoons water
1
⁄4 cup fresh mushrooms, sliced
⁄ 8 teaspoon salt
1 green onion, sliced
Dash cayenne pepper
1 tablespoon butter or margarine
1
⁄ 3 cup (1 ounce) cheddar cheese, shredded
1
1
Set skillet temperature to 300° F. Add ham, green bell pepper,
mushrooms, onions and butter. Sauté 2 minutes, stirring frequently.
Arrange vegetables in an even layer. Lightly beat eggs with
water, salt and cayenne pepper; pour egg mixture over ham and
vegetables. Cover and cook 4 minutes or until eggs are set. Sprinkle
with cheese, cover and cook additional 2 minutes. To serve, slice
omelet in half then gently fold each part in half. Lift omelet from
skillet with a wide spatula.
Ham and Cheese Favorite
1 tablespoon butter or margarine
2 eggs
1
1
⁄4 cup onion, chopped
⁄ 2 cup ham, chopped and cooked
1
2 tablespoons all-purpose flour
⁄ 2 cup fresh spinach, chopped
1
⁄4 cup milk
3
⁄4 cup (3 ounces) Swiss cheese, shredded
Set skillet temperature to 300° F. Add butter and melt. Add onions
and sauté until onions are tender, about 2 minutes, remove onion
from skillet and set aside. Combine flour, milk and eggs; beat
lightly to blend. Pour egg mixture into pan. Cover and cook 2
minutes. Arrange ham, spinach and cooked onions evenly over
eggs. Sprinkle cheese evenly over top. Cover and cook additional 2
minutes. Gently cut into four pie-shaped wedges with a soft utensil.
Lift each wedge onto serving plate.
www.oster.com
13
5/16/13 3:12 PM
1 Year Limited Warranty
Sunbeam Products, Inc. doing business as Jarden Consumer Solutions or if
in Canada, Sunbeam Corporation (Canada) Limited doing business as Jarden
Consumer Solutions (collectively “JCS”) warrants that for a period of one year
from the date of purchase, this product will be free from defects in material
and workmanship. JCS, at its option, will repair or replace this product or
any component of the product found to be defective during the warranty
period. Replacement will be made with a new or remanufactured product or
component. If the product is no longer available, replacement may be made
with a similar product of equal or greater value. This is your exclusive warranty.
Do NOT attempt to repair or adjust any electrical or mechanical functions on
this product. Doing so will void this warranty.
consequential or similar damages or loss of profits, or for any breach of contract,
fundamental or otherwise, or for any claim brought against purchaser by any
other party.
This warranty is valid for the original retail purchaser from the date of initial
retail purchase and is not transferable. Keep the original sales receipt. Proof
of purchase is required to obtain warranty performance. JCS dealers, service
centers, or retail stores selling JCS products do not have the right to alter,
modify or any way change the terms and conditions of this warranty.
In the U.S.A.
This warranty does not cover normal wear of parts or damage resulting from
any of the following: negligent use or misuse of the product, use on improper
voltage or current, use contrary to the operating instructions, disassembly,
repair or alteration by anyone other than JCS or an authorized JCS service
center. Further, the warranty does not cover: Acts of God, such as fire, flood,
hurricanes and tornadoes.
What are the limits on JCS’s Liability?
JCS shall not be liable for any incidental or consequential damages caused by
the breach of any express, implied or statutory warranty or condition.
Except to the extent prohibited by applicable law, any implied warranty or
condition of merchantability or fitness for a particular purpose is limited in
duration to the duration of the above warranty.
Some provinces, states or jurisdictions do not allow the exclusion or limitation
of incidental or consequential damages or limitations on how long an implied
warranty lasts, so the above limitations or exclusion may not apply to you.
This warranty gives you specific legal rights, and you may also have other
rights that vary from province to province, state to state or jurisdiction to
jurisdiction.
How to Obtain Warranty Service
If you have any question regarding this warranty or would like to obtain
warranty service, please call 1-800-334-0759 and a convenient service center
address will be provided to you.
In Canada
If you have any question regarding this warranty or would like to obtain
warranty service, please call 1-800-667-8623 and a convenient service center
address will be provided to you.
In the U.S.A., this warranty is offered by Sunbeam Products, Inc. doing business as
Jarden Consumer Solutions located in Boca Raton, Florida 33431. In Canada, this
warranty is offered by Sunbeam Corporation (Canada) Limited doing business as
Jarden Consumer Solutions, located at 20 B Hereford Street, Brampton, Ontario
L6Y 0M1. If you have any other problem or claim in connection with this product,
please write our Consumer Service Department.
PLEASE DO NOT RETURN THIS PRODUCT TO ANY OF
THESE ADDRESSES OR TO THE PLACE OF PURCHASE.
JCS disclaims all other warranties, conditions or representations, express,
implied, statutory or otherwise.
JCS shall not be liable for any damages of any kind resulting from the purchase,
use or misuse of, or inability to use the product including incidental, special,
14
www.oster.com
CKSTSKFM12WM-ECO_13EM1.indd 14-15
www.oster.com
15
5/16/13 3:12 PM