1
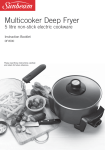
Multicooker Deep Fryer
5 litre non-stick electric cookware
Instruction Booklet
DF4500
Please read these instructions carefully
and retain for future reference.
Contents
Sunbeam’s Safety Precautions
Sunbeam’s Safety Precautions
Features of your Multicooker
Features of your Multicooker
An Introduction
Introduction to
to Multicookers
Multicookers
An
Temperature
settings
Non-stick cooking
Understanding
your Multicooker
Temperature
settings
Understanding
your Multicooker
Using your Multicooker
Using
your
Multicooker
Hints for
perfect
frying
Hints
for
perfect
frying
Care and cleaning
Care and cleaning
High Grade Non-stick cooking surfaces
High Grade Non-stick cooking surfaces
Cooking with your Multicooker
Cooking with your Multicooker
Vegetable cooking
cooking hints
hints
Vegetable
Cooking
information
Cooking information
Definitions
Cooking Definitions
1
1
2
2
4
4
6
5
7
6
7
8
8
9
9
10
10
11
11
12
12
14
14
17
17
19
Recipes for your Multicooker
Soups
Soups, Sauces, Stocks
Main
Main courses
Meals
Desserts
Desserts and Sweets
Sauces
20
20
23
23
28
28
31
Cooking with your deep fryer
31
Cooking with your deep fryer
The perfect chip
31
The perfect chip
33
Deep
home battered
battered food
food 34
32
Deep fry
fry cooking
cooking with
with home
Frying
times
and
temperatures
33
Frying times and temperatures
35
Fryer
35
Recipes For your Deep Fryer
37
Troubleshooting
45
Troubleshooting43
Important instructions – retain for
future use.
Sunbeam’s Safety Precautions
SAFETY PRECAUTIONS FOR YOUR DEEP FRYER.
• The MultiCooker Deep Fryer must only be used with
the control probe provided.
• Warning: The Control Probe must be removed
before the frypan is cleaned and the Control
Probe inlet must be dried before the MultiCooker
Deep Fryer is used again. NEVER immerse the control probe in water or other liquid.
• Never connect the fryer to the electricity supply
without placing oil in the tank first.
• If using solid fat, remove the lid and the basket, cut
the fat into pieces and place them directly into the
tank. Do not melt solid fat in the frying basket as it
may damage the appliance.
• Never operate the fryer with oil level below the
minimum mark or above the maximum mark.
• Do not touch any metal surfaces of the product while
it is in use as they will be hot.
• Remove excess moisture and ice particles from food
before deep frying.
• Check oil levels are correct before and during deep
frying.
• Be careful when lifting lid during and after cooking.
Steam can result in serious burns. Never place face
over deep fryer.
• Never decant oil from deep fryer while still hot.
• Do not move deep fryer once it is in use.
• Only use the oils recommended in this instruction
booklet.
Sunbeam is very safety conscious when designing and
manufacturing consumer products, but it is essential
that the product user also exercise care when using
an electrical appliance. Listed below are precautions
which are essential for the safe use of an electrical
appliance:
• Read carefully and save all the instructions provided
with an appliance.
• Always turn the power off at the power outlet before
you insert or remove a plug. Remove by grasping the
plug - do not pull on the cord.
• Turn the power off and remove the plug when the
appliance is not in use and before cleaning.
• Do not use your appliance with an extension cord
unless this cord has been checked and tested by a
qualified technician or service person.
• Always use your appliance from a power outlet of the
voltage (A.C. only) marked on the appliance.
• This appliance is not intended for use by persons
(including children) with reduced physical, sensory
or mental capabilities, or lack of experience and
knowledge, unless they have been given supervision
or instruction concerning use of the appliance by a
person responsible for their safety.
• Children should be supervised to ensure that they do
not play with the appliance.
• The temperature of accessible surfaces may be high
when the appliance is operating.
• Never leave an appliance unattended while in use.
• Do not use an appliance for any purpose other than
its intended use.
• Do not place an appliance on or near a hot gas
flame, electric element or on a heated oven.
• Do not place on top of any other appliance.
• Do not let the power cord of an appliance hang over
the edge of a table or bench top or touch any hot
surface.
• Do not operate any electrical appliance with a
damaged cord or after the appliance has been
damaged in any manner. If damage is suspected,
return the appliance to the nearest Sunbeam
Appointed Service Centre for examination, repair or
adjustment.
• For additional protection, Sunbeam recommend
the use of a residual current device (RCD) with a
tripping current not exceeding 30mA in the electrical
circuit supplying power to your appliances.
• Do not immerse the appliance in water or any other
liquid unless recommended.
• Appliances are not intended to be operated by means of an external timer or separate remote
control system.
• This appliance is intended to be used in household
and similar applications such as: staff kitchen areas
in shops, offices and other working environments;
farm houses; by clients in hotels, motels and other
residential type environments; bed and breakfast
type environments.
If you have any concerns regarding the performance and use of your appliance, please visit www.sunbeam.com.au or contact the Sunbeam Consumer Service Line.
Ensure the above safety precautions are understood.
1
Features of your Sunbeam
Multicooker
Integrated knob & adjustable steam vent
Allows you to accurately control moisture levels
during cooking.
Stainless Steel deep fry basket
Deep fry basket with detachable handle. This lightweight stainless steel deep fry basket
is removable and has a 1.0kg food capacity for
deep frying. It can also be used for cooking and
draining spaghetti and other pasta.
Dupont Teflon® Platinum Premium™
Non-Stick Cooking Surface
Enables healthy fat-free cooking
and simple wipe down cleaning.
Three layers of premium scratch
and abrasive resistant non-stick
coating. Safe to use with metal
utensils. See page 5.
Extra large cooking vessel
This 5 litre capacity non stick cooking vessel,
not only allows you to deep fry, but makes an
ideal saucepan as well for boiling, roasting,
braising, stewing, soups etc. The cooking vessel
is completely dishwasher safe and fully immersible.
Trigger Release Control Probe
The probe is thermostatically controlled and incorporates an indicator light which
switches off automatically when the temperature
selected has been reached and then cycles on
and off to indicate that the selected temperature
is being maintained. Being removable enables the vessel to be fully immersible and dishwasher safe for easy cleaning. The trigger release lever makes removal of the probe easy. 2
Glass lid
The lid should be used when bringing water
to the boil, simmering, soups and stews etc.
NEVER USE THE LID WHEN DEEP FRYING.
Basket handle
Has a draining lever which rests securely
inside the rim of the vessel to allow safe,
hands-free draining of food. The basket
handle folds inside the basket for easy
storage.
Draining lever
Cool Touch Handles
1600 watt die-cast element
The 1600 watt element is completely cast
into the heavy duty base for faster superior
heating and a longer element life.
3
An Introduction to Multicookers
Versatile
Use as a deep fryer or electric saucepan.
Boils, roasts, casseroles, braises, stir-frys and
is great for deep frying.
Economical
Cooks food quickly and uses less power than
an ordinary oven or grill.
The Trigger Release Control Probe has 10
heat settings to give you total heat control.
4
Easy to clean
Features a fully sealed element, so that the
frypan is dishwasher-safe and can be fully
immersed in water.
DuPont Teflon Platinum
Premium - Professional Use
®
™
Your Sunbeam appliance features a special
scratch and abrasive-resistant non-stick
cooking coating that makes it safe to
use metal utensils when cooking. Teflon®
Platinum Premium™ – Professional Use is
DuPont’s toughest non-stick coating to date
– up to 10 times more scratch resistant than
single layer non-stick coatings.*
DuPont is the world leader in non-stick
coatings and today more than 2 billion
households have Teflon® non-stick coated
cookware.
Teflon® Platinum Premium™ is a superior 3 layer non-stick coating. It features special
scratch resistant minerals causing metal
utensils to slide over these particles without
damaging the Teflon® matrix. This preserves
the release properties of the non-stick coating
and the life of the appliance.
The result is a non-stick coating that can be
treated like ordinary cookware, enabling the
use of metal utensils. However, Sunbeam
recommends that care is taken with the
non-stick coating when using metal utensils.
Do not use sharp objects or cut food inside
the appliance. Damage caused to your
appliance as a result of misuse of metal
utensils will void your warranty.
Teflon® Platinum Premium™ – 3 layer scratch
resistant coating
5
Temperature settings
Trigger Release Control Probe
The Probe is thermostatically controlled and
incorporates an indicator light which switches
off automatically when the temperature
selected has been reached and then cycles
on and off to indicate that the selected
temperature is being maintained.
The trigger release makes removal of the
probe easy.
The numbers on the dial represent the following approximate cooking surface temperatures.
Preheat your multicooker on setting 7-8, then change to your desired setting.
Dial
Setting
Celsius
(approx)
Farenheight
(approx)
1
100°C
2
110°C
3
125°C
260°F
4
140°C
285°F
5
150°C
300°F
6
160°C
320°F
7
175°C
350°F
8
185°C
365°F
9
200°C
390°F
10
210°C
410°F
Uses
Keeping food warm and reheating
Low
Simmering, sauteing and slow cooking
Boiling, pan frying and stir-frying
Medium
Shallow frying, baking
Deep frying, searing and sealing,
roasting
Note: The cooking surface temperatures given
are a guide only and may require adjustment
to suit various foods and individual tastes.
When the dial is set to a low setting, it
is quite normal for food to stop and start
bubbling, as the thermostat maintains the
selected temperature.
6
Temperature
High
Understanding your Sunbeam
Multicooker
Glass Lid
With the lid in place, the multicooker can be
used as an oven, giving you the versatility to
roast pieces of beef, lamb and chicken.
The lid also retains heat and moisture when
simmering food such as casseroles.
Be careful when handling and lifting the hot
lid during and after cooking as steam can
result in burns.
Cast-in element
The element is completely cast into the heavy
duty base for faster superior heating and a
longer element life.
Adjustable steam vent
The steam vent allows moisture to escape
without losing too much heat. Keep the vent
closed whenever cooking food where it is
necessary to retain the heat and/or moisture.
The vent should be left open for a crisper
result. When roasting chicken and meat,
open the vent in the last 15 minutes of
cooking to crispen.
7
Using your Multicooker
Before the first use
Wash, rinse and dry your Multicooker Deep
Fryer, basket and lid, “Season” the cooking
surface by applying a thin coat of cooking oil
and rub in with paper towelling.
1.Insert the Control Probe into the inlet on
the Multicooker Deep Fryer.
2.Plug the cord into a 230-240V power
outlet and turn the power on.
3.Preheat the Multicooker on setting 7-8
then set the Control Probe Dial to the
desired temperature setting. Refer to page
6 for the temperature guide.
This light will remain on until the set
temperature has been reached and then will
cycle on and off throughout cooking, as the
cooking temperature is maintained by the
thermostat.
Hint: On initial heating of the Multicooker
Deep Fryer, it is recommended that the
temperature be allowed to cycle (the light
glowing on and off) several times. This will
help the cooking surface to adjust to a more
accurate cooking temperature.
Note: The Multicooker Deep Fryer must only
be used with the Control Probe provided.
Saucepan cooking
The Multicooker is not just suitable for deep
frying, but it has many other uses. Use the
cooking vessel without the Deep Fryer Basket
as a rice and a pasta boiler, for simmering
soups and large stews, preparing spaghetti
sauce and braising roasts.
Deep fry cooking
1. Place the deep fryer on a flat and stable
surface away from any heating source and
where it cannot be splashed with water.
2. Remove the lid. NEVER USE THE LID
WHEN DEEP FRYING.
8
3. Pour good quality vegetable, nut or seed
oil into the vessel until it reaches ‘MAX’
mark indicated on the inside of the
non-stick vessel. (approx 2lt)
Note: Do not mix different types of oil.
4. Insert the plug into a 230-240 volt power
outlet and turn the power on by using the
on/off switch.
5. Heat the oil to the cooking temperature
as recommended by the recipe. Rotate
the dial on the temperature control probe
to the temperature that you wish to cook
the food.
6. Using the frying basket supplied, pull
the handle backwards until it locks into
position.
7. Place your food inside the basket, and
gently lower the basket into the oil.
8. Cook your food for recommended time as
per the recipe, or as desired.
9. When the food is cooked, (ensuring that
the handle is locked in position) gently
lift the basket directly out of the cooking
vessel. Tilt the basket so that the draining
lever rests securely on the inside rim of
the cooking vessel. (see diagram below)
10.Remove hot food with tongs and drain on
absorbent paper.
1.Always
Alwaysuse
usethe
thebest
bestquality
qualityoiloilpossible.
possible.We
1.
We recommend
nut, seed
or
recommend
corn, corn,
nut, seed
or vegetable
vegetable
oils.butter,
Never margarine
use butter,or olive
oils.
Never use
margarine or olive oils.
oils.
2.
Avoidmixing
mixingoils
oilsofofdifferent
differentqualities
qualitiesoror
2. Avoid
types.
types.
3.
Changethe
theoiloilwhen
whenit itbecomes
becomesbrown
brownoror
3. Change
milkyinincolour.
colour.
milky
4.
Takeinto
intoaccount
accountthe
thefood
foodtotobebecooked
cooked
4. Take
beforesetting
settingthe
thefrying
fryingtemperature.
temperature.AsAsa
before
a general
guide
precooked
need
general
guide
precooked
foodfood
willwill
need
a
a higher
temperature
food,
higher
temperature
thanthan
rawraw
food,
andand
the
itemsitems
the lower
the
the larger
the individual
the lower
larger
the individual
temperature
shouldshould
be. be.
the temperature
5. Large
5.
Largepieces
piecesofoffood
foodshould
shouldnot
notbe
bedeep
deep
fried,
long
to to
cook
thus
fried,asasthey
theytake
taketotoo
long
cook
thus
absorbing
absorbingtoo
toomuch
muchoil.
oil.
6. Fry
6.
Frysmall
smallamounts
amountsatata atime,
time,adding
addingtoo
too
much
muchatata atime
timewill
willdecrease
decreasethe
theoils
oils
temperature
temperatureand
andincrease
increasethe
thechance
chancethat
that
food
foodwill
willstick
sticktogether.
together.
7. Make
7.
Makesure
surethat
thatfood
foodisisdry
drybefore
beforefrying,
frying,
wet
wetfood
foodwill
willsplatter.
splatter.
8. Do not use the lid when deep frying
9
Care and cleaning
Vessel
Take care when handling the vessel and any
metal surfaces whilst it is in use, as these
will be hot.
Be careful when lifting the lid during and
after cooking, as steam can result in serious
burns. Never place face over deep fryer.
Control Probe
If cleaning is necessary, wipe over with a
damp cloth.
WARNING: The Control Probe must be
removed before the frypan is cleaned and the
Control Probe inlet must be dried before the
Multicooker Deep Fryer is used again.
NEVER IMMERSE THE CONTROL PROBE IN
WATER OR OTHER LIQUID.
Storage: Store the Control Probe carefully.
Do not knock or drop it as this can damage
the probe. If damage is suspected, return
the Control Probe to your nearest Sunbeam
Appointed Service Centre for inspection Refer
to the separate warranty and service centre
booklet.
WARNING: Always wait for the fryer vessel
and hot oil to cool down before emptying the
vessel.
Drain off any oil, water or other liquid from
the vessel and remove any food particles.
NEVER PUT COLD WATER INTO A HOT DEEP-FRYER
Allow the vessel to cool, add tepid water and
let stand, if necessary, to soak and soften
stubborn food particles.
10
Washing the inside of the vessel
1.When cooled, remove any excess food
particles.
2.When cooled, wash thoroughly in hot soapy
water.
Note: Your cooking vessel is fully immersible
in water and is also dishwasher safe.
3.Remove stubborn spots with a plastic
washing pad or sponge.
WARNING: DO NOT USE STEEL WOOL OR
COARSE SCOURING PADS. These will
damage the non-stick cooking surface.
4.Rinse out in hot or boiling water to remove
unseen fat particles.
Washing the outside of the vessel
Wash grease and oil off the outside of the
vessel with hot soapy water.
Cleaning the basket
1.Remove excess food particles from the
Deep Fry Basket.
2.Place in hot, soapy water in a sink. Steel
wool or a mild abrasive may be used to
remove stubborn food particles.
3.Rinse and dry thoroughly.
4.Alternately, place the basket in a
dishwasher.
Cleaning the lid
Wash the lid in hot, soapy water. Alternately,
place the lid in a dishwasher.
High Grade Non-Stick cooking
surfaces.
Cooking on a non-stick surface minimises the
need for oil, food does not stick and cleaning
is easier.
To ensure you get the best results from your
non-stick cooking surfaces, follow these
simple instructions:
Before the first use
“Season” the cooking surface by applying a
thin coat of cooking oil and rub in with paper
towelling. This will also be necessary after
cleaning in a dishwasher.
Avoid using high settings (8-10), as any food
which may burn on the non-stick surface may
cause it to discolour.
Any discolouration that may occur will only
detract from the appearance of the frypan
and will not affect the cooking performance.
To clean interior and exterior surface
Wash in hot soapy water. Remove stubborn
spots with a plastic washing pad or sponge.
WARNING: DO NOT USE STEEL WOOL
OR COURSE SCOURING PADS.
These will damage the non-stick cooking
surface.
WASH AS DIRECTED, AND RE-SEASON THE
MULTICOOKER DEEP FRYER BEFORE USING
AGAIN.
Dishwasher-safe
Your Multicooker Deep Fryer is completely
dishwasher-safe. The heating element is
totally sealed so it is safe to fully immerse in
water.
11
Cooking with your Multicooker
Shallow frying
Add only sufficient quantity of oil to cover
the surface of the vessel. Preheat oil on dial
setting 6-7 before adding food. Turn the
food as you fry it, reducing heat if necessary.
Remove the food with a slotted spoon or
tongs, drain well and serve.
Sauteing
This is a term which means foods are quickly
fried and gently stirred in a small amount of
hot butter, margarine or oil. Foods that are
commonly sauteed are onions, mushrooms,
garlic, capsicums and meats. Sauteing
develops flavour. Preheat the vessel to dial
setting 3-4 with oil and saute as desired.
Boiling
Ideal for cooking vegetables where they
are completely immersed in water which is
brought to boiling point. Heat is regulated to
continue the boiling action. Place the lid on
the vessel unless stated in the recipe.
Dry Frying
Preheat the cooker to dial setting 6-8 with a
little butter, margarine or oil. Remove excess
fat from meat and place it directly into the
vessel. Turn the food to seal and brown
both sides. It may be necessary to lower the
setting after sealing to complete the cooking.
When small amounts of butter, margarine or
oil are used, tilt the vessel slightly to coat the
entire surface.
Reheating Foods
To keep foods hot or reheat foods, place the
leftovers into the vessel and heat on setting
1-2. To prevent food drying out add a small
amount of stock or water as required. Another
way to heat leftovers is to wrap them in foil,
seal and place in the vessel with the lid on.
Heat on settings 3 or 4 for 5 to 10 minutes.
12
Braising and Stewing
This is the ideal method for cooking tougher
cuts of meat. First saute the food in butter
or oil to develop the flavour. Then cover
with stock, water or wine and cook for the
suggested time and setting in the recipe.
Always keep the lid on and the vent closed
when braising or stewing.
Deep Frying
• It is essential that foods to be deep fried
are completely immersed in the frying
medium. Select any frying medium you
wish, but refined, deodorised vegetable oils
are recommended. They can be used more
than once without marked deterioration.
Sunbeam also recommends peanut oil
or solid vegetable shortening of reliable
brands. Lard is the best of animal fats,
but it tends to be very rich in flavour and
odour. Dripping darkens quickly and is
not completely satisfactory. DO NOT USE
BUTTER OR MARGARINE FOR DEEP
FRYING.
• Do not overfill the cooking vessel with oil
or shortening. Allow at least 8cm from the
top of the oil or shortening to the rim of
the vessel. About 8 to 10 cups (2 to 2 ½
litres) of oil or 2kg of shortening is ample.
If more is used, boilovers may occur.
• Never leave oil or shortening at high frying
temperatures for long periods of time. If
cooking fried foods in batches, lower the
temperature to setting 1-2 between frying
sessions, as it helps to extend the life of
the oil.
• NEVER PLACE THE LID ON THE VESSEL
WHEN DEEP FRYING.
Cooking with your Multicooker continued
Care of oils and shortenings
• Strain after each use because food particles
or sediments cause oil to darken, foam and
lose its browning quality.
• Store in a cool place away from light.
• Renew oil frequently. We do not
recommend the addition of new oil to old,
as used oil breaks down the quality of the
new oil.
• DO NOT STORE OIL IN THE
MULTICOOKER.
To clarify oils and shortenings
Oil or shortening will last longer if clarified
regularly. For each 500g of shortening or
2 cups (500 ml) of oil, add one potato,
peeled and cut into 5mm slices. Heat oil
or shortening gradually. When it ceases to
bubble and the potatoes are well browned,
strain the oil through several thicknesses of
muslin or cheesecloth placed over a strainer.
Set aside to cool. When ready to use, discard
any sediment left at the bottom of the bowl.
Hints for frying
• Vary time and temperature to suit taste,
size and quantity of foods.
• Do not heat more oil or shortening than
required.
• Dry foods thoroughly on absorbent
paper before adding to hot oil, or before
dipping into frying batter, to avoid excess
spattering.
• Use tongs or a long-handled slotted spoon
to gently lower food into hot oil. To avoid
spatter burns, never drop foods from
fingers.
• Do not overcrowd the frying basket. It is
better to cook about half a basketful at a
time.
• Batter-covered foods such as doughnuts are
best cooked one layer at a time.
• Wait for indicator light to go OFF before
frying next batch. Skim off any food
particles.
• Have absorbent paper handy for draining
foods.
Boiling vegetables
• Prepare vegetables (see pages 14-16).
• Add enough water to the vessel to barely
cover vegetables.
• Bring water to a rapid boil on setting 5-6.
• Add vegetables and return to
the boil.
• Cover, unless stated in recipe
or chart.
• Reduce setting to 2 (or gentle boil) and
cook for the suggested cooking time
(see pages 14-16).
• Drain vegetables.
Note: Vegetable stock may be used as a base
for sauces.
To blanch vegetables for freezing
• Prepare vegetables and plunge into boiling
water.
• Boil rapidly for 1 to 10 minutes
(depending on vegetable).
• Remove and cool vegetables quickly by
placing in iced or running cold tap water.
• Leave approximately 2.5 cm space before
sealing.
• Label, date and freeze.
The following pages give basic preparation
and cooking directions for boiling steaming or
sauteing a wide selection of vegetables.
13
Vegetable Cooking Hints
Asparagus
Scrub stalks gently with a vegetable brush to
remove soil. Snap off woody end and scrape
white part with knife to remove outer layer of
stalk.
Boil: Tie asparagus into bundles of 8-10 with
string and place upright into vessel. Add
water to almost cover stalks, 1 teaspoon each
sugar and salt. Simmer for 5-10 minutes.
Tips will cook in steam.
Beans (green)
Wash well. Remove tops and tails. If
necessary, remove ‘strings’ with vegetable
peeler. Cut diagonally down centre into
desired lengths or leave whole.
Boil: Follow basic boiling directions and cook
for approx. 5 to 10 minutes.
Broad beans
If young, may be cooked whole with top and
tails removed. If mature remove from pods.
Boil: Follow basic boiling directions for 10-15
minutes or until tender.
DRIED BEANS e.g. Red, Kidney, Haricot, Soya,
Lima
Wash beans well, cover with cold water. Allow
to soak overnight.
Boil: Bring beans and water in which they
have been soaked to the boil. Cover, and
simmer for 40 mins to 1 hour. Add salt and
continue to simmer for a further hour or until
tender.
Broccoli
Soak in cold water, drain and rinse well
under running water. Remove woody sections
of stalks and coarse leaves. Split lower
sections of stalk lengthwise.
Boil: Follow basic boiling directions, cook for
5-10 minutes or until tender.
14
Brussel Sprouts
Remove coarse outer leaves and wash well.
Trim and cut a slit lengthwise on bases.
Boil: Follow basic boiling directions, adding a
pinch of sugar. Cook for 15 minutes or until
tender.
Cabbage
Remove coarse outer leaves. Wash cabbage
well, under cold running water. Shred or cut
into wedges leaving some of the core on each
wedge to keep leaves in place.
Boil: Place prepared cabbage into vessel
with salt and a little water if insufficient is
on cabbage. Cover, cook for 10-15 minutes
depending on size and quantity.
Saute: Cover surface of vessel with butter,
margarine or oil and saute mushrooms on
Simmer to 1 for 3-5 minutes. Season and
serve.
Capsicums (peppers) red or green
Wash well. Cut around long stem. Remove
stem with seeds attached, cut away white
membrane, rinse. Follow recipe regarding
cutting.
Saute: Cover surface of vessel with butter
or margarine, or oil, and saute capsicum
on Simmer to 1 for 5 minutes, stirring
frequently to coat and brown evenly.
Carrots
Wash and scrub with vegetable brush, scrape
and peel thinly. Trim tops and tails, cut into
desired shapes.
Boil: Follow basic boiling directions and cook
for 5-10 minutes or until just tender.
Vegetable Cooking Hints continued
Cauliflower
Remove outer leaves leaving young leaves
close to head. Trim base. Wash under cold
running water. Cut into halves or break into
flowerettes.
Boil: Follow basic boiling directions, and cook
for approx. 10 minutes or until tender. To
keep cauliflower white, cook in half milk and
water to almost cover cauliflower.
Chokoes
Peel under running water. Halve and remove
seeds. Cut into quarters.
Boil: Follow basic boiling directions and cook
for 10-15 minutes or until tender.
Corn – Cob
Remove husks and ‘threads from cob and
trim tip and base. Wash under running water.
Boil: Follow basic boiling directions. Simmer
for 10-15 minutes.
Corn Kernels
Hold cob upright on chopping board, with
sharp knife, cut down near core, removing
kernels from cob.
Boil: In 1 ½ -1 cup boiling salted and
sugared water. Cook for 8-10 minutes.
Eggplant (Aubergine)
Wash and remove stems. Follow recipe
regarding cutting.
Shallow or Deep Fried: Coat with batter, flour,
or crumb and fry according to basic frying
directions.
Saute: Cover surface of vessel with butter,
margarine or oil and saute mushrooms on
Simmer to 1 for 3-5 minutes. Season and
serve.
Mushrooms
Wipe mushrooms with damp cloth. Trim
stems or remove if necessary.
DO NOT peel unless necessary. Leave
whole or slice. Keep stalks and peelings for
flavouring sauces, soups.
Saute: Cover surface of vessel with butter,
margarine or oil and saute mushrooms on
Simmer to 1 for 3-5 minutes. Season and
serve.
Onion
Trim tops and roots and peel under cold
water. Use as required.
To Blanch: See basic blanching directions.
Saute: Quickly in hot butter, margarine or oil
Boil: Follow basic boiling directions, add to
soups, casseroles or stews.
Parsnips
Wash well, trim top and bottom. Peel thinly
and cut as desired. Chop into cubes for
soups, casseroles or stews.
Parboil: For 5-7 minutes, cook and use in
salads.
Peas
Wash pea pods; shell.
Boil: Place peas into small amount boiling,
salted water. Add sugar and mint (if desired).
Cook uncovered for 10 minutes.
15
Vegetable Cooking Hints continued
Potatoes
Wash well. If potatoes are to be cooked in
their jackets, scrub skin well with vegetable
brush. Remove “eyes” or peel and cut as
desired, e.g. slices, thick strips, cubes. After preparation place into cold water to
prevent discolouration.
Boil: Follow basic boiling directions and cook
for approx. 20 minutes or until tender. Serve
whole, mashed or cold for potato salad.
Deep Fried: Heat oil on dial setting 10 (see notes on deep frying, pages 8 - 9 ). Cook until golden and drain.
Pumpkin
Wash pumpkin, slice and remove seeds and
membranes. Remove skin if desired. N.B.
(Skins are easy to remove after cooking). Cut slices in half if large.
Boil: Follow basic boiling directions and cook
for 15 minutes or until tender.
Spinach
Wash well in cold water. Trim leaves from
stalks. N.B. Stalks may be used in Chinese
cookery or cooked in milk until tender.
Cooking: If desired place leaves in vessel
and add salt. DO NOT add water. Cover and
simmer for 5-10 minutes. Drain and chop
spinach. Add butter, salt and pepper (if
desired).
Swedes and Turnips
Remove tops and roots. Wash well, peel
thickly. Follow recipe regarding chopping.
Boil: Follow basic boiling directions and cook
for 20-25 minutes, depending on size. Add
to soups, casseroles and stews.
16
Tomatoes
Wash well and dry. Cut as desired. To peel
tomatoes, see hints page 13.
Saute: Cover surface of vessel with butter,
margarine or oil and saute mushrooms on
Simmer to 1 for 3-5 minutes. Season and
serve.
Zucchini and Marrow
Wash vegetables, trim ends and halve.
Remove seeds from marrow and cut as
desired. Slice zucchini in half or lengthwise
or slice diagonally.
Boil: Follow basic boiling directions and boil
for 10 minutes.
Saute: Cover surface of vessel with butter,
margarine or oil and saute mushrooms on
Simmer to 1 for 3-5 minutes. Season and
serve.
Cooking Information
Setting and cooking times
These are given as a guide for best results.
However, vary the temperature and cooking
times to suit the foods prepared and the
personal tastes of your family.
Omission or addition of ingredients to the
recipes will alter the suggested cooking
times, and adjustments should be made
accordingly – your own imagination will
personalise these recipes.
Many recipes in your files or cookbooks
are perfectly suitable for cooking in this
appliance. Check first to see if there is
a similar recipe in this book, then follow
accordingly.
Measurements
All cup and spoon measurements are level.
Recipes have been tested using Australian
Standard Metric Cup and Spoon
Measurements. Australian Standard
Metric measuring utensils are available at
large departmental stores. There are four
measuring spoons: tablespoon, teaspoon, half
teaspoon and quarter teaspoon. Also there
are four fractional metric measuring cups:
full, half, third and quarter, for measuring dry
ingredients. As well there is a metric cup and
a litre measure for liquid measurement.
metric
1 cup is equivalent to 250 ml
tablespoon
1
is equivalent to 20 ml
teaspoon
1 is equivalent to 5 ml
Ingredients
Most ingredients in this book are given in
volume (cups and spoons). Ingredients such
as meat, butter and margarine are given by
weight (kilograms or grams).
Chicken sizes are given in metric numbers.
Packets of butter or margarine may be
divided by length and width with sufficient
accuracy for cookery. It is essential to
thoroughly thaw frozen foods unless otherwise
stated in recipes in a refrigerator prior
to cooking. Just before cooking, wipe off
excess moisture with paper towelling. DO
NOT RE-FREEZE THAWED FOODS BEFORE
COOKING.
Abbreviations used in this book
g
gram
kg
kilogram
ml
millilitre
pkt
packet
HANDY HINTS
Au Gratin Topping
Melt 60g butter on dial setting 5-6 in
cooking vessel. Add 1 cup fresh white
breadcrumbs and stir until browned. Sprinkle
over white sauce mixtures.
Blanching Tomatoes
Half fill cooking vessel with water and bring
to the boil on dial setting 5-8. Add 2-3
tomatoes and boil for 1 minute. Using a
slotted spoon lift tomatoes from water.
Plunge into iced water, drain and peel.
Browning Coconut
Heat the cooking vessel to dial setting 4-8.
Add coconut and stir continuously until
evenly browned. Turn power OFF and remove
coconut immediately.
Cooking Pastas (Macaroni, spaghetti,
vermicelli, noodles etc.)
Fill the cooking vessel two thirds full with
water; add salt. Bring to the boil on dial
setting 4-8. Add pasta and boil for 10-15
minutes or until tender. Drain well in a
colander. Do not rinse. Add butter if desired
and toss. Note: 1 tablespoon oil added to the
water whilst cooking helps to keep the pasta
separate.
17
Cooking Information continued
To Cook Rice
Fill the cooking vessel two thirds full with
water; add salt. Bring to the boil on dial
setting 5-10. Add rice and boil for 10-15
minutes, or until tender. Drain and rinse
under cold water. Add butter and toss.
Variations;
1. Add 1½ cup chopped shallots which have
been sauteed in 30g butter.
2. Add 1½ teaspoon tumeric whilst cooking.
Heating or Scalding Milk
For hot chocolate, desserts, custards,
puddings or where hot or scalded milk is
required, set control dial setting 3-4. Add
milk and bring to the desired temperature.
Melting Chocolate
Roughly chop chocolate and add to cooking
vessel. Set control between dial setting 2-4.
When chocolate has almost melted, turn
power OFF. Chocolate will completely melt
using ‘stored heat’.
Reconstituting Dried Fruit
Place dried fruit into a bowl and cover with
cold water. Soak for several hours. Transfer
fruit and water to cooking vessel. Set control
to dial setting 3-4. Cover with lid. Simmer
for 15-20 minutes, or until tender. Add sugar
5 minutes before end of cooking time, if
desired.
Roasting And Baking Meats
You will find it quite convenient to cook
joints of 2-3 kg in the cooking vessel. When
roasting meat, chickens, rabbits, etc., you
will find that two or three small pieces may
be put in side by side if required. Use only a
small quantity of oil, up to ¼ cup, to prevent
meat from sticking. Heat the vessel to dial
setting 8-10, place the meat in and turn it
to brown and seal on all sides. Veal or fat
18
free fillets of meat may require a little more
oil, while lamb and fatty cuts can be cooked
in their own fat. If excess fat accumulates
in the vessel, it is advisable to spoon this
out during cooking. After browning, set
the control to 10 to achieve a sizzling
action whilst the light is ON. Only fat, not
juice should accumulate whilst roasting.
Moisture in the fat indicates the necessity
to increase the temperature. Turn the meat
two or three times during cooking and add
vegetables three-quarters to one hour before
anticipated serving time. If necessary, change
temperature to 6 for crisp, brown vegetables.
To obtain crisp pork crackling, it is necessary
to increase the temperature to 8-10.
Roasting Nuts
Heat ¼ cup oil in cooking vessel on dial
setting 4-10 and add dry blanched nuts.
Stir continuously until browned. Drain on
absorbent paper and sprinkle with salt.
Cooking definitions
Baste To moisten meat, poultry or fish with
their own juices while they are being cooked.
Blanch
• To remove skins from vegetables, fruits and
nuts.
• To pre-cook vegetables or fruits before
freezing.
Blend To combine two or more ingredients,
usually a powder and a liquid, to form a
smooth paste.
Boil To cook in water,held at boiling point.
Boutquet Garni A selection of herbs, usually
sprigs of parsley, thyme, rosemary, a bayleaf,
peppercorns, which are tied in muslin; the bag
is placed in with the food being cooked and
removed on completion of cooking.
Parboil To boil until partially cooked.
Preheat To have appliance or oven at desired
setting or temperature before adding food.
Puree To place cooked food in a blender or
through a fine sieve to form a thick smooth
mixture.
Reduce
• To simmer a liquid until it diminishes and
becomes concentrated.
• To reduce temperature.
Saute To cook or lightly fry food quickly
in a small amount of hot fat or oil, stirring
frequently.
Scald To heat liquids to a temperature just
below boiling point.
Caramelise To melt sugar slowly until it turns
golden brown.
Seasoned Flour Add desired seasonings to flour,
when coating meat for frying or making
casseroles and stews.
Coat To cover entire surface of food with
ingredients, e.g. coating cutlets with seasoned
flour, egg and breadcrumbs.
Shred Cut food into thin strips.
Croutons Bread shapes which are fried or
toasted.
Simmer To keep food at a constant temperature
just below boiling point.
Dripping Residue remaining in pan after meat
or poultry is cooked.
Flake To separate food into small pieces with
a fork.
Garnish To decorate food, usually with
something edible.
Marinade To tenderise and add flavour to meat,
fish or poultry. The food is placed in a mixture
of oil, wine, vinegar and herbs.
Marinate To allow food to stand in marinade.
19
Recipes for your Multicooker
All the recipes have been specifically created and tested by the Sunbeam Test Kitchen for the
MultiCooker Deep Fryer. We hope you enjoy using your Multicooker.
Soups, Sauces, Stocks
Béchamel Sauce
Sweet and Sour Sauce
Makes: 2 ½ cups
Makes: 2 ½ cups
1 onion
¼ cup sunflower oil
4 cloves
1 red capsicum, seeds removed, diced
2 ½ cups milk
1 onion, cut into wedges
45g butter
1 carrot, sliced, cooked
¼ cup plain flour
½ cup fresh pineapple, cubed
Salt and freshly ground white pepper, to taste
¼ cup caster sugar
1.Stud onion with cloves.
2.Place pan on setting 4. Add onion and
milk. Allow milk to gently simmer for 10
minutes. Strain.
3.Add butter to the pan. Add flour and stir
until a thick paste. Slowly add milk to the
pan and stir until combined.
4.Increase to setting 5. Bring to the simmer
and stir constantly until thickened. Season
to taste with salt and pepper.
1 tablespoon dry sherry
1 tablespoon soy sauce
1 tablespoon tomato sauce
1 tablespoon white vinegar
½ cup water
2 tablespoons cornflour
Salt and freshly ground black pepper, to taste
1.Preheat pan on setting 3 for 2 minutes.
2.Add oil, capsicum, onion and carrot. Cook
for 5 minutes or until tender.
3.Add pineapple, sugar, sherry, soy sauce,
tomato sauce and white vinegar. 4.Increase to setting 5. Bring to a simmer.
5.In a separate bowl combine water and
cornflour. Slowly add to the pan, stirring
until sauce has thickened. Season to taste
with salt and pepper. Serve.
20
Soups, Sauces, Stocks continued
Spicy Barbeque Sauce
Pumpkin Soup
Makes: 2 cups
Serves: 4-6
45g butter
30g butter
1 onion, finely chopped
1 onion, chopped
1 teaspoon freshly grated ginger
750g pumpkin, peeled, seeds removed,
chopped
1 tablespoon plain flour
1 cup tomato sauce
½ cup water
¹⁄³ cup white vinegar
2 tablespoons brown sugar
1 tablespoon American mustard
2 teaspoons Worcestershire sauce
¼ teaspoon ground allspice
¼ teaspoon chilli sauce
Salt and freshly ground black pepper, to taste
1.Preheat pan on setting 2 for 2 minutes.
2.Add butter, onion and ginger to pan. Cook
for 2-3 minutes or until tender. Add flour
and stir for 1 minute or until a paste has
formed. 3.Add remaining ingredients. Increase to
setting 5. Bring to the simmer and cook for
15 minutes or until thickened.
2 ½ cups chicken stock
1 teaspoon ground nutmeg
Salt and freshly ground black pepper, to taste
Sour cream and chives, to serve
1.Preheat pan on setting 4 for 2 minutes.
2.Add butter and onion to pan. Cook for 2-3
minutes or until softened.
3.Add pumpkin, chicken stock and nutmeg
to the pan. Cover. Simmer for 10- 15
minutes or until pumpkin is tender. Allow
soup to cool.
4.Process soup until smooth. Season with
salt and pepper.
5.Reheat soup before serving. Serve with
sour cream and freshly chopped chives.
21
Soups, Sauces, Stocks continued
French Onion Soup
Basic Chicken Stock
Serves: 6
Makes: 6 cups
60g butter
1 chicken carcass
6 onions, peeled, chopped
5 cups water
6 cups beef stock
2 carrots, chopped
2 tablespoons brandy
2 stalks celery, chopped
6 slices French bread
2 onions, quartered
½ cup grated gruyere cheese
4 bay leaves
Salt and freshly ground black pepper, to taste
1.Place all ingredients in pan and bring
to the boil on setting 5. Reduce heat to
simmer and cook for a further 1- 1 ½
hours.
2.Strain stock. Discard solids.
TIP: freeze chicken stock in ½ cup portions
in the freezer. This prevents having to defrost
large quantities.
1.Preheat oven to 180C.
2.Preheat pan to setting 4 for 2 minutes.
3.Add butter and onion to pan. Cook for 15
minutes or until onions are caramelized.
4.Add stock and brandy. Cover. Simmer for
15-20 minutes or until slightly thickened.
Season to taste with salt and pepper.
5.Place bread on a baking tray. Cover evenly
with grated cheese. Cook for 2-3 minutes
or until cheese has melted.
6.Serve soup with a slice of cheesy bread.
22
Main Meals
Garlic Prawns
Spaghetti Bolognese
Serves: 6-8
Serves: 6
1kg green king prawns, shelled, deveined
2 tablespoons olive oil
½ cup olive oil
2 onions, chopped
4 cloves garlic, crushed
2 stalks celery, chopped
Salt and freshly ground black pepper, to taste
2 cloves garlic, crushed
1.Combine all ingredients in a small bowl. 2.Preheat pan to setting 10 for 2 minutes. Add prawns and cook for 3-4 minutes or
until cooked. Season to taste with salt and
pepper. Serve.
125g button mushrooms, chopped
750g beef mince
1 tablespoon tomato paste
440g can whole tomatoes
1 bay leaf
1 tablespoon freshly chopped flat-leaf parsley
1 teaspoon dried oregano leaves
1 teaspoon dried basil leaves
¼ teaspoon ground nutmeg
Salt and freshly ground black pepper, to taste
Cooked spaghetti, grated parmesan cheese,
to serve
1.Preheat pan on setting 4 for 2 minutes.
2.Add oil and onion, celery, garlic and
mushrooms to pan. Cook for 4-5 minutes
or until softened.
3.Add mince to the pan and cook for a
further 5 minutes or until cooked. Add
all remaining ingredients to the pan.
Cover. Simmer for 15-20 minutes or until
thickened. Season to taste with salt and
pepper.
4.Serve over spaghetti and top with grated
parmesan cheese.
23
Main Meals continued
Chilli Con Carne
Party Time Tacos
Serves: 6
Serves: 16-20
2 tablespoons olive oil
1 tablespoon olive oil
2 onions, chopped
1 onion, chopped
2 cloves garlic, crushed
1 clove garlic, crushed
1 green capsicum, seeds removed, sliced
1 kg beef mince
1 kg beef mince
2 x 440g can chopped tomatoes
2 x 310g can kidney beans, drained, rinsed
1 tablespoons ground cumin
440g can whole tomatoes
1 tablespoon dried oregano
1 bay leaf
1 tablespoon Mexican chilli power
1 teaspoon caster sugar
Salt and freshly ground black pepper, to taste
1 teaspoon chilli powder
16 taco shells, warmed
½ teaspoon dried basil leaves
Grated cheese, lettuce, chopped tomato,
chopped onion and sour cream, to serve
Salt and freshly ground black pepper, to taste
Sour cream, to serve
1.Preheat pan on setting 4 for 2 minutes.
2.Add oil, onion, garlic and capsicum to pan.
Cook for 4-5 minutes or until tender.
3.Increase to setting 6. Add mince to the
pan and cook for 4-5 minutes or until
cooked.
4.Add remaining ingredients to the pan.
Bring to a simmer. Reduce to Setting 3.
Allow to simmer for 40 minutes, stirring
occasionally. Season to taste with salt and
pepper.
5.Serve in a bowl with a dollop of sour
cream.
24
1.Preheat pan on setting 4 for 2 minutes.
2.Add oil, onion and garlic to pan. Cook for
2-3 minutes or until tender.
3.Add mince to pan and cook for a further 5
minutes or until browned.
4.Add tomato, cumin, oregano and chilli
powder to the pan.
5.Increase to setting 6. Bring to a simmer
and cook for a further 20 minutes or until
thickened. Season to taste with salt and
pepper.
6.Serve tacos with mince and toppings.
TIP: This recipe can be made with chicken or
pork mince.
Main Meals continued
Sweet and Sour Mince
Spaghetti Marinara
Serves: 6
Serves: 4-6
90g butter
30g butter
1 green capsicum, seeds removed, sliced
1 onion, chopped
1 red capsicum, seeds removed, sliced
1 onion, chopped
1 clove garlic, crushed
750g beef mince
400g fresh pineapple, peeled, chopped
¼ cup white vinegar
1 clove garlic, crushed
440g can chopped tomatoes
2 tablespoons tomato paste
¼ cup white wine
¼ cup fish stock
2 tablespoons tomato sauce
500g fresh scallops
1 tablespoon grated fresh ginger
500g prawns, peeled, deveined
1 tablespoon soy sauce
Salt and freshly ground black pepper, to taste
1 tablespoon corn flour
Cooked spaghetti and parsley, to serve
1 cup water
1.Preheat pan on setting 4 for 2 minutes.
2.Add butter, onion and garlic to pan. Cook
for 3-4 minutes or until tender.
3.Add chopped tomatoes and tomato paste.
Bring to a simmer. Add wine and simmer
for 3-4 minutes.
4.Add stock, scallops and prawns. Cook for 5
minutes or until seafood is cooked. Season
to taste with salt and pepper.
5.Serve over spaghetti and top with fresh
parsley.
TIP: Any type of seafood can be used in this
recipe. Mussels and clams go especially well.
1 cup frozen peas, thawed
Salt and freshly ground black pepper, to taste
Rice, to serve
1.Preheat pan on setting 4 for 2 minutes.
2.Add butter, capsicums, onion and garlic to
pan. Cook for 4-5 minutes or until tender.
3.Add mince to pan and cook for a further 5
minutes or until browned.
4.Add pineapple, vinegar, tomato sauce,
ginger and soy sauce to the pan. Stir to
combine.
5.In a separate bowl combine water and
cornflour. Stir to make a paste. Add to the
pan and bring to a simmer for 10 minutes
or until thickened.
6.Stir through peas. Season to taste with salt
and pepper. Serve over rice.
TIP: Chicken or pork mince can be used in
this recipe.
25
Main Meals continued
Normandy Chicken
Fried Rice
Serves: 4
Serves: 4-6
40g butter
2 tablespoons olive oil
2 tablespoons olive oil
1 clove garlic, crushed
4 chicken marylands
1 teaspoon freshly grated ginger
1 onion, chopped
4 cups cooked white rice
1 clove garlic, crushed
1 ½ cups chopped cooked chicken
3 rashers bacon, rind removed, chopped
4 long green shallots, sliced
2 tablespoons plain flour
2 tablespoons soy sauce
2 cups sweet apple cider
2 eggs, beaten
2 apples, peeled, cored, chopped
Salt and freshly ground black pepper, to taste
¹⁄³ cup thickened cream
1.Preheat pan on setting 6 for 2 minutes.
2.Add oil to the pan. Add garlic and ginger
and cook for 1 minute or until fragrant.
3.Add rice, chicken and shallots. Stir to
combine.
4.Add soy sauce and eggs. Stir constantly
until eggs are cooked. Season to taste with
salt and pepper. Serve.
2 tablespoons freshly chopped flat-leaf
parsley
Salt and freshly ground black pepper, to
serve
Rice, to serve
1.Preheat pan on setting 9 for 2 minutes.
2.Add butter and oil to the pan. Add chicken
and cook for 3-4 minutes or until browned.
Remove from pan.
3.Reduce heat to setting 4. Add onion, garlic
and bacon. Cook for 3-4 minutes or until
tender.
4.Add flour to the pan and stir to form
a paste. Slowly add the cider, stirring
constantly until combined. Add apples and
simmer for 20 minutes or until sauce has
thickened and chicken is cooked.
5.Stir through cream and parsley. Season to
taste with salt and pepper. Serve over rice.
26
Main Meals continued
Chinese Fried Vegetables
Serves: 6
¼ cup vegetable oil
4 stalks celery, sliced
2 carrots, peeled, sliced
1 cucumber, sliced
125g can bamboo shoots, drained
125g shitake mushrooms, chopped
1 cup fresh bean sprouts
2 tablespoons soy sauce
1 teaspoons freshly grated ginger
1 teaspoon rice wine
1 teaspoon sesame oil
Salt and freshly ground black pepper, to taste
1.Place oil in pan. Preheat on setting 6 for 2
minutes.
2.Add celery, carrots, cucumber, bamboo,
mushrooms and bean sprouts. Cook for 3-4
minutes or until tender.
3.Add remaining ingredients and cook for a
further 2-3 minutes. Season to taste with
salt and pepper. Serve.
27
Desserts and Sweets
Choux Pastry
Jamaican Bananas
125g butter
Serves: 4-6
1 ¼ cups cold water
½ teaspoon salt
1 ¼ cups plain flour
4 eggs
1.Preheat oven to 220C. Place pan on
setting 5.
2.Add butter, water and salt. Bring to a
simmer. Add flour and stir constantly until
dough forms a ball that cleans the side of
the pan.
3.Turn power off and allow to cool for 5
minutes.
4.Add eggs one at a time to the pan, stirring
well between each addition.
5.Spoon/ pipe mixture onto a lined baking
tray in desired shape. Bake for 20-30
minutes depending on size.
28
125g butter
½ cup brown sugar
½ cup orange juice
8 bananas, peeled
½ cup dark rum
Ice cream, to serve
1.Place pan on setting 5.
2.Add butter, sugar and orange juice. Stir
until sugar has dissolved.
3.Add bananas to the pan. Cook for 5-6
minutes or until softened. Place bananas
in serving dish. 4.Turn pan to setting 10. Add rum and
carefully ignite. Pour sauce over bananas.
Serve with vanilla ice-cream.
Desserts and Sweets recipes continued
Golden Syrup Dumplings
Chocolate Fudge
Makes: 24
410g can evaporated milk
Dumplings:
1 cup self raising flour
1 tablespoon milk
1 teaspoon lemon rind
30g butter, diced
1 egg
Sauce:
1 ½ cups water
¼ cup brown sugar
1 ¾ cups caster sugar
500g dark chocolate, roughly chopped
1.Grease and line a slice pan with baking
paper.
2.Place pan on setting 10.
3.Add milk and sugar. Bring to a boil.
Reduce to setting 6. Allow to simmer for 3
minutes, stirring constantly.
4.Turn heat off and add chocolate, stirring
until smooth.
5.Pour into prepared pan and refrigerate until
firm. Cut into slices.
2 tablespoons golden syrup
1 teaspoon lemon juice
20g butter
1.Dumplings: In a large bowl combine all
ingredients and stir to form a firm dough.
Shape into 1 tablespoon sized balls. Set
aside.
2.Sauce: Place pan on setting 5. Add all
sauce ingredients to pan. Bring to a
simmer and stir until sugar has dissolved.
Gently add dumplings to the pan and cook
for 15 minutes. Serve.
29
Desserts and Sweets recipes continued
Toffee Apples
Creamy Caramel Sauce
Makes 20
125g butter
20 small red apples
20 wooden skewers
1 kg caster sugar
¼ cup water
¼ cup white vinegar
¼ teaspoon cream of tartar
Red food colouring
1.Lightly grease two baking trays.
2.Insert a wooden skewer into the base of
each apple.
3.Combine sugar, water, vinegar and cream
of tartar in the pan. Place pan on setting
5 and stir constantly until sugar has
dissolved.
4.Allow mixture to simmer, undisturbed for a
further 15 minutes or until a golden colour.
5.Add a few drops of food colouring to the
toffee until a desired colour is achieved.
6.Holding the wooden skewer, dip the apple
quickly into the toffee before placing
on prepared tray. Repeat with remaining
apples. Allow to set before serving.
30
1 ½ cups brown sugar
2 egg yolks
½ cup cold water
¼ teaspoon vanilla essence
1.Place pan on setting 3.
2.Add butter and sugar to the pan. Stir until
butter has melted.
3.Combine egg yolks and water. Whisk until
well combined.
4.Add egg yolk mixture to the pan. Increase
to setting 5. Bring sauce to the simmer for
5 minutes. Add vanilla. Serve.
Cooking with your Deep Fryer
The Perfect Chip.
• For perfect fries and wedges old potatoes
are ideal. The potato should be low starch,
waxy variety i.e. chats, new potato or
desiree potatoes.
• Make sure that the chips are cut evenly
to guarantee even cooking.
• The cut chips should be rinsed under
running water until the water runs
clear. This removes excess starch from
the potatoes, starch burns at high
temperatures.
• Dry on kitchen towel before frying.
• Shake the basket at short intervals to
encourage even browning and to prevent
chips from sticking together.
• Homemade fries are double cooked. The
first fry blanches the chips so that they
cook through. The second fry colours the
chips and gives them a crisp crust. Use the
table below as a guide.
• Cooking times will vary depending on the
size of your fries or chips and the variety of
the potato used.
Hints for cooking the perfect frozen chip.
• Do not defrost frozen precooked chips.
For the best results they should be taken
directly from the freezer to the fryer.
• Heat oil to the maximum setting, 8-10.
• Place up to 1kg frozen chips into the fryer
basket and lower into the hot oil for 1 - 2
minutes to seal.
• Lift the basket out and rest the drainage
lever inside the rim of the cooking vessel.
Allow the oil to heat up again.
• Lower the basket again and fry the chips
for a further 3 - 4 minutes until golden
brown. The time required will depend on
the size and cut of the chip, and personal
taste.
• Allow chips to drain for a moment before
removing from the basket and seasoning.
Temperature
Control settings
Time for first fry
(blanch)
Temperature
Control Settings
Time for second
fry - Max temp
Thin fries french fries
8
5 min
10
5 min
Thick chips
8
7-8 min
10
7-8 min
Wedges
8
10 min
10
10 min
• Allow oil to heat up to 2nd temperature before re-immersing the basket in the hot oil.
33
31
Deep fry cooking with home
battered food.
This method allows for the fact that if
wet batter is placed in the basket prior to
cooking the food may stick to the basket.
THIS METHOD OF COOKING REQUIRES
EXTREME CARE.
1. Follow steps 1 - 6 only from the deep fry
cooking instructions on page 8.
2. Place the frying basket into the vessel with
the heated oil.
3. Coat the food in batter (see recipes on
page 35) and allow it to drain slightly to
get rid of the excess coating.
4. Very carefully, slowly lower the coated food
into the hot oil, using a suitable implement
or tongs.
This allows the batter to become solid
and prevents it sealing to the mesh of the
basket.
Note: Remember to take care as the oil may
spit as the food is added.
5. You can now follow the deep fry cooking
instructions from steps 8-10 on page 8.
32
34
Frying times and temperatures
Fish and Seafood
Maximum
Qty
Temperature
Control settings
Approx. time
(min)
Suggestions
Fresh
600g
8-10
5-7
Crumb/batter
Frozen
600g
8-10
3-5
Fry frozen
Small pieces
400g
8-10
3-5
Crumb/batter
Fresh fillets
600g
8-10
7-10
Crumb/batter
Frozen fillets
600g
8-10
5-7
Fry frozen
Fresh
500g
8-10
5-7
Crumb/batter
Frozen
500g
8-10
3-5
Fry frozen
Maximum
Qty
Temperature
Control settings
Approx. time
(min)
Suggestions
SMALL
400g
8-10
15-20
Crumb or batter
LARGE
600g
8-10
20-30
Crumb or batter
FRESH
250g
8-10
5-10
Crumb
FROZEN
250g
8-10
3-8
Crumb
Type
PRAWNS
FISH
CALAMARI
Meat and Poultry
Type
Fresh chicken
portions
Chicken or Veal
Schnitzel
33
35
Frying times and temperatures continued
Vegetables
Maximum
Qty
Temperature
Control settings
Approx. time
(min)
Suggestions
Beans
200g
8-10
2-4
Tempura
Type
Bok Choy
150g
8-10
2-4
Tempura
Broccoli /
Cauliflower
250g
8-10
3-5
Tempura or batter
Eggplant (slices)
150g
8-10
4-6
Batter
Mushrooms whole
button
200g
8-10
3-5
Batter
Onion Rings
150g
8-10
3-5
(ind. leaves)
Batter
Potatoes
French Fries
500g
8-10
4-6
Chips
500g
8-10
5-10
Wedges
500g
8-10
10-15
Always blanch potato chips at a lower temp; setting 8. Then brown at maximum temp;
setting 10.
34
36
Recipes for your Deep Fryer
All the recipes have been specifically created and tested by the Sunbeam Test Kitchen for the
Multicooker Deep Fryer. We hope you enjoy using your Sunbeam Deep Fryer.
Tempura Batter
For perfect batter:
1.Always sift all dry ingredients, then add
liquids. Mix until smooth
2.Keep your batter as cold as possible (it will
be crisper)
3.Coat food in seasoned flour before batter
as the batter will stick to the food better
4.Fry until golden brown
5.Always use the deep fry ‘cooking with
home battered food technique’, see page
34 for more information
TIP: it is important for this batter to remain
very cold.
Beer Batter
Easy Crispy Coating
1 cup cornflour
1 tablespoon water
1 cup plain flour
1 cup cornflour
¾ cup cold beer
1 egg
¹⁄³ cup cold water
Salt and freshly ground black pepper, to taste
½ teaspoon baking powder
1.Beat egg with water. Season flour with salt
and pepper.
2.Dip food in egg mix and then coat with
flour.
3.Deep fry at setting 8-10 depending on size
of foodstuff, until crispy.
2 eggs
Sweet Fritter Batter
1 cup self raising flour
1 cup soda water
½ cup plain flor
¼ cup rice flour
1 teaspoon bicarbonate soda
1 egg
²⁄³ cup milk
1 tablespoon caster sugar
1 egg
20g butter, melted
35
Recipes for your Deep Fryer continued
Prawn Cutlets
Deep fried Pork Balls
750g green king prawns, peeled, deveined
Makes: 14
½ cup plain flour
500g pork mince
1 egg, lightly beaten
2 tablespoons corn flour
2 cups fresh breadcrumbs
2 tablespoons plain flour
Lemon wedges, to serve
Salt and freshly ground black pepper, to taste
1.Coat prawns in flour, eggs then
breadcrumbs. Shake off excess crumbs.
2.Heat oil to setting 8-10. Fry cutlets for 4-5
minutes or until golden and brown.
3.Drain. Season to taste with salt and
pepper. Serve immediately with lemon
wedges.
36
1 tablespoon soy sauce
1 teaspoon garlic salt
1 egg, lightly beaten
Salt and freshly ground black pepper
1.Combine all ingredients in a large bowl.
Continue to mix pork until sticky. Season to
taste with salt and pepper.
2.Form mixture into 2 tablespoon sized balls.
3.Heat oil to setting 8-10. Place pork balls
in the basket in batches. Lower into the oil
and cook for 8-10 minutes or until cooked
and golden. Serve.
Recipes for your Deep Fryer continued
Calamari
Dim Sims
Serves: 2-3
125g green prawns, peeled, deveined
500g squid, washed, cleaned
½ cup plain flour
1 egg, lightly beaten
1 cup dried breadcrumbs
Tartare sauce and lemon wedges, to serve
1.Cut the squid tubes into 1cm rings.
2.Coat all of the squid in flour, egg and
breadcrumbs.
3.Heat oil to settings 8-10. Fry the squid
until cooked and golden brown. 4.Drain and serve immediately with tartare
sauce and lemon wedges.
500g pork mince
1 onion, finely chopped
½ cup chopped bamboo shoots
½ cup chopped water chestnuts
1 tablespoon sherry
1 tablespoon soy sauce
Salt and freshly ground black pepper, to taste
125g wonton wrappers
1.Finely mince prawns and combine with
pork.
2.Add remaining ingredients to the pork
mixture. Season to taste with salt and
pepper.
3.Place 1 teaspoon of pork mixture into the
centre of each wonton wrapper. Gather the
sides of the wrapper up and around the
filling, leaving a small opening at the top.
4.Heat the oil to setting 8-10. Deep fry in
batches for 4-5 minutes or until golden
and cooked.
5.Drain and serve.
37
Recipes for your Deep Fryer continued
Spring Rolls
Minted Pea Wontons
Makes: 24
Makes:
500g green prawns, peeled, deveined
3 potatoes, diced
500g pork mince
125g wontons wrappers
230g can water chestnuts, drained, finely
chopped
2 tablespoons vegetable oil
125g brown mushrooms, finely chopped
1 onion, finely chopped
2 cups peas
1 green capsicum, seeds removed, finely
chopped
1 teaspoon ground cumin
1 onion, finely chopped
¼ cup freshly chopped mint
½ small head of cabbage, finely shredded
Salt and freshly ground black pepper, to taste
2 tablespoons dry sherry
1.Boil diced potato until just cooked. Drain.
2.Preheat pan to setting 4 for 2 minutes.
3.Add oil, onion, peas and cumin to the
pan. Cook for 3-4 minutes or until tender.
Add Mint and potato. Stir to combine.
Season to taste with salt and pepper.
4.Place 2 teaspoons of mix into each wonton
wrapper and bring edges together. Seal
with a light brush of water.
5.Heat the oil to setting 8-10. Deep fry in
batches for 4 minutes or until golden and
cooked.
6.Drain and serve.
2 tablespoons soy sauce
1 teaspoon caster sugar
½ teaspoon ground ginger
Salt and freshly ground black pepper, to taste
24 spring roll wrappers
1 egg, lightly beaten
1.Finely chop prawns and combine with pork.
2.Add water chestnuts, mushrooms,
capsicum, onion, cabbage, sherry, soy,
sugar and ginger. Mix well to combine.
3.Place 2 tablespoons pork mixture in
the corner of a spring roll wrapper. Roll
wrapper folding in the sides to encase the
filling.
4.Brush egg on the end of the wrapper to
seal.
5.Heat oil to setting 8-10. Deep fry until
golden brown, about 5 minutes.
6.Drain and serve.
38
Recipes for your Deep Fryer continued
Southern Fried Chicken
Shallot and Sesame Puffs
Serves: 4-6
Makes: 8
½ cup plain flour
2 sheets ready rolled shortcrust pastry
½ teaspoon hot paprika
1 tablespoon vegetable oil
750g chicken drumsticks
1 teaspoon freshly grated ginger
1 egg
12 green shallots, sliced
¼ cup milk
1 clove garlic, crushed
1 cup dried breadcrumbs
½ cup sesame seeds
Salt and freshly ground black pepper, to taste
2 tablespoons oyster sauce
1.In a large bowl combine flour and paprika.
Season to taste with salt and pepper.
2.Lightly beat eggs and milk together.
3.Coat drumsticks in seasoned flour. Dip
each drumstick into egg mixture and coat
in breadcrumbs.
4.Heat the oil to setting 8-10. Place chicken
in the basket and slowly lower into the hot
oil. Cook for 10-15 minutes or until cooked
and golden.
1 egg yolk, beaten
Salt and freshly ground black pepper, to taste
1.Preheat pan on setting 3 for 2 minutes.
2.Add oil, ginger shallots and garlic. Cook for
2-3 minutes or until cooked. Add sesame
seeds and oyster sauce. Season to taste
with salt and pepper. Set aside.
3.Cut each pastry into 8 squares. Place
1 tablespoon of shallot mixture into the
middle of each piece of pastry. Glaze edges
of pastry with egg yolk. Bring the corners
of the pastry together and pinch to seal.
4.Glaze the outside of the parcels with
remaining yolk.
5.Heat the oil to setting 8-10. Add parcels
and cook for 3-4 minutes or until puffed
and golden.
39
Recipes for your Deep Fryer continued
Meatballs
Felafel
Makes: 12
1 ½ cups dried chickpeas, washed, soaked
overnight
750g beef mince
1 onion, finely chopped
½ cup fresh breadcrumbs
2 tablespoons freshly chopped flat-leaf
parsley
2 cloves garlic
1 egg
1 onion
½ cup besan flour
2 teaspoons Worcestershire sauce
¼ cup freshly chopped flat-leaf parsley
1 teaspoons dried mixed herbs
1 tablespoon ground cumin
1 egg, lightly beaten
1 tablespoon lemon juice
Salt and freshly ground black pepper, to taste
1 teaspoon chilli powder
1.Place all ingredients into a large bowl and
mix to combine. Season to taste with salt
and pepper.
2.Form mixture into 1 tablespoon sized balls.
Refrigerate for 1 hour.
3.Heat the oil to setting 8-10. Fry for 6-8
minutes or until golden and cooked.
Salt and freshly ground black pepper, to taste
40
1.Place chickpeas in a large saucepan. Bring
to a simmer and cook for 1 hour. Drain.
2.Place the cooled chickpeas and remaining
ingredients in a food processor. Pulse until
smooth. Season to taste with salt and
pepper. 3.Shape felafel into 1 tablespoon sized balls.
4.Heating oil to setting 8-10. Add felafel
balls in batches and cook for 3-4 minutes
or until golden and cooked. Serve.
Recipes for your Deep Fryer continued
Corn Fritters
Apple Fritters
Makes: approximately 12
Serves: 4
300g can corn kernels, drained
1 cup self-raising flour
¾ cup self-raising flour
²⁄³ cup milk
1 egg
1 tablespoon caster sugar
¹⁄³ cup milk
20g butter, melted
Salt and freshly ground black pepper, to taste
1.Place flour and corn in a bowl. Pour over
wet ingredients and whisk until smooth.
Season to taste with salt and pepper.
2.Heat the oil on setting 8-10. Drop
spoonful’s of batter into oil. Cook for 3-4
minutes or until cooked.
1 egg
2 apples, peeled, core removed, sliced
½ cup plain flour
1.In a bowl combine flour, milk, sugar, butter
and egg. Whisk until smooth.
2.Dust apples rings with flour. Dip into
batter.
3.Heat the oil on setting 8-10. Slowly lower
the apple slices into the hot oil. Cook for
3-4 minutes or until cooked and golden.
Serve hot.
TIP: these fritters are great sprinkled with
cinnamon sugar.
41
Recipes for your Deep Fryer continued
Strawberry Stack
Family Doughnuts
Serves: 4
Makes: 20
12 wonton wrappers
20g butter, softened
1 cup thickened cream
½ cup caster sugar
2 tablespoons icing sugar
2 tablespoons golden syrup
½ teaspoons vanilla essence
²⁄³ cup milk
250g strawberries, hulled
2 cups self raising flour
Icing sugar, to serve
½ teaspoon ground cinnamon
1.Heat oil on setting 8-10.
2.Fry wonton wrappers in batches for 12
minutes or until golden and crisp. Drain on
absorbent towel.
3.Place cream icing sugar and vanilla
essence in the bowl of an electric mixer.
Whisk until soft peaks.
4.Once the wonton wrappers have cooled
layer with cream and strawberries. Dust
with icing sugar before serving.
¼ cup cinnamon sugar
42
1.In a small bowl combine butter, sugar and
golden syrup. Mix together until creamy.
2.Slowly add milk. Once combined fold
through flour and cinnamon.
3.Turn out onto a lightly floured work surface
and roll out to 1cm thick. Cut with a
doughnut cutter.
4.Heat oil to setting 8-10. Lower the
doughnuts, in batches, into the hot oil.
Cook for 3-4 minutes or until golden and
cooked. Serve sprinkled in cinnamon sugar.
Troubleshooting
Problem
Possible Cause
Solution
Strong Smell
• Oil has gone bad
• The correct oil is not
being used
• Replace oil
• Use only high quality oil.
Do not mix oils of a different
quality or type.
Oil overflowing
• Fryer is filled above the
• Check oil level on the inside
maximum level
of fryer.
• Wet food placed in hot oil. • Dry food first
• Stated quantities
• Do not fry food above the
exceeded.
weight indicated.
Food is not browning
• Cooking temperature is
too low.
• Basket is overloaded.
• Oil is not hot enough.
• Adjust the dial to the correct
cooking temperature.
• Do not fry food above the
stated quantities and
weights
• Faulty temperature control.
Consult Service Centre.
Chips are sticking together
• Food not washed
thoroughly before placed
in the oil
• Wash potatoes thoroughly
and dry before frying.
45
43
Notes
12 Month Replacement Guarantee
In the unlikely event that this appliance develops any malfunction
within 12 months of purchase (3 months commercial use) due to
faulty materials or manufacture, we will replace it for you
free of charge.
Should you experience any difficulties with
your appliance, please phone our customer
service line for advice on 1300 881 861 in
Australia, or 0800 786 232 in New Zealand.
Alternatively, you can send a written claim to Sunbeam at the address listed below. On receipt of your claim, Sunbeam will
seek to resolve your difficulties or, if the
appliance is defective, advise you on how to obtain a replacement or refund.
Your Sunbeam 12 Month Replacement
Guarantee naturally does not cover misuse or negligent handling and normal wear and
tear.
Similarly your 12 Month Replacement
Guarantee does not cover freight or any other
costs incurred in making a claim. Please
retain your receipt as proof of purchase.
The benefits given to you by this guarantee
are in addition to your other rights and
remedies under any laws which relate to the
appliance.
Our goods come with guarantees that cannot
be excluded under the Australian Consumer
Law and under the New Zealand Consumer
Guarantees Act.
In Australia you are entitled to a
replacement or refund for a major failure and
for compensation for any other reasonably
foreseeable loss or damage. You are also
entitled to have the goods repaired or
replaced if the goods fail to be of acceptable
quality and the failure does not amount to a major failure.
Should your appliance require repair or
service after the guarantee period, contact
your nearest Sunbeam service centre.
For a complete list of Sunbeam’s authorised
service centres visit our website or call:
Australia
www.sunbeam.com.au
1300 881 861
Units 5 & 6, 13 Lord Street
Botany NSW 2019 Australia
New Zealand
www.sunbeam.co.nz
0800 786 232
26 Vestey Drive, Mt Wellington Auckland, New Zealand
Need help with your appliance?
Contact our customer service team or visit
our website for information and tips on
getting the most from your appliance.
In Australia
Visit www.sunbeam.com.au
Or call 1300 881 861
In New Zealand
Visit www.sunbeam.co.nz
Or call 0800 786 232
is a registered trademark.
‘Teflon’ and ‘Platinum Premium’ are trademarks of DuPont.
Made in China.
Due to minor changes in design or otherwise,
the product may differ from the one shown in this leaflet.
© Copyright. Sunbeam Corporation Limited 2006.
ABN 45 000 006 771
Units 5 & 6, 13 Lord Street
Botany NSW 2019 Australia
Unit 3, Building D
26 Vestey Drive
Mt Wellington Auckland
New Zealand
Sunbeam Corporation is a division of GUD Holdings Ltd.
4/13